

Empfohlen
Weitere ähnliche Inhalte
Was ist angesagt?
Was ist angesagt? (20)
Andere mochten auch
Andere mochten auch (16)
Ähnlich wie P.point.i
Ähnlich wie P.point.i (20)
Kürzlich hochgeladen
Kürzlich hochgeladen (20)
P.point.i
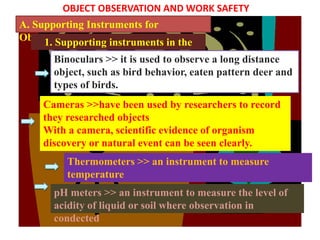
- 1. OBJECT OBSERVATION AND WORK SAFETY A. Supporting Instruments for Observation 1. Supporting instruments in the field Binoculars >> it is used to observe a long distance object, such as bird behavior, eaten pattern deer and types of birds. Cameras >>have been used by researchers to record they researched objects With a camera, scientific evidence of organism discovery or natural event can be seen clearly. Thermometers >> an instrument to measure temperature pH meters >> an instrument to measure the level of acidity of liquid or soil where observation in condected
- 2. 2. Supporting instruments in the laboratory Dissecting Kits > used to observe the anatomy of an animal or a plant Dissection boards Scalpels Dissection needles Sucking papers Specimen bottles Curved spincers Dissecting forceps Angular spincers curved Dissecting forceps Loupes angular Surgical Chlorofor scissors m Loupes > the simplest magnifier, magnify between 2-20x
- 3. Microscope The first microscope was invented by Antoni van Leeuwenhoek Light microscope, use in laboratory in scholls and university. The light come from the sunlight or lamp. Binocular microscope is a stereo microscope with two ocular lense, use to observe the surface of three dimensions object Scanning Electron Microscope (SEM), as very sophisticated microscope
- 4. Parts of a Microscope Optical part Mechanic part The optical partsAn oculer lens, the top most lens in the microscope, to mignify the object image. The image reflected by the lens is virtual, upright and magnified. An objective lens, the lens close to the observed object. The image yielded is real, inverted and magnified. A diaphragm, a part of the microscope that function to adjust the intensity of the coming light
- 5. A reflected consist, consist of flat and concave mirros that function to direct the reflected light that comes or falls on the object lens. The Mechanical parts of a microscope A condensor that functions to collect the light to light the microscope slide. A macrometer, used to quickly adjust the microscope body tube to get the correct focus of the object. A micrometer, used to find the clearest image A revolver, used to select the optioned objective lens A body tube, a tube which connects oculer lens and objective lens. A stage, the place where we put our slide
- 6. A slide holder, used to hold in place so it will not move easily A coarse, used to adjust the angel of the stand of the microscope body Arm, used to hold the microscope A base is the holder of microscope body
- 7. How to Use Microscope Take the microscope from its storage place carefully Procedure: hold the microscope with one of your hands whereas the other hands supports base of the microscope Put the microscope on a flat table. Adjust that arm of the microscope is located precisely before you. Rotate revolver that objective lens at magnification precisely on the stage, until “click” sound is heard
- 8. How to Use Microscope Lower tube of the microscope by rotating macrometer that objective lens is about 1 cm above the stage. Put the mount to observe on the stage Adjust that part to observe is precisely on the stage hole. Clip the mount using stage clips. While seeing from side view, rotate macrometer carefully that tube of the microscope goes down until it almost touches mount
- 9. How to Use Microscope While observing by ocular lens, rotate micrometer slowly to raise tube of the microscope that the mount is clearly seen Rotate micrometer to get best focus To see the mount at strong magnification, rotate revolver until “click” sound is heard and strong objective lens is precisely above the stage.