
Empfohlen
Weitere ähnliche Inhalte
Was ist angesagt?
Was ist angesagt? (19)
Andere mochten auch
Andere mochten auch (10)
Ähnlich wie Screencast o-matic how to presentation
Ähnlich wie Screencast o-matic how to presentation (20)
Mehr von anewton8710
Mehr von anewton8710 (10)
Kürzlich hochgeladen
Kürzlich hochgeladen (20)
Screencast o-matic how to presentation
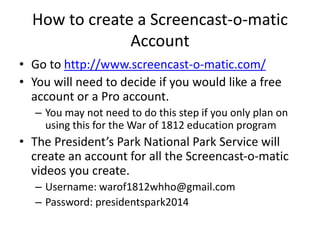
- 1. How to create a Screencast-o-matic Account • Go to http://www.screencast-o-matic.com/ • You will need to decide if you would like a free account or a Pro account. – You may not need to do this step if you only plan on using this for the War of 1812 education program • The President’s Park National Park Service will create an account for all the Screencast-o-matic videos you create. – Username: warof1812whho@gmail.com – Password: presidentspark2014
- 2. To login or create an account click login here.
- 4. Once logged in, to create a screencast-o- matic video click the “Start Recording” button.
- 5. In order for the recorder to load, you have to allow Java to run. Unclick the “Always trust content” button. Once the box is unclick, click the “Run” button. The recorder may take a few seconds to load due to downloading a newer version if it is needed.
- 7. The above box is the recorder. Be sure your microphone volume has been set. Screencast- o-matic records whatever is on your computer screen. Resize it using the white squares to the size needed. You can drag it anywhere on the screen.
- 8. The box below is the control panel. This will not show up in the video you create. When ready click the red button to start recording (red line). The bar next the microphone will have movement in it if it is recognizes your microphone (green line). The other controls are typically not used very often. The X closes the recorder (purple line).
- 9. After you click the red button, the screen will look like this and count down from 3 to 1. After “GO! “ you may begin speaking to record your voice. You may pause at any time. Click the pause button. When you are ready to continue, click the red record button again. The count down will happen after each pause. You can also restart, but you will lose what you recorded. Hit “done “ when you are finished your recording. The “draw” button will allow you to draw on the screen. Pro users do not have a recording limit. Non- pro users can record at most 15 minutes.
- 10. Once you click “done,” a preview of what you recorded will appear in a new window. You may listen to it. You may edit (cut items) at this point. Give it a name in the box to the right.
- 11. When you have named the file and finished editing, chose one of the items in the “publish areas” to be able to finalize and share your video. If you have an account with the other options, you may pick other ones, but the NPS will not have direct access. Pick “SOM – Screencast-o-matic.”
- 12. The next page will be this view. Add a description, such as student names , school, and your name. The other options should not be changed.
- 13. Click to the “Upload to SOM” to complete the publishing process.
- 14. The publish process can take a few minutes. The longer the recording, the longer it will take. The status is listed below. The uploading process is never long.
- 15. When the uploading process is complete, the URL link will be listed. Click that link to take you to the completed upload.
- 16. The link will take you to a screen that looks like this. Anyone with this link may view the video by pushing the play button.
- 17. If you scroll down on the same page as the previous slide, you will see the information you need to embed the video on another website, like Wikispaces. Be sure to choose the width. The full option is very large – you will typically use the small or tiny option. Be sure to copy the entire embed code (red line). You can also download it as a MP4 file (green line). You may also leave comments and notes (purple line).
- 18. To add a screencast-o-matic video to Wikispaces, go to the page you want to add it to, then push the “Edit” button.
- 19. Be sure your cursor is where you want the video to appear on the screen. Then push the “widget” button.
- 20. Click the “Video” tab. Then click the “Other Video” link. Use the other tabs if you have a video from one of those locations.
- 21. Take the embed code you copied previously and paste it in the box provided above. Again be sure it is the entire code or it will not work!
- 22. Before you hit save, click the “Preview” button to ensure it will load properly.
- 23. If the preview looks like the screen you saw before, then your video is ready to be saved. Click the X button to return to the previous screen.
- 24. Click “Save.”
- 25. You may choose to align the video another way, change the size, edit the widget, or remove it with the above dialogue box. Click the “Save” button when you are done editing the page.
- 26. This is what your edited wiki page will look like. Note the info above.
- 27. To view your uploads from Screencast- o-matic.com at any time, go to your login page and click “Uploads.”
- 28. Here you may delete ,edit, and find the information (including links and embed codes).
- 29. Questions? • Practice by creating your own Screencast-o- matic video. The best way to learn is by doing! • Need help during the year? Contact me at anewton@ccboe.com