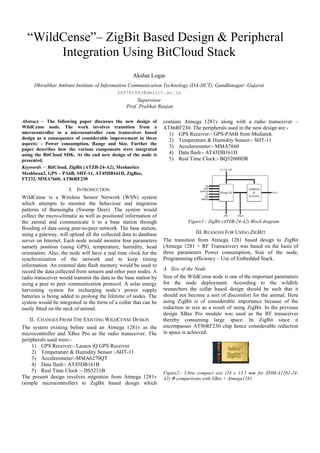
1. “WildCense”– ZigBit Based Design & Peripheral
Integration Using BitCloud Stack
Akshat Logar
Dhirubhai Ambani Institute of Information Communication Technology (DA-IICT), Gandhinagar- Gujarat
200701043@daiict.ac.in
Supervisor
Prof. Prabhat Ranjan
Abstract – The following paper discusses the new design of contains Atmega 1281v along with a radio transceiver –
WildCense node. The work involves transition from a AT86RF230. The peripherals used in the new design are:-
microcontroller to a microcontroller cum transceiver based 1) GPS Receiver:- GPS-PA6B from Mediatek
design as a consequence of considerable improvement in three 2) Temperature & Humidity Sensor:- SHT-11
aspects: - Power consumption, Range and Size. Further the
3) Accelerometer:- MMA7660
paper describes how the various components were integrated
using the BitCloud SDK. At the end new design of the node is 4) Data flash:- AT45DB161D
presented. 5) Real Time Clock:- BQ32000DR
Keywords – BitCloud, ZigBit (ATZB-24-A2), Meshnetics
Meshbean2, GPS – PA6B, SHT-11, AT45DB161D, ZigBee,
FT232, MMA7660, AT86RF230
I. INTRODUCTION
WildCense is a Wireless Sensor Network (WSN) system
which attempts to monitor the behaviour and migration
patterns of Barasingha (Swamp Deer). The system would
collect the micro-climatic as well as positional information of
the animal and communicate it to a base station through Figure1:- ZigBit (ATZB-24-A2) Block diagram
flooding of data using peer-to-peer network. The base station,
using a gateway, will upload all the collected data to database III. REASONS FOR USING ZIGB IT
server on Internet. Each node would monitor four parameters The transition from Atmega 1281 based design to ZigBit
namely position (using GPS), temperature, humidity, head (Atmega 1281 + RF Transceiver) was based on the basis of
orientation. Also, the node will have a real time clock for the three parameters Power consumption, Size of the node,
synchronization of the network and to keep timing Programming efficiency – Use of Embedded Stack.
information. An external data flash memory would be used to
record the data collected from sensors and other peer nodes. A A. Size of the Node
radio transceiver would transmit the data to the base station by Size of the WildCense node is one of the important parameters
using a peer to peer communication protocol. A solar energy for the node deployment. According to the wildlife
harvesting system for recharging node’s power supply researchers the collar based design should be such that it
batteries is being added to prolong the lifetime of nodes. The should not become a sort of discomfort for the animal. Here
system would be integrated in the form of a collar that can be using ZigBit is of considerable importance because of the
easily fitted on the neck of animal. reduction in size as a result of using ZigBit. In the previous
design XBee Pro module was used as the RF transceiver
II. CHANGES FROM THE EXISTING WILDCENSE DESIGN thereby consuming large space. In ZigBit since it
The system existing before used an Atmega 1281v as the encompasses AT86RF230 chip hence considerable reduction
microcontroller and XBee Pro as the radio transceiver. The in space is achieved.
peripherals used were:-
1) GPS Receiver:- Lassen iQ GPS Receiver
2) Temperature & Humidity Sensor :-SHT-11
3) Accelerometer:-MMA6270QT
4) Data flash:- AT45DB161B
5) Real Time Clock :- DS3231B Figure2:- Ultra compact size (24 x 13.5 mm for ZDM-A1281-24-
The present design involves migration from Atmega 1281v A2) comparisons with XBee + Atmega1281
(simple microcontroller) to ZigBit based design which
2. B) Software Stack Description
B. Power Consumption
Factors AT86RF230 (RF XBee Pro Series 2
Transceiver in ZigBit)
Current TX :- 18mA TX:- 215 mA
Consumption RX :- 19mA RX:- 55mA
Sleep Current:- Sleep Current:-
~.2uA ~10uA
TX Power -17 – 3dBm 1-3dBm
Sensitivity -104dBm -96dBm
Table1.1:- Comparisons made using the respective datasheets of
AT86RF230 and XBee Pro Series 2.
The above comparison between the two RF modules clearly
shows the difference in current consumptions and in turn the
effect in the power consumptions levels. In the WildCense
node design the parameter which is of the most concern is the
power consumption since we require a large lifetime of the Figure3:- BitCloud Stack Architecture taken from Bitcloud Technical
Documentation
node. RF communication consumes significant amount energy
(~60 %) hence optimizing this significant chunk can save us a
BitCloud SDK and the supported kits serve as the perfect
lot of power and thus make the system more efficient.
vehicle to evaluate the performance and features of Atmel
C. Programming Efficiency – Use of Embedded Software microcontrollers and radio transceivers as devices in a
Stack wireless sensor network. The SDK provides a complete
Due to the availability of BitCloud SDK specifically software and documentation toolkit for prototyping,
developed by ATMEL the task of integrating the various developing and debugging custom applications on top of Bit
components especially the RF transceiver. Since the RF Cloud’s application programming interface (API) [7].
transceiver is already integrated in ZigBit this relieves us from BitCloud internal architecture follows the suggested
the task of integrating RF Transceivers, like XBee in the separation of the network stack into logical layers as found in
earlier versions. IEEE 802.15.4™ and ZigBee. Besides the core stack
Efficient use of the RF transceivers and the software containing protocol implementation, BitCloud contains
interoperability is one of the major factors for using ZigBit. additional layers implementing shared services (e.g. task
The BitCloud SDK has been explained in the following manager, security, and power manager) and hardware
section. Support for AT commands is also provided through abstractions (e.g. hardware abstraction layer (HAL) and board
Serialnet. support package (BSP)). The APIs contributed by these layers
are outside the scope of core stack functionality. However,
IV. SOFTWARE DESCRIPTION these essential additions to the set of APIs significantly help
reduce application complexity and simplify integration.
Atmel BitCloud is a full-featured ZigBee PRO stack
BitCloud API reference manual provides detailed information
supporting reliable, scalable, secure wireless applications
on all public APIs and their use. [7]
running on Atmel wireless platforms. The design software is
completely standard compliant with the ZigBee PRO certified
C) BitCloud Programming Paradigm
platform. [7]
All the programming tasks that are carried out using BitCloud
Architecture have to be carried out using an Event – Driven
A) Key Features
programming methodology.
Full standards compliance with the ZigBee PRO
Event-driven or event-based programming refers to
certified platform.
programming style and architectural organization which pairs
Easy-to-use C API and serial AT commands
each invocation of an API function with an asynchronous
available.
notification (and result of the operation) of the function
Large network support for hundreds of devices,
completion is delivered through a call back associated with
optimized for ultra-low power consumption with 5 to
the initial request. Programmatically, the user application
15 years battery life (application dependent).
provides the underlying layers with a function pointer, which
Flexible, easy to use developer tools.
the layers below call when the request is serviced.
3. V. INTERFACING OF GPS RECEIVER – GPS-PA6B FROM Recommended
MEDIATEK Minimum Navigation Information.
Global Top Gms-u1LP is an all-in-one, high sensitivity, small VTG Course and speed information relative to the
SMD form factor, and low power consumption GPS antenna ground.
module. It utilizes Mediatek GPS MT3329 solution that Table 1.3:- Table showing various NMEA output sentences
supports up to 66 channels of satellite searching with -
165dBm sensitivity and 10Hz maximum update rate for The GPS Receiver outputs each of these default NMEA
precise GPS signal processing under low receptive, high sentences at a frequency which is equal to the update rate
velocity conditions. frequency on Serial port, i.e, UART port. Out of all these
NMEA output sentences only GGA & RMC messages are
A) Comparisons with Lassen iQ GPS Receiver used in essential since they give Latitude, Longitude, and Time &
previous Design:- Date respectively. The above information can be obtained by
parsing the GGA & RMC messages.
Factors Lassen iQ GPS – PA6B Each of the NMEA message code can be of 82 bytes (max).
Current 33mA tracking 24mA tracking
Consumption 42mA acquisition 30mA acquisition C) GPS-PA6B connections with ZigBit :-
Sensitivity Typically - -148dBm
130dBm Acquisition The GPS Receiver is connected to ZigBit using the USART
-160dBm interface .ZigBit is programmed using a FT232 USB to UART
Reacquisition converter .UART port is connected with the FT232 chip
-165dBm whereas GPS is connected to USART port of ZigBit.
Tracking Following is the schematic for the appropriate connections:-
Update Rate 1Hz Upto 10Hz
Channels 12 66
Dimensions 26 x 26 x 6 mm 16 x 16 x 6 mm
TTFF(Time To fix Hot Start ~10s Hot Start ~1s
first) Warm Start ~38s Warm Start~33s
Cold start ~50s Cold Start~35s
Reacquisition
time:- <1s
VCC Ranges 3-3.6 V 3-3.6V
Table1.2:- Comparisons between Lassen IQ GPS Receiver and GPS-
PA6B using the Respective Datasheets of the 2 GPS Receivers
The above comparison shows the reason for selecting the
GPS-PA6B module, the significant factors being the
Sensitivity, Channels supported and TTFF values in
comparison with the old GPS Receiver.
B) Programming the GPS-PA6B Receiver:-
The GPS-PA6B module supports the NMEA 0183 v3.01
protocol. (Default : GGA, GSA, GSV, RMC, VTG).The
GPS-PA6B supports MTK NMEA commands for giving
instructions to the GPS Receiver.
The following table gives the description of various output Figure4:- Eagle Schematic showing GPS Receiver connections with
NMEA sentences:- ZigBit
NMEA Output Sentences D) Basic NMEA Codes & GPS Terminologies
Option Description Hot Start - The GPS receiver remembers its last calculated
GGA Time, position and fix type data. position and which satellites were in view, the almanac used,
GSA GPS receiver operating mode, active satellites and the UTC Time. This is the quickest re-acquisition of a
used in the position solution and DOP values. GPS lock.
GSV The number of GPS satellites in view satellite Warm Start - The GPS receiver remembers it’s last
ID numbers, elevation, azimuth, and SNR calculated position, almanac used, and knows the UTC Time,
values. but not which satellites were in view. This takes longer than a
RMC Time, date, position, course and speed data. Hot Start but not as long as a Cold Start.
4. Cold Start - The GPS receiver dumps all information and
resets. It then attempts to locate satellites and then calculate a
GPS lock. This takes the longest because there is no known
information.
Whenever GPS is powered on it tries to achieve fix using
COLD start. If the TTFF has to be changed then the
corresponding MTK packet command has to be issued to have
WARM start. Having WARM start correspondingly saves
large amount of time required to achieve a fix.
Figure7:- Terminal showing Parsed data
VI. INTERFACING OF SHT-11 TEMPERATURE & HUMIDITY
SENSOR
Figure5:- MiniGPS software snapshot showing GPS Fix Achieved The sensor used for measuring the humidity and temperature
for the project node is Sensirion SHT11 which is a single chip
The Following table shows the cold start times obtained for relative humidity and temperature multi sensor module
the GPS Receiver at different Testing Locations. comprising a calibrated digital output.
The device is interfaced with the microcontroller using a 2‐
Location Cold Start Time Remarks wire serial interface which is different from the two wire serial
Lab202 (outside) 83.4s Open space, Not interface supported by ZigBit. This made it necessary to
full line of sight program the microcontroller to send the appropriate pulses on
Outside the Hostel 123.4s Obstructions data and clock lines of the sensor through the I/O pins of the
from various microcontroller. Since, the device does not use any standard
trees, buildings protocol; the clock frequency for communication with the
Football ground 42.1s Clear sky, open sensor can be configured by the programmer. For the project,
space a clock frequency of 1 KHz was used.
Table1.4:- Cold start times obtained in various locations
A) Differences between two wire serial interfaces of
ZigBit and SHT11
ZigBit has a support for two wire serial interface (TWI) which
is provided through its SDA (data) and SCL (clock) pins.
Although the protocol used by SHT11 for serial
communication uses the same name, the protocol used is
significantly different. This section highlights the difference
between the two.
ZigBit starts communication through its TWI by sending a
start sequence which is lowering the data line while keeping
the clock high. While in SHT11, a start sequence involves
lowering the data line at the center of a high pulse on clock
line and making the data line high at the center of next high
clock pulse. The clock line should remain low for five clock
Figure6: GPS-PA6B Breakout board connected with a cycles before this next high pulse is sent on it. When the
Meshnetics Meshbean2 kit through UART0 for testing communication is established for the first time after SHT11 is
powered on, a connection reset sequence should be sent before
5. sending the start sequence. This sequence involves sending 9 The sensor should now send a 0 on the data line to
high clock pulses while keeping the data line high. acknowledge the Command.
ZigBit has a 7-bit address space to support 128 different slave SI No. Register Operating Mode
addresses. The 8th bit is to indicate whether a read or write value
mode is being used. This can be followed by one or multiple 1. 0x00 Heater Off; 12 bit RH/14 bit Temp.
bytes of data until a stop sequence is sent. A stop sequence is 2. 0x04 Heater On; 12 bit RH/14 bit Temp.
generated by taking the data line from low to high while 3. 0x01 Heater Off; 8 bit RH/12 bit Temp.
keeping the clock line high. SHT11 has a fixed 3 bit address 4. 0x05 Heater On; 8 bit RH/12 bit Temp.
of 000. The rest of the 5 bits of the byte are used to send the Table 1.5: Various operation states of SHT11
command to the sensor. After the command is sent, the sensor
sends an acknowledgment by lowering the data line during the SI No. Command byte Command
next clock pulse. After this, the sensor controls the data line 1. 0x06 Write to status register
and sends the temperature data on this line which is right
2. 0x07 Read from status register
justified on the byte. If the microcontroller does not send an
3. 0x03 Measure Temperature
acknowledgment (lowering of data line) during the next clock
4. 0x05 Measure Humidity
pulse, the transmission is ended.
5. 0x1e Reset sensor
Table 1.6: Various Commands available in SHT11
B) Interfacing the Sensor
After issuing a measurement command, the controller has to
wait for the measurement to complete. To signal the
completion of a measurement, the SHT11 pulls down the data
line and enters idle mode. The controller must wait for this
signal before restarting SCK to readout the data. The
measured data is stored until readout. Two bytes of data and
one byte of CRC checksum will then be transmitted. The uC
must acknowledge each byte by pulling the DATA line low.
All values are MSB first, right justified. Communication
terminates after the acknowledge bit of the CRC data. The
device automatically returns to sleep mode after the
measurement and communication have ended. However, the
data recorded by the sensor and transmitted to the
microcontroller is not the actual Temp. / Humidity
measurement. This is a raw data, which needs to be converted
into accrual temperature/humidity values by using the
following formula:-
RH = C1 + C2 x SORH + C3 x (SORH) 2
T = D1 + D2 x SOT
Where the value of these parameters vary according to the
Figure8:- EAGLE schematic showing the SHT11 connections with resolution selection and the voltage supply to the sensor. For
ZigBit the project configuration, where 3.6V supply and 12 bit
RH/14 bit Temp was used:-
The connections to be made for interfacing the sensor are C1 = -4 C2 = 0.0405 C3 = -0.0000028
shown in the adjoining picture. The operating range of the D1 = -4 D2 = 0.01
sensor is from 2.4 V to 5.5 V. In the experiment conducted, it
was operated at 3.6V.
This is followed by writing appropriate commands into the
status register. The status register is used to choose between
the two operating modes of 8 bit RH/12 bit temperature
resolution or 12 bit RH/14 bit temperature resolutions. It also
controls the heater of the sensor.
The commands to be written are sent serially through the data
pin to the sensor. Every bit of data sent should be followed by
one complete pulse of 1 and 0 on the clock line. After sending
the complete byte, the data pin should be released by the
microcontroller for the sensor, and a high clock pulse sent. Figure9:- Connection Reset Sequence followed by transmission start
sequence on a DSO
6. VII. INTERFACING ATMEL AT45DB161D (DATA FLASH) B) Hardware Interfacing with ZigBit
WITH ZIGBIT
The Data flash is required for the storage of readings obtained The AT45DB161D is enabled through the chip select pin
from the sensors used in design, i.e, GPS, Temp. /Humidity (~CS), and accessed via a three wire interface consisting of
sensor and the Accelerometer. For this purpose ATMEL’s Serial Input (SI), Serial Output (SO), and the Serial Clock
AT45DB161D was found suitable for our requirement. (SCK).
A) Salient Features of Atmel AT45DB161D
16Mbit storage space
Single 2.5V -3.6V supply
66Mhz maximum frequency
SPI compatible modes of operation , compatible
with SPI Mode 0 and Mode 3
Page size is user configurable (512/528 bytes)
Two SRAM buffers (512/528 bytes) allows
receiving of data while reprogramming the flash
Flexible erase options :- Page Erase , Sector
Erase and Chip Erase
Low power dissipation: - 7mA active read
current, 25uA standby current, 15uA Deep Figure12:- EAGLE schematic showing the connections of
power down mode. AT45DB161D with ZigBit
In the experiment performed VCC used is 3.6V. One of the
problems faced during the experiment was that SPI pins of
ZigBit were reserved for stack operation since we used
BitCloud and hence were not available for programming. The
Data flash supported the SPI protocol only hence in order to
use SPI protocol we had to use USART0 of the ZigBit in SPI
mode for programming the Flash.
C) Communication Sequence with ZigBit
Figure10:- AT45DB161D Block diagram taken from The Flash operation is controlled by instructions from the
AT45DB161D Datasheet microcontroller. A valid instruction starts with the falling edge
of (~CS) followed by the appropriate 8bit opcode and the
desired main memory address location. While the (~CS) pin is
low, toggling the SCK pin controls the loading of the opcode
and the desired buffer or main memory address location
through the SI (serial input) pin. All instructions, addresses
are transferred with the most significant bit (MSB) first.
Buffer addressing is done using the terminology BFA9-BFA0
to denote the ten address bits required to designate a byte
address within a buffer. Main memory addressing is
referenced using the terminology PA12-PA0 and BA9-BA0
where PA12-PA0 denotes the 13 address bits required to
designate a page address and BA9 -BA0 denotes the ten
Figure11:- Architecture Diagram of AT45DB161D taken from address bits required to designate a byte address within the
AT45DB161D datasheet
page.
Commands Opcode
The memory array of the AT45DB161D is divided into three
Main memory Page Read 0xD2
levels of granularity comprising of sectors, blocks and pages.
Buffer 1 Read 0xD4
The buffers allow receiving of data while a page in the main
Buffer 2 Read 0xD6
memory is being reprogrammed, as well as reading or writing
a continuous data. All programming operations to the Buffer 1 Write 0x84
Data Flash occurs on a page by page basis. Buffer 2 Write 0x87
Buffer 1 to Main memory page program 0x83
7. with built in Erase Using the API’s of the BitCloud one of the nodes was
Buffer 2 to Main memory page program 0x86 configured as the coordinator and other node was configured
with built in Erase as a router. The GPS module was connected on the router and
Page Erase 0x81 the coordinator was acting as the base station.
Block Erase 0x50 The router node was parsing the incoming NMEA codes and
Sector Erase 0x7C extracting the corresponding Latitude, Longitude, Date &
Status Register Read 0xD7 Time values further sending the packet to the base station
node.
Table 1.7:- Different Opcodes for Data Flash
Components Size(in bytes)
Latitude + N/S indicator 10
Longitude + E/W indicator 10
UTC Time 10
Total 30
Total size of data obtained after parsing =30 bytes which is <
84 (bytes) which is the max payload that can be sent using the
ZigBee protocol. This 30bytes was combined into a single
packet and transmitted from router to coordinator.
Figure13:- SPI Mode0 waveform taken from AT45DB161D For the purpose of networking experiment two Meshbean2
datasheet kits were used.
Figure14:- SPI Mode3 waveform taken from AT45DB161D
datasheet
Figure16:- Networking Experiment conducted using 2 Meshnetics
Meshbean2 Kits with the GPS Receiver connected on the Router
node and the other node acting as coordinator
The peer to peer protocol as described in the original
WildCense architecture has not been implemented.
For the network discovery, network formation & network join
functions ZDO layer of the Bitcloud stack was used which
evoked the appropriate functions of the NWK layer. Data
request, Data Transmission and Data Reception from the
Figure15:- ATMEL AT45DB161D connections with Meshnetics network layer was done using the appropriate functions of the
Meshbean2 kit for testing APS layer of the Bitcloud stack.
VII. ESTABLISHING NODE TO NODE COMMUNICATION USING VIII. SYSTEM OVERVIEW & SCHEMATIC DESIGN
BITCLOUD ZIGBEE STACK Design of the new node makes use of ZigBit (Atmega 1281v
In the Networking aspect of WildCense, experiment showing + AT86RF230 – RF transceiver) hence this eliminates the
Node to Node communication of the GPS data from one node need of using XBee as the RF transceiver. The various
to other node was performed using BitCloud ZigBee stack peripherals used in the new design are:-
provided by ATMEL.
BitCloud stack provides API’s for creating a network and GPS Receiver:-
further send data packets from one node to another node as GPS-PA6B module from Mediatek instead of the Lassen IQ
well as multihop communication aspects are handled by the GPS Receiver from Trimble.
ZigBee Protocol which uses IEEE 802.15.4 at the MAC layer. Temperature / Humidity Sensor:-
8. SHT-11 dual (Temp cum Humidity) sensor as used in the MCP1640:-
original design. MCP1640 is Buck/Boost converter from Microchip is used in
Accelerometer:- place of TPS630001 which was used in the earlier design.
MMA7660 digital I2C based accelerometer is used in place of MAX3373:-
MMA6270QT which was an analog accelerometer. MAX3373 is an I2C accelerator which is used for signal
Data flash:- conditioning.
Atmel’s AT45DB161D 16Mbit data flash is used in place of MCP111:-
AT45DB161B. Voltage detecting chip designed to keep the uC in reset state
Real Time Clock (RTC):- until the system voltage has stabilized for suitable operation.
BQ2000DR is used in place of DS3231which was used in the TPS2092:-
previous design because DS3231 was becoming obsolete. Acts as a power switch as in original design.
Figure17:- Block Level Diagram of New Design node
http://ieeexplore.ieee.org/stamp/stamp.jsp?tp=&arnumber=47
IX. CONCLUSIONS
62058
The GPS Receiver GPS-PA6B, Temperature / Humidity [2] Atmel ATMega32 Datasheet [HTTP Online Document]
sensor SHT11, Data flash – AT45DB161D were successfully http://www.atmel.com/dyn/resources/prod_documents/doc250
integrated with ZigBit using the BitCloud SDK. 3.pdf
Accelerometer – MMA7660 has been tested as it had already [3]SHT11‐Temperature and Humidity Sensor [Datasheet]
been interfaced with ZigBit. Node to node communication http://www.sensirion.com/en/pdf/product_information/Datash
was tested using ZigBit however the Communication protocol eet-humidity-sensor-SHT1x.pdf
needs to be implemented .Once all the peripherals have been [4] NMEA Protocol [HTTP Online Document]
integrated they have to be combined and the device has to be
http://www.kh‐gps.de/nmea‐faq.html
integrated. RTC also has to be integrated.
[5]GPS-PA6B – GPS Receiver [Datasheet]
http://www.4dsystems.com.au/downloads/GPS/GPS-PA6B-
ACKNOWLEDGEMENT
DS.pdf
Special thanks to Prof. Prabhat Ranjan for guiding and
[5]ATMEL AT45DB161D – [Datasheet] [Data flash]
mentoring at every stage of the project in order to streamline
http://www.atmel.com/dyn/resources/prod_documents/doc350
the workflow. Also thanks to Sainath Nambiar [RA], Juhi
0.pdf
Ranjan [RE], Hiren Shah [RE], Jay Kapasi and Firoja Sheikh
[6]ATZB-24-A2 – ZigBit [Datasheet]
[Lab Assistant] for constant helping hand throughout the
http://www.atmel.com/dyn/resources/prod_documents/doc822
entire duration of the project.
6.pdf
[7]Complete BitCloud SDK
REFERENCES
http://www.atmel.com/forms/bitcloud_rzraven.asp?category_i
[1]WildCense: GPS based Animal Tracking System
d=163&family_id=676&subfamily_id=2124&fn=dl_BitCloud
By Vishwas Jain, Ravi Bagree, Aman Kumar, #Prabhat
_ATAVRRZRAVEN_1_11_0.zip
Ranjan.
9. [8]BQ32000DR – Real Time Clock [Datasheet] [13]MeshBean2 - User Guide
http://www.ti.com/lit/gpn/bq32000 http://www.meshnetics.com/netcat_files/Image/P-MB2P-
[9]TPS2092 – Power Switch [Datasheet] 461~02-(WDB-A1281-A2%20Schematics).pdf
http://www.ti.com/lit/gpn/tps2092 [14 Atmel ATMega128 Datasheet [HTTP Online Document]
[10]MCP1640 – Datasheet http://www.atmel.com/atmel/acrobat/doc2467.pdf
http://ww1.microchip.com/downloads/en/DeviceDoc/22234B. [15] XBee Pro Series 2 [Datasheet]
pdf http://ftp1.digi.com/support/documentation/90000976_C.pdf
[11]MAX3373 – Datasheet [16]EAGLE Schematic Design – Spark fun Tutorials
http://pdfserv.maxim-ic.com/en/an/AN4096.pdf http://www.sparkfun.com/tutorials/108
[12]MMA7660 – Datasheet [17]Meshnetics Meshbean2 [Datasheet]
http://cache.freescale.com/files/sensors/doc/data_sheet/MMA http://www.meshnetics.com/netcat_files/Image/P-MB2P-
7660FC.pdf?pspll=1 461~02-(WDB-A1281-A2%20Schematics).pdf
Figure18:- WildCense ZigBit based new Design Schematic designed in EAGLE

![B) Software Stack Description
B. Power Consumption
Factors AT86RF230 (RF XBee Pro Series 2
Transceiver in ZigBit)
Current TX :- 18mA TX:- 215 mA
Consumption RX :- 19mA RX:- 55mA
Sleep Current:- Sleep Current:-
~.2uA ~10uA
TX Power -17 – 3dBm 1-3dBm
Sensitivity -104dBm -96dBm
Table1.1:- Comparisons made using the respective datasheets of
AT86RF230 and XBee Pro Series 2.
The above comparison between the two RF modules clearly
shows the difference in current consumptions and in turn the
effect in the power consumptions levels. In the WildCense
node design the parameter which is of the most concern is the
power consumption since we require a large lifetime of the Figure3:- BitCloud Stack Architecture taken from Bitcloud Technical
Documentation
node. RF communication consumes significant amount energy
(~60 %) hence optimizing this significant chunk can save us a
BitCloud SDK and the supported kits serve as the perfect
lot of power and thus make the system more efficient.
vehicle to evaluate the performance and features of Atmel
C. Programming Efficiency – Use of Embedded Software microcontrollers and radio transceivers as devices in a
Stack wireless sensor network. The SDK provides a complete
Due to the availability of BitCloud SDK specifically software and documentation toolkit for prototyping,
developed by ATMEL the task of integrating the various developing and debugging custom applications on top of Bit
components especially the RF transceiver. Since the RF Cloud’s application programming interface (API) [7].
transceiver is already integrated in ZigBit this relieves us from BitCloud internal architecture follows the suggested
the task of integrating RF Transceivers, like XBee in the separation of the network stack into logical layers as found in
earlier versions. IEEE 802.15.4™ and ZigBee. Besides the core stack
Efficient use of the RF transceivers and the software containing protocol implementation, BitCloud contains
interoperability is one of the major factors for using ZigBit. additional layers implementing shared services (e.g. task
The BitCloud SDK has been explained in the following manager, security, and power manager) and hardware
section. Support for AT commands is also provided through abstractions (e.g. hardware abstraction layer (HAL) and board
Serialnet. support package (BSP)). The APIs contributed by these layers
are outside the scope of core stack functionality. However,
IV. SOFTWARE DESCRIPTION these essential additions to the set of APIs significantly help
reduce application complexity and simplify integration.
Atmel BitCloud is a full-featured ZigBee PRO stack
BitCloud API reference manual provides detailed information
supporting reliable, scalable, secure wireless applications
on all public APIs and their use. [7]
running on Atmel wireless platforms. The design software is
completely standard compliant with the ZigBee PRO certified
C) BitCloud Programming Paradigm
platform. [7]
All the programming tasks that are carried out using BitCloud
Architecture have to be carried out using an Event – Driven
A) Key Features
programming methodology.
Full standards compliance with the ZigBee PRO
Event-driven or event-based programming refers to
certified platform.
programming style and architectural organization which pairs
Easy-to-use C API and serial AT commands
each invocation of an API function with an asynchronous
available.
notification (and result of the operation) of the function
Large network support for hundreds of devices,
completion is delivered through a call back associated with
optimized for ultra-low power consumption with 5 to
the initial request. Programmatically, the user application
15 years battery life (application dependent).
provides the underlying layers with a function pointer, which
Flexible, easy to use developer tools.
the layers below call when the request is serviced.](data:image/gif;base64,R0lGODlhAQABAIAAAAAAAP///yH5BAEAAAAALAAAAAABAAEAAAIBRAA7)