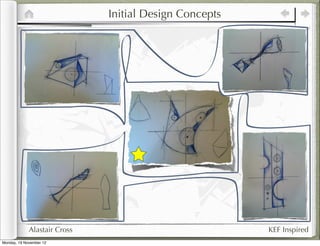
Initial design concepts focused on squaring up the design to make it more striking visually. Inspiration was drawn from the Shard in London, with plans to incorporate some of its shapes and textures. Construction concepts included developing an initial structure, using bolts and screws for joins rather than adhesives, and prototyping a wall joint. Usability considerations centered around ergonomics, anthropometrics, and placing speakers in effective locations within a room. Various materials were tested including carbon fiber, clay, steel rods, plaster, aluminium sheet, and wire to determine suitability for the design.
2. Development
Aesthetics- squaring up Aesthetics- The Shard
From the start i always wanted my design to be inspired
somewhat by architecture and the shapes that are created in
the real world, while the initial ‘squaring up’of the design
has helped improved my vision of what my design would be
like, i would want to also used a certain case study to almost
When i use as a direct link to another aesthetic change. The shard,
first which is near complete in London has always interested me
looked at my due to its pyramidal shape and stunning angles it can
design that i be seen from, and as this is what i want my
plan on creating,
and more importantly the aesthetics of design to be like, i plan to use some shapes
the design, i saw the idea as a very soft and visual aspects of the shard to help my
style with the use of all the smooth design. The first part of this structure that
curves and the general roundness interests me would be the tip of the
of the design. From here however i shard(left). I have taken construction images
did say in my initial specification it and zoomed closer to see the detail and
would stand out in a modernism clearly from the images there is the steel top
room, and I'm not sure the level that it which gives a very blade like feature and
is at is striking enough to the eye. So gives a certain danger to the design, i will
clearly i had to change something. So probably use this feature however the
what i did was to start sharpening and construction methods will have to fit in for me
edging of my design to, almost make my to incorporate this. Secondly is the open
design more viscous to the eye. I started space between the struts in the building itself,
with a side profile of the design and
added now views and details to give using this on my design
me an idea of what i was working would give it a raw and
towards, and clearly from the almost unfinished edge just
results(left) the design is like a sculpture would have
certainly more striking with and this could be done with
not one curved edge the the use of a clear
and pointed edges as material
three separate
locations. From
what i have changed
from the design i feel it has
improved it, not only to
follow my specification
more throughly but it
also looks much more
attractive, and this is
what i wanted to
achieve.
Alastair Cross KEF Inspired
Monday, 19 November 12
3. Development
Construction- Initial Structure Construction- Bolts and Screws
Moving on from the
previous idea of the initial
Before i went any further into structure, rather that the
my development i wanted to use of adhesives all over my
get my initial structure or the design which would be mostly
skeleton of my design completed weak and a long process, i
so once the basics are done i can would prefer to use bolts and
focus on more of the details and screws to create a more
parts that will permeant joint to al the main
characterise components of the design.
my design. There are many different types
From the of bolts i can use, for example a
left, my dome head bolt which would suit
design will well with my design as it would give
have a different dimension and a
straight different texture which may make
edges all my design more interesting if people
over the design, were to look closer at the more
this should help with joining processes detailed parts. From the top right
and also making it more sturdy and so image, and the top right of the
the longevity can be extended. Another picture the idea
point that i will make would be the idea of of a 90 degree
balance of the whole weight is to be put steel joint which
on a section of the wall, this means my would make
design will either have to have a very complex
strong wall joint or have a relatively angles
light weight with all the materials strongly
added together so that it will not fixed to
fall of the wall at any point. But the
due to my idea of the shard and design
different materials i want to
incorporate my wall design will have
to be strong instead.
Alastair Cross KEF Inspired
Monday, 19 November 12
4. Development
Construction- Adhesives Construction- Wall Joint
Although i did say adhesives were a longer and weaker Here i have created wall joint
process to joining larger sections of my design together it prototype to where i will be able to
doesn't mean that the smaller place my design over, it may be
parts cant be joined using using the simple but this means i can make it
different methods on the left. incredibly strong from strong
Adhesives such as cement, epoxy materials. To begin with i used one
resin, PVA and glue gun glue sticks sheet of a bendable material, here i
can all be used differently on
different materials to ensure the bet used thick cardboard as it can be
stick, i will most probably use all of easily bent and shaped. Then cut
these to give my design the best diagonals on the corners and then
overall quality. Glue gun glue sticks fold them over, if this process it
are very versatile joined strongly, this means my design
and can used on can be slotted into the wall joint and
most materials can be permanent or
however it may not temporary depending on
be strong enough preferences. However it needs
to hold non porous to be strong so i will make it in
materials. The sections and join them together
strongest adhesive using strong joins like a dove
would be cement tail. This will improve the
however this longevity.
would severely
weigh down the
design and so i
will have to
look for
different
adhesive
later on.
Alastair Cross KEF Inspired
Monday, 19 November 12
5. Development
Construction- Model Usability- Card Model
Next was a more solid model
Continuing on from the giving me a better understanding
development of of how someone may use my
construction i wanted to design and how i might change
look more in detail about some aspects of the design so
how my design will hold that people can find it more
together when it is being natural to find and use some of
build, and although this the attachments that may be
model is only a 2D added. To begin with, image top,
representation using this gives a perspective of how
lightweight wood sticks, it someone may see my
gave me an idea where the design(walking down stairs) and
stressful parts of the design from this view i could clearly see
are and where the key point an opportunity to add the
are if it was to break at any controls to may design while not
point. A key area of this spoiling the aesthetics, or even
model was the parts joining adding to the aesthetics. Using
the two curved segments of the image on the
the design up, it was fairly left we can see i
flexible even when i had have added small
glued it down meaning this is markings on the
the part where more card to show some
industrial joints or adhesives places where
were to be applied. Another buttons can be
section would be the top of placed, this gives a
the lower curve, this was greater usability of
also quite delicate but the product as
from here i know that a they don't have to
strut would go from he walk directly in
tip down through front of the
the design so this speaker to change
would not be volume, song etc...
a problem. and so the sound
of the speakers will
not be distorted by
someone standing
in front of the
speaker
Alastair Cross KEF Inspired
Monday, 19 November 12
6. Development
Usability- Ergonomics Usability- Anthropometrics
Ergonomics are a key point in any design that
has been carefully been planned out to work Now anthropometrics focus on the sizes of
around a human, my design is no different as i the human body rather than making a product
must take account of the different sizes to allow fit around a human, i have already looked at the
my user to use height of someone in
my design ergonomics
comfortably and and how they
with ease. As my must be able
design is wall to use the
mounted i will design but
have to take here i plan to
some change my
measurements to design so than
see how my everything is
design will be natural, one
placed(height quick
on wall). An example will
average sized be the
man is around measure of
5,10 ft tall and a woman 5, 5 ft tall, this means my someones
design will have to be around 6 ft of the ground arm and then use this information so that the
so that it is not in the way and keeps itself design is no wider than this (0.8 metres), this
spaciously efficient but also so that all would improve my design as it would allow
people can reach the design and change people to reach around and make it
certain aspects without issues or more accessible from different angles
problems so that my market does so that it is not constantly in the way .
close up on the taller/shorter
Alastair Cross KEF Inspired
Monday, 19 November 12
7. Development
Usability- Card model con. Usability- Placing of Speaker
Again i am going to look at card model
however this time i have
zoomed in more to see
how someone may
approach, now for the
bottom image the place
where the controls may go
shows there is only room for
around 6 buttons, that
gives enough for on/off,
volume and track change
which is perfect, however
on the other side i plan to
put on additions for the
movement or removal of
the speaker just to allow
easier Placing my speaker in a suitable location in a typical
accessibility modern home is very important to what i am trying to
achieve in the development, as i would like my design to
be aesthetically enjoyed from most areas in the room and
also from the sound to be heard and finally for it to be
specially efficient. On the is simple CAD(computer
aided design) image of a typical room i have put on
green circled areas in and around the room which
would be effective for all three of the criteria
however the red areas are places where they do
not fit either one to none. Although every
home is different it still will always have a key
vocal point in a room which anyone can
exploit. This a key part that i will use and
always relate back to as this will
ensure that my design is core to
a room
Alastair Cross KEF Inspired
Monday, 19 November 12
8. Development
Materials- Carbon Fibre Materials- Clay
Another material that i wanted to experiment with was clay,
although it may be a rather unorthodox material for such
Like i have said before leading designs for
speakers etc,
up to my development, i have the shapes and
always planned to use carbon textures that
fibre in my design as it is a very can be
created would
stylish, modern material. And from give my design
the left i have tried out over some something
basic moulds to see how it works. special about
it, but this all
Carbon fibre is done in layers with depends on
releasing agents being applied how practice
went. On the
first to the mould then we apply left we have
around two layers of carbon some images
weave with hardener, all one at a of a test run on
the whole
time after allowing to dry. model, and the
Although the process may be mess was
terrible with all
simple, to do well it is very difficult of my mould
this is why it was good for me to covered in
practice with different things dried clay and
was fairly
before i am to start make it fully. awkward to
From this i will only use carbon get off. After
fibre on a small part of my using clay i feel
it is quite a
design, so that room for error is rough edgy
low and so it can be done material that
probably will
well and to a high standard. not fit my
To use this i may apply this design as it
material to the tip of the must take
time,
design giving it a patients and
shine and lots of
resources to
sharpness. make clay
attractive to
the eye.
Alastair Cross KEF Inspired
Monday, 19 November 12
9. Development
Materials- Steel Rods Materials- Polishing Plaster
I have never thought of using plaster before as for most
Using steel pure can be tricky however using steel rods for times the quality of
a design can be generally very easy and also look good if finishing is not
the finishing of the material is done to a high standard.
With this test i have got three lines of steel rod. The first one is good enough for
rough with no finishing it is nice designs,
ugly and very dirty to the however after
eye. The second has been seeing what
sanded with course sand polished plaster
paper to technically give looks like when
the rod a ‘grain’ which done well it looks
looks very edgy but also like something
quite clean. And finally the that would work
bottom two images have with my design.
had a full finish done in For polishing
them which the use of plaster it is very
smaller grain sand paper simple all that
followed by wet and dry needs to be done
then moving onto buffering
and then finally polishing. is: sanding a steel
Now this last process takes trowel this removes
and long times and does imperfections,
give a good shine to the wiping trowel with
steel rod, however it does tack cloth then
just remind me of the KEF rubbing in short
Muon which is very strokes with polish,
clean and wipe wall then wax
sophisticated, on the the wall. This process
other hand i would is very simple and
like my design to be yet we can see from
a little shaper so i the images the finish
will go with the looks good on all
middle method different surfaces
of steel
finishing however this is not regular to use on
product especially speakers so i will
have to see what happens later
in manufacture.
Alastair Cross KEF Inspired
Monday, 19 November 12
10. Development
Materials- Wire Materials- Aluminium sheet
I have used wire before and is excellent for Aluminium sheet can be worked on in many ways
finishing of designs giving it and extra but the most interesting method for
shine on a corner for me is cold
giving a plain forging with a
material some hammer, this
texture, it is used in can give
different parts of extraordinary
architecture shapes in the
especially bridges metal and can
making it perfectly also be
suited to my moulded
design, i will use around rough
wire however in shapes to
small moderation create delicate
and only for textures like for
finishing touches example to the
bottom left. I
will try and use
aluminium in
my design
where possible as it
gives shine and it
finishes well.
Alastair Cross KEF Inspired
Monday, 19 November 12
11. Development
Materials- Clear/ Matt Acrylic Materials- Rubber
I would like to use
Earlier in my development i an elastomer in my
discussed the design as it would
influence of the give a bit of variety
shard on my design as most of the
and the the materials i will use
raw nature of are very cold and
the open un textured,
structure however if i was to
use an elastomer for
interests me, the buttons for the
well here in base of my product
materials I've it would definitely
looked at the show more of a
use of either quality in terms of a
completely material that other
clear acrylic, manufacturers
glossy acrylic or of speakers like
Bose, KEF and
lightly transparent Sony use all the
acrylic. From here i time. Touch
have placed all these sensitive can
materials up against also be added
light, dark, wood, if available.
plastic backgrounds to see
which would suit best, now
at the moment i will not be
able to make my choice
till i see the structure
later in my development however the
clearly acrylic seems to look good
in all conditions.
Alastair Cross KEF Inspired
Monday, 19 November 12
12. Specification Check
Aesthetics
When designing my speaker the aesthetics will be modern and
fit the profile of KEF, it will be smooth and incorporate different Here i have met the specification due to the research in
materials giving it texture and character in the environment
where it must be placed. I will use some composite materials in the sculptured and modern industry for example the
my design, it should show and emphasise sculptured design as shard and geometric shapes.
well as a modern minimalist feel.
Cost
My design will be a medium to high priced design, with the
joining, materials and overall quality being good. The finishes While looking at materials such as carbon fibre and steel,
should be extremely high and a smooth texture should be
consistent throughout the product. It should be attractive to KEF this has gone along with this section
costumers.
Costumer
The main users of my product (continued on page 11) will be a
sophisticated character, male or female, very interested in
functional artistic art and can be placed anywhere in their Due to the research in clay, ergonomics and
specified environment. My user can be of any range as long as anthropometrics, this has been met
the interest of music and art is apparent, and can afford the
highly priced product.
Environment
My design will be placed in a very minimalist and modern home
environment which can be distinguished wherever it is placed in
that environment. I will be placing my design to conserve most When i had looked at the environment to see where my
space in an environment either on a wall, ceiling or shelfs. It design will go, i have fulfilled this section
should stand out but not to the scale where the design look
ridiculous.
Size
In terms of the product, the design can be any type of size due
to the amount of free space in the modernist environment,
however i do not plan for my design to be as big as a design as In ergonomics i have looked at how a human will fit
the KEF Muon. It is to be big enough to capacitate the speakers around certain sizes, this has been met
and be recognised in the environment as a stylish piece of gear,
that is the only specification for size.
Safety
For my design there will be minimal issues with the safety as it will
be placed in an area which should not be in the way of the Due to the research on the wall joint, the product should
user. As before my design should look as if the design becomes
one with the environment, and look aesthetically pleasing while be safe and will not cause health issues
doing so
Function
There can be many functions and features for speakers
however my design should be mainly aesthetically pleasing and I have looked at aesthetics in detail and the development
functional in terms of the sound that will be produced. I may onto elastomers is key in meeting this section
include some small smart features such as touch sensitive, but
nothing to change the style of the design.
Materials I have used an abundance in materials like carbon fibre etc...
I will use materials mostly including plastics and wood, however However , i have not looked at the use of wood yet which is
to make my design unique i might use some smart materials something i will have to look at
such as carbon fibre....
Alastair Cross KEF Inspired
Monday, 19 November 12
13. Development Section 2
Materials- Finishing Off Materials
When i finally start to create my speaker design, the finish of the materials that i am using,
such as steel, wood and carbon fibre all have a certain look and texture when i use them,
however as my design will be a sculpture style i want my design to be finished off to the
highest degree. For wood (pictured right), i experimented with the use of wet and dry and
varnish. With wet and dry it gives the wood a certain crisp-ness to the
wood making it sharper and more defined, however the wood
pictured far right i have added a varnish, this makes the wood a
more complete colour and more consistent. From this i will only use
wet and dry as it resembles sculptures to a higher degree. With
metals such as steel only finishes such as wet and dry, buffing and
polishing are available to me. However as before in my
development i have looked at this therefore i will only use wet and
dry as it gives the material an edginess. And finally the use of plastics,
now all acrylic sheets come pre-finished and so not much can be
done. I will however sand the edges and clean the acrylic with
window cleaner to maximise its finish.
Materials- Joining
As my design will be using so many materials and process i decided
to look at joining all of these different materials together.....
Woods Plastics
When connecting woods to plastics, the main type of permanent joining would be bolts and screws with
the availability of adhesives and other types of joints(dove tail). On these two materials slight flaws such
as scratches or marks are a big problem as they would show heavily. So because of this i will use carefully
the use of adhesives such as epoxy resin, and if done correctly will look clean and be strong.
Woods Metals
For woods and metals, a very efficient and strong method is the use of screws and bolts to hold these two
together. After practicing with the use of bolts it seems the only valid and strong option as much of the
strong parts of my design will be made of these two. It will also give me a chance to use the new finishes
and using them together from the development above
Plastics Metals
And finally for the last two different materials, now plastics and metals are rarely used together due to their
contrasting styles of construction, however such joining as sheet-metal nuts or rivets are a valid option
rather than adhesives again, such joining as wielding would not work, so from here i will be using these two
methods
Alastair Cross KEF Inspired
Monday, 19 November 12
14. Development Section 2
Construction- Sized Model
For practicing, viewing and changing the actual size of my design this will help me
understand more about my design and will allow me to make mistakes in this
product rather than my actual product. From Doing this sized model i have
realised that the angles of the design and the
corners are very important so later in my
development i will have to look at this in more
detail. Another point i will have to change will be
the idea that it would be in three parts (page 36),
but from now it will only be in two main sections
with the top and bottom sections. This will help
reduce the error i could make in measurements
and make it easier to join one the parts are
made.
Construction- speaker placement/ Arrangement
At this stage i will need to look
at where speakers will be
placed on my design to allow
maximum effectiveness. Since
my original idea was to
include 3 sets of two
speakers placed on
the area to the left,
this my have to be
reduced as the size of
my design will be be
big enough to old all of
them, from this point i have
placed new rings of colour orange to
tell where they will be placed. This
allows all speakers to be seen and
also allow the sound to travel in all sorts of different
directions to be heard all over the room
Alastair Cross KEF Inspired
Monday, 19 November 12
15. Development Section 2
Construction- Wire Placement
As my designs main focus is to be as aesthetically
pleasing as possible the idea of wires must strongly
be considered. Even if my design turns out to be
battery powered there is still connector wires
that will be a possible problem. From this
i have identified on the far right where
the initial wire will come from the
speaker, then on the immediate right
shows where the wire will trace on a smaller
scale and clearly shown on the left is the direct route
it will take. From practicing this route it will able me to
hide the possible viewing point and so keep it looking
well finished and clean.
Construction- Inside View Construction
Due to the fact my product will
have some open sections where
someone will be able to look
inside it, i must consider the way
it is laid and and how well it must
be finished. After looking a
various sculptures inside and out, i
noticed that from all views it does
have an artist point to it, and i must
incorporate this too, as this is the case
i will have to finnish both sides of my
design and to put materials must as
metals and woods to complete and
fill out the design. This has changed
from my original idea and so a lot
more time would have to be spent
on this aspect.
Alastair Cross KEF Inspired
Monday, 19 November 12
16. Development Section 2
Construction- The joint of the sections
From the multiple images of my design, there are clearly two
main sections to the design, however there is also the joint to
the wall mount which must also be considered. The idea of the
sections would make it easier for me to create the design and
join it together in sections. Looking at the two largest
sections, as they will be made of steel rods of some kind a
clear strong wield would be done to solidify this joint and
make it permanent rather than the use of bolts and
screws. The use of tungsten gas wielding would allow
there to be a solid joint all along the two sections
where they meet, this would able me to make
both sections separately and join them at
the last stage, saving time on working
around them.
Manufacture- Joining design (Basics)
From the beginning from a purely
one sided view of one panel of my
design that there is a lot or room to
attach and join parts of my design together,
and over the manufacture i will be going into
more detail. So from the basics of joining my
design this is the lower section split up, and here i
looked at the gaps where the struts of material
would leave space and from a sculpture point of
view this gives me a lot of choices with what i want
to do with this space, but as i have already looked at
architecture in the shard i must keep this open to
follow my other research. But for this part of my
research i plan to keep my design simple with minimal
amounts of struts to keep joining to a minimum and also
to follow my modernism design movement.
Alastair Cross KEF Inspired
Monday, 19 November 12
17. Development Section 2
Manufacture- Different order of Constructions
Obviously the order i create my design will be very
important as the whole design will be fairly heavy
with all the steel and will need to be constructed
slowly and carefully so that everything will
be balanced rather than before where i
thought i could create it all at once. To
begin with i will create my sturdy wall
joint, followed by the lower section,
this will allow me to judge what
the weight will be like, then the
etc.... top section followed all all
the smaller components
of the design like the
speaker switch
etc...
Manufacture- Template/ outline of design
For my design i needed a template for
my design where i can follow various parts
of my design without making a mistake (such
sections as general shapes, amounts of edges,
width, general sizes, speaker placement, wire
placement and also how the design will be pieced
together. Also on this cardboard and MDF model i
have circled in red where the major stress point will be
and this is where extra care will be taken in terms of the
joining processes and the materials finishings if there are
any. Although i have used a thermoset glue, it has
helped me practice and understand the problems i will
have with wielding the design such as the tighter angles
and the areas where there is minimal surface area and i
will have to be more though rough with the joining.
Alastair Cross KEF Inspired
Monday, 19 November 12
18. Development Section 2
Manufacture- Ways of constructing wall mount
There are many ways in which i can construct my wall mount
which will be attaching to my design making it a wall
mounted product. I can use more modern and traditional
methods of wall mounting with images bottom right, they use
finely tuned materials to be able to hold as much weight
in as little space as possible, however i have already
created one prototype in my development
which has already worked well so i plan to
use this design, although i have changed
one small thing to give my design just a little
more stability, it is a small V shaped piece
of material screwed into the wall piece
and then a diamond shape on the
speaker side, rather than just
laying all of its weight on the
bottom of the wall joint, i have
also looked at the idea of a twisting
wall mount however this would cause
problems from how rectangular the back of the
design is, so i will not
be using that idea.
Alastair Cross KEF Inspired
Monday, 19 November 12
19. Development Section 2
Manufacture- Ways i could make the frame/ structure
On this page, as my design will basically be a frame
sculpture i have looked at different types of framed
structures, buildings etc... and from all off the types of
frames they are incredibly well balanced and strong at
every point, i have looked at weaker parts of my design
already but now it is just the balance that i need to focus
on, to achieve this the top section of my design my
have a less mass to reduce pressure on the
bottom section, this would keep the
centre of mass lower and the overall
weight of the design would be
severely decreased. I have also
been looking at the image and
framework above of a wooden home
and from research i have found that
there are 10 main strong beams/ columns
of wood holding the structure up with the
smaller beams giving stability and shape, i
would like to use this idea but i would use
more like two or 3 main
struts to hold the design up
and the rest to give it its
shape.
Alastair Cross KEF Inspired
Monday, 19 November 12
20. Development Section 2
Manufacture- Ways i could make Base (wall to main body) Joint
For my design i did want a midpoint between the wall mounter and the
actual design itself, and even since my design will not be going on the
floor i have created a base. For this section coloured orange on the
sketch to the right it would act simply to hold the main design all
together. The elastomer that i plan to place in this position wouldn't
need much thought in terms of joining as firstly it wouldn't be seem
plus rummer is an extremely good material to be bolted which
could work with all different types of materials. It would
also give a certain amount of texture and class to the
design when being touched or being looked at.
Another thing i have thought about is the
idea when it is not attached to the wall
it must be laid down on the floor,
however to make sure that the design
can be picked up and can rest on the
floor i will plan for the last bottom part
highlighted green will be slightly longer
and heavier so that the situation named
above can be sorted, this would also
help the usability of the
design.
Alastair Cross KEF Inspired
Monday, 19 November 12
21. Development Section 2
Manufacture- Creating sharp clean edges
A final Manufacture that i would like to look at with my design would be the
idea of sharpening the metal on my design with the use of files, sanding
and buffing to make it, not just to make it look better but also when I'm
joining this material it becomes a lot easier to join
and makes the joint even stronger. Practicing
this on aluminium it also works, this also makes
the design have more emotion and feeling
to it. This could be linked back to different
materials i have used and how i have
also finished them to be much
sharper, and the way the design is
going this will also contribute
to it.
Key Inspiration:
Keppel Bay, Singapore ‘World Architecture Festival 2012 Award Nominee’
Alastair Cross KEF Inspired
Monday, 19 November 12
22. Specification Check
Aesthetics
When designing my speaker the aesthetics will be modern and
fit the profile of KEF, it will be smooth and incorporate different My design has looked at making my design sharper going
materials giving it texture and character in the environment
where it must be placed. I will use some composite materials in against my further spec. however i have used a variety of
my design, it should show and emphasise sculptured design as materials and plan to use them also.
well as a modern minimalist feel.
Cost
My design will be a medium to high priced design, with the
joining, materials and overall quality being good. The finishes With the processes and materials i plan to use the cost
should be extremely high and a smooth texture should be
consistent throughout the product. It should be attractive to KEF will be high
costumers.
Costumer
The main users of my product (continued on page 11) will be a
sophisticated character, male or female, very interested in
functional artistic art and can be placed anywhere in their From images and development my design looks like a
specified environment. My user can be of any range as long as modern speaker which sound be liked by my costumer
the interest of music and art is apparent, and can afford the
highly priced product.
Environment
My design will be placed in a very minimalist and modern home
environment which can be distinguished wherever it is placed in
that environment. I will be placing my design to conserve most i have looked a lot about where it will be placed and it
space in an environment either on a wall, ceiling or shelfs. It satisfies this section
should stand out but not to the scale where the design look
ridiculous.
Size
In terms of the product, the design can be any type of size due
to the amount of free space in the modernist environment,
however i do not plan for my design to be as big as a design as i have done this by doing a sized model and and looking
the KEF Muon. It is to be big enough to capacitate the speakers briefly at sizes
and be recognised in the environment as a stylish piece of gear,
that is the only specification for size.
Safety
For my design there will be minimal issues with the safety as it will
be placed in an area which should not be in the way of the my design i out of the way however it is very sharp and
user. As before my design should look as if the design becomes
one with the environment, and look aesthetically pleasing while could hurt someone if it it too low down the wall
doing so
Function
There can be many functions and features for speakers
however my design should be mainly aesthetically pleasing and the function will be its wall feature and being able to see
functional in terms of the sound that will be produced. I may inside the design, it fulfils the criteria here
include some small smart features such as touch sensitive, but
nothing to change the style of the design.
Materials
I will use materials mostly including plastics and wood, however i have used steel, aluminium, woods, plastic etc although
to make my design unique i might use some smart materials not carbon fibre on a working model
such as carbon fibre....
Alastair Cross KEF Inspired
Monday, 19 November 12
23. Development Section 3
Components- Parts in Wall Joint
When looking at the wall design in terms of the components that i will use to
create this section, i wanted to break up this part and see how the design well be
pieced together. For this part it is very simple with splitting the design up into 4
simple sections and joined into two when the small parts on the top of the
images are placed into the design. This gives my design simplicity which in
term will make it easier to create and so able to be made in a higher
quality. For the section to the bottom right it is one component
however it will formed or moulded making it stronger in the
longer term and also a better finish with no seams etc...
Components- Wire conclusion
As before i have looked and developed the direction of
all the wires, i now have though of a final point on the
design to place this holder for an iPod/ mp3 player, this
would be placed on the underside of the bottom part
of the design so that it does not effect
the style of the speaker but also not
the clutter the rest of the design
with unnecessary parts and
components. The components of this holder
will be made from sheet aluminium to fit in with
my design, this will keep that aesthetics consistent
and clean.
Alastair Cross KEF Inspired
Monday, 19 November 12
24. Development Section 3
Components- Panels
For this component i am looking at i want to look at the panel and how it
may be seen and joined. To begin with from the sketch to left my
plan is to place a panel of some sort of sheet material to
cover some of my design, this my be acrylic or sheet
metal. However were i want to focus on joining
this section together- i can join this together with
the use of adhesives but that will be messy- so
instead i plan to pop rivet or drill which
would work on steel rods well.
Components- Measurements*(mm)
100
For this development rather than
250 150
200 looking at one individual component of my
50 design i wanted to look as them as a whole unit in
100 200 a working format. From here i looked at the specific
700 250 measurements to make my design work properly in a
real life situation. Clearly From the diagram to the left
100 i have left out measurements for the inside
construction, partly due to the fact it is hard to
45 measure this distance but also as the inside is not
350
110 as important as for the measurements as it only
300 must have a strong core and not necessarily a
250 particular pattern to follow.
300
Alastair Cross KEF Inspired
Monday, 19 November 12
25. Development Section 3
Components- Angles to product Total 360
For my design to work and to be joined perfectly i have looked at the angles
of my design so that it can look sleek and modern but also to be stable to
hold its own weight once it has been built full and to its maximum mass
with all the components and this will only happen with this
development. For my angles i have given most strength through the use A
of angles with the green circled area, as this would be the section
where most of the weight would be forced on and the lowest angle C
difference is the best. When looking at joining my product in more
detail i have looked at compound joints where i will have to look B
at what angles i will have to make the two pieces of metal so that
they join together to make the total angle (images right). I have
measured and calculated *C, however to create this angle i 360-A-B=C
have to cut the angles into the two materials first, i can use the
equation to the right to do this accurately for all my angles
Components- The switches i will use and how they will be used
For these components i have tried switches 1 and
4, and looked at the others 2 and 3- and from looking
at what would look best on my design and would
complement my style the most, numbers 1 and 2 would fit
1 2 with the materials of steel rods and sheets- and as before i have
said how the switches will be lined up vertically along the side of
my design i plan to change this so that they group the design in 2’s
allowing easier accessibility and putting these components into the
design. One this i have noticed is the use of joining switches to my
design which would be done now with all the switches on one panel
which would be then laid into the side of the design blending it into the
3 4 design and making it easier to work with.
Alastair Cross KEF Inspired
Monday, 19 November 12
26. Development Section 3
Components- speaker
This is the design of speaker i will be using for
my design as it uses the right colour scheme
and it is the correct size to fit into my design
also- For this component it has a diameter in
length of around 90 and a diameter of depth
of around 40mm, this size now gives my an
idea of the sizes to cut out for the panels they
will fit into, however i must watch out at the
design is curved and the hole will have to be
inch perfect. I will have to use a precise
type of equipment to measure the diameter so
that i can cut the correct size of hole.
Components- Mid joint to the main design
At this point
i am looking in more
detail in the mid section of
my design where the wall joint
will be joined onto the main design
structure- and so this part has to be as
strong as possible! to do this i plan to
create a dove-tail joint which is
incredibly strong and then covering it on
an elastomer to fulfil one of my previous
criteria. Using this sort of method just makes
the whole process a lot simpler once the
components are created. It is also a more
professional method of joining.
Alastair Cross KEF Inspired
Monday, 19 November 12
27. Development Section 3
Components- Frame My final two pieces of Development come from the
main feature of my design which is the frame and i
wanted to use this last as the rest of my development
can work around this main already rather than
working the other way round. For the frame i could
use squared rectangular or circular types of steel rod
however the decision will always be made on how
easy it will be to make the shape of my design and
the ability to join the product up in a physically
strong way. And from the clear example on the right
the use of square hollow tubing is the best and the
edges can be lined up but also can cut to fit into
shapes and the shape of my design
Components- Frame continued
At my final stage i have used 3 different types of
joining methods to see what is best for this
component- The first using MIG wielding(top of triangle),
this was a relatively quick process but left large bulks of
material and often was difficult to clean up. The
second technique(left of triangle and right) we have
used a braising to joining the components and this
was the quickest to join but also the quickest to
sand down after. And finally to the right of
the triangle using an acetylene torch to
melt the material together, however this
blew a hole into the steel which is a risk
MIG i’m not going to take. In conclusion i
will be using the brazing rod as it is the
easier and quickest for of joining.
BRAZING *PRACTICE
Alastair Cross KEF Inspired
Monday, 19 November 12
28. Specification Check
Aesthetics
When designing my speaker the aesthetics will be modern and
fit the profile of KEF, it will be smooth and incorporate different I have kept aesthetics constant throughout by looking at
materials giving it texture and character in the environment
where it must be placed. I will use some composite materials in the components and the processes and materials that i
my design, it should show and emphasise sculptured design as will you for them.
well as a modern minimalist feel.
Cost
My design will be a medium to high priced design, with the
joining, materials and overall quality being good. The finishes Using a range of materials has kept my design at a
should be extremely high and a smooth texture should be
consistent throughout the product. It should be attractive to KEF reasonably high price, i have achieved this criteria.
costumers.
Costumer
The main users of my product (continued on page 11) will be a
sophisticated character, male or female, very interested in
functional artistic art and can be placed anywhere in their My costumer will be into sculptures, and from the
specified environment. My user can be of any range as long as components i have added, it still looks like a sculpture.
the interest of music and art is apparent, and can afford the
highly priced product.
Environment
My design will be placed in a very minimalist and modern home
environment which can be distinguished wherever it is placed in My design has not changed where it will be placed nor
that environment. I will be placing my design to conserve most have i changed how it will be placed, i have completed
space in an environment either on a wall, ceiling or shelfs. It
should stand out but not to the scale where the design look this criteria previously.
ridiculous.
Size
In terms of the product, the design can be any type of size due
to the amount of free space in the modernist environment,
however i do not plan for my design to be as big as a design as On measurements i have carefully decided on how large
the KEF Muon. It is to be big enough to capacitate the speakers the design will be, and the structs as well.
and be recognised in the environment as a stylish piece of gear,
that is the only specification for size.
Safety
For my design there will be minimal issues with the safety as it will
be placed in an area which should not be in the way of the Wires have been carefully mapped on the design and
user. As before my design should look as if the design becomes
one with the environment, and look aesthetically pleasing while that will be the only issue with safety here.
doing so
Function
There can be many functions and features for speakers
however my design should be mainly aesthetically pleasing and My design has no specific function, i have not looked at
functional in terms of the sound that will be produced. I may
include some small smart features such as touch sensitive, but this section, i have not completed this criteria.
nothing to change the style of the design.
Materials
I will use materials mostly including plastics and wood, however
to make my design unique i might use some smart materials In components i have completed this criteria
such as carbon fibre....
Alastair Cross KEF Inspired
Monday, 19 November 12