Cleaning and Shaping of Root Canal Systems
•Als PPTX, PDF herunterladen•
367 gefällt mir•109,895 views

A concise and brief presentation on cleaning and shaping of root canals. Colorful and well pictured. Ideal for UG students and PG students to get a good understanding of BMP techniques.

Empfohlen
Weitere ähnliche Inhalte
Was ist angesagt?
Was ist angesagt? (20)
Ähnlich wie Cleaning and Shaping of Root Canal Systems
Ähnlich wie Cleaning and Shaping of Root Canal Systems (20)
Mehr von Dr Aaron Sarwal
Mehr von Dr Aaron Sarwal (16)
Kürzlich hochgeladen
Kürzlich hochgeladen (20)
Cleaning and Shaping of Root Canal Systems
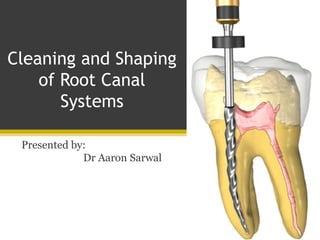
- 1. Cleaning and Shaping of Root Canal Systems Presented by: Dr Aaron Sarwal
- 2. Introduction • Clinical evidence demonstrates that root canal systems can be cleaned and shaped and obturated in three dimensions with a high degree of predictability, approaching 100% success. • The major objective of the root canal treatment procedure is to remove the contents of the pulp space and shape the walls of the canal to receive the filling material. KNOWLEDGE DESIRE SKILL Elements determining the predictability of successful endodontics.
- 3. Brief History • In 1852 Arthur used small files for root canal enlargement. • Ingle and Levine (1958) listed standardization for instruments. • Ingle described conventional technique/ standardized taper technique of root canal preparation. • Almost 50 years ago, Schilder introduced the concept (and the expression phrase) "cleaning and shaping." Cohen’s Pathways of the pulp 10th edition
- 4. Cleaning and Shaping • Cleaning refers to removal of all contents of root canal system before and during shaping that is organic subtracts, microflora, bacterial by products, food debris, caries, denticles pulpstones previous root canal filling materials and dentinal shavings. • Shaping refers to specific cavity form with five design objectives. Cohen’s Pathways of the pulp 10th edition
- 5. Shaping of Root Canals • Shaping process of the root canal can be classified into five phases- Phase I Negotiating the canal- “patency filling” Phase II Coronal pre enlargement Phase III Working length measurement Phase IV Root canal shaping techniques Phase V Root canal working width
- 6. Objectives of Cleaning and Shaping • The primary objectives in cleaning and shaping the root canal system are to: ▫ Remove infected soft and hard tissue ▫ Give disinfecting irrigants access to the apical canal space ▫ Create space for the delivery of medicaments and subsequent obturation ▫ Retain the integrity of radicular structures
- 7. Herbert Schilder's Five Mechanical Objectives Schilder H: Cleaning and shaping the root canal, Dent Clin North Am 18:269, 1974. Develop a continuously tapering conical form in the root canal preparation. Make the canal narrower apically, with the narrowest cross- sectional diameter at its terminus. Make the preparation in multiple planes. Never transport the foramen. Keep the apical foramen as small as is practical.
- 8. Biological objectives: • To completely debride the pulp space from- Pulp tissue Bacteria / Microorganisms Dentinal debris Endotoxins
- 9. Weine’s Rules For Canal Preparation 1. Preparation must enlarge the canal while maintaining the general form of the preoperative shape, but it also must develop the most desirable shape to fill.
- 10. Weine’s Rules For Canal Preparation 2. Once working length is determined all instruments should be kept within the confines the canal.
- 11. Weine’s Rules For Canal Preparation 3. Instruments must be used extravagantly, especially the smaller sizes.
- 12. Weine’s Rules For Canal Preparation 4. Canals must be prepared in wet environment
- 13. Motions of Cleaning and Shaping (Cohen, 6th ed) • Used initially during cleaning and shaping, or any time an obstruction blocks the foramen.Follow • It is simply an in-and-out, passive motion that makes no attempt to shape the canal.Follow-withdraw • The precurved reamer should gently touch the dentinal walls and "cart" away debris.Cart • Carving is for shaping. Reamers are the best instruments for carving and sculpting.Carve • Smoothing is usually accomplished with files. Also known as circumferential filing motionSmooth • It means simply that the portal of exit has been cleared of any debris in its path.Patency
- 14. Motions of Instrument Manipulation • Several motions of manipulation are useful for generating or controlling the cutting activity of an endodontic instrument. • These may be referred to as envelopes of motion, historically 1. Filing 2. Reaming 3. Turn And Pull 4. Watch Winding 5. Balanced Force Instrumentation. 6. Anti-curvature Filing
- 15. 1. Filing • The term filing indicates a push- pull action with the instrument. • The inward passage of a K-type file under working loads is capable of damaging the canal wall very quickly, even when the slightest curvature is encountered.
- 16. 1. Filing Standard K-type file is pushed into a curved canal the junctional angles gouge the wall rather than reorient to the curvature. This action can form a ledge very rapidly.
- 17. 1. Filing The same motion with a modified tip produces little alteration of the canal wall since most of the cutting ability has been removed.
- 18. Circumferential Filing • Instrument is first moved toward the buccal side, then reinserted & removed slightly mesially. This continues around the preparation to the lingual aspect & then to the distal untill all dentin walls have received rasping. • Enhances preparation when a flaring method is used by widening the orifice of the canal. 6th ed. Pg 166/7Weine Reaming action Keyhole Circumferential filing
- 19. 2. Reaming • The term ream indicates clockwise or right-hand rotation of an instrument. • Rotating any endodontic hand instrument to the right may be risky, though this risk is subtle and goes unnoticed until an instrument fractures under the load.
- 20. 2. Reaming This in turn increases the strain or working load against the instrument. That strain continues to rise until the instrument ceases to move. As they slide into the canal more and more of the length of the instrument engages the canal. This configuration causes them to slide into the canal as the edges rotate to the right. The cutting edges of all endodontic files and reamers spiral about the shaft of the instrument.
- 21. 2. Reaming They have a nearly axial orientation of the cutting edges and feed themselves into the canal with less force when rotated to the right than K-type or H-type files. Specialized instruments (i.e., reamers) manage the complexity of this motion. If the instrument over inserts and bends, further rotation will break it.
- 22. 3. Turn and Pull Motion • A quarter turn to the right is followed by a straight outward pull. The arrow indicates a light inward force, which engages the file before rotation.
- 23. 4. Watch Winding Motion • Watch-winding is the back-and-forth oscillation of a file (30 to 60 degrees) right and (30 to 60 degrees) left as the instrument is pushed forward into the canal. The back- and-forth movement of K-type files and reamers causes them to plane dentinal walls rather efficiently. Motion is less aggressive than quarter turn-and pull motions, as the tip is not pushed as far into the apical regions 30 to 60 degrees of clockwise rotation pushes the file tip and working edges into the canal 30 to 60 degrees of counter clockwise turn partially cuts away the engaged dentin.
- 24. 4. Watch Winding Motion • The arched arrow indicates a gentle right and left rocking motion that causes the instrument to cut while light inward pressure (straight arrow) keeps the file engaged and progressing towards the apex. The arc of rotation is indicated by the shaded region in the circle.
- 26. 4. Balanced Force Technique (James B. Roane 1985) • When file engages, with apical pressure, 1/4 turn (clockwise for all instruments according to Buchanan its easier for right handed dentists this way!) • Then again, with apical pressure, 3/4 turn counterclockwise • If done properly, at this time you will hear a "click" when the instrument is cutting dentine . Repeat sequence 2 or three time. • The black arrow indicates that one should alternate these two directions until the working depth is reached. • The inward pressure and the rotating force should always be very light.
- 27. 4. Balanced Force Technique (James B. Roane 1985)
- 28. Anti-curvature Filing • Put forward by Abou- rass, Frank, and Glick • Involves filing away from the inner curve of a root to reduce the risk of a strip perforation.
- 30. Recapitulation • Re-instrumentation with a smaller instrument following each irrigation step. • Use of a smaller instrument to remove debris produced during instrumentation. • Prevents pushing debris beyond the apex and apical plug formation.
- 31. Techniques Of Pulp Space Preparation Apical to Coronal • Standardized preparation • Step back preparation & modifications by: • Schilder • Weine • Passive step back • Roane Balanced Force Coronal to Apical • Step down technique • Double flare technique • Crown down pressure less technique Hybrid technique • Step back step down combination procedure
- 32. Standardized Preparation John Ingle(1961) • Same working length definition for all instruments introduced into root canal and relies on the inherent shape of the instruments to impart the final shape to canal. • Negotiation of fine canals is initiated with fine files that are then advocated to WL and worked until a next larger instrument may be used. • The final shape is predicted by the last used instrument. Hourglass preparation
- 33. FEATURES STEP- BACK STEP DOWN HYBRID AUTHOR CLEM AND WEINE 1969-74 GOERIG 1982 CONCEPT Involves preparation of the apical third initially followed by middle and coronal third of the canal using larger instruments. Involves preparation of the coronal two thirds of the canal first followed by middle and apical third of the canal Involves combination of crown down and step back techniques SEQUENCE OF INSTRUMENTATION RECOMMENDED INSTRUMENTS Hand instruments Hand and rotary instruments Hand and rotary
- 34. PRINCIPLE MOTION OF INSTRUMENTATI ON • Coronal instrumentation with reaming motion and apical instrumentation with circumferential filing • Reaming motion • Coronal instrumentation with reaming motion and apical instrumentation with circumferential filing ADVANTAGES • Popular technique employed with 2% SS files • Ability to prepare proper apical stop • Shaping is easier • Elimination of the bulk of micro organisms, tissue and debris from middle coronal third before shaping apical third • Minimizes debris extrusion • Better penetration of irrigants • Optimizes the advantages of crown down and step back techniques LIMITATIONS • Extrusion of debris into periapex • Tendency to straighten the canal • Gauging of the apical third is done as the last phase of the procedure • Middle third should be carefully prepared in order to prepare a continuous tapered preparation
- 35. STEP BACK PREPARATION (Telescopic, Serial root canal prep) • Phase I • Apical preparation up to the file #25(MAF) to full WL with recapitulation using prior size files.
- 36. STEP BACK PREPARATION (Telescopic, Serial root canal prep) • Phase II • Stepping back procedure in 1 mm increments • Recapitulation with no. 25 file till full working length
- 37. STEP BACK PREPARATION (Telescopic, Serial root canal prep) • Phase II-A • Refining phase • Gates Glidden no 2, 3, 4 are used to create coronal and middle preparations.
- 38. STEP BACK PREPARATION (Telescopic, Serial root canal prep) • Phase II-B • Return to # 25 last file (MAF) • Short of working length to smooth the step back with vertical push- pull strokes (circumferential filing) H files used. • Guttmann “final prep should be exact replica of original canal configuration”
- 39. STEP BACK PREPARATION (Telescopic, Serial root canal prep) • Final Preparation • Final form with smooth taper. Advantages Better tactile awareness Keeps apical preparation small in its original position- gradual taper Ability to prepare proper apical stop Avoids zipping Disadvantages Chances of pushing debris into peri- radicular tissues WL likely to change as canal curvatures are eliminated
- 40. Modifications Of Step Back • Schilder ▫ Advocated canal bed enlargement, shaping consisted of placing instrument larger than MAF to a point of 1st binding and then using reaming action to enlarge coronal portion, no force applied apically, Gates glidden used coronally ▫ Allows body of canal to be prepared without procedural errors, permits natural morphology • Weine ▫ precurving of files to minimize canal alteration
- 41. Modifications Of Step Back • Passive Step- Back ▫ Developed by Torabinejad uses a combination of hand and rotary instrument to develop flared preparation. ▫ Gradual enlargement of root in apical to coronal without application of force, rotating at 1/8 to one quarter turn • Advantages: ▫ Reduces risk of apical transportation, removal of debris and canal obstruction, gradual passive enlargement ▫ Also advocated for use with ultrasonic instruments
- 42. Modifications Of Step Back • Modified Step- Back ▫ The preparation is completed in the apical area, and then the step-back procedure begins 2 to 3 mm up the canal. ▫ This gives a short, almost parallel retention form to receive the primary gutta-percha point when lateral condensation is being used to fill the canal. Ingle 5th ed. pg530
- 43. Apical to Coronal Preparation: Advantages and Disadvantages ADVANTAGES Conservation of tooth structure especially in cervical third DISADVANTAGES Apical plug Decreased volume of irrigating solution Procedural mishaps
- 44. Coronal To Apical Preparation: Advantages and Disadvantages ADVANTAGES Better tactile awareness in negotiating the delicate apical third microanatomy. It reduces pressure Holds greater volume of irrigant - enhances cleaning. Removal of dentin mud decreases post treatment problems Improves identifying the foramen EPT more reliable DISADVANTAGES Increased removal of tooth structure
- 45. Step Down Preparation • First suggested by Schilder in 1974 • Goerig 1982 named and described the technique in detail • Principle- coronal aspect of the root canal is prepared and cleaned before the apical part
- 46. Step Down Preparation 1 • In this method, the access cavity is filled with sodium hypochlorite, and the first instrument is introduced into the canal. 2 • Start with exploration of the canal with a fine, stainless steel, .02 taper (No. 8, 10, 15, or 20 file, determined by the canal width), It is important that the canal be patent to the apical constriction before cleaning and shaping begin. 3 • Sometimes the chosen file will not reach the apical constriction, and one assumes that the file is binding at the apex. But, more often than not, the file is binding in the coronal canal. 4 • In this case, one should start with a wider (0.04 or 0.06 taper) instrument or a Gates-Glidden drill to free up the canal so that a fine instrument may reach the mid- and apical canal.
- 47. Step Down Preparation Prepare the coronal portion of the canal to the depth of 16-18 mm or to the beginning of the curve using Hedstroem files 15,20,and 25 in a circumferential filling motion.
- 48. Step Down Preparation • Gates Glidden drills 1,2 &3 are then used to refine the coronal preparation, the no 3 drill extending 1-2 mm into the canal orifice. • A – No. 3 GG Drill • B – No. 2 GG Drill • C – No. 1 GG Drill
- 49. The next sequence of instruments are used in crown down fashion The instruments are used in a watch-winding motion until the apical constriction (or working length) is reached. When resistance is met to further penetration, the next smallest size is used. Irrigation should follow the use of each instrument and recapitulation after every other instrument Then the apical preparation done upto 25 size with enough lubrication, irrigation, and recapitulation
- 50. Rotary Instruments that are used in crown down technique are- • Profile • Profile GT • Quantec • Light speed • protaper • Race • Hero 642 • Hyflex • K3
- 51. Modifications Of Crown Down Technique • Crown Down Pressureless • Balanced Force Technique • Double Flare Technique
- 52. CROWN DOWN PRESSURELESS • Suggested by Marshall and Pappin. • Basic sequence similar to step down technique • Used in rotary system and hand system with greater taper • Early coronal flaring GG drills is followed by an incremental removal of dentin from coronal to apical direction- hence called as ‘crown-down’ technique. • Straight K files are then used in large to small sequence with a reaming motion with no apical pressure- hence called as ‘pressureless’ technique.
- 54. Double-Flare Technique • Fava presented this technique • Consisted of exploratory action with small size file, a crown- down portion with K files of descending sizes, and an apical enlargement to size #40 or similar. • He recommended stepping back in 1mm increment with ascending file sizes and frequent recaptulations with MAF
- 55. Hybrid Technique • Achieving patency with pre curved no. 10 or smaller K file • Passive pressureless placement of sequential sizes of # 15, 20 and 25 K files to the point of canal binding • Coronal pre enlargement with GG drills in the sequence no. 3, 2 and 1 ( Not beyond 3 -4 mm of canal orifice) • Establishing the working length • Placement of 40 or smaller k file to the point of canal binding
- 56. Hybrid Technique • Enlarging working length from size 15 k file to recommended master apical file sizes • Canal preparation done with sequential use of progressively larger instruments placed successively short of working length • This step back is performed till middle third to obtain continuous taper preparation
- 57. Non-instrumentation Root Canal Cleansing • Lussi and his associates at the University of Bern, Switzerland, introduced devices to cleanse the root canal “without the need of endodontic instrumentation.” • The first device, reported in 1993, consisted of a “pump” that inserted an irrigant into the canal, creating “bubbles” and cavitation that loosened the debris.
- 58. Mishaps During Cleaning and Shaping 1. Loss Of Working Length 2. Blockage Of The Canal System 3. Ledging 4. Breakage Of Instruments In The Canal 5. Zipping 6. Stripping Or Lateral Wall Perforation 7. Overinstrumentation 8. Overpreparation/Underpreparation
- 59. 1. Loss Of Working Length • CAUSES: ▫ Due to rapid increases in file size and accumulation of dentinal debris in the apical one third of the canal ▫ Malpositioned instrument stops • PREVENTIVE MEASURES: ▫ Frequent irrigation with naocl ▫ Recapitulation ▫ Periodic radiographic verification of working length ▫ Proper use of instruments stops ▫ Use of directional stops in ▫ Curved canals
- 60. 2. Blockage Of The Canal System • CAUSES: • Packing of dentin chips, tissue debris, restorative materials, cotton pellets, paper points or a fractured instrument in the canal
- 61. 3. Ledging • A ledge is an artificially created irregularity on the surface of the root canal wall that prevents the placement of instruments to the apex of an otherwise patent canal CAUSES Inadequate access cavity preparation False estimation of pulp space direction Failure to pre-curve SS instruments Failure to use instruments in a sequential manner Attempt to retrieve separated instruments Attempt to prepare calcified canals
- 62. 4. Breakage Of Instruments In The Canal • Causes of breakage Torsional fatigue Flexural fatigue • Management Bypass Retrieval • Prevention Knowledge of the physical characteristics of the instrument Flaws, such as shiny areas or unwinding are detected on the flutes Instrument bending or crimping occurs due to excessive use The file kinks instead of curving Corrosion is noted on the instrument
- 63. Classification of Damaged Instruments Type I Bent instruments Type II Stretching or straightening of twist contour without bending Type III Peeling or tearing off of metal at the edges without bending or straightening Type IV Partial reverse twisting of instruments Type V Cracking along the file axis Type VI Fracture of the instrument T. Sotokowa classified the types of damage to instruments: Unused Blunt Distorted
- 64. Retrieval of Separated Instruments • Ultrasonic Tips • Stieglitz forceps • Perry gold foil pliers • Peet splinter forceps • Hartment 3½ CVD mosquito forceps • Forceps
- 65. Masserann Kit - Introduced By Masserann EXTRACTORSTREPHAN BUR MASSERANN KIT
- 66. Masserann Kit – Technique of Application
- 67. 5. Zipping • Refers to transportation of the apical portion of the canal • It is characterized by a normally curved canal which has been straightened, especially in the apical third CAUSES ▫ Failure to pre-curve files. ▫ Rotation of instruments in ▫ Curved canals. ▫ The use of large , stiff ▫ Instruments to bore out ▫ A curved canal. APICAL FORAMEN TENDS TO BECOME TEARDROP SHAPED OR ELLIPTICAL
- 68. 6. Stripping Or Lateral Wall Perforation Refers to thinning of the lateral root wall with eventual perforation CAUSES • Overzealous instrumentation In the mid-root areas of certain teeth, usually molars PREVENTION • Use of anti-curvature filing. • Clean & shape the canals using small files extravagantly & in a sequential manner. • Avoid using large-diameter instruments as well as rotary instruments
- 69. Diagnosis Of Perforations • The key factors for repair are immediate sealing of the perforation. • Diagnosis Of Perforation: ▫ Apex locators ▫ Surgical microscopes ▫ Radiographs ▫ Paper points ▫ Bleeding ▫ Pain ▫ Loss of tactile sensation
- 70. Perforation Repair Materials MTA - latest, attaches to cementum, long setting time Glass ionomer- good flow Composite- curing is a problem at mid root level Zinc oxide eugenol - irritates the tissues IRM- less eugenol - less irritation Super EBA- less eugenol than IRM Gutta percha - for apical perforation Amalgam- not used any more
- 71. 7. Over-instrumentation • Violates the periodontal ligament and alveolar bone. • Loss of apical constriction creates: ▫ An open apex ▫ Lack of an adequate apical seal ▫ Pain & discomfort to the patient
- 72. Prevention of Over-instrumentation Using good radiographic technique Accurately determining the apical constriction of the root canal Using stable instrument stops placed perpendicular to the shaft of the instrument Retaining all instruments within the confines of the canal system. Occlusal refinement or reduction prior to working length determination and instrumentation Attention to detail during all cleaning and shaping procedures and Assessing the integrity of the apical stop with stiff paper points or files.
- 73. 8. Under-preparation • It is the failure to remove pulp tissue, dentinal debris, and micro-organisms from the root canal system. • Underprepared canals are best managed by adhering to sound principles of : ▫ Proper length determination ▫ Canal cleaning & shaping ▫ Recapitulation • Treatment for overpreparation/underpreparation is “retreatment”
- 74. Conclusion • Endodontist has a wide array of instruments and techniques at its disposal. • Ni-Ti Rotary instruments need the practitioners expertise and one should use them in-vitro prior to clinical use • Even the best of instruments have its limitations in the hand of an inexperienced practitioner. • Experienced endodontist should choose tried and tested instruments and techniques.
- 75. References: • Grossman’s Endodontic Practice 13th Edition • Cohen’s Pathways of the Pulp, 6th Edition • Ingles' Endodontics, 6th Edition • Weine’s Endodntic Therapy, 5th Edition • Essentials of Endodontics, Vimal Sikri
Hinweis der Redaktion
- Permits vertical pluggers to fit freely with in R C system and to generate hydraulics required to transform and capture maximum cushion of GP and microfilm of sealer into all foramina. Facilitates 3 dimensional cleaning by allowing easy access to files and irrigants during shaping process.
- Herbert Schilder taught endodontists to think and operate in the third dimension. Schilder's five mechanical objectives for successful cleaning and shaping were first introduced to the endodontic literature 50 years ago.
- During the inward stroke, the cutting force is a combination of both resistance to bending and the apically directed hand pressure. These two combine at the junctional angle of the instrument tip and gouge the curving canal wall very quickly.
- The gouge imparts a shape that does not allow even a small instrument to pass beyond it. This procedural error can occur anywhere beyond the point where a canal begins to curve.
- Canal ledging is responsible for more short endodontic obturations than any other procedural errors. The withdrawal or pull portion of this action produces very little potential for canal wall damage.
- The pull motion strips out treads started by the one fourth turn to the right motion. Angles up to a half turn have been advocated. This can be an effective motion if the instrument is not forcefully pushed toward the apex and the preparation depths are allowed to diminish with each subsequent instrument.
- Balanced force instrumentation has been demonstrated to extrude no more debris through the apex than other techniques of canal preparation. Balanced force instrumentation is specifically designed to operate K-type endodontic instruments and should not be used with Broach type or Hedstrom type instruments, since neither possesses left-hand cutting capacity.
- Also called as “single length technique” – recently gained popularity with Protaper and Mtwo rotary instruments. Canals shaped with standardized technique, end up wider than the instrument size Second production quality is insufficient both for instruments and for gutta percha cones, leading to size variations. In small curved root canals Ledging, zipping, elbow formation, Perforation and loss of working length owing to compaction of dentin debris
- The gutta-percha trial point should go fully to the constriction, and a slight tug-back should be felt when the point is removed (retention form). This shows that it fits tightly into the last 2 to 3 mm of the prepared canal.
- In narrow calcified canals sizes 08 &10 should be first used to enable placement of the Hedstroem files and establish patency. They are also used intermittently between the Hedstroem files to maintain canal patency.
- Minimize or eliminate the amount of necrotic debris that could be extruded through the apical foramen during instrumentation. Preparation of the coronal portion tends to shorten the effective length of the canal, and determining the working length after such enlargement will reduce the problem of its alteration during preparation. It allows better control over apical instruments
- Prevents: post-treatment discomfort incomplete cleansing difficulty in achieving a biocompatible seal at the apical constriction It has risen in popularity, especially among those using nickel-titanium instruments with varying tapers
- Counter clock wise rotation and apical pressure strikes a balance between tooth structure and instrument elastic memory. This balance locates the file very near the central axis even in curved canals. It avoids transportations. (Montgomery 1988)
- This pressure action was followed by a negative pressure (suction) that removed the debris: “The irrigant fluid was injected through the outer tube while the reflux occurred through the inner tube.” More recently, they have improved the device and reported that the “smaller new machine produced equivalent or better cleanliness results in the root canal system using significantly less irrigant (NaOCl).”
- Procedural accidents in endodontics are those unfortunate occurrences that happen during treatment, some due to inattention to detail, and others totally unpredictable.
- PREVENTION By pre-curving or over curving the apical 3-4 mm of the file with the same curvature as the canal depicted in the radiograph By-passing the ledges if small enough
- Files should be over-curved , especially in the apical 3 to 4 mm and always worked in the direction of curvature with short , in-out strokes ; do not rotate the file or change its orientation. Anti-curvature or reverse filing should be used in curved canals and in roots with deep proximal invaginations…