1. Firstly I used Windows Media Player and DivX player to watch through the footage to work out when
the scenes would cut and at what points the viewer would be able to see each character in order to
get the story across.
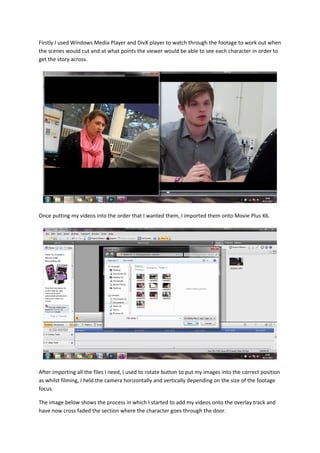
Once putting my videos into the order that I wanted them, I imported them onto Movie Plus X6.
After importing all the files I need, I used to rotate button to put my images into the correct position
as whilst filming, I held the camera horizontally and vertically depending on the size of the footage
focus.
The image below shows the process in which I started to add my videos onto the overlay track and
have now cross faded the section where the character goes through the door.
2. Cross fade.
I then changed the ‘play speed’ of the section
where the character goes through the door as I
felt that it was much slower in comparison to the
next part in which the viewer see’s the character
from walking into the room. – I felt that speeding
it up helped to make the 2 sections that were
filmed separately flow better.
I then trimed the last section of the patient coming through the door as it was too long and there
was a long pause with the camera focused on the wall which I felt was unnecessary.
3. I then added the next video that I was going to edit. I then found that I needed to fade out the
scene in which the character walks through the door as I wanted to add an audio file in which you
hear the doctor speaking before the footage is seen.
4. I changed around the parameters to make sure that it zoomed out at the end of this section and not
at the beginning when the character opens the door, as that interrupted the flow of the door
opening.
I then changed the brightness of each section, the first being -17.0% and the process in which the
character opens the door and the viewer can her coming through the door had to be darker due to
the lighting in the two areas were different in comparison to on the stairs which meant that I had to
increase the level of darkness on the door section to 21.0% for them to match.
5. I then moved the next clip onto the video track as I wanted the sound from the video to play but I
wanted a different image to be shown. So I clicked on the mute ‘eye’ to make the screen blank.
I then started to trim the video so that only some of the audio can be heard, to make the
conversation flow.
6. I then trimmed the video track so that the viewer could hear the correct information.
7. The picture below shows what the bars looked like after I had finished trimming them.
I then added the next clip that I wanted to use and trimmed it.
8. I Tried out the cross fade but felt it slowed down the conversation and made it have unnecessary
pauses in it. I then decided that it would be best if the camera shot flicked between the characters
to enhance the conversation.
I added the next clip and trimmed it.
I then added the next clip and trimmed it.
9. I then added the next clip which would have to link into the previous one to show the character
walking out. This had to be in two shots which is why I had to edit it more in the same way as when
the character comes through the door, to make the movement smooth.
I then imported a clip that I previously forgot to import.
I rotated the clip so that it was in the correct position
10. Mis-en-scene: computer with diagnosis on it.
I added the next clip, trimmed it and cross faded it with the previous clip.
I then copied and pasted all the work I just did
11. This section is going to act as the replay of the recent events in the mind of the protagonist.
I selected all the clips, went to galleries and changed it to black and white to express how the
protagonist feels and therefore make this section more poignant.
I then changed the playing speed to 1:300 but felt that the speed was making the voices sound too
comedic. I then decided to change the playing speed to 1:110
12. After doing that, I added another clip that will be used again later just to add to the confusion and
shock that the character is feeling.
I then added the 20 staggered blind transition to the end of one of the clips
13. I Cross faded the following clip and also added the black and white effect to it also.
14. When listening to this file, I could hear when I clicked on the button of the camera which meant I
had to trim this to avoid it from being heard in the finishing product.
I then played the video from the top to check whether it ran smoothly, I noticed at the beginning of
the ‘replay’, when the character walks up the stairs it isn’t fast enough when at 1:110, I then noticed
that its original speed was 1:600 and that I had to make it faster based on that. I then changed it to
1:700.
15. I then changed the speed of when the character is seen going through the door from behind from
1:600 to 1:800.
I also changed the speed of when the character walks through the door from 1:100 to 1:300
16. I then started to work my way through the replay section, trimming them so that the characters
whole lines aren’t said. I am doing this to make this section faster so that it resembles a thought
process. The following 3 images show the clips that I have trimmed.
17. After trimming these clips, I decided to add in another clip but to put onto the audio track line. I
trimmed the section before adding it which is shown below.
18. I added it then made sure that the image would not be visible on the video track as I am using it as
an audio file.
I increased the volume and moved it across so that the viewer can hear it when the character is
leaving the surgery. This should sound like a nightmarish voice in the head of the protagonist which
should add to the viewers understanding of her shock and disbelief.
19. I then decided to move that clip to the end of the video because I felt that it made the ending more
eerie.
I watched through the entire video but didn’t feel that the speed was fast enough on the thought
process part and therefore felt it wouldn’t impact the viewer in the way I wished.
I removed the 20 staggered blind transition which also deleted a clip. I trimmed all my clips so that
they were short and snappy.
20.
21. I also cut the file that I was using for the audio so that it would be in sync with the character
speaking
I then watched through it again and felt that it flowed better than before. I then added a new file
which is of Miss Andrews face, this clip will be used as a reminder to the audience that what is
happening during the second section is happening in her head.
22. I cut the clip so that the viewer would not be able to hear the clicking of the camera.
I then added the ‘Old film’ effect so that this section was uniform with the other sections.
23. I then copied and pasted this clip in different sections.
After doing that I imported to audio files which were placed near the beginning of the video.
I trimmed the first audio file so that only the beginning part was heard, I then added it to the audio
track line.
24. Again with the same audio track, I trimmed the audio but this time I wanted the end section to be
heard.
I then decided to delete my other audio file as I didn’t feel that the ‘creaking door’ was loud enough
and instead thought that an audio file would be better.
I then watched through my video and felt that I had completed most the editing that needed to be
done and now I just had to find sounds.
25. Sounds: Heartbeat, Muttering, Creaking door, scream, slam.
http://www.soundjay.com/phone-sounds-3.html
http://www.soundsnap.com/taxonomy/term/21644
http://www.loudtronix.me/search/Hospital-Flatline-Sound-Effect
After finding all the sounds I needed for my video, I imported them all
26. I added the ‘open door’ and ‘close door’ sound effect to the piece
I then inserted another ‘audio track’
I added ‘Quinns song – new man’ and trimmed it
27. I added ‘Long note one’ to the video and moved it to play throughout
the entire speaking part with the doctor until the character gets to the door
and closes her eyes.
I then added ‘Stormfront’ and trimmed it to fit the last section of the video.
28. I multitrimmed it after listening to the audio and feeling that it didn’t build
tension in the way I wanted.
I then imported the ‘ Heart rate monitor flat line’ sound effect
29. I added it to the video and trimmed it
One thing I have learned during this task is the ‘180 degree rule’, I purposely
made the camera’s visible throughout this to make the audience feel the same
confusion as the protagonist. I believe that if I hadn’t done this, the piece
wouldn’t have been as effective. This will be a rule that I will take into
consideration when working on my film opening.