Tips for Setting up a WordPress Blog
•Als PPTX, PDF herunterladen•
0 gefällt mir•431 views

1. The document provides tips for setting up a basic WordPress blog, including choosing a theme, adding pages and posts, setting categories, and enabling comments. 2. Key steps include signing up for a WordPress account, selecting a theme, creating pages and posts, adding categories to organize posts, and moderating comments. 3. Additional options covered are embedding media like images and videos, gaining followers through signups and social media, and using other WordPress features.

Empfohlen
Weitere ähnliche Inhalte
Was ist angesagt?
Was ist angesagt? (20)
Andere mochten auch
Ähnlich wie Tips for Setting up a WordPress Blog
Ähnlich wie Tips for Setting up a WordPress Blog (20)
Mehr von Zarb School of Business, Hofstra University
Mehr von Zarb School of Business, Hofstra University (19)
Kürzlich hochgeladen
Kürzlich hochgeladen (20)
Tips for Setting up a WordPress Blog
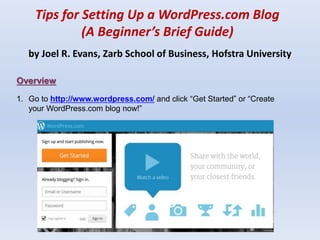
- 1. Tips for Setting Up a WordPress.com Blog (A Beginner’s Brief Guide) by Joel R. Evans, Zarb School of Business, Hofstra University Overview 1. Go to http://www.wordpress.com/ and click “Get Started” or “Create your WordPress.com blog now!”
- 2. 2. Follow the instructions and choose your E-mail address, user name, password, and blog address.
- 3. 3. Unless you want to use the blog professionally, select the “free” option. That’s all you really need!! Click “create blog”.
- 4. 4. MAKE SURE YOU RESPOND TO THE CONFIRMING E-MAIL TO ACTIVATE THE BLOG.
- 5. 5. After you confirm the E-mail and login, your WordPress Dashboard will appear. DO NOT WRITE A POST until you set up your blog. a. Click “General settings” and verify. Include your own tagline. Upload a picture/icon that appears when a post you write is E-mailed to others. Save your changes. b. Click “Your profile” and enter any data you want (be careful not to give out too much information). Add a Gravatar by clicking “Change your Gravatar.” c. Click “Select your theme” and browse the themes. Preview the themes. Activate the one you like. You can always change it.
- 6. 6. To make a post, return to the dashboard and highlight “Posts” and then click “Add New.” 7. Hints for posts a. From the dashboard, click “Add New” under “Posts.” b. Name each new post. c. On the top line of the new post toolbar (in “visual”), clicking the last icon activates a second line of tools such as text colors and underlining. (Alt + Shift + z also activates the other tools.)
- 7. d. To show photos, charts, etc. with links to sites (rather than just show URLs), do this: Click on the camera icon where the screen shows “Add Media”). Click “From URL”. • Enter image link information in top line (URL) and the source link in the last line (“Link Image To”). Here is my example – in visual and text modes.
- 8. Extra hints: (1) To capture an image URL from a Web site (line one), do this: From the Web page you are linking to, highlight an image, right click the image, select properties, and then copy the URL and place it on line one. This only works if the image file properties show jpg or gif, etc. in the URL). (2) The URL link to the article itself goes on line three.
- 9. 8. REMEMBER, be careful and credit and link to the source. 9. To embed a YouTube video, (a) copy the share embed code for the video and (b) and paste this in the “Text” screen of your new post. a. Go to YouTube and select a video. b. In “Text” view (in WordPress), enter the embed code. c. Here is my YouTube example: http://www.youtube.com/watch?v=0vb57y_jEw8
- 12. Special Topics Gaining followers: 1. Signups : Go to your dashboard and scroll down to “Appearance.” Click on “Widgets”. Scroll down to “Follow Blog” and then drag and drop this icon to your sidebar. 2. Social media: Activate posts from social media links. Using pages 1. To create top-of-the-page items such as “About,” WordPress requires the use of pages. 2. Return to the dashboard and highlight “Pages” on the left toolbar. Then click “Add New.” 3. Enter a title and some text. Your blog should at least have an “About” section that says something about you and the purpose of your blog. Setting up categories for posts 1. To make life simpler for your blog followers, you categorize your posts. 2. Return to the dashboard and highlight “Posts.” Click on “Categories.” Add as many as you want. 3. After you set up your categories, you MUST indicate in each of your posts which category in which to place the post by clicking one or more category boxes under the new post box.
- 13. Comments 1. YOU control whether or not individual comments appear on your blog. 2. No comments appear without your approval. 3. From the dashboard, click on “Comments.” If any are listed there, you have the option of approving or rejecting them. More WordPress has a lot of other free features, if you want to use them.