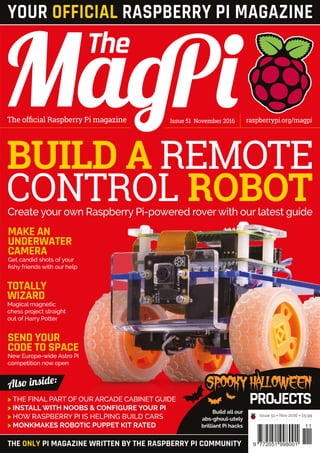
1. BUILD A REMOTE
CONTROL ROBOT
SPOOKYHALLOWEEN
PROJECTS
Issue 51 November 2016The official Raspberry Pi magazine raspberrypi.org/magpi
THE ONLY PI MAGAZINE WRITTEN BY THE RASPBERRY PI COMMUNITY
Also inside:
11
9 772051 998001
Issue 51 • Nov 2016 • £5.99
YOUR OFFICIAL RASPBERRY PI MAGAZINE
Create your own Raspberry Pi-powered rover with our latest guide
TOTALLY
WIZARD
Magical magnetic
chess project straight
out of Harry Potter
SEND YOUR
CODE TO SPACE
New Europe-wide Astro Pi
competition now open
MAKE AN
UNDERWATER
CAMERA
Get candid shots of your
fishy friends with our help
Also inside:
> THE FINAL PART OF OUR ARCADE CABINET GUIDE
> INSTALL WITH NOOBS & CONFIGURE YOUR PI
> HOW RASPBERRY PI IS HELPING BUILD CARS
> MONKMAKES ROBOTIC PUPPET KIT RATED
Build all our
abs-ghoul-utely
brilliant Pi hacks
2.
3. raspberrypi.org/magpi 3April 2016
PAGE 30
SEE PAGE 30 FOR DETAILS
raspberrypi.org/magpi 3
Welcome
EDITORIAL
Managing Editor: Russell Barnes
russell@raspberrypi.org
Features Editor: Rob Zwetsloot
News Editor: Lucy Hattersley
Sub Editors: Laura Clay, Phil King, Lorna Lynch
DESIGN
Critical Media: criticalmedia.co.uk
Head of Design: Dougal Matthews
Designers: Lee Allen, Mike Kay
PUBLISHING
For advertising & licensing:
russell@raspberrypi.org +44 (0)7904 766523
Publisher: Liz Upton
CEO: Eben Upton
The MagPi magazine is published by Raspberry Pi (Trading) Ltd., 30 Station Road, Cambridge, CB1 2JH. The publisher,
editor and contributors accept no responsibility in respect of any omissions or errors relating to goods, products or services
referred to or advertised in the magazine. Except where otherwise noted, content in this magazine is licensed under a
Creative Commons Attribution-NonCommercial-ShareAlike 3.0 Unported (CC BY-NC-SA 3.0). ISSN: 2051-9982.
WELCOME TO
THE OFFICIAL
MAGAZINE
e’re still riding high on the success
of last month’s 50th issue, in which
we counted down the best Raspberry
Pi projects ever made. The response from our
readers to the public-voted portion of our
countdown – the all-important top 20 – was
astounding, so please accept our heartfelt
thanks for making it such a memorable
community event!
We’re back to business as usual this issue.
Just the standard, everyday, run‑of‑the‑mill
articles you’ve come to expect from the
magazine on a month-by-month basis.
Standard stuff like shooting your code
into space, building awesome robots,
mastering essential computing expertise,
and bootstrapping the impossible with
nothing more than affordable technology,
a free weekend, and the skills to succeed.
Just the usual.
Enjoy the issue!
Russell Barnes
Managing Editor
W
CONTRIBUTORS
WesArcher,Alex Bate, Bare Conductive, Brian Corteil,
Mike Cook, Rachel-Chloe Gregory, Gareth Halfacree,
Richard Hayler, Ben Nuttall, Phil King, Simon Long,
Matt Richardson, Richard Smedley& CliveWebster
GET IN TOUCH
THIS MONTH:
magpi@raspberrypi.orgFIND US ONLINE raspberrypi.org/magpi
This magazine is printed on paper sourced from
sustainable forests and the printer operates an
environmental management system which has
been assessed as conforming to ISO 14001.
DISTRIBUTION
Seymour Distribution Ltd
2 East Poultry Ave
London
EC1A 9PT | +44 (0)207 429 4000
SUBSCRIPTIONS
Select Publisher Services Ltd
PO Box 6337
Bournemouth
BH1 9EH | +44 (0)1202 586 848
November 2016
06 BLAST YOUR CODE INTO SPACE
Enter the new, improved Europe-wide Astro Pi competition
14 BUILD YOUR OWN ROBOT
Ladies and gentleman, we can build it. We have the technology
44 CONFIGURE YOUR RASPBERRY PI
Tweak your Pi’s dials in another essential beginner’s guide
48 MAKE AN UNDERWATER CAMERA
Take your Raspberry Pi for a swim with the fishes
4. raspberrypi.org/magpi4 November 2016
BUILD A ROBOT
ContentsIssue 51 November 2016 raspberrypi.org/magpi
COVER FEATURETUTORIALS
14
Element14’s community challenge
is over, with some amazing results
Astro Pi is back with a Europe-wide
challenge for kids to enter!
PIIOT
WINNERS
NEW ASTRO PI COMPETITION
126
IN THE NEWS
> RASPBERRY PI 101 – NOOBS 42
Install one of many OSes with NOOBS
> RASPBERRY PI 101 – CONFIG 44
Change the way your Raspberry Pi works
> HOW TO USE SCRATCH 2.0 46
Upgrade Raspbian with PIXEL to use Scratch 2.0
> UNDERWATER CAMERA 48
Build a waterproof, Pi-powered camera
> INTRO TO C PART 5 50
How to use pointers in your code
> BUILD A WIFI DETECTOR 52
Find out who’s been at your house by using WiFi
> CREATE A STATUES GAME 54
Play statues with a Raspberry Pi in the Pi Bakery
> ARCADE MACHINE PART 5 58
Finish building the RaspCade
> MAKE PONG WITH PI CAP 60
How to make Capong, a physical version of Pong
> PIVR – PVR ON YOUR PI 64
Upgrade your Pi media centre with a PVR
A car factory in Portugal has
supercharged its production line
with Raspberry Pis
PI-MADE
CARS 8
5. Magic chess. Like Harry Potter, only real!
32
YOUR PROJECTS
Contents
raspberrypi.org/magpi 5November 2016
> NEWS 06
> TECHNICAL FAQ 66
> BOOK REVIEWS 82
> THE FINAL WORD 96
REGULARS
> PUPPET KIT 76
> FORMCARD 78
> MCROBOFACE 79
> ZERO SEG 80
> ZERO LIPO 81
REVIEWS
COMMUNITY
> THIS MONTH IN PI 84
What else happened this month in the world of Pi?
> EVENTS 88
Find a community event near you
> MEET A JAM ORGANISER 90
We talk to Les Pounder of the Blackpool Jams
> LETTERS 92
We answer your letters about the magazine and Pi
A glockenspiel powered by a Pi
MONOME PI 34
An old-school, self-playing piano
Relive the glory days of Ceefax
PIANOLA 36
TEEFAX 38
Scare your friends with these quick Halloween
projects you can do in time for the big day
THE BIG FEATURE
68
86Meet Matt Reed, American
maker extraordinaire
COMMUNITY
SPOTLIGHT
EASY HALLOWEEN PROJECTS
WIZARD CHESS
94
ONE OF TWO
PI-TOPCEEDS
OR A PI-TOP!
6. raspberrypi.org/magpi6 November 2016
News
All aboard the ISS
“We have a Raspberry Pi computer
on the International Space Station,
which is being programmed by
school students,” said Dave Honess,
programme manager for Astro Pi.
“Think about how profound that
is for a school student,” continued
Dave, speaking at the Space for
Inspiration conference. “You can
have something you’ve made up in
space; that’s what Astro Pi is.”
Getting the Astro Pi devices on
board the ISS in the first place was
no easy feat for the Raspberry Pi
Foundation, so it’s fantastic to
see them doing a second mission.
“If you want to fly anything to the
International Space Station, even
if it’s a small payload, you have
to have something called a Flight
Safety Certificate (FSC),” said Dave.
“Our FSC was quite hard to get,
because as an educational payload
we were quite unusual.”
The Astro Pi units went up for
Major Tim Peake, a British ESA
Brand-new European mission for Astro Pi units sees students
across Europe developing code for Ed and Izzy
he European Space Agency
(ESA) and the Raspberry
Pi Foundation have
teamed up to run a brand-new
Astro Pi challenge.
Space cadets will get another
chance to create code for Ed and
Izzy, the two Astro Pi units on
board the International Space
Station (ISS). For this mission,
students from France, Spain,
Germany, and other European
countries will join young coders
from Britain.
This time around, ESA French
astronaut Thomas Pesquet will run
code on Ed and Izzy.
Thomas is ready to blast into
space in November 2016. He will
serve on board the ISS as a flight
engineer for Expeditions 50 and 51.
“I’m currently at the European
Astronaut centre,” he told us.
“I’m training for my Proxima
mission. I’ll be going to the
International Space Station
this autumn, for six months.”
T
FEATURE
Students and teachers should first assemble
a mission team, which must include at least
one support teacher as well as students under
the age of 16. Use the Mission Plan Template
(magpi.cc/2enYSWP) to design a sample mission
that showcases your approach to running a space
mission, and demonstrates that you can break
down your big idea into concrete steps.
The deadline for the first round of applications
is 13 November 2016.
Teams from France should register in French
through the Centre National d’Études Spatiales:
magpi.cc/2eo1zYh.
Teams from Poland should register in Polish
through ESERO Poland: magpi.cc/2dUyJya.
Teams from the other ESA Member States
should register and upload their mission plan
(in English) with ESA: magpi.cc/2eo3Fre.
If you’re looking for inspiration, take a look at
the winners from Tim Peake’s Astro Pi mission
(magpi.cc/2eo258N).
SIGN UP FOR ASTRO PI
ASTRO PI BLASTS
BACK INTO SPACE
ESA astronaut Thomas Pesquet is challenging
school students across Europe (credit: ESA/NASA)
Our two Astro Pi devices, Ed and Izzy, are still hard
at work on board the ISS (credit: ESA/NASA)
7. raspberrypi.org/magpi 7November 2016
NewsASTRO PI BLASTS BACK INTO SPACE
Astronaut. Tim manually uploaded
code, developed by UK school
students, to the boards.
Before Tim left the ISS, he
plugged in an Ethernet cable to the
Astro Pi devices. “So we now have
space-to-ground communications
with the Raspberry Pi,” said
Dave. “We can remotely access it
to deploy new student code and
download experiment results,
which we didn’t have in Tim’s
mission. He had to take the SD
card out and plug it into a laptop,
which was time-consuming.”
Ed and Izzy flying high
“My friend and fellow ESA
astronaut Tim Peake just finished
up his ISS mission,” said new
astronaut Thomas. “He has left
Above Ed and Izzy, the two Astro Pi devices
flying on the ISS (credit: ESA/NASA)
7November 2016
two very special items on board for
me: two Astro Pi computers.”
Each Astro Pi contains a standard
Raspberry Pi 2 and a Sense HAT.
“So get ready,” continued Thomas,
“since a lot of exciting science
can be done with the Astro Pis.
I’m very glad to invite you to join
the Astro Pi School Challenge. I
will challenge you to run a coding
competition, based on the mission
that I will assign you.
“You may even have the
chance to send your code to the
Astro Pi on the ISS, where it will
run in space,” said Thomas.
“Have fun learning. I can’t wait to
see all the code that you come up
with. So, see you soon!”
We now have space-to-
ground communications
with the Raspberry Pi
ASTRO PI
IN NUMBERS
RESPONDED TO ESA’S
‘DO YOU WANT TO BE
AN ASTRONAUT?’ AD
8. raspberrypi.org/magpi8 November 2016
News
Chariot driving
The AGV contains a Raspberry Pi,
a touch display, a 12-channel USB
servo controller, and a RoboClaw
ST 2x45A motor controller (which
drives the two DC motors).
A Roboteq MGS1600 magnetic
band sensor is used to guide the
AGV along the track that runs
around the factory. “It travels 36
metres per cycle,” says Pedro.
“We currently have a production
of 220 cars per day; it travels 7,920
metres per day.”
The robot sports a RoboPeak
RPLIDAR 360° scanner for safety.
“The RPLIDAR is used for people
detection,” explains Pedro. So
the AGV will stop automatically
if a person is in its way.
Robot controlled by Raspberry Pi carries cars around the factory
he Raspberry Pi is taken
incredibly seriously
in engineering, with
thousands of our favourite
computers embedded in industrial
projects around the world.
Peugeot Citroën has taken
the Raspberry Pi to heart. The
company is using Raspberry Pi
boards to revolutionise the way
it builds cars.
The jewel in its crown is this
automatic guided vehicle (AGV)
used in its Portugal factory. We
spoke to Pedro Lopes, manager
of the engineering department.
“In our weld shop, the cars
are transported in a wheeled
iron structure that we call ‘the
chariot’,” he tells us.
Vítor Duarte, Peugeot Citroën's
weld shop manager, challenged
T
CAR FACTORY
PEUGEOT CITROEN USING
RASPBERRY PI
ROBOTS
TO BUILD CARS
The Raspberry Pi and other
components live inside the white
box on the front of the robot
Pedro to build a low-cost, but
reliable, solution for carrying
the chariots “without using
human hands”. The manager
of IT infrastructure, Carlos
Mesquita, sponsored the project.
“He’s a believer in these types
of solutions,” says Pedro. The
Raspberry Pi AGV was born.
“Our metalworkers made the
completely iron structure,”
recalls Pedro. “At the same time,
the programmers, who are all
Raspberry Pi fans, started to
choose the components and began
writing the code.”
The result is a giant,
autonomous robot, which is used
to lift and move cars around the
Peugeot Citroën factory.
Below Rui Peixoto,
Pedro Lopes, and
Gonçalo Marques
stand on top the
AGV in the Peugeot
Citroën factory
9. 9November 2016raspberrypi.org/magpi
NewsALEXA / HMI
9November 2016
he Alexa Voice Service
(AVS) API for Raspberry
Pi now includes
hands-free functionality.
“Any digital maker using the free
API from the Amazon Developer
team had to add a button to their
build, putting a slight dampener
on the futuristic vibe of the
disembodied Alexa,” writes Alex
Bate, Raspberry Pi’s social media
editor. “We know about this
because a bunch of you [makers]
complained about it.”
This update removes the press-
a-button limitation. Makers can
now use Alexa by issuing a wake
word, calling out to “Alexa”,
“Echo”, or “Amazon”.
HANDS-FREE
WITH ALEXA
Above The update to Amazon's Alexa
API now enables Raspberry Pi makers to
create hands-free devices similar to the
Amazon Echo Dot
If you’re looking for ideas
for builds, check out the
Internet of Voice Challenge that
Raspberry Pi and Hackster hosted
(magpi.cc/2baErdf). Winning
builds included a voice-activated
Baseball Pitching Machine, a voice-
controlled K’nex Car, and a Smart
Cap for the visually impaired.
NOW TRENDING
The stories that made waves on
our social media sites this month
PIPER REVIEW magpi.cc/2dT46qz
Rob's review of the crowdfunded laptop that gamifies
the hardware building process piqued the interest of
our lively Google Plus community.
ZERO 360 magpi.cc/2dT2Qnk
This project generated
lots of love on Twitter.
James Mitchell’s
ingenious device
can take 360-degree
panoramas and
even time-lapses. It
features eight Pi Zeros
equipped with Camera
Modules, placed
around a laser-cut
wooden housing.
BUILDING A
HUMAN MACHINE
INTERFACE
roy Miller, applications
engineer at Galil Motion
Control, has developed
a human machine interface
(HMI) using Galil software
and a Raspberry Pi
The result is a cheap, powerful
HMI perfect for industrial
environments, without having
to use a full-sized PC.
“There are many sources
for HMIs, and many can cost
thousands of dollars,” says
Troy. The Raspberry Pi is a much
cheaper option, but it also comes
with a 7-inch touch display, and
now it can run Galil’s motion-
control software.
“This powerful trio forms the
foundation for an inexpensive but
fully capable HMI, customised for
any motion-control application,”
says Troy.
“There are free software tools
that can allow a person to create
just about any interface to run on
the Raspberry Pi,” he adds. “The
software acts as the glue to take in
the input from the user in the touch
interface, and the Galil gclib API
translates those simple instructions
into the commands to send to the
machine motion controller.”
Troy has made an excellent video
demonstration of a Raspberry
Pi running Galil software to
control a stepper motor linear
stage (magpi.cc/2dSXGYu).
TOP 50 magpi.cc/2dT4FAM
We were taken aback by the sheer weight of
community love for the Top 50 feature (from The MagPi
issue 50). Our Top 50 photo album got a huge amount of
attention on Facebook.
T
T
10. News
raspberrypi.org/magpi10 November 2016
ROYALRASPBERRY
ROYAL RASPBERRY
Raspberry Pi community invited to meet the Duke of York
at St James’s Palace
and support our community to
grow and achieve more.”
The event came shortly after the
news that the Raspberry Pi had sold
over ten million units in total. It
was a great opportunity to reward
some of the community that had
made this British computer such a
success story.
ucky members of the
Raspberry Pi community
attended a special event at
St James Palace on 5 October.
The Duke of York, HRH Prince
Andrew, invited members of the
Raspberry Pi community to the
event to celebrate all the good work
that they do.
Invitees were free to mingle with
members of the community, and
learn about Code Club and Raspberry
Jam events, while taking in the
splendour of the palace.
There were inspirational speeches
from the Raspberry Pi Foundation
CEO Philip Colligan, Code Club UK
co-founder Clare Sutcliffe, and The
Duke of York himself.
“The event at St James’s
Palace was an opportunity for
us to celebrate the awesome
achievements of our community of
makers, educators, volunteers, and
young people,” says Philip Colligan.
“More than anything, Raspberry
Pi is a community and we really
just wanted to say thank you for
everything they do.”
L
More than anything, Raspberry Pi is a
community and we really just wanted
to say thank you for everything they do
Grand old duke
“The Duke of York is patron of
the Raspberry Pi Foundation and
was also the patron of Code Club
before we merged,” explains
Philip. “So he hosted the event
and gave a heartfelt speech about
the importance of computing and
digital making education.”
Places for the event were
extremely limited. “The only
downside was that we could only
fit 150 people in the room,” Philip
tells us, “and, of course, our
community is much, much bigger
than that. That’s why we’re always
thinking of more ways to celebrate
Right Hannah
Belshaw, from
Cumnor House Girls’
School in Croydon,
was an Astro Pi
winnerwith her
idea to represent
data from the Astro
Pi in the world
of Minecraft
Below Maria
Quevedo, Clare
Sutcliffe, and
Rik Cross from
Code Club UK
Below Tom Hartley, president of Imperial
College Robotics Society; Amy Mather,
winner of European Commission’s Digital Girl
award; and MatthewTimmons- Brown, The
Raspberry Pi Guy
11. News
raspberrypi.org/magpi 11November 2016
NEC DISPLAY / OPEN INDIRECT
Below The displays are designed for public
signage and presentations; the range starts
at a 40-inch size
NEC DISPLAY
WITH PI INSIDE
EC has announced a new
display with a Raspberry Pi 3
Compute Module inside.
“We think that the large-format
NEC displays will be suitable for a
very broad range of applications,”
says Eben Upton, CEO of Raspberry
Pi Trading. “Obviously digital
signage applications, but there are
also opportunities for interactive
presentations and a broad range of
IoT projects.”
The Raspberry Pi Compute Module
comprises the guts of a Raspberry
Pi 3 board. Other projects can have a
Raspberry Pi embedded inside.
NEC has customised the Compute
Module with a larger than usual
16GB of flash storage.
“People are using Raspberry
Pis to add intelligence to their
products,” explains Eben. “We’ve
been fortunate enough to have sold
10 million Raspberry Pis so far, and
the commercial success has led
to the third generation of a more
mature and powerful technology
which can be used with NEC’s
intelligent display.”
Custom Raspberrry Pi Compute Module makes
new NEC display super-smart
N
Developer powered
“Our work on the Raspberry Pi
mini-computers is driven by the
huge community of developers,”
continues Eben. “Overall, this
collaboration shows NEC’s
confidence with our ability to
provide a platform that can be used
in a variety of environments.”
“Integrating the Raspberry
Pis with our displays will provide
businesses with advanced technology
suitable for digital signage,
streaming, and presenting to
enhance the overall visual experience
at an affordable price point,”
says Stefanie Corinth, senior VP
marketing & business development
at NEC Display Solutions.
“It’s an incredible vote of
confidence in the Raspberry Pi
Compute Module platform from a
blue-chip hardware vendor, and
will hopefully be the first of many,”
concludes Eben.
This NEC display is seriously smarter
than its rivals thanks to the Raspberry Pi
Compute Module embedded inside
he Raspberry Pi is being used to save the
eyesight of people in India thanks to the
Open Indirect Ophthalmoscope (OIO) project.
“The OIO is a portable retinal camera that uses
machine learning to make diagnosis not only
affordable but also accurate and reliable,” explains
Sandeep Vempati, a mechanical engineer at the
Srujana Center for Innovation. The device uses a
Raspberry Pi to drive down the cost of diagnosis.
“Currently, visual impairment affects 285 million
people worldwide,” reveals Sandeep. “What's
more surprising is the fact that 80 percent of all
visual impairment can be prevented, or cured if
diagnosed correctly.”
“India is the diabetic capital of the world,”
says Dr Jay Chhablani, a retinal disease specialist.
“Diabetics affects the retina and leads to something
called ‘diabetic retinopathy’. If we see the patient
at an early stage of diabetes, we can treat these
patients by controlling diabetes and applying
laser treatment.”
“3D printing creates the OIO for a fraction of the
cost of conventional devices, and yet maintains the
same quality,” says Sandeep. The OIO costs $800 to
build. Conventional retinal cameras cost ten times
as much.
OIO’s Hackaday page (magpi.cc/2dVtqfN) lists the
required components. “Engineering feels great when
you see a product being useful in the real world,”
enthuses Sandeep.
OPEN INDIRECT
OPHTHALMOSCOPE
This ultra-low-cost eye screening
device uses machine learning to
save eyesight in India
T
The OIO scans the
retina and uses
machine learning
to diagnose
problems. The
touch screen on
the front displays
the diagnosis
The case is 3D printed, and the components are low-
cost and widely available. The project is open-source so
anybody can build one
12. raspberrypi.org/magpi12 November 2016
News
Element14 tasked makers with creating an IoT command centre using a Pi 3
FEATURE
he element14 Raspberry
Pi community is a pretty
amazing place, especially if
you want to catch some great Pi-
related maker projects. In the past
we’ve featured projects straight
from here, like a super-scary
haunted door and even a Pi Zero
soldered into a CRT TV for retro
gaming. Recently, the community
held a design challenge called
PiIoT, with the aim to create
‘Smarter Spaces with Raspberry
Pi 3’. Using a Pi 3, contestants
were tasked with creating a better
command centre for all their IoT
devices in a specific area. The
winners were announced just after
we went to print last issue, but
they’re pretty cool so we thought
we’d introduce you to them now!
T
MEET THE
WINNERS OF
PIIOT SMARTER SPACES
And the winners are…
Plant health smart camera
Maker: Gerrit Polder
magpi.cc/2ej7RnP
Gerrit’s project isn’t even about
an IoT home, but an IoT farm.
This project uses two Pi Camera
Modules, a normal one and a
Pi NoIR camera, along with
OpenCV to track plant health.
It’s a contained system with a
purpose-built display and a slave
Raspberry Pi Model B+ to operate
the other camera. This method
uses the same technique as the
Enviro Pi experiment that was
carried out on the ISS for Astro Pi:
Normalized Difference Vegetation
Index (NDVI). The images are
combined in this method, which
can then be reviewed on the
system itself.
Thuis
Maker: Robin Eggenkamp
magpi.cc/2ejjbjS
Thuis is a full home automation
system with the Raspberry Pi at
the core. The original brief was
to have a smartphone greet you
as you get home, and to have the
house react as you move through
it. This has been accomplished,
with lights turning on as you
enter rooms and a custom UI
that lets you control lighting,
music, and other media aspects
throughout the home. It’s a very
powerful and complex system;
Robin has also put together
some fantastic documentation
for it if you wish to follow in
his footsteps.
3
2
Below A simple
interface for Thuis
that controls many
parts of the house
13. raspberrypi.org/magpi 13November 2016
NewsPIIOT SMARTER SPACES WINNERS
IoT Alarm Clock
Maker: Frederick Vandenbosch
magpi.cc/2ej74n5
This IoT Alarm Clock is something
slightly simpler: it’s a control
unit that lives in Frederick’s
bedroom. While primarily an
alarm clock, it also has access to
the IoT network in his house. It
also has a sister unit in the living
room, and includes a full screen
for slightly more precise control.
Both units can control the IoT
devices in the house, which
comprise a cat feeder, a special
tower light in Frederick’s garage
to notify him if he’s needed, a set
of Philips Hue lights, and a couple
of other bits around the house.
The judges really liked the
hand-built wooden enclosures
for the project, and the excellent
interface he built to go with
it. Apparently, Frederick also
moved during the time he was
building his entry, which is a
very impressive feat. His efforts
won him a 3D printer, which will
definitely help him in the future.
Element14’s community has regular challenges
that people can enter – PiIoT was the second
of the year – and they always have pretty good
prizes, too. PiIoT’s first prize was a 3D printer, and
the runners-up managed to go home with a huge
selection of kit, including some power tools. Keep
an eye out on the element14 contest pages for the
next round: magpi.cc/2ejj9bB.
DESIGN CHALLENGES
1
14. his is no ordinary robot build. Over the next
few pages, we are going to show you how to
design, build, and program a robot capable
of winning a robotics competition; the best part is,
anyone can make one!
In this feature, we will take you thought the
steps required to build this amazing robot.
We’ll look at different types of components
you could select, how to program it, how to
build it, and then how to control your robot.
We’ll even have some tips for if you want
to enter your robot into a competition.
Read on and we can get started…
Make a Pi Wars-winning robot with our expert Brian Corteil
T
BUILD A
REMOTE
CONTROL
ROBOT
raspberrypi.org/magpi14 November 2016
Feature
15. obots come in many configurations. The
type we will be looking at are commonly
called rovers (ROV or remotely operated
vehicle). There are many types of rovers, including
the classic two-wheel tail dragger, omnidirectional,
tank tracked, four-wheel, and the six-wheel Mars
rover. Each type has its pros and cons.
R
FOUR-WHEEL
DIRECT DRIVE
This is the robot we’re building. The four-wheel direct drive
chassis is a common design for a robot, and can be bought
as a kit from many stores. Four-wheel direct drive robots
have many advantages over two-wheeled robots: they have
more torque, more grip, they’re faster, and are able to turn
on the spot. This makes the robot nimble and very suitable
for challenges like the maze and the obstacle course.
Disadvantages include a higher cost due to the
greater number
of motors and
more expensive
motor controller
to use them.
TANK TRACK
Tank tracks are cool. They have loads of grip
when matched to the surface you are running
on, are great over rough ground, and you can turn
on the spot. However, they can difficult to build. The
alignment of the tracks needs to be spot on when
installing them, or you will risk the track slipping
off. Tracks can also be slower than
wheels because there’s
more friction on them.OMNI
Omnidirectional robots are
great for avoiding your opponent
in sumo-style contests like Pi Noon
at Pi Wars, as they can move in any
direction. The downside is they are not so
great on rough ground due to the design of
their wheels. The wheels are complex and can
be quite expensive to buy, and you’ll need to do
a lot more coding on them. The maths behind
getting it to work can be very cool, but it’s also
scary enough to make you want to run and
hide behind the sofa.
SIX WHEELS
Six-wheel direct drive robots
have most of the advantages of
both tracked and wheel robots,
offering good grip, high torque, and
manoeuvrability. The use of multiple
motors balances their output.
Disadvantages for this type are the
cost of six motors, wheels, and a motor
controller powerful enough to supply
the juice required.
What kind of robot do you want to make?
SELECT
YOUR
STYLE
raspberrypi.org/magpi 15November 2016
FeatureBUILD A REMOTE-CONTROLLED ROBOT
November 2016
16. PICK YOUR
MOTORS
otors come in many sizes, types, with/without
gearboxes, etc. Common motor types used in
maker projects are brushless, brushed, and
stepper (see more details on the right). When selecting
a motor, you need to consider its voltage rating, free-
run current, stall current, and type. The free-run (or
operating) current is how much current the motor will
draw when running; with this information, you’ll be
able to estimate how much power the robot needs.
This is important for a reliable design, as
you’ll need to match the motor and controller
characteristics; if you use a motor that has a voltage
rating higher than the motor controller, you won’t get
the full potential out of the motor. If the stall current
is higher than the controller’s peak output current,
you’ll see ‘magic smoke’ come from the controller,
which is bad. Another characteristic of the motor you
need to consider is its speed: the higher the RPM of
the motor, the faster it will turn the robot’s wheels/
tracks. For this robot, we’re using the micro metal 6V
N20 motors from Pimoroni.
M
MOTOR TYPES
BRUSHLESS
PROS: No brushes to wear out
More torque
More power
Better control
Power-to-size ratio
CONS: Complex expensive controls
Less rugged
Cost
BRUSHED
PROS: High torque at lower speeds
Simple control circuits
Cost
CONS: Shorter operational life
Power-to-size ratio
STEPPER
PROS: Precise control
(turns in small steps)
CONS: Complex controls
Cost
Slow
MOTOR MARKINGS
MOTOR MARKINGS
Some things you’ll see on a motor…
DC: 12V
The rated voltage of the motor. Can also be shown
as ‘12V DC’. DC means that the motor must be
powered by a direct current source like a battery.
RPM
Revolutions per minute. Can also be shown as r/min.
The lower the number, the slower the motor is, so
500 rpm is faster than 25 rpm.
GEAR BOX RATIO
Not pictured on this motor. If a motor output is
described as a ratio, the lower the number, the
faster the motor, so 50:1 is faster than 254:1.
How will the robot
get around everywhere?
Our tiny
robot is using
this tiny micro
metal brushed
motor
raspberrypi.org/magpi16 November 2016
Feature
17. otor controllers, like the name suggests,
are used to control motors. There are many
types available for the Raspberry Pi, so when
selecting the motor controller, you need to match the
controller to your motors. An important consideration
in this selection is the support documents, libraries,
and software examples. Features to look out for are
inputs, outputs, servo control, and whether or not
it can power the Pi from a single power source. The
controller you select must be able to handle the
battery voltage, the peak current of the motors when
stalled, and be compatible with the Raspberry Pi.
M
SELECT A MOTOR
CONTROLLER
Now we have motors, we need a way to use them
MOTOR
CONTROLLER
SPECS:
Peak current:
How much current the driver
will tolerate before releasing
magic smoke
Drive voltage:
Voltage used to drive the motor(s)
Drive current:
Constant current the driver
chip can maintain
Logic voltage:
Voltage the logic must
be driven at to function
Logic current:
Current required to function
SOME CONTROLLERS
TO CONSIDER:
ZEROBORG piborg.org/zeroborg
The ZeroBorg is the controller we’re using in this project.
It has a number of features that make it stand out from
some of the other boards, such as its use of two TI DVR 8833
H-bridges which allows for independent control of up to four motors.
This makes it good for controlling an omnidirectional robot, or two
stepper motors. You also can add/specify a DC-to-DC converter to power
both the motors and the attached Raspberry Pi Zero. One final feature is the
IR receiver, so you can control your robot with an IR remote control.
PICON ZERO magpi.cc/1p9wGaA
Awell-thought-out Pi Zero format controller from 4tronix, it uses the same TI
DRV8833 motor driver H-bridge chip as the ZeroBorg. The extra inputs and outputs
are great for adding sensors, servos, and NeoPixels; there’s even a dedicated socket
for an HC-SR04 ultrasonic sensor! The power arrangements are very flexible, as you
can drive the motors from the Pi’s 5V rail or from a separate power source, from 3V
to 11V. It’s also worth checking out 4tronix’s RoboHAT if you’re using a full-sized Pi.
EXPLORER PHAT magpi.cc/1Pk5SdN
The Pimoroni Explorer pHAT was the first Pi Zero-format motor driver HAT,
and is an excellent controller. It uses the TI DVR8833 H-bridge again and has
four 5V-tolerant digital and analogue inputs, plus four 500mA outputs. The
various inputs give options for connecting different types of sensors, and the
motor driver will happily drive a pair of N20 metal gear motors. For a full-sized
Pi, use the Explorer HAT Pro.
raspberrypi.org/magpi 17November 2016
FeatureBUILD A REMOTE-CONTROLLED ROBOT
17November 2016
18. POWER
YOUR ROBOT
he correct battery can make a huge difference
to your robot. It all comes down to four types
for robots: lithium-ion, NiCad-based, lead
acid, and dry cells. Battery technology has improved a
great deal in recent years, thanks to the development
of mobile phones, laptop computers, and tablets,
with their requirement for high power and increased
standby life. Whichever battery type you use, you’ll
need a battery holder to connect them.
T
The perfect batteries to get your
robot moving
NICAD / NIMH
(nominal cell voltage 1.2V)
NiCad / NiMH batteries
were the number one choice
before the rise of the lithium-
ion batteries, due to their
power-to-weight ratio and a
predictable discharge voltage
that changes little from 1.2V
per cell until it nearly runs out.
They’re packaged in common
battery sizes, including AAA,
AA, and PP3. Chargers are also
commonly available, even
being sold in supermarkets.
The discharge rates are not
as high as a lithium battery,
but they don’t have a
flammable metal in
their construction.
We’re using this
type for our robot.
LITHIUM-ION
INCLUDING LIPO
(nominal cell voltage 3.7V)
Lithium-ion-based batteries
offer some of the highest
energy density and energy
release available. This means a
robot powered in this fashion
can use a smaller, lighter
battery. Lithium batteries
are more dangerous, though.
There are two types of lithium
batteries: type one has built-
in safety circuits, to protect
against under- and over-
voltage and short circuit. Type
two batteries have no safety
circuits! If you wish to upgrade
your robot to LiPo, make sure
to be safe.
LEAD ACID
(nominal cell voltage 2V)
The granddaddy of all
rechargeable batteries, the
lead acid battery was invented
in 1859 by Gaston Planté. This
type of battery has a very low
energy density and is made
of lead. This makes it a poor
choice for use in a robot,
although it can supply high
surge currents. While larger
lead acid batteries are used
in most cars, they’re best
ignored for this project due
to their high weight and low
energy density.
DRY CELL
(nominal cell voltage 1.5V)
Zinc-carbon and alkaline
are the more common types
of dry cells, widely available
in common battery sizes,
including AAA, AA, and PP3.
Although not rechargeable,
they’re useful as an emergency
replacement for NiCad /
NiMH; however, you need to
be careful with the increased
voltage. They’re also expensive
to continually replace.
raspberrypi.org/magpi18 November 2016 raspberrypi.org/magpi
Feature
19. CHOOSE A
RASPBERRY PI
hen it comes to choosing which Raspberry
Pi to use in your robot, there are two
Raspberry Pi models that are perfect for
the role: the Pi Zero and the Raspberry Pi 3. The
Model A is a close third due to its size and low
power requirements, and the eventual Pi 3
Model A with on-board radio chip will make
that an excellent choice in the future.
The Pi Zero is a great choice for a robot
because of its even smaller size, along with
its low power requirements. The Raspberry
Pi 3 is the most powerful Pi to date,
with 1.2GHz CPU, 1GB of memory, plus
built-in wireless LAN and Bluetooth,
leaving the four USB sockets free.
The Raspberry Pi 3 makes sense for
highly demanding applications
like computer vision and multi-
threading, but it will use up
more power.
W
Finally, choose your computer
PI ZERO
PROS: Very small
Very cheap
Low power consumption
More powerful than a Model A+
CONS: Limited USB connectivity
Needs more soldering for GPIOs
No on-board wireless or Bluetooth
RASPBERRY PI 3
PROS: The most powerful Pi
Relatively low electricity requirement
4× USB ports
Wireless LAN and Bluetooth
CONS: Higher power consumption than other Pis
The biggest Pi
Most expensive Pi
MODEL A+
PROS: Fairly small
Low power consumption
Standard-size USB port
CONS: Bigger than Pi Zero
Only one USB port
No on-board wireless or Bluetooth
Least powerful Pi
NOW WE’RE
READY TO
BUILD A
ROBOT!
raspberrypi.org/magpi 19November 2016raspberrypi.org/magpi
FeatureBUILD A REMOTE-CONTROLLED ROBOT
20. DESIGNING
THE CHASSIS
he chassis for a robot needs to be strong
and light, and have enough space to fit all
the parts on it. For something like Pi Wars,
there’s an additional requirement for the robot’s
footprint to be less than 300 × 225mm.
Start by laying out the parts you already selected on a
piece of paper the size of, or smaller than, the footprint
you are building to. If you don’t already have all the
parts, you can model them in 3D or CAD software, or
even cut them out of paper. This will give you an idea of
what size your robot will need to be, and what clearance
the wheels require. It also helps to think where and
how additional sensors attach to your chassis.
In addition, you’ll need to think about how to
add and remove parts for different challenges. The
T
Now we have all the parts, they need to attach to something
distance between your robot’s wheels will affect
how your robot will turn/handle: if the wheel base is
longer than its width, the robot will turn more slowly.
This could be an advantage in a speed run challenge,
as it would make it harder for the robot to turn and
hopefully help keep it on track.
You also need to think about the clearance height
from the surface your robot is standing on to the
bottom of your motors/chassis. The higher it is, the
better your robot will be at clearing obstacles. It’s also
a good idea to keep most of the weight low down in
your design; this will stabilise your robot and make
it less likely to topple over.
One of the most important things to think about is
how easy will it be to change or charge your battery.
This motor
has an extended
shaft, so an
encoder can be
fitted if you want to
measure speed
The wheels
should have a
good grip. The size
will have an effect on
the speed of your robot:
a large wheel will be
faster, but slower to
accelerate than a
small wheel
The controller
dongle with a short
USB OTG adapter in
the Zero’s USB port
The ZeroBorg
controls the power
to the motors and in
what direction they
turn; it is connected to
the Raspberry Pi via
the I2
c bus
raspberrypi.org/magpi20 November 2016
Feature
21. PRE-
MADE
ROBOT
CHASSIS
f you don’t fancy designing a chassis just
yet, we’ve got some files you can use.
They’re for the robot we’ve built; it’s made
up of two Perspex plates, with 3mm PCB spacers
joining the two together. The motors and battery
are fitted on the bottom plate, with the motor
controller and Raspberry Pi mounted on the
top plate. This creates a box, making a light
and strong chassis with plenty of space for
all the components, along with any sensors
to be added in the future. The plates are
laser-cut for this project, but they could
also be 3D-printed or even cut and
drilled by hand.
I
Download our files so you can
make the rover from our cover!
HOW TO
MAKE THE CHASSIS
For the chassis plates, you’ll have to get them
laser-cut – or cut them out yourself – from 3mm
plywood, MDF, or Perspex (acrylic). It’s also possible
to convert files for 3D printing.
You can download a PDF for the plates from
GitHub (magpi.cc/2dx82hO). You’ll also find a
DXF file, plus the original Inkscape SVG files, so
you can modify the design if required. Your local
makerspace, hackspace, or fab lab may be able
to help cut the plates. In the UK, there’s also Eagle
Labs. There are other online laser cutting services
– try searching for ‘laser cutting services’ in Google
and look for local ones. A top tip to remember: the
plates’ edges should be cut last on the laser cutter.
RESOURCES:
CHASSIS FILES
MagPi robot chassis files: magpi.cc/2dx82hO
PLACES TO BUILD THE CHASSIS
Hackspaces and makerspaces: magpi.cc/2dxbnxr
Eagle Labs: labs.uk.barclays
Fab Labs UK: fablabsuk.co.uk
ONLINE SERVICES
RazorLAB: razorlab.co.uk
Laser Make: lasermake.co.uk
Perspex (acrylic) supplier: kitronik.co.uk
01. BOTTOM PLATE
The bottom plate is the biggest part of the chassis
– technically you don’t need the top plate for this
robot, but it’s a lot more sturdier with it on
02. TOP PLATE
The Pi Zero and ZeroBorg are mounted on this.
It also creates a little space between the chassis
plates to store the battery
03. CAMERA MOUNT
The camera mount
needs to be bent
along the line going
through it, so it can be
mounted underneath
the bottom plate while
still having the camera
face forward
01
02
03
raspberrypi.org/magpi 21November 2016
FeatureBUILD A REMOTE-CONTROLLED ROBOT
22. BUILDING
THE ROBOTGet your screwdriver handy, as it’s time to make your robot
Major components:
Raspberry Pi Zero
(v1.3 if adding a camera)
PiBorg ZeroBorg complete
piborg.org/zeroborg
Chassis plates
4× 50:1 micro metal gear motors
magpi.cc/2eynuNk
4× Pimoroni motor brackets
magpi.cc/2dW6NYR
4× wheels
magpi.cc/2eq0Npp
USB to micro-USB OTG Converter Shim
magpi.cc/1JT9aZc
Wireless controller – we used the PDP Rock Candy
magpi.cc/2dvjKJS
Connectors and fasteners:
PP3 battery clip
magpi.cc/2ebjlgV
PP3 rechargeable battery
Female-to-male jumper wires
magpi.cc/2dvjMSb
6× 3mm hole, 20mm length PCB
spacer posts
magpi.cc/2dvjKJR
12× 3mm, 8mm length hex pan
head machine screws
magpi.cc/2ebkaWQ
8× straight header pins for motors
magpi.cc/2eeUbv9
Optional camera:
Camera holder
Raspberry Pi Camera Module
PARTS LIST: STEP-01
Prepare the motors
The motors must be modified slightly
to make sure they fit under the
chassis. Using a soldering iron
and a pair of pliers, you should
remove the bent pins from
each motor shim, suck out
the solder, and solder
some straight pins
back in. Once that’s
done, connect the
wheels to the motors.
STEP-02
Attach the motors
The motors need to be attached to the
bottom plate using the brackets, as shown.
You can either have the wires connected now
while it’s easier to do, or you can add them
afterwards so they’re out of the way as you
connect the rest of the motors.
raspberrypi.org/magpi22 November 2016
Feature
23. STEP-03
Tidy the wires
Once all the motors are connected,
flip the bottom plate the right way
up and make sure all the wires are
connected to the motors. You can
push them two at a time through the
rectangular holes on the side, which
you’ll need to do now.
STEP-04
A little bit of soldering
Solder the header for the ZeroBorg onto the Pi Zero. It should be
positioned on pins one through six, as shown above. Make sure it’s
soldered to the underside as in the picture as well!
STEP-05
Make the brains
Attach the spacers to the ZeroBorg and then follow that up
by placing the Pi Zero on top, making sure the header goes
over the relevant pins. The USB ports and HDMI port are
on the same side as the ZeroBorg connectors – refer to the
step 06 image, just in case.
STEP-06
Construct the top part
You can attach the power wires now if you wish – refer to step 09
for the orientation – but either way, you need to
then mount the ZeroBorg and Pi Zero combo to
the top plate. It attaches to the shorter side;
you’ll know as it’s the only spot you
can slot in the screws.
raspberrypi.org/magpi 23November 2016
FeatureBUILD A REMOTE-CONTROLLED ROBOT
24. STEP-10
Connect the motor wires
You can now start connecting the motors to the
ZeroBorg. Each motor has a pair of cables, and
they should all be connected in pairs, one after
another, in the remaining four pairs of
ZeroBorg terminals. It’s a good idea to keep
the right-side motors on the right and
left-side on the left as well. It doesn’t
matter which way around the pairs
go in their individual terminal
blocks, though.
STEP-07
Complete the top
Once the Pi Zero combo is attached, attach four of the
spacers for connecting the two plates onto the bottom
of the top plate, as shown below.
STEP-08
Build up the robot
Attach the remaining two spacers onto the bottom plate;
these can be secured to the top plate by removing the Pi
Zero combo, but it’s not necessary. Place the top plate
onto the chassis and secure the top plate’s spacers to
the bottom plate.
STEP-09
Check the battery wires
If you haven’t already, connect the power wires to
the central terminals, as shown. It’s important to do
so in this order (positive on left, negative on right),
otherwise you won’t be able to properly power the
ZeroBorg, which in turn powers everything else.
raspberrypi.org/magpi24 November 2016
Feature
25. STEP-14
Robot complete!
You’re finished! Now, with a bit of coding, you can get
your robot working. We’ll get started over the page…
STEP-11
Tidy the robot up
Tidy up the wires and connect the battery; it won’t
turn the robot on until you move the jumper to the on
position. Connect the wireless controller’s dongle and
you’re ready to get programming, if all you want is a
remote-controlled robot.
STEP-13
Connect the camera cable
The last thing to do is add the camera connector; it
needs to go in both the Pi Zero (v1.3) and the Camera
Module. Make sure the white side of the cable is
facing up when you connect it to the Pi Zero, while
the silver side should be facing the Pi Camera when
it’s inserted in that end.
STEP-12
Mount the camera
To add the camera, screw the Camera Module to the extra
camera plate. This can then be mounted to the front of
the bottom plate, removing the screws that secure the
spacers and using them to add the camera.
raspberrypi.org/magpi 25November 2016
FeatureBUILD A REMOTE-CONTROLLED ROBOT
26. STEP-01
Update Raspbian
Once installed, connect your Raspberry Pi to the
internet and update it in a terminal window or the
command line with:
sudo apt-get update
sudo apt-get upgrade
Next, enable the I2
C bus. You will need to do this
via the Raspberry Pi Configuration menu. Click the
Menu button at the top left of the Raspbian desktop,
select Preferences, and finally, click Raspberry Pi
Configuration. Find the Interfaces tab and then click
the Enable button for I2C. Click the OK button to save
and exit, then restart your Raspberry Pi.
PROGRAM
YOUR ROBOTIt has a body. Now it’s time give it a brain!
s we’re using the ZeroBorg, we will use the
library that comes with it to program the
robot. We’ll need to modify the code slightly to
get it working for our needs, though. It’s best to start
with a fresh install of Raspbian as well – you can do
the setup on another Raspberry Pi if you wish.
Start by downloading the latest edition of Raspbian
or NOOBS and copying it to a microSD card. There’s
a quick-start guide to doing so on the Raspberry Pi
website (magpi.cc/2eopaEf), so you can either follow
the instructions given there or read our guide from
issue 50 (magpi.cc/Issue-50).
A
It’s best to test
the motors with
the robot upside
down or in the air
so it doesn’t go
running off
Enabling I2
C
here is extremely
important for
making sure the
robot works
raspberrypi.org/magpi26 November 2016
Feature
27. STEP-02
Install ZeroBorg software
Now you need to download the ZeroBorg software.
Open a terminal window and enter the following:
bash (curl https://www.piborg.org/
install-zeroborg.txt)
You should also install the joystick app for testing
your joypad and mapping the buttons. See the ‘Using
a gamepad’ section (bottom right) for more details.
The button mapping for the game controller is in
zbJoystick.py. Use nano to open the file, and find the
line # Settings for the joystick. For the Rock
Candy controllers used in our version, it should look
something like this:
axisUpDown = 1
axisUpDownInverted = False
axisLeftRight = 2
axisLeftRightInverted = False
buttonResetEpo = 9
buttonSlow = 6
slowFactor = 0.5
buttonFastTurn = 7
interval = 0.00
STEP-03
Auto-start on boot
The final step is for the software to auto-start when
you power on your robot. On the command-line
or in a terminal window, use:
sudo nano /etc/rc.local
This will open the nano text editor; after the line
starting with fi, enter the following:
./home/pi/zeroborg/runJoystick.sh
Save and exit. You can now test your robot! If you
have not done so already, put the microSD card into
the Raspberry Pi Zero, then power up your robot by
moving the jumper on the ZeroBorg to cover both the
power pins. Test the motors by pushing forward on
the wireless controller’s left stick; this should result
in all four wheels moving in the same direction.
If some wheels are going in a different direction,
swap around their cables in the ZeroBorg for that
specific motor. Next, push the stick to the left and
right, making sure that the correct wheels run
when selected – if they do not, swap the incorrect
pairs of jumpers.
CONTROL FROM
A WEB BROWSER
For this way of controlling the robot, you’ll have to switch out
any game controller receiver for a WiFi adapter. Plug the Pi Zero
into a computer and get the WiFi connected before continuing.
Once that’s done, you need to find the IP address of the
robot by opening a terminal window and using:
ifconfig
Make a note of it – this is how we’ll connect to the robot
from elsewhere. Then install OpenCV using:
sudo app-get install python-opencv
Once that’s done, you’ll need to download the PiBorg web
interface. Back in the terminal window, use:
git clone https://github.com/piborg/diddyborg-web.git
This will create a folder called diddyborg-web. Enter the
following commands to start the web server:
cd diddyborg-web
sudo python diddyborg-webyetiWeb.py
It will confirm when the web server has started. Type the
IP address you found earlier into a browser on your PC or
smartphone (or even another Raspberry Pi!) and you’ll be able
to connect to the robot and see through the camera. Disconnect
the monitor and any peripherals, then go for a ride!
Control your robot from your computer or
smartphone and use the on board camera
USING A GAMEPAD
To get the gamepad or joystick button numbers,
install the joystick software with:
sudo apt-get install joystick
Plug your gamepad in and then run the
following to find out how it’s listed:
ls /dev/input/js*
It will probably come up as something like
/dev/input/js0. You can then test it using:
jstest /dev/input/js0
Move each stick and press each button in turn. You will see the values
change for the axis or button pressed in real-time. Make some notes so you
remember which button is which!
raspberrypi.org/magpi 27November 2016
FeatureBUILD A REMOTE CONTROLLED ROBOT
28. NEXT ISSUE:
THE CHALLENGESCome back next issue to learn how to add and use sensors
to your robot to make it a true automaton
i Wars is next April and has a load of different
challenges; it’s a bit too late to enter them,
but that doesn’t stop you from learning how
to get your robot competition-ready by using some
excellent robo-sensors. Come back next month for
our guide on how to add and use amazing sensors to
conquer these challenges.
P
STRAIGHT-LINE
SPEED TEST
The Straight-Line Speed Test is autonomous,
with only a start and stop button allowed for the
starting and stopping of your robot’s run. The
course is a straight run, just over 7.3m long, with
walls 67mm high placed 522mm apart – very
precisely. There are penalties if your robot touches
a wall, plus points for each clean and completed
run. Three runs must be attempted. Here are some
methods you could use for this challenge…
Computer vision: Find the walls and guide
your robot down the centre. You could also
use an IR light beacon placed at the end of
the course and aim to keep the beacon in the
centre of the image, while steering the robot
down the centre of the course.
Dead reckoning using wheel/motor encoders:
Count the number of turns each wheel makes
in a set time. The shorter the time, the more
accurate it should be.
Distance sensors: Measuring the distance
between the walls, steer the robot down the
centre of the course.
IMU: Set a bearing and follow it – distance
sensors may be useful as a backup check.
This ultrasonic
distance sensor
can be used to
check how far away
the wall is
raspberrypi.org/magpi28 November 2016
Feature
29. The Minimal Maze is new to the Pi Wars contest, and it is an
autonomous event. It’s basically two right turns followed by
two left turns in a course with 65mm-high walls. Additional
points will be given for clean runs where the robot does not
touch the walls, along with points for a completed run.
Penalties are given for touching walls, rescue attempts,
and non-completed runs. As the measurements for the maze
are not given, it will not be possible to use dead reckoning
to navigate the maze, so the challenge requires the use of
sensors. Not counting access to a lidar (a laser radar!), we
have a number of sensors at our disposal.
You could use the Pi Camera Module and OpenCV to find
the positions of the walls or determine their colour. The
walls are colour-coded to their orientation, so you will be
able to tell which way your robot is facing.
It may be a good idea to use distance sensors to avoid hitting
the walls. Another method would to drive forward until you
are a set distance away from the wall, then turn 90 degrees,
either clockwise or anticlockwise depending on whether you
need to turn left or right, repeat until last turn, then drive
forward to the exit. The use of wheel/motor encoders and an
IMU may help. If you use the data from your first run, it may
be possible to improve your next run’s time.
MINIMAL
MAZE Check the wall
colours with
the camera to
determine the
robot’s direction
The classic line-following challenge returns to Pi
Wars. This time, organisers Michael and Tim have
promised a return to the black line on a white
background for the course. You have a number of
options, including building your own line-following
sensor, or buying one of the many available sensor
arrays. A popular choice is Ryanteck’s three-way line
follower (magpi.cc/2eoEXTl), as used by the winning
robot for the line-following challenge in 2015. Other
sensors are available from Pololu and Sparkfun. The
line-following sensor used by Revenge, the second-
place robot in the last contest, was a Pololu QTR
interfaced with an Arduino.
LINE
FOLLOWING
Line
followers come
in many varieties:
choose the best one
for the size and
shape of your
robot
raspberrypi.org/magpi 29November 2016
FeatureBUILD A REMOTE CONTROLLED ROBOT
30. Tutorial WALKTHROUGH
raspberrypi.org/magpi30 November 2016
FREE PI ZERO!Subscribe in print for six or 12 months to receive this stunning free gift
SAVE
UP TO
25%
Subscribe today receive:
A free Pi Zero v1.3 (the latest model)
A free Camera Module connector
A free USB HDMI cable bundle
Delivered with your first issue!
Other benefits:
Save up to 25% on the price
Free delivery to your door
Exclusive Pi offers discounts
Get every issue first (before stores)
31. Tutorial
raspberrypi.org/magpi 31November 2016
RETURNTHISFORMTO:
MagPiMagazine Subscriptions, Select Publisher Services Ltd, PO Box 6337,
Bournemouth BH1 9EH
Please tick this box if you DO NOT want to receive any other information
from Select Publisher Services Ltd.
Please tick this box if you DO NOT want to receive any other information
from other companies.
Please tick this box if you DO NOT want to subscribe to The MagPi newsletter.
This subscription is: nFor me n A gift for someone*
YOUR DETAILS Mr n Mrs n Miss n Ms n
First name ............................................ Surname ........................................................
Address ........................................................................................................................
....................................................................................................................................
Postcode ............................................... Email .............................................................
Daytime phone ..................................... Mobile ............................................................
*If giving The MagPi as a gift, please complete both your own details (above) and the recipient’s (below).
GIFT RECIPIENT’S DETAILS ONLY Mr n Mrs n Miss n Ms n
First name ............................................ Surname ........................................................
Address ........................................................................................................................
Postcode .................................................... Email ..................................................................
SUBSCRIPTION FORM
YES! I’d like to subscribe to The MagPi magazine and save money
PAYMENT OPTIONS
1 DIRECT DEBIT PAYMENT £12.99 every 3 issues (UK only)
InstructiontoyourbankorbuildingsocietytopaybyDirectDebit
Please fill in the form and send to:
The MagPi, Select Publisher Services Ltd,
PO Box 6337, Bournemouth BH1 9EH
Name and full postal address of your bank or building society:
To: The Manager Bank/building society .......................................................................
Address ...........................................................................................................................
........................................................................................................................................
..................................................................................... Postcode ....................................
Name(s) of account holder(s) ............................................................................................
Branch sort code n n n n n n Account number n n n n n n n n
Reference n n n n n n n n n n n n n n n n n (Official use only)
Instruction to your bank or building society
Please pay Select Publisher Services Ltd Direct Debits from the account detailed in this instruction
subject to the safeguards assured by the Direct Debit Guarantee. I understand that this instruction
may remain with Select Publisher Services Ltd and, if so, details will be passed electronically to my
bank/building society.
Signature ..................................................................... Date n n/n n/n n
Banks and building societies may not accept Direct Debit instructions for some types of account.
SUBSCRIPTION PRICING WHEN PAYING BY CHEQUE OR CREDIT/DEBIT CARD
6 ISSUES nUK £30 nEurope £45 nRest of World £50
12 ISSUES nUK £55 nEurope £80 nRest of World £90
2 CHEQUE
I enclose a cheque for ............................... (made payable to Select Publisher Services Ltd)
3 CREDIT/DEBIT CARD nVisa nMasterCard nMaestro nSwitch
Card number n n n n n n n n n n n n n n n n
Expiry date n n n n Valid from n n n n (if shown)
Issue number n n (if shown) Security number n n n
(last 3 digits on the back of the card)
Signature ..................................................................... Date n n/n n/n n
I would like my subscription to begin from issue ............................................ (month + year)
Service user number 8 3 8 7 7 3
Mag#51
Pricing
Get six issues:
£30 (UK)
£45 (EU)
$69 (USA)
£50 (Rest of World)
Subscribe for a year:
£55 (UK)
£80 (EU)
$129 (USA)
£90 (Rest of World)
Get three issues:
£12.99 (UK) (Direct Debit)
$37.50 (US) (quarterly)
How to subscribe:
magpi.cc/Subs1 (UK / ROW)
imsnews.com/magpi (USA)
Call +44(0)1202 586848 (UK/ROW)
Call 800 428 3003 (USA)
32. raspberrypi.org/magpi32 November 2016
ethanie Fentiman can’t
play chess, but when her
imagination sparked and
the opportunity presented itself, she
brought the iconic game of Wizard’s
Chess from Harry Potter to life using
a Raspberry Pi, stepper motors, and
possibly a little magic.
For her A-level computing
coursework, Bethanie took an idea
that had been nestling in the back
of her mind, and turned it into a
reality. Well, as much of a reality
Projects SHOWCASE
19-year-old Bethanie Fentiman shocked her A-level classmates when she
rocked up with a fully working Harry Potter Wizard’s Chess set as her final
coursework assignment
Watch the
set in action
at youtu.be/
Z7xdFn5bVrA
The Wizard
Chess Tour
started in
Harlow
After Harlow,
it visited the
Covent Garden
Raspberry Jam
Inspiration
came from
Instructables
user maxjus at
magpi.cc/
2cnyoB0
It’s wingardium
leviOsa, not
leviosAH
Quick
Facts
Etched acrylic allows
magnets to move the
pieces from beneath
WIZARD CHESS
Sadly, the pieces have yet
to crush their opponents,
as they do in the book
B
Motors on an x- and y-axis
select the appropriate
piece to move
BETHANIE FENTIMAN
19-year-old Bethanie plans to visit
every Disney park in the world… which
is an amazing bucket list goal if ever
we’ve seen one.
magpi.cc/2cnzMDO
one can create when the literary
version includes battling chess
pieces that leave their opponents
crushed to rubble on the board.
Luckily for Bethanie, she’s a
self-proclaimed Jambassador,
actively participating in the
Raspberry Pi scene via the Kent
Raspberry Jam. With a community
of makers to support her, Bethanie
knew that she could complete the
build and got to work, researching
similar projects online that used
magnets and motors to ‘magically’
move chess pieces on a board.
After an internet search for
inspiration, she came across
an Instructables build for an
Arduino-powered chess-playing
robot by user maxjus, and used
the main concept as the basis for
her build. The guide provided all
the information Bethanie needed
to build the physical structure of
the board, allowing for drawer
runners, gears and, of course,
the electromagnet that would
move each piece when required.
A 4tronix PiStep board, along with
two 28BYJ-48 stepper motors, took
up the job of moving the runners
and electromagnet into place,
linked through to the Raspberry Pi.
As mentioned previously,
Bethanie didn’t actually know how
to play chess. So when it came to
inputting the legal movements of
each piece, she had two options:
learn fast, or cheat a bit. Opting
for the latter due to the time
constraints of her coursework
deadlines, Bethanie researched all
the possible moves of each chess
piece and worked them into the
code. She could always learn to
play the game later on.
A second issue, and one far
more associated with the original
material from which she was
taking her inspiration, was what
The open sides of the build allow for an
interesting view of the working mechanism
33. raspberrypi.org/magpi 33November 2016
ProjectsWIZARD CHESS
STEP-01
Setting up the runners
Runners allow for the motors to move the
electromagnet, and code dictates which pieces to shift
across the board. Here Bethanie could put her newly
discovered soldering skills to the test.
STEP-02
Etching the acrylic
Bethanie was fortunate enough to have access to
various pieces of equipment, although she admits
that any future build would omit the added vinyl that
made movement less fluid.
STEP-03
Building the board
The entire build was a learning curve for Bethanie,
allowing her to expand her knowledge of new skills
and to call on a number of Raspberry Pi community
members for support.
YOU’RE A (CHESS)
WIZARD, HARRY
the pieces would do as they ‘took’
an opponent. In the book, each
piece defeats its foes through
‘barbaric’ means. In reality,
Bethanie plans on an upgrade
to allow for movement around
pieces… though once she gets her
belated invitation to Hogwarts,
we’re sure she’ll incorporate the
expected level of brutality.
With the build complete and
presented to her computing
A-level class, Bethanie’s Wizard
Chess was met with amazement.
“When I said I was going to make
it, they just thought I was going to
write the code and come up with
designs for the board. So when I
turned up with the board at school,
fully moving and playable, they
were slightly shocked.”
And they weren’t the only
ones. Upon finishing her board,
Bethanie took it to the Kent
Raspberry Jam, where Twitter
soon exploded with praise. From
the Jam, ‘The Wizard Chess Tour’
was born as Bethany and fellow
Jam members took to the road and
presented the project at Jams in
both Harlow and Covent Garden.
Now actively seeking an
apprentice in the field, Bethanie
plans on upgrading the build while
continuing the Wizard Chess Tour
at more Jams in the future.
When I turned up with the fully
moving and playable board at
school, they were shocked
With so many new skills required,
Bethanie thanks Ed Bye for helping
her with the electrics of the build
34. raspberrypi.org/magpi34 November 2016
ith hammers hitting the
bars of a toy glockenspiel
to play a tune, the
Monomepi sounds just like an
old-fashioned music box, but this
Pi-powered contraption is based
on new technology… and on quite
a lot of LEGO. “It was just my luck
that the components fitted with
the LEGO bricks almost perfectly!”
reveals its creator, Joon Guillen.
Projects SHOWCASE
A music box featuring old and new technology in perfect harmony
The LEGO
contraption
took around
three evenings
to build
Joon’s young
daughter
added some
extra blocks
The hammers
are made from
coffee stirrers
and LEGO
A Pi 3 runs
the Python
sequencing
software
The project
took around
two months
to perfect
Quick
Facts
The user presses light-up
buttons on the Monome
Grid step sequencer to
program a tune
MONOMEPI
W
Driven by the servos, the hammers
hit the bars of the glockenspiel to
play the sequenced tune
JOON GUILLEN
When not busy being a dad, Joon
works for an online retailer as a Linux
sysadmin. And when not busy doing
that, he makes music under the
moniker modulogeek and dabbles in
geeky projects from time to time.
modulogeek.com
He got the idea after seeing a
couple of videos of Arduino-based
music boxes a few years ago, while
working on a Conway’s Game of Life
Pi project using a Monome Grid, a
versatile piece of hardware that can
be used to control music and more.
For the Monomepi, the Monome
is connected to a Raspberry Pi 3
running a step sequencer program,
which registers the user’s button
presses on the Monome and
lights them up accordingly. The
Pi then sends serial commands
to an Arduino Uno connected via
a ProtoShield kit to eight servo
motors, which move makeshift
hammers to play glockenspiel notes
to match the pattern shown on the
Monome. On the latter, the user can
switch buttons on and off to alter
the sequence as it plays.
While the Pi is the brains of the
setup, an Arduino is used to
control eight servos attached
to makeshift hammers
35. raspberrypi.org/magpi 35November 2016
ProjectsMONOMEPI
STEP-01
Glockenspiel hammers
To play the notes on a toy glockenspiel, the hammers
are made from coffee stirrers, sticky tape, and LEGO
blocks borrowed from Joon’s young daughter.
STEP-02
Arduino servos
Eight servo motors are connected to an Arduino Uno
R3 and ProtoShield kit with a mini-breadboard. This
is controlled by the Raspberry Pi and Monome Grid.
STEP-03
LEGO construction
With the wiring complete, it’s time to connect the
hammers and add more LEGO blocks around the
servos to keep everything firmly in place.
BUILDING A
MODERN-DAY
MUSIC BOX
“The contraption itself took
only two or three evenings to
build,” Joon tells us. “I focused
most of my energy on the software
side, so the physical construction
was almost an afterthought.”
To build it, he borrowed a bunch
of LEGO blocks from his young
daughter. “They were the first
things I thought of using. I
haven’t the talent for crafts,
and so LEGO was the quickest
way to build the contraption. My
daughter even added some blocks
of her own in there!”
While the construction was quick,
the project as a whole took around
two months, with Joon working
casually over the course of several
evenings and weekends. “Most of it
was figuring out the step sequencer
logic, Arduino code, and optimising
performance.” The main Python
program running on the Pi is
based on a Monome library Joon
had created for his previous project.
“That took a very long time, as I
had zero Python knowledge when
I started out. The library has since
undergone several improvements
through the years.”
While Joon opted to control his
servos via an Arduino, he says
there’s no reason why anyone
creating a similar project couldn’t
trigger them from the Pi itself,
using a suitable motor driver board.
And if you’re lacking a Monome
(quite an expensive piece of kit), a
touchscreen could be used instead:
“A web-based UI should work, too.
Or, if one isn’t necessarily trying
to make a step sequencer, push
buttons or [a computer] keyboard
are viable control alternatives.”
As a part-time musician, Joon
plans to sample the Monomepi to
use in at least one of his tracks.
He’s also looking to improve the
project by “adding features to the
step sequencer program, such
as having more than 16 steps,
and the ability to use multiple
velocities. Other than that, I am
trying to think of more ways to
use my servos with the Pi!”
Joon admits he was lucky that the servos
fitted easily between the LEGO blocks,
albeit with a bit of paper padding
The note-playing hammers are made from coffee stirrers
stuck to LEGO blocks snaffled from Joon’s toddler!
36. raspberrypi.org/magpi36 November 2016
’ve always wanted an
pianola,” says Lloyd
Bayley, the owner of this
rather fantastic Yamaha Disklavier
self-playing piano.
Pianolas may look like regular
instruments, but they don’t just
make the sound of a piano. They also
move the keys all by themselves.
Self-playing pianos have a long
and distinguished history. “I was
around the old paper roll, bellows-
driven ones when I was a child,”
Lloyd reminisces, “and I found
them fascinating. I found this one
at a Sydney piano shop and went
to visit them for a demonstration
Projects SHOWCASE
When one maker’s self-playing piano failed, he used a Raspberry Pi
to repair it… and made it his pianola play even better than before
Pianolas were
first developed
in the late
19th and early
20th centuries
Original pianolas
used bellows to
push down keys
with air
The keys in
this pianola are
pushed using
electromagnets
It can play songs
backwards
Lloyd originally
used aplaymidi
from the
command line
Quick
Facts
The touchscreen display enables
users to control the Raspberry Pi
and select MIDI tracks
PIANOLA
“I
LLOYD BAYLEY
Lloyd is an IT consultant/systems
engineer and maker. He’s played the
piano since he was a child and taught
himself to play by ear.
bayleysbanter.com
and decided to buy it on the
spot… I’m still enjoying it after
almost three years.”
Pianolas are spectacular to
watch. Classic versions were
controlled by reams of paper with
holes punched into them. You can
see self-playing pianos in classic
movies (particularly westerns
and comedies). Modern pianolas
have replaced the paper rolls with
floppy disks and MIDI files.
“The piano itself doesn’t store
songs,” explains Lloyd, “as it has
no on-board memory. Everything
must be loaded via floppy drive or
via the MIDI ports.”
The electronic system uses
programming to fire solenoids,
“which are a bit like a little finger
that prods the hammers to strike
the strings,” says Lloyd. “The
strike force can be varied, and
they are thus able to play loud and
soft notes with ease.”
Lloyd’s Yamaha Disklavier
eventually suffered a hardware
fault. The 3.5-inch floppy drive,
which was used to load the
music files, stopped working.
Rather than pay for an expensive
replacement from Yamaha, he
chose to use a Raspberry Pi with
a touchscreen display instead.
The MIDI file is used by the pianola
to determine which keys to play
A USB-to-MIDI cable is used to
connect the Raspberry Pi to the
Yamaha Disklavier’s MIDI IN socket
37. raspberrypi.org/magpi 37November 2016
ProjectsPIANOLA
STEP-01
Touchscreen
A touchscreen display with a Raspberry
Pi mounted on the rear is used to control
the pianola. It is loaded with XPMIDI,
which provides an interface to select,
and then play, the MIDI tracks.
STEP-02
MIDI input
The Raspberry Pi connects to the pianola
via the MIDI IN connector (using a USB-to-
MIDI converter cable). MIDI files contain
information on which notes to play, and MIDI
is used to start and stop playing tracks.
STEP-03
Tapping the keys
The MIDI file sent by the Raspberry Pi controls
the Yamaha Disklavier directly. The signals
are used to activate solenoids, a type of
electromagnet, inside the piano. These push
the keys down, and the piano plays itself.
CONTROLLING A PIANOLA
The Raspberry Pi attaches to the
back of the touchscreen with pre-
installed mounting accessories.
“To connect it to the pianola, I
used a USB-to-MIDI converter
cable and was a little surprised to
find it was that simple.”
Lloyd loaded the Raspbian Jessie
operating system and tried to
play a file on the command line
with the aplaymidi utility. “I was
going to write my own cataloguing
and playing software and while
researching it, I came across
XPMIDI (magpi.cc/2cCfG9L),
which does the job nicely. It has
a GNU public licence, so you can
modify it if need be.”
The end result is a fully working,
self-playing piano which is a vast
improvement upon the original
version. Lloyd is able to store far
more songs, and a program that
he developed for the touchscreen
enables rapid access to his choice
of a list of thousands of songs.
“It’s working and working
well,” says Lloyd. “I have a few
different playlists that I favour,
and I also like to play manually as
well. It’s a nice happy pianola to
have around the house.
“I have showed it to people and
they are amazed, and think I’m
very clever. However, it was quite
an easy project, as most of the
‘trickery’ is already in place.
I just had to fit all the pieces
of the puzzle together.”
Lloyd tells us that his pianola
project is mostly complete.
“I think I would like to have a crack
at doing the reverse, so I could
play straight into the storage on
the Raspberry Pi.” This is a feature
built into the pianola, but it writes
directly to the floppy disk.
“With a bit of extra software,”
says Lloyd, “you could output
through the MIDI ports back in.
That will take a little research and
is on the list of things to do.”
It was quite an easy project,
as most of the ‘trickery’
is already in place
The pianola is quite mesmerising to watch,
and plays songs with precision and perfection
The Disklavier script launches the
interfaces, enabling users to select
songs via the touchscreen
38. raspberrypi.org/magpi38 November 2016
efore the dawn of the
world wide web, teletext
was the best way of
keeping up to date with the latest
news, sports scores and other
information. The BBC’s Ceefax
teletext service continued in the
UK right up until analogue TV
transmissions ceased in October
2012. We still miss its no-nonsense
approach and blocky graphics,
so we’re delighted that teletext
has been revived by the Teefax
project. Users can install the free
Projects SHOWCASE
Teletext makes a comeback with the help of the Raspberry Pi
Peter built a
text service
for the Stroud
Fringe festival
NewTeefax
contributors
are always
welcome
You can use
Peter’s wxTED
page editor
(magpi.cc/
2dsEZfG)
Dave Honess
has made a
teletext QR
code generator
Peter is
developing
a Muttlee
multi‑user live
editing system
Quick
Facts
TEEFAX
The data transmitted via the
Pi’s composite video signal is
converted into teletext pages
B
Teefax project founder
Peter Kwan is a former
teletext engineer
PETER KWAN
Having worked as an engineer with
teletext equipment for the last 12 years
it was transmitted in the UK, Peter is an
expert in the field. When not recreating
teletext, he’s out riding his bike through
the valleys of Stroud.
teastop.co.uk/teletext
software (magpi.cc/2dssVeo) on
a Raspberry Pi, connect its 3.5mm
video output to a TV (via the SCART
socket), then hit the teletext
button on the remote control.
Project founder Peter Kwan is
a former teletext engineer who
carried on working in the field
as a hobby. “As the analogue TV
network was being shut down,
I was thinking
about how I could
generate my own
teletext,” he
recalls. With the idea of making
a low-cost basic teletext inserter,
Peter manufactured his own VBIT
hardware and managed to get a
full teletext service running on it.
Initially, there was a practical use
for the system. “There is a lot of
hidden signalling in the teletext
signal,” Peter reveals. “The BBC
uses a system called Presfax which
hides schedule information in
databroadcast packets. They also
have special signals that let
London take over the whole
To control the service, just use
the teletext buttons on your
TV remote, as usual
39. raspberrypi.org/magpi 39November 2016
ProjectsTEEFAX
STEP-01
Teefax server
The Teefax server is an original Raspberry Pi
Model B running Subversion and Apache web
server. PHP scripts scrape the BBC News website
and convert stories to teletext pages.
STEP-02
Pi client
With a client Pi’s composite video output
connected to a TV, teletext data is transmitted in
normally unseen VBI (vertical blanking interval)
lines of the video signal.
STEP-03
Teletext pages
Hit the teletext button on your TV remote to start
viewing the pages as normal. Page numbers
can be entered, or coloured buttons pressed
to switch sections.
GETTING TELETEXT
BACK ON THE TELLY
network in an emergency.” In
addition, betting chains use control
signals to switch TV channels or
mute audio in their shops, while
European broadcasters use opt-
out signals to insert local adverts.
“These all need testing and VBIT
was a low-cost and flexible way of
generating these signals.”
When the Raspberry Pi was
launched in 2012, Peter soon
realised it could be used instead of
his bespoke hardware. “It had I2
C,
SPI, and GPIOs to drive and it was
cheaper than the AVR boards that I
was using, so I hooked one up and
it worked. I made a second spin of
the board and called it VBIT-Pi.”
The next big breakthrough came
when Alistair Buxton managed
to create a teletext signal direct
from the video output of the Pi. “I
bypassed the teletext stream from
my hardware to Alistair’s software
and instantly halved the cost of a
teletext system,” says Peter. “The
only thing that the Pi can’t do is
overlaying from video, so things
like subtitles and newsflash need
an original hardware VBIT.”
The Teefax server is actually
an original Pi Model B running
Subversion. “Apache handles
user authentication. PHP scripts
triggered by Cron scrape the BBC
News website and update the news
pages every day.” Currently, there
are seven authorised contributors
to Teefax. “The real number is more
because people are welcome to
submit their own pages and designs
and we will put them into Teefax for
them.” To do so, you can use Peter’s
wxTED page editor on a PC.
Meanwhile, Peter is currently
working on a more flexible version
of the VBIT system with a much
faster update speed. “This actually
has a commercial application in
the betting industry where a small
delay in reporting the ‘off’ in a
horse race can be costly.”
Above Along with news, Teefax pages include teletext art, quizzes, and some humorous
articles from the likes of Mr Biffo
40.
41.
42. raspberrypi.org/magpi42 xxxx 2016
Tutorial RASPBERRY PI 101: BEGINNER’S GUIDE TO NOOBS
ne of the things we love about the Raspberry
Pi is just how easy it is to get started. A lot
of this is down to a custom, simple-to-use
installer called NOOBS.
NOOBS (or ‘New Out Of Box Software’, to give
it its full name) is a unique installation image
and an essential tool for newcomers. With
NOOBS loaded on a micro SD card, you can install
a wonderful range of operating systems for
your Raspberry Pi.
More importantly, you can speedily set up a new
Raspberry Pi with Raspbian, the official operating
system. When you start up a Raspberry Pi with
NOOBS for the first time, you’re given the option to
install the Raspbian operating system. Connect the
Raspberry Pi to a network and you’ll also get a bunch
of other operating systems to choose from.
From there it’s just a matter of picking the
operating system you want and letting NOOBS do
its thing. The NOOBS installer wipes the micro
SD card and sets up the operating system
for you. When the Raspberry Pi restarts,
you’ll no longer see NOOBS, just your
operating system.
In this tutorial, we’re going to help
absolute newcomers install Raspbian
Jessie with PIXEL (the official
operating system). But don’t forget:
you can use NOOBS to experiment
with other operating systems.
NOOBS isn’t just great for
beginners; it’s also ideal for
exploring what other operating
systems have to offer.
raspberrypi.org/magpi42 November 2016
micro SD card
(8GB or larger)
NOOBS
installation files
Mac, PC or
Linux machine
You’ll
Need
BEGINNER’S GUIDE TO
NOOBS
O
The ‘Raspbian [RECOMMENDED]’ option is the
official operating system and is available offline. The ‘x’
next to it indicates that this OS is going to be installed
The easiest way to set up a Raspberry Pi with Raspbian,
and other operating systems, is to use the NOOBS installer
Click the Install button
to format your micro SD
card and install the selected
operating system
Connect to a wireless
network (or attach an Ethernet
cable) to access a wider range
of operating systems
43. raspberrypi.org/magpi 43xxxxx 2016
Tutorial
raspberrypi.org/magpi
01
RASPBERRY PI 101
STEP-01
Download NOOBS
Open your web browser and visit raspberrypi.org/
downloads/noobs/. Click on Download ZIP under
‘NOOBS Offline and network install’. Save the ZIP file
to your Downloads folder and extract its contents.
STEP-02
SD card
Download SD Card Formatter from sdcard.org and
open the program (click Yes in the User Account
Control alert on Windows). Attach your micro SD card
to the computer, and the card will appear in Drive.
Enter ‘SD CARD’ in the Volume Label so you can
identify it in the next step. Click Format (enter your
password on a Mac). Answer OK to the alerts.
STEP-03
Copy the files
Return to your Downloads and open the folder
containing the NOOBS files. Make sure you’re looking
at the files inside the folder, and not the folder itself.
Select all the files in the NOOBS folder and drag them
to the SD CARD folder (in the sidebar).
02
03
STEP-04
Power up
Eject the micro SD card from your computer. Place
it into your Raspberry Pi and power it up. You’ll be
greeted by the NOOBS v1.9 screen. If you haven’t
connected to the internet, you’ll only see a single
option: ‘Raspbian [RECOMMENDED]’.
STEP-05
Connect to network
To access more operating system options, connect the
Raspberry Pi to a network. Attach an Ethernet cable or
click ‘WiFi networks’. Choose your wireless network
and enter the password. Click OK. You’ll now see a wider
range of options (as shown in the main image opposite).
STEP-06
Install Raspbian
We’re going to go with Raspbian, so click to put an X
in the box next to ‘Raspbian [RECOMMENDED]’ and
click Install. Click Yes in the alert window. The NOOBS
software is copied to the micro SD card. NOOBS
displays ‘OS(es) Installed Successfully’ when the
software is installed. Click OK and the Raspberry Pi
will restart and boot into the operating system.
05
06
04
43November 2016
44. raspberrypi.org/magpi44 xxxx 2016
Tutorial BEGINNER’S GUIDE
raspberrypi.org/magpi44 November 2016
Raspberry Pi
Raspbian Jessie
with PIXEL
You’ll
Need
MASTER THE
RASPBERRY PI
CONFIGURATION TOOL
Learn your way around the configuration tool found in Raspbian Jessie
System
Options to expand the file system and change password
and hostname sit alongside various login choices.
Interfaces
Support for the various hardware and software
features, such as Camera Module, SSH, and VNC.
Performance
Overclocking and GPU memory options can improve
the performance of a Raspberry Pi.
Localisation
Set up an international keyboard, global WiFi options,
and adjust the locale and time zone.
ne of the best features in Raspbian Jessie
these days is the desktop Raspberry Pi
Configuration tool.
Located inside the Preferences option in the
desktop Menu, this enables you to configure the
hardware and software settings of your Raspberry Pi.
The Raspberry Pi Configuration tool works
alongside the old raspi-config tool, which can
still be accessed through the terminal using
sudo raspi-config.
However, the new Configuration tool uses a GUI,
making it much easier for newcomers. It offers
the same options, but with a neater interface.
Adjustments made in one tool affect the other.
As a result, you can use either tool, or both.
O
Presently, the Raspberry Pi Configuration tool
displays four tabs: System, Interfaces, Performance,
and Localisation.
System is where you’ll find the most useful tools.
In this area you can expand the file system, change
the password, and adjust login options. Interfaces
contains options for activating hardware and
software features. Performance is used to access
overclock modes, and change the amount of RAM
allocated to the GPU. The final tab, Localisation,
enables you to adjust the locale, time zone,
keyboard, and WiFi country for your Raspberry Pi.
There’s a bunch of powerful features in the
Raspberry Pi Configuration tool. As a result, learning
its options makes you a better Raspberry Pi owner.
45. raspberrypi.org/magpi 45xxxxx 2016
Tutorial
raspberrypi.org/magpi
01
CONFIGURATION TOOL
OPTION-01
Expand file system
Open Menu Preferences Raspberry Pi
Configuration. If you’ve installed Raspbian via an
image file (instead of NOOBS), then the first thing
you need to do is expand the file system. Expand
Filesystem makes the whole of the SD card space
available. Click on Expand Filesystem, then OK.
OPTION-02
Hostname and password
Customise your Pi by changing the hostname and
password. Enter a new name for your Raspberry Pi and
click Change Password. Enter the same password into
both fields and click OK. Note that the hostname – used
to identify the Pi on your network – isn’t the same as
your user name (which remains ‘pi’).
OPTION-03
Login options
Below the Hostname setting sit various boot options.
Choose To CLI to boot into the command line instead
of PIXEL. You can also opt to disable the splash screen
and/or remove the auto login. You need to restart
Raspbian for any of these to take effect. Click OK
and Yes to reboot your Raspberry Pi.
02
03
OPTION-04
Interfaces
Reopen the Configuration tool and click on Interfaces
to view the available options. Set Camera to Enabled
if you plan on using the Raspberry Pi Camera Module.
Now you’ll be able to take images directly from the
camera. Set VNC to Enabled if you plan on using VNC
to remotely access your Raspberry Pi.
OPTION-05
Performance
Click on Performance to view the two options here:
Overclock and GPU Memory. Overclocking isn’t
available for the Raspberry Pi 3 yet, so this option will
be greyed out. You can adjust the amount of RAM, in
megabytes, allocated to the GPU (64 is the default, and
is fine for most tasks). Set it to 128 to experiment with
higher GPU memory.
OPTION-06
Localisation
Under the Localisation tab sit various international
options. Click on Set Keyboard if you’re using an
international keyboard. If you own a US keyboard,
click Set Keyboard. Now choose United States under
country and English (US) as the Variant. Click OK
and select Yes to reboot the Raspberry Pi.
05
06
04
45November 2016
46. Tutorial STEP BY STEP
raspberrypi.org/magpi46 November 2016
SCRATCH 2.0
Get access to the upgrade for Scratch on your Raspberry Pi
via some very easy steps
cratch is an amazing piece of software that
has helped many people take their first steps
into the world of coding. We’ve done a fair few
Scratch tutorials ourselves on the Raspberry Pi, but
they always use Scratch 1.4, which is installed on the
Raspberry Pi itself.
Thanks to the recent updates to Raspbian with
PIXEL, the official Raspberry Pi operating system, you
can finally upgrade to the latest version of Scratch.
It’s very easy to do as well, so get your Raspberry Pi
out and let’s begin.
STEP-01
Upgrade Raspbian
You’ll need to do this in one of two ways: upgrading
from a previous install, or downloading the latest
release of Raspbian with PIXEL (magpi.cc/2ejN6sk)
and writing it to a new SD card.
S Raspberry Pi 3
You’ll
Need
ON RASPBERRY PI
ROB ZWETSLOOT
Tinkerer, sometime maker,
other-times cosplayer, and
all-the-time features editor
of The MagPi.
magpi.cc / @TheMagP1
To upgrade from an earlier version of Raspbian
to Raspbian PIXEL, open up the terminal and type
the following:
sudo apt-get update
sudo apt-get dist-upgrade
This may take a while and will probably require a
reboot once you’re done. You’ll then be in the latest
version of Raspbian with the PIXEL desktop.
STEP-02
Update your Raspberry Pi
The ability to use Scratch 2.0 is tied to the new
browser, Chromium, being able to use Adobe Flash.
This isn’t installed as standard with PIXEL, so you’ll
need to update to get the Flash library. If you did a
dist-upgrade to get PIXEL, then you may be able to
The stage is the same
as before, and you can
maximise it by clicking
the blue square icon
Save and load your
projects, just as you
could previously
Create your code in this
space and make your
wildest dreams a reality
47. Tutorial
raspberrypi.org/magpi 47November 2016
LEARN TO CODE
WITH SCRATCH
SCRATCH 2.0 ON RASPBERRY PI
skip this step. Otherwise, close Chromium if you have
it open, go to the terminal, and enter the following:
sudo apt-get update
sudo apt-get upgrade
At some point during the upgrade process, you’ll
be asked in the terminal window if you want to install
Flash; just press ENTER to accept. Once everything is
updated, you’re ready to go.
STEP-03
Find Scratch 2.0
Scratch 2.0 is not a program you can install on your
Raspberry Pi, but instead is an online editor you can
use through the Chromium browser. This is good, as
it means you can use Scratch anywhere, taking your
projects easily between computers. It also means your
old Scratch projects for Scratch 1.4 on the Raspberry Pi
will still work on that version installed on the Pi.
Open up the Chromium browser and head to the
following address: scratch.mit.edu.
STEP-04
Browsing the website
From the main page, you can head straight to the
editor by clicking the Create button at the top-left of
the screen, or you can browse some examples if you
want something more than just a blank canvas. There
are also some games and programs that have been
uploaded onto the website by other users to try out.
Once you click through to anything, though, you’ll
need to right-click on the puzzle piece on the screen
and then select ‘Run this plug-in’ for Flash to start
working. It might take a moment to load the interface.
STEP-05
Make something
Scratch 2.0 works in mostly the same way as Scratch
1.4, although there are some extra features you can
make use of. As before, you place blocks to create
code with loops, variables, and triggers. You can also
upload sprites and music from your computer if you
want to use more than just the defaults available. You
can then save your files to your Raspberry Pi by going
to File and then ‘Download to your computer’.
You’ll also notice an ‘Upload from your computer’
option; this can be used to load the files you make
in Scratch 2.0, and upload some of your Scratch 1.4
projects as well.
STEP-06
Compatibility
Scratch 2.0 projects can sometimes have a hard time
working on the version of Scratch that’s installed
on the Raspberry Pi. As long as you have an internet
connection, it shouldn’t be a problem, as you can run
them in the browser. If you want to convert the files
If you want to get stuck in with
Scratch and make some cool stuff,
you should check out our Scratch
Essentials book, Learn to Code with
Scratch. While it’s written for Scratch
1.4 on the Raspberry Pi, the projects
should mostly work on 2.0 on the
web as well. You can find the free
PDF, along with other ways to get it,
here: magpi.cc/Scratch-book
to work offline in Scratch 1.4, you can try out the Retro
Converter here: magpi.cc/2dtEUYW.
It’s not perfect, though, so you may need to make
some tweaks once you’ve done the conversion to get
it working properly on the older version of Scratch.
Above This screen will show up during
the upgrade process – just press
ENTER to install Flash
Above Updating your Raspberry Pi is essential
– make sure you do it regularly
48. Tutorial STEP BY STEP
raspberrypi.org/magpi48 November 2016
AQUAPI-CAMExplore the underwater world with a Raspberry Pi camera
here are plenty of underwater sports cameras
available, but they can be quite expensive,
especially if you want to control them remotely.
In this tutorial we’re going to use readily available Pi
add-ons to make a cheaper, customisable camera unit.
There are lots of options and alternative sources of
components for a project like this. For example, the
Pimoroni Enviro pHAT is a really useful option that
can report back information about the environment
in which the camera is operating, especially how
much light is available. There’s a fair bit of software
configuration involved, but example config files are in
the GitHub repo for this article (magpi.cc/2e8dtFk).
T
A transparent,
waterproof box
magpi.cc/
2e8beBX
Pi Camera
Module
Portable power
source
hostapd and
dnsmasq
packages
Python Flask
library
WiFi dongle
(if not using
a Pi 3)
Enviro pHAT
(optional)
magpi.cc/
29NHB3T
ZeroView
(optional)
magpi.cc/
2e89hWt
You’ll
Need
THE HAYLER-GOODALLS
Ozzy, Jasper, and Richard are mentors
at CoderDojo Ham and gave a talk at
the Raspberry Pi birthday party about
their AstroPi adventures.
magpi.cc/1lLmeoi
@rdhayler / coderdojoham.org
STEP-01
Find a suitable container
This needs to be watertight and have at least a see-
through lid. You can find Tupperware boxes with a very
tight seal, but these tend to be translucent rather than
transparent. The size of box will probably determine
your choice of Pi and power source. Zeros are great as
they’re so small, but then you’ll need a WiFi dongle and
shim. You can also save space by using a LiPo battery
instead of a power bank, although you’ll need a boost
regulator too, such as the Pimoroni Zero LiPo.
STEP-02
Configure your Pi to be a WiFi access point
Start from a fresh Raspbian Jessie Lite SD card and
install the following:
sudo apt-get update
sudo apt-get install -y dnsmasq hostapd python3
python3-dev python3-flask python3-picamera
First, configure your wireless interface to have a
static IP address by editing /etc/network/interfaces.
Then set it to not use DHCP by adding this line:
denyinterfaces wlan0
The Zero LiPo board
fits neatly under the
Enviro pHAT
If you use a Pi Zero,
you'll need a USB shim
for the WiFi dongle
49. Tutorial
raspberrypi.org/magpi 49November 2016
AQUAPI-CAM
…to the end of your /etc/dhcpcd.conf file. Next,
create the /etc/hostapd/hostapd.conf file, using the
example in this tutorial’s GitHub repository as
a template. Change the interface, ssid, and
passphrase parameters as needed. Finally, edit /etc/
dnsmasq.conf, ensuring that the IP addresses are
consistent with your settings in
/etc/network/interfaces. Then reboot!
STEP-03
Add the Enviro pHAT
You have the option of soldering this board directly
onto the Pi’s GPIO pins, or you can use the supplied
female header if you want to reuse it in other projects.
After that, install the Python library and dependencies
using the following command:
curl -sS https://get.pimoroni.com/envirophat | bash
The library comes with some example programs
and you should run these to test that everything
is working correctly.
STEP-04
Fit everything into your container
To cut down on reflections and get the best possible
images, the camera should be as close to the
transparent side of your container as possible. The
ZeroView from the Pi Hut is a clever mounting plate
that uses suction cups and will also hold your Pi
securely. Alternatively, you could make a mount
out of cardboard and glue this to the inside of the
container. Velcro tape can be a good solution for
power sources (which normally need to be removable
for recharging).
STEP-05
Add some code, HTML and CSS
Clone the entire Flask folder from the project
repository onto your Pi. Flask is a small web
framework written in Python which allows you to
create simple web services; in this case, it’s a webpage
that allows us to see data from the Enviro pHAT
and the latest captured images. We can also switch
between recording modes (movie or continuous still
frames) or take photos on demand. This control of the
camera is achieved via the excellent Python picamera
library. You could enhance the project by adding
additional exposure and shutter speed controls to
your interface if you want.
STEP-06
Set the code to run at boot
To set the AquaPiCam program to run when the
Pi boots up, add this line to your /etc/rc.local file,
immediately above the exit 0 line:
python3 /home/pi/Flask/apc.py
It’s also a good idea to configure the Pi to only boot
to the command line, using:
sudo raspi-config
…and selecting ‘console’ under option 3.
Now go and find somewhere wet! You might
want to run a few tests in the bath before venturing
further afield!
Above left You'll still have to get pretty close to the water yourself
Above right The web interface shows environmental information
and lets you control the camera
50. Tutorial WALKTHROUGH
raspberrypi.org/magpi50 November 2016
POINTERShe term ‘pointer’ has struck fear into the
heart of many a beginner C programmer, but
once you’ve got your head around them, they
are a very useful feature of the language. They aren’t
actually that complicated in reality.
Remember when we looked at the declaration of
variables? Declaring a variable – telling the compiler
what type it is and what it’s called – before you can
use it is necessary in C, because the declaration
enables the compiler to allocate a block of memory
to store the variable. So for every variable you
declare, there’s a block of memory which is set aside
by the compiler for that variable, and the compiler
remembers which particular block of memory is used
for each variable.
What is a pointer?
A pointer is just the address of a block of memory
with a variable in it – that’s all there is to it. So
if you declare a variable and a pointer to that
variable, you can access the value in that block of
memory in two ways: either with the variable name,
or with the pointer.
Let’s look at a simple example:
#include stdio.h
void main (void)
{
int a;
int *ptr_to_a;
ptr_to_a = a;
a = 5;
printf (The value of a is %dn, a);
*ptr_to_a = 6;
printf (The value of a is %dn, a);
printf (The value of ptr_to_a is
%dn, ptr_to_a);
printf (It stores the value %dn,
*ptr_to_a);
printf (The address of a is %dn,
a);
}
Taking it line by line, the first line is one we’re
already familiar with: we declare an integer variable
called a. But what’s this?
T
AN INTRODUCTION TO C
SIMON LONG
Works for Raspberry Pi as a software
engineer, specialising in user interface
design. In his spare time he writes apps
for the iPhone and solves crosswords.
raspberrypi.org
PART 05
A declaration for a pointer to an
integer variable – in effect, an
address containing an integer
An assignment of a pointer
– initialises the pointer to
point at a specific variable
Pointers: variables have addresses as well as names...
* AND
When first
learning about
pointers, you
may find it
helpful to say
out loud what
a line of code
is doing: an * is
“what is pointed
to by”, and an
is “the address
of”. Once you
have got those
two ideas
fixed in your
head, you’ve
pretty much
understood
pointers!