SlideShare ist ein Scribd-Unternehmen logo
1 von 115
D R G AV I N A S H R A O
F E L L O W I N H A N D &
M I C R O S U R G E RY
S K I M S , S R I N A G A R
PRINCIPLES OF
Microsurgery
 Definition
 Surgery utilizing
magnification and
small, handheld
instruments and
sutures to correct
defects in small &/or
delicate tissues
INTRODUCTION
 Two main purposes of microsurgery are to transplant tissue from one part of
the body to another and to reattach amputated parts.
 It is incorrect to state that microsugery is simply a general term for surgery
requiring an operating microscope
 It is based on the fact that the human hand, by appropriate training, is
capable of performing finer movements than the naked eye is able to see.
 Magnification is a tool to lessen the effects of compromise in treatment
modalities
 The term MICROVASCULAR SURGERY was coined by JACOBSON
 Super Microsurgery is defined as microsurgery in less than 0.8 mm vessels.
Microsurgical techniques include nerve and blood vessel repairs
and grafts, free tissue transfers, limb replantation, and composite
tissue allotransplantation.
Technical expertise, Preoperative planning and Post-Operative
monitoring are also critical in achieving a successful microsurgical
reconstruction.
HISTORY
► 1590- Invention of compound microscope by Zacharia
Janseen
► 1889- First successful end-to-end arterial anastomosis by
Jassinowski in sheep.
► 1897- First vascular anastomosis by J.B.Murphy in
humans
► 1902- End to end anastomosis by 3-stay suture technique by
Alexis Carrel.
► 1965- First digital replantation by Tamai
► 1968- First successful toe to thumb transfer by Cobbett
► Guthrie and Carrel - inclusion of the INTIMA in repair laid the
foundations for standardization of anastomotic techniques.
► 1912 - Carrel – (Nobel Prize in Medicine and Physiology), First
described the technique of placing triangulating sutures to
ensure equal traction on the blood vessels being anastomosed.
► 1968- First free flap in Bombay,India by Antia and Buch (Use of
dermatolipomatous groin flap to fill a facial defect).
► 1970- First completely successful free flap operation in
Oakland,California by Mclean and Buncke.
► 1973- First composite flap (groin flap) by Daniel.
PRINCIPLES OF MICROSURGERY
 As a treatment philosophy, microsurgery incorporates three
important principles:
1.Improvement of motor skills, thereby enhancing surgical ability.
2.An emphasis on passive wound closure with exact primary
apposition of the wound edge.
3.The application of microsurgical instrumentation and suturing to
reduce tissue trauma.
MICROSURGICAL TRIAD
To do a job….you need the right tools
Microsurgery
 Differs from traditional surgery
in:
 Surgeon position
 Magnification
 Specialized
instrumentation
 Suture and needle size
EQUIPMENT FOR MICROSURGERY
 Good quality instruments – prefer own instruments
 Old wornout, battered instruments – not even
suitable for Lab training.
 Spring tension – appropriate.
Weak – closes early – hold the instrument gently with
tips 1-2mm apart and pronate forearm such that
instrument is upside down – falls down.
Firm – fatigue of thumb muscles – hold the instrument
gently closed for 10 min.
Jewellers forceps
 Straight pointed no.3 – non dominant hand for
tissue handling and suture tying.
 Tip precision – 1/1000 = diameter of 10.0
Nylon.
 Jaws should meet over 3mm (not only at tip)–
easy thread pickup
Angled jewellers forceps
 Reaching under vessel, tying knots, doing
patency test.
 Rest same as straight jewellers.
Needle holder
 Round handled, fine, fully curved jaws with a lock.
 Look for open gap at the at the point jaws closes
completely – thread traps.
Vessel dilator
 Modified jewellers forceps
 Slender, smoothly polished, non-tapering tip.
 Used for dilating vessel, counter pressure for
suturing.
Dissecting scissors
 Spring handled with gently curved blades, lightly
round at the tips.
 Rounded tips are important – enable to dissect
closely along a vessel with out perforating it,
Adventitia scissors
 Trimming adventitia off the vessel end.
 A pair of Fine straight, sharp pointed tip
microscissors.
Vessel clamps
 Collection of clamps required.
 One comparatively large sliding approximator clamp with built in
suture holding frame.
 A smaller plain approximator clamp
 Two small single clamps – small gentle jaws.
Larger – 11mm – harmless on vessels between 1.5 and 0.7 mm
diameter
Smaller – 8mm – less closing force for vessels between 1.0 and
0.4mm.
 Clamp applicator forceps.
Closing pressure (gms), area of vessel wall compressed by clamp
(mm2)
 Good clamp – Recommended closing pressure – 5-10gm/mm2 – large
vessels and 15-20 gm/mm2 on smaller vessels.
 For every vessel there will be two suitable clamp sizes – smaller clamp is
recommended to use.
0
2
4
6
8
10
12
B1 B2 B3 HD RD
5gm/mm2
10gm/mm
2
15gm/mm
2
Non microsurgical instruments.
 Autoclavable Instrument case.
 Hemolytic emzyme solution – contact time of 30 min - best to
clean microinstruments.
 Small fine flat jawed pliers – minor adjustments tip of jewellers.
 Instrument demagnetizer – simple hollow electric coil connected
to the regular AC supply – place instrument inside – swith on
current – slowly withdraw till it is 60cm away- then swit
 Sutures – flat bodied microvascular needles on 10.0 nylon. ch
off current.
100 microns needle – basic exercise.
75 microns needle for advanced exercise.
AVOID round bodied needles – difficult to control.
Magnification
 OPERATING MICROSCOPE
 MAGNIFICATION LOUPES-
Microscope
 Zeiss – Good Optics.
 Best focal length for objective lens is 200mm for
normal height, 300mm for very tall persons for better
working position
 Best eyepiece magnification is 12.5X.
 200mm + 12.5X gives magnification range between 4
to 20.
 Full floor column, adjustable supprt arm, foot controls,
inclinable eyepiece – in newer scopes – required.
 Floor mounted / Ceiling mounted / Table mounted /
Portable
Care of microscope
 Clean outer glass surface of eyepiece and objective
lens each time – with lens tissue.
 Cover after use.
 Careful handling while moving.
Optical head has
 Primary surgeon
 Beam splitter
 Assistant surgeon
 Video attachment
OPERATING MICROSCOPE - Features
 Coaxial illumination.
 variable magnification
 motorized continuous zoom
 motorized focus
 motorized X-Y axis
 Foot controls adjust light, magnification, zoom, focus and X-Y
axis
 Allow multiple surgeons
 Floor, table or ceiling mount
 Additional attachments
 Operating Microscope
 magnification from 5-40x
 magnification of 5-20x is generally
sufficient.
 Increased cost and maintenance
 longer surgical setup time
 less intraoperative positioning flexibility
 less portability
 Center the X-Y axis
 Lowest magnification, Zero the fine focus.
 Adjust the gross focus manually
 Adjust the interpupillary distance
 Adjust the chair and table height
 Ensure the surgeons view and the video view are both in focus Verify at the
highest magnification to be used.
 Position all foot pedals where they can be reached
 Microscope pedal goes to the non- dominant foot
 Know Where All The Foot Pedal Controls Are Before Starting Surgery
 When seated, adjust gross focus by hand, not foot pedal.
Prior to surgery
 Surgeon is seated comfortably
 Feet reach the pedals
 Back is straight
 Arms at 90 degrees
 Lean slightly forward
 Arms on armrests
 Hands positioned and supported
 Rest on the ball of the hand or extend 5th finger for support
 Turn off room light and on microscope light
AT THE START OF SURGERY
Adjust table height
Adjust chair height
 Adjust microscope height
Adjust chair arm rest position
Set microscope fine focus to neutral Center X-Y axis
Adjust microscope tilt
Adjust interpupillary distance
Set microscope to highest magnification to be used
Adjust focus of oculars
Ensure video and assistant images are also in focus
Return microscope to low magnification Place foot pedals to be comfortably accessible
PREOP CHECK LIST
Surgeon Position
 Surgical Position
 Seated
 Specialized chairs with
armrests
 Arms resting on armrest
 Essential for fine motor control
 Surgical Position
 Seated
 Specialized chairs with
armrests
 Arms resting on table
or armrest
 Essential for fine motor
control
 Able to adjust height
Positioning of hand
 Arm - Rested, Elbow, Wrist, Ulnar border of
hand on table, forearm supinated a little.
 Three digit grip – IF, THUMB, MF.
 MF – rest firmly on the working surface either
directly or via RF.
PULP TO PULP PINCH
 Instrument Handling
 Delicate, precise
movements
 Finger movements only
 Pencil grip
 Arms on arm rests
 Elbows and wrists
locked
Simple Loupes
 one pair of positive meniscus lenses
 limited by spherical aberration and color fringing
 plastic construction
 fixed interpupillary distance
 very short working distance
 poor surgeon body and arm position
 strain on the surgeon’s neck and back.
 POOR CHOICE
 up to 2.5x magnification
 multiple lenses to offer magnification
and are generally lightweight and less
expensive
 adjustable interpupillary distance
 working distance varies
Galilean Loupes
 up to 8.0x magnification
 ≥5.0x a microscope is preferred
 highest optical quality
 series of lenses and prisms to magnify the subject
 similar in principle to low-power telescopes
 greater magnification
 sharp resolution
 greater depth of field
 heavier and more expensive
Prismatic Loupes
As magnification increases
 they become long and
heavy
 Shallow depth of field
 Head movements
make use difficult
(>5X)
 Provide an improved view of the tissues
of concern
Will vary by tissue of interest
 Allow a comfortable working distance
for the surgeon
Back straight, arms at 90 degrees
 Facilitate adjustment of the
interpupillary distance to suit the
surgeon
 Permit a wide field of view
Magnification – purpose:
AS MAGNIFICATION INCREASES
 The field of view and depth of field decrease
 At 3.5X - field of view is 50mm and depth of field is
2.6mm
 At 20X - field of view is 10mm and depth of field is
0.4mm
 Magnification
 Beginning surgeons should
start with magnification
early as part of their basic
training
 Will improve their tissue
handling and appreciation
for tissue trauma and wound
apposition
FIRST THING FIRST – PRECONDITIONS FOR
SUCCESS
 Uninteruppted Surgical training.
 Adequate sleep.
 Diengage from Clock and Telephone.
 NO MAGIC for success – dedicated Practice – as
Margin of error is measured in thousandths of an
inch.
 If Some thing is wrong – Donot Struggle ON –
Figureout First and then Proceed.
 Avoid Cigarette Smoking, Coffee before Surgery,
Strenous manual exertion like weight lifting / playing
tennis etc (Causes tremors).
 Surgeons must have a plan to achieve the goal, But must also
be adaptable and familiar with more than one technique, so that
obstacles encountered during the surgical procedure may be
overcome.
 Not all surgeries proceed according to the plan.
 We may all travel a different route and method.
 We get there in various ways, BUT…..we all get to the SAME
DESTINATION
Regardless of our individual variations, we
must all follow the BASIC RULES:
 To Use Appropriate Magnification And Instrumentation
 To Be Efficient And Precise
 To Ensure Minimal Tissue Trauma
 To Minimize Surgical Time
 To Obtain Excellent Tissue Wound Apposition With The
Smallest And Most Appropriate Suture Materials
 To Achieve A Successful, Comfortable, Cosmetic Outcome
EXIT PUPIL – OPTICAL AXIS
Exit pupil
 Lies in mid air at short distance of 15mm from eye piece.
 Diameter of exit pupil is 2mm and pupil in normal light
condition is 3mm.
 The exit pupil must sit right in the middle of the hole in iris, that
is pupil – for circular field of vision.
 Movements even by a millimeter changes circular field to
eclipse.
 Position eyepiece at 500 angle to the horizontal for better
longterm comfort. (very tall near to 60, very small near to 40)
Handling needle holder and
suture
 Lift thread with forceps in left hand till the needle dangles and
just rest on surface – rotate thread accordingly to position
needle direction.
 Needle is to be setup at 900 to the needle holder tip.
 Needle tip should point horizontally not up / not down – hold at
the middle of needle.
 Needle holder is held with tip pointing away – towards left for
right handed.
Passing Needle through the
tissue
 Needle should pass perpendicular to tissue surface.
 Evert tissue edge before passing needle – place
forceps underneath, near to the needle placement
and evert tissue – never grab full thickness.
 Needle should come out of the other side
perpendicularly – counter press to the needle is
given from outside side with forceps near the exit
point.
 Width of bite from tissue edge – 3 times the
thickness of needle.
 Pull thread in straight line, drop the needle.
 Short end of thread should be at least 3mm.
Knot tying
 Pick the long thread with left hand forceps.
 Turning it into loop over needle holder.
 Now Picking up short end.
 Completing first half knot
 Then second half knot
 Use third extra half knot also for safety.
 Cut short end first and discard it.
 Then hold long end and cut it after needle come in
view.
 Surgeons knot with a double throw – overcomes
MICROVASCULAR
SURGERY
1. Gentle handling of
tissues
*Avoid grasping the
ends of the vessels to be
anastomosed
*Grasp only a small
quantity of loose
periadventitia
2. ADEQUATE DEBRIDEMENT
► Inspect under high
power for signs of
damage
► Debride until no signs of
vessel damage
► Strong pulsatile flow of blood
after adequate debridement
3.SPASM
► Trauma is blamed for the reason of spasm
► Two main factors for spasm
- cold
- contact of outside wall of vessel with freshly shed blood
RELIEF OF SPASM
► Mechanical dilatation
► Hydrodistention of the vein graft
► Moist gauge soaked in warm saline
► 1% lignocaine spray – contact time 3 min – after dilation wash
with RL
4. SIMILAR DIAMETER OF
VESSELS
Vessels with dissimilar
diameter of upto 50%
can be anastamosed
satisfactorily
► Small vessel is dilated
and divided obliquely
(not >300 to give
adequate symmetry
► When the size
discrepancy is much
greater, an
interposing vein graft
is used
5. TENSION-FREE
ANASTOMOSIS
► Apply an adjustable approximating clamp to bring the vessel
end together for convenient suturing
► Never apply clamp with excess tension
► Avoid any kinking or twisting of the vessels distal to the
anastomosis
► Avoid inverting cut end of vessel wall during anastamosis -
THROMBOGENIC
6. CORRECT SUTURE TENSION
► Not too tight or too loose sutures
► Too tight sutures
Avoided by a
small “suture
circle” at the end
of three ties.
7. APPROPRIATE SUTURE SPACING:
-Goal is to achieve an ultimately leak - free
anastomosis with as few sutures as possible
8. RECHEK OF ANASTOMOSIS:
-All anastomosis are rechecked prior to the final skin
closure
8 CHOICE OF RECIPIENT
VESSELS
► Use of healthy vessel of reasonable size with good outflow is
the key for success
► Pre-operative assessment - caliber and injury during dissection.
► Mobilisation of vessels – for tension free repair.
DISSECTION TECHNIQUES
► Hemostasis – must
*Torniquet
*Vascular clips
*Bipolar coagulator
► Avoid perivascular hematoma
► Irrigation – moisten tissue every few minutes with RL, mop
excess with sponge.
Avoid damage – on dissection
 DONOT - work in a field obscured by blood.
- work out of focus.
- cut when you cant see.
- hold scissors at wrong angle.
- grab full thickness of vessel wall.
 Grab vessel with its outer layer – adventitia
 Divide adhesions b/w adventitia and vessel wall – tease the adventitia before
cutting with round microscissors – to see cut end of tunica media.
 Cauterize any branching of vessel with bipolar at a distance away from main
vessel.
Preparing the vessel ends
 Get the blood out – RL Flushes
 Remove the adventitia – to see media.
 Dilate vessel ends – relieve spasm. And to
handle
easily during repair.
This will determine the quality of anastamosis to
a larger extent
Background –
1mm Grid Lines - Provides an accurate measuring tool for the
surgeon
Available in Blue, Green or Yellow - Best contrast
Non-Reflective Surface - Eliminates glare from OR lighting
Radiopaque Silicone Material - Can be seen under X-Ray if
needed
TECHNIQUE OF ANASTOMOSIS
-
1.Resection to normal
vessels:
Resect proximal to areas
with microscopic signs of
vessel damage with fine,
straight, sharp scissors in
a single motion
Demonstration of forward pulsatile flow prior to clamping
2. Clamping of vessels:
-With double approximating
clamp leaving generous length
of vessel end for ease of
working
-Tips of the jaws should project
just beyond the vessel for
maximal grip
Incorrect vertical position
Incorrect horizontal position
3. Positioning: -Correct position of the clamp is
horizontal and parallel to the operator
4. Final Preparation of vessel
ends:
nd
► Resect sufficient periadventitia,
flush with the underlying vessel
to expose 2-3 mm of the vessel
wall for suturing
► If the lumen is small
or in spasm, gently
dilate it with vessel
dilator
dr sumer yadav (mch nd nstructive
► Irrigate the lumen with
solution of heparinized
saline (1000 units per 100
ml).
5. SUTURING
► End to end / End to side - depending on type of anastamosis
► Full thickness of wall
► Size of the suture material – 10.0 Nylon
► Number of sutures – 8 stiches for 0.7 – 2 mm vessel diameter
sufficient
► Distance between sutures – equidistant – good enough to
prevent leak.
► Arteries- more sutures than veins
► Pass the needle at right angles to the wall at a distance from
the margin slightly greater( 1-2 times for arteries, 2-3 times
for veins) than the thickness of the vessel wall
► Make sure that the posterior wall is not accidentally cought
► For last 2-3 sutures: Modified Harashina technique
► For thick walled arteries
and large diameter
collapsible veins- use
180 degree halving
method ( first suture at
150 degree position and
second suture at -30
degree
For thin walled vessels,
use 120 degree
triangulating method for
key sutures (First suture
at 150 degree position
and second suture at
+30 degree position)
6.RELEASE OF CLAMPS
► The distal clamp is released first
► If any major leak, reapply the clamp, irrigate and insert
additional superficial thickness sutures
► Now release both the clamps- usually small amount of blood
leaks from anastomosis, but stops after a few min. with the
application of sponges
VENOUS ANASTOMOSIS
► Veins are thinner, flatter and more difficult to anastomose
► Use ringer’s solution to float or irrigate the vessel
► Deeper bites
► More sutures
ALTERNATIVE ANASTOMOSIS
TECHNIQUES
1. BACK-WALL FIRST (ONE-
WAY UP) TECHNIQUE
-This technique is safest
because the entire inside of
the anastomosis can be
visualized until the very last
few sutures are placed
2. FLIPPING TECHNIQUE
When free flap, digit or vein graft is fixed fo mobile vessel, it can
be flipped to expose the back-wall for repair, as rotation is not
possible
3. CONTINUOUS SUTURING
► Acceptable patency rates ( 92% for arteries, 84% for veins)
comparable with interrupted sutures
► Advantages: Quicker and more hemostatic
► Disadvantages:
* Potential for creating purse-string constriction at the site of
anastomosis
* Entrapment of the suture material in the clamp
* Breakage of the suture
► So less favourable
4. SLEEVE ANASTOMOSIS
► Microanastomosis of
vessels in 1 mm external
diameter range can be
accomplished by means of
invaginating technique
with fewer sutures than the
end to end method of
closure
► Advantages:
- Quicker
- Less intraluminal suture exposure
- Less vessel trauma owing to fewer sutures
► Disadvantages:
- Patency rate is significantly less than that achieved
by the conventional end to end method, so it is not
superior in clinical situations
END TO SIDE ANASTOMOSIS
► Indications:
*To preserve patency of the recipient vessel in lower
limb,esp. in elderly patients, where sacrifice of a major
vessel can have a serious effect on the distal blood flow
*Considerable size or wall thickness, mismatch between
the vessels
Steps of end to side anastomosis
► Advantages:
- Search for recipient arteries is simplified
- No. of possible sites to which free flaps can be transferred
is greatly increased
Signs of Patency
 Expansile pulsations – increase and decrease in diameter of
vessel distally with each pulsation – patent
 Wriggling – change in curvature of vessel distally with each
beat – patent
 Longitudinal pulsations – conentrared over particular point –
along long axis – hammering against a partial / complete block
 False wriggling can be seen with longitudinal pulsations – lift
anastamotic site with suture thread.
PATENCY
► Return of colour
► Capillary oozing and venous bleeding from the
revascularized tissue
► Direct inspection under the microscope
► Uplift test & Empty and Refill test
Uplift test
Empty & Refill
test
► This is traumatic and is performed as gently and infrequently as
possible
Modified Uplift test – Vein
patency
 Curved forceps beneath vein distal to anastamosis – lift it up till
occluded – move it along proximal in downstream direction –
going past anastamotic site.
 Patent – vessel fills up behind moving instrument.
 Blocked – distally dilated with negative filling test & with time
blood in vein becomes dark.
Practical points on blood.
 Undamaged vessel wall secretes anticoagulants – so
uncontaminated blood in undamaged vessel remain liquid for several
hours.
 Blood inside a vessel will not clot unless – the vessel is damaged /
blood contaminated with thromboplastins
 Blood that is in open contact with the wound should never be allowed
to stand still in a vessel unless heparinized irrigation fluid is present.
 Wise to leave the vessel alone and run for 20 min – after dissection &
20 min after anastamosis.
ANASTOMOTIC FAILURE
A) TECHNICAL ERRORS:
1. Tearing
2. Leaking
3. Narrowing
4. Through-stitching
5. Inclusion of adventitia
B) Poor flow from proximal vessel due to undetected damage
more proximally or vasospasm
C) A clot or thrombus at the anastomotic site or in an area where
a clamp was applied
-
Damage to endothelium from
+ Excessive clamp pressure
+ Poor technique or
+ Contamination
 Prevention:
+ Flushing of the suture line with heparinized solution
+ Systemic heparin (40 u/kg before completion of anastomosis
and release of clamps)
REVISION OF THE FAILED
ANASTOMOSIS
► If the patency test reveals slow filling of the distal vessel,
revise the anastomosis, carefully keeping original
problem in mind
► Insert a vein graft, if the vessel length is insufficient
*Poor proximal flow that does not respond to local vasodilator
and warming may require:
Proximal exploration of the vessel
Dilatation along a proximal length of vessel sufficient to relieve
vasospasm
FACTORS INFLUENCING
FAILURE OF
ANASTOMOSIS
A. TECHNICAL:
► Both walls sutured together
► Traumatic vessel handling
► Apposition of vessel edges
► Disproportional vessel size
► Tension at suture line
► Excessive clamp pressure
► Kinking of vessels
B. REPERFUSION FAILURE:
► Blood turbulence
► Spasm
► Hypercoagulability
► Acidosis
► Cold
► Hypovolemia
► Vasoconstrictors
C. POSTOPERATIVE CARE:
► Infection
► Acidosis
► Cold
► Limb position
► Environmental factors
POST-OPERATIVE MEASURES
► Oxygen administation
► Bed rest or limited movements for 3 to 5 days
► Warm room
► Limb elevation to decrease the venous congestion
► Fluid administration
► Pharmaotherapy – anticoagulants
► Adequate analgesia
► Limitation of visitors and telephone calls to decrease the
emotional stress
► Prohibition of smoking, caffeine and chocolate
because they may cause vasoconstriction
Principles of Microsurgery

Weitere ähnliche Inhalte

Was ist angesagt? (20)

laparoscopic suturing
laparoscopic suturinglaparoscopic suturing
laparoscopic suturing
 
Electrosurgery.ppt
Electrosurgery.pptElectrosurgery.ppt
Electrosurgery.ppt
 
Concept laparoscopic surgery
Concept laparoscopic surgeryConcept laparoscopic surgery
Concept laparoscopic surgery
 
Anterolateral thigh flap
Anterolateral thigh flap Anterolateral thigh flap
Anterolateral thigh flap
 
Flaps in plastic surgery
Flaps in plastic surgeryFlaps in plastic surgery
Flaps in plastic surgery
 
Types of mesh & complications
Types of mesh & complicationsTypes of mesh & complications
Types of mesh & complications
 
Presentation microsurgery
Presentation microsurgeryPresentation microsurgery
Presentation microsurgery
 
Latissimus dorsi free flap
Latissimus dorsi free flapLatissimus dorsi free flap
Latissimus dorsi free flap
 
Staplers in Surgery
Staplers in SurgeryStaplers in Surgery
Staplers in Surgery
 
Diathermy - Electrocautery
Diathermy - ElectrocauteryDiathermy - Electrocautery
Diathermy - Electrocautery
 
Flaps in surgery
Flaps in surgeryFlaps in surgery
Flaps in surgery
 
Surgical diathermy
Surgical diathermySurgical diathermy
Surgical diathermy
 
Lasers in surgery
Lasers in surgeryLasers in surgery
Lasers in surgery
 
reduction mammoplasty
reduction mammoplastyreduction mammoplasty
reduction mammoplasty
 
Reduction mammoplasty
Reduction mammoplastyReduction mammoplasty
Reduction mammoplasty
 
Lower limb-flaps
Lower limb-flapsLower limb-flaps
Lower limb-flaps
 
Skin substitutes
Skin substitutesSkin substitutes
Skin substitutes
 
Antero Lateral thigh flap
Antero Lateral thigh flapAntero Lateral thigh flap
Antero Lateral thigh flap
 
Use of Staplers in surgery
Use of Staplers in surgeryUse of Staplers in surgery
Use of Staplers in surgery
 
Scapular flap
Scapular flapScapular flap
Scapular flap
 

Ähnlich wie Principles of Microsurgery

Laparoscopic instruments and Ergonomics
Laparoscopic instruments and ErgonomicsLaparoscopic instruments and Ergonomics
Laparoscopic instruments and ErgonomicsDr Mubashir Bashir
 
"PERIODONTAL - MICROSURGERY"
"PERIODONTAL - MICROSURGERY""PERIODONTAL - MICROSURGERY"
"PERIODONTAL - MICROSURGERY"Dr.Pradnya Wagh
 
General principles of arthroscopy kle, belgaum, dr utkarsh dwivedi
General principles of arthroscopy kle, belgaum, dr utkarsh dwivediGeneral principles of arthroscopy kle, belgaum, dr utkarsh dwivedi
General principles of arthroscopy kle, belgaum, dr utkarsh dwivediUtkarsh Dwivedi
 
dental operating microscope.ppt
dental operating microscope.pptdental operating microscope.ppt
dental operating microscope.pptRoopaBabannavar1
 
arthroscopy principles priyank
arthroscopy principles priyankarthroscopy principles priyank
arthroscopy principles priyankDr Khushbu
 
PRINCIPLE OF ARTHROSCOPY n.pptx Dr Ashish pargaie Orthopaedic resident Aiims ...
PRINCIPLE OF ARTHROSCOPY n.pptx Dr Ashish pargaie Orthopaedic resident Aiims ...PRINCIPLE OF ARTHROSCOPY n.pptx Dr Ashish pargaie Orthopaedic resident Aiims ...
PRINCIPLE OF ARTHROSCOPY n.pptx Dr Ashish pargaie Orthopaedic resident Aiims ...ashishpargaie
 
PRINCIPLE OF ARTHROSCOPY n.pptx
PRINCIPLE OF ARTHROSCOPY n.pptxPRINCIPLE OF ARTHROSCOPY n.pptx
PRINCIPLE OF ARTHROSCOPY n.pptxashishpargaie
 
Minimally invasive gastrointestinal and bariartic surgeries
Minimally invasive gastrointestinal and bariartic surgeriesMinimally invasive gastrointestinal and bariartic surgeries
Minimally invasive gastrointestinal and bariartic surgeriesAayush Rai
 
BASICS OF LAPAROSCOPY IN GYNAECOLGY
BASICS OF LAPAROSCOPY IN GYNAECOLGYBASICS OF LAPAROSCOPY IN GYNAECOLGY
BASICS OF LAPAROSCOPY IN GYNAECOLGYNeha Sharma
 
BASICS OF LAPAROSCOPY IN GYNAECOLGY
BASICS OF LAPAROSCOPY IN GYNAECOLGYBASICS OF LAPAROSCOPY IN GYNAECOLGY
BASICS OF LAPAROSCOPY IN GYNAECOLGYNeha Sharma
 
Minimal access surgery
Minimal access surgeryMinimal access surgery
Minimal access surgeryAjayKumar4497
 
periodontal Surgical instrument and magnification loupes
  periodontal Surgical instrument and magnification loupes   periodontal Surgical instrument and magnification loupes
periodontal Surgical instrument and magnification loupes Mohammed Abo-AL-Naga
 
Periodontal microsurgery
Periodontal microsurgeryPeriodontal microsurgery
Periodontal microsurgeryNiharika Sowki
 
Basics of laparoscopy by Dr.Mohsin Khan
Basics of laparoscopy by Dr.Mohsin KhanBasics of laparoscopy by Dr.Mohsin Khan
Basics of laparoscopy by Dr.Mohsin KhanDr.Mohsin Khan
 
B.Sc RADIOLOGY QUESTION AND ANSWER BANK - POSITIONING
B.Sc RADIOLOGY QUESTION AND ANSWER BANK - POSITIONING B.Sc RADIOLOGY QUESTION AND ANSWER BANK - POSITIONING
B.Sc RADIOLOGY QUESTION AND ANSWER BANK - POSITIONING Ganesan Yogananthem
 
Immobilisation in Radiotherapy
Immobilisation in RadiotherapyImmobilisation in Radiotherapy
Immobilisation in RadiotherapyYamini Baviskar
 

Ähnlich wie Principles of Microsurgery (20)

Laparoscopic instruments and Ergonomics
Laparoscopic instruments and ErgonomicsLaparoscopic instruments and Ergonomics
Laparoscopic instruments and Ergonomics
 
"PERIODONTAL - MICROSURGERY"
"PERIODONTAL - MICROSURGERY""PERIODONTAL - MICROSURGERY"
"PERIODONTAL - MICROSURGERY"
 
Periodontal microsurgery
Periodontal microsurgeryPeriodontal microsurgery
Periodontal microsurgery
 
General principles of arthroscopy kle, belgaum, dr utkarsh dwivedi
General principles of arthroscopy kle, belgaum, dr utkarsh dwivediGeneral principles of arthroscopy kle, belgaum, dr utkarsh dwivedi
General principles of arthroscopy kle, belgaum, dr utkarsh dwivedi
 
dental operating microscope.ppt
dental operating microscope.pptdental operating microscope.ppt
dental operating microscope.ppt
 
arthroscopy principles priyank
arthroscopy principles priyankarthroscopy principles priyank
arthroscopy principles priyank
 
PRINCIPLE OF ARTHROSCOPY n.pptx Dr Ashish pargaie Orthopaedic resident Aiims ...
PRINCIPLE OF ARTHROSCOPY n.pptx Dr Ashish pargaie Orthopaedic resident Aiims ...PRINCIPLE OF ARTHROSCOPY n.pptx Dr Ashish pargaie Orthopaedic resident Aiims ...
PRINCIPLE OF ARTHROSCOPY n.pptx Dr Ashish pargaie Orthopaedic resident Aiims ...
 
PRINCIPLE OF ARTHROSCOPY n.pptx
PRINCIPLE OF ARTHROSCOPY n.pptxPRINCIPLE OF ARTHROSCOPY n.pptx
PRINCIPLE OF ARTHROSCOPY n.pptx
 
Periodontal microsurgery
Periodontal microsurgeryPeriodontal microsurgery
Periodontal microsurgery
 
Basics of arthroscopy ppt
Basics of arthroscopy pptBasics of arthroscopy ppt
Basics of arthroscopy ppt
 
Microsurgery
MicrosurgeryMicrosurgery
Microsurgery
 
Minimally invasive gastrointestinal and bariartic surgeries
Minimally invasive gastrointestinal and bariartic surgeriesMinimally invasive gastrointestinal and bariartic surgeries
Minimally invasive gastrointestinal and bariartic surgeries
 
BASICS OF LAPAROSCOPY IN GYNAECOLGY
BASICS OF LAPAROSCOPY IN GYNAECOLGYBASICS OF LAPAROSCOPY IN GYNAECOLGY
BASICS OF LAPAROSCOPY IN GYNAECOLGY
 
BASICS OF LAPAROSCOPY IN GYNAECOLGY
BASICS OF LAPAROSCOPY IN GYNAECOLGYBASICS OF LAPAROSCOPY IN GYNAECOLGY
BASICS OF LAPAROSCOPY IN GYNAECOLGY
 
Minimal access surgery
Minimal access surgeryMinimal access surgery
Minimal access surgery
 
periodontal Surgical instrument and magnification loupes
  periodontal Surgical instrument and magnification loupes   periodontal Surgical instrument and magnification loupes
periodontal Surgical instrument and magnification loupes
 
Periodontal microsurgery
Periodontal microsurgeryPeriodontal microsurgery
Periodontal microsurgery
 
Basics of laparoscopy by Dr.Mohsin Khan
Basics of laparoscopy by Dr.Mohsin KhanBasics of laparoscopy by Dr.Mohsin Khan
Basics of laparoscopy by Dr.Mohsin Khan
 
B.Sc RADIOLOGY QUESTION AND ANSWER BANK - POSITIONING
B.Sc RADIOLOGY QUESTION AND ANSWER BANK - POSITIONING B.Sc RADIOLOGY QUESTION AND ANSWER BANK - POSITIONING
B.Sc RADIOLOGY QUESTION AND ANSWER BANK - POSITIONING
 
Immobilisation in Radiotherapy
Immobilisation in RadiotherapyImmobilisation in Radiotherapy
Immobilisation in Radiotherapy
 

Mehr von Umar Farooq Baba

Mehr von Umar Farooq Baba (9)

Scalp defects
Scalp defectsScalp defects
Scalp defects
 
Chemical burns
Chemical burnsChemical burns
Chemical burns
 
SCIP Flap -Dr Junaid Khurshid
SCIP Flap -Dr Junaid Khurshid SCIP Flap -Dr Junaid Khurshid
SCIP Flap -Dr Junaid Khurshid
 
Carpal Tunnel Syndrome- Dr G .Avinash Rao
Carpal Tunnel Syndrome- Dr G .Avinash RaoCarpal Tunnel Syndrome- Dr G .Avinash Rao
Carpal Tunnel Syndrome- Dr G .Avinash Rao
 
Radial Forearm Flap
Radial Forearm  Flap Radial Forearm  Flap
Radial Forearm Flap
 
Tongue Flaps
Tongue FlapsTongue Flaps
Tongue Flaps
 
Carpal Tunnel Syndrome
Carpal Tunnel SyndromeCarpal Tunnel Syndrome
Carpal Tunnel Syndrome
 
Cartilage grafts
Cartilage graftsCartilage grafts
Cartilage grafts
 
Ok's operative techniques inn burn management
Ok's operative techniques inn burn managementOk's operative techniques inn burn management
Ok's operative techniques inn burn management
 

Kürzlich hochgeladen

Unit 3 Emotional Intelligence and Spiritual Intelligence.pdf
Unit 3 Emotional Intelligence and Spiritual Intelligence.pdfUnit 3 Emotional Intelligence and Spiritual Intelligence.pdf
Unit 3 Emotional Intelligence and Spiritual Intelligence.pdfDr Vijay Vishwakarma
 
Tatlong Kwento ni Lola basyang-1.pdf arts
Tatlong Kwento ni Lola basyang-1.pdf artsTatlong Kwento ni Lola basyang-1.pdf arts
Tatlong Kwento ni Lola basyang-1.pdf artsNbelano25
 
UGC NET Paper 1 Mathematical Reasoning & Aptitude.pdf
UGC NET Paper 1 Mathematical Reasoning & Aptitude.pdfUGC NET Paper 1 Mathematical Reasoning & Aptitude.pdf
UGC NET Paper 1 Mathematical Reasoning & Aptitude.pdfNirmal Dwivedi
 
This PowerPoint helps students to consider the concept of infinity.
This PowerPoint helps students to consider the concept of infinity.This PowerPoint helps students to consider the concept of infinity.
This PowerPoint helps students to consider the concept of infinity.christianmathematics
 
How to Create and Manage Wizard in Odoo 17
How to Create and Manage Wizard in Odoo 17How to Create and Manage Wizard in Odoo 17
How to Create and Manage Wizard in Odoo 17Celine George
 
Philosophy of china and it's charactistics
Philosophy of china and it's charactisticsPhilosophy of china and it's charactistics
Philosophy of china and it's charactisticshameyhk98
 
How to Manage Global Discount in Odoo 17 POS
How to Manage Global Discount in Odoo 17 POSHow to Manage Global Discount in Odoo 17 POS
How to Manage Global Discount in Odoo 17 POSCeline George
 
latest AZ-104 Exam Questions and Answers
latest AZ-104 Exam Questions and Answerslatest AZ-104 Exam Questions and Answers
latest AZ-104 Exam Questions and Answersdalebeck957
 
ICT Role in 21st Century Education & its Challenges.pptx
ICT Role in 21st Century Education & its Challenges.pptxICT Role in 21st Century Education & its Challenges.pptx
ICT Role in 21st Century Education & its Challenges.pptxAreebaZafar22
 
80 ĐỀ THI THỬ TUYỂN SINH TIẾNG ANH VÀO 10 SỞ GD – ĐT THÀNH PHỐ HỒ CHÍ MINH NĂ...
80 ĐỀ THI THỬ TUYỂN SINH TIẾNG ANH VÀO 10 SỞ GD – ĐT THÀNH PHỐ HỒ CHÍ MINH NĂ...80 ĐỀ THI THỬ TUYỂN SINH TIẾNG ANH VÀO 10 SỞ GD – ĐT THÀNH PHỐ HỒ CHÍ MINH NĂ...
80 ĐỀ THI THỬ TUYỂN SINH TIẾNG ANH VÀO 10 SỞ GD – ĐT THÀNH PHỐ HỒ CHÍ MINH NĂ...Nguyen Thanh Tu Collection
 
Accessible Digital Futures project (20/03/2024)
Accessible Digital Futures project (20/03/2024)Accessible Digital Futures project (20/03/2024)
Accessible Digital Futures project (20/03/2024)Jisc
 
Beyond_Borders_Understanding_Anime_and_Manga_Fandom_A_Comprehensive_Audience_...
Beyond_Borders_Understanding_Anime_and_Manga_Fandom_A_Comprehensive_Audience_...Beyond_Borders_Understanding_Anime_and_Manga_Fandom_A_Comprehensive_Audience_...
Beyond_Borders_Understanding_Anime_and_Manga_Fandom_A_Comprehensive_Audience_...Pooja Bhuva
 
ICT role in 21st century education and it's challenges.
ICT role in 21st century education and it's challenges.ICT role in 21st century education and it's challenges.
ICT role in 21st century education and it's challenges.MaryamAhmad92
 
SOC 101 Demonstration of Learning Presentation
SOC 101 Demonstration of Learning PresentationSOC 101 Demonstration of Learning Presentation
SOC 101 Demonstration of Learning Presentationcamerronhm
 
Sociology 101 Demonstration of Learning Exhibit
Sociology 101 Demonstration of Learning ExhibitSociology 101 Demonstration of Learning Exhibit
Sociology 101 Demonstration of Learning Exhibitjbellavia9
 
On_Translating_a_Tamil_Poem_by_A_K_Ramanujan.pptx
On_Translating_a_Tamil_Poem_by_A_K_Ramanujan.pptxOn_Translating_a_Tamil_Poem_by_A_K_Ramanujan.pptx
On_Translating_a_Tamil_Poem_by_A_K_Ramanujan.pptxPooja Bhuva
 
Single or Multiple melodic lines structure
Single or Multiple melodic lines structureSingle or Multiple melodic lines structure
Single or Multiple melodic lines structuredhanjurrannsibayan2
 
Graduate Outcomes Presentation Slides - English
Graduate Outcomes Presentation Slides - EnglishGraduate Outcomes Presentation Slides - English
Graduate Outcomes Presentation Slides - Englishneillewis46
 
Basic Civil Engineering first year Notes- Chapter 4 Building.pptx
Basic Civil Engineering first year Notes- Chapter 4 Building.pptxBasic Civil Engineering first year Notes- Chapter 4 Building.pptx
Basic Civil Engineering first year Notes- Chapter 4 Building.pptxDenish Jangid
 
Google Gemini An AI Revolution in Education.pptx
Google Gemini An AI Revolution in Education.pptxGoogle Gemini An AI Revolution in Education.pptx
Google Gemini An AI Revolution in Education.pptxDr. Sarita Anand
 

Kürzlich hochgeladen (20)

Unit 3 Emotional Intelligence and Spiritual Intelligence.pdf
Unit 3 Emotional Intelligence and Spiritual Intelligence.pdfUnit 3 Emotional Intelligence and Spiritual Intelligence.pdf
Unit 3 Emotional Intelligence and Spiritual Intelligence.pdf
 
Tatlong Kwento ni Lola basyang-1.pdf arts
Tatlong Kwento ni Lola basyang-1.pdf artsTatlong Kwento ni Lola basyang-1.pdf arts
Tatlong Kwento ni Lola basyang-1.pdf arts
 
UGC NET Paper 1 Mathematical Reasoning & Aptitude.pdf
UGC NET Paper 1 Mathematical Reasoning & Aptitude.pdfUGC NET Paper 1 Mathematical Reasoning & Aptitude.pdf
UGC NET Paper 1 Mathematical Reasoning & Aptitude.pdf
 
This PowerPoint helps students to consider the concept of infinity.
This PowerPoint helps students to consider the concept of infinity.This PowerPoint helps students to consider the concept of infinity.
This PowerPoint helps students to consider the concept of infinity.
 
How to Create and Manage Wizard in Odoo 17
How to Create and Manage Wizard in Odoo 17How to Create and Manage Wizard in Odoo 17
How to Create and Manage Wizard in Odoo 17
 
Philosophy of china and it's charactistics
Philosophy of china and it's charactisticsPhilosophy of china and it's charactistics
Philosophy of china and it's charactistics
 
How to Manage Global Discount in Odoo 17 POS
How to Manage Global Discount in Odoo 17 POSHow to Manage Global Discount in Odoo 17 POS
How to Manage Global Discount in Odoo 17 POS
 
latest AZ-104 Exam Questions and Answers
latest AZ-104 Exam Questions and Answerslatest AZ-104 Exam Questions and Answers
latest AZ-104 Exam Questions and Answers
 
ICT Role in 21st Century Education & its Challenges.pptx
ICT Role in 21st Century Education & its Challenges.pptxICT Role in 21st Century Education & its Challenges.pptx
ICT Role in 21st Century Education & its Challenges.pptx
 
80 ĐỀ THI THỬ TUYỂN SINH TIẾNG ANH VÀO 10 SỞ GD – ĐT THÀNH PHỐ HỒ CHÍ MINH NĂ...
80 ĐỀ THI THỬ TUYỂN SINH TIẾNG ANH VÀO 10 SỞ GD – ĐT THÀNH PHỐ HỒ CHÍ MINH NĂ...80 ĐỀ THI THỬ TUYỂN SINH TIẾNG ANH VÀO 10 SỞ GD – ĐT THÀNH PHỐ HỒ CHÍ MINH NĂ...
80 ĐỀ THI THỬ TUYỂN SINH TIẾNG ANH VÀO 10 SỞ GD – ĐT THÀNH PHỐ HỒ CHÍ MINH NĂ...
 
Accessible Digital Futures project (20/03/2024)
Accessible Digital Futures project (20/03/2024)Accessible Digital Futures project (20/03/2024)
Accessible Digital Futures project (20/03/2024)
 
Beyond_Borders_Understanding_Anime_and_Manga_Fandom_A_Comprehensive_Audience_...
Beyond_Borders_Understanding_Anime_and_Manga_Fandom_A_Comprehensive_Audience_...Beyond_Borders_Understanding_Anime_and_Manga_Fandom_A_Comprehensive_Audience_...
Beyond_Borders_Understanding_Anime_and_Manga_Fandom_A_Comprehensive_Audience_...
 
ICT role in 21st century education and it's challenges.
ICT role in 21st century education and it's challenges.ICT role in 21st century education and it's challenges.
ICT role in 21st century education and it's challenges.
 
SOC 101 Demonstration of Learning Presentation
SOC 101 Demonstration of Learning PresentationSOC 101 Demonstration of Learning Presentation
SOC 101 Demonstration of Learning Presentation
 
Sociology 101 Demonstration of Learning Exhibit
Sociology 101 Demonstration of Learning ExhibitSociology 101 Demonstration of Learning Exhibit
Sociology 101 Demonstration of Learning Exhibit
 
On_Translating_a_Tamil_Poem_by_A_K_Ramanujan.pptx
On_Translating_a_Tamil_Poem_by_A_K_Ramanujan.pptxOn_Translating_a_Tamil_Poem_by_A_K_Ramanujan.pptx
On_Translating_a_Tamil_Poem_by_A_K_Ramanujan.pptx
 
Single or Multiple melodic lines structure
Single or Multiple melodic lines structureSingle or Multiple melodic lines structure
Single or Multiple melodic lines structure
 
Graduate Outcomes Presentation Slides - English
Graduate Outcomes Presentation Slides - EnglishGraduate Outcomes Presentation Slides - English
Graduate Outcomes Presentation Slides - English
 
Basic Civil Engineering first year Notes- Chapter 4 Building.pptx
Basic Civil Engineering first year Notes- Chapter 4 Building.pptxBasic Civil Engineering first year Notes- Chapter 4 Building.pptx
Basic Civil Engineering first year Notes- Chapter 4 Building.pptx
 
Google Gemini An AI Revolution in Education.pptx
Google Gemini An AI Revolution in Education.pptxGoogle Gemini An AI Revolution in Education.pptx
Google Gemini An AI Revolution in Education.pptx
 

Principles of Microsurgery

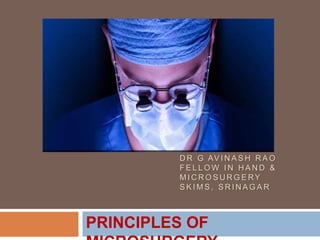
  • 1. D R G AV I N A S H R A O F E L L O W I N H A N D & M I C R O S U R G E RY S K I M S , S R I N A G A R PRINCIPLES OF
  • 2. Microsurgery  Definition  Surgery utilizing magnification and small, handheld instruments and sutures to correct defects in small &/or delicate tissues
  • 3. INTRODUCTION  Two main purposes of microsurgery are to transplant tissue from one part of the body to another and to reattach amputated parts.  It is incorrect to state that microsugery is simply a general term for surgery requiring an operating microscope  It is based on the fact that the human hand, by appropriate training, is capable of performing finer movements than the naked eye is able to see.  Magnification is a tool to lessen the effects of compromise in treatment modalities  The term MICROVASCULAR SURGERY was coined by JACOBSON  Super Microsurgery is defined as microsurgery in less than 0.8 mm vessels.
  • 4. Microsurgical techniques include nerve and blood vessel repairs and grafts, free tissue transfers, limb replantation, and composite tissue allotransplantation. Technical expertise, Preoperative planning and Post-Operative monitoring are also critical in achieving a successful microsurgical reconstruction.
  • 5. HISTORY ► 1590- Invention of compound microscope by Zacharia Janseen ► 1889- First successful end-to-end arterial anastomosis by Jassinowski in sheep. ► 1897- First vascular anastomosis by J.B.Murphy in humans ► 1902- End to end anastomosis by 3-stay suture technique by Alexis Carrel. ► 1965- First digital replantation by Tamai ► 1968- First successful toe to thumb transfer by Cobbett
  • 6. ► Guthrie and Carrel - inclusion of the INTIMA in repair laid the foundations for standardization of anastomotic techniques. ► 1912 - Carrel – (Nobel Prize in Medicine and Physiology), First described the technique of placing triangulating sutures to ensure equal traction on the blood vessels being anastomosed. ► 1968- First free flap in Bombay,India by Antia and Buch (Use of dermatolipomatous groin flap to fill a facial defect). ► 1970- First completely successful free flap operation in Oakland,California by Mclean and Buncke. ► 1973- First composite flap (groin flap) by Daniel.
  • 7. PRINCIPLES OF MICROSURGERY  As a treatment philosophy, microsurgery incorporates three important principles: 1.Improvement of motor skills, thereby enhancing surgical ability. 2.An emphasis on passive wound closure with exact primary apposition of the wound edge. 3.The application of microsurgical instrumentation and suturing to reduce tissue trauma.
  • 9. To do a job….you need the right tools
  • 10. Microsurgery  Differs from traditional surgery in:  Surgeon position  Magnification  Specialized instrumentation  Suture and needle size
  • 11. EQUIPMENT FOR MICROSURGERY  Good quality instruments – prefer own instruments  Old wornout, battered instruments – not even suitable for Lab training.  Spring tension – appropriate. Weak – closes early – hold the instrument gently with tips 1-2mm apart and pronate forearm such that instrument is upside down – falls down. Firm – fatigue of thumb muscles – hold the instrument gently closed for 10 min.
  • 12.
  • 13. Jewellers forceps  Straight pointed no.3 – non dominant hand for tissue handling and suture tying.  Tip precision – 1/1000 = diameter of 10.0 Nylon.  Jaws should meet over 3mm (not only at tip)– easy thread pickup
  • 14. Angled jewellers forceps  Reaching under vessel, tying knots, doing patency test.  Rest same as straight jewellers.
  • 15. Needle holder  Round handled, fine, fully curved jaws with a lock.  Look for open gap at the at the point jaws closes completely – thread traps.
  • 16.
  • 17. Vessel dilator  Modified jewellers forceps  Slender, smoothly polished, non-tapering tip.  Used for dilating vessel, counter pressure for suturing.
  • 18. Dissecting scissors  Spring handled with gently curved blades, lightly round at the tips.  Rounded tips are important – enable to dissect closely along a vessel with out perforating it,
  • 19. Adventitia scissors  Trimming adventitia off the vessel end.  A pair of Fine straight, sharp pointed tip microscissors.
  • 20. Vessel clamps  Collection of clamps required.  One comparatively large sliding approximator clamp with built in suture holding frame.  A smaller plain approximator clamp  Two small single clamps – small gentle jaws. Larger – 11mm – harmless on vessels between 1.5 and 0.7 mm diameter Smaller – 8mm – less closing force for vessels between 1.0 and 0.4mm.  Clamp applicator forceps.
  • 21. Closing pressure (gms), area of vessel wall compressed by clamp (mm2)  Good clamp – Recommended closing pressure – 5-10gm/mm2 – large vessels and 15-20 gm/mm2 on smaller vessels.  For every vessel there will be two suitable clamp sizes – smaller clamp is recommended to use. 0 2 4 6 8 10 12 B1 B2 B3 HD RD 5gm/mm2 10gm/mm 2 15gm/mm 2
  • 22. Non microsurgical instruments.  Autoclavable Instrument case.  Hemolytic emzyme solution – contact time of 30 min - best to clean microinstruments.  Small fine flat jawed pliers – minor adjustments tip of jewellers.  Instrument demagnetizer – simple hollow electric coil connected to the regular AC supply – place instrument inside – swith on current – slowly withdraw till it is 60cm away- then swit  Sutures – flat bodied microvascular needles on 10.0 nylon. ch off current. 100 microns needle – basic exercise. 75 microns needle for advanced exercise. AVOID round bodied needles – difficult to control.
  • 24. Microscope  Zeiss – Good Optics.  Best focal length for objective lens is 200mm for normal height, 300mm for very tall persons for better working position  Best eyepiece magnification is 12.5X.  200mm + 12.5X gives magnification range between 4 to 20.  Full floor column, adjustable supprt arm, foot controls, inclinable eyepiece – in newer scopes – required.  Floor mounted / Ceiling mounted / Table mounted / Portable
  • 25. Care of microscope  Clean outer glass surface of eyepiece and objective lens each time – with lens tissue.  Cover after use.  Careful handling while moving.
  • 26. Optical head has  Primary surgeon  Beam splitter  Assistant surgeon  Video attachment
  • 27. OPERATING MICROSCOPE - Features  Coaxial illumination.  variable magnification  motorized continuous zoom  motorized focus  motorized X-Y axis  Foot controls adjust light, magnification, zoom, focus and X-Y axis  Allow multiple surgeons  Floor, table or ceiling mount  Additional attachments
  • 28.  Operating Microscope  magnification from 5-40x  magnification of 5-20x is generally sufficient.  Increased cost and maintenance  longer surgical setup time  less intraoperative positioning flexibility  less portability
  • 29.  Center the X-Y axis  Lowest magnification, Zero the fine focus.  Adjust the gross focus manually  Adjust the interpupillary distance  Adjust the chair and table height  Ensure the surgeons view and the video view are both in focus Verify at the highest magnification to be used.  Position all foot pedals where they can be reached  Microscope pedal goes to the non- dominant foot  Know Where All The Foot Pedal Controls Are Before Starting Surgery  When seated, adjust gross focus by hand, not foot pedal. Prior to surgery
  • 30.  Surgeon is seated comfortably  Feet reach the pedals  Back is straight  Arms at 90 degrees  Lean slightly forward  Arms on armrests  Hands positioned and supported  Rest on the ball of the hand or extend 5th finger for support  Turn off room light and on microscope light AT THE START OF SURGERY
  • 31. Adjust table height Adjust chair height  Adjust microscope height Adjust chair arm rest position Set microscope fine focus to neutral Center X-Y axis Adjust microscope tilt Adjust interpupillary distance Set microscope to highest magnification to be used Adjust focus of oculars Ensure video and assistant images are also in focus Return microscope to low magnification Place foot pedals to be comfortably accessible PREOP CHECK LIST
  • 32. Surgeon Position  Surgical Position  Seated  Specialized chairs with armrests  Arms resting on armrest  Essential for fine motor control
  • 33.  Surgical Position  Seated  Specialized chairs with armrests  Arms resting on table or armrest  Essential for fine motor control  Able to adjust height
  • 34.
  • 35. Positioning of hand  Arm - Rested, Elbow, Wrist, Ulnar border of hand on table, forearm supinated a little.  Three digit grip – IF, THUMB, MF.  MF – rest firmly on the working surface either directly or via RF. PULP TO PULP PINCH
  • 36.  Instrument Handling  Delicate, precise movements  Finger movements only  Pencil grip  Arms on arm rests  Elbows and wrists locked
  • 37. Simple Loupes  one pair of positive meniscus lenses  limited by spherical aberration and color fringing  plastic construction  fixed interpupillary distance  very short working distance  poor surgeon body and arm position  strain on the surgeon’s neck and back.  POOR CHOICE
  • 38.  up to 2.5x magnification  multiple lenses to offer magnification and are generally lightweight and less expensive  adjustable interpupillary distance  working distance varies Galilean Loupes
  • 39.  up to 8.0x magnification  ≥5.0x a microscope is preferred  highest optical quality  series of lenses and prisms to magnify the subject  similar in principle to low-power telescopes  greater magnification  sharp resolution  greater depth of field  heavier and more expensive Prismatic Loupes As magnification increases  they become long and heavy  Shallow depth of field  Head movements make use difficult (>5X)
  • 40.  Provide an improved view of the tissues of concern Will vary by tissue of interest  Allow a comfortable working distance for the surgeon Back straight, arms at 90 degrees  Facilitate adjustment of the interpupillary distance to suit the surgeon  Permit a wide field of view Magnification – purpose:
  • 41. AS MAGNIFICATION INCREASES  The field of view and depth of field decrease  At 3.5X - field of view is 50mm and depth of field is 2.6mm  At 20X - field of view is 10mm and depth of field is 0.4mm
  • 42.  Magnification  Beginning surgeons should start with magnification early as part of their basic training  Will improve their tissue handling and appreciation for tissue trauma and wound apposition
  • 43. FIRST THING FIRST – PRECONDITIONS FOR SUCCESS  Uninteruppted Surgical training.  Adequate sleep.  Diengage from Clock and Telephone.  NO MAGIC for success – dedicated Practice – as Margin of error is measured in thousandths of an inch.  If Some thing is wrong – Donot Struggle ON – Figureout First and then Proceed.  Avoid Cigarette Smoking, Coffee before Surgery, Strenous manual exertion like weight lifting / playing tennis etc (Causes tremors).
  • 44.  Surgeons must have a plan to achieve the goal, But must also be adaptable and familiar with more than one technique, so that obstacles encountered during the surgical procedure may be overcome.
  • 45.  Not all surgeries proceed according to the plan.  We may all travel a different route and method.  We get there in various ways, BUT…..we all get to the SAME DESTINATION
  • 46. Regardless of our individual variations, we must all follow the BASIC RULES:  To Use Appropriate Magnification And Instrumentation  To Be Efficient And Precise  To Ensure Minimal Tissue Trauma  To Minimize Surgical Time  To Obtain Excellent Tissue Wound Apposition With The Smallest And Most Appropriate Suture Materials  To Achieve A Successful, Comfortable, Cosmetic Outcome
  • 47. EXIT PUPIL – OPTICAL AXIS
  • 48. Exit pupil  Lies in mid air at short distance of 15mm from eye piece.  Diameter of exit pupil is 2mm and pupil in normal light condition is 3mm.  The exit pupil must sit right in the middle of the hole in iris, that is pupil – for circular field of vision.  Movements even by a millimeter changes circular field to eclipse.  Position eyepiece at 500 angle to the horizontal for better longterm comfort. (very tall near to 60, very small near to 40)
  • 49. Handling needle holder and suture  Lift thread with forceps in left hand till the needle dangles and just rest on surface – rotate thread accordingly to position needle direction.  Needle is to be setup at 900 to the needle holder tip.  Needle tip should point horizontally not up / not down – hold at the middle of needle.  Needle holder is held with tip pointing away – towards left for right handed.
  • 50.
  • 51. Passing Needle through the tissue  Needle should pass perpendicular to tissue surface.  Evert tissue edge before passing needle – place forceps underneath, near to the needle placement and evert tissue – never grab full thickness.  Needle should come out of the other side perpendicularly – counter press to the needle is given from outside side with forceps near the exit point.  Width of bite from tissue edge – 3 times the thickness of needle.  Pull thread in straight line, drop the needle.  Short end of thread should be at least 3mm.
  • 52.
  • 53. Knot tying  Pick the long thread with left hand forceps.  Turning it into loop over needle holder.  Now Picking up short end.  Completing first half knot  Then second half knot  Use third extra half knot also for safety.  Cut short end first and discard it.  Then hold long end and cut it after needle come in view.  Surgeons knot with a double throw – overcomes
  • 54.
  • 55.
  • 56. MICROVASCULAR SURGERY 1. Gentle handling of tissues *Avoid grasping the ends of the vessels to be anastomosed *Grasp only a small quantity of loose periadventitia
  • 57. 2. ADEQUATE DEBRIDEMENT ► Inspect under high power for signs of damage ► Debride until no signs of vessel damage ► Strong pulsatile flow of blood after adequate debridement
  • 58. 3.SPASM ► Trauma is blamed for the reason of spasm ► Two main factors for spasm - cold - contact of outside wall of vessel with freshly shed blood
  • 59. RELIEF OF SPASM ► Mechanical dilatation ► Hydrodistention of the vein graft ► Moist gauge soaked in warm saline ► 1% lignocaine spray – contact time 3 min – after dilation wash with RL
  • 60. 4. SIMILAR DIAMETER OF VESSELS Vessels with dissimilar diameter of upto 50% can be anastamosed satisfactorily
  • 61. ► Small vessel is dilated and divided obliquely (not >300 to give adequate symmetry ► When the size discrepancy is much greater, an interposing vein graft is used
  • 62. 5. TENSION-FREE ANASTOMOSIS ► Apply an adjustable approximating clamp to bring the vessel end together for convenient suturing ► Never apply clamp with excess tension ► Avoid any kinking or twisting of the vessels distal to the anastomosis ► Avoid inverting cut end of vessel wall during anastamosis - THROMBOGENIC
  • 63. 6. CORRECT SUTURE TENSION ► Not too tight or too loose sutures ► Too tight sutures Avoided by a small “suture circle” at the end of three ties.
  • 64. 7. APPROPRIATE SUTURE SPACING: -Goal is to achieve an ultimately leak - free anastomosis with as few sutures as possible 8. RECHEK OF ANASTOMOSIS: -All anastomosis are rechecked prior to the final skin closure
  • 65. 8 CHOICE OF RECIPIENT VESSELS ► Use of healthy vessel of reasonable size with good outflow is the key for success ► Pre-operative assessment - caliber and injury during dissection. ► Mobilisation of vessels – for tension free repair.
  • 66. DISSECTION TECHNIQUES ► Hemostasis – must *Torniquet *Vascular clips *Bipolar coagulator ► Avoid perivascular hematoma ► Irrigation – moisten tissue every few minutes with RL, mop excess with sponge.
  • 67. Avoid damage – on dissection  DONOT - work in a field obscured by blood. - work out of focus. - cut when you cant see. - hold scissors at wrong angle. - grab full thickness of vessel wall.  Grab vessel with its outer layer – adventitia  Divide adhesions b/w adventitia and vessel wall – tease the adventitia before cutting with round microscissors – to see cut end of tunica media.  Cauterize any branching of vessel with bipolar at a distance away from main vessel.
  • 68. Preparing the vessel ends  Get the blood out – RL Flushes  Remove the adventitia – to see media.  Dilate vessel ends – relieve spasm. And to handle easily during repair. This will determine the quality of anastamosis to a larger extent
  • 69. Background – 1mm Grid Lines - Provides an accurate measuring tool for the surgeon Available in Blue, Green or Yellow - Best contrast Non-Reflective Surface - Eliminates glare from OR lighting Radiopaque Silicone Material - Can be seen under X-Ray if needed
  • 70. TECHNIQUE OF ANASTOMOSIS - 1.Resection to normal vessels: Resect proximal to areas with microscopic signs of vessel damage with fine, straight, sharp scissors in a single motion
  • 71. Demonstration of forward pulsatile flow prior to clamping
  • 72. 2. Clamping of vessels: -With double approximating clamp leaving generous length of vessel end for ease of working -Tips of the jaws should project just beyond the vessel for maximal grip
  • 75. 3. Positioning: -Correct position of the clamp is horizontal and parallel to the operator
  • 76. 4. Final Preparation of vessel ends: nd ► Resect sufficient periadventitia, flush with the underlying vessel to expose 2-3 mm of the vessel wall for suturing
  • 77. ► If the lumen is small or in spasm, gently dilate it with vessel dilator dr sumer yadav (mch nd nstructive
  • 78. ► Irrigate the lumen with solution of heparinized saline (1000 units per 100 ml).
  • 79. 5. SUTURING ► End to end / End to side - depending on type of anastamosis ► Full thickness of wall ► Size of the suture material – 10.0 Nylon ► Number of sutures – 8 stiches for 0.7 – 2 mm vessel diameter sufficient ► Distance between sutures – equidistant – good enough to prevent leak. ► Arteries- more sutures than veins
  • 80. ► Pass the needle at right angles to the wall at a distance from the margin slightly greater( 1-2 times for arteries, 2-3 times for veins) than the thickness of the vessel wall
  • 81.
  • 82.
  • 83.
  • 84.
  • 85. ► Make sure that the posterior wall is not accidentally cought ► For last 2-3 sutures: Modified Harashina technique
  • 86. ► For thick walled arteries and large diameter collapsible veins- use 180 degree halving method ( first suture at 150 degree position and second suture at -30 degree
  • 87. For thin walled vessels, use 120 degree triangulating method for key sutures (First suture at 150 degree position and second suture at +30 degree position)
  • 88. 6.RELEASE OF CLAMPS ► The distal clamp is released first ► If any major leak, reapply the clamp, irrigate and insert additional superficial thickness sutures ► Now release both the clamps- usually small amount of blood leaks from anastomosis, but stops after a few min. with the application of sponges
  • 89. VENOUS ANASTOMOSIS ► Veins are thinner, flatter and more difficult to anastomose ► Use ringer’s solution to float or irrigate the vessel ► Deeper bites ► More sutures
  • 90. ALTERNATIVE ANASTOMOSIS TECHNIQUES 1. BACK-WALL FIRST (ONE- WAY UP) TECHNIQUE -This technique is safest because the entire inside of the anastomosis can be visualized until the very last few sutures are placed
  • 91. 2. FLIPPING TECHNIQUE When free flap, digit or vein graft is fixed fo mobile vessel, it can be flipped to expose the back-wall for repair, as rotation is not possible
  • 92. 3. CONTINUOUS SUTURING ► Acceptable patency rates ( 92% for arteries, 84% for veins) comparable with interrupted sutures ► Advantages: Quicker and more hemostatic ► Disadvantages: * Potential for creating purse-string constriction at the site of anastomosis * Entrapment of the suture material in the clamp * Breakage of the suture ► So less favourable
  • 93. 4. SLEEVE ANASTOMOSIS ► Microanastomosis of vessels in 1 mm external diameter range can be accomplished by means of invaginating technique with fewer sutures than the end to end method of closure
  • 94. ► Advantages: - Quicker - Less intraluminal suture exposure - Less vessel trauma owing to fewer sutures ► Disadvantages: - Patency rate is significantly less than that achieved by the conventional end to end method, so it is not superior in clinical situations
  • 95. END TO SIDE ANASTOMOSIS ► Indications: *To preserve patency of the recipient vessel in lower limb,esp. in elderly patients, where sacrifice of a major vessel can have a serious effect on the distal blood flow *Considerable size or wall thickness, mismatch between the vessels
  • 96. Steps of end to side anastomosis
  • 97.
  • 98. ► Advantages: - Search for recipient arteries is simplified - No. of possible sites to which free flaps can be transferred is greatly increased
  • 99. Signs of Patency  Expansile pulsations – increase and decrease in diameter of vessel distally with each pulsation – patent  Wriggling – change in curvature of vessel distally with each beat – patent  Longitudinal pulsations – conentrared over particular point – along long axis – hammering against a partial / complete block  False wriggling can be seen with longitudinal pulsations – lift anastamotic site with suture thread.
  • 100. PATENCY ► Return of colour ► Capillary oozing and venous bleeding from the revascularized tissue ► Direct inspection under the microscope ► Uplift test & Empty and Refill test
  • 102. Empty & Refill test ► This is traumatic and is performed as gently and infrequently as possible
  • 103.
  • 104. Modified Uplift test – Vein patency  Curved forceps beneath vein distal to anastamosis – lift it up till occluded – move it along proximal in downstream direction – going past anastamotic site.  Patent – vessel fills up behind moving instrument.  Blocked – distally dilated with negative filling test & with time blood in vein becomes dark.
  • 105. Practical points on blood.  Undamaged vessel wall secretes anticoagulants – so uncontaminated blood in undamaged vessel remain liquid for several hours.  Blood inside a vessel will not clot unless – the vessel is damaged / blood contaminated with thromboplastins  Blood that is in open contact with the wound should never be allowed to stand still in a vessel unless heparinized irrigation fluid is present.  Wise to leave the vessel alone and run for 20 min – after dissection & 20 min after anastamosis.
  • 106. ANASTOMOTIC FAILURE A) TECHNICAL ERRORS: 1. Tearing 2. Leaking 3. Narrowing 4. Through-stitching 5. Inclusion of adventitia B) Poor flow from proximal vessel due to undetected damage more proximally or vasospasm
  • 107. C) A clot or thrombus at the anastomotic site or in an area where a clamp was applied - Damage to endothelium from + Excessive clamp pressure + Poor technique or + Contamination  Prevention: + Flushing of the suture line with heparinized solution + Systemic heparin (40 u/kg before completion of anastomosis and release of clamps)
  • 108. REVISION OF THE FAILED ANASTOMOSIS ► If the patency test reveals slow filling of the distal vessel, revise the anastomosis, carefully keeping original problem in mind ► Insert a vein graft, if the vessel length is insufficient
  • 109. *Poor proximal flow that does not respond to local vasodilator and warming may require: Proximal exploration of the vessel Dilatation along a proximal length of vessel sufficient to relieve vasospasm
  • 110. FACTORS INFLUENCING FAILURE OF ANASTOMOSIS A. TECHNICAL: ► Both walls sutured together ► Traumatic vessel handling ► Apposition of vessel edges ► Disproportional vessel size ► Tension at suture line ► Excessive clamp pressure ► Kinking of vessels
  • 111. B. REPERFUSION FAILURE: ► Blood turbulence ► Spasm ► Hypercoagulability ► Acidosis ► Cold ► Hypovolemia ► Vasoconstrictors
  • 112. C. POSTOPERATIVE CARE: ► Infection ► Acidosis ► Cold ► Limb position ► Environmental factors
  • 113. POST-OPERATIVE MEASURES ► Oxygen administation ► Bed rest or limited movements for 3 to 5 days ► Warm room ► Limb elevation to decrease the venous congestion ► Fluid administration ► Pharmaotherapy – anticoagulants
  • 114. ► Adequate analgesia ► Limitation of visitors and telephone calls to decrease the emotional stress ► Prohibition of smoking, caffeine and chocolate because they may cause vasoconstriction