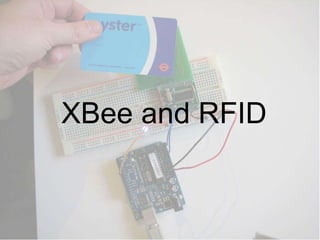
XBee and RFID
•Als PPT, PDF herunterladen•
1 gefällt mir•1,574 views

Introduction to using XBee and RFID with Arduino. Part of Internet of Things workshop at dConstruct 2009.

Empfohlen
Empfohlen
Weitere ähnliche Inhalte
Was ist angesagt?
Was ist angesagt? (20)
Ähnlich wie XBee and RFID
Ähnlich wie XBee and RFID (20)
Mehr von Tinker London
Kürzlich hochgeladen
Kürzlich hochgeladen (20)
XBee and RFID
- 2. XBee in 30 minutes Xbees are small radio modules that communicate with each other over radio using the Zigbee protocol (built on top of the IEEE 802.15.4 standard, if you care). They allow for drop-in, drop-out mesh networking. New devices can be automatically detected, and existing devices can be removed without disrupting the entire system. Each radio can broadcast or can address specific other modules. Today we will set up a very basic XBee network.
- 3. What Does an Xbee Network Need? One coordinator to manage the overall network. Multiple endpoints/routers to receive and pass on information. External sensors or other modules to collect and/or respond to the information that the radios communicated.
- 4. What Hardware Do You Have? Arduino XBee Module XBee USB Explorer Arduino Xbee Shield
- 5. Loading Firmware You Need: -Xbee Module -Xbee USB Explorer -X-CTU software Digi’s X-CTU software is a program that lets you load firmware onto your XBee module, configure settings, and test the radio’s functionality. It is only available for Windows but can be run in an emulator on an Intel Mac (load Arduino and the relevant drivers in Windows ). http://www.digi.com/support/productdetl.jsp?pid=3352&osvid=57&tp=5&s=316
- 7. Programming a Router There should be a com port (probably the last) labeled USB Serial Port . Click on it. Click on Test / Query .
- 8. Programming a Router You should see this ==> Click OK, then click on the Modem Configuration tab.
- 10. Programming Arduino Remember the button you wired earlier? Make that circuit again. In the Arduino IDE, open “ XBButton.pde” and load it onto your Arduino. You can test that the code is functioning by starting the serial monitor in Arduino. Every time you press the button, the pane should show “Hello world!” (Change the “Hello world!” to say whatever you want.)
- 13. RFID in 15 minutes RFID (radiofrequency identification) is a way of storing and communicating small amounts of data. RFID tags store data (usually a serial number and a few bytes of changeable information), and RFID readers can read, decode, and sometimes change that data. RFID has historically been used in industrial logistics and tracking, but cheaper and more accessible technologies have recently opened it up for hacking and other creative uses. Today we will set up an RFID reader to read the serial numbers of tags.
- 14. What Hardware Do You Have? RFID reader RFID antenna Arduino
- 15. Connecting the Reader 4 5 5 +5V Ground
- 16. 4 5 +5V Ground
- 17. Upload your Code Load “RFIDReader.pde” onto your Arduino board. Activate the serial debugger pane in Arduino. Touch an RFID card to the antenna.
- 18. What is Happening? The RFID reader communicates with Arduino using a communication protocol called I2C, which Arduino code manages using the Wiring library, and which uses analog pins 4 and 5. This is one standard way that microcontrollers communicate with more complicated external devices. This Arduino code continually asks the RFID reader to look for the serial number of any tags near the reader. The RFID reader does the heavy lifting and returns a number to the Arduino--the serial number if it sees a tag, and a 2 if no tags are present. The Arduino then sends the tag’s serial number over the serial port, which you are monitoring on your computer.
- 19. The Xbee communicates with Arduino over the serial port. The RFID reader communicates with Arduino using I2C and analog pins 4 and 5. Can we combine these? 15 Minutes Left
- 20. Putting it All Together 4 5 5 +5V Ground
- 21. Xbee (beware of Series 1 vs Series 2 documentation) http://www.arduino.cc/playground/Main/InterfacingWithHardware http://www.humboldt.edu/~cm19/XBee%20setup.pdf http://hcgilje.wordpress.com/resources/xbee_arduino_code/ http://www.faludi.com/projects/zigbee/ RFID http://www.tinker.it/en/Teaching/RFID http://www.tigoe.net/pcomp/code/?s=RFID&searchsubmit=Find Some Resources