SlideShare ist ein Scribd-Unternehmen logo
1 von 69
R12 HRMS Setups

Open R12 Login Page

User ID : operations
Pwd : welcome
Click on Login .
Select the Responsibility ‘ System Administrator’.
Create a Responsibility for HRMS Manager :
Navigation :
System Administrator → Security →Responsibility →Define
The following page appears :
Press ‘F11’ and query with ‘ Golbal Super HRMS Manager’ and press ‘Ctrl+F11’.

Create New Responsibility with the same menus and same data group with ur name .
Save it and close it.
Create a user with ur name
Navigation :
System Administrator → Security → User → Define
Give some name for the user and give a password .
Attach your ‘ Human Resources’ Responsibility.
And also attach ‘ Application Developer’ and ‘ System Administrator’.
Logout of ‘ Operations ‘ and login with your username and password.

Click on ‘Login’.
As it is the first time of entering with the username system prompts you to change the
password.
Give the Old password and new password and confirm the new password.
And click on ‘Submit’.
The following page appears with the Responsibilities you have attached to the user.

Click on your “ Human Resources’ responsibility .
Specify the 6 Key Flexfield Structures that must be defined before you can define a
Business Group in Oracle HRMS. These are:
Job (Oracle HR)
Position (Oracle HR)
Grade (Oracle HR)
People Group (Oracle Payroll)
Cost Allocation (Oracle Payroll)
Competency Flexfield (Oracle HR)
Specify your requirements for the Key Flexfields specified above. The specification
must include the following details for each Key Flexfield:
The Structure Name and the number of Segments
The Flexfield Segment Names, Order, Validation Options and Qualifiers
The Flexfield Value Sets to be used and any lists of values
The sequence of implementation for each Flexfield is as follows:
Define Key Flexfield Segments
Define Flexfield Segment Values
Define Flexfield Value Sets
Define Key Flexfield Cross-Validation Rules
Define Key Flexfield Aliases
Freeze and Compile Key Flexfield Structure
Populate Flexfield value sets and list of values
Navigation : Application Developer→ Flex Fields→ Key → Segments
Flex field Qualifiers are mandatory for Competence Flex field ( Human Resources) and
Cost Allocation ( Pay Roll) .
The important point which must do while defining flex fields is to Freeze and compile
each and every Flex Fields after defining segments for it.
Human Resources :
Job Flex field :
Query with ‘Job Flex field’ in the ‘ Flex field Title’ and click ‘ Ctrl+↓’ in the below
window displayed with predefined flex fields to create your own Flex field for ‘ Job ‘.

Give a name for your Job structure and click on ‘Segments’ button.
Define the Job structure for your Organization and check the required fields based on
your requirement.
Save and close the window.
Check the ‘Freeze Flex field Definition ‘ and ‘Allow Dynamic Inserts’ check boxes and
Click on ‘Compile’ button.
Position Flex field :
Query with ‘Position Flex field’ in the ‘ Flex field Title’ and click ‘ Ctrl+↓’ in the below
window displayed with predefined flex fields to create your own Flex field for
‘ Position ‘.

Give a name for your Position structure and click on ‘Segments’ button.
Define the Position structure for your Organization and check the required fields based
on your requirement.

Save and close the window.
Check the ‘Freeze Flex field Definition ‘ and ‘Allow Dynamic Inserts’ check boxes and
Click on ‘Compile’ button.
Competence Flex field :
Query with ‘Competence Flex field’ in the ‘ Flex field Title’ and click ‘ Ctrl+↓’ in the
below window displayed with predefined flex fields to create your own Flex field for
‘ Competence‘.

Give a name for your Competence structure and click on ‘Segments’ button.
Define the Competence structure for your Organization and check the required fields
based on your requirement.

Flex field Qualifiers are mandatory for ‘ Competence Flex field’.
Click on Flex field Qualifiers ‘ button and select any one qualifier for the Competence .

Save and close the window.
Check the ‘Freeze Flex field Definition ‘ and ‘Allow Dynamic Inserts’ check boxes and
Click on ‘Compile’ button.
Grade Flex field :
Query with ‘Grade Flex field’ in the ‘ Flex field Title’ and click ‘ Ctrl+↓’ in the below
window displayed with predefined flex fields to create your own Flex field for
‘ Grade ‘.
Give a name for your Grade structure and click on ‘Segments’ button.
Define the Grade structure for your Organization and check the required fields based on
your requirement.

Save and close the window.
Check the ‘Freeze Flex field Definition ‘ and ‘Allow Dynamic Inserts’ check boxes and
Click on ‘Compile’ button.
Cost Allocation Flex field :
Cost Allocation Flex Field is the interaction between Pay Roll and General Ledger . So
the Segments which we are defining in HRMS should match with the Accounting Flex
Field which we define in Financials.
Query with ‘Cost Allocation Flex field’ in the ‘ Flex field Title’ and click ‘ Ctrl+↓’ in the
below window displayed with predefined flex fields to create your own Flex field for
‘ Cost Allocation‘.

Give a name for your Cost Allocationn structure and click on ‘Segments’ button.
Define the Cost Allocation structure for your Organization and check the required fields
based on your requirement.

Flex field Qualifiers are mandatory for ‘ Cost Allocation Flex field’ also.
Click on Flex field Qualifiers ‘ button and select any one qualifier for the Competence .
Save and close the window.
Check the ‘Freeze Flex field Definition ‘ and ‘Allow Dynamic Inserts’ check boxes and
Click on ‘Compile’ button.
People Group Flex field :
Query with ‘People Group Flex field’ in the ‘ Flex field Title’ and click ‘ Ctrl+↓’ in the
below window displayed with predefined flex fields to create your own Flex field for
‘ People Group‘.

Give a name for your People Group structure and click on ‘Segments’ button.
Define the People Group structure for your Organization and check the required fields
based on your requirement.

Save and close the window.
Check the ‘Freeze Flex field Definition ‘ and ‘Allow Dynamic Inserts’ check boxes and
Click on ‘Compile’ button.
Business Group Creation
The next Step is to Create our Business Group .
The Important thing we must not forgot while creating our business group and all our
organizations is “Date Tracking’. The date must be checked while creating all the
organizations . The dates which we give for our orgnizations must be after the date which
our business group is created and the dates are those from which we want the
organizations to be existed in our business group.The Date Tracking Plays a vital role in
HRMS.
For that first we have to create a Location
Navigation :
HRMS : Work Structures → Location
The next step is to attach all our flex fields which we have defined before to our business
group .
Organization Classification is Important in HRMS.
Navigation : Work Structure → Organization→Description
Click on ‘New’
Create the Business Group.

Enable the Business Group and click on ‘Others’ and give the Business Group
Information .
Give a Short name for the Busines group.
Select the Employee number , Applicant Number Generation, Contingent Worker
Generation Fields as either as ‘Automatic’ or ‘Manual’ based on your business group
requirement.
Select and attach your grade,people group,job,costing,position,competence flexfields to
your business groups here.
Select your Legislation Coed and currency .
Then click on ‘Yes’ for saving the Business Group Information.

Attach ‘ HR Organization ‘ so that we can attaché employees in that organization.
Now Switch the Responsibility to “ System Administrator’
Navigation :
Profile → System
Attach our business group to HR Security Profile .
Under ‘HR Cross Business Group ‘ Profile Select ‘yes ‘ .
Add ‘HR with Payroll’ for ‘HR User Type’
Switch back to our HRMS Responsibility
The next step is to create organizations in our business group.
It will be better if we Select the Organization type while creating them .
But Attaching HR Organization for every Organization is must .
Create other Locations in your Business group.
Navigation : Work Structures →Location
Now create all Divisions and Departments in your Business Group.
Navigation : Work Structure → Organization → Description
The next step is to create a hierarchy for our organization .We must not forget date
tracking.
If we want to create a new hierarchy for our organization we will give an end date for our
old hierarchy. The version name will be changed here.
Navigation :
Work Structures → Organization → Hierarchy

Give a name to the Organization Hierarchy and create the hierarchy. Select ‘Primary’
check box if it is the primary hierarchy of the organization.
Select Version number as ‘1’ and give the starting date for the hierarchy.
Query in the ‘Organization’ window with the Business Group Name and add all the
divisions an departments as per the hierarchy in your organization in the ‘Subordinates’
window.
Job Creation :
Create the Jobs in your Business Group based in the Structure you have defined for the
jobs.
Navigation :
Work Structures →Job →Description
Job is a role in our organization .Here create jobs which we want in our organization .
The job group will be generated automatically.But if we want a new job group we can
create it ourself.Don’t forget to check the date .After creating the jobs with the job code
and job name save them.
The next step is to create positions in our organization.
There r many differences between Jobs and Positions.
Jobs
1) Jobs are Flexible roles
2) Jobs are independent of organization
3) Jobs are independent of positions
4) A job may have multiple positions

Positions
1) Positions are rigid roles
2) Positions are dependent on organization
3) Positions are dependent on Jobs.
4) A position will have specific job

Navigation for creating a position :
Work Structures → Position → Description
After creating the positions , create Position Hierarchy.
Navigation :
Work Structures → Position → Hierarchy
Give a name to your hierarchy. If the Hierarchy is the primary hierarchy in your
organization , check the ‘Primary’ check box .Save it and version number populated for it
automatically. If you are creating first hierarchy give the ‘Date From’ . If we want to
create another new hierarchy after some days , give the ‘End Date ‘ for the previous
hierarchy which is running. Save it.
Query with Higher position name and attach the positions in the order as it is in your
organization.
The next step is to assign grades to the jobs in our organization. Grades can be assigned
to jobs or positions. But Oracle prefers to assign grades to jobs.
Navigation :
Work Structures → Grade→Description
Here we will define all the grades which are available in our organization.
The next step is to assign the grades to our jobs.
Navigation :
Work Structures→Jobs→Description→ Valid Grades
The next step is to enter the details of Employees
Navigation : People → Enter and Maintain
Enter all the details of the employee.
Creating Vacancies and Recruitments :
Navigation :
Recruitment → Requisition and Vacancy
We can create Requisitions, vacancies and openings in our organization using
‘Requisition and Vacancy’ window. A requisition can be for one or more vacancies .
Process of raising a requisition for a vacancy :
1. Enter the requisition and save it before beginning to define the vacancy.
2. Enter a name and number of openings for the vacancy.
3. If you advertise vacancies using SSHR, enter the vacancy category. The
vacancy is automatically advertised under this category.
4. Optionally enter a description and select a status.
5. You can select one or more assignment components to define the vacancy.
6. Optionally enter the name of the recruiter.
7. Optionally enter the budget measurement unit and value for the vacancy.
The value you enter is for all the openings for that vacancy.
Creating Reqruitment Activity :
We use ‘Requisitement Activity’ window to define either single recruitment activity or
more.
Process of creating Recruitment Activity :
1. Enter the details of the recruitment activity. You can enter the name of a
’parent’ recruitment activity in the Within Recruitment Activity region, if the
activity you are defining is part of a campaign.
2. Choose the Recruiting For button to select one or more vacancies to associate
with the activity.
Navigation :
Recruitment → Recruitment Activity
Entering the Applicant’s details :
We use the ‘ Applicant Quick Entry’ window to enter basic personal information and one
assignment for an application. If we want to update this information or add further
information , we use ‘People ‘ window.
Navigation :
Recruitment → Applicant Quick Entry
The process of recording the applicant details quickly :
1. Enter the applicant’s name and an identifying number recognized by the
system.
2. Select a status for the application. By default a new application has the
status Active Application (or an equivalent user status defined on your
system). All other fields are optional.
3. Enter information in the Further Information field if your Oracle localization
team has set it up.
4. To enter an address, select a national address style. A window opens with the
address format for the country you select. Enter the address lines and choose
OK.
5. The Date Received defaults to your effective date, but you can change it. This
is the date the applicant’s record will begin.
6. You can enter the name of the applicant’s current employer.
7. You can select a recruitment activity. If there is only one vacancy for the
activity, the vacancy details appear automatically.
8. If you select a vacancy, applicant assignment information is displayed from
the vacancy record. You can add to this information or change it. However, if
you change it, the vacancy field clears.
9. If you do not select a vacancy, you can enter assignment information in the
Vacancy Applied For region. If you do not enter an organization, it defaults to
the Business Group.
Updating Applicant Assignments by Group :
We can query and update the groups of Applicants assignments using ‘Mass Update of
Applicants’ window.
Navigation :
Requisition → Mass Update Of Applicants
Process of updating Applicants :
1. Select find from the Query menu to open the Find Applications window.
Enter selection criteria for the group of applicants you want to update and
choose the Find button.
2. Do one of the following:
• If you want to update all or most of these applicant assignments,
choose the Select All buttons. Then uncheck the Mark check box for
any assignments that you do not want to update.
• If you want to update less than half of this group of assignments,
check the Mark check box for each assignment you want to update.
3. Choose the Update button.
4. In the Update window:
• If you want to update the status of the selected assignments, select the
new status.
• If you want to refer these applicants to a new recruiter, select the
name of the Recruiter.
5. Choose OK to effect the update.

Schedule Applicant Interview
Typically, you track applicant progress through a series of interviews and
update the status of the application after each interview. You can schedule
these interviews and update the applicant assignment status using the
Applicant Interview window. Before you can schedule interviews, interview
types, such as First Interview, or Selection Test, must be defined as values for
the Lookup

After Clicking on ‘Update’ button we will get the following window.

Select the status and Recruiter Name
Click on ‘Correction’ button .Then the status of the applicants who were applied will be
changed to ‘First Interview’.
Process of Applicant Interview :
1. Select an interview type, and enter the date of the interview in the Start Date
field. You can also select a location and enter times and an end date.
2. If you want to associate an applicant assignment status change with the
interview, enter it in the New Status field. This creates a datetracked update
to the applicant assignment. You cannot enter a status when:
• There are future changes to the assignment
• The interview date is the date when the active application status began
• You are updating an existing interview record.
Follow the same process till we give the ‘Offer ‘ to the applicants to hire
them and the applicant may accept or reject it.
If the applicant accept the offer . the next step is to hire the applicant as
an employee. The main point to remember here is that there must be one
day difference between the day the applicant accepts the offer from the
company and hiring the applicant as employee.

Weitere ähnliche Inhalte

Was ist angesagt?

Oracle HRMS Payroll Table Overview
Oracle HRMS Payroll Table OverviewOracle HRMS Payroll Table Overview
Oracle HRMS Payroll Table OverviewChris Martin
 
Hrms and payroll 11i v3.5
Hrms and payroll 11i   v3.5Hrms and payroll 11i   v3.5
Hrms and payroll 11i v3.5abdul616
 
Oracle EBS R12 Self service user manual
Oracle EBS R12 Self service user manualOracle EBS R12 Self service user manual
Oracle EBS R12 Self service user manualFeras Ahmad
 
Oracle EBS R 12 Core hr user manual
Oracle EBS R 12 Core hr user manualOracle EBS R 12 Core hr user manual
Oracle EBS R 12 Core hr user manualFeras Ahmad
 
Oracle EBS Apps HRMS Presentation
Oracle EBS Apps HRMS PresentationOracle EBS Apps HRMS Presentation
Oracle EBS Apps HRMS PresentationFeras Ahmad
 
Oracle HRMS Fast Formula
Oracle HRMS Fast FormulaOracle HRMS Fast Formula
Oracle HRMS Fast Formularunjithrocking
 
Otl Oracle Time and Labor
Otl Oracle Time and LaborOtl Oracle Time and Labor
Otl Oracle Time and LaborFeras Ahmad
 
Setup Oracle EBS R12 Performance Management
Setup Oracle EBS R12 Performance ManagementSetup Oracle EBS R12 Performance Management
Setup Oracle EBS R12 Performance ManagementFeras Ahmad
 
Oracle EBS R12 Payroll user manual
Oracle EBS R12 Payroll user manualOracle EBS R12 Payroll user manual
Oracle EBS R12 Payroll user manualFeras Ahmad
 
Fujcci crp oracle payroll
Fujcci crp oracle payrollFujcci crp oracle payroll
Fujcci crp oracle payrollFeras Ahmad
 
Oracle EBS Self service from A to Z
Oracle EBS Self service from A to ZOracle EBS Self service from A to Z
Oracle EBS Self service from A to ZFeras Ahmad
 
Presentation i recruitment
Presentation i recruitment Presentation i recruitment
Presentation i recruitment Feras Ahmad
 
Oracle Time and Labor (OTL) Setup for Project
Oracle Time and Labor (OTL) Setup for ProjectOracle Time and Labor (OTL) Setup for Project
Oracle Time and Labor (OTL) Setup for Projectiavinashpatel
 
142500146 using-oracle-fast formula-for-payroll-calculations
142500146 using-oracle-fast formula-for-payroll-calculations142500146 using-oracle-fast formula-for-payroll-calculations
142500146 using-oracle-fast formula-for-payroll-calculationsuday reddy
 
Accrual plan set up in oracle hrms
Accrual plan set up in oracle hrmsAccrual plan set up in oracle hrms
Accrual plan set up in oracle hrmsRajiv reddy
 
Oracle Human Capital Management
Oracle Human Capital ManagementOracle Human Capital Management
Oracle Human Capital ManagementAddvantum
 
How to debug a fast formula
How to debug a fast formulaHow to debug a fast formula
How to debug a fast formulaFeras Ahmad
 
Oracle HRMS Accrual plan Setup
Oracle HRMS Accrual plan SetupOracle HRMS Accrual plan Setup
Oracle HRMS Accrual plan SetupFeras Ahmad
 

Was ist angesagt? (20)

Oracle HRMS Payroll Table Overview
Oracle HRMS Payroll Table OverviewOracle HRMS Payroll Table Overview
Oracle HRMS Payroll Table Overview
 
Hrms and payroll 11i v3.5
Hrms and payroll 11i   v3.5Hrms and payroll 11i   v3.5
Hrms and payroll 11i v3.5
 
Oracle EBS R12 Self service user manual
Oracle EBS R12 Self service user manualOracle EBS R12 Self service user manual
Oracle EBS R12 Self service user manual
 
Oracle EBS R 12 Core hr user manual
Oracle EBS R 12 Core hr user manualOracle EBS R 12 Core hr user manual
Oracle EBS R 12 Core hr user manual
 
Oracle EBS Apps HRMS Presentation
Oracle EBS Apps HRMS PresentationOracle EBS Apps HRMS Presentation
Oracle EBS Apps HRMS Presentation
 
Oracle HRMS Fast Formula
Oracle HRMS Fast FormulaOracle HRMS Fast Formula
Oracle HRMS Fast Formula
 
Oracle HRMS Proration
Oracle HRMS ProrationOracle HRMS Proration
Oracle HRMS Proration
 
Otl Oracle Time and Labor
Otl Oracle Time and LaborOtl Oracle Time and Labor
Otl Oracle Time and Labor
 
Setup Oracle EBS R12 Performance Management
Setup Oracle EBS R12 Performance ManagementSetup Oracle EBS R12 Performance Management
Setup Oracle EBS R12 Performance Management
 
Oracle EBS R12 Payroll user manual
Oracle EBS R12 Payroll user manualOracle EBS R12 Payroll user manual
Oracle EBS R12 Payroll user manual
 
Oracle HRMS & Payroll
Oracle HRMS & PayrollOracle HRMS & Payroll
Oracle HRMS & Payroll
 
Fujcci crp oracle payroll
Fujcci crp oracle payrollFujcci crp oracle payroll
Fujcci crp oracle payroll
 
Oracle EBS Self service from A to Z
Oracle EBS Self service from A to ZOracle EBS Self service from A to Z
Oracle EBS Self service from A to Z
 
Presentation i recruitment
Presentation i recruitment Presentation i recruitment
Presentation i recruitment
 
Oracle Time and Labor (OTL) Setup for Project
Oracle Time and Labor (OTL) Setup for ProjectOracle Time and Labor (OTL) Setup for Project
Oracle Time and Labor (OTL) Setup for Project
 
142500146 using-oracle-fast formula-for-payroll-calculations
142500146 using-oracle-fast formula-for-payroll-calculations142500146 using-oracle-fast formula-for-payroll-calculations
142500146 using-oracle-fast formula-for-payroll-calculations
 
Accrual plan set up in oracle hrms
Accrual plan set up in oracle hrmsAccrual plan set up in oracle hrms
Accrual plan set up in oracle hrms
 
Oracle Human Capital Management
Oracle Human Capital ManagementOracle Human Capital Management
Oracle Human Capital Management
 
How to debug a fast formula
How to debug a fast formulaHow to debug a fast formula
How to debug a fast formula
 
Oracle HRMS Accrual plan Setup
Oracle HRMS Accrual plan SetupOracle HRMS Accrual plan Setup
Oracle HRMS Accrual plan Setup
 

Ähnlich wie R12 HRMS Setups Guide

Sales force class-3
Sales force class-3Sales force class-3
Sales force class-3Amit Sharma
 
183201020 sales force-class-5
183201020 sales force-class-5183201020 sales force-class-5
183201020 sales force-class-5Amit Sharma
 
Elshayeb Oracle R12 Order Management
Elshayeb Oracle R12 Order ManagementElshayeb Oracle R12 Order Management
Elshayeb Oracle R12 Order ManagementAhmed Elshayeb
 
Purchase order release in fiori
Purchase order release in fioriPurchase order release in fiori
Purchase order release in fioriNguyen Hai
 
183201019 sales force-class-6
183201019 sales force-class-6183201019 sales force-class-6
183201019 sales force-class-6Amit Sharma
 
Middleware creation of site publication_subscription
Middleware creation of site publication_subscriptionMiddleware creation of site publication_subscription
Middleware creation of site publication_subscriptionRipunjay Rathaur
 
Create chart of account
Create chart of accountCreate chart of account
Create chart of accountHassan Fadl
 
KP Salesforce PPT Part I.pptx
KP Salesforce PPT Part I.pptxKP Salesforce PPT Part I.pptx
KP Salesforce PPT Part I.pptxSarasJain8
 
183203806 sales force-class-8
183203806 sales force-class-8183203806 sales force-class-8
183203806 sales force-class-8Amit Sharma
 
Sales force certification-lab-ii
Sales force certification-lab-iiSales force certification-lab-ii
Sales force certification-lab-iiAmit Sharma
 
Desk Sync User Installation Guide
Desk Sync User Installation GuideDesk Sync User Installation Guide
Desk Sync User Installation GuideCloud Analogy
 
Sales force managing-data
Sales force managing-dataSales force managing-data
Sales force managing-dataAmit Sharma
 
Crm quote process ppt
Crm quote process pptCrm quote process ppt
Crm quote process pptKris
 
Crm quote process ppt
Crm quote process pptCrm quote process ppt
Crm quote process pptKris
 
Sales force certification-lab-ii
Sales force certification-lab-iiSales force certification-lab-ii
Sales force certification-lab-iiAmit Sharma
 
183207316 sales force-class-14
183207316 sales force-class-14183207316 sales force-class-14
183207316 sales force-class-14Amit Sharma
 
Crm dynamics workflow
Crm dynamics workflowCrm dynamics workflow
Crm dynamics workflowDynamic-CRM
 

Ähnlich wie R12 HRMS Setups Guide (20)

Sales force class-3
Sales force class-3Sales force class-3
Sales force class-3
 
183201020 sales force-class-5
183201020 sales force-class-5183201020 sales force-class-5
183201020 sales force-class-5
 
Elshayeb Oracle R12 Order Management
Elshayeb Oracle R12 Order ManagementElshayeb Oracle R12 Order Management
Elshayeb Oracle R12 Order Management
 
Purchase order release in fiori
Purchase order release in fioriPurchase order release in fiori
Purchase order release in fiori
 
183201019 sales force-class-6
183201019 sales force-class-6183201019 sales force-class-6
183201019 sales force-class-6
 
Middleware creation of site publication_subscription
Middleware creation of site publication_subscriptionMiddleware creation of site publication_subscription
Middleware creation of site publication_subscription
 
Create chart of account
Create chart of accountCreate chart of account
Create chart of account
 
KP Salesforce PPT Part I.pptx
KP Salesforce PPT Part I.pptxKP Salesforce PPT Part I.pptx
KP Salesforce PPT Part I.pptx
 
183203806 sales force-class-8
183203806 sales force-class-8183203806 sales force-class-8
183203806 sales force-class-8
 
Sales force certification-lab-ii
Sales force certification-lab-iiSales force certification-lab-ii
Sales force certification-lab-ii
 
Desk Sync User Installation Guide
Desk Sync User Installation GuideDesk Sync User Installation Guide
Desk Sync User Installation Guide
 
Sales force managing-data
Sales force managing-dataSales force managing-data
Sales force managing-data
 
Salesforce crm projects
Salesforce crm projects Salesforce crm projects
Salesforce crm projects
 
Crm quote process ppt
Crm quote process pptCrm quote process ppt
Crm quote process ppt
 
Crm quote process ppt
Crm quote process pptCrm quote process ppt
Crm quote process ppt
 
Sales force certification-lab-ii
Sales force certification-lab-iiSales force certification-lab-ii
Sales force certification-lab-ii
 
AXIS USER GUIDE
AXIS USER GUIDEAXIS USER GUIDE
AXIS USER GUIDE
 
How To Set Up Insightly CRM
How To Set Up Insightly CRMHow To Set Up Insightly CRM
How To Set Up Insightly CRM
 
183207316 sales force-class-14
183207316 sales force-class-14183207316 sales force-class-14
183207316 sales force-class-14
 
Crm dynamics workflow
Crm dynamics workflowCrm dynamics workflow
Crm dynamics workflow
 

Kürzlich hochgeladen

Nutritional Needs Presentation - HLTH 104
Nutritional Needs Presentation - HLTH 104Nutritional Needs Presentation - HLTH 104
Nutritional Needs Presentation - HLTH 104misteraugie
 
APM Welcome, APM North West Network Conference, Synergies Across Sectors
APM Welcome, APM North West Network Conference, Synergies Across SectorsAPM Welcome, APM North West Network Conference, Synergies Across Sectors
APM Welcome, APM North West Network Conference, Synergies Across SectorsAssociation for Project Management
 
social pharmacy d-pharm 1st year by Pragati K. Mahajan
social pharmacy d-pharm 1st year by Pragati K. Mahajansocial pharmacy d-pharm 1st year by Pragati K. Mahajan
social pharmacy d-pharm 1st year by Pragati K. Mahajanpragatimahajan3
 
Disha NEET Physics Guide for classes 11 and 12.pdf
Disha NEET Physics Guide for classes 11 and 12.pdfDisha NEET Physics Guide for classes 11 and 12.pdf
Disha NEET Physics Guide for classes 11 and 12.pdfchloefrazer622
 
Beyond the EU: DORA and NIS 2 Directive's Global Impact
Beyond the EU: DORA and NIS 2 Directive's Global ImpactBeyond the EU: DORA and NIS 2 Directive's Global Impact
Beyond the EU: DORA and NIS 2 Directive's Global ImpactPECB
 
Ecosystem Interactions Class Discussion Presentation in Blue Green Lined Styl...
Ecosystem Interactions Class Discussion Presentation in Blue Green Lined Styl...Ecosystem Interactions Class Discussion Presentation in Blue Green Lined Styl...
Ecosystem Interactions Class Discussion Presentation in Blue Green Lined Styl...fonyou31
 
SOCIAL AND HISTORICAL CONTEXT - LFTVD.pptx
SOCIAL AND HISTORICAL CONTEXT - LFTVD.pptxSOCIAL AND HISTORICAL CONTEXT - LFTVD.pptx
SOCIAL AND HISTORICAL CONTEXT - LFTVD.pptxiammrhaywood
 
Paris 2024 Olympic Geographies - an activity
Paris 2024 Olympic Geographies - an activityParis 2024 Olympic Geographies - an activity
Paris 2024 Olympic Geographies - an activityGeoBlogs
 
The byproduct of sericulture in different industries.pptx
The byproduct of sericulture in different industries.pptxThe byproduct of sericulture in different industries.pptx
The byproduct of sericulture in different industries.pptxShobhayan Kirtania
 
Measures of Dispersion and Variability: Range, QD, AD and SD
Measures of Dispersion and Variability: Range, QD, AD and SDMeasures of Dispersion and Variability: Range, QD, AD and SD
Measures of Dispersion and Variability: Range, QD, AD and SDThiyagu K
 
Kisan Call Centre - To harness potential of ICT in Agriculture by answer farm...
Kisan Call Centre - To harness potential of ICT in Agriculture by answer farm...Kisan Call Centre - To harness potential of ICT in Agriculture by answer farm...
Kisan Call Centre - To harness potential of ICT in Agriculture by answer farm...Krashi Coaching
 
1029-Danh muc Sach Giao Khoa khoi 6.pdf
1029-Danh muc Sach Giao Khoa khoi  6.pdf1029-Danh muc Sach Giao Khoa khoi  6.pdf
1029-Danh muc Sach Giao Khoa khoi 6.pdfQucHHunhnh
 
Software Engineering Methodologies (overview)
Software Engineering Methodologies (overview)Software Engineering Methodologies (overview)
Software Engineering Methodologies (overview)eniolaolutunde
 
Arihant handbook biology for class 11 .pdf
Arihant handbook biology for class 11 .pdfArihant handbook biology for class 11 .pdf
Arihant handbook biology for class 11 .pdfchloefrazer622
 
1029 - Danh muc Sach Giao Khoa 10 . pdf
1029 -  Danh muc Sach Giao Khoa 10 . pdf1029 -  Danh muc Sach Giao Khoa 10 . pdf
1029 - Danh muc Sach Giao Khoa 10 . pdfQucHHunhnh
 
Organic Name Reactions for the students and aspirants of Chemistry12th.pptx
Organic Name Reactions  for the students and aspirants of Chemistry12th.pptxOrganic Name Reactions  for the students and aspirants of Chemistry12th.pptx
Organic Name Reactions for the students and aspirants of Chemistry12th.pptxVS Mahajan Coaching Centre
 
Mastering the Unannounced Regulatory Inspection
Mastering the Unannounced Regulatory InspectionMastering the Unannounced Regulatory Inspection
Mastering the Unannounced Regulatory InspectionSafetyChain Software
 
Call Girls in Dwarka Mor Delhi Contact Us 9654467111
Call Girls in Dwarka Mor Delhi Contact Us 9654467111Call Girls in Dwarka Mor Delhi Contact Us 9654467111
Call Girls in Dwarka Mor Delhi Contact Us 9654467111Sapana Sha
 

Kürzlich hochgeladen (20)

Nutritional Needs Presentation - HLTH 104
Nutritional Needs Presentation - HLTH 104Nutritional Needs Presentation - HLTH 104
Nutritional Needs Presentation - HLTH 104
 
APM Welcome, APM North West Network Conference, Synergies Across Sectors
APM Welcome, APM North West Network Conference, Synergies Across SectorsAPM Welcome, APM North West Network Conference, Synergies Across Sectors
APM Welcome, APM North West Network Conference, Synergies Across Sectors
 
social pharmacy d-pharm 1st year by Pragati K. Mahajan
social pharmacy d-pharm 1st year by Pragati K. Mahajansocial pharmacy d-pharm 1st year by Pragati K. Mahajan
social pharmacy d-pharm 1st year by Pragati K. Mahajan
 
Disha NEET Physics Guide for classes 11 and 12.pdf
Disha NEET Physics Guide for classes 11 and 12.pdfDisha NEET Physics Guide for classes 11 and 12.pdf
Disha NEET Physics Guide for classes 11 and 12.pdf
 
Beyond the EU: DORA and NIS 2 Directive's Global Impact
Beyond the EU: DORA and NIS 2 Directive's Global ImpactBeyond the EU: DORA and NIS 2 Directive's Global Impact
Beyond the EU: DORA and NIS 2 Directive's Global Impact
 
Ecosystem Interactions Class Discussion Presentation in Blue Green Lined Styl...
Ecosystem Interactions Class Discussion Presentation in Blue Green Lined Styl...Ecosystem Interactions Class Discussion Presentation in Blue Green Lined Styl...
Ecosystem Interactions Class Discussion Presentation in Blue Green Lined Styl...
 
SOCIAL AND HISTORICAL CONTEXT - LFTVD.pptx
SOCIAL AND HISTORICAL CONTEXT - LFTVD.pptxSOCIAL AND HISTORICAL CONTEXT - LFTVD.pptx
SOCIAL AND HISTORICAL CONTEXT - LFTVD.pptx
 
Paris 2024 Olympic Geographies - an activity
Paris 2024 Olympic Geographies - an activityParis 2024 Olympic Geographies - an activity
Paris 2024 Olympic Geographies - an activity
 
The byproduct of sericulture in different industries.pptx
The byproduct of sericulture in different industries.pptxThe byproduct of sericulture in different industries.pptx
The byproduct of sericulture in different industries.pptx
 
Measures of Dispersion and Variability: Range, QD, AD and SD
Measures of Dispersion and Variability: Range, QD, AD and SDMeasures of Dispersion and Variability: Range, QD, AD and SD
Measures of Dispersion and Variability: Range, QD, AD and SD
 
INDIA QUIZ 2024 RLAC DELHI UNIVERSITY.pptx
INDIA QUIZ 2024 RLAC DELHI UNIVERSITY.pptxINDIA QUIZ 2024 RLAC DELHI UNIVERSITY.pptx
INDIA QUIZ 2024 RLAC DELHI UNIVERSITY.pptx
 
Kisan Call Centre - To harness potential of ICT in Agriculture by answer farm...
Kisan Call Centre - To harness potential of ICT in Agriculture by answer farm...Kisan Call Centre - To harness potential of ICT in Agriculture by answer farm...
Kisan Call Centre - To harness potential of ICT in Agriculture by answer farm...
 
1029-Danh muc Sach Giao Khoa khoi 6.pdf
1029-Danh muc Sach Giao Khoa khoi  6.pdf1029-Danh muc Sach Giao Khoa khoi  6.pdf
1029-Danh muc Sach Giao Khoa khoi 6.pdf
 
Software Engineering Methodologies (overview)
Software Engineering Methodologies (overview)Software Engineering Methodologies (overview)
Software Engineering Methodologies (overview)
 
Arihant handbook biology for class 11 .pdf
Arihant handbook biology for class 11 .pdfArihant handbook biology for class 11 .pdf
Arihant handbook biology for class 11 .pdf
 
Mattingly "AI & Prompt Design: The Basics of Prompt Design"
Mattingly "AI & Prompt Design: The Basics of Prompt Design"Mattingly "AI & Prompt Design: The Basics of Prompt Design"
Mattingly "AI & Prompt Design: The Basics of Prompt Design"
 
1029 - Danh muc Sach Giao Khoa 10 . pdf
1029 -  Danh muc Sach Giao Khoa 10 . pdf1029 -  Danh muc Sach Giao Khoa 10 . pdf
1029 - Danh muc Sach Giao Khoa 10 . pdf
 
Organic Name Reactions for the students and aspirants of Chemistry12th.pptx
Organic Name Reactions  for the students and aspirants of Chemistry12th.pptxOrganic Name Reactions  for the students and aspirants of Chemistry12th.pptx
Organic Name Reactions for the students and aspirants of Chemistry12th.pptx
 
Mastering the Unannounced Regulatory Inspection
Mastering the Unannounced Regulatory InspectionMastering the Unannounced Regulatory Inspection
Mastering the Unannounced Regulatory Inspection
 
Call Girls in Dwarka Mor Delhi Contact Us 9654467111
Call Girls in Dwarka Mor Delhi Contact Us 9654467111Call Girls in Dwarka Mor Delhi Contact Us 9654467111
Call Girls in Dwarka Mor Delhi Contact Us 9654467111
 

R12 HRMS Setups Guide

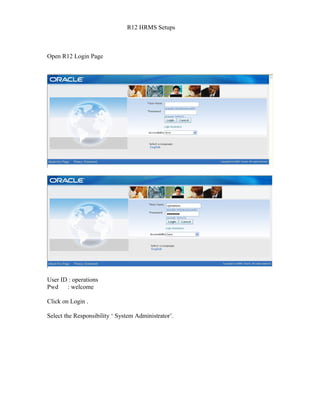
  • 1. R12 HRMS Setups Open R12 Login Page User ID : operations Pwd : welcome Click on Login . Select the Responsibility ‘ System Administrator’.
  • 2. Create a Responsibility for HRMS Manager : Navigation : System Administrator → Security →Responsibility →Define The following page appears :
  • 3. Press ‘F11’ and query with ‘ Golbal Super HRMS Manager’ and press ‘Ctrl+F11’. Create New Responsibility with the same menus and same data group with ur name .
  • 4. Save it and close it. Create a user with ur name Navigation : System Administrator → Security → User → Define
  • 5. Give some name for the user and give a password . Attach your ‘ Human Resources’ Responsibility. And also attach ‘ Application Developer’ and ‘ System Administrator’. Logout of ‘ Operations ‘ and login with your username and password. Click on ‘Login’. As it is the first time of entering with the username system prompts you to change the password.
  • 6. Give the Old password and new password and confirm the new password. And click on ‘Submit’. The following page appears with the Responsibilities you have attached to the user. Click on your “ Human Resources’ responsibility . Specify the 6 Key Flexfield Structures that must be defined before you can define a Business Group in Oracle HRMS. These are: Job (Oracle HR) Position (Oracle HR) Grade (Oracle HR) People Group (Oracle Payroll) Cost Allocation (Oracle Payroll) Competency Flexfield (Oracle HR) Specify your requirements for the Key Flexfields specified above. The specification must include the following details for each Key Flexfield: The Structure Name and the number of Segments The Flexfield Segment Names, Order, Validation Options and Qualifiers The Flexfield Value Sets to be used and any lists of values The sequence of implementation for each Flexfield is as follows: Define Key Flexfield Segments
  • 7. Define Flexfield Segment Values Define Flexfield Value Sets Define Key Flexfield Cross-Validation Rules Define Key Flexfield Aliases Freeze and Compile Key Flexfield Structure Populate Flexfield value sets and list of values Navigation : Application Developer→ Flex Fields→ Key → Segments Flex field Qualifiers are mandatory for Competence Flex field ( Human Resources) and Cost Allocation ( Pay Roll) . The important point which must do while defining flex fields is to Freeze and compile each and every Flex Fields after defining segments for it. Human Resources : Job Flex field : Query with ‘Job Flex field’ in the ‘ Flex field Title’ and click ‘ Ctrl+↓’ in the below window displayed with predefined flex fields to create your own Flex field for ‘ Job ‘. Give a name for your Job structure and click on ‘Segments’ button. Define the Job structure for your Organization and check the required fields based on your requirement.
  • 8. Save and close the window. Check the ‘Freeze Flex field Definition ‘ and ‘Allow Dynamic Inserts’ check boxes and Click on ‘Compile’ button.
  • 9. Position Flex field : Query with ‘Position Flex field’ in the ‘ Flex field Title’ and click ‘ Ctrl+↓’ in the below window displayed with predefined flex fields to create your own Flex field for ‘ Position ‘. Give a name for your Position structure and click on ‘Segments’ button.
  • 10. Define the Position structure for your Organization and check the required fields based on your requirement. Save and close the window. Check the ‘Freeze Flex field Definition ‘ and ‘Allow Dynamic Inserts’ check boxes and Click on ‘Compile’ button.
  • 11. Competence Flex field : Query with ‘Competence Flex field’ in the ‘ Flex field Title’ and click ‘ Ctrl+↓’ in the below window displayed with predefined flex fields to create your own Flex field for ‘ Competence‘. Give a name for your Competence structure and click on ‘Segments’ button.
  • 12. Define the Competence structure for your Organization and check the required fields based on your requirement. Flex field Qualifiers are mandatory for ‘ Competence Flex field’. Click on Flex field Qualifiers ‘ button and select any one qualifier for the Competence . Save and close the window. Check the ‘Freeze Flex field Definition ‘ and ‘Allow Dynamic Inserts’ check boxes and Click on ‘Compile’ button.
  • 13. Grade Flex field : Query with ‘Grade Flex field’ in the ‘ Flex field Title’ and click ‘ Ctrl+↓’ in the below window displayed with predefined flex fields to create your own Flex field for ‘ Grade ‘.
  • 14. Give a name for your Grade structure and click on ‘Segments’ button. Define the Grade structure for your Organization and check the required fields based on your requirement. Save and close the window. Check the ‘Freeze Flex field Definition ‘ and ‘Allow Dynamic Inserts’ check boxes and Click on ‘Compile’ button.
  • 15. Cost Allocation Flex field : Cost Allocation Flex Field is the interaction between Pay Roll and General Ledger . So the Segments which we are defining in HRMS should match with the Accounting Flex Field which we define in Financials. Query with ‘Cost Allocation Flex field’ in the ‘ Flex field Title’ and click ‘ Ctrl+↓’ in the below window displayed with predefined flex fields to create your own Flex field for
  • 16. ‘ Cost Allocation‘. Give a name for your Cost Allocationn structure and click on ‘Segments’ button. Define the Cost Allocation structure for your Organization and check the required fields based on your requirement. Flex field Qualifiers are mandatory for ‘ Cost Allocation Flex field’ also. Click on Flex field Qualifiers ‘ button and select any one qualifier for the Competence .
  • 17.
  • 18. Save and close the window. Check the ‘Freeze Flex field Definition ‘ and ‘Allow Dynamic Inserts’ check boxes and Click on ‘Compile’ button.
  • 19. People Group Flex field : Query with ‘People Group Flex field’ in the ‘ Flex field Title’ and click ‘ Ctrl+↓’ in the below window displayed with predefined flex fields to create your own Flex field for ‘ People Group‘. Give a name for your People Group structure and click on ‘Segments’ button.
  • 20. Define the People Group structure for your Organization and check the required fields based on your requirement. Save and close the window. Check the ‘Freeze Flex field Definition ‘ and ‘Allow Dynamic Inserts’ check boxes and Click on ‘Compile’ button.
  • 21. Business Group Creation The next Step is to Create our Business Group . The Important thing we must not forgot while creating our business group and all our organizations is “Date Tracking’. The date must be checked while creating all the organizations . The dates which we give for our orgnizations must be after the date which our business group is created and the dates are those from which we want the organizations to be existed in our business group.The Date Tracking Plays a vital role in HRMS. For that first we have to create a Location Navigation : HRMS : Work Structures → Location
  • 22.
  • 23. The next step is to attach all our flex fields which we have defined before to our business group . Organization Classification is Important in HRMS. Navigation : Work Structure → Organization→Description
  • 24. Click on ‘New’ Create the Business Group. Enable the Business Group and click on ‘Others’ and give the Business Group Information .
  • 25. Give a Short name for the Busines group. Select the Employee number , Applicant Number Generation, Contingent Worker Generation Fields as either as ‘Automatic’ or ‘Manual’ based on your business group requirement. Select and attach your grade,people group,job,costing,position,competence flexfields to your business groups here. Select your Legislation Coed and currency .
  • 26. Then click on ‘Yes’ for saving the Business Group Information. Attach ‘ HR Organization ‘ so that we can attaché employees in that organization. Now Switch the Responsibility to “ System Administrator’ Navigation : Profile → System
  • 27. Attach our business group to HR Security Profile .
  • 28. Under ‘HR Cross Business Group ‘ Profile Select ‘yes ‘ .
  • 29. Add ‘HR with Payroll’ for ‘HR User Type’ Switch back to our HRMS Responsibility The next step is to create organizations in our business group. It will be better if we Select the Organization type while creating them . But Attaching HR Organization for every Organization is must . Create other Locations in your Business group. Navigation : Work Structures →Location
  • 30.
  • 31. Now create all Divisions and Departments in your Business Group. Navigation : Work Structure → Organization → Description
  • 32.
  • 33.
  • 34.
  • 35.
  • 36.
  • 37. The next step is to create a hierarchy for our organization .We must not forget date tracking. If we want to create a new hierarchy for our organization we will give an end date for our old hierarchy. The version name will be changed here.
  • 38. Navigation : Work Structures → Organization → Hierarchy Give a name to the Organization Hierarchy and create the hierarchy. Select ‘Primary’ check box if it is the primary hierarchy of the organization. Select Version number as ‘1’ and give the starting date for the hierarchy. Query in the ‘Organization’ window with the Business Group Name and add all the divisions an departments as per the hierarchy in your organization in the ‘Subordinates’ window.
  • 39.
  • 40.
  • 41. Job Creation : Create the Jobs in your Business Group based in the Structure you have defined for the jobs. Navigation : Work Structures →Job →Description Job is a role in our organization .Here create jobs which we want in our organization . The job group will be generated automatically.But if we want a new job group we can create it ourself.Don’t forget to check the date .After creating the jobs with the job code and job name save them.
  • 42.
  • 43. The next step is to create positions in our organization. There r many differences between Jobs and Positions. Jobs 1) Jobs are Flexible roles 2) Jobs are independent of organization 3) Jobs are independent of positions 4) A job may have multiple positions Positions 1) Positions are rigid roles 2) Positions are dependent on organization 3) Positions are dependent on Jobs. 4) A position will have specific job Navigation for creating a position : Work Structures → Position → Description
  • 44.
  • 45.
  • 46.
  • 47.
  • 48.
  • 49.
  • 50.
  • 51.
  • 52.
  • 53. After creating the positions , create Position Hierarchy. Navigation : Work Structures → Position → Hierarchy
  • 54. Give a name to your hierarchy. If the Hierarchy is the primary hierarchy in your organization , check the ‘Primary’ check box .Save it and version number populated for it automatically. If you are creating first hierarchy give the ‘Date From’ . If we want to create another new hierarchy after some days , give the ‘End Date ‘ for the previous hierarchy which is running. Save it. Query with Higher position name and attach the positions in the order as it is in your organization.
  • 55.
  • 56. The next step is to assign grades to the jobs in our organization. Grades can be assigned to jobs or positions. But Oracle prefers to assign grades to jobs. Navigation : Work Structures → Grade→Description
  • 57. Here we will define all the grades which are available in our organization. The next step is to assign the grades to our jobs. Navigation : Work Structures→Jobs→Description→ Valid Grades
  • 58.
  • 59. The next step is to enter the details of Employees Navigation : People → Enter and Maintain Enter all the details of the employee.
  • 60. Creating Vacancies and Recruitments : Navigation : Recruitment → Requisition and Vacancy We can create Requisitions, vacancies and openings in our organization using ‘Requisition and Vacancy’ window. A requisition can be for one or more vacancies . Process of raising a requisition for a vacancy : 1. Enter the requisition and save it before beginning to define the vacancy. 2. Enter a name and number of openings for the vacancy. 3. If you advertise vacancies using SSHR, enter the vacancy category. The vacancy is automatically advertised under this category. 4. Optionally enter a description and select a status. 5. You can select one or more assignment components to define the vacancy. 6. Optionally enter the name of the recruiter. 7. Optionally enter the budget measurement unit and value for the vacancy. The value you enter is for all the openings for that vacancy.
  • 61.
  • 62. Creating Reqruitment Activity : We use ‘Requisitement Activity’ window to define either single recruitment activity or more. Process of creating Recruitment Activity : 1. Enter the details of the recruitment activity. You can enter the name of a ’parent’ recruitment activity in the Within Recruitment Activity region, if the activity you are defining is part of a campaign. 2. Choose the Recruiting For button to select one or more vacancies to associate with the activity.
  • 63. Navigation : Recruitment → Recruitment Activity
  • 64. Entering the Applicant’s details : We use the ‘ Applicant Quick Entry’ window to enter basic personal information and one assignment for an application. If we want to update this information or add further information , we use ‘People ‘ window. Navigation : Recruitment → Applicant Quick Entry The process of recording the applicant details quickly : 1. Enter the applicant’s name and an identifying number recognized by the system. 2. Select a status for the application. By default a new application has the status Active Application (or an equivalent user status defined on your system). All other fields are optional. 3. Enter information in the Further Information field if your Oracle localization team has set it up. 4. To enter an address, select a national address style. A window opens with the address format for the country you select. Enter the address lines and choose OK. 5. The Date Received defaults to your effective date, but you can change it. This is the date the applicant’s record will begin. 6. You can enter the name of the applicant’s current employer. 7. You can select a recruitment activity. If there is only one vacancy for the activity, the vacancy details appear automatically. 8. If you select a vacancy, applicant assignment information is displayed from the vacancy record. You can add to this information or change it. However, if you change it, the vacancy field clears. 9. If you do not select a vacancy, you can enter assignment information in the Vacancy Applied For region. If you do not enter an organization, it defaults to the Business Group.
  • 65.
  • 66. Updating Applicant Assignments by Group : We can query and update the groups of Applicants assignments using ‘Mass Update of Applicants’ window. Navigation : Requisition → Mass Update Of Applicants
  • 67. Process of updating Applicants : 1. Select find from the Query menu to open the Find Applications window. Enter selection criteria for the group of applicants you want to update and choose the Find button. 2. Do one of the following: • If you want to update all or most of these applicant assignments, choose the Select All buttons. Then uncheck the Mark check box for any assignments that you do not want to update. • If you want to update less than half of this group of assignments, check the Mark check box for each assignment you want to update. 3. Choose the Update button. 4. In the Update window: • If you want to update the status of the selected assignments, select the new status. • If you want to refer these applicants to a new recruiter, select the name of the Recruiter.
  • 68. 5. Choose OK to effect the update. Schedule Applicant Interview Typically, you track applicant progress through a series of interviews and update the status of the application after each interview. You can schedule these interviews and update the applicant assignment status using the Applicant Interview window. Before you can schedule interviews, interview types, such as First Interview, or Selection Test, must be defined as values for the Lookup After Clicking on ‘Update’ button we will get the following window. Select the status and Recruiter Name
  • 69. Click on ‘Correction’ button .Then the status of the applicants who were applied will be changed to ‘First Interview’. Process of Applicant Interview : 1. Select an interview type, and enter the date of the interview in the Start Date field. You can also select a location and enter times and an end date. 2. If you want to associate an applicant assignment status change with the interview, enter it in the New Status field. This creates a datetracked update to the applicant assignment. You cannot enter a status when: • There are future changes to the assignment • The interview date is the date when the active application status began • You are updating an existing interview record. Follow the same process till we give the ‘Offer ‘ to the applicants to hire them and the applicant may accept or reject it. If the applicant accept the offer . the next step is to hire the applicant as an employee. The main point to remember here is that there must be one day difference between the day the applicant accepts the offer from the company and hiring the applicant as employee.