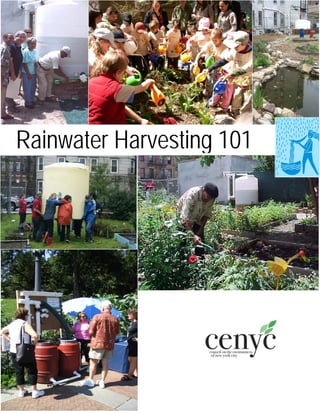
2. RAINWATER HARVESTING 101
COUNCIL ON THE ENVIRONMENT OF NEW YORK CITY
Robert J. Kafin, Esq., Chairman
Marcel Van Ooyen, Executive Director
Prepared by:
Julia Leung, DEC Summer Intern
for
Council on the Environment of New York City
51 Chambers Street, Room 228
New York, NY 10007
(212) 788-7900
August 2008
3.
PREFACE
The Council on the Environment of NYC (CENYC) is a hands-on non-profit that has been improving New
York City's environment for over thirty years. CENYC’s dedicated staff green our neighborhoods, create the
environmental leaders of the future, promote waste prevention and recycling, and run the largest farmers
market program in the country. CENYC achieves its mission through the following projects and programs:
The Open Space Greening Program, Greenmarket, The New Farmer Development Project, Environmental
Education Training Student Organizers, Learn It, Grow It, Eat It and Office of Recycling Outreach and
Education.
The Open Space Greening Program (OSG) empowers people in neighborhoods throughout the city to
create, manage and sustain community gardens and park/playgrounds. OSG provides best practices
workshops, services, tools, donated plant material, and open space planning/mapping information and
other services. Grow Truck provides tools, donated supplies, plants and horticultural advice and assistance
to gardening groups all over New York City. The Plant-A-Lot Project gives substantial material and
technical assistance to several new gardens each year and helps the 45 existing gardens created in prior
years.
Since 2002, OSG staff has taken the lead in building and maintaining rainwater harvesting systems in
community gardens across the five boroughs, leading educational workshops, assisting community
gardeners in identifying alternate water resources and building low cost systems. CENYC is an active
member of the Water Resources Group, a network of NYC greening and environmental organizations
promoting sustainable water conservation practices in NYC. The New York State Department of
Environmental Conservation (DEC) recognized CENYC’s efforts with The Environmental Excellence Award
in 2006. This manual was created to disseminate to a wide audience the design parameters and building
techniques used by CENYC staff.
Summer intern was able to prepare this document thanks to a grant from The New York State Department
of Environmental Conservation in 2008 for Pollution Prevention. Ms. Leung provided many of the photos,
charts, and drawings used. OSG staff, Lars Chellberg, and Lenny Librizzi provided invaluable guidance,
advice, and editing of the manual. CENYC Executive Director Marcel Van Ooyen and Assistant Executive
Director Julie Walsh edited the text. Additional information and assistance was provided by NYC
community gardeners and members of the Water Resources Group.
4. Table of Contents
Introduction of Rain Water Harvesting 2
History of Rain Water Harvesting 5
Benefits of Rain Water Harvesting in Urban Areas 6
Current Efforts 7
Materials 10
Where to obtain supplies 11
Cost Estimates 12
PVC Applications 14
Sizing of the tank and roof washer 18
Construction 21
Tank 23
Leaders 26
Roof Washer 30
Overflow 33
Anchoring 36
Drip Irrigation 39
Filtration Systems 41
Treatment 42
Aesthetics 43
Roofing Material 45
Seasonal Maintenance 46
Living with the RWH system 47
Existing RWH Systems 48
10 Ways to Conserve Water 49
Bibliography 50
Feedback Form 51
5. Introduction
"It isn't easy to come up with 'one size fits all' instructions for building rainwater harvesting
systems because of variations in styles of roofs, downspouts, storage tanks, and garden layouts.
You have to use a combination of research, common sense, ingenuity, and dumb luck to design
and build your system."
‐Lenny Librizzi, Assistant Director of Open Space Greening at the CENYC
Rain water harvesting (RWH) is the means of collecting and storing rain water in large, durable
containers, usually, collecting from rooftop gutters. RWH systems come in a variety of shapes
and sizes (see pictures below).
1
7.
Here is a closer view of how the plunger works.
The pipes lead to a roof washer system which is a containment area for the first few gallons of
water. Since the initial flushes of water contain rooftop debris and leaves, the roof washer acts
as a filtering system by separating the dirty water from the cleaner water. Once the roof washer
is full, the cleaner water enters the rain tank. As soon as the tank is full, excess water flows into
the overflow pipe which leads to an adjacent rain garden (5), is directed back to where it
originally flowed or piped underground. A rain garden is a plot containing hardy plants that can
survive with both saturated and dry soil.
3
12. Maplewood, Minnesota has forged a coalition
between its water and sanitation departments
and residential landowners to plant large‐scale
curbside rain gardens that reduce storm‐water
sewage (see picture on left).
The Minnesota Arboretum uses its parking lots to
demonstrate best landscape practices such as
planting rain gardens and using permeable pavers
to reduce contamination caused by storm water
runoff (see picture on right).
The City of Toronto Downspout Disconnection
Program offers a free service to homeowners to
disconnect downspouts from the sewer system and
install rain barrels which are available at a discount.
Chicago also encourages its citizens to disconnect
downspouts. In addition, Chicago’s Water Agenda 2003 included a rooftop garden initiative, a
pilot program for permeable alleys, and rain gardens planted in the City’s rights‐of‐way.
Austin offers rebates of up to $30 for newly installed rain barrels and of up to $500 for
installation of rainwater harvesting systems, following design approval by the City.
In 2001, the first Drought Emergency to be announced since 1989 was declared in New York
City. The reservoir levels were 40% below normal which resulted in mandatory water use
restrictions. The Water Resources Group (WRG) was founded as a response to this single
drought year. Since then WRG and CENYC have built 35 rainwater harvesting systems in New
York City, collecting over 422, 900 gallons of storm water per year.
“New York City currently lags behind other cities like Boston and Chicago, which capture 90% of
their combined sewage overflow; New York City only captures about 70%, according to the
city”4
8
13.
Materials
Every rain water harvesting system is different but
they do have similarities. Here is a comprehensive list
of tools and supplies. Your system will use many of
these but may not require all of them.
Tools:
• Drill
• Hole saw attachment or jigsaw
• Screw drivers
• Hammer
• Level
• PVC saw (see top saw in picture) and metal hacksaw (bottom saw)
• Tin snips or sheet metal shears
• Crimping tool (see picture on right) and cable cutting tools
Gutters:
• Gutter lengths
• Leaders and bends
• Pre‐fabricated gutter hangers
• Plumbing strap (for securing pipes to wall)
• Flexible, accordion style expandable plastic pipe
• Tube of gutter sealant and caulk gun to apply it
• PVC cleaner and cement
• Teflon tape (for creating a water tight seal on threaded bushings)
Barrel storage system:
• Tanks and PVC parts or other materials to
construct the manifold. Here we have a
capped 4 way tee (see leftmost picture)
and a 90° and 45° elbow respectively (see
rightmost picture)
• Window screen or screened vents for mosquito proof vent
• Bulk head fittings (An elongated compression fitting, which will allow pipe, to run
through a bulkhead)
• Platform material such as treated lumber, plastic lumber or concrete blocks
• Eyebolts (for securing tank)
• Spigot
• Metal flanges of corresponding size to spigot and hardware
• Rope or cabling supplies to secure the tank
9
14.
Where to obtain supplies
Polyethylene tanks are best purchased locally because of high shipping costs. Search online for
local suppliers. You can personally ship smaller tanks and save on extra expenses. Here are
some websites that sell tanks:
• http://www.liquidlogictanks.com/index.html
• http://www.tank‐depot.com/
• http://www.rainbarrelsource.com/
• http://www.rainbarrelsandmore.com/
• http://www.aquabarrel.com/
Drip irrigation suppliers include:
• http://www.dripdepot.com/
• http://www.dripirrigation.com/
• http://www.rainbird.com/drip/index.htm
• http://www.dripworksusa.com/
• http://www.netafim.com/
• http://www.chapindrip.com/
• http://www.farmtek.com
Downspout filters and a variety of other specialized parts for systems can be purchased from:
• http://www.starkenvironmental.com/a‐1‐filtration.html
• http://www.braewater.com/
• http://www.rainharvesting.com.au/default.asp
• http://downspoutfilter.com/index.php
• http://rainharvest.com/shop/default.asp
Tools and PVC gutter pieces can be purchased at your local hardware stores. Lowes or Home
Depot also sells these items. For locations near you, visit their websites at
http://www.lowes.com/ or http://www.homedepot.com.
10
16. Cost analysis for a 300 gallon rainwater system in 2008
Tank $300
Shipping of Tank $300
Leaders and Gutters $100
Platform $300
Hardware $100
Plumbing $100
Tool Kit $50
Total Cost $1250
Cost analysis for a 1000 gallon rainwater system in 2008
Tank $1000
Shipping of Tank $1000
Leaders and Gutters $200
Platform $600
Hardware $200
Plumbing $200
Tool Kit $50
Total Cost $3250
If there is not already an existing roof or shed nearby, a shade
structure can be constructed. One possible design is the winged
structure seen here:
Cost analysis for a 300 gallon rainwater system with winged structure in 2008
Tank $300
Shipping of Tank $300
Leaders and Gutters $100
Platform $300
Hardware $100
Plumbing $100
Tool Kit $50
Materials for Shade Structure
$2500
Total Cost $3750
12
18. This 2”x 1 ¼” slip bushing connects a 2” (diameter) piece of pipe
with a 1 ¼ “pipe. Slip bushings can be adhered using the cleaner
and cement method mentioned above.
This 2”x 1” slip and thread bushing connects a 2” slip pipe with a 1” threaded pipe. Thread
bushings can be adhered tightly using Teflon tape. Roll the tape starting at the end of the male
thread bushing towards the middle. Two or three wraps are sufficient.
PVC parts are very versatile since no two rainwater harvesting systems are alike. Many
different combinations of PVC parts can be used for the same function. Here are 5 different
ways to connect a 2” pipe with a ¾ “pipe.
It is very important to align adjacent pipes. The two tees in the first picture (see picture below)
must align exactly in order to connect to the same wall. Careless glueing will lead to problems.
Use a hard, level surface such as a concrete floor to help you align pipes.
14
19. The pipes in the second picture (see
picture on left) must be exactly
perpendicular to each other. The tee on
the left will connect to the barrel. The tee
on the right will connect to existing pipes.
Use a marker to indicate the points where
the one pipe must meet the other.
The pictures above also point out the use of piping. Notice how the two tees are joined in each
picture. In the second picture, the two tees are joined by using a small piece of pipe in between
them, called a sleeve. The interior coupling is too short to be seen in this picture. In a situation
where you want the tees to be further apart, such as in the first picture, just extend the size of
the pipe to the desired length.
Although every rainwater system must be carefully planned before actual construction begins,
it is very easy to miscalculate or measure incorrectly. Often times, errors are not realized at
first. To fix a measurement or connection problem where the 2 pipes that were intended to
connect do not match up, use two 45° degree elbows. A combination of two 45° elbows will
produce almost any twist or angle desired.
Two pipes that
Two 45° did not
elbows can connect before
make a 90° can now be
degree connected
twist or a with the help
180° of two 45°
degree elbows.
twist.
15
24. Construction
The first step of the construction project is to make a plan drawing. The plan drawing considers
the location of the downspout and the amount of space available. Each system must include
the tank, the first flush and the overflow. Here are some issues that should be considered in
your planning:
• The most stable place to position your barrel is against a stable wall on level ground as close
to the downspout as possible.
• Gravity moves water downhill. Be sure there is available space for a downward pitch in all
pipes.
• The barrel on its platform is the highest point of the garden but the lowest point of the
system.
• The overflow pipe should be directed toward a rain garden not toward pathways or
structures.
• The overflow pipe should flow from the barrel’s highest point.
• The spigot should be at the barrel’s lowest point.
20
27.
Lid: The lid should remain closed at all times. Still water is a haven for mosquito larvae. Inspect
the lid and any vents annually and clean as necessary
Inflow and Overflow pipes: Some tanks come with bulkhead fittings installed for the inflow and
overflow pipes. For those that don’t, a hole saw is used to drill a large hole in the barrel. Two
bushing pieces, like the ones pictured below, are used to fashion a bulkhead fitting.
Use a marker to trace the hole you will cut for the threaded bushings. Make the hole tight to
the threads. Once the hole is prepared, thread the first piece in from the outside.
23
31.
Connecting to the downspout is one of the last steps in construction of your system. You do not
want to disconnect your downspout and start collecting rainwater with an unfinished system.
Wintering tee: The purpose of the wintering tee is to allow the water to be directed back into
the sewers during freezing temperatures. Rain water should not be collected at that time
because it may freeze and cause breaks in the system. A simple wintering tee utilizes a
removable plunger head. The plunger head blocks water flow into the sewer and forces it to
enter the system. It is removed during the winter and rain water will just flow straight down
into the sewer (see picture on left and diagram on page 4). Complicated wintering tees include
a filtering system. It operates with the same principle but instead of a removable plunger head,
there is a removable filter which catches debris (see picture on right).
Roof washer system: Refer to ‘Roof washers’ on page 30.
Connecting the barrel: Refer to ‘Tanks’ on page 23.
27
32.
Here are some ideas to help you with the design of your leader.
INFLOW
1: 90° elbow
2: 4"pipe
3: 90° elbow
4: 45° elbow
5: 4"pipe
6: 45° elbow
OVERFLOW
7: 2"bushing
8: 90° elbow
9: 2"pipe
This design uses a separate inflow and overflow pipe.
INFLOW
1: downspout
2: 4"rubber coupling
3: cap
4: 4 way tee
5: rubber coupling
6: 90° elbow
7: 4"sleeve
8: 4"rubber coupling
9: 3 way tee
OVERFLOW
10: 45° elbow
11: 90° elbow
12: 4"pipe
This design uses the same tank opening for both the inflow and overflow.
28
34. An alternative to the container method of the roof washer is a device like the Flow‐Rate
Diverter by Safe Rain. It consists of a plastic ball attached to a spring. The top of the ball
contains a screen and a movable tab. During a rainfall event, water that enters the pipe will
either flow into the ball or on its sides (see picture on left). The purpose of the screen on top is
to gradually allow water to enter the ball. Once the ball is filled, it will sink down and block the
drain (see picture on right). Water can then start filling up the pipe and start entering the tank.
The moveable tab controls the amount of water that enters the ball by covering or exposing the
screen as desired. For example, larger barrels that require larger roof washers require a screen
that is less exposed. Larger amounts of water will have to pass through the pipe before the ball
can be filled. The ball will have a small drip hole to slowly empty once the rain has ended to
then return to its original position to be ready for the next rainfall.
Entering rainwater The ball is placed in a 3 way tee with a
will flow into this removable cap so that the ball can be Once the ball is
pipe. Some will enter taken out. saturated with water,
the ball, making it it will sink down and
heavier and some will block the pipe. Water
flow past the ball and will fill up the pipe
out of the pipe. and finally enter the
Water tank.
gradually
enters
the ball
through
this
screen.
This device allows the overflow pipe to be connected to the roof washer pipe.
30
35. Water
gradually
enters
the ball
through
this
screen.
Here is an idea to help you design a roof washer of your own.
ROOF WASHER
1: 3 way tee
2: 6”pipe
3: 90° elbow
4: 6”pipe
5: 3 way tee
6: 6”pipe
7: 3 way tee
8: 6” pipe
9: drain valve
INFLOW
10: 6”x4” rubber
coupling
11: 4” pipe
12: 45° elbow
13: 4”pipe
14: 45° elbow
15: 4”pipe
16: bushing
OVERFLOW
17: bushing
18: 90° elbow
19: 2”pipe
20: 90° elbow
21: 2” pipe
ANCHORING
22: plumber’s strap
Although this rainwater harvesting system has a good roof washer design, it does not have a good
overflow design. Excess water will back up into the inflow pipe before the overflow pipe starts
working. The overflow pipe should also be the same diameter as the inflow pipe to avoid a
bottleneck situation.
31
37. The overflow pipe is connected back to the sewer.
Building systems close to the downspout requires
less piping.
OVERFLOW
1: 2” pipe
2: 90° elbow
3: 2” pipe
Instead of directing water back into the sewer, you can direct the water into a rain garden,
gravel filled trench or connect it to a drip irrigation system. Overflow can be turned into works
of art. Here the overflow is turned into a small water course (see picture on below), which
ultimately ends in a rain garden.
33
39.
Anchoring
Because the rain barrel is fairly light and may tip or fall when it is empty, it is important to
anchor the system to the platform or a structure. The easiest method to tie down your system
is to use nylon rope. Steel cable is also a solution. Since cabling is more complicated, we will
illustrate these steps.
Cut a piece of steel aircraft cable and slip 5 cable swedges in it Use the first piece of cable
swedge (see picture 1) and a crimping tool to connect it into a circle (2). Its circumference
should be a less than the circumference of the rain barrel but more than that of the lid. Cut two
more long pieces of steel cable. They should be at least twice the height of the rain barrel. Use
one cable and slip it through two of the metal cable swedges that are already on the circle.
Making sure both lengths of cable are even; use the crimping tool to secure the metal swedges
in place. Do the same with the other cable and two metal swedges (3).
Screw a metal eyebolt into each of the four corners of your platform. Connect a turn buckle to
each metal eyebolt (4). Place the series of cables onto your rain barrel. The circle should be on
top of the rain barrel (5). The four hanging ends should be facing each corner of the platform.
Loop the ends of the cables into the turn buckle (6). Use a metal swedge to secure the loop. Do
this for all four corners. Finally, twist the turn buckles until the metal cables are taut (7) to finish
securing your rain barrel (8).
35
40.
For cinder block platforms, nail a thick wooden plank on top and use the eyebolt method
mentioned above.
Pre‐fabricated steel brackets are generally used to anchor horizontal tanks.
36
44.
Filtration Systems
This rain water harvesting system already has two means of filtration, one at the gutter (see
picture 1) and the other at the roof washer (2).
1
The gutter filters out
leaves and large debris.
The roof washer filters out the
particulate matter found on
rooftops.
2
This gutter screen that is put at the mouth of the downspout (see
picture on right) prevents leaves and other large debris from
entering the system. If you want to buy a filter, two choices are Rain
Keeper Downspout filter for smaller roofs and the Rain Keeper
Downspout collection filter for smaller systems. Refer to “Where to
obtain supplies” on page 11 for more information.
40
49. Seasonal Maintenance
To ensure your health and safety the Water Resources Group recommends the following seasonal
maintenance schedule for keeping your rainwater free of contaminants.
Spring
• Close spigot
• Re‐direct roof water from the drain pipe back into tank storage system by replacing the
in‐line plunger or changing the position of the valve
• Clean any winter debris from gutters, leader inlets and roof
• Repair any leaks in barrel or tanks
• Inspect and clean barrel tops
• Fill system with a few inches of water to check hose connections for leaks
• Inspect rope/cable retainers to assure that barrels are secure
• Be sure that your tank is labeled with a “do not drink the water” sign in all appropriate
languages
• To help ensure that children do not drink the water remove the valve from spigot and
store with tools
Summer
• Keep the roof, gutters and leader inlets clear of debris, check monthly
• Inspect vents at top of each barrel to insure that they are clean and intact
• Visit your system during a heavy rain or shortly after to check for leaks and overflow
problems.
• Any water from the overflow system should drain within 24 hours of a rainfall; if
puddles form, you should move the outflow pipe to a more porous site or consider
installing a small rain garden
• Inspect pipes and connectors regularly for any damage or disrepair
• Check man‐way hatch on top of your tank to make sure it is securely closed
Fall
• Remove plunger from the PVC joint to redirect water into the drain pipe to the sewer
• Empty water from the entire system‐ roof washer and tank
• Open main valve of storage tank and rain barrels
• Open valve on roof washer. Valves should remain open all winter to keep water from
freezing in system
• Disconnect leader from system and re‐route water as necessary for particular system
• Cover any openings in leaders
45
50. Living with the RWH System
Now that you have built your rain water harvesting system, you have helped to conserve one of
the Earth’s most valuable resources. A rain barrel is not something you build and walk away
from. It is important to make sure there are no leaks in your barrel and to drain the first flush
after every storm.
Remember to drain your roof washer and tank during the winter and to take out your
wintering tee! Freezing water will BREAK the system. The cracks seen in the two pictures
below are from left over water freezing and expanding.
If properly built and maintained, your rain water harvesting system will last many years. Even
the smallest tanks will save thousands of gallons of water.
It is essential to learn how to manage
your water usage. Seventy percent of
residential water use goes to outdoor
activities. One third of that water is
wasted (see diagram on right17). Using
pumps or sprinklers to water plants are
one of the most inefficient ways to
irrigate. Plants only need to be watered
at the roots. Sprinklers relentlessly
waste water by randomly shooting out
water to tree branches or leaves. Drip
irrigation systems with outlets placed
strategically next to plant roots are the most efficient ways to irrigate.
46
51. Existing RWH Systems
Organic Gardening Magazine has been sponsoring construction of rain water harvesting
systems in community gardens since 2007. Their Waterworks Project funded 30 systems in the
past 2 years. Looking at existing rain water harvesting systems and talking to community
gardeners may assist you in building your own. Locations in the USA and Canada include:
Alemany Farm ‐ San Francisco, CA
Ashview Community Garden ‐ Atlanta, GA
Aspen Farms ‐ Philadelphia, PA
Boyd Street Urban Farm ‐ Portland, ME
Bradner Gardens Park – Seattle, WA
Brentwood Community Garden ‐ Portland, OR
Children Garden ‐ Camden, NJ
City Seeds Urban Farm ‐ St. Louis, MO
Dias y Flores – New York, NY
The Farm Garden at the Early Childhood Education Center ‐ Columbus, OH
Fremont Community Garden ‐ Sacramento, CA
The Garden of Dreams ‐ New York, NY
Global Gardens ‐ Tulsa, OK
Gloryland Community Garden, Detroit, MI
Growing Green Youth Garden, Buffalo, NY
Guadalupe Montessori School, Silver City, NM
Hope Community Garden ‐ Toronto, ON Canada
Marigold Meadows ‐ Phoenix, AZ
Master Peace Youth and Community Garden ‐ Riverdale, MD
Our Saviour Community Garden ‐ Dallas, TX
The 1100 Block Bergen Street Garden ‐ Brooklyn, NY
Urban Ministry Center ‐ Charlotte, NC
Wasatch Community Gardens ‐ Salt Lake City, UT
Woodlawn Garden ‐ Portland, OR
Xochiquetzal Peace Garden ‐ Chicago, IL
For more information on these gardens, visit their website at:
http://www.organicgardening.com/feature/0,7518,s1‐2‐10‐1531‐1‐1X2X3‐4,00.html
This guide can be found on CENYC’s website at:
http://www.cenyc.org/openspace/rainwater/RWHHowTo.pdf
47
52. 10 Ways to Conserve Water
1. Turn off the faucet when brushing your teeth, washing your face and shaving.
2. Fix any leaky sinks, toilets or showerheads.
3. Wash only full loads‐ for clothing and dishes.
4. Do not run water to thaw meats.
5. Water plants at the roots.
6. Take showers instead of baths.
7. Replace showerheads and sink aerators with low flow ones.
8. Use a pitcher to store cold water in the refrigerator instead of running the tap every time.
9. Water plants during early mornings and late afternoons to reduce evaporation.
10. Do not flush the toilet unnecessarily. Dispose of bugs, cigarette butts and tissues another
way. 18 19 20
The Water Resources Group (WRG), a coalition of NYC greening & community garden groups is
dedicated to the preservation of NYC water resources through gardening, ecological design and
education programs. WRG is installing rainwater harvesting systems in gardens across NYC to
conserve water and prevent pollution. For more information on how you can help conserve
water in New York City, visit the Water Resources Group website at
www.waterresourcesgroup.org. The Water Resources Group meets every second Thursday of
the month at 10 a.m. at the Council on the Environment of New York City, 51 Chambers Street,
Room 214. All are welcome to attend.
If you have any questions regarding the construction of your rain water harvesting system e‐
mail Lenny Librizzi, Assistant Director of Open Space Greening at CENYC at llibrizzi@cenyc.org.
48
53.
1
Hasse, Rolf. “Rain water reservoirs above ground structures for roof catchment.” Welcome to Energy. 19 November 2003. 20
June 2008 <http://ces.iisc.ernet.in/energy/water/paper/drinkingwater/rainwater/introduction.html>
2
“An introduction to rain water harvesting.” The WWW Virtual Library on Urban Environmental Management. 9 May 2008. 20
June 2008 <http://www.gdrc.org/uem/water/rainwater/introduction.html>
3
10,000 Rain Gardens. 2008. 20 June 2008 < http://www.rainkc.com/>
4
“Water.” The New York Observer. 21 April 2008: G 10.
5
“An introduction to rain water harvesting.” The WWW Virtual Library on Urban Environmental Management. 9 May 2008. 20
June 2008 <http://www.gdrc.org/uem/water/rainwater/introduction.html>
6
“Rhizome Collective.” Eco Warrior. 28 Nov 2007. 11 July 2008 <http://hurricanecandice.wordpress.com/2007/11/28/rhizome‐
collective/>
7
“Oak Whiskey Barrel.” Rain Barrel by Aaron. 2003. 11 July 2008 <www.ne‐design.net/oak‐whiskey‐barrel.html>
8
“Products.” RainDrops Cisterns Rainwater Harvesting and Storage. 23 June 2008. 11 July 2008
<http://www.raindropscisterns.com/cat_photo_3.php>
9
“Rain Garden.” Wikipedia: The Free Encyclopedia. 12 June 2008. 20 June 2008 <http://en.wikipedia.org/wiki/Rain_garden>
10
“Bioswales.” Wikipedia: The Free Encyclopedia. 3 April 2008. 20 June 2008 <http://en.wikipedia.org/wiki/Bioswales>
11
Chapin Watermatics Inc. 11 July 2008 <http://www.chapindrip.com/index.php>
12
Drip depot. 11 July 2008 <http://www.dripdepot.com/>
13
Drip depot. 11 July 2008 <http://www.dripdepot.com/>
14
“Roofing.” Sam Siding Home Improvement. 20 June 2008 <www.samsiding.com/Roofing.aspx>
15
Lexis Coatings. 20 June 2008 <http://www.lexiscoatings.com/>
16
“Cedar.” Hynes Home Improvement: The Sign of Quality. 11 July 2008. <http://www.hyneshomeimprovement.com/roofing‐
cedar.html>
17
“Hydrapure Water Solutions.” Hydrapure. 11 July 2008. <http://www.hydrapure.net>
18
Lenz, Ericka. “10 easy ways to conserve water.” Gaiam Life‐ Your Guide to a Better Life. 20 June 2008
<http://life.gaiam.com/gaiam/p/10SimpleWaystoConserveWater.html>
19
“10 ways to conserve water.” Etowah Water and Sewer Authority. 2 February 2008. 2008 June 2008
<http://www.etowahwater.org/FAQs/10_Ways_to_Conserve_Water/10_ways_to_conserve_water.html>
20
“Ten Ways To Conserve Water Around The House And Help The Environment.” The Good Human. 2 July 2007. 20 June 2008.
<http://www.thegoodhuman.com/2007/07/02/ten‐ways‐to‐conserve‐water‐around‐the‐house‐and‐help‐the‐environment/>
This manual was put together by Julia Leung, Lenny Librizzi, Assistant Director of Open Space
Greening at CENYC and Lars Chellberg.
49