SlideShare ist ein Scribd-Unternehmen logo
1 von 4
Downloaden Sie, um offline zu lesen
Using ASP.Net Web Site Administration Tool for Security Setup

Microsoft Visual Studio has a built-in ASP.Net Website Administration Tool that helps you set up and
edit users, roles, and permissions for your web site or application with minimal code writing. Assuming
that you already have a website and now need to implement security for it, this article will show you
how you can use ASP.Net Website Administration tool to implement this task.

We used this tool for our social media marketing product development, but for the purpose of this
article, I created another test application called WebApplication1 that has all the default folders and files
and just added one extra folder called “Admin.” See below.


The first step is to identify what database to use and application services (membership, roles, etc.) to
add to your application. By default, the Web Site Administration Tool configures and uses a local Microsoft
SQL Server Standard Edition database in the App_Data folder for the Web site. If you, however, do not have a
database defined in the App_Data folder, one easy way to add it is discussed in this article:

Adding Membership and Roles to your MVC or ASP.Net Web Site – Application Services,
http://computerscribe.com/blogs/BlogPost?id=11

Note that if you use Visual Studio 2010 and .Net framework 4.0, the membership configuration is
automatically added to your web.config and you just need to modify the database connection string.

To fire up the Website Administration Tool, go to Visual Studio, select your project and click on Project -
> ASP.Net Configuration. The page that opens up looks like this
Figure 1 – ASP.Net Web Site Administration Tool

The first step that I recommend is to test your database connection. Click on Provider Configuration and
either select a single provider (first link) or different providers (second link). For my case, I need only one
provider, so I click the first link. This will take me to the second page where I can click on “Test” to
validate my database connection. Once you have successfully established a database connection, you’re
ready for security setup.

If you want to work with roles (recommended), you first need to enable and create new roles. The steps
to create new roles are straightforward so I will not discuss them here. For my test, I created two roles:
Admin and User.

Once roles were created, you are ready to create users. Note: to create users, you do not need to have
roles. However, I find that setting up access rules is easier with roles than with users. Again, the steps
for creating users are self-explanatory so I just went ahead and created two users: Admin1 and User1
without showing you how it’s been done.

The final step in the Security tab is to set up access rules. This is the place where you set permissions to
the whole site or individual folders for roles and users. For example, if I want to give everyone access to
the Account folder, I can select the folder, and make sure “All users” and “Allow” are selected as shown
below.
Figure 2 – Setting up Access Rules for the Account folder

For the Admin folder, I want to give access only to the Admin role. To do this, I select the folder, choose
“Admin” role, select “Allow” and click “OK”. See Figure 3 below. Note: every time you click “OK”, you will
be taken back to the previous page and to add a new rule, you have to click on “Create access rules”
again. I found this annoying and confusing at first, so I wanted to point it out.


Figure 3 – Allowing Access to the Admin folder for Admin Role

What I also need to do is to deny access from everyone else, so I choose “All users” and “Deny” and click
“OK”
Figure 4 – Denying Access to the Admin folder for all other users

Now we’re ready for testing. Press F5 to start the debugger. You can log in as either the user or admin
role and see that you have no problem accessing the Account folder. If you, however, log in as “User1”
and try to go to the Admin folder (by typing http://locahost/WebApplication1/Admin in the address
bar), you’d be kicked back to the log in page because you don’t have permission for this folder. Now if
you switch to “Admin1”, you are not redirected to the login page and can access the folder. See Figure 5
below.


Figure 5 – Admin Role can access the Admin page in the Admin folder

Setting up access rules for individual pages in the application or for controls (e.g. links, textboxes,
dropdown list, gridview, etc.) on the pages cannot be done via this tool and is beyond the scope of this
article, so I’ll leave it to you for your own exploration.

Weitere ähnliche Inhalte

Mehr von Amplephi

Maximizing the Value of PLM and ERP: Integration and Collaboration - Updated
Maximizing the Value of PLM and ERP: Integration and Collaboration - UpdatedMaximizing the Value of PLM and ERP: Integration and Collaboration - Updated
Maximizing the Value of PLM and ERP: Integration and Collaboration - Updated
Amplephi
 
ERP and PLM Integration Considerations by Richard Bourke
ERP and PLM Integration Considerations by Richard BourkeERP and PLM Integration Considerations by Richard Bourke
ERP and PLM Integration Considerations by Richard Bourke
Amplephi
 
Why Data Stream Management Systems Is a New Frontier for Social Media Marketi...
Why Data Stream Management Systems Is a New Frontier for Social Media Marketi...Why Data Stream Management Systems Is a New Frontier for Social Media Marketi...
Why Data Stream Management Systems Is a New Frontier for Social Media Marketi...
Amplephi
 
Computer Ethics and Content Marketing Platforms
Computer Ethics and Content Marketing PlatformsComputer Ethics and Content Marketing Platforms
Computer Ethics and Content Marketing Platforms
Amplephi
 
Social Media Engagement Tools
Social Media Engagement ToolsSocial Media Engagement Tools
Social Media Engagement Tools
Amplephi
 
How to create a Quick Post on Amplephi
How to create a Quick Post on AmplephiHow to create a Quick Post on Amplephi
How to create a Quick Post on Amplephi
Amplephi
 
Using Simple Script to install your Wordpress site
Using Simple Script to install your Wordpress siteUsing Simple Script to install your Wordpress site
Using Simple Script to install your Wordpress site
Amplephi
 

Mehr von Amplephi (7)

Maximizing the Value of PLM and ERP: Integration and Collaboration - Updated
Maximizing the Value of PLM and ERP: Integration and Collaboration - UpdatedMaximizing the Value of PLM and ERP: Integration and Collaboration - Updated
Maximizing the Value of PLM and ERP: Integration and Collaboration - Updated
 
ERP and PLM Integration Considerations by Richard Bourke
ERP and PLM Integration Considerations by Richard BourkeERP and PLM Integration Considerations by Richard Bourke
ERP and PLM Integration Considerations by Richard Bourke
 
Why Data Stream Management Systems Is a New Frontier for Social Media Marketi...
Why Data Stream Management Systems Is a New Frontier for Social Media Marketi...Why Data Stream Management Systems Is a New Frontier for Social Media Marketi...
Why Data Stream Management Systems Is a New Frontier for Social Media Marketi...
 
Computer Ethics and Content Marketing Platforms
Computer Ethics and Content Marketing PlatformsComputer Ethics and Content Marketing Platforms
Computer Ethics and Content Marketing Platforms
 
Social Media Engagement Tools
Social Media Engagement ToolsSocial Media Engagement Tools
Social Media Engagement Tools
 
How to create a Quick Post on Amplephi
How to create a Quick Post on AmplephiHow to create a Quick Post on Amplephi
How to create a Quick Post on Amplephi
 
Using Simple Script to install your Wordpress site
Using Simple Script to install your Wordpress siteUsing Simple Script to install your Wordpress site
Using Simple Script to install your Wordpress site
 

Kürzlich hochgeladen

Why Teams call analytics are critical to your entire business
Why Teams call analytics are critical to your entire businessWhy Teams call analytics are critical to your entire business
Why Teams call analytics are critical to your entire business
panagenda
 

Kürzlich hochgeladen (20)

Mcleodganj Call Girls 🥰 8617370543 Service Offer VIP Hot Model
Mcleodganj Call Girls 🥰 8617370543 Service Offer VIP Hot ModelMcleodganj Call Girls 🥰 8617370543 Service Offer VIP Hot Model
Mcleodganj Call Girls 🥰 8617370543 Service Offer VIP Hot Model
 
Apidays New York 2024 - The value of a flexible API Management solution for O...
Apidays New York 2024 - The value of a flexible API Management solution for O...Apidays New York 2024 - The value of a flexible API Management solution for O...
Apidays New York 2024 - The value of a flexible API Management solution for O...
 
Rising Above_ Dubai Floods and the Fortitude of Dubai International Airport.pdf
Rising Above_ Dubai Floods and the Fortitude of Dubai International Airport.pdfRising Above_ Dubai Floods and the Fortitude of Dubai International Airport.pdf
Rising Above_ Dubai Floods and the Fortitude of Dubai International Airport.pdf
 
Elevate Developer Efficiency & build GenAI Application with Amazon Q​
Elevate Developer Efficiency & build GenAI Application with Amazon Q​Elevate Developer Efficiency & build GenAI Application with Amazon Q​
Elevate Developer Efficiency & build GenAI Application with Amazon Q​
 
MINDCTI Revenue Release Quarter One 2024
MINDCTI Revenue Release Quarter One 2024MINDCTI Revenue Release Quarter One 2024
MINDCTI Revenue Release Quarter One 2024
 
Boost Fertility New Invention Ups Success Rates.pdf
Boost Fertility New Invention Ups Success Rates.pdfBoost Fertility New Invention Ups Success Rates.pdf
Boost Fertility New Invention Ups Success Rates.pdf
 
Six Myths about Ontologies: The Basics of Formal Ontology
Six Myths about Ontologies: The Basics of Formal OntologySix Myths about Ontologies: The Basics of Formal Ontology
Six Myths about Ontologies: The Basics of Formal Ontology
 
Apidays New York 2024 - Scaling API-first by Ian Reasor and Radu Cotescu, Adobe
Apidays New York 2024 - Scaling API-first by Ian Reasor and Radu Cotescu, AdobeApidays New York 2024 - Scaling API-first by Ian Reasor and Radu Cotescu, Adobe
Apidays New York 2024 - Scaling API-first by Ian Reasor and Radu Cotescu, Adobe
 
WSO2's API Vision: Unifying Control, Empowering Developers
WSO2's API Vision: Unifying Control, Empowering DevelopersWSO2's API Vision: Unifying Control, Empowering Developers
WSO2's API Vision: Unifying Control, Empowering Developers
 
Artificial Intelligence Chap.5 : Uncertainty
Artificial Intelligence Chap.5 : UncertaintyArtificial Intelligence Chap.5 : Uncertainty
Artificial Intelligence Chap.5 : Uncertainty
 
Apidays New York 2024 - The Good, the Bad and the Governed by David O'Neill, ...
Apidays New York 2024 - The Good, the Bad and the Governed by David O'Neill, ...Apidays New York 2024 - The Good, the Bad and the Governed by David O'Neill, ...
Apidays New York 2024 - The Good, the Bad and the Governed by David O'Neill, ...
 
Emergent Methods: Multi-lingual narrative tracking in the news - real-time ex...
Emergent Methods: Multi-lingual narrative tracking in the news - real-time ex...Emergent Methods: Multi-lingual narrative tracking in the news - real-time ex...
Emergent Methods: Multi-lingual narrative tracking in the news - real-time ex...
 
[BuildWithAI] Introduction to Gemini.pdf
[BuildWithAI] Introduction to Gemini.pdf[BuildWithAI] Introduction to Gemini.pdf
[BuildWithAI] Introduction to Gemini.pdf
 
Corporate and higher education May webinar.pptx
Corporate and higher education May webinar.pptxCorporate and higher education May webinar.pptx
Corporate and higher education May webinar.pptx
 
How to Troubleshoot Apps for the Modern Connected Worker
How to Troubleshoot Apps for the Modern Connected WorkerHow to Troubleshoot Apps for the Modern Connected Worker
How to Troubleshoot Apps for the Modern Connected Worker
 
Polkadot JAM Slides - Token2049 - By Dr. Gavin Wood
Polkadot JAM Slides - Token2049 - By Dr. Gavin WoodPolkadot JAM Slides - Token2049 - By Dr. Gavin Wood
Polkadot JAM Slides - Token2049 - By Dr. Gavin Wood
 
Why Teams call analytics are critical to your entire business
Why Teams call analytics are critical to your entire businessWhy Teams call analytics are critical to your entire business
Why Teams call analytics are critical to your entire business
 
MS Copilot expands with MS Graph connectors
MS Copilot expands with MS Graph connectorsMS Copilot expands with MS Graph connectors
MS Copilot expands with MS Graph connectors
 
Exploring Multimodal Embeddings with Milvus
Exploring Multimodal Embeddings with MilvusExploring Multimodal Embeddings with Milvus
Exploring Multimodal Embeddings with Milvus
 
Apidays New York 2024 - Passkeys: Developing APIs to enable passwordless auth...
Apidays New York 2024 - Passkeys: Developing APIs to enable passwordless auth...Apidays New York 2024 - Passkeys: Developing APIs to enable passwordless auth...
Apidays New York 2024 - Passkeys: Developing APIs to enable passwordless auth...
 

Setting up security for web application with ASP.Net Web Site Administration Tool

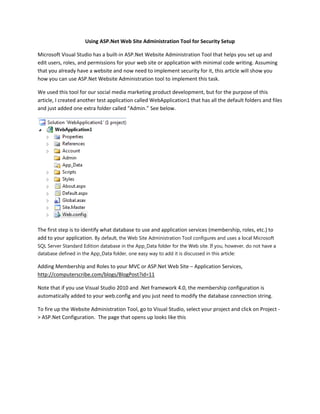
  • 1. Using ASP.Net Web Site Administration Tool for Security Setup Microsoft Visual Studio has a built-in ASP.Net Website Administration Tool that helps you set up and edit users, roles, and permissions for your web site or application with minimal code writing. Assuming that you already have a website and now need to implement security for it, this article will show you how you can use ASP.Net Website Administration tool to implement this task. We used this tool for our social media marketing product development, but for the purpose of this article, I created another test application called WebApplication1 that has all the default folders and files and just added one extra folder called “Admin.” See below. The first step is to identify what database to use and application services (membership, roles, etc.) to add to your application. By default, the Web Site Administration Tool configures and uses a local Microsoft SQL Server Standard Edition database in the App_Data folder for the Web site. If you, however, do not have a database defined in the App_Data folder, one easy way to add it is discussed in this article: Adding Membership and Roles to your MVC or ASP.Net Web Site – Application Services, http://computerscribe.com/blogs/BlogPost?id=11 Note that if you use Visual Studio 2010 and .Net framework 4.0, the membership configuration is automatically added to your web.config and you just need to modify the database connection string. To fire up the Website Administration Tool, go to Visual Studio, select your project and click on Project - > ASP.Net Configuration. The page that opens up looks like this
  • 2. Figure 1 – ASP.Net Web Site Administration Tool The first step that I recommend is to test your database connection. Click on Provider Configuration and either select a single provider (first link) or different providers (second link). For my case, I need only one provider, so I click the first link. This will take me to the second page where I can click on “Test” to validate my database connection. Once you have successfully established a database connection, you’re ready for security setup. If you want to work with roles (recommended), you first need to enable and create new roles. The steps to create new roles are straightforward so I will not discuss them here. For my test, I created two roles: Admin and User. Once roles were created, you are ready to create users. Note: to create users, you do not need to have roles. However, I find that setting up access rules is easier with roles than with users. Again, the steps for creating users are self-explanatory so I just went ahead and created two users: Admin1 and User1 without showing you how it’s been done. The final step in the Security tab is to set up access rules. This is the place where you set permissions to the whole site or individual folders for roles and users. For example, if I want to give everyone access to the Account folder, I can select the folder, and make sure “All users” and “Allow” are selected as shown below.
  • 3. Figure 2 – Setting up Access Rules for the Account folder For the Admin folder, I want to give access only to the Admin role. To do this, I select the folder, choose “Admin” role, select “Allow” and click “OK”. See Figure 3 below. Note: every time you click “OK”, you will be taken back to the previous page and to add a new rule, you have to click on “Create access rules” again. I found this annoying and confusing at first, so I wanted to point it out. Figure 3 – Allowing Access to the Admin folder for Admin Role What I also need to do is to deny access from everyone else, so I choose “All users” and “Deny” and click “OK”
  • 4. Figure 4 – Denying Access to the Admin folder for all other users Now we’re ready for testing. Press F5 to start the debugger. You can log in as either the user or admin role and see that you have no problem accessing the Account folder. If you, however, log in as “User1” and try to go to the Admin folder (by typing http://locahost/WebApplication1/Admin in the address bar), you’d be kicked back to the log in page because you don’t have permission for this folder. Now if you switch to “Admin1”, you are not redirected to the login page and can access the folder. See Figure 5 below. Figure 5 – Admin Role can access the Admin page in the Admin folder Setting up access rules for individual pages in the application or for controls (e.g. links, textboxes, dropdown list, gridview, etc.) on the pages cannot be done via this tool and is beyond the scope of this article, so I’ll leave it to you for your own exploration.