SlideShare ist ein Scribd-Unternehmen logo
1 von 18
Downloaden Sie, um offline zu lesen
PERFORMANCE WITH SAMSUNG LRDIMMS
AND INPHI’S iMB TECHNOLOGY


                       What do you do when you need more memory but all of your server’s system
               memory slots are full and a new server isn’t in your budget? You can increase your
               available memory with high-speed Samsung Load-Reduced Dual Inline Memory
               Modules, or LRDIMMs, using Inphi’s Isolation Memory Buffer (iMB) technology. iMB-
               enabled Samsung LRDIMMs can provide twice the memory in a given amount of space
               by allowing you to fill all memory slots with quad-ranked DIMMs.
                       In our labs, Principled Technologies benchmarked an IBM® System x3750 M4, a
               server based on the Intel® Xeon® processor E5-4600 product family, targeted at end-
               user applications such as ecommerce servers as well as high-performance compute
               systems that could benefit from the additional cores and system memory available in a
               four-socket system compared to traditional two-socket systems. We set up the System
               x3750 M4 with 384 GB of standard system memory, or RDIMMs, to determine how
               much overall application performance it delivered and how adding virtual machines
               (VMs) affected performance with standard RDIMMs.
                       Then we replaced the standard system memory DIMMs with the iMB-enabled
               Samsung LRDIMMs that use Samsung memory and Inphi’s iMB component, giving us
               768 GB of system memory using the same number of memory slots.


                                                                                         AUGUST 2012
                                 A PRINCIPLED TECHNOLOGIES TEST REPORT
                                                                        Commissioned by Inphi Corporation
We measured the application performance of the two configurations using a
                          tool that simulates a real-world ecommerce workload. With the LRDIMMs, the server
                          could support twice as much memory and deliver more than twice as many orders per
                          minute (OPM) at 10 VMs. As we added more VMs, performance increased, rather than
                          decreased as it did with the RDIMM configuration, because each VM had a large amount
                          of system memory driving performance. At 12 VMs, the iMB-enabled Samsung LRDIMM
                          configuration delivered 148.1 percent greater performance than the RDIMM
                          configuration provided at 10 VMs. This boost means more capacity and room for your
                          business to grow.

DOUBLE YOUR MEMORY WITH INPHI TECHNOLOGY
                                  Using Inphi’s iMB technology, high-speed Samsung LRDIMMs can provide twice
                          the memory in a given amount of space. Inphi’s iMB addresses the high-speed signal
                          integrity challenges of the memory interface by isolating the CPU and the memory
                          components and buffering the memory I/O, control, and data signals. iMB reduces the
                          load on the memory controller, allowing the memory subsystem to double the capacity
                          while maintaining the same speed. With iMB-enabled Samsung LRDIMMs in your server,
                          you can increase the memory available for your applications and virtual machines.
                                  To test the capacity and performance increase that iMB-enabled Samsung
                          LRDIMMs deliver, we configured a four-socket IBM System x3750 M4 server two ways:
                          with 384 GB of system memory using traditional registered DIMMS (RDIMMs) and with
                          768 GB of memory using iMB-enabled Samsung LRDIMMs in the same amount of space.
                          The IBM System x3750 M4 has a maximum capacity of 768 GB of system memory with
                          RDIMMs and 1.5 TB at 1,333 MT/s operating at 1.35V using iMB-enabled Samsung
                          LRDIMMs, but we tested with only half of those amounts. The IBM System x3750 M4
                          hosted varying numbers of VMware® vSphere® 5 VMs each running Microsoft®
                          Windows Server® 2008 R2 and containing a 50GB Microsoft SQL Server® 2012 database
                          instance.
                                  Figure 1 shows the performance of the server with the 768GB iMB-enabled
                          Samsung LRDIMM configuration and with the 384GB RDIMM configuration at varying
                          VM counts. At 12 VMs, the iMB-enabled Samsung LRDIMM configuration delivered
                          275.2 percent greater performance than the RDIMM configuration at 12 VMs, and 148.1
                          percent greater performance than the best RDIMM configuration at 10 VMs. With
                          increased memory driving performance, your server could support more ecommerce
                          users or applications.


Performance with Samsung LRDIMMs and Inphi’s iMB technology            A Principled Technologies test report 2
Application performance
                                                             500,000                                           768GB system
                                                                                                               memory
                                                             400,000                                           (iMB-enabled
  Figure 1: Samsung LRDIMMs


                                         Orders per minute
                                                                                                               Samsung
  enabled by Inphi’s iMB                                                                                       LRDIMM
  technology doubled system                                  300,000
                                                                                                               configuration)
  memory capacity and delivered
  275.2 percent greater                                      200,000                                           384GB system
  performance at 12 VMs.                                                                                       memory
                                                             100,000                                           (RDIMM
                                                                                                               configuration)
                                                                  0
                                                                        10          11               12
                                                                                Number of VMs

                                                   As Figure 1 shows, performance continued to increase using iMB-enabled
                                  Samsung LRDIMMs as the number of VMs increased, while performance decreased at
                                  higher VM counts with the RDIMM configuration. This occurred because of the amount
                                  of system memory that was available for each VM.

                                                   Figure 2 shows the amount of system memory each VM used for both memory
                                  configurations at the different VM counts we tested. As the number of VMs increased,
                                  we changed the amount of memory allocated to each VM instead of using memory
                                  oversubscription. Because the iMB-enabled Samsung LRDIMM configuration permitted
                                  more system memory for each VM, performance increased instead of degraded as with
                                  the RDIMM configuration.

System memory, in GB, allotted for each VM
                                                                       10 VMs              11 VMs                 12 VMs
768GB system memory (iMB-enabled
                                                                         72                     64                   60
Samsung LRDIMM configuration)
384GB system memory (RDIMM
                                                                         36                     32                   30
configuration)
Figure 2: System memory allotted per VM, in GB, for the two configurations at varying VM counts.
                                                   The staggering cost of powering data centers makes it important to look not
                                  only at performance, but also at the power requirements for each server. In addition to
                                  performance, we recorded power consumption during testing so we could calculate the
                                  performance-per-watt advantage of using higher-memory-capacity LRDIMMs with the
                                  ability to handle greater server loads.

                                                   Figure 3 shows the performance per watt of the server with the two memory
                                  capacities at varying VM counts. At 12 VMs, the iMB-enabled Samsung LRDIMM
                                  configuration delivered 174.2 percent greater performance per watt than the RDIMM


Performance with Samsung LRDIMMs and Inphi’s iMB technology                               A Principled Technologies test report 3
configuration at 12 VMs, and 86.0 percent greater performance per watt than the best
                                 RDIMM configuration at 10 VMs. This shows that adding more system memory to your
                                 server can not only boost performance, but also can bring overall power savings as well.


                                                                            Performance per watt
                                                                 600                                            768GB system
                                                                                                                memory


                                        Orders per minute/watt
 Figure 3: Samsung’s LRDIMMs                                     500
                                                                                                                (iMB-enabled
 enabled by Inphi’s iMB                                                                                         Samsung
                                                                 400
 technology doubled system                                                                                      LRDIMM
 memory capacity and delivered                                   300                                            configuration)
 174.2 percent better
 performance per watt at 12                                      200                                            384GB system
 VMs.                                                                                                           memory
                                                                 100                                            (RDIMM
                                                                                                                configuration)
                                                                  0
                                                                       10          11              12
                                                                               Number of VMs


WHAT WE TESTED
About Inphi’s Isolation Memory Buffer technology
                                                  Inphi’s iMB technology is a technique for overcoming the engineering problems
                                 involved in designing low-latency, high-bandwidth registered memory for server and
                                 high-end workstation use cases. The core of the iMB is a component on the LRDIMM
                                 module that isolates the data, control, and clock signal drivers from the DRAM
                                 components. In doing so, the LRDIMMs are able to support longer traces and deeper
                                 ranks of memory with greater signal integrity, resulting in doubled memory capacity per
                                 slot. For more information, visit http://www.inphi.com/products-
                                 technology/computing-storage-products/products/imbtrade02-gs02a.php.

About iMB-enabled Samsung Load-Reduced DIMMs
                                                  Enabled by Inphi’s iMB technology, high-speed Samsung LRDIMMs are a new,
                                 higher-capacity class of Registered DIMM. Designed for use in high-memory-capacity
                                 environments, LRDIMMs may be well suited to the virtualization, enterprise application,
                                 and high-performance computing (HPC) fields, as well as scenarios such as visualization
                                 workstations, which have a low DIMM slot count, but above-average memory demands.
                                 For more information, visit http://www.inphi.com/lrdimm.php.

About Samsung memory
                                                  Samsung Semiconductor, Inc. is a longtime supplier of consumer and enterprise-
                                 level memory components. Samsung DDR3 LRDIMMs are available in 1.35V and 1.5V


Performance with Samsung LRDIMMs and Inphi’s iMB technology                               A Principled Technologies test report 4
power requirement levels, and at speeds of 1,600; 1,333; and 1,066 Mbps in capacities
                          of 32GB and 16GB. For more information, visit
                          http://www.samsung.com/us/business/components/pdfs/samsung_LRDIMM.PDF.

About the IBM System x3750 M4
                                  The IBM System x3750 M4 is a high-density 2U rack server with the capability to
                          run up to four 8-core Intel Xeon processor E5-4600 product family processors. The
                          server has a maximum capacity of 48 DIMM slots, for up to 1.5TB total system memory
                          in 3DPC configurations at 1,333 MT/s. The System x3750 M4 chassis is configurable for
                          up to 16 HDDs or 32 eXFlash SSDs. The system provides a flexible and expandable option
                          for applications such as HPC and ecommerce that may benefit from high-density
                          memory with the processing power of up to 32 cores. For more information, visit
                          http://www.ibm.com/systems/x/hardware/rack/x3750m4/index.html.

HOW WE TESTED
                                  We optimized the virtual hardware configuration for each VM for best
                          performance using the available resources on each server. Our goal was to create a real-
                          world representation of how these servers would be utilized while under stress from an
                          ecommerce application. We configured the VMs on the System x3750 M4 with four
                          vCPUs. For each configuration, we divided the amount of available memory between
                          the VMs. For example, for the configuration with 10 VMs and 768GB total memory, we
                          assigned 72 GB of memory to each VM, leaving some memory overhead for the
                          hypervisor.
                                  We used the DVD Store version 2.1 (DS2) benchmark to test the application
                          performance of the servers. We ran DS2 on multiple client machines against each
                          System x3750 M4 test configuration and recorded the power that the server consumed
                          and the orders per minute that it could handle for each test configuration.
                                  For detailed information on the System x3750 M4 configurations that we tested,
                          see Appendix A. For detailed instructions on how we tested, see Appendix B.

About DVD Store Version 2.1
                                  To create our real-world ecommerce workload, we used the DVD Store Version
                          2.1 benchmarking tool. DS2 models an online DVD store, where customers log in, search
                          for movies, and make purchases. DS2 reports these actions in orders per minute that
                          the system could handle, to show what kind of performance you could expect for your
                          customers. The DS2 workload also performs other actions, such as adding new
                          customers, to exercise the wide range of database functions you would need to run your
                          ecommerce environment.


Performance with Samsung LRDIMMs and Inphi’s iMB technology             A Principled Technologies test report 5
WHAT WE FOUND
                                           Figure 4 presents the results of our tests with the total application performance
                                  in OPM at the different VM counts we tested.

Performance results, in OPM
                                                           10 VMs                     11 VMs                12 VMs
768GB system memory (iMB-enabled
                                                           361,433                   378,682                397,063
Samsung LRDIMM configuration)
384GB system memory (RDIMM
                                                           160,035                   119,558                105,836
configuration)
Percentage increase with iMB-enabled
                                                           125.8%                     216.7%                275.2%
Samsung LRDIMM configuration
Figure 4: Performance results, in orders per minute, for the two configurations at varying VM counts.
                                           Figure 5 shows the server’s performance per watt for both memory
                                  configurations at the different VM counts we tested.

Performance per watt
                                                           10 VMs                     11 VMs                12 VMs
768GB system memory (iMB-enabled
                                                            493.3                      514.5                527.4
Samsung LRDIMM configuration)
384GB system memory (RDIMM
                                                            283.5                      220.7                192.3
configuration)
Percentage increase with iMB-enabled
                                                            74.0%                     133.2%                174.2%
Samsung LRDIMM configuration
Figure 5: Performance per watt during our tests for the two configurations at varying VM counts.
                                           Figure 6 shows the server’s power consumption in watts for both memory
                                  configurations at the different VM counts we tested.

Power
                                                           10 VMs                     11 VMs                12 VMs
768GB system memory (iMB-enabled
                                                             733                             736                753
Samsung LRDIMM configuration)
384GB system memory (RDIMM
                                                             564                             542                550
configuration)
Figure 6: Power in watts during our tests for the two configurations at varying VM counts.


IN CONCLUSION
                                           When you can get twice the memory in the same amount of space with iMB-
                                  enabled Samsung LRDIMMs, normal system memory is a less attractive option. In our
                                  tests, replacing traditional RDIMMS with iMB-enabled Samsung LRDIMMs boosted
                                  ecommerce application performance by 148.1 percent and increased performance per
                                  watt by 86.0 percent.


Performance with Samsung LRDIMMs and Inphi’s iMB technology                         A Principled Technologies test report 6
The iMB-enabled Samsung LRDIMMs can provide higher application
                          productivity, Increased energy efficiency, and a lower real estate footprint by
                          maximizing a company’s existing server infrastructure
                                  For any company that needs to gain memory without losing space, iMB-enabled
                          Samsung LRDIMMs with Samsung memory and Inphi’s iMB technology could be a wise
                          investment. The Samsung LRDIMMs are available from IBM in both 32GB and 16GB
                          capacity.


Performance with Samsung LRDIMMs and Inphi’s iMB technology             A Principled Technologies test report 7
APPENDIX A – SERVER CONFIGURATION INFORMATION
       Figure 7 provides detailed configuration information for the IBM System x3750 M4 used for both 384GB and
768GB memory configurations. We used different memory for the two configurations.
System                                                                      IBM System x3750 M4
Power supplies
Total number                                               2
Vendor and model number                                    Delta Electronics DPS-1400BB
Wattage of each (W)                                        1,400
Cooling fans
Total number                                               6
Vendor and model number                                    IBM 46C9727
Dimensions (h x w) of each                                 2.5” x 2.5”
General
Number of processor packages                               4
Number of cores per processor                              8
Number of hardware threads per core                        2
CPU
Vendor                                                     Intel
Name                                                       Xeon
Model number                                               E5-4650
Stepping                                                   C1
Socket type                                                LGA2011
Core frequency (GHz)                                       2.7 GHz
L1 cache                                                   32 KB + 32 KB (per core)
L2 cache                                                   256 KB (per core)
L3 cache (MB)                                              20
Platform
Vendor and model number                                    IBM System x3750 M4
BIOS name and version                                      IBM KOE113AUS
BIOS settings                                              Default
Memory modules
iMB-enabled Samsung LRDIMM configuration
Total system memory in system (GB)                         768
Vendor and model number                                    Samsung M386B4G70BM0-YH90
Type                                                       PC3L-10600L
Speed (MHz)                                                1,333
Speed running in the system (MHz)                          1,333
Timing/Latency (tCL-tRCD-tRP-tRASmin)                      9-9-9-36
Size (GB)                                                  32
Number of system memory module(s)                          24
Chip organization                                          Double-sided
Rank                                                       Quad


Performance with Samsung LRDIMMs and Inphi’s iMB technology               A Principled Technologies test report 8
System                                                                           IBM System x3750 M4
RDIMM configuration
Total system memory in system (GB)                               384
Vendor and model number                                          Samsung M393B2G70BH0-CH9
Type                                                             PC3-10600R
Speed (MHz)                                                      1,333
Speed running in the system (MHz)                                1,333
Timing/Latency (tCL-tRCD-tRP-tRASmin)                            9-9-9-36
Size (GB)                                                        16
Number of system memory module(s)                                24
Chip organization                                                Double-sided
Rank                                                             Dual
Operating system (host)
Name                                                             VMware ESXi 5.0 Update 1
Build number                                                     623860
File system                                                      EXT3
Kernel                                                           5.0.0U1
Language                                                         English
Operating system (virtualized)
Name                                                             Windows Server 2008 R2 SP1
Build number                                                     7601
File system                                                      NTFS
Kernel                                                           ACPI x64-based PC
Language                                                         English
RAID controller
Vendor and model number                                          IBM ServeRAID M5110e
Cache size (MB)                                                  512 MB
Hard drives
Vendor and model number                                          IBM MBF2600RC
Number of drives                                                 4
Size (GB)                                                        600
RPM                                                              10,000
Type                                                             SAS
Ethernet adapter
Vendor and model number                                          Emulex OneConnect OCe11100
Type                                                             Integrated
Figure 7: Detailed configuration information for the IBM System x3750 M4.


Performance with Samsung LRDIMMs and Inphi’s iMB technology                    A Principled Technologies test report 9
APPENDIX B - HOW WE TESTED
Setting up the test environment
          We used an IBM System x3750 M4 as the system under test. We connected two 24-disk external arrays through
a dual-port SAS controller. The two arrays each had 146GB, 10,000RPM SAS hard disks installed. We configured each
array as RAID 0 volumes to maximize available disk space. We used one array for the server VMs and SQL Server
database instances, and the second array for SQL Server database logs.
          We used virtual clients to run the DVD Store workload. We used a four-socket server with four quad-core
processors, 32 GB of system memory, and eight internal 146GB, 10,000RPM SAS hard disks for our virtualized client
server. Each client VM ran the workload for a single server VM under test so there was a one-to-one configuration. For
example, when testing with 12 VMs, we used 12 client VMs. We configured the client VMs with one virtual CPU, 2GB
system memory, and a 30GB virtual disk for the operating system. We connected all network traffic through a 1Gb
switch.

Setting up VMware vSphere 5.0
          We used the steps below to configure VMware on the IBM System x3750 M4 and client VM servers.
Configuring partitions on the servers
          We configured four internal drives in a RAID 1 on the IBM System x3750 M4 for the VMware vSphere 5.0.1
installation. On the virtual client server, we configured two disks in a RAID 1 for the VMware vSphere 5.0.1 installation.
Installing VMware vSphere 5.0 (ESXi) U1
          We used VMware vSphere 5.0 Update 1 with IBM Customization on the IBM System x3750 M4. We did not use
the IBM Customization version on the virtual client server.
    1. Insert the disk, and select Boot from disk.
    2. On the Welcome screen, press Enter.
    3. On the End User License Agreement (EULA) screen, press F11.
    4. On the Select a Disk to Install or Upgrade Screen, select the relevant volume to install ESXi on and press Enter.
    5. On the Please Select a Keyboard Layout screen, press Enter.
    6. On the Enter a Root Password Screen, assign a root password and confirm it by entering it again. Press Enter to
       continue.
   7. On the Confirm Install Screen, press F11 to install.
   8. On the Installation complete screen, press Enter to reboot.
Configuring ESXi after Installation
    1.    On the ESXi screen, press F2, enter the root password, and press Enter.
    2.    On the System Customization screen, select Troubleshooting Options, and press Enter.
    3.    On the Troubleshooting Mode Options screen, select enable ESXi Shell, and press Enter.
    4.    Select Enable SSH, press Enter, and press ESC.
    5.    On the System Customization screen, select Configure Management Network.
    6.    On the Configure Management Network screen, select IP Configuration.
    7.    On the IP Configuration screen, select set static IP, enter an IP address, subnet mask, and default gateway, and
          press Enter.


Performance with Samsung LRDIMMs and Inphi’s iMB technology                    A Principled Technologies test report 10
8. On the Configure Management Network screen, press Esc. When asked if you want to apply the changes, press
       Y.
Configuring VM networking on ESXi
   1. Using the vSphere client from another machine, connect to the ESXi server.
   2. Add the necessary vSwitch for the network that DVD Store traffic will use:
       a. Click the host, click the Configuration tab, and click Networking.
       b. Click Add Networking.
       c. Choose Virtual Machine, and click Next.
       d. Choose create a vSphere standard switch.
       e. Choose the NIC associated with VM traffic.
       f. Assign the network label and assign IP settings.
       g. Click Finish.
Configuring VMware datastores on the servers
We created three datastores on the IBM System x3750 M4.
   1. Using the vSphere client, select HomeDatastore and Datastore Clusters.
   2. Right-click Cluster and select Add new Datastore.
   3. Select the appropriate host, and click Next.
   4. Leave default Storage type as Disk/LUN, and click Next.
   5. Select the desired Disk/LUN, and click Next.
   6. Select VMFS-5, and click Next.
   7. Click Next.
   8. Enter desired datastore name, and click Next.
   9. Keep default capacity of Maximum available space, and click Next.
   10. Click Finish.
   11. Repeat all steps above to create the remaining two datastores.
Creating the first VM
         We created the server virtual machines on two external 24-disk SAS enclosures connected to the IBM System
x3750 M4 using the steps below. Figure 8 shows the configuration information for each server VM. For the virtual client
server we used six internal disks in a RAID 0 for the virtual machines. We configured the client VMs with a 30GB OS
partition and no other partitions, following steps 1-16 below.

IBM System x3750 M4 VM virtual
                                               Datastore           Size (GB)         Node            Provisioning
disk settings
Hard disk 1                              OS                           50               0:0     Thick, Lazy Zeroed
Hard disk 2                              Database                     120              0:1     Thick, Lazy Zeroed
Hard disk 3                              Database_Logs                30               0:2     Thick, Lazy Zeroed
Figure 8: Virtual disk settings for the IBM System x3750 M4.

    1.   In the vSphere client, connect to the vCenter Server, and browse to the ESXi host.
    2.   Click the Virtual Machines tab.
    3.   Right-click, and choose New Virtual Machine.
    4.   Choose Custom, and click Next.
    5.   Assign a name to the virtual machine, and click Next.
    6.   Select the corresponding OS Datastore, and click Next.


Performance with Samsung LRDIMMs and Inphi’s iMB technology                    A Principled Technologies test report 11
7. Choose Virtual Machine Version 8, and click Next.
    8. Choose Windows, choose Microsoft Windows Server 2008 R2 (64-bit), and click Next.
    9. Change the number of cores per virtual socket to 4, and click Next. (Note: We used only one vCPU on the client
        server.)
    10. Choose the default amount of memory, and click Next.
    11. Click 1 for the number of NICs, select vmnicX, and click Next.
    12. Leave the default virtual storage controller, and click Next.
    13. Choose to create a new virtual disk, and click Next.
    14. Reference Figure 8 to assign OS virtual disk parameters, (e.g., 50 GB, thick-provisioned lazy zeroed), specify the
        OS datastore, and click Next.
    15. Keep the default virtual device node (0:0), and click Next.
    16. Click Finish.
    17. Right-click the VM, and choose Edit Settings.
    18. On the Hardware tab, click Add…
    19. Click Hard Disk, and click Next.
    20. Click Create a new virtual disk, and click Next.
    21. Reference Figure 8 for the appropriate virtual disk size, choose thick-provisioned lazy zeroed, and specify the
        datastore for backup and SQL Server data usage.
    22. Choose SCSI(0:1) for the device node, and click Next.
    23. On the Hardware tab, click Add…
    24. Click Hard Disk, and click Next.
    25. Click Create a new virtual disk, and click Next.
    26. Reference Figure 8 for the appropriate virtual disk size, choose thick-provisioned lazy zeroed, and specify the
        datastore for the SQL Server log virtual disks.
    27. Click Finish, and click OK.
    28. Start the VM.
    29. Attach the Windows Server 2008 R2 SP1 ISO image to the VM, and install Windows Server 2008 R2 SP1 on your
        VM.
Configuring the VMs
        We used Windows Server 2008 R2 SP1 Enterprise Edition and Microsoft SQL Server 2012 inside the VMs on the
IBM System x3750 M4. We used the same steps to configure the virtual client server, but did not install Microsoft SQL
Server 2012 inside those client VMs.
Installing the VM operating system on the first VM
    1. Insert the installation DVD for Windows Server 2008 R2 SP1 Enterprise into the DVD drive, and attach the
        physical DVD drive to the VM. Alternatively, use an ISO image and connect to the ISO image from the VM
        console.
    2. Open the VM console on vSphere.
    3. At the Language Selection Screen, click Next.
    4. Click Install Now.
    5. Select Windows Server 2008 R2 Enterprise (Full Installation), and click Next.
    6. Click the I accept the license terms check box, and click Next.
    7. Click Custom.
    8. Click Next.
    9. At the User’s password must be changed before logging on warning screen, click OK.
    10. Enter the desired password for the administrator in both fields, and click the arrow to continue.


Performance with Samsung LRDIMMs and Inphi’s iMB technology                   A Principled Technologies test report 12
11. At the Your password has been changed screen, click OK.
   12.  Install the latest VMware Tools package on the VM. Restart as necessary.
   13. Connect the machine to the Internet, and install all available Windows updates. Restart as necessary.
   14. Enable remote desktop access.
   15. Change the hostname and reboot when prompted.
   16. Create a shared folder to store test script files. Set permissions as needed.
   17. Set up networking:
       a. Click StartControl Panel, right-click Network Connections, and choose Open.
       b. Right-click the VM traffic NIC, and choose Properties.
       c. Select TCP/IP (v4), and choose Properties.
       d. Set the IP address, subnet, gateway, and DNS server for the virtual NIC, which will handle outgoing server
            traffic. Click OK, and click Close.
   18. In the VM, configure the VM storage:
       a. Click the Server Manager icon in the taskbar.
       b. In the left pane, expand Storage and click Disk Management.
       c. Right-click the first volume and choose Initialize Disk.
       d. In the right pane, right-click the volume and choose New Simple Volume...
       e. At the welcome window, click Next.
       f. At the Specify Volume Size window, leave the default selection, and click Next.
       g. At the Assign Drive Letter or Path window, choose a drive letter, and click Next.
       h. At the Format Partition window, choose NTFS and 64K allocation unit size, and click Next.
       i. At the Completing the New Simple Volume Wizard window, click Finish.
       j. Repeat steps c through i for the remaining volumes.
Installing SQL Server 2012 on the first VM
   1.    Open the vSphere console for the VM.
   2.    Log into the virtual machine.
   3.    Insert the installation DVD for SQL Server 2012 Enterprise into the vSphere host server’s DVD drive.
   4.    Attach the physical DVD drive to the VM.
   5.    Click Run SETUP.EXE. If Autoplay does not begin the installation, navigate to the SQL Server 2012 DVD, and
         double-click.
   6.    If the installer prompts you with a .NET installation prompt, click Yes to enable the .NET Framework Core role.
   7.    In the left pane, click Installation.
   8.    Click New SQL Server stand-alone installation or add features to an existing installation.
   9.    At the Setup Support Rules screen, wait for the check to complete. If there are no failures or relevant warnings,
         click OK.
   10.   Select the Enter the product key radio button, and enter the product key. Click Next.
   11.   Click the checkbox to accept the license terms, and click Next.
   12.   Click Install to install the setup support files.
   13.   If there are no failures displayed, click Next.
   14.   At the Setup Role screen, choose SQL Server Feature Installation.
   15.   At the Feature Selection screen, select Database Engine Services, Full-Text and Semantic Extractions for Search,
         Client Tools Connectivity, Client Tools Backwards Compatibility, Management Tools –Basic, and Management
         Tools – Complete. Click Next.
   16.   At the Installation Rules screen, click Next once the check completes.
   17.   At the Instance configuration screen, leave the default selection of default instance, and click Next.
   18.   At the Disk space requirements screen, click Next.


Performance with Samsung LRDIMMs and Inphi’s iMB technology                   A Principled Technologies test report 13
19. At the Server Configuration screen, choose NT ServiceSQLSERVERAGENT for SQL Server Agent, and choose NT
        ServiceMSSQLSERVER for SQL Server Database Engine. Click Next.
    20. At the Database Engine Configuration screen, select Mixed Mode.
    21. Enter and confirm a password for the system administrator account.
    22. Click Add Current user. This may take several seconds.
    23. Click Next.
    24. At the Error and usage reporting screen, click Next.
    25. At the Installation Configuration Rules screen, check that there are no failures or relevant warnings, and click
        Next.
    26. At the Ready to Install screen, click Install.
    27. After installation completes, click Close.
    28. Click Close.
    29. Create a SQL Server login for the ds2user.
    30. Copy the pre-created DVD Store backup to the specified backup VHD volume.
Configuring additional VMs on vSphere
         We used the steps below to clone out additional VMs on the IBM System x3750 M4 and virtual client server.
    1.   Log into the vCenter Server, which manages the host.
    2.   Right-click the first VM, and choose Clone.
    3.   Name the new VM.
    4.   Choose the cluster, and select the host.
    5.   For the storage screen, choose advanced and direct the new virtual disks to the applicable datastores. Choose to
         customize using the customization wizard. Save the clone details as a new customization specification.
    6.   Continue cloning each VM, modifying the customization specification as necessary for IP addressing and so on.
    7.   Ensure in each VM that the necessary virtual disks are all online, the hostname is renamed, and the IP
         addressing was properly assigned by the customization wizard.
    8.   Modify the SQL Server hostname of each VM using the instructions provided by Microsoft
         (http://msdn.microsoft.com/en-us/library/ms143799.aspx ).
    9.   To configure automatic start for your specified number of VMs, click the Host configuration tab in the vSphere
         client, and click Virtual Machine Startup/Shutdown.
Configuring the database (DVD Store)
         We generated the data using the Install.pl script included with DVD Store version 2.1 (DS2), providing the
parameters for our 50GB database size and the database platform on which we ran: Microsoft SQL Server. We ran the
Install.pl script on a utility system running Linux. The database schema was also generated by the Install.pl script.
         After processing the data generation, we transferred the data files and schema creation files to a Windows-
based system running SQL Server 2008 R2. We built the 50GB database in SQL Server 2008 R2, and then performed a full
backup, storing the backup file on the C: drive for quick access. We used that backup file to restore on the test server
between test runs. We performed this procedure once, and used the same backup file for all virtual machines.
         The only modification we made to the schema creation scripts were the specified file sizes for our database. We
explicitly set the file sizes higher than necessary to ensure that no file-growth activity would affect the outputs of the
test. Besides this file size modification, the database schema was created and loaded according to the DVD Store
documentation. Specifically, we followed the steps below:


Performance with Samsung LRDIMMs and Inphi’s iMB technology                    A Principled Technologies test report 14
1. We generated the data and created the database and file structure using database creation scripts in the DS2
      download. We made size modifications specific to our 50GB database and the appropriate changes to drive
      letters.
   2. We transferred the files from our Linux data generation system to a Windows system running SQL Server.
   3. We created database tables, stored procedures, and objects using the provided DVD Store scripts.
   4. We set the database recovery model to bulk-logged to prevent excess logging.
   5. We loaded the data we generated into the database. For data loading, we used the import wizard in SQL Server
      Management Studio. Where necessary, we retained options from the original scripts, such as Enable Identity
      Insert.
   6. We created indices, full-text catalogs, primary keys, and foreign keys using the database-creation scripts.
   7. We updated statistics on each table according to database-creation scripts, which sample 18 percent of the
      table data.
   8. On the SQL Server instance, we created a ds2user SQL Server login using the following Transact SQL (TSQL)
      script:

         USE [master]
         GO
         CREATE LOGIN [ds2user] WITH PASSWORD=N’’,
                         DEFAULT_DATABASE=[master],
                         DEFAULT_LANGUAGE=[us_english],
                         CHECK_EXPIRATION=OFF,
                         CHECK_POLICY=OFF
         GO
   9.    We set the database recovery model back to full.
   10.   We created the necessary full text index using SQL Server Management Studio.
   11.   We created a database user and mapped this user to the SQL Server login.
   12.   We then performed a full backup of the database. This backup allowed us to restore the databases to a pristine
         state relatively quickly between tests.
         Figure 9 details our initial file size modifications.

Logical name                                            Filegroup                            Initial size (MB)
Database files
primary                                       PRIMARY                             8
cust1                                         DS_CUST_FG                          5,623
cust2                                         DS_CUST_FG                          5,623
cust3                                         DS_CUST_FG                          5,623
cust4                                         DS_CUST_FG                          5,623
cust5                                         DS_CUST_FG                          5,623
cust6                                         DS_CUST_FG                          5,623
cust7                                         DS_CUST_FG                          5,623
cust8                                         DS_CUST_FG                          5,623
ind1                                          DS_IND_FG                           3,479
ind2                                          DS_IND_FG                           3,479
ind3                                          DS_IND_FG                           3,479
ind4                                          DS_IND_FG                           3,479
ind5                                          DS_IND_FG                           3,479

Performance with Samsung LRDIMMs and Inphi’s iMB technology                 A Principled Technologies test report 15
Logical name                                               Filegroup                            Initial size (MB)
ind6                                                DS_IND_FG                       3,479
ind7                                                DS_IND_FG                       3,479
ind8                                                DS_IND_FG                       3,479
ds_misc1                                            DS_MISC_FG                      129
ds_misc2                                            DS_MISC_FG                      129
ds_misc3                                            DS_MISC_FG                      129
ds_misc4                                            DS_MISC_FG                      129
ds_misc5                                            DS_MISC_FG                      129
ds_misc6                                            DS_MISC_FG                      129
ds_misc7                                            DS_MISC_FG                      129
ds_misc8                                            DS_MISC_FG                      129
orders1                                             DS_ORDERS_FG                    2,682
orders2                                             DS_ORDERS_FG                    2,682
orders3                                             DS_ORDERS_FG                    2,682
orders4                                             DS_ORDERS_FG                    2,682
orders5                                             DS_ORDERS_FG                    2,682
orders6                                             DS_ORDERS_FG                    2,682
orders7                                             DS_ORDERS_FG                    2,682
orders8                                             DS_ORDERS_FG                    2,682
Log files
ds_log                                              Not Applicable                  16,000
Figure 9: The file size modifications we used in our testing.


Running the DVD Store tests
         We created a series of batch files, SQL scripts, and shell scripts to automate the complete test cycle. DVD Store
outputs an orders-per-minute metric, which is a running average calculated through the test. In this report, we report
the last OPM reported by each client/target pair.
         Each complete test cycle consisted of the general steps listed below. For each scenario, we ran three test cycles,
and chose the median outcome.
    1.   Clean up prior outputs from the host system and all client driver systems.
    2.   Drop all databases from all target VMs.
    3.   Restore all databases on all target VMs.
    4.   Shut down all VMs.
    5.   Reboot the host system and the client system.
    6.   Wait for a ping response from the server under test (the hypervisor system), the client system, and all VMs.
    7.   Let the test server idle for five minutes.
    8.   Start the DVD Store driver on all respective clients. We used the following DVD Store parameters for testing the
         virtual machines in this study:

         ds2sqlserverdriver.exe --target=<target_IP> --ramp_rate=10 --run_time=15 --
         n_threads=16 --db_size=50GB --think_time=0.01 –database_name=ds2 –


Performance with Samsung LRDIMMs and Inphi’s iMB technology                   A Principled Technologies test report 16
detailed_view=Y –warmup_time=45 –pct_newcustomers=5 --
       output_path=c:clientshareClient1.txt

Measuring power usage
       To record the IBM System x3750 M4 power consumption during each test, we used an Extech Instruments
(www.extech.com) 380803 Power Analyzer/Datalogger. We connected the two power supplies on the IBM System
x3750 M4 under test to the Power Analyzer’s output load power outlet using a two-connection splitter cable. We then
plugged the power cord from the Power Analyzer’s input voltage connection into a 120-volt outlet.
       We used the Power Analyzer’s Data Acquisition Software (version 2.11) to capture all recordings. We installed
the software on a separate system, which we connected to the Power Analyzer via an RS-232 cable.
       We recorded the power usage in watts for the IBM System x3750 M4 during the testing at one-second intervals.
To compute the average power usage, we averaged the power usage during the 15-minute DVD Store run time when
the System x3750 M4 was under peak performance load.


Performance with Samsung LRDIMMs and Inphi’s iMB technology                A Principled Technologies test report 17
ABOUT PRINCIPLED TECHNOLOGIES
                                               We provide industry-leading technology assessment and fact-based marketing
                                               services. We bring to every assignment extensive experience with and expertise
                                               in all aspects of technology testing and analysis, from researching new
                                               technologies, to developing new methodologies, to testing with existing and new
                                               tools.
Principled Technologies, Inc.
1007 Slater Road, Suite 300                    When the assessment is complete, we know how to present the results to a
Durham, NC, 27703
www.principledtechnologies.com                 broad range of target audiences. We provide our clients with the materials they
                                               need, from market-focused data to use in their own collateral to custom sales
                                               aids, such as test reports, performance assessments, and white papers. Every
                                               document reflects the results of our trusted independent analysis.

                                               We provide customized services that focus on our clients’ individual
                                               requirements. Whether the technology involves hardware, software, Web sites,
                                               or services, we offer the experience, expertise, and tools to help our clients
                                               assess how it will fare against its competition, its performance, its market
                                               readiness, and its quality and reliability.

                                               Our founders, Mark L. Van Name and Bill Catchings, have worked together in
                                               technology assessment for over 20 years. As journalists, they published over a
                                               thousand articles on a wide array of technology subjects. They created and led
                                               the Ziff-Davis Benchmark Operation, which developed such industry-standard
                                               benchmarks as Ziff Davis Media’s Winstone and WebBench. They founded and
                                               led eTesting Labs, and after the acquisition of that company by Lionbridge
                                               Technologies were the head and CTO of VeriTest.


Principled Technologies is a registered trademark of Principled Technologies, Inc.
All other product names are the trademarks of their respective owners.

Disclaimer of Warranties; Limitation of Liability:
PRINCIPLED TECHNOLOGIES, INC. HAS MADE REASONABLE EFFORTS TO ENSURE THE ACCURACY AND VALIDITY OF ITS TESTING, HOWEVER,
PRINCIPLED TECHNOLOGIES, INC. SPECIFICALLY DISCLAIMS ANY WARRANTY, EXPRESSED OR IMPLIED, RELATING TO THE TEST RESULTS AND
ANALYSIS, THEIR ACCURACY, COMPLETENESS OR QUALITY, INCLUDING ANY IMPLIED WARRANTY OF FITNESS FOR ANY PARTICULAR PURPOSE.
ALL PERSONS OR ENTITIES RELYING ON THE RESULTS OF ANY TESTING DO SO AT THEIR OWN RISK, AND AGREE THAT PRINCIPLED
TECHNOLOGIES, INC., ITS EMPLOYEES AND ITS SUBCONTRACTORS SHALL HAVE NO LIABILITY WHATSOEVER FROM ANY CLAIM OF LOSS OR
DAMAGE ON ACCOUNT OF ANY ALLEGED ERROR OR DEFECT IN ANY TESTING PROCEDURE OR RESULT.

IN NO EVENT SHALL PRINCIPLED TECHNOLOGIES, INC. BE LIABLE FOR INDIRECT, SPECIAL, INCIDENTAL, OR CONSEQUENTIAL DAMAGES IN
CONNECTION WITH ITS TESTING, EVEN IF ADVISED OF THE POSSIBILITY OF SUCH DAMAGES. IN NO EVENT SHALL PRINCIPLED TECHNOLOGIES,
INC.’S LIABILITY, INCLUDING FOR DIRECT DAMAGES, EXCEED THE AMOUNTS PAID IN CONNECTION WITH PRINCIPLED TECHNOLOGIES, INC.’S
TESTING. CUSTOMER’S SOLE AND EXCLUSIVE REMEDIES ARE AS SET FORTH HEREIN.


Performance with Samsung LRDIMMs and Inphi’s iMB technology                          A Principled Technologies test report 18

Weitere ähnliche Inhalte

Mehr von Principled Technologies

Increase security, sustainability, and efficiency with robust Dell server man...
Increase security, sustainability, and efficiency with robust Dell server man...Increase security, sustainability, and efficiency with robust Dell server man...
Increase security, sustainability, and efficiency with robust Dell server man...
Principled Technologies
 
Increase security, sustainability, and efficiency with robust Dell server man...
Increase security, sustainability, and efficiency with robust Dell server man...Increase security, sustainability, and efficiency with robust Dell server man...
Increase security, sustainability, and efficiency with robust Dell server man...
Principled Technologies
 

Mehr von Principled Technologies (20)

Boost PC performance: How more available memory can improve productivity
Boost PC performance: How more available memory can improve productivityBoost PC performance: How more available memory can improve productivity
Boost PC performance: How more available memory can improve productivity
 
Deploy with confidence: VMware Cloud Foundation 5.1 on next gen Dell PowerEdg...
Deploy with confidence: VMware Cloud Foundation 5.1 on next gen Dell PowerEdg...Deploy with confidence: VMware Cloud Foundation 5.1 on next gen Dell PowerEdg...
Deploy with confidence: VMware Cloud Foundation 5.1 on next gen Dell PowerEdg...
 
Upgrade your cloud infrastructure with Dell PowerEdge R760 servers and VMware...
Upgrade your cloud infrastructure with Dell PowerEdge R760 servers and VMware...Upgrade your cloud infrastructure with Dell PowerEdge R760 servers and VMware...
Upgrade your cloud infrastructure with Dell PowerEdge R760 servers and VMware...
 
A comparison of security features in Dell, HP, and Lenovo PC systems
A comparison of security features in Dell, HP, and Lenovo PC systemsA comparison of security features in Dell, HP, and Lenovo PC systems
A comparison of security features in Dell, HP, and Lenovo PC systems
 
Increase security, sustainability, and efficiency with robust Dell server man...
Increase security, sustainability, and efficiency with robust Dell server man...Increase security, sustainability, and efficiency with robust Dell server man...
Increase security, sustainability, and efficiency with robust Dell server man...
 
Increase security, sustainability, and efficiency with robust Dell server man...
Increase security, sustainability, and efficiency with robust Dell server man...Increase security, sustainability, and efficiency with robust Dell server man...
Increase security, sustainability, and efficiency with robust Dell server man...
 
Scale up your storage with higher-performing Dell APEX Block Storage for AWS ...
Scale up your storage with higher-performing Dell APEX Block Storage for AWS ...Scale up your storage with higher-performing Dell APEX Block Storage for AWS ...
Scale up your storage with higher-performing Dell APEX Block Storage for AWS ...
 
Scale up your storage with higher-performing Dell APEX Block Storage for AWS
Scale up your storage with higher-performing Dell APEX Block Storage for AWSScale up your storage with higher-performing Dell APEX Block Storage for AWS
Scale up your storage with higher-performing Dell APEX Block Storage for AWS
 
Get in and stay in the productivity zone with the HP Z2 G9 Tower Workstation
Get in and stay in the productivity zone with the HP Z2 G9 Tower WorkstationGet in and stay in the productivity zone with the HP Z2 G9 Tower Workstation
Get in and stay in the productivity zone with the HP Z2 G9 Tower Workstation
 
Open up new possibilities with higher transactional database performance from...
Open up new possibilities with higher transactional database performance from...Open up new possibilities with higher transactional database performance from...
Open up new possibilities with higher transactional database performance from...
 
Improving database performance and value with an easy migration to Azure Data...
Improving database performance and value with an easy migration to Azure Data...Improving database performance and value with an easy migration to Azure Data...
Improving database performance and value with an easy migration to Azure Data...
 
Realize better value and performance migrating from Azure Database for Postgr...
Realize better value and performance migrating from Azure Database for Postgr...Realize better value and performance migrating from Azure Database for Postgr...
Realize better value and performance migrating from Azure Database for Postgr...
 
Realize better value and performance migrating from Azure Database for Postgr...
Realize better value and performance migrating from Azure Database for Postgr...Realize better value and performance migrating from Azure Database for Postgr...
Realize better value and performance migrating from Azure Database for Postgr...
 
Set up students and teachers to excel now and in the future with Intel proces...
Set up students and teachers to excel now and in the future with Intel proces...Set up students and teachers to excel now and in the future with Intel proces...
Set up students and teachers to excel now and in the future with Intel proces...
 
Finding the path to AI success with the Dell AI portfolio - Summary
Finding the path to AI success with the Dell AI portfolio - SummaryFinding the path to AI success with the Dell AI portfolio - Summary
Finding the path to AI success with the Dell AI portfolio - Summary
 
Finding the path to AI success with the Dell AI portfolio
Finding the path to AI success with the Dell AI portfolioFinding the path to AI success with the Dell AI portfolio
Finding the path to AI success with the Dell AI portfolio
 
Achieve strong performance and value on Azure SQL Database Hyperscale
Achieve strong performance and value on Azure SQL Database HyperscaleAchieve strong performance and value on Azure SQL Database Hyperscale
Achieve strong performance and value on Azure SQL Database Hyperscale
 
Improve backup and recovery outcomes by combining Dell APEX Data Storage Serv...
Improve backup and recovery outcomes by combining Dell APEX Data Storage Serv...Improve backup and recovery outcomes by combining Dell APEX Data Storage Serv...
Improve backup and recovery outcomes by combining Dell APEX Data Storage Serv...
 
Improve backup and recovery outcomes by combining Dell APEX Data Storage Serv...
Improve backup and recovery outcomes by combining Dell APEX Data Storage Serv...Improve backup and recovery outcomes by combining Dell APEX Data Storage Serv...
Improve backup and recovery outcomes by combining Dell APEX Data Storage Serv...
 
Utilizing Azure Cosmos DB for intelligent AI‑powered applications
Utilizing Azure Cosmos DB for intelligent AI‑powered applicationsUtilizing Azure Cosmos DB for intelligent AI‑powered applications
Utilizing Azure Cosmos DB for intelligent AI‑powered applications
 

Performance with Samsung LRDIMMs and INPHI's iMB technology

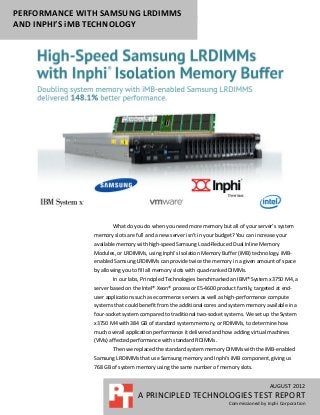
  • 1. PERFORMANCE WITH SAMSUNG LRDIMMS AND INPHI’S iMB TECHNOLOGY What do you do when you need more memory but all of your server’s system memory slots are full and a new server isn’t in your budget? You can increase your available memory with high-speed Samsung Load-Reduced Dual Inline Memory Modules, or LRDIMMs, using Inphi’s Isolation Memory Buffer (iMB) technology. iMB- enabled Samsung LRDIMMs can provide twice the memory in a given amount of space by allowing you to fill all memory slots with quad-ranked DIMMs. In our labs, Principled Technologies benchmarked an IBM® System x3750 M4, a server based on the Intel® Xeon® processor E5-4600 product family, targeted at end- user applications such as ecommerce servers as well as high-performance compute systems that could benefit from the additional cores and system memory available in a four-socket system compared to traditional two-socket systems. We set up the System x3750 M4 with 384 GB of standard system memory, or RDIMMs, to determine how much overall application performance it delivered and how adding virtual machines (VMs) affected performance with standard RDIMMs. Then we replaced the standard system memory DIMMs with the iMB-enabled Samsung LRDIMMs that use Samsung memory and Inphi’s iMB component, giving us 768 GB of system memory using the same number of memory slots. AUGUST 2012 A PRINCIPLED TECHNOLOGIES TEST REPORT Commissioned by Inphi Corporation
  • 2. We measured the application performance of the two configurations using a tool that simulates a real-world ecommerce workload. With the LRDIMMs, the server could support twice as much memory and deliver more than twice as many orders per minute (OPM) at 10 VMs. As we added more VMs, performance increased, rather than decreased as it did with the RDIMM configuration, because each VM had a large amount of system memory driving performance. At 12 VMs, the iMB-enabled Samsung LRDIMM configuration delivered 148.1 percent greater performance than the RDIMM configuration provided at 10 VMs. This boost means more capacity and room for your business to grow. DOUBLE YOUR MEMORY WITH INPHI TECHNOLOGY Using Inphi’s iMB technology, high-speed Samsung LRDIMMs can provide twice the memory in a given amount of space. Inphi’s iMB addresses the high-speed signal integrity challenges of the memory interface by isolating the CPU and the memory components and buffering the memory I/O, control, and data signals. iMB reduces the load on the memory controller, allowing the memory subsystem to double the capacity while maintaining the same speed. With iMB-enabled Samsung LRDIMMs in your server, you can increase the memory available for your applications and virtual machines. To test the capacity and performance increase that iMB-enabled Samsung LRDIMMs deliver, we configured a four-socket IBM System x3750 M4 server two ways: with 384 GB of system memory using traditional registered DIMMS (RDIMMs) and with 768 GB of memory using iMB-enabled Samsung LRDIMMs in the same amount of space. The IBM System x3750 M4 has a maximum capacity of 768 GB of system memory with RDIMMs and 1.5 TB at 1,333 MT/s operating at 1.35V using iMB-enabled Samsung LRDIMMs, but we tested with only half of those amounts. The IBM System x3750 M4 hosted varying numbers of VMware® vSphere® 5 VMs each running Microsoft® Windows Server® 2008 R2 and containing a 50GB Microsoft SQL Server® 2012 database instance. Figure 1 shows the performance of the server with the 768GB iMB-enabled Samsung LRDIMM configuration and with the 384GB RDIMM configuration at varying VM counts. At 12 VMs, the iMB-enabled Samsung LRDIMM configuration delivered 275.2 percent greater performance than the RDIMM configuration at 12 VMs, and 148.1 percent greater performance than the best RDIMM configuration at 10 VMs. With increased memory driving performance, your server could support more ecommerce users or applications. Performance with Samsung LRDIMMs and Inphi’s iMB technology A Principled Technologies test report 2
  • 3. Application performance 500,000 768GB system memory 400,000 (iMB-enabled Figure 1: Samsung LRDIMMs Orders per minute Samsung enabled by Inphi’s iMB LRDIMM technology doubled system 300,000 configuration) memory capacity and delivered 275.2 percent greater 200,000 384GB system performance at 12 VMs. memory 100,000 (RDIMM configuration) 0 10 11 12 Number of VMs As Figure 1 shows, performance continued to increase using iMB-enabled Samsung LRDIMMs as the number of VMs increased, while performance decreased at higher VM counts with the RDIMM configuration. This occurred because of the amount of system memory that was available for each VM. Figure 2 shows the amount of system memory each VM used for both memory configurations at the different VM counts we tested. As the number of VMs increased, we changed the amount of memory allocated to each VM instead of using memory oversubscription. Because the iMB-enabled Samsung LRDIMM configuration permitted more system memory for each VM, performance increased instead of degraded as with the RDIMM configuration. System memory, in GB, allotted for each VM 10 VMs 11 VMs 12 VMs 768GB system memory (iMB-enabled 72 64 60 Samsung LRDIMM configuration) 384GB system memory (RDIMM 36 32 30 configuration) Figure 2: System memory allotted per VM, in GB, for the two configurations at varying VM counts. The staggering cost of powering data centers makes it important to look not only at performance, but also at the power requirements for each server. In addition to performance, we recorded power consumption during testing so we could calculate the performance-per-watt advantage of using higher-memory-capacity LRDIMMs with the ability to handle greater server loads. Figure 3 shows the performance per watt of the server with the two memory capacities at varying VM counts. At 12 VMs, the iMB-enabled Samsung LRDIMM configuration delivered 174.2 percent greater performance per watt than the RDIMM Performance with Samsung LRDIMMs and Inphi’s iMB technology A Principled Technologies test report 3
  • 4. configuration at 12 VMs, and 86.0 percent greater performance per watt than the best RDIMM configuration at 10 VMs. This shows that adding more system memory to your server can not only boost performance, but also can bring overall power savings as well. Performance per watt 600 768GB system memory Orders per minute/watt Figure 3: Samsung’s LRDIMMs 500 (iMB-enabled enabled by Inphi’s iMB Samsung 400 technology doubled system LRDIMM memory capacity and delivered 300 configuration) 174.2 percent better performance per watt at 12 200 384GB system VMs. memory 100 (RDIMM configuration) 0 10 11 12 Number of VMs WHAT WE TESTED About Inphi’s Isolation Memory Buffer technology Inphi’s iMB technology is a technique for overcoming the engineering problems involved in designing low-latency, high-bandwidth registered memory for server and high-end workstation use cases. The core of the iMB is a component on the LRDIMM module that isolates the data, control, and clock signal drivers from the DRAM components. In doing so, the LRDIMMs are able to support longer traces and deeper ranks of memory with greater signal integrity, resulting in doubled memory capacity per slot. For more information, visit http://www.inphi.com/products- technology/computing-storage-products/products/imbtrade02-gs02a.php. About iMB-enabled Samsung Load-Reduced DIMMs Enabled by Inphi’s iMB technology, high-speed Samsung LRDIMMs are a new, higher-capacity class of Registered DIMM. Designed for use in high-memory-capacity environments, LRDIMMs may be well suited to the virtualization, enterprise application, and high-performance computing (HPC) fields, as well as scenarios such as visualization workstations, which have a low DIMM slot count, but above-average memory demands. For more information, visit http://www.inphi.com/lrdimm.php. About Samsung memory Samsung Semiconductor, Inc. is a longtime supplier of consumer and enterprise- level memory components. Samsung DDR3 LRDIMMs are available in 1.35V and 1.5V Performance with Samsung LRDIMMs and Inphi’s iMB technology A Principled Technologies test report 4
  • 5. power requirement levels, and at speeds of 1,600; 1,333; and 1,066 Mbps in capacities of 32GB and 16GB. For more information, visit http://www.samsung.com/us/business/components/pdfs/samsung_LRDIMM.PDF. About the IBM System x3750 M4 The IBM System x3750 M4 is a high-density 2U rack server with the capability to run up to four 8-core Intel Xeon processor E5-4600 product family processors. The server has a maximum capacity of 48 DIMM slots, for up to 1.5TB total system memory in 3DPC configurations at 1,333 MT/s. The System x3750 M4 chassis is configurable for up to 16 HDDs or 32 eXFlash SSDs. The system provides a flexible and expandable option for applications such as HPC and ecommerce that may benefit from high-density memory with the processing power of up to 32 cores. For more information, visit http://www.ibm.com/systems/x/hardware/rack/x3750m4/index.html. HOW WE TESTED We optimized the virtual hardware configuration for each VM for best performance using the available resources on each server. Our goal was to create a real- world representation of how these servers would be utilized while under stress from an ecommerce application. We configured the VMs on the System x3750 M4 with four vCPUs. For each configuration, we divided the amount of available memory between the VMs. For example, for the configuration with 10 VMs and 768GB total memory, we assigned 72 GB of memory to each VM, leaving some memory overhead for the hypervisor. We used the DVD Store version 2.1 (DS2) benchmark to test the application performance of the servers. We ran DS2 on multiple client machines against each System x3750 M4 test configuration and recorded the power that the server consumed and the orders per minute that it could handle for each test configuration. For detailed information on the System x3750 M4 configurations that we tested, see Appendix A. For detailed instructions on how we tested, see Appendix B. About DVD Store Version 2.1 To create our real-world ecommerce workload, we used the DVD Store Version 2.1 benchmarking tool. DS2 models an online DVD store, where customers log in, search for movies, and make purchases. DS2 reports these actions in orders per minute that the system could handle, to show what kind of performance you could expect for your customers. The DS2 workload also performs other actions, such as adding new customers, to exercise the wide range of database functions you would need to run your ecommerce environment. Performance with Samsung LRDIMMs and Inphi’s iMB technology A Principled Technologies test report 5
  • 6. WHAT WE FOUND Figure 4 presents the results of our tests with the total application performance in OPM at the different VM counts we tested. Performance results, in OPM 10 VMs 11 VMs 12 VMs 768GB system memory (iMB-enabled 361,433 378,682 397,063 Samsung LRDIMM configuration) 384GB system memory (RDIMM 160,035 119,558 105,836 configuration) Percentage increase with iMB-enabled 125.8% 216.7% 275.2% Samsung LRDIMM configuration Figure 4: Performance results, in orders per minute, for the two configurations at varying VM counts. Figure 5 shows the server’s performance per watt for both memory configurations at the different VM counts we tested. Performance per watt 10 VMs 11 VMs 12 VMs 768GB system memory (iMB-enabled 493.3 514.5 527.4 Samsung LRDIMM configuration) 384GB system memory (RDIMM 283.5 220.7 192.3 configuration) Percentage increase with iMB-enabled 74.0% 133.2% 174.2% Samsung LRDIMM configuration Figure 5: Performance per watt during our tests for the two configurations at varying VM counts. Figure 6 shows the server’s power consumption in watts for both memory configurations at the different VM counts we tested. Power 10 VMs 11 VMs 12 VMs 768GB system memory (iMB-enabled 733 736 753 Samsung LRDIMM configuration) 384GB system memory (RDIMM 564 542 550 configuration) Figure 6: Power in watts during our tests for the two configurations at varying VM counts. IN CONCLUSION When you can get twice the memory in the same amount of space with iMB- enabled Samsung LRDIMMs, normal system memory is a less attractive option. In our tests, replacing traditional RDIMMS with iMB-enabled Samsung LRDIMMs boosted ecommerce application performance by 148.1 percent and increased performance per watt by 86.0 percent. Performance with Samsung LRDIMMs and Inphi’s iMB technology A Principled Technologies test report 6
  • 7. The iMB-enabled Samsung LRDIMMs can provide higher application productivity, Increased energy efficiency, and a lower real estate footprint by maximizing a company’s existing server infrastructure For any company that needs to gain memory without losing space, iMB-enabled Samsung LRDIMMs with Samsung memory and Inphi’s iMB technology could be a wise investment. The Samsung LRDIMMs are available from IBM in both 32GB and 16GB capacity. Performance with Samsung LRDIMMs and Inphi’s iMB technology A Principled Technologies test report 7
  • 8. APPENDIX A – SERVER CONFIGURATION INFORMATION Figure 7 provides detailed configuration information for the IBM System x3750 M4 used for both 384GB and 768GB memory configurations. We used different memory for the two configurations. System IBM System x3750 M4 Power supplies Total number 2 Vendor and model number Delta Electronics DPS-1400BB Wattage of each (W) 1,400 Cooling fans Total number 6 Vendor and model number IBM 46C9727 Dimensions (h x w) of each 2.5” x 2.5” General Number of processor packages 4 Number of cores per processor 8 Number of hardware threads per core 2 CPU Vendor Intel Name Xeon Model number E5-4650 Stepping C1 Socket type LGA2011 Core frequency (GHz) 2.7 GHz L1 cache 32 KB + 32 KB (per core) L2 cache 256 KB (per core) L3 cache (MB) 20 Platform Vendor and model number IBM System x3750 M4 BIOS name and version IBM KOE113AUS BIOS settings Default Memory modules iMB-enabled Samsung LRDIMM configuration Total system memory in system (GB) 768 Vendor and model number Samsung M386B4G70BM0-YH90 Type PC3L-10600L Speed (MHz) 1,333 Speed running in the system (MHz) 1,333 Timing/Latency (tCL-tRCD-tRP-tRASmin) 9-9-9-36 Size (GB) 32 Number of system memory module(s) 24 Chip organization Double-sided Rank Quad Performance with Samsung LRDIMMs and Inphi’s iMB technology A Principled Technologies test report 8
  • 9. System IBM System x3750 M4 RDIMM configuration Total system memory in system (GB) 384 Vendor and model number Samsung M393B2G70BH0-CH9 Type PC3-10600R Speed (MHz) 1,333 Speed running in the system (MHz) 1,333 Timing/Latency (tCL-tRCD-tRP-tRASmin) 9-9-9-36 Size (GB) 16 Number of system memory module(s) 24 Chip organization Double-sided Rank Dual Operating system (host) Name VMware ESXi 5.0 Update 1 Build number 623860 File system EXT3 Kernel 5.0.0U1 Language English Operating system (virtualized) Name Windows Server 2008 R2 SP1 Build number 7601 File system NTFS Kernel ACPI x64-based PC Language English RAID controller Vendor and model number IBM ServeRAID M5110e Cache size (MB) 512 MB Hard drives Vendor and model number IBM MBF2600RC Number of drives 4 Size (GB) 600 RPM 10,000 Type SAS Ethernet adapter Vendor and model number Emulex OneConnect OCe11100 Type Integrated Figure 7: Detailed configuration information for the IBM System x3750 M4. Performance with Samsung LRDIMMs and Inphi’s iMB technology A Principled Technologies test report 9
  • 10. APPENDIX B - HOW WE TESTED Setting up the test environment We used an IBM System x3750 M4 as the system under test. We connected two 24-disk external arrays through a dual-port SAS controller. The two arrays each had 146GB, 10,000RPM SAS hard disks installed. We configured each array as RAID 0 volumes to maximize available disk space. We used one array for the server VMs and SQL Server database instances, and the second array for SQL Server database logs. We used virtual clients to run the DVD Store workload. We used a four-socket server with four quad-core processors, 32 GB of system memory, and eight internal 146GB, 10,000RPM SAS hard disks for our virtualized client server. Each client VM ran the workload for a single server VM under test so there was a one-to-one configuration. For example, when testing with 12 VMs, we used 12 client VMs. We configured the client VMs with one virtual CPU, 2GB system memory, and a 30GB virtual disk for the operating system. We connected all network traffic through a 1Gb switch. Setting up VMware vSphere 5.0 We used the steps below to configure VMware on the IBM System x3750 M4 and client VM servers. Configuring partitions on the servers We configured four internal drives in a RAID 1 on the IBM System x3750 M4 for the VMware vSphere 5.0.1 installation. On the virtual client server, we configured two disks in a RAID 1 for the VMware vSphere 5.0.1 installation. Installing VMware vSphere 5.0 (ESXi) U1 We used VMware vSphere 5.0 Update 1 with IBM Customization on the IBM System x3750 M4. We did not use the IBM Customization version on the virtual client server. 1. Insert the disk, and select Boot from disk. 2. On the Welcome screen, press Enter. 3. On the End User License Agreement (EULA) screen, press F11. 4. On the Select a Disk to Install or Upgrade Screen, select the relevant volume to install ESXi on and press Enter. 5. On the Please Select a Keyboard Layout screen, press Enter. 6. On the Enter a Root Password Screen, assign a root password and confirm it by entering it again. Press Enter to continue. 7. On the Confirm Install Screen, press F11 to install. 8. On the Installation complete screen, press Enter to reboot. Configuring ESXi after Installation 1. On the ESXi screen, press F2, enter the root password, and press Enter. 2. On the System Customization screen, select Troubleshooting Options, and press Enter. 3. On the Troubleshooting Mode Options screen, select enable ESXi Shell, and press Enter. 4. Select Enable SSH, press Enter, and press ESC. 5. On the System Customization screen, select Configure Management Network. 6. On the Configure Management Network screen, select IP Configuration. 7. On the IP Configuration screen, select set static IP, enter an IP address, subnet mask, and default gateway, and press Enter. Performance with Samsung LRDIMMs and Inphi’s iMB technology A Principled Technologies test report 10
  • 11. 8. On the Configure Management Network screen, press Esc. When asked if you want to apply the changes, press Y. Configuring VM networking on ESXi 1. Using the vSphere client from another machine, connect to the ESXi server. 2. Add the necessary vSwitch for the network that DVD Store traffic will use: a. Click the host, click the Configuration tab, and click Networking. b. Click Add Networking. c. Choose Virtual Machine, and click Next. d. Choose create a vSphere standard switch. e. Choose the NIC associated with VM traffic. f. Assign the network label and assign IP settings. g. Click Finish. Configuring VMware datastores on the servers We created three datastores on the IBM System x3750 M4. 1. Using the vSphere client, select HomeDatastore and Datastore Clusters. 2. Right-click Cluster and select Add new Datastore. 3. Select the appropriate host, and click Next. 4. Leave default Storage type as Disk/LUN, and click Next. 5. Select the desired Disk/LUN, and click Next. 6. Select VMFS-5, and click Next. 7. Click Next. 8. Enter desired datastore name, and click Next. 9. Keep default capacity of Maximum available space, and click Next. 10. Click Finish. 11. Repeat all steps above to create the remaining two datastores. Creating the first VM We created the server virtual machines on two external 24-disk SAS enclosures connected to the IBM System x3750 M4 using the steps below. Figure 8 shows the configuration information for each server VM. For the virtual client server we used six internal disks in a RAID 0 for the virtual machines. We configured the client VMs with a 30GB OS partition and no other partitions, following steps 1-16 below. IBM System x3750 M4 VM virtual Datastore Size (GB) Node Provisioning disk settings Hard disk 1 OS 50 0:0 Thick, Lazy Zeroed Hard disk 2 Database 120 0:1 Thick, Lazy Zeroed Hard disk 3 Database_Logs 30 0:2 Thick, Lazy Zeroed Figure 8: Virtual disk settings for the IBM System x3750 M4. 1. In the vSphere client, connect to the vCenter Server, and browse to the ESXi host. 2. Click the Virtual Machines tab. 3. Right-click, and choose New Virtual Machine. 4. Choose Custom, and click Next. 5. Assign a name to the virtual machine, and click Next. 6. Select the corresponding OS Datastore, and click Next. Performance with Samsung LRDIMMs and Inphi’s iMB technology A Principled Technologies test report 11
  • 12. 7. Choose Virtual Machine Version 8, and click Next. 8. Choose Windows, choose Microsoft Windows Server 2008 R2 (64-bit), and click Next. 9. Change the number of cores per virtual socket to 4, and click Next. (Note: We used only one vCPU on the client server.) 10. Choose the default amount of memory, and click Next. 11. Click 1 for the number of NICs, select vmnicX, and click Next. 12. Leave the default virtual storage controller, and click Next. 13. Choose to create a new virtual disk, and click Next. 14. Reference Figure 8 to assign OS virtual disk parameters, (e.g., 50 GB, thick-provisioned lazy zeroed), specify the OS datastore, and click Next. 15. Keep the default virtual device node (0:0), and click Next. 16. Click Finish. 17. Right-click the VM, and choose Edit Settings. 18. On the Hardware tab, click Add… 19. Click Hard Disk, and click Next. 20. Click Create a new virtual disk, and click Next. 21. Reference Figure 8 for the appropriate virtual disk size, choose thick-provisioned lazy zeroed, and specify the datastore for backup and SQL Server data usage. 22. Choose SCSI(0:1) for the device node, and click Next. 23. On the Hardware tab, click Add… 24. Click Hard Disk, and click Next. 25. Click Create a new virtual disk, and click Next. 26. Reference Figure 8 for the appropriate virtual disk size, choose thick-provisioned lazy zeroed, and specify the datastore for the SQL Server log virtual disks. 27. Click Finish, and click OK. 28. Start the VM. 29. Attach the Windows Server 2008 R2 SP1 ISO image to the VM, and install Windows Server 2008 R2 SP1 on your VM. Configuring the VMs We used Windows Server 2008 R2 SP1 Enterprise Edition and Microsoft SQL Server 2012 inside the VMs on the IBM System x3750 M4. We used the same steps to configure the virtual client server, but did not install Microsoft SQL Server 2012 inside those client VMs. Installing the VM operating system on the first VM 1. Insert the installation DVD for Windows Server 2008 R2 SP1 Enterprise into the DVD drive, and attach the physical DVD drive to the VM. Alternatively, use an ISO image and connect to the ISO image from the VM console. 2. Open the VM console on vSphere. 3. At the Language Selection Screen, click Next. 4. Click Install Now. 5. Select Windows Server 2008 R2 Enterprise (Full Installation), and click Next. 6. Click the I accept the license terms check box, and click Next. 7. Click Custom. 8. Click Next. 9. At the User’s password must be changed before logging on warning screen, click OK. 10. Enter the desired password for the administrator in both fields, and click the arrow to continue. Performance with Samsung LRDIMMs and Inphi’s iMB technology A Principled Technologies test report 12
  • 13. 11. At the Your password has been changed screen, click OK. 12. Install the latest VMware Tools package on the VM. Restart as necessary. 13. Connect the machine to the Internet, and install all available Windows updates. Restart as necessary. 14. Enable remote desktop access. 15. Change the hostname and reboot when prompted. 16. Create a shared folder to store test script files. Set permissions as needed. 17. Set up networking: a. Click StartControl Panel, right-click Network Connections, and choose Open. b. Right-click the VM traffic NIC, and choose Properties. c. Select TCP/IP (v4), and choose Properties. d. Set the IP address, subnet, gateway, and DNS server for the virtual NIC, which will handle outgoing server traffic. Click OK, and click Close. 18. In the VM, configure the VM storage: a. Click the Server Manager icon in the taskbar. b. In the left pane, expand Storage and click Disk Management. c. Right-click the first volume and choose Initialize Disk. d. In the right pane, right-click the volume and choose New Simple Volume... e. At the welcome window, click Next. f. At the Specify Volume Size window, leave the default selection, and click Next. g. At the Assign Drive Letter or Path window, choose a drive letter, and click Next. h. At the Format Partition window, choose NTFS and 64K allocation unit size, and click Next. i. At the Completing the New Simple Volume Wizard window, click Finish. j. Repeat steps c through i for the remaining volumes. Installing SQL Server 2012 on the first VM 1. Open the vSphere console for the VM. 2. Log into the virtual machine. 3. Insert the installation DVD for SQL Server 2012 Enterprise into the vSphere host server’s DVD drive. 4. Attach the physical DVD drive to the VM. 5. Click Run SETUP.EXE. If Autoplay does not begin the installation, navigate to the SQL Server 2012 DVD, and double-click. 6. If the installer prompts you with a .NET installation prompt, click Yes to enable the .NET Framework Core role. 7. In the left pane, click Installation. 8. Click New SQL Server stand-alone installation or add features to an existing installation. 9. At the Setup Support Rules screen, wait for the check to complete. If there are no failures or relevant warnings, click OK. 10. Select the Enter the product key radio button, and enter the product key. Click Next. 11. Click the checkbox to accept the license terms, and click Next. 12. Click Install to install the setup support files. 13. If there are no failures displayed, click Next. 14. At the Setup Role screen, choose SQL Server Feature Installation. 15. At the Feature Selection screen, select Database Engine Services, Full-Text and Semantic Extractions for Search, Client Tools Connectivity, Client Tools Backwards Compatibility, Management Tools –Basic, and Management Tools – Complete. Click Next. 16. At the Installation Rules screen, click Next once the check completes. 17. At the Instance configuration screen, leave the default selection of default instance, and click Next. 18. At the Disk space requirements screen, click Next. Performance with Samsung LRDIMMs and Inphi’s iMB technology A Principled Technologies test report 13
  • 14. 19. At the Server Configuration screen, choose NT ServiceSQLSERVERAGENT for SQL Server Agent, and choose NT ServiceMSSQLSERVER for SQL Server Database Engine. Click Next. 20. At the Database Engine Configuration screen, select Mixed Mode. 21. Enter and confirm a password for the system administrator account. 22. Click Add Current user. This may take several seconds. 23. Click Next. 24. At the Error and usage reporting screen, click Next. 25. At the Installation Configuration Rules screen, check that there are no failures or relevant warnings, and click Next. 26. At the Ready to Install screen, click Install. 27. After installation completes, click Close. 28. Click Close. 29. Create a SQL Server login for the ds2user. 30. Copy the pre-created DVD Store backup to the specified backup VHD volume. Configuring additional VMs on vSphere We used the steps below to clone out additional VMs on the IBM System x3750 M4 and virtual client server. 1. Log into the vCenter Server, which manages the host. 2. Right-click the first VM, and choose Clone. 3. Name the new VM. 4. Choose the cluster, and select the host. 5. For the storage screen, choose advanced and direct the new virtual disks to the applicable datastores. Choose to customize using the customization wizard. Save the clone details as a new customization specification. 6. Continue cloning each VM, modifying the customization specification as necessary for IP addressing and so on. 7. Ensure in each VM that the necessary virtual disks are all online, the hostname is renamed, and the IP addressing was properly assigned by the customization wizard. 8. Modify the SQL Server hostname of each VM using the instructions provided by Microsoft (http://msdn.microsoft.com/en-us/library/ms143799.aspx ). 9. To configure automatic start for your specified number of VMs, click the Host configuration tab in the vSphere client, and click Virtual Machine Startup/Shutdown. Configuring the database (DVD Store) We generated the data using the Install.pl script included with DVD Store version 2.1 (DS2), providing the parameters for our 50GB database size and the database platform on which we ran: Microsoft SQL Server. We ran the Install.pl script on a utility system running Linux. The database schema was also generated by the Install.pl script. After processing the data generation, we transferred the data files and schema creation files to a Windows- based system running SQL Server 2008 R2. We built the 50GB database in SQL Server 2008 R2, and then performed a full backup, storing the backup file on the C: drive for quick access. We used that backup file to restore on the test server between test runs. We performed this procedure once, and used the same backup file for all virtual machines. The only modification we made to the schema creation scripts were the specified file sizes for our database. We explicitly set the file sizes higher than necessary to ensure that no file-growth activity would affect the outputs of the test. Besides this file size modification, the database schema was created and loaded according to the DVD Store documentation. Specifically, we followed the steps below: Performance with Samsung LRDIMMs and Inphi’s iMB technology A Principled Technologies test report 14
  • 15. 1. We generated the data and created the database and file structure using database creation scripts in the DS2 download. We made size modifications specific to our 50GB database and the appropriate changes to drive letters. 2. We transferred the files from our Linux data generation system to a Windows system running SQL Server. 3. We created database tables, stored procedures, and objects using the provided DVD Store scripts. 4. We set the database recovery model to bulk-logged to prevent excess logging. 5. We loaded the data we generated into the database. For data loading, we used the import wizard in SQL Server Management Studio. Where necessary, we retained options from the original scripts, such as Enable Identity Insert. 6. We created indices, full-text catalogs, primary keys, and foreign keys using the database-creation scripts. 7. We updated statistics on each table according to database-creation scripts, which sample 18 percent of the table data. 8. On the SQL Server instance, we created a ds2user SQL Server login using the following Transact SQL (TSQL) script: USE [master] GO CREATE LOGIN [ds2user] WITH PASSWORD=N’’, DEFAULT_DATABASE=[master], DEFAULT_LANGUAGE=[us_english], CHECK_EXPIRATION=OFF, CHECK_POLICY=OFF GO 9. We set the database recovery model back to full. 10. We created the necessary full text index using SQL Server Management Studio. 11. We created a database user and mapped this user to the SQL Server login. 12. We then performed a full backup of the database. This backup allowed us to restore the databases to a pristine state relatively quickly between tests. Figure 9 details our initial file size modifications. Logical name Filegroup Initial size (MB) Database files primary PRIMARY 8 cust1 DS_CUST_FG 5,623 cust2 DS_CUST_FG 5,623 cust3 DS_CUST_FG 5,623 cust4 DS_CUST_FG 5,623 cust5 DS_CUST_FG 5,623 cust6 DS_CUST_FG 5,623 cust7 DS_CUST_FG 5,623 cust8 DS_CUST_FG 5,623 ind1 DS_IND_FG 3,479 ind2 DS_IND_FG 3,479 ind3 DS_IND_FG 3,479 ind4 DS_IND_FG 3,479 ind5 DS_IND_FG 3,479 Performance with Samsung LRDIMMs and Inphi’s iMB technology A Principled Technologies test report 15
  • 16. Logical name Filegroup Initial size (MB) ind6 DS_IND_FG 3,479 ind7 DS_IND_FG 3,479 ind8 DS_IND_FG 3,479 ds_misc1 DS_MISC_FG 129 ds_misc2 DS_MISC_FG 129 ds_misc3 DS_MISC_FG 129 ds_misc4 DS_MISC_FG 129 ds_misc5 DS_MISC_FG 129 ds_misc6 DS_MISC_FG 129 ds_misc7 DS_MISC_FG 129 ds_misc8 DS_MISC_FG 129 orders1 DS_ORDERS_FG 2,682 orders2 DS_ORDERS_FG 2,682 orders3 DS_ORDERS_FG 2,682 orders4 DS_ORDERS_FG 2,682 orders5 DS_ORDERS_FG 2,682 orders6 DS_ORDERS_FG 2,682 orders7 DS_ORDERS_FG 2,682 orders8 DS_ORDERS_FG 2,682 Log files ds_log Not Applicable 16,000 Figure 9: The file size modifications we used in our testing. Running the DVD Store tests We created a series of batch files, SQL scripts, and shell scripts to automate the complete test cycle. DVD Store outputs an orders-per-minute metric, which is a running average calculated through the test. In this report, we report the last OPM reported by each client/target pair. Each complete test cycle consisted of the general steps listed below. For each scenario, we ran three test cycles, and chose the median outcome. 1. Clean up prior outputs from the host system and all client driver systems. 2. Drop all databases from all target VMs. 3. Restore all databases on all target VMs. 4. Shut down all VMs. 5. Reboot the host system and the client system. 6. Wait for a ping response from the server under test (the hypervisor system), the client system, and all VMs. 7. Let the test server idle for five minutes. 8. Start the DVD Store driver on all respective clients. We used the following DVD Store parameters for testing the virtual machines in this study: ds2sqlserverdriver.exe --target=<target_IP> --ramp_rate=10 --run_time=15 -- n_threads=16 --db_size=50GB --think_time=0.01 –database_name=ds2 – Performance with Samsung LRDIMMs and Inphi’s iMB technology A Principled Technologies test report 16
  • 17. detailed_view=Y –warmup_time=45 –pct_newcustomers=5 -- output_path=c:clientshareClient1.txt Measuring power usage To record the IBM System x3750 M4 power consumption during each test, we used an Extech Instruments (www.extech.com) 380803 Power Analyzer/Datalogger. We connected the two power supplies on the IBM System x3750 M4 under test to the Power Analyzer’s output load power outlet using a two-connection splitter cable. We then plugged the power cord from the Power Analyzer’s input voltage connection into a 120-volt outlet. We used the Power Analyzer’s Data Acquisition Software (version 2.11) to capture all recordings. We installed the software on a separate system, which we connected to the Power Analyzer via an RS-232 cable. We recorded the power usage in watts for the IBM System x3750 M4 during the testing at one-second intervals. To compute the average power usage, we averaged the power usage during the 15-minute DVD Store run time when the System x3750 M4 was under peak performance load. Performance with Samsung LRDIMMs and Inphi’s iMB technology A Principled Technologies test report 17
  • 18. ABOUT PRINCIPLED TECHNOLOGIES We provide industry-leading technology assessment and fact-based marketing services. We bring to every assignment extensive experience with and expertise in all aspects of technology testing and analysis, from researching new technologies, to developing new methodologies, to testing with existing and new tools. Principled Technologies, Inc. 1007 Slater Road, Suite 300 When the assessment is complete, we know how to present the results to a Durham, NC, 27703 www.principledtechnologies.com broad range of target audiences. We provide our clients with the materials they need, from market-focused data to use in their own collateral to custom sales aids, such as test reports, performance assessments, and white papers. Every document reflects the results of our trusted independent analysis. We provide customized services that focus on our clients’ individual requirements. Whether the technology involves hardware, software, Web sites, or services, we offer the experience, expertise, and tools to help our clients assess how it will fare against its competition, its performance, its market readiness, and its quality and reliability. Our founders, Mark L. Van Name and Bill Catchings, have worked together in technology assessment for over 20 years. As journalists, they published over a thousand articles on a wide array of technology subjects. They created and led the Ziff-Davis Benchmark Operation, which developed such industry-standard benchmarks as Ziff Davis Media’s Winstone and WebBench. They founded and led eTesting Labs, and after the acquisition of that company by Lionbridge Technologies were the head and CTO of VeriTest. Principled Technologies is a registered trademark of Principled Technologies, Inc. All other product names are the trademarks of their respective owners. Disclaimer of Warranties; Limitation of Liability: PRINCIPLED TECHNOLOGIES, INC. HAS MADE REASONABLE EFFORTS TO ENSURE THE ACCURACY AND VALIDITY OF ITS TESTING, HOWEVER, PRINCIPLED TECHNOLOGIES, INC. SPECIFICALLY DISCLAIMS ANY WARRANTY, EXPRESSED OR IMPLIED, RELATING TO THE TEST RESULTS AND ANALYSIS, THEIR ACCURACY, COMPLETENESS OR QUALITY, INCLUDING ANY IMPLIED WARRANTY OF FITNESS FOR ANY PARTICULAR PURPOSE. ALL PERSONS OR ENTITIES RELYING ON THE RESULTS OF ANY TESTING DO SO AT THEIR OWN RISK, AND AGREE THAT PRINCIPLED TECHNOLOGIES, INC., ITS EMPLOYEES AND ITS SUBCONTRACTORS SHALL HAVE NO LIABILITY WHATSOEVER FROM ANY CLAIM OF LOSS OR DAMAGE ON ACCOUNT OF ANY ALLEGED ERROR OR DEFECT IN ANY TESTING PROCEDURE OR RESULT. IN NO EVENT SHALL PRINCIPLED TECHNOLOGIES, INC. BE LIABLE FOR INDIRECT, SPECIAL, INCIDENTAL, OR CONSEQUENTIAL DAMAGES IN CONNECTION WITH ITS TESTING, EVEN IF ADVISED OF THE POSSIBILITY OF SUCH DAMAGES. IN NO EVENT SHALL PRINCIPLED TECHNOLOGIES, INC.’S LIABILITY, INCLUDING FOR DIRECT DAMAGES, EXCEED THE AMOUNTS PAID IN CONNECTION WITH PRINCIPLED TECHNOLOGIES, INC.’S TESTING. CUSTOMER’S SOLE AND EXCLUSIVE REMEDIES ARE AS SET FORTH HEREIN. Performance with Samsung LRDIMMs and Inphi’s iMB technology A Principled Technologies test report 18