Call Girls Talegaon Dabhade Call Me 7737669865 Budget Friendly No Advance Boo...
Compost toilet manual
1. 1
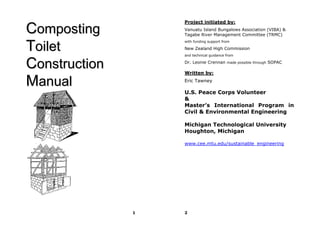
CCoommppoossttiinngg
TTooiilleett
CCoonnssttrruuccttiioonn
MMaannuuaall
2
Project initiated by:
Vanuatu Island Bungalows Association (VIBA) &
Tagabe River Management Committee (TRMC)
with funding support from
New Zealand High Commission
and technical guidance from
Dr. Leonie Crennan made possible through SOPAC
Written by:
Eric Tawney
U.S. Peace Corps Volunteer
&
Master’s International Program in
Civil & Environmental Engineering
Michigan Technological University
Houghton, Michigan
www.cee.mtu.edu/sustainable_engineering
2. 3
Introduction
Composting toilet (CT) technology is not new
to Vanuatu. Before independence, some of the
rural schools on Ambae and North Efate, like
Onesua, were using these toilets.
The CT design in this manual was adapted
from a toilet used in Tonga, Kiribati and Fiji.
There are many advantages CTs have over pit,
VIP, water sealed toilets and septic systems.
They do not smell when properly
maintained.
They do not pollute the environment or
groundwater.
They do not need to be moved when full.
They do not use water.
They are cheaper to build compared to
septic systems.
There is no bad smelling unhygienic septic
waste to remove and dispose of.
They require no digging of pits since they
are built on top of the ground, except for
the evapotranspiration (ET) beds for
treating the urine/liquid.
They can be built anywhere.
4
Tools & Materials List
As the availability of tools and materials varies
from island to island, the lists shown here are
for what was used at the CT workshop in
Blacksands in August 2004 for building the
chambers and ET beds. Suggestions for using
local materials are included in the construction
steps later in the manual. Materials used for
constructing the toilet house on top of the
chambers will differ from island to island, so a
list was not provided.
Tools List Construction Use
Hammers Nailing wood & using chisel
Handsaws Cutting wood
Trowels & wooden
floats
Working concrete
Shovels Preparing site, mixing concrete
Spirit Level Leveling blocks and concrete
Plumb Bob and
String Line
Leveling blocks and concrete
String Line Marking out CT dimensions
Measuring Tape Measuring CT dimensions
Cold Chisel Breaking concrete blocks
Fly Screen Separating sand from coral
Chicken Wire w/
25mm holes
Separating small coral from
large
Large bucket or
wheelbarrow
Mixing concrete
No. 10 & 15 block
mould
Making blocks for substructure
Bolt cutters or
hacksaw
Cutting rebar to size
Pliers Cutting and fastening tie wire
Carpenter’s square Accurate measurements
Drill Drilling holes in wood for bolts
3. 5
Materials No. Use
No.15 standard concrete block 95 Chamber Walls
No.10 standard concrete block 6 Chamber Walls
10mm Rod x 6m 4
Chamber /
Foundation Slab
6mm Rod x 6m 2
Chamber /
Foundation Slab
Arc Mesh F52 2.4m x 1.2m 2
Foundation Slab
& Floor Slab
3/8" Anchor Bolt 6" 7 Toilet House
M12 Galv Washers 7 Toilet House
Cement (40 kg Bags) 6
Chamber /
Foundation &
Floor Slab
Black Plastic 4m wide (per m) 3
ET Bed /
Foundation Slab
50mm galvanized nail (kg) 1 False Floor
sand (cubic meter) 2 Chamber / Base
aggregate (cubic meter) 1
Chamber / Base
/ ET Bed
100mm D.W.V. 6m 2
ET Bed / Vent
Pipe
100mm D.W.V. access caps
4 ET Bed
100mm D.W.V. 90 Bend 4 ET Bed
100mm D.W.V. Junction 90
Bend
2 ET Bed
100mm Coupling Straight 2 ET Bed
D.W.V. Glue (125 ml) 1 ET Bed
Tie wire (g) 250
Chamber /
Foundation Slab
Fiberglass Toilet Stool 1 Toilet Stool
3 x 10 hardwood or treated
whitewood (3m)
1 False Floor
3 x 10 hardwood or treated
whitewood (3m )
5 False Floor
6
Materials (Continued) No. Use
3 x 15 whitewood (3m) 3 Formwork
5 x 7.5 hardwood or treated
whitewood (2.5m)
2
Access Door
Frames
5 x 7.5 hardwood or treated
whitewood (2m)
2
Access Door
Frames
3/8" wing nuts 8 Access Doors
3/8" x 3" Bolt 8 Access Doors
3/8" x 2" Bolt 4 Toilet Stool
8' x 4' x 16mm plywood
exterior (sheet)
1
Access Doors /
Baffle Boards
4. 7
Construction Steps
Select a Site
Do not select a site where water is known to
collect after rain.
The toilet can be placed on flat ground, on a
small hill or on the side of a hill.
If possible, face the toilet so that cyclone
winds hit on the sides of the toilet.
Identify where the ET beds will be located in
relation to the toilet. This will be important
when laying the blocks since a space will
have to be left for the pipe, which drains
into the ET bed.
Prepare the Site
Clear and level the ground where the toilet
will be located. If building on a slope, dig a
space in the hill big enough to build the
chambers.
8
Do not remove any banana or pawpaw trees
if they are close to the site. They will
provide shade and privacy and will ‘drink’
the urine from the ET beds.
Make sure all of the materials and tools are
at the site before each construction step is
started.
Mixing the Concrete
Only use aggregate (stone or coral) that will
pass through 25 mm chicken wire mesh.
The concrete mix is 4 shovels aggregate, 2
shovels sand, and 1 shovel cement.
5. 9
The mix for the CT workshop was not good
because the aggregate size was too big.
More sand was added to make working the
concrete easier, but this made it chalky and
brittle after it had set.
Do not add too much water during the
mixing or the cement will collect in the
bottom of the mix and not bind well with
the sand and aggregate.
When finished for the day, always sprinkle
some water on the finished concrete before
covering it in plastic, banana or laplap
leaves, and wash concrete off your tools.
Construct the Foundation Slab
Construct a box with the inner dimensions
of 255cm by 135cm with a depth of 10cm.
Put this box where you would like the toilet.
Mark the ground around the inside of the
box with a stick. Remove the box.
10
The foundation at the CT workshop was too
low and there is a possibility that water
could get in the chamber from the access
doors during a cyclone. To avoid this, I
suggest building the formwork on top of the
ground and digging out the footings
afterward.
Dig out the footings inside the marked area
for the foundation making them 15cm deep
and 25cm wide.
There were many suggestions on how to
build the foundation slab after the CT
workshop. I will describe them all below
including the one that was used.
Method A – (used at the workshop):
o Line the footings with black plastic.
o Cut 2 pieces of 10mm rebar 240cm long
and 3 pieces 110cm long.
o Cut 8 pieces of 6mm rebar 50cm long
and bend them all into an ‘L’ shape with
one side at least 30cm long. These will
be used as starter bars to connect the
foundation with the chambers.
o Use tie wire to secure these starter bars
to the 10mm bars.
o Space them 70cm from each other.
o Place the 10mm bars in the middle of the
footings on small stones so they are not
resting on the ground. Should be about
3cm above the ground.
6. 11
o Do the same with the arc mesh wire for
the concrete above the footing trenches.
Use stones to put the wire about 7cm
above the ground.
o Mix and pour the concrete.
Method B – (no wire):
o Fill in the footing trenches by ramming
large stones in them.
o Fill the footings with concrete and half of
the foundation slab.
o Cut long pieces of bamboo and place
them in on the wet concrete to be used
as reinforcement.
o Pour the rest of the concrete.
Method C – (for hard ground):
o Do not dig footing trenches.
o Inside the formwork, dig down 1 to 2 cm
and level the ground.
o Fill this space with 1 to 2 cm of sand.
o Line the ground inside the formwork with
black plastic.
o Mix and pour half of the foundation slab.
o Cut long pieces of bamboo and place
them in on the wet concrete to be used
as reinforcement.
o Pour the rest of the concrete.
12
Constructing Chambers
After letting the foundation slab cure for a
few days remove the plastic and formwork
and clean the foundation with water.
Cut 8 pieces of 10mm rebar into 85cm
lengths and tie them to the 6mm starter
bars already located in the foundation slab.
The outer dimensions for the chambers are
245cm long by 125cm wide.
Place No. 15 blocks using 3:1 mortar (3
shovels sand, 1 shovel cement) and filling
them with same concrete mix used in the
foundation construction.
7. 13
Blocks should be set 5cm from the edge of
the foundation slab on every side.
The chamber is four blocks high and should
be 80cm from the surface of the foundation
slab to the top of the last block.
14
Remember to leave space in side of
chamber for the drainage pipe for the urine
to pass. The location depends on where the
ET beds will be placed. The hole can be cut
out with a cold chisel.
8. 15
Make the concrete base for the access
doorframe using No. 10 blocks turned on
their side or wood formwork. Should be
10cm high and 20cm wide.
Make a small concrete ledge opposite the
base for the access doorframe where the
false floor will rest. It should be 50mm
wide and 100mm high.
16
Coat the inside of the chambers with a very
thin coat (2-3mm) of 1:1 mortar mix. Be
sure to wet the walls with a wet rag before
applying the mortar.
Avoid drilling the concrete after it has cured
to install anchor bolts. Place them after the
last layer of blocks are finished. Use the
175mm long bolts making sure they are
sticking out at least 100mm above the layer
of blocks.
9. 17
Constructing ET Beds
Dig the holes for the bed and the pipe.
The bed dimensions are 50cm wide by
100cm long by 30cm deep. The distance
from the bed to the chamber depends on
site conditions.
ET bed can be lined with blocks, a
ferrocement shell or just plastic.
18
Method A – (with Blocks):
o Line the inside of the trench with two
layers of No.10 or No.15 blocks using the
same methods for constructing the
chamber.
o Lay black plastic inside trench and over
the edge of the blocks.
o Fill with aggregate.
Method B – (with ferrocement shell):
o Lay black plastic inside the trench
bottom and up over the sides.
o Line the bottom and sides of the trench
with 25mm chicken wire mesh over the
black plastic.
o Mix a 3:1 mortar (the same one used for
the blocks) and cover the chicken wire.
o Cover the trench with plastic, banana or
laplap leaves and sprinkle with water.
o After a day of curing, remove the cover
and place a thin layer of 1:1 mortar (the
same one used for lining the chambers)
on the old 3:1 mortar.
o After covering and letting it set for
another day, fill the trench with
aggregate.
Method C – (with plastic):
o Lay plastic inside the trench bottom and
up over the sides.
o Fill the trench with aggregate.
10. 19
Cut and fit the pipe to the different joints
before putting glue.
Drill holes in pipe for urine to drain into the
ET bed.
Fill the bed with large stones or aggregate
no smaller than 25mm up to the bottom of
the pipe.
Make sure the pipe from the inside of the
chamber to the edge of the ET bed is sloped
slightly down into the bed.
The pipe in the ET bed with the holes should
be level.
20
The access cap at the end of the pipe
should be 600mm above the floor of the ET
bed.
Glue all of the pipe joints together
remembering that the holes in the pipe
should be placed down into the aggregate.
Fill aggregate to the top of the pipe followed
by 5cm of sand on top of that, then filled in
with dirt.
11. 21
Make sure the ET bed is mounded so that
water will run off and away from the bed
during heavy rains.
Line the ET bed with stones to identify the
boundaries and plant flowers on it.
Fill in the spaces with mortar around the
pipe entering the chamber.
Slope the chamber floor with mortar toward
the pipe. (See pg 36, Technical Drawings)
Constructing Toilet House Floor Slab
Using either local or imported materials
construct formwork that covers the space
over the chambers.
22
Place wood all around the chambers about 5
to 6cm above the level of the top layer of
blocks.
Cover the top of the formwork with banana
leaves or plastic.
12. 23
Place the arc mesh wire making sure it is
about 2cm above the formwork. Also, place
a 240cm long 10mm rebar at the back of
slab where the access doors are located.
Using the fiberglass toilet stool, mark out
where the hole will be located for both
chambers and cut the arc mesh.
24
Using local or imported materials, form the
hole over each chamber.
Place small pipe cuttings in the slab to allow
for vent pipe installation.
13. 25
Pour the concrete.
Don’t forget to install the 50mm long bolts
around both holes for securing the toilet
stool to the concrete.
Cover the slab with plastic and let it sit for a
few days.
To ensure a tight fit for the toilet stool,
when the house is built on the chambers,
put the stool on one hole and put mortar
sloping from the lip of the base to the slab.
Do the same with the other hole and the
vent pipes.
26
Constructing False Floor
Measure the inner dimensions of each
chamber. They will vary based on how
much mortar is used when smoothing the
inside of the chambers.
It is good to use treated whitewood for the
false floor, but this may be too expensive or
not available at all on some islands. Other
options mentioned during the workshop
were natong, palm tree, natora and
bamboo. Bamboo would have to be
replaced every time the chamber is emptied
as it breaks down quickly.
The size of the timber is at least 50cm wide
and 25cm thick and the spacing between
the timber pieces is 15mm.
14. 27
After nailing all of the pieces together and
ensuring there is a good fit, cut the floor in
half to allow for easier removal during
cleaning.
Constructing Access Doors
The material used for constructing every
part of the access doors should be
constructed from treated timber, or from a
local timber, which you know rots slowly.
Dimensions for the access doorframes will
depend on how much mortar is used on the
inside of the chambers. The dimensions
should be about 1m wide by 70cm high.
The frame should be in the middle of
concrete ledge.
28
Nail the doorframe to the concrete using
concrete nails or special concrete screws.
Measure the frame and cut the access doors
from the marine ply.
Rest the door against the frame and drill
four holes through the doors and frames for
the bolts. Use a drill bit one size smaller
than the bolt diameter.
Hammer the 75mm long bolts in the holes
from the inside of the chamber.
Cut 4 baffle boards 20cm wide and the
correct length to fit the doorframe from the
left over marine ply.
Cut 8 - 2 x 2 cm runners 35cm long to hold
the baffle boards.
Nail the runners into the doorframe and
slide in the baffle boards.
15. 29
Nail two handles on each marine ply access
door.
Set the doors against their frames to block
the chambers. Use the wing nuts to fasten
the door closed tight.
Building House on Top of Chambers
The house located on top of the toilet
should be constructed using methods and
materials common on the island.
There are many choices for materials as
well as design, a small sample of designs
options are provided below.
30
16. 31
Operation and Maintenance
Proposed sign to be placed in the toilet
notifying guest about the toilet and how to use
it.
This is an eco-toilet
No pollution goes into the environment
Please add a handful of leaves after use
Close the lid
Wash your hands
No water or chemicals should go in the
toilet
Changing Chamber When One is Full
Before moving the toilet stool to the other
chamber open the access door and check
the compost by looking over the baffle
boards. If it is fully composted and
inoffensive, remove the compost using a
shovel.
After removing the compost, check under
the false floor to see if any compost fell
through the false floor and may block the
ET bed pipe. If there is any material,
remove the false floor, remove the material
and then replace the false floor.
Prime the chamber by adding a thick layer
(about 100mm deep) of dry brown leaves
32
onto the false floor. Then put the baffle
boards back and close the access door.
Now move the toilet stool to the hole over
the primed chamber.
Before closing off the chamber that is full,
fill it up with dry leaves up to the bottom of
the floor slab.
Maintaining/Cleaning the Toilet
After using the toilet, throw one handful of
dry leaves into the chamber and then shut
the lid.
Keep the area inside the toilet house clean.
If the toilet has a bad smell it means that it
is not working properly. Try throwing twice
as many leaves as normal for a few days.
If the smell is still there, the pipe may be
blocked.
Put a long piece of tie wire in one end of the
pipe through the access cap and push it
through to the other access cap. Tie an old
piece of calico to the end of the wire and
pull it back through to the other side. Also
clean the pipe in the chamber with the tie
wire. This should remove anything blocking
this section of pipe. Throw the cloth in the
composting chamber when you have
finished.
20. 39 40
Technical Specifications
1. Specifications for installation as
freestanding unit, or retrofit into a house
The design includes the composting system and a
superstructure for a freestanding toilet building.
The composting chambers as shown, including
ventilation and the drainage system can also be
installed beneath a bathroom or toilet room, within
a house or amenities block. The design of the
superstructure can be adapted to local
requirements, but should be durable.
a). Two concrete composting chambers, each of
approximately a cubic meter internal volume, in a
side by side configuration on 100 mm concrete
slab. Dimensions of the chambers can be reduced
but height should not be less than 800mm and
width of a chamber should not be less than
650mm. Walls can be in 400 x 150 mm concrete
blocks, or constructed on site using formwork.
Chambers must be insect and vermin proof and
water-resistant. Foundations of chambers should
comply with local specifications for weather
conditions and site soils. All timber should be
treated pine or durable local timber, unless
otherwise stated. The internal walls, roof and
plenum floor of the concrete chambers should be
sealed with a moisture-proofing agent. All nails and
screws should be galvanized or otherwise corrosion
proof.
b). Plenum floor of chambers falls 25 mm to 90
mm drainage outlets from each chamber.
21. 41
c). 90 mm PVC pipe from each chamber drains to
HDPE or concrete lined trench 500 x 1400 x 750
mm. Trench contains 25 mm aggregate and is fed
by 90 mm slotted pipe. Screw capped inspection
points in 458 bend between building and trench in
90 mm drainage pipe and at end of trench to allow
for cleaning. The trenches can be sited at any side
of the chamber as long as the plenum floor falls in
that direction.
d). Appropriate vegetation or trees should be
planted on or adjacent to trench to assist
evapotranspiration of any liquid that may drain into
the lined trench (eg. banana trees). Completed
trenches should be mounded to assist surface
runoff.
e). 50 x 25 mm timber slats provide removable
false floor to support compost pile. Removable
false floor rests on 50 mm wide concrete block
work 100 mm above plenum floor of concrete
chambers. A 50 x 25 mm frame is screwed to the
underneath of the slats 80 mm from side edge of
the false floor. 15 mm gap is required between the
slats. A sheet of galvanized expanded metal with
similar size gaps can be substituted for the timber
slat false floor. The access port to the chambers is
framed by 70 x 50 mm timber. The top of the false
floor is 10 mm below the base of the 70 x 50 mm
timber frame to which access doors are bolted.
f). The access port should be sufficient depth and
width to allow removal of the false floor from the
chamber, for maintenance. This can be achieved by
building the false floor in two sections, or the false
floor can be removed from the port by turning it
42
onto the diagonal. 19 mm marine ply doors or
framed zincalume sheet doors are fixed to the 70 x
50 mm timber frame that is recessed into concrete
walls of each chamber. The access doors are
secured onto the frame by 10 mm galvanized or
stainless steel bolts screwing into T-nuts in timber
frame. It is essential that the chamber doors are
easy to open by an adult but are well secured
against access by children. The chamber doors
should be black or a dark color to absorb heat.
g). Three 20 x 150 mm marine ply or treated pine
baffle boards are supported by 25 x 25 mm
runners at port of chambers. The runners are
nailed to the inside of the 50 x 75 mm doorframe
allowing a gap of 25 mm for baffle boards to slide
out of the runners. These allow for expansion when
wet. The baffle boards prevent the pile from falling
out of the chamber when the door is removed. The
gap at the top of the boards permits inspection of
the pile and easy removal of the three baffle
boards.
h) 75 mm ferrocement slab, or 19 mm marine ply
sheet on frame, forms ceiling of concrete chambers
and the floor of toilet room, protected by damp
course. The ferrocement slab usually provides
more permanent and effectively sealed chambers
and is the preferred option.
i). A splayed fiberglass pedestal/seat is screwed
into a hole in the floor of the toilet room above the
chamber that is being used. A fiberglass blanking
plate or framed zincalume plate or timber lid is
screwed into the hole above the chamber that is
not being used. The seat and the blanking plate/lid
should be easy for householders or maintenance
22. 43
staff to exchange. Seats can also be in timber or
molded concrete.
j) The frame of the toilet room, or superstructure,
should be storm resistant and suitable for cladding
with natural materials such as pandanus thatch or
permanent materials such as fibro, form ply, or
corrugated iron. Form ply walls should be painted
for waterproofing. The hinged door of the toilet
room is secured on the outside with a sliding bolt
that will allow a padlock to be attached if required.
A sliding bolt or similar should also be attached to
the inside of the toilet room door.
k). The toilet room should be well ventilated and
allow for natural light. If possible the building
should be sited so that the access chambers at the
back of the building are north facing.
l). The roof can be in zincalume, corrugated iron,
or thatched, on a skillion frame or gabled. The
materials and design of the superstructure toilet
room can be varied to suit local building
regulations and the practicalities and aesthetics of
the site, as long as it does not compromise the
function of the composting chamber and the
drainage system.
m). One 90 mm PVC vent pipe insert 20 mm into
each chamber through the toilet room floor, and
extends 1 m above the roof line. The ventilation
pipes are painted black to facilitate convection. The
vent pipes can be placed behind the pedestal to
support the open toilet lid.
n). Stairs with 200 x 50 mm treads and 200 x 500
mm stringers and handrail would provide stable
44
and safe entry to toilet room for adults and
children. Alternatively a ramp can be installed
across the front of the building to provide
wheelchair access. Concrete blocks can also be
used to build the steps. If the site has a raised
area that is an appropriate site, the building can be
set into the bank so that access to the toilet room
is level. The back of the composting chambers and
access doors must be above ground level to enable
easy maintenance and ensure the drainage system
does not threaten groundwater.
o) The walls of the pedestal or toilet seat should be
splayed to avoid adherence of faecal matter to
sides and to reduce necessity for cleaning. The
pedestals used in the CT construction workshop
were purchased from a Port Vila fiberglass shop.
The unit had a wide lip at the base of the pedestal,
which allowed for it being bolted onto the toilet
room floor. For future installation of CTs on an
extended scale, production of pedestals and seats
could be undertaken by a local fiberglass industry.
23. 45
Acknowledgements
The members of VIBA and TRMC would like to
thank the following organizations and people for
their support and contributions to this project.
Mr. Joyle Yau for his ingenuity, leadership and
continuous support well before, during and well
after the workshop. Also for hosting the workshop
at his home, including his family in the pilot
project, and answering questions from the
numerous people that came (and continue to
come) to visit his home where the CT was built.
Dr. Leonie Crennan for sharing her technical
expertise on compost toilets during the workshop
and the use of her technical drawings,
specifications, and pictures in this manual. Her
preparatory advise for the workshop and guidance
during the workshop was invaluable as was her
help and advise in editing this manual after the
workshop was finished.
New Zealand High Commission for generously
funding this project, which included flying
participants from around Vanuatu to Vila,
accommodating them, purchasing workshop
materials, printing and distributing this manual,
and purchasing and distributing start-up materials
to each of the participants at their sites.
South Pacific Applied Geoscience Commission
(SOPAC) for sponsoring Dr. Crennan to make the
trip to Vanuatu to share her expertise on CT
technology.
46
Vanuatu Institute of Technology for lending the
tools necessary for the construction of the CT.
Also for their construction of a 1:5 scale model of
the CT, which was used to prepare an accurate list
of materials for the workshop.
SHEFA Provincial Council Chamber for the use of
the council truck in transporting materials and tools
before, during and after the workshop. Also for
use of the council chamber during the workshop.
Island Safaris employees for their organization of
transportation and accommodation for the
workshop participants, and their management of
the funds from New Zealand High Commission.
The participants for their questions, advice and
hard work under difficult conditions during the
workshop. The questions and advice was
especially useful for the drafting of this manual.