SlideShare ist ein Scribd-Unternehmen logo
1 von 10
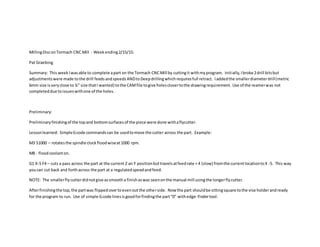
MillingDisconTormach CNC Mill - Weekending2/15/15:
Pat Graebing
Summary: This week Iwasable to complete apart on the Tormach CNCMill by cuttingit withmyprogram. Initially,Ibroke 2drill bitsbut
adjustmentswere made tothe drill feedsandspeeds ANDtoDeepdrillingwhichrequiresfull retract. Iaddedthe smallerdiameterdrill(metric
6mm size isveryclose to ¼” size thatI wanted) tothe CAMfile togive holesclosertothe drawingrequirement. Use of the reamerwas not
completeddue toissueswithone of the holes.
Preliminary:
Preliminaryfinishingof the topand bottomsurfacesof the piece were done withaflycutter.
Lessonlearned: SimpleGcode commandscan be usedtomove the cutter across the part. Example:
M3 S1000 – rotatesthe spindle clockfloodwiseat1000 rpm.
M8 - floodcoolanton.
G1 X-5 F4 – cuts a pass across the part at the current Z an Y positionbuttravelsatfeedrate = 4 (slow) fromthe currentlocationtoX -5. This way
youcan cut back and forthacross the part at a regulatedspeedandfeed.
NOTE: The smallerfly cutterdidnotgive assmootha finishaswas seenonthe manual mill usingthe longerflycutter.
Afterfinishingthe top,the partwas flippedovertoevenoutthe otherside. Nowthe part shouldbe sittingsquare tothe vise holderandready
for the program to run. Use of simple Gcode linesisgoodforfindingthe part“0” withedge-findertool.
TEST AirPASS:
Since thisprogramwas modeledbyme,Iwantedtoperforman “air pass”before millinganymetal. Youneedtofindthe “0” pointforall the
axes. For “air pass” I addedabout5 inchestomove the Z axiszeropointup above the part.
Problem1: The cuttingheadplungesdowntomy part on the firstair pass.
Solution: Tool numbersinthe programneedtomatch the tool numbersinthe tool table for the Tormach. The tool was plungingbecause there
was noheightenteredforthe firsttool inthe program. I re-enteredthe tool table tomatchmy program. Toolsin the librarysometimeshave a
tool numberthat comesoverwiththemtothe CAMfiles. Thiscanbe changedas you make the program.
Final Tool table:
Tool # Description Diameter, inches Height, inches
5 Drill , 6mm,2 flutes 0.236” 4.365”
3 3/8 endmill;2 flutes 0.375” 3.464”
2 6 flute reamer,.251 0.251” 6.182”
Afterthis,nofurtherproblemswere seenonthe airpass.
Program Run:
Problem2: I broke the LetterB drill bitonthe firststepandfirsthole of my part.
Discussion:Ihadtrouble gettingthe coolanttoflow. The mill wasrunningveryfastand broke off the tool.
Solution: Ichangedto a LetterC drill thatI had in reserve andmade sure the coolantwasflowingbefore the start –use manual.
Problem3: Nextrunwiththe C drill andit breakstoo! Itis not justcoolant. (1) I see that the drill doesnotretract afterthe firsthole. (2) I also
see that the drill seemstobe stickingoutof the tool holder. Comparisontoanotherdrill inacolletchucktool holder,itseemstohave less
lengthexposed. The DCconfirmsthatthe collettool holderwill give bettercontrol of the bitthanthe 3-pointtool holderthatI wasusing. (3)
The DC indicatesthatmaybe 40 in/ministoofast forthe feedrate.
Solution: Igo back to the program andfindthat I can retract the drill higherwith “Deepdrilling”selectedthatforcesthe drill tofullyretract. I
add the 6 mm metricdrill (0.236”) tothe programsince thisis close tothe size that I expectedforthe letterBandC drills. Ireducedthe plunge
feedrate to 12in/min. Re-save the programandpost the code.
Problem4: Since I hadbrokenall of the drill bitsof the size that I needed, Imovedmypartout of the holder. The DCsuggestedthatI coulduse
a metric6 mm drill or6.1 mm or evena 15/64 drill. I foundtheydidhave a 6 mm drill inthe drillsyoucan borrowat the desk. Due to moving
the part, I wouldnotbe able to line upthe firsthole withsubsequentdrilling.
Solution: Iwantto continue torun the program and findanyotherissueswiththe programrun. I mountthe part onthe vise andre-setall the
“0” pointsforthe axes – X,Y and Z.
The part hasa double hole atthe firsthole of the 6-hole circle.
Drilling6hole circle:
Change tool to the End mill tocut the centerholes:
Lots of coolantto keepthe chipsmovingoutof the closedendpocket.
Problem5: Asthe End mill beginstocutthe centerpocketwider,aloadscreechingnoise comesoutof the tool. I hitthe E stopthinking
somethingisverywrong. Hittingthe E stopdisengagesthe motorsandsoyouloose the “0” pointsonthe part. I couldhave hitthe free stop
and had an easierrestart.
Part afterEstop:
Solution: The DCsays nothingiswrongwiththe tool and I can continue butinstoppingthe program, (1) I have to re-findall the “0” s foreach
axisand (2) I will have torestart the programat the stepwhere itwas halted.
(1) Change back to edge finderandindicate the edgestofindthe centerpointforXand Y-axis. Re-indicate the topof the partfor Z-axis
“0”.
(2) Change back to the endmill tool. Startthe spindle turningforthe correcttool # and speed. Clearthe stopsandstart the program.
Startingon the line afterwhere youwanttorestart the program worksandthe programstarts up again.
Outside Diameter:
The end mill continuesthe programtocut the outerdiameterof the part.
CNCProgram Completed:
Cut off finishedpartfromthe blockand face off the roughend.
Problem6: Usedthe chopsaw to cut off the finishedparttotry and save time butthere wasnot enoughsupporttoholdthe part at a right
angle while sawing. The resultwasa crookedpart. Notsufficientstocktolevel off the partheightwithouttakingitbelowsize.
Final Dimensions:
Actual Measurement DrawingRequirement
OuterDiam. 2.688” ** 2.688” +0, -.004
thickness 0.886” max.**/0.803” min. 0.875”
ID firstpocket 1.181” 1.313”
FirstpocketDepth 0.403” 0.375” +.002,-.001
ID lowerpocket 0.8815” 0.875” +0, -.004
ID 6 holes 0.248” 0.250”
ID 6 holes 0.247” 0.250”
ID 6 holes 0.250” 0.250”
ID 6 holes X bad hole 0.250”
ID 6 holes 0.248” 0.250”
ID 6 holes 0.250” 0.250”
Centertocenter( diam.Of 6
hole circle
2.0715” 2.063”
X Bad hole 2.063”
Centertocenter( diam.Of 6
hole circle
2.074” 2.063”
See drawingsketchonnextpage.
PlansforThis Week:
Reserve more time onthe Tormach.
(1) Continue askingmore experiencedmachinistswhythe firstcenterpocketseemstogotoo deep.
(2) Addball mill toprogram to cut out radiusinfirstcenterpocket.
(3) Try to make anotherpart on the blockremaining. Improve cutoff method.
Currentorderof operationsplanned:
Face off bothendswiththe flycuttertool.
Attach toolstoholdersandmeasure them.
Load the program fromthe desktop. Create the tool table.
Mount the firsttool,edge finder. Findthe 0and setX and Y-axis“0”.
Mount the firstcuttingtool. Set “0” forthe Z-axis.
FollowCNCprogram.
Cut off the part fromthe blockwithenoughstocktofinishtothe thicknessneeded.
Finishthe roughend.

Weitere ähnliche Inhalte

Ähnlich wie Milling Discon Tormach CNC Mill

Vice Grip Soldiworks Project
Vice Grip Soldiworks ProjectVice Grip Soldiworks Project
Vice Grip Soldiworks ProjectMichael Lagalle
 
412448445555454078-CNC-Project-Report.pdf
412448445555454078-CNC-Project-Report.pdf412448445555454078-CNC-Project-Report.pdf
412448445555454078-CNC-Project-Report.pdfYousef453089
 
Pemrograman cnc tu 3 a
Pemrograman cnc tu 3 aPemrograman cnc tu 3 a
Pemrograman cnc tu 3 aAlen Pepa
 
Lathe Introduction
Lathe IntroductionLathe Introduction
Lathe Introductionillpa
 
Tapers and taper_turning
Tapers and taper_turningTapers and taper_turning
Tapers and taper_turningadiyaksa182
 
Reservoir Rock Properties Laboratory Manual Exp (#1)
Reservoir Rock Properties Laboratory Manual Exp (#1)Reservoir Rock Properties Laboratory Manual Exp (#1)
Reservoir Rock Properties Laboratory Manual Exp (#1)Muhammed Fuad Al-Barznji
 
Workshop Report.pdf
Workshop Report.pdfWorkshop Report.pdf
Workshop Report.pdfHogr kamal
 
CNC Router and Engraver machine.pptx
CNC Router and Engraver machine.pptxCNC Router and Engraver machine.pptx
CNC Router and Engraver machine.pptxrukmangadpranjal1902
 
DrawBotAssemblyUserGuideV3.pdf
DrawBotAssemblyUserGuideV3.pdfDrawBotAssemblyUserGuideV3.pdf
DrawBotAssemblyUserGuideV3.pdfUsmanBhatti46
 
Computer integrated Manufacture & design Lab Manual
Computer integrated Manufacture & design Lab  ManualComputer integrated Manufacture & design Lab  Manual
Computer integrated Manufacture & design Lab ManualSpikeAerotek
 
Solid works lab manual including auto cad
Solid works lab manual including auto cadSolid works lab manual including auto cad
Solid works lab manual including auto cadPUDOTATHARUN
 
Manufacturing technology lab-1
Manufacturing technology lab-1Manufacturing technology lab-1
Manufacturing technology lab-1Krishna Gali
 
Manufacturimg of comressor blade presentation 4 - copy
Manufacturimg of comressor blade presentation  4 - copyManufacturimg of comressor blade presentation  4 - copy
Manufacturimg of comressor blade presentation 4 - copyanup sharma
 
Design For Manufacturing Module 3
Design For Manufacturing Module 3Design For Manufacturing Module 3
Design For Manufacturing Module 3RajuBasava
 
Machining_Processes_Introduction.pdf
Machining_Processes_Introduction.pdfMachining_Processes_Introduction.pdf
Machining_Processes_Introduction.pdfgeynnn
 

Ähnlich wie Milling Discon Tormach CNC Mill (20)

Work Precedure Side Standard
Work Precedure Side StandardWork Precedure Side Standard
Work Precedure Side Standard
 
Vice Grip Soldiworks Project
Vice Grip Soldiworks ProjectVice Grip Soldiworks Project
Vice Grip Soldiworks Project
 
412448445555454078-CNC-Project-Report.pdf
412448445555454078-CNC-Project-Report.pdf412448445555454078-CNC-Project-Report.pdf
412448445555454078-CNC-Project-Report.pdf
 
Pemrograman cnc tu 3 a
Pemrograman cnc tu 3 aPemrograman cnc tu 3 a
Pemrograman cnc tu 3 a
 
Carding (1)
Carding (1)Carding (1)
Carding (1)
 
Lathe Introduction
Lathe IntroductionLathe Introduction
Lathe Introduction
 
Tapers and taper_turning
Tapers and taper_turningTapers and taper_turning
Tapers and taper_turning
 
Reservoir Rock Properties Laboratory Manual Exp (#1)
Reservoir Rock Properties Laboratory Manual Exp (#1)Reservoir Rock Properties Laboratory Manual Exp (#1)
Reservoir Rock Properties Laboratory Manual Exp (#1)
 
milling.pdf
milling.pdfmilling.pdf
milling.pdf
 
Workshop Report.pdf
Workshop Report.pdfWorkshop Report.pdf
Workshop Report.pdf
 
CNC Router and Engraver machine.pptx
CNC Router and Engraver machine.pptxCNC Router and Engraver machine.pptx
CNC Router and Engraver machine.pptx
 
Me2258 lm
Me2258 lmMe2258 lm
Me2258 lm
 
DrawBotAssemblyUserGuideV3.pdf
DrawBotAssemblyUserGuideV3.pdfDrawBotAssemblyUserGuideV3.pdf
DrawBotAssemblyUserGuideV3.pdf
 
Computer integrated Manufacture & design Lab Manual
Computer integrated Manufacture & design Lab  ManualComputer integrated Manufacture & design Lab  Manual
Computer integrated Manufacture & design Lab Manual
 
Solid works lab manual including auto cad
Solid works lab manual including auto cadSolid works lab manual including auto cad
Solid works lab manual including auto cad
 
Manufacturing technology lab-1
Manufacturing technology lab-1Manufacturing technology lab-1
Manufacturing technology lab-1
 
Manufacturimg of comressor blade presentation 4 - copy
Manufacturimg of comressor blade presentation  4 - copyManufacturimg of comressor blade presentation  4 - copy
Manufacturimg of comressor blade presentation 4 - copy
 
15 me404l manual - ex 1 to 4
15 me404l   manual - ex 1 to 415 me404l   manual - ex 1 to 4
15 me404l manual - ex 1 to 4
 
Design For Manufacturing Module 3
Design For Manufacturing Module 3Design For Manufacturing Module 3
Design For Manufacturing Module 3
 
Machining_Processes_Introduction.pdf
Machining_Processes_Introduction.pdfMachining_Processes_Introduction.pdf
Machining_Processes_Introduction.pdf
 

Milling Discon Tormach CNC Mill

  • 1. MillingDisconTormach CNC Mill - Weekending2/15/15: Pat Graebing Summary: This week Iwasable to complete apart on the Tormach CNCMill by cuttingit withmyprogram. Initially,Ibroke 2drill bitsbut adjustmentswere made tothe drill feedsandspeeds ANDtoDeepdrillingwhichrequiresfull retract. Iaddedthe smallerdiameterdrill(metric 6mm size isveryclose to ¼” size thatI wanted) tothe CAMfile togive holesclosertothe drawingrequirement. Use of the reamerwas not completeddue toissueswithone of the holes. Preliminary: Preliminaryfinishingof the topand bottomsurfacesof the piece were done withaflycutter. Lessonlearned: SimpleGcode commandscan be usedtomove the cutter across the part. Example: M3 S1000 – rotatesthe spindle clockfloodwiseat1000 rpm. M8 - floodcoolanton. G1 X-5 F4 – cuts a pass across the part at the current Z an Y positionbuttravelsatfeedrate = 4 (slow) fromthe currentlocationtoX -5. This way youcan cut back and forthacross the part at a regulatedspeedandfeed. NOTE: The smallerfly cutterdidnotgive assmootha finishaswas seenonthe manual mill usingthe longerflycutter. Afterfinishingthe top,the partwas flippedovertoevenoutthe otherside. Nowthe part shouldbe sittingsquare tothe vise holderandready for the program to run. Use of simple Gcode linesisgoodforfindingthe part“0” withedge-findertool.
  • 2. TEST AirPASS: Since thisprogramwas modeledbyme,Iwantedtoperforman “air pass”before millinganymetal. Youneedtofindthe “0” pointforall the axes. For “air pass” I addedabout5 inchestomove the Z axiszeropointup above the part. Problem1: The cuttingheadplungesdowntomy part on the firstair pass. Solution: Tool numbersinthe programneedtomatch the tool numbersinthe tool table for the Tormach. The tool was plungingbecause there was noheightenteredforthe firsttool inthe program. I re-enteredthe tool table tomatchmy program. Toolsin the librarysometimeshave a tool numberthat comesoverwiththemtothe CAMfiles. Thiscanbe changedas you make the program. Final Tool table: Tool # Description Diameter, inches Height, inches 5 Drill , 6mm,2 flutes 0.236” 4.365” 3 3/8 endmill;2 flutes 0.375” 3.464” 2 6 flute reamer,.251 0.251” 6.182” Afterthis,nofurtherproblemswere seenonthe airpass. Program Run: Problem2: I broke the LetterB drill bitonthe firststepandfirsthole of my part. Discussion:Ihadtrouble gettingthe coolanttoflow. The mill wasrunningveryfastand broke off the tool. Solution: Ichangedto a LetterC drill thatI had in reserve andmade sure the coolantwasflowingbefore the start –use manual. Problem3: Nextrunwiththe C drill andit breakstoo! Itis not justcoolant. (1) I see that the drill doesnotretract afterthe firsthole. (2) I also see that the drill seemstobe stickingoutof the tool holder. Comparisontoanotherdrill inacolletchucktool holder,itseemstohave less lengthexposed. The DCconfirmsthatthe collettool holderwill give bettercontrol of the bitthanthe 3-pointtool holderthatI wasusing. (3) The DC indicatesthatmaybe 40 in/ministoofast forthe feedrate.
  • 3. Solution: Igo back to the program andfindthat I can retract the drill higherwith “Deepdrilling”selectedthatforcesthe drill tofullyretract. I add the 6 mm metricdrill (0.236”) tothe programsince thisis close tothe size that I expectedforthe letterBandC drills. Ireducedthe plunge feedrate to 12in/min. Re-save the programandpost the code. Problem4: Since I hadbrokenall of the drill bitsof the size that I needed, Imovedmypartout of the holder. The DCsuggestedthatI coulduse a metric6 mm drill or6.1 mm or evena 15/64 drill. I foundtheydidhave a 6 mm drill inthe drillsyoucan borrowat the desk. Due to moving the part, I wouldnotbe able to line upthe firsthole withsubsequentdrilling. Solution: Iwantto continue torun the program and findanyotherissueswiththe programrun. I mountthe part onthe vise andre-setall the “0” pointsforthe axes – X,Y and Z. The part hasa double hole atthe firsthole of the 6-hole circle. Drilling6hole circle:
  • 4. Change tool to the End mill tocut the centerholes: Lots of coolantto keepthe chipsmovingoutof the closedendpocket. Problem5: Asthe End mill beginstocutthe centerpocketwider,aloadscreechingnoise comesoutof the tool. I hitthe E stopthinking somethingisverywrong. Hittingthe E stopdisengagesthe motorsandsoyouloose the “0” pointsonthe part. I couldhave hitthe free stop and had an easierrestart.
  • 5. Part afterEstop: Solution: The DCsays nothingiswrongwiththe tool and I can continue butinstoppingthe program, (1) I have to re-findall the “0” s foreach axisand (2) I will have torestart the programat the stepwhere itwas halted. (1) Change back to edge finderandindicate the edgestofindthe centerpointforXand Y-axis. Re-indicate the topof the partfor Z-axis “0”. (2) Change back to the endmill tool. Startthe spindle turningforthe correcttool # and speed. Clearthe stopsandstart the program. Startingon the line afterwhere youwanttorestart the program worksandthe programstarts up again.
  • 6. Outside Diameter: The end mill continuesthe programtocut the outerdiameterof the part.
  • 7. CNCProgram Completed: Cut off finishedpartfromthe blockand face off the roughend. Problem6: Usedthe chopsaw to cut off the finishedparttotry and save time butthere wasnot enoughsupporttoholdthe part at a right angle while sawing. The resultwasa crookedpart. Notsufficientstocktolevel off the partheightwithouttakingitbelowsize.
  • 8. Final Dimensions: Actual Measurement DrawingRequirement OuterDiam. 2.688” ** 2.688” +0, -.004 thickness 0.886” max.**/0.803” min. 0.875” ID firstpocket 1.181” 1.313” FirstpocketDepth 0.403” 0.375” +.002,-.001 ID lowerpocket 0.8815” 0.875” +0, -.004 ID 6 holes 0.248” 0.250” ID 6 holes 0.247” 0.250” ID 6 holes 0.250” 0.250” ID 6 holes X bad hole 0.250” ID 6 holes 0.248” 0.250” ID 6 holes 0.250” 0.250” Centertocenter( diam.Of 6 hole circle 2.0715” 2.063” X Bad hole 2.063” Centertocenter( diam.Of 6 hole circle 2.074” 2.063” See drawingsketchonnextpage.
  • 9.
  • 10. PlansforThis Week: Reserve more time onthe Tormach. (1) Continue askingmore experiencedmachinistswhythe firstcenterpocketseemstogotoo deep. (2) Addball mill toprogram to cut out radiusinfirstcenterpocket. (3) Try to make anotherpart on the blockremaining. Improve cutoff method. Currentorderof operationsplanned: Face off bothendswiththe flycuttertool. Attach toolstoholdersandmeasure them. Load the program fromthe desktop. Create the tool table. Mount the firsttool,edge finder. Findthe 0and setX and Y-axis“0”. Mount the firstcuttingtool. Set “0” forthe Z-axis. FollowCNCprogram. Cut off the part fromthe blockwithenoughstocktofinishtothe thicknessneeded. Finishthe roughend.