Instruction Manual | Burris Signature 2000 LRF | Optics Trade
•
0 gefällt mir•61 views

The document provides instructions for operating the Burris Signature LRF 2000 laser rangefinder. It describes safety precautions, an overview of the product features, instructions for adjusting settings like display brightness and ranging mode, and how to take measurements. It also includes specifications, troubleshooting tips, maintenance instructions, and details about the lifetime warranty.

Empfohlen
Empfohlen
Weitere ähnliche Inhalte
Ähnlich wie Instruction Manual | Burris Signature 2000 LRF | Optics Trade
Ähnlich wie Instruction Manual | Burris Signature 2000 LRF | Optics Trade (20)
Mehr von Optics-Trade
Mehr von Optics-Trade (20)
Kürzlich hochgeladen
Kürzlich hochgeladen (15)
Instruction Manual | Burris Signature 2000 LRF | Optics Trade
- 1. SIGNATURE LRF 2000 LASER RANGEFINDER
- 2. TABLE OF CONTENTS Safety and Operation Precautions ............................................. Product Map .............................................................................. Internal Display Element ............................................................ Eyepiece Adjustments ................................................................ Battery...................................................................................... Mode Set Up / Operation........................................................... Internal Display Brightness / Options......................................... Ranging..................................................................................... LOS vs. HOR and Angle Compensation........................................ Specifications.............................................................................. Problems and Solutions............................................................... Care and Maintenance................................................................ Warranty................................................................................... 3 5 6 7 7 8 10 12 13 15 16 17 18
- 3. 3 SAFETY AND OPERATION PRECAUTIONS The Burris Signature LRF 2000 rangefinder employs an eye safe FDA Class 1 Laser in its operation. Outside of the United States, the IEC is the governing body over laser products and has classified the Burris Signature LRF 2000 as Class 3R. Even so, there are a few precautions that are important to remember: •Do not depress the POWER button while aiming at a human eye or while looking into the optics from the objective side •Do not leave the Signature LRF 2000 within the reach of small children •Do not take the product apart as it may cause an electric shock •Do not attempt to use any power source other than a CR2 battery (or equivalent) - the Burris Signature LRF 2000 is designed to prohibit accessing any other external power supply.
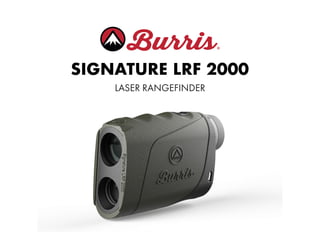
- 4. 4 Congratulations on purchasing a Burris® Signature LRF 2000. This compact optic combines laser rangefinding capability with high performance HD lenses, letting you quickly determine a precise distance to your target with the push of a button. •Eye safe laser measures targets out to 2,400 yards or 2,194 meters. •Three ranging modes for maximum precision: Auto, Sport and Hunt. •Distances can be displayed as line-of-sight or horizontal with angles of degree. •The Signature LRF 2000 is nitrogen-filled for waterproof, fog proof performance. •Outer surfaces are rubber armored for protection and a sure grip. •Adjustable eyepiece ensures a clear view.
- 6. 6 INTERNAL DISPLAY ELEMENTS The internal display on the Signature LRF 2000 will display the ranging reticle, distance to the target, measurement units (yards or meters), target angle, low battery indicator and ranging modes.
- 7. 7 EYEPIECE The eyepiece on the Signature LRF 2000 is adjustable to ensure a crisp view of the target. LASER RANGER FINDER OPERATION Install Battery The laser rangefinder is powered by a CR2 lithium battery. The battery compartment is located on the back of the unit below the eye piece. Open the battery compartment and install the battery + side up. ADJUSTABLE FOCUS ON THE DIOPTER INSERT CR2 BATTERY WITH +POSITIVE END FACING OUT
- 8. 8 MODE SETUP Settings Menu To power on press the range button. Then to access the settings menu, press and hold the Mode button for 2 seconds. The first menu screen to appear is the Ranging Mode selection. Press the Power button to change the active menu setting option. The selected setting will flash. Press the Mode button to select the current setting and advance to the next menu option. To exit the settings mode at any time, press the Mode button for 2 seconds or wait for 12 seconds to automatically return to normal ranging operation. MODE BUTTON LEFT SIDE ONLY POWER / RANGING BUTTON
- 9. 9 MODES OF OPERATION Once you’ve accessed the settings menu, press the Power button to select between Auto, Sport or Hunt modes. Auto Mode – displays the range of the target with strongest signal Sport Mode – displays the range of the closest target in a group. This mode has a short delay when ranging. Hunt Mode – displays the furthest range of a group of targets. This is useful when ranging through branches or tall grass. UNIT DISPLAY Ranged distances can be in Yards or Meters. The default selection is Yards. To change the units, press the Power button to select between the Yards or Meters. Press the Mode button to make your selection.
- 10. 10 DISPLAY OPTIONS There are five display options: • LOS - line-of-sight only • HOR – horizontal distance only • LOS and HOR – line-of-sight and horizontal • LOS and ANG – line -of-sight and angle (+ above horizontal, - below horizontal) • HOR and ANG – horizontal and angle (+ above horizontal, - below horizontal) The factory default is line-of-sight. INTERNAL DISPLAY BRIGHTNESS The brightness of the display can be adjusted for optimal viewing in bright or dark situations. To change the brightness settings, press the Power button to choose levels from 1 to 5. To select the desired level, press the Mode button. After selecting a brightness the LRF will return to normal operation.
- 11. 11
- 12. 12 RANGING Ranging Activation To activate the LRF, press the Range Button on the top. The ranging reticle will appear in the internal display. Single Measurement Place the small circle of the reticle on the object or target you want to range and press the Range Button once more. The distance to the target will be shown in yards or meters. Highly reflective and larger targets are easier to range. If you have difficulty getting a range, try ranging an object close to your target (tree, rock, bush) Continuous Measurement (Scan Mode) To activate continuous ranging, press and hold the power button. Continue to hold down the Power button while tracking your target. To conserve the battery, the display will automatically power off after 10 seconds.
- 13. 13 KNOW YOUR TARGETS PRECISE DISTANCE SHOOTING ANGLE 30° HORIZONTAL DISTANCE 519.6 yds LINE OF SIGHT 600 yds
- 14. 14 ANGLE COMPENSATION FOR THE MOST ACCURATE SHOT PLACEMENT HORIZONTAL DISTANCE 26.8 yds LINE OF SIGHT 35 yds SHOOTING ANGLE 40°
- 15. 15 MEASURE RANGE Effective................ Reflective.............. Non reflective...... Deer/Game......... Minimum Range... ACCURACY ±1 yd ≤ 1,000 yds ±2 yds > 1,000 yds SPECIFICATIONS Magnification 7x Objective Diameter 25mm Field of View @ 100 yd 31.5 ft. Eye Relief 16mm Angle Range ±70° Diopter Adjustment +/- 6 Dimensions 4.75 in x 3.25 in x 1.5 in Weight 6 oz. Operating Temperature 14°F to 131°F Power Source CR2 Lithium Battery x1 Battery Life 2000 ranges Laser Classification Class 1 5 – 2400 yds 2400 yds 1600 yds 1 100 yds 5 yds
- 16. 16 The Signature LRF2000 is designed to provide trouble-free operation, but it if fails to function, try these steps before returning to Burris for warranty repair PROBLEM SOLUTION Does not turn on 1. Press and hold Power Button 2. Check the battery to make sure it is properly installed 3. Replace if necessary Cannot see internal display 1. Check brightness display settings Unable to range to target 1. Check for objects in the way of laser signal 2. Clean objective lens 3. Check mode settings 4. Try ranging a large object, nearby object (i.e., a building)
- 17. 17 CARE & MAINTENANCE The Signature LRF 2000 is fully waterproof and fogproof. In the event that the lenses are subjected to dust, dirt or mud, follow these steps to clean and protect the lens surface. Failure to remove grit before final cleaning can damage lens coatings. Coarse dirt/debris must be removed from the lens surface. The most convenient way to clean a lens surface is to use a Lens Pen. Position the scope so particles will fall away from the lens, and then use the Lens Pen or soft brush to gently whisk away the debris while blowing on the lens to dislodge the particles. Canned air or an air compressor will help clear off any dust particles. For heavy dirt, like dried mud, use a spray of clean water or lens cleaning fluid to remove the dirt. Your Burris optic will provide reliable performance given reasonable care and treatment. All moving assemblies are permanently lubricated. Only occasional cleaning of the outside of the unit and the exterior lenses is required. Never disassemble your Signature LRF 2000. Disassembly by anyone other than our factory will void the warranty. If you have any other problems, contact Burris Customer Service.
- 18. WARRANTY This Signature LRF 2000 is covered by the Burris Forever Warranty™ You can be confident that the optic you purchased is built to the most exacting standards. You can count on Burris to perform every time you use it. We’re so confident in the craftsmanship of our products that we back them with a no questions asked Forever Warranty. We will repair or replace your Burris optic if it is damaged or defective. The warranty is automatically transferred to future owners. • No repair or replacement charge • No warranty card needed • No receipt needed • No questions asked
- 19. BurrisConnect SCAN FOR DOWNLOAD Download the BurrisConnect app for free access to our ballistic tools, manage Burris app-compatible optics, watch how-to videos, and keep current on all our new products. Available now on Apple Store and Google play.
- 20. BURRIS COMPANY 331 East 8th St., Greeley, CO 80631 (970) 356-1670 BURRISOPTICS.COM Facebook.com/BurrisOptics INSTR-0351