

Empfohlen
Weitere ähnliche Inhalte
Was ist angesagt?
Was ist angesagt? (19)
Ähnlich wie Zoom user manual
Ähnlich wie Zoom user manual (20)
Mehr von Safiah Sulaiman
Mehr von Safiah Sulaiman (20)
Kürzlich hochgeladen
Kürzlich hochgeladen (20)
Zoom user manual
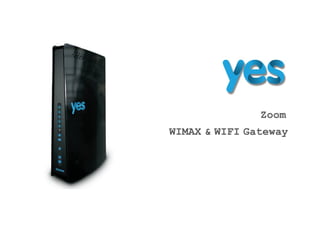
- 1. Zoom WIMAX & WIFI Gateway
- 2. Zoom User Manual V1.0 1 Contents....................................................................................... 1 About this Manual.............................................................................. 4 Purpose ...................................................................................... 4 Prerequisite Skills and Knowledge ............................................................ 4 Conventions Used in this Document ............................................................ 5 Chapter 1 – Introduction....................................................................... 6 Product Overview ............................................................................. 6 Product Package .............................................................................. 7 Connectors ................................................................................... 8 LED Indicators .............................................................................. 10 Chapter 2 – Installation...................................................................... 11 Chapter 3 – Web Interface..................................................................... 15 Chapter 4 – Reference manual.................................................................. 18 Contents
- 3. Zoom User Manual V1.0 2 User Interface Introduction ................................................................. 19 Basic Setup ................................................................................. 20 Step1 : Yes ID ............................................................................ 20 Step2 : Device SSID ....................................................................... 21 Confirmation (Step3) ...................................................................... 23 Complete (Step4) .......................................................................... 24 Status ...................................................................................... 25 Status | WiMAX Status ..................................................................... 25 Status | Device Status .................................................................... 26 Status | Lease Status ..................................................................... 27 WiFi ........................................................................................ 28 VoIP ........................................................................................ 33 Network ..................................................................................... 34 Network | Basic ........................................................................... 35
- 4. Zoom User Manual V1.0 3 Network | Internet Protocol ............................................................... 37 Network | DHCP Server ..................................................................... 38 Network | Lease Reservation ............................................................... 40 Network | Port Forwarding ................................................................. 41 Management .................................................................................. 42 Management | Password ..................................................................... 42 Management | Device Time .................................................................. 44 Management | Device Name .................................................................. 45 Management | Device Name .................................................................. 46 Control Panel ............................................................................... 47 Control Panel | Software .................................................................. 47 Control Panel | Dynamic DNS ............................................................... 49 Control Panel | About ..................................................................... 53
- 5. Zoom User Manual V1.0 4 Purpose This document provides information and procedures on installation and configuration of Zoom WiMax and WiFi Gateway. You could utilize the theoretical information in this guide to setup your device. Prerequisite Skills and Knowledge To use this document effectively, you should have a working knowledge of Local Area Networking (LAN) concepts and wireless Internet access infrastructures. In addition, you should be familiar with the following: Hardware installers should have a working knowledge of basic electronics and mechanical assembly, and should understand related local building codes. Network administrators should have a solid understanding of software installation procedures for network operating systems under Microsoft Windows 95, 98, Millennium, 2000, NT, and Windows XP, Windows 7 and general networking operations and troubleshooting knowledge. About this Manual
- 6. Zoom User Manual V1.0 5 Conventions Used in this Document The following typographic conventions and symbols are used throughout this document: Very important information. Failure to observe this may result in damage. Important information that should be observed. Additional information that may be helpful but which is not required. bold Menu commands, buttons and input fields are displayed in bold code File names, directory names, form names, and system-generated output such as error messages are displayed in constant-width type <value> Placeholder for certain values, e.g. user inputs [value] Input field format, limitations, and/or restrictions.
- 7. Zoom User Manual V1.0 6 Product Overview Thank you for choosing Zoom WIMAX and WIFI Gateway. Zoom WIMAX and WIFI Gateway is an all-in-one device that integrates WiMAX, Wi-Fi and VoIP service. Compliant with IEEE 802.16e WiMAX standard and Wi-Fi 802.11b/g/n, Zoom provides extended coverage and high performance wireless connectivity with minimized capital expenses. Product Overview Chapter 1 – Introduction
- 8. Zoom User Manual V1.0 7 Product Package Item Qty 1 Zoom WIMAX and WIFI Gateway. 1 2 User Manual 1 3 Power Adapter 1 4 RJ-45 Ethernet cable 1 If any of the items mentioned above are missing or damaged, please contact our customer support immediately.
- 9. Zoom User Manual V1.0 8 Connectors 1. WPS Button: Press WPS button to establish wireless connection without setup the device. Step1: Press the WPS button on Zoom, and the WPS LED indicator will start flashing. Step2: And then press the WPS button on the client you wish to connect within 2 minutes. 2. RESET Button (Reboot/ Reset): Press and hold the Reset button for less than 5 seconds to reboot the device. Or press and hold the Reset button for more than 5 seconds to reset IP address, device name and login password settings of device to factory default. 3. Telephone Port (RJ-11): Connect your telephone to the device using an RJ-11 telephone cable.
- 10. Zoom User Manual V1.0 9 4. LAN Port (RJ-45): This port is for connecting the device to your PC or other network equipment (such as hubs or switches) with an RJ-45 Ethernet cable. 5. DC-12V Port (Power Adapter Socket): Connect the power adapter provided with the device.
- 11. Zoom User Manual V1.0 10 LED Indicators LED Description Off AC Input not active or Power Fail Power On Power On Off LAN Device Disconnect On LAN Device ConnectEthernet Flashing Data Packet Transmit Off VoIP disable (Not registered or RJ11 not connected) On Device registered and on hookVoIP Flashing Device registered and off hook Off Wi-Fi disable On Wi-Fi enableWi-Fi Flashing Data Packet Transmit Off WPS Off WPS lights up when button is pressed;Wi-Fi WPS On WPB lights off when release WPS button Flashing Scanning until Network entry successfullyWiMAX Signal Strength On Displays Signal Strength
- 12. Zoom User Manual V1.0 11 Please follow the steps below to install the device: Step 1: Place the device on a flat work surface. Step 2: Connect the device Ethernet port to your PC with an RJ-45 Ethernet cable that is supplied. Step 3: Connect a standard telephone to the device VoIP port using a standard phone cable. Step 4: Insert the power cord into the device's DC-12V power jack. Step 5: Insert the power cord into power outlet. Step 6: The device will start the boot process. Please wait for a few seconds to let the boot process complete. Chapter 2 – Installation Installation
- 13. Zoom User Manual V1.0 12 Step 7: Select Local Area Connection Status from the Windows task bar and click Properties. Local Area Connection Status
- 14. Zoom User Manual V1.0 13 Step 8: Double click on the Internet Protocol (TCP/IP). Local Area Connection Properties
- 15. Zoom User Manual V1.0 14 Step 9: Select Obtain an IP address automatically and click OK. Step 10: At this point, the device should have been connected to the WiMAX Base station successfully. This can be verified by observing the signal strength LEDs (Please refer to Visual Indications section in Chapter 1 of this manual to find the location of these LEDs on the device). At least one of these LEDs should be glowing continuously to confirm the successful connection to the Base Station. Now you can start browsing the Internet. Internet Protocol (TCP/IP) Properties
- 16. Zoom User Manual V1.0 15 Please follow the steps below to configure your device through the web interface: Step 1: Open the Web browser and enter the default IP address of the device, which is: http://192.168.1.1/ Web Browser Chapter 3 – Web Interface
- 17. Zoom User Manual V1.0 16 Step 2: Enter the administrator login password to access web management interface. The default Password is admin. Welcome Page
- 18. Zoom User Manual V1.0 17 Step 3: The page shown here will be displayed on your browser after login. You can now configure the device settings. User Interface
- 19. Zoom User Manual V1.0 18 The main menu is located on the left side of the screen and each main menu item contains sub-items on the top right of the screen. You can refer to the menu structure below: Menu Items Sub Items Menu Items Sub Items Menu Items Sub Items Basic Setup - VoIP - Control Panel Software Dynamic DNS About Status WiMAX Status Device Status Lease Staus Network Basic Internet Protocol DHCP Server Lease Reservation Port Forwarding Reboot Logout Reconnect - WiFi - Management Password Device Time Device Name Restore To Factory Chapter 4 – Reference manual Please click Apply button every time the settings are changed to save the changes.
- 20. Zoom User Manual V1.0 19 User Interface Introduction Reboot/Logout/Reconnect There are 3 buttons in the lower left corner. Clicking Reboot will restart your device. Click the Logout button to logout from the web interface. When the Reconnect button is clicked the device will attempt reconnection to the Base Station. Wi-Fi Indicator VoIP Indicator WiMAX Signal Indicator UI Introduction
- 21. Zoom User Manual V1.0 20 Basic Setup Basic Setup is just like a simple setup wizard that could help you setup your device by following the steps. Step1 : Yes ID Please enter the Yes ID and Password on the Yes Card provided in the product package for the first time. And re-enter the password on the Password Confirmation field. Cancel Button: Click the Cancel button to clear all input fields on this window. Next>> Button: Click Next button to continue the setup process. Basic Setup > Step1 : Yes ID
- 22. Zoom User Manual V1.0 21 Step2 : Device SSID Network Name (SSID): Define the service set identifier that represents the “name” of your network. (Default value will be “Yes Zoom” - “last 6 digits of your device MAC Address”) SSID Broadcast: Broadcast your SSID into open air by checking this checkbox that is checked in default. Otherwise uncheck the checkbox to make your device invisible unless a wireless client already knows the SSID. Basic Setup > Step2 : Device SSID
- 23. Zoom User Manual V1.0 22 Security: Check this checkbox to enable Wi-Fi Protected Access (WPA) wireless security. Key Pass Phrase: This field will appear if you enable the option above. Enter the key you would like to use for your wireless security in 8~63 characters or 64 hex digits. <<Back Button: Click Back button to go back to the previous setup process. Next>> Button: Click Next button to continue the setup process. Basic Setup > Step2 : Device SSID > WPA Key Be aware that other computer in the same range of your wireless network would be able to see your network if you enable SSID Broadcast, so we strongly recommend you to enable the security option at the same time to ensure others could not access your network.
- 24. Zoom User Manual V1.0 23 Confirmation (Step3) You can double confirm the input data in the previous setup process here. <<Back Button: Click Back button to go back to the previous setup process. Done Button: Click Done button to finish setup process. Basic Setup > Confirmation
- 25. Zoom User Manual V1.0 24 Complete (Step4) The setup wizard is complete! You can view the status by clicking on the Status page link (in blue) to redirect to the Status page. Basic Setup > Complete
- 26. Zoom User Manual V1.0 25 Status Status | WiMAX Status Select Status > WiMAX Status to display the WiMAX connection status. Refresh Button: Click the Refresh button to refresh the current WiMAX connection status. Auto Button: Click the Auto button to update the status information periodically. Status > WiMAX Status
- 27. Zoom User Manual V1.0 26 Status | Device Status Select Status > Device Status to display the status of device system uptime and WAN information. Refresh Button: Click the Refresh button to update the current device status. Auto Button: Click the Auto button to update the status information periodically. Status > Device Status
- 28. Zoom User Manual V1.0 27 Status | Lease Status Select Status > Lease Status to view the current status of client host PC such as host name, host PC’s MAC address, IP address, and remaining lease time. Refresh Button: Click the Refresh button to display the updated information of the client host PC. Auto Button: Click the Auto button to refresh the information automatically. Status > Lease Status
- 29. Zoom User Manual V1.0 28 WiFi Select WiFi to enable/disable and configure the Wi-Fi interface. Wireless Settings: Interface status: Enable or disable the Wi-Fi interface by clicking this button. Network Name (SSID): Define the service set identifier that represents the “name” of your network. (Default value will be “Yes Zoom” - “last 6 digits of your device MAC Address”) Radio Channel: Select the appropriate channel for your Wi-Fi network. WiFi
- 30. Zoom User Manual V1.0 29 Working Mode: Select the wireless operation mode for your Wi-Fi network. (The selection contains 802.11b/g/n, 802.11b/g, 802.11g/n, 802.11b only, 802.11g only and 802.11n only) Bandwidth: Select the channel bandwidth for 802.11n only. Transmit Power: Select the Wi-Fi transmit power from the drop down menu. RTS Threshold: Specify the packet size threshold of the device by changing the request-to-send (RTS) value. (Range : 256 to 2432) CTS Protection Mode: Set Clear to send (CTS) protection mode to Auto to ensures computers on a network can connect to a wireless router when many communications devices are present.
- 31. Zoom User Manual V1.0 30 Preamble Length: Define the length of preamble, either short or long. SSID Broadcast: Broadcast your SSID into open air by checking this checkbox, which is checked in default. Otherwise uncheck the checkbox to make your device invisible unless a wireless client already knows the SSID. Security: Authentication: Select the Wi-Fi security method. Encryption: Select the Wi-Fi encryption algorithm. WiFi >Security
- 32. Zoom User Manual V1.0 31 ACL Setting: System Default: Select the filter action for the device access control. Disable: Select disable to disable access control (ACL) feature. Allow: To create a MAC filter list that allows the specific clients to have access to the wireless network. Insert Button: Click Insert to add MAC address (up to 10) to the list. Del Button: Click Del to remove MAC address from the list. WiFi > Access Control List WiFi > Access Control List > Allow
- 33. Zoom User Manual V1.0 32 Deny: To create a MAC filter list that will block the specific clients to have access to the wireless network. Insert Button: Click Insert to add MAC address (up to 10) to the list. Del Button: Click Del to remove MAC address from the list. Cancel Button: Click the Cancel button to clear the changes that you have made on this window. Apply Button: The changes that you have made on this window can be saved in the device by clicking the Apply button. WiFi > Access Control List > Deny
- 34. Zoom User Manual V1.0 33 VoIP Select VoIP to enable or disable the VoIP feature. Enable Line1: Check on this checkbox to enable VoIP feature or uncheck it to disabled. Cancel Button: Click the Cancel button to clear the changes that you have made on this window. Apply Button: The changes that you have made on this window can be saved in the device by clicking the Apply button. VoIP
- 35. Zoom User Manual V1.0 34 Network Web Login from Internet This function enables the Zoom to be accessed from external networks, typically from the internet. To enable this function, follow the procedures below: Step 1: Go to Network. Then click Basic. Step 2: Ensure that Enable Web Login from Internet is checked. Step 3: Specify the Web Login Port from Internet to use. Default is 8080. Step 4: When done, click Apply to save the settings. Enabling Web Login from Internet may expose Zoom to unauthorized access.
- 36. Zoom User Manual V1.0 35 Network | Basic Select Network > Basic to configure the basic network settings. Operation Mode: Displays the operation mode of the firewall. Enable Firewall: Click the checkbox to enable device firewall. Enable Web Login from Internet: Enabling this option will allow you to access the device from other networks by https. Web Login Port from Internet: Define a specific port number for security access control (Matches numbers in range of 1 through 65536). Network > Basic
- 37. Zoom User Manual V1.0 36 Enable ping from internet: The device will respond to a ping request from the internet if this option is enabled. Enable UPnP IGD: When this option is enabled, certain Windows applications would setup the port forwarding rule dynamically. DMZ IP Address: The IP address of DMZ should be entered here. Cancel Button: Click the Cancel button to clear the changes that you have made on this window. Apply Button: The changes that you have made on this window can be saved in the device by clicking the Apply button. The firewall feature can be used to block unauthorized access while allowing only the authorized communications from the Internet. This feature also allows the device to be managed over the Internet by authorized personnel.
- 38. Zoom User Manual V1.0 37 Network | Internet Protocol Select Network > Internet Protocol to configure the internet protocol. Connection Mode: Displays the current connection mode of the device to the WiMAX network. Host Name: Enter the host name provided by your service provider (optional). Cancel Button: Click the Cancel button to clear the changes that you have made on this window. Apply Button: The changes that you have made on this window can be saved in the device by clicking the Apply button. Network > Internet Protocol
- 39. Zoom User Manual V1.0 38 Network | DHCP Server Select Network > DHCP Server to configure the internal DHCP server settings. This device has a built-in DHCP server that can be used for managing the allotment of IP address for the devices connected to the LAN Port of the device. Enable DHCP Server: Enable DHCP Server by clicking on the checkbox. DHCP Server IP address: Enter the IP address for device's DHCP server. DHCP Starting IP address/ DHCP Ending IP address: Define the IP address range that will be supported by the DHCP server. DHCP Lease Time: Specify the IP address renewal time. Network > DHCP Server
- 40. Zoom User Manual V1.0 39 Cancel Button: Click the Cancel button to clear the changes that you have made on this window. Apply Button: The changes that you have made on this window can be saved in the device by clicking the Apply button.
- 41. Zoom User Manual V1.0 40 Network | Lease Reservation Select Network > Lease Reservation to assign the specific IP addresses to the specific client device connected to the LAN port. Add Button: Click the Add button to enter the lease reservation information. Del Button: Click the Del button to delete the selected lease reservation information. Before clicking Del, one or more of information items must be selected by enabling the checkbox on the Select column of the table. Cancel Button: Click the Cancel button to clear the changes that you have made on this window. Apply Button: The changes that you have made on this window can be saved in the device by clicking the Apply button. Network > Lease Reservation
- 42. Zoom User Manual V1.0 41 Network | Port Forwarding Select Network > Forwarding to manage the additional port forwarding rules. Add Button: Click the Add button to insert new port forwarding rule. When adding a new port forwarding rule, please select TCP or UDP, and then enter port and IP information such as WAN port range, LAN IP address, and LAN port range. Del Button: Click the Del button to delete the selected port forwarding rule. Cancel Button: Click the Cancel button to clear the changes that you have made on this window. Apply Button: The changes that you have made on this window can be saved in the device by clicking the Apply button. Network > Port Forwarding
- 43. Zoom User Manual V1.0 42 Management Management | Password Select Management > Password to change the login credential. New Login Password: Enter a new password. Confirm New Login Password: Re-enter the new password to confirm. Cancel Button: Click the Cancel button to clear the changes that you have made on this window. Apply Button: The changes that you have made on this window can be saved in the device by clicking the Apply button. Management > Password
- 44. Zoom User Manual V1.0 43 Forgot your password? Press and hold the Reset button for more than 5 seconds to reset IP address, device name and login password to factory default. (Please see “Connector” section in CHAPTER 1 of this document to find the location of Reset button on the device) Factory default password? The factory default password is admin. We strongly recommend you to change the login credential for device security.
- 45. Zoom User Manual V1.0 44 Management | Device Time Select Management > Device Time to set the time zone. Current Local Time: Displays current local time. Time Zone: Select the proper time zone for your location from the drop-down menu. Auto Adjust for Daylight Saving Time: You may enable this option if your location observes Daylight Savings Time. Cancel Button: Click the Cancel button to clear the changes that you have made on this window. Apply Button: The changes that you have made on this window can be saved in the device by clicking the Apply button. Management > Device Time
- 46. Zoom User Manual V1.0 45 Management | Device Name Select Management > Device Name to define a specific name for your device, so that you can login to this device from any PC on your internal network by entering the device name on the address bar. The default name is “Yes Zoom” - “last 6 digits of your device MAC Address”. Device Name: Displays the current device name. New Device Name: Enter a new device name for your device. Cancel Button: Click the Cancel button to clear the changes that you have made on this window. Apply Button: The changes that you have made on this window can be saved in the device by clicking the Apply button. Management > Device Name
- 47. Zoom User Manual V1.0 46 Management | Device Name Select Management > Restore To Factory to clear all users’ configuration and restore to factory default settings. Apply: Click the Apply button to reset the device settings to factory default. Management > Restore To Factory
- 48. Zoom User Manual V1.0 47 Control Panel Control Panel | Software Select Control Panel > Software to manage the software of your device. Software Upgrade Install IPKG: Click Browse button to select the IPKG file and then click Upgrade button to install the selected IPKG. Or click the Remove button to delete the IPKG file. Configuration Backup Configuration: Enter the full file path or locate the backup file which you want to restore by clicking on Browse button and click Restore button to restore Control Panel > Software
- 49. Zoom User Manual V1.0 48 the selected backup file. Otherwise, click on Browse button to select where you want to save your backup file and click on Save button to save the backup file.
- 50. Zoom User Manual V1.0 49 Control Panel | Dynamic DNS Dynamic Domain Name Service (DDNS) Dynamic Domain Name Service (DDNS) is a service that allows an internet device such as the Zoom to be remotely reachable by the user although it does not have a fixed IP address. It allows the user to create a friendly URL address (example: zoom.ddnsservice.com) for easy access to the Zoom remotely. Below is a list of DDNS service providers supported on the Zoom: www.dyndns.org www.dyns.cx www.zoneedit.com
- 51. Zoom User Manual V1.0 50 To use the DDNS service, you will need to register an account with one of above DDNS service providers. Then follow the procedures below to set up the DDNS on Zoom: Step 1: Go to Control Panel. Then click Dynamic DNS. Step 2: Ensure that Enable DDNS is checked. Step 3: Select the DDNS Service Provider and then fill up the DDNS User Name, Password and Host Name. Step 4: When done, click Apply to save the settings
- 52. Zoom User Manual V1.0 51 How to use Web Login With DDNS? To remotely accessed Zoom, please ensure you have followed procedures specified in Dynamic Domain Name Service (DDNS) and Web Login from Internet. Step 1: On the browser, type in the user selected URL together with https and port number into the address bar (example: https://zoom.ddnsservice.com:8080). Step 2: You will need to click allow on the warning message displayed on the browser to accept the device certificate. Step 3: Browser will load the login page. Step 4: Log into Zoom as per normal.
- 53. Zoom User Manual V1.0 52 Select Control Panel > Dynamic DNS to configure the DDNS settings. Enable DDNS: Check the checkbox to enable the Dynamic Domain Name Service in order to keep the domain name associated. DDNS Service Provider: Select the address of DDNS service provider from the drop-down menu. Cancel Button: Click the Cancel button to clear the changes that you have made on this window. Apply Button: The changes that you have made on this window can be saved in the device by clicking the Apply button. Control Panel > Dynamic DNS
- 54. Zoom User Manual V1.0 53 Control Panel | About Select Control Panel > About to display the basic information about the device: Service Provider, Product Name, WAN port MAC address, LAN Port MAC address, Model ID, Device hardware version and Serial ID. Control Panel > About