Collaboration with skype for business and outlook 2015
•Als PPSX, PDF herunterladen•
6 gefällt mir•2,100 views

Slide deck of the presentation I did for Collaboration with Skype for Business and Outlook user awareness project for the Knit Cluster of Hirdaramani Group in Sri Lanka.

Empfohlen
Empfohlen
Weitere ähnliche Inhalte
Was ist angesagt?
Was ist angesagt? (17)
Ähnlich wie Collaboration with skype for business and outlook 2015
Ähnlich wie Collaboration with skype for business and outlook 2015 (20)
Kürzlich hochgeladen
Kürzlich hochgeladen (20)
Collaboration with skype for business and outlook 2015
- 1. Collaboration with Skype for Business and Outlook 2015 By Muditha Jayath Chathuranga
- 2. What is Skype for Business? Skype for Business is an instant messenger that can be used for sending instant messages, having a voice or video chat and for conducting corporate meetings and communicate not only with enterprise users but with people from around the globe on an extremely flexible scale just to name a few. • You can instant message (IM) your colleagues over a safe and encrypted connection. The client software integrates with your email account and Microsoft Outlook to enable you to easily control your privacy and overall experience. • You can start a video chat with one or more of your colleagues for a quick face to face meeting without leaving your desk. • You can share all or part of your desktop with your colleagues so that you can easily collaborate on a document, get help on a problem, etc.
- 3. What is Skype for Business? • You can start or join web conferences with multiple attendees to collaborate on Microsoft Office documents, and more. • You can invite colleagues outside of the Hirdaramani Group to join your chats and video conferences via the free Lync Web App. • You can communicate with colleagues in other institutions that also use Skype for Business, Lync or Skype. • You can access Skype for Business from your office, on the road with your laptop, tablet or mobile phone, or anywhere else that you can get an Internet connection.
- 4. Downloading & Installing Skype for Business Skype for Business 2015 client is available to download for Office 365 users with an eligible license. To see your eligibility and download, navigate to https://portal.office.com/OLS/MySoftware.aspx and sign in using your organizational credentials.
- 5. Access Skype for Business After downloaded and installed, search for Skype for Business in your Programs in Start menu.
- 7. IM, Presence, and Contacts Find someone The quickest way to find someone is to start a search by typing the person’s name, or IM address in the Search box on the Skype for Business main window. The results automatically display.
- 8. IM, Presence, and Contacts View a Contact Card The contact card contacts details from a contact’s company directory, such as the person’s office location, phone numbers, organization, and Outlook calendar free/busy information. To see someone's card, find the person on your Contact list or via search, point at the photo area, and then click the contact card icon. Add a Contact Your Contacts list simplifies your communication and lets you see presence and contact information for the people most important to you. Add to it anyone-inside or outside your organization-you expect to be interacting with regularly. To add a contact: 1. Using Skype for Business search, locate the person you want to add 2. Right click the person’s listing in the search returns. 3. Click Add to Contact List 4. Click a group to add your new contacts to.
- 9. IM, Presence, and Contacts Create a Group You can set up a group for each team you work with so you can see at a glance who’s available at any given time, or communicate with the entire team at once. To create a new group: 1. In the Skype for Business main window click the Add a Contact button. 2. In the drop down menu, select Create New Group. 3. In the space that opens up at the bottom of the window, type over the phrase New Group to give your group a name.
- 10. IM, Presence, and Contacts Set or Change Your Presence Presence lets other people see at a glance whether you and your contacts are currently available. Presence Status and their meaning are as follows:
- 11. IM, Presence, and Contacts
- 12. IM, Presence, and Contacts To change your presence, in the Skype for Business main window, click the arrow next to your status, and then select a status from the list, such as Do Not Disturb. The presence statuses are pre-set in Skype for Business, which means you can’t create a custom status, but you can give your contacts more details about where you are or what you’re doing by adding a personal note. See the next section for details.
- 13. IM, Presence, and Contacts Send an Instant Message Use instant messaging (IM) to get in touch right away with your available contacts. 1. In your Contacts list, point to the picture of the contact you want to send an instant message to. To have an IM conversation with more than one contact, hold down the Ctrl key, and click each contact you want to include. 2. In the display bar that appears, click the IM button. 3. Type your message in the message input area at the bottom of the IM window, and then press the Enter key on your keyboard.
- 14. IM, Presence, and Contacts Add audio, video, sharing, to an IM conversation You can quickly add audio, video, or a presentation to your IM conversation, and/or invite others to join the conversation by selecting the appropriate button(s) at the bottom of the conversation window. Switch between tabbed conversations If you have several conversations or meetings going on at the same time. Skype for Business displays them all in one place, which lets you toggle between them. Click any tab to bring that activity to the foreground
- 15. IM, Presence, and Contacts Find a previous IM conversation Skype for Business automatically saves your IM conversation history. To view or continue a previous IM conversation or see an IM request you missed; 1. Near the top of the Skype for Business main window, click the Conversations tab 2. Click All or Missed, depending on what you’re looking for. If you don’t see the conversation you’re looking for, click View More in Outlook at the bottom of the list. 3. Double-click the conversation that you want to view or resume.
- 17. Skype for Business Meetings Schedule a Skype Meeting using Outlook 2013 To schedule a Skype meeting, you need a sign-in address and password from an organization that uses Skype for Business Server. 1. Open Outlook, and go to your calendar. 2. On the Home tab ribbon, in the Skype Meeting section, click New Skype Meeting. 3. Set up the meeting as you typically would: • In the To box, type the email address of each person you’re inviting, separated by semicolons. • In the Subject box, type a name for the meeting. • If you’ll have in-person attendees, either click Room Finder, in the Options section of the Meeting tab, and then find a room or, in the Location box, type a meeting location, such as a conference room. • Select a start time and end time. Notes To look for a time that works for everyone, click Scheduling Assistant, in the Show section of the Meeting tab ribbon
- 18. Skype for Business Meetings 4. In the meeting area, type an agenda. Be careful not to change any of the Skype meeting information. Important Scheduling a meeting with the default options, like we just did, is suitable for small, internal meetings, such as casual meetings with a few coworkers. If you have a meeting with people outside your company, or you’re scheduling a large event, change the meeting options before sending the invites to better fit your meeting requirements. In the meeting request, on the Skype Meeting section of the Meeting ribbon, click Meeting Options, and then select the appropriate options. 5. (Optional) In the Show section of the Meeting ribbon, click Scheduling Assistant to make sure you have the best time for the meeting. 6. You're almost done. Just double- check the information and click Send.
- 19. Skype for Business Meetings Join a Skype Meeting In the meeting request, click Join Skype Meeting or click Join Online in the meeting reminder.
- 20. Skype for Business Meetings Record and playback the meeting Skype for Business recording captures audio, video, IM, program sharing, PowerPoint presentations and whiteboards. 1. In the meeting window, click More Options, and then click Start Recording 2. Use the controls at the bottom of the meeting room to pause, resume, or stop the recording. After the recording is stopped, Skype for Business automatically saves it in a format that plays In windows Media Player and Zune. To play, rename, or delete a recording, click Manage Recording on the More Options menu, and click your selection. You can also click Browse to go to the location of the recording and make a copy of the file to post on a shared location for others to review. Manage Participants In the meeting window, point to the people button and do any of the following: • To manage a participant, on the Participants tab, right-click the person’s name, and use the options to mute, unmute, remove, and so on. • To manage all, on the Action tab, click o Invite More People to add participants o Mute Audience to eliminate background noise. o No Meeting IM to turn off meeting IM o No Attendee Video to block attendees from starting their video. o Hide Names to hide the names on the pictures. o Everyone an Attendee if you have to many presenters. o Invite by Email to send email invitations to additional people.
- 22. Sharing and Collaboration Share your desktop or a program 1. In your Contacts list, double click a contact to start IM conversation, and add people or groups by dragging them into the window from your Contact list. Or, join a scheduled Skype Meeting. 2. Point to the presenter (monitor) button, and on the Presenter tab, either: • Click Desktop to show the entire content of your desktop. • Click Program if you want to share just an open program, and then double- click the program you want. 3. (Optional) To add audio, click the phone button. 4. (Optional) To add video, click the camera button.
- 23. Sharing and Collaboration Give control of your sharing session to others Allow others to flip through slides, contribute information and make changes to a whiteboard, OneNote, PowerPoint or other kind of file, or demonstrate a program with just a couple of clicks. Take back control at anytime. 1. On the sharing bar at the top of the screen, click Give Control. 2. Click the name of a person under Attendees to give them access or click Give Control Automatically to automatically give access to anyone who asks for control of your desktop. Take back control of a sharing session 1. To take back control of your desktop or program, click Give Control again. 2. If Give Control Automatically is selected, click it to clear it. To take back control from a person, click Take Back Control
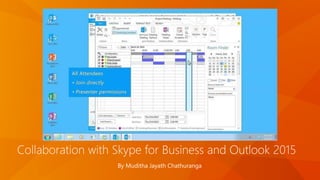
- 24. Sharing and Collaboration Select who can download shared files In a scheduled meeting, while you’re presenting you can restrict who can Download a copy of the file you’re sharing, if, for example, the information isn’t final or is confidential. 1. During a sharing session, point to the present (monitor) button, and then click the Manage Presentable Content button. 2. Click the Permission menu, and then select one of the following: • Organizer, to allow only the person who setup the meeting to download the file. • Presenter, to allow only the people who the organizer set up as presenters to download the file. • Anyone, to allow all participants to download the file.
- 25. Sharing and Collaboration Sharing Notes Often, you want to take notes during a meeting, if you use OneNote you can take notes that everyone can see, work collaboratively on those notes and/or share notes you’ve already taken. 1. In a conversation window, point to the present (monitor) button 2. Click Shared Notes…, and then, in the note picker, select a notebook or note page, or click New Notebook to create a new one. The page you select docks on your desktop, and the other participants receive a notification about the shared notebook. Let them add notes if you want.
- 26. Sharing and Collaboration Share a Whiteboard A whiteboard is a blank area where you can type notes, draw, or Import images that meeting participants can work on together,. It’s Great for brainstorming. • In a conversation window, point to the present (monitor) button • Click More…, then click Whiteboard. Use the annotation toolbar on the right side of the whiteboard for highlight, stamps, laser pointer, writing, drawing, and other tools.
- 27. Sharing and Collaboration Share a PowerPoint Presentation 1. Point to the presentation (monitor) button. 2. On the Present tab, click PowerPoint, and upload the file in the meeting. 3. (Optional) do any of the following: • To move the slides, click Thumbnails, and then click the slide you want to show, or use the arrows at the bottom f the meeting window. • To see your presenter notes, click Notes. • Click the Annotations button on the upper-right side of the slide to open the toolbar and use highlights, stamps, laser pointer, and so on.
- 28. Sharing and Collaboration Share a file or a picture Simply drag and drop saved files, images, or copy and paste files or any image into the text input area of a conversation window. A small version of the picture or file will appear that the user can save or open to view in detail. Or you can use the file transfer option. • In a conversation window, click the present (monitor) button. • Then click the Attachment. Skype for Business sends a file transfer invitation to the participants, and the files is sent if the invitation is accepted
- 30. Video with Skype for Business Set up your video device You need a camera to share your video, but you don’t need one to see someone else’s video. To set up your camera: • Click Options in the Skype for Business main window, then click Video Device. • If you don’t see your video preview, make sure the camera is working correctly. • To adjust settings, click Camera Settings.
- 31. Video with Skype for Business Start a video call In your Contacts list, point to a contract’s photo and click the camera icon. A message pops up on your contact’s screen to accept your call. To end the video portion of the call, point to the camera icon, and then click one of the following: • Stop My Video to stop your video steam, you’ll still see other’s video. • End Video to stop seeing all video, you’ll still have audio. TIP During an instant messaging or audio call, click the camera icon to make it a video call.
- 32. Video with Skype for Business Choose the layout In the video conversation window, click Pick a Layout, and choose one of the following: • Gallery View to show all the participant' videos. • Speaker View to show only the presenters videos. • Content View to show only the meeting content. • Compact View to show the tiles of the participants in a compact window. Manage the participants To manage the participants, right-click their video or picture: • Mute, Unmute, or Remove the person from the meeting. • Lock the Video Spotlight locks video on the person in spotlight. • Pin to Gallery keeps a participant visible in the Gallery View. Full Screen View • Click Pop out video gallery to see the videos in a separate window. • Click Full Screen View for a large view of the videos. • Click Pop in video gallery to go back to regular view.
- 33. Video with Skype for Business Invite other people to a video call 1. In the conversation window, pause on the people button, and click Invite More People. 2. Select the invitees from the Add People window, and click Add. 3. Your new invitees receive a request to join your call. Add video to an IM Conversation 1. Pause on the camera button and check your preview. 2. Adjust your camera if needed, and click Start My Video. 3. To stop sharing your video, click Stop My Video TIP Click End Video to stop sharing your Video with others and end their video feeds to you.
- 34. Video with Skype for Business Start a video conference Start an ad-hoc video conference to discuss a subject matter that requires immediate attention. 1. Select many contacts by holding down the Ctrl key and clicking the names. 2. Right-click the selections, and click Start a Video-Call. 3. When you start a video call, you automatically use Skype for Business computer audio. 4. Use the video controls to manage the conference.
- 35. Lync Web App
- 36. Lync Web App Join a Skype Meeting with computer audio If you don’t have Lync 2013 or Skype for Business, you can join a Skype Meeting with Lync Web App. Just click the meeting link in your invitation and follow the instructions on the page to join. 1. In your meeting invitation, click Join Lync Meeting. 2. When Lync Web App opens, do one of the following: • To join as a guest, type your name in the text box, and select Join the meeting. • If the meeting is from someone in your own organization, you can select Sign in if you are from the organizers company. Then type the same user name and password that you use to log into your company’s network. 3. Make sure to select Install Lyn Web App plug-in, which is required for video and computer audio. It also lets you share your screen if you’re a presenter.
- 37. Lync Web App Call into the meeting If you want to call in for the audio portion of the meeting, follow the instructions in the previous section, but make sure the option to install the Lync Web App Plug-in is Not selected then click Join the meeting. In the Join Meeting Audio box, click have the meeting call me, and type a phone number where the conference can call you. Or click I will dial in to the meeting and use the number and conference ID listed in your meeting invitation.
- 38. Lync Web App Manage your video display If you have a camera connected to your computer, click to share your video in the meeting. A camera is required only to share your video, not to view shared by others. Sharing and Collaboration Sharing and collaboration tools that come with Lync Web App are similar to the Lync 2013 or Skype for Business desktop client.
- 40. Mobile Devices – Windows Phone
- 41. Mobile Devices – Windows Phone
- 42. Mobile Devices – Android
- 43. Mobile Devices – Android
- 44. Mobile Devices – Android
- 45. Mobile Devices – iPad
- 46. Mobile Devices – iPad
- 47. Mobile Devices – iPad
- 48. Mobile Devices – iPhone
- 49. Mobile Devices – iPhone
- 50. See Skype for Business in Action!
- 51. Q&A
- 52. Where to get help? • Organization IT Department • Microsoft Knowledge Base Articles • Blogs