Smart Maintenance engineering
•
1 gefällt mir•399 views

Learning Technique and method to do maintenance Engineering and Preventive maintenance of manufacturing Plant

Empfohlen
Weitere ähnliche Inhalte
Was ist angesagt?
Was ist angesagt? (20)
Ähnlich wie Smart Maintenance engineering
Ähnlich wie Smart Maintenance engineering (20)
Kürzlich hochgeladen
Kürzlich hochgeladen (20)
Smart Maintenance engineering
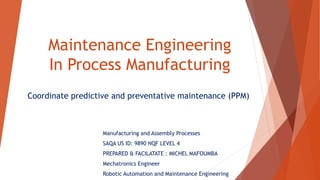
- 1. Maintenance Engineering In Process Manufacturing Coordinate predictive and preventative maintenance (PPM) Manufacturing and Assembly Processes SAQA US ID: 9890 NQF LEVEL 4 PREPARED & FACILATATE : MICHEL MAFOUMBA Mechatronics Engineer Robotic Automation and Maintenance Engineering
- 2. PURPOSE OF THE UNIT STANDARD understand know various types of maintenance, especially predictive and preventive maintenance and their roles in the production processes of the company. They will be able to identify root causes of problems, use various analytical techniques to analyse the production process with respect to maintenance, develop a practical maintenance plan and make recommendations that will increase the synergy between production and maintenance. LEARNING ASSUMED TO BE IN PLACE AND RECOGNITION OF PRIOR LEARNING Electro-Mechanical Winding Metal and Engineering Manufacturing Processes Manufacturing and Assembly Operations Supervision Maintenance in Manufacturing
- 3. Explain the purpose of predictive and preventative maintenance. Identify root-causes of break-downs and identify solutions. The Bath-tub model is explained and the appropriate PPM strategies (counter measures for each of the phases are discussed as part of the proactive maintenance process and data on). Discuss the safety, health and environmental (SHE) factors in maintenance Explain the principles of production scheduling systems. Discuss the principles of maintenance scheduling. Maintenance in Manufacturing
- 7. Types of maintenance a. Run-to-failure (breakdown maintenance) b. Preventive (scheduled) maintenance c. Predictive maintenance (PdM) d. Reliability-centered maintenance (RCM) 1. Reactive maintenance (breakdown maintenance) Also known as breakdown or run-to-failure, reactive maintenance is pretty simple: fix things when they break. Since repairs are not planned, it’s a good method to employ for equipment that is not essential for operations or has a low cost
- 8. 2. Preventive maintenance (scheduled) Also known as proactive maintenance, this method involves periodically taking assets offline and inspecting or repairing them at predetermined intervals (usually time or event-based triggers). The goal of this approach is to extend the useful life of an asset and prevent breakdowns from occurring. Many organizations employing preventive maintenance use CMMS software to trigger work orders when a PM is due. This allows a facility to automate much of its scheduling efforts, which is a key ingredient of this preventive approach. Because planning is done in advance, it’s much easier to have the right parts and resources on hand to complete each task.
- 9. 3. Predictive maintenance (PdM) Predictive maintenance (PdM) aims to predict failures before they happen so maintenance can occur at just the right time. PdM uses data from machine sensors and smart technology to alert the maintenance team when a piece of equipment is at risk of failing. For example, a sensor may use vibration analysis to alert the maintenance team that a piece of equipment is at risk of failing, at which point it will be taken offline, inspected, and repaired accordingly.
- 10. 4. Reliability-centred maintenance (RCM) Reliability-centered maintenance (RCM) addresses the fact that failure is not always linear. RCM is a highly-involved process that seeks to analyze all the possible failure modes for each piece of equipment and customize a maintenance plan for each individual machine. The ultimate goal of RCM is to increase equipment availability or reliability.
- 11. Maintenance management strategies comparison chart Need a quick comparison of these four strategies? Check out the chart below for a quick rundown of each approach. Maintenance strategy comparison chart Strategy Summary Cost to Implement Pros Cons Reactive Fix it when it breaks Low Ideal for low-priority equipment Can lead to runaway repair costs Preventive Maintenance on a predetermined schedule Average Best strategy to implement without expertise Without optimization, “PM creep” can occur Predictive Condition-based monitoring triggering work orders High Timely and informed monitoring. More insight into causes of breakdowns Can be expensive to set up RCM Investigation of failure modes to determine best maintenance strategy Highest If executed properly, provides the most efficient maintenance schedule Requires time, skill and financial resources to be effective
- 16. Maintenance Documentation • Electrical Information • Mechanical Documentation • Control System Documentation • Operator Recording Information • Manufacturer Documentation
- 19. Communicate equipment repair needs and preventive maintenance needs to maintenance specialists. Step 8: Make Final Checks Competent troubleshooters always check to make sure the trouble is actually cleared and the system is functioning normally. They know too well how easy it is to cause a new trouble while clearing an old one. They also know how easy it is to leave something like a setscrew loose, or something unplugged or out of adjustment. Therefore, a final check of normal operation is a necessary part of the troubleshooting sequence Step 9: Complete Paperwork Troubleshooters are not immune to the bureaucratic plea to "fill out those forms!" Even though paperwork is not troubleshooting, it is part of the troubleshooters job. Often, the history of a machine is recorded in an equipment log. Dates of PMs, information about retrofit, and parts that have been changed are recorded at the time of service or repair Step 10: Inform Area Supervision/Instruct Operators Once the equipment is returned to service, the user is informed of this fact. Often, operators are instructed in the proper use or care of the equipment or cautioned about peculiarities of the system. Although this activity is not strictly part of the troubleshooting procedure, it is important to the continued proper functioning of the equipment
- 20. Maintenance Troubleshooting or Breakdown Five-Step Troubleshooting Process consists of the following: 1. Verify that a problem actually exists. 2. Isolate the cause of the problem. 3. Correct the cause of the problem. 4. Verify that the problem has been corrected. 5. Follow up to prevent future problems. Step 1: Verify That a Problem Actually Exists • What are the operators indications of the trouble • How did the operator discover the trouble • What were the conditions at the time the trouble first occurred • Is the trouble constant or intermittent • Panel graphics • Loop diagrams • Piping and instrumentation diagrams • Block diagrams • Wiring diagrams • Schematic diagrams Each of these examples is described briefly next.
- 21. A panel graphic is a graphic representation of the system that is mounted on an equipment or system control panel. Although the panel is intended to provide the operator with a big picture of the operations, it can be useful to the troubleshooter during this step Panel Graphic
- 22. Loop Diagram A loop diagram is used to provide detailed mechanical information about a process. This diagram does not give significant electrical or instrumentation information. Figure 5 is an example of a loop diagram.
- 23. Piping and Instrumentation Diagram A piping and instrumentation diagram (P&ID;) shows the functional layout of a fluid system and its piping, valves, and instrumentation as clearly and accurately as possible. It is accurate to the extent that all components are connected to each other as shown in relation to flow path orientation
- 24. Block Diagram Block diagrams are the simplest of all electrical diagrams. A block diagram illustrates the major components and electric or mechanical interrelations in block (square, rectangular, or other geometric figure) form.
- 25. Schematic Diagram Schematic diagrams (often just called schematics) are drawings that show all the components in their proper electrical positions, but not necessarily in their proper physical locations. Schematic diagrams are very useful to the technician troubleshooting an electrical or electronic circuit
- 27. The third step of the five-step troubleshooting process is correcting the cause of the problem. This step involves performance of the repair or other activity that eliminates the problem Correct the Cause of the Problem
- 29. Step 4: Verify That the Problem Has Been Corrected Once the corrective action is taken, the troubleshooter should verify that the trouble has been corrected. This usually involves rechecking the same indications that proved there was a problem. This time though, the checks should prove that a problem does not exist • Check all indications that relate to the repaired area. • Perform a valve/switch line-up check to validate the integrity of the system. • Using approved procedures, establish normal operating conditions and check equipment performance. • Check for abnormal operation of all inputs and outputs to the repaired equipment
- 30. Follow Up to Prevent Future Problems The final step in the five-step troubleshooting process is to follow up to prevent future problems. This step involves taking preventive measures and recommend actions that could help keep the equipment from failing. This may include the following: Changing the preventive maintenance schedule to help prevent failures. Recommend a different supplier if a replacement component is unsatisfactory. Recommend procedure modifications that may prevent future failures. Conduct operator/maintenance training to raise awareness of the potential for problems. Complete proper documentation and troubleshooting log entries to aid in future troubleshooting of similar problems.