Year 9 art portraiture / alter ego
•Als PPT, PDF herunterladen•
4 gefällt mir•3,000 views

Year 9 Art Sow, Portraiture, Alter ego, hybrids

Empfohlen
Weitere ähnliche Inhalte
Was ist angesagt?
Was ist angesagt? (20)
Andere mochten auch
Andere mochten auch (20)
Ähnlich wie Year 9 art portraiture / alter ego
Ähnlich wie Year 9 art portraiture / alter ego (20)
Mehr von Melanie Powell
Mehr von Melanie Powell (20)
Kürzlich hochgeladen
Kürzlich hochgeladen (20)
Year 9 art portraiture / alter ego
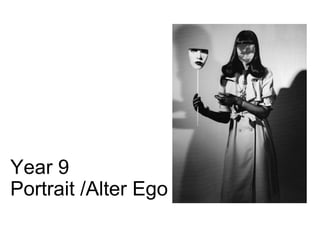
- 1. Year 9 Portrait /Alter Ego
- 2. CHUCK CLOSE Watch the clip ‘On following the Grid’ (on dept website) Why did Close start using the grid in the first place? How does he paint each square? Why doesn’t he feel the need to step back form the painting to see how he is getting on?
- 4. Self Portrait “Inspiration is for amateurs. The rest of us just show up and get to work. If you wait around for the clouds to part and a bolt of lightening to strike you in the brain, you are not going to make an awful lot of work. All the best ideas come out of the process; they come out of the work itself.” ― Chuck Close
- 7. The creation of self-portraits can create a connection to yourself and your artwork. Artists represent themselves from both their own internal views and the way they feel the world sees (or should see) them. Using different materials, methods and perspectives can help portray the same subject in a new and interesting way. What is the purpose of a self- portrait? In what ways do artists represent themselves?
- 8. LESSONS 1 & 2 Today you will have your portrait photograph taken so that you can complete this project on Portraiture and The Alter Ego Learning Objective: Understand how to use the “Grid Method” in drawing and be able to apply a range of tones using a 2B /4B pencil Learning Outcome: Choose one of the following 4 images by Chuck Close and copy each square carefully using the grid provided.
- 9. Drawing task Look carefully at each square on the photograph. Choose the tone that you feel is the most dominant. Shade in the corresponding square on the blank grid in that tone.
- 10. Drawing task Look carefully at each square on the photograph. Choose the tone that you feel is the most dominant. Shade in the corresponding square on the blank grid in that tone.
- 11. Drawing task Look carefully at each square on the photograph. Choose the colour that you feel is the most dominant. Shade in the corresponding square on the blank grid in that colour.
- 12. Drawing task Look carefully at each square on the photograph. Choose the colour that you feel is the most dominant. Shade in the corresponding square on the blank grid in that colour.
- 13. LESSON 3: CHUCK CLOSE FINGERPRINT TASK Chuck Close Fingerprint portrait of Phillip Glass (1979) Learning Objective: Understand how to build up tonal values using layering Learning Outcome: Using only your fingers/thumbs and black printing ink try to copy the image on to A3 cartridge paper. Once completed make a line drawing tracing of your portrait photo.
- 14. Your teacher has now enlarged your line drawing onto A3 cartridge paper. LESSON 4: Learning Objective Understand how to build tone by layering different thicknesses of ink. Develop understanding of monochrome painting. Learning Outcome Complete your own finger print portrait over your A3 drawing. Pay close attention to the tonal values in the original photograph. Use different fingers for smaller and bigger prints.
- 15. LESSONS 5-7: A3 Pencil /Fine liner self portraits using a GRID Learning Objective: Understand how to use mark making and pattern to create different tonal values. Learning Outcome: Create a detailed pencil line drawing using the grid system and your portrait photograph. Complete each square on the grid with a different line pattern to create different tones.
- 16. 1. Your teacher will give you an A3 Grid and your A4 photograph. 2. Take your time and really focus on one square at a time to create your own photorealistic drawing. 3. Once you have completed the line drawing, complete each square using a PATTERN 4. The pattern you choose must match the tones in the photograph. 5. Change your patterns in each square. As long as each square reflects the correct tonal values in the photo you will succeed! See the next slide for examples. It may be an idea to practice a section in your sketchbook first!
- 18. LESSON 8: Alter EgosLESSON 8: Alter Egos An alter ego is a second self. A person who has an alter ego is said to lead a double life. International artist Moritz Wehrmann was invited by WERK to show 'Alter Ego’ at Longbridge Light Festival. The installation which blurs the lines between Science and Art was one of the highlights of Longbridge Light Festival (part of LPAP) exhibited in an empty cavernous industrial unit situated on the grounds of the former Longbridge car factory. Queues formed throughout the night with over 550 participants entering the mysterious black box structure, two at a time, where they saw their bodies merge together through the use of special glass and light technology Moritz Wehrmann LINK
- 19. ‘Pearls on by day, tattoos out by night’ – a photographer's cleverly-styled images show how people often have more than one side to them. Toby Dixon, 34, who is based in Sydney, Australia, recruited a stylist and make-up artist to transform a man and woman's appearance into two halves and captured the pair's alter egos on camera. On the one side they look distinctly 'serious', with combed hair, buttoned-up collars and glasses, while on the other they appear more 'playful', displaying inches of inked flesh and cheeky smirks. Toby Dixon
- 20. Dixon proudly said about this project, "No cutting, no comping, no Photoshop trickery."
- 21. Cindy Sherman reveals how dressing up in character began as a kind of performance and evolved into her earliest photographic series. Cindy Sherman invents a myriad of disguises, metamorphosing from Hollywood starlet to clown to society matron. Often with the simplest of means—a camera, a wig, makeup, an outfit— Sherman fashions ambiguous but memorable characters that suggest complex lives lived out of frame. Sherman's investigations have a compelling relationship to public images, from kitsch to art history (Old Masters and Surrealism) to green-screen technology and the latest advances in digital photography.
- 23. Paul Smith Smith acts as the unnamed hero for these dramatics, in a Die-Hard, James Bond style character. Although independently coherent, the images are a deliberately montage that creates a scene that is clearly fake. By doing this Smith avoids any documentary overtones and produces an entirely fantastical environment in which to play the hero.
- 24. HOMEWORK: Superhero Images (Collage and drawing double page) Grade 3 Grade 4 Grade 5 Image is cut out and superimposed on a different background. The drawing is mainly line with limited shading. The image is thoughtfully created with some thought about camera angle and lighting. The drawing shows a range of 3 or more tones. The photograph is well taken with consideration for lighting , camera angle and pose. The background has been carefully chosen to fit the scene. The drawing is an excellent copy of the collage showing 5 different tones creating depth in the image 1. Take photographs of yourself in super hero poses. 2. Cut yourself out of the photographs and collage yourself into different backgrounds. (You can use photoshop if you prefer.) 3. Stick the finished collage in your book. 4. Draw your scene in pen or pencil. Fill the page.
- 25. LESSON 8: Practical Task Learning Objective: Interpret the work of John Stezaker. Consider composition carefully to create an effective portrait. Learning Outcome: Combine your portrait with your neighbour’s in different ways to create a range of outcomes. John Stezaker Alternative way to collage
- 26. John Stezaker In pairs create a combined portrait. Experiment with repeating features, cutting images up horizontally, vertically or diagonally. Extension: Create a painting of this collage in black and white acrylic.
- 27. Charlotte Caron The paintings of artist Charlotte Caron explore both the ancient tendency to humanize animals and the dreams of humans to transform into animals. Caron’s acrylic paintings of animal faces are set on the photographed portraits of people as if they were masks. The people of the photographs not only assume the appearance of the animals, but nearly seem to embody corresponding personalities LESSON 9: Animal Instinct
- 28. Daniel Lee, ‘Manimals’ One of the disturbing things about Daniel Lee's “Manimals,” is how normal they appear, at least at first. Even more disturbing, however, is how possible they seem in the gene- splicing age. Bare-shouldered, Lee's creations either look off into the distance or straight ahead, evoking such a quiet dignity through their seamlessly merged features it almost feels impolite to stare.
- 29. Which animal best reflects your personality? Animal Characteristic Animal Characteristic Fox Sly Lion Fierce, brave Cat Independent Meerkat Quick witted, caring Owl Wise, thoughtful Dove Calm, innocence Monkey Cheeky, happy Adder Cunning, wisdom Cheetah Quick, focussed Deer Gentleness Dog Faithful Peacock Beautiful
- 30. Combine a photo of yourself and an animal of your choice. It could be your pet at home? Try to think about the personality of the animal and how it may affect your portrait. Does the animal reflect who you are or who you want to be? Collage your portrait together with an animal. You do not have to follow a straight line.
- 31. Once you have your animal /human hybrid collage, photograph it and open it in a word document. Turn it into a ‘Cut-out’ image. In Word, select the image, select Format then Artistic Effects and Cut- out. LESSON 10- Image Manipulation If you are doing this in Photoshop: open the image, select Filters, then Cut-Out. Select the number of layers that allows you to see the image without it becoming too complicated. Eg. 5 Trace your new stencil image onto A4 tracing paper. Your teacher will then photocopy this image on to A3 cartridge paper ready for you to paint next week.
- 32. Before you begin mix 8 different tones of paint using just black and white and create a tonal scale in your sketchbook. Begin to paint in the very lightest tones on your painting. Refer closely to the original image. LESSON 11 Learning Objective: Develop an understanding of mixing shades and tones using acrylic paint. Learn from painting experiments before starting the final painting. Learning Outcome: Painting experiments and the lightest tones on the painting filled in.
- 33. LESSONS 12 & 13 Learning Objective: Improve control of colour mixing and applying paint to complete the painting. Learning Outcome: Complete the mid tones then finish with the darkest tones to complete the painting.