Falcon's Invoice Discounting: Your Path to Prosperity
Rt svx34 p-en
1. SSAAFFEETTYY WWAARRNNIINNGG
Only qualified personnel should install and service the equipment. The installation, starting up, and servicing of heating, ventilating, and
air-conditioning equipment can be hazardous and requires specific knowledge and training. Improperly installed, adjusted or altered
equipment by an unqualified person could result in death or serious injury. When working on the equipment, observe all precautions in the
literature and on the tags, stickers, and labels that are attached to the equipment.
May 2019 RRTT--SSVVXX3344PP--EENN
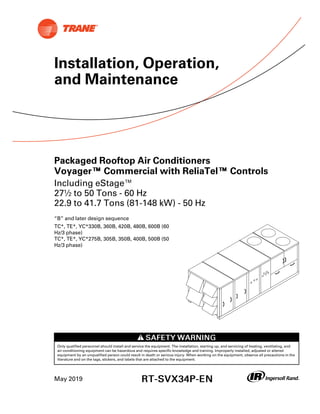
Packaged Rooftop Air Conditioners
Voyager™™ Commercial with ReliaTel™™ Controls
Including eStage™
27½ to 50 Tons - 60 Hz
22.9 to 41.7 Tons (81-148 kW) - 50 Hz
“B” and later design sequence
TC*, TE*, YC*330B, 360B, 420B, 480B, 600B (60
Hz/3 phase)
TC*, TE*, YC*275B, 305B, 350B, 400B, 500B (50
Hz/3 phase)
Installation, Operation,
and Maintenance
3. RT-SVX34P-EN 3
WWAARRNNIINNGG
FFoollllooww EEHHSS PPoolliicciieess!!
FFaaiilluurree ttoo ffoollllooww iinnssttrruuccttiioonnss bbeellooww ccoouulldd rreessuulltt iinn
ddeeaatthh oorr sseerriioouuss iinnjjuurryy..
•• AAllll IInnggeerrssoollll RRaanndd ppeerrssoonnnneell mmuusstt ffoollllooww
IInnggeerrssoollll RRaanndd EEnnvviirroonnmmeennttaall,, HHeeaalltthh aanndd
SSaaffeettyy ((EEHHSS)) ppoolliicciieess wwhheenn ppeerrffoorrmmiinngg wwoorrkk
ssuucchh aass hhoott wwoorrkk,, eelleeccttrriiccaall,, ffaallll pprrootteeccttiioonn,,
lloocckkoouutt//ttaaggoouutt,, rreeffrriiggeerraanntt hhaannddlliinngg,, eettcc.. AAllll
ppoolliicciieess ccaann bbee ffoouunndd oonn tthhee BBOOSS ssiittee.. WWhheerree
llooccaall rreegguullaattiioonnss aarree mmoorree ssttrriinnggeenntt tthhaann
tthheessee ppoolliicciieess,, tthhoossee rreegguullaattiioonnss ssuuppeerrsseeddee
tthheessee ppoolliicciieess..
•• NNoonn--IInnggeerrssoollll RRaanndd ppeerrssoonnnneell sshhoouulldd aallwwaayyss
ffoollllooww llooccaall rreegguullaattiioonnss..
Overview of Manual
One copy of the appropriate service literature ships
inside the control panel of each unit. The procedures
discussed in this manual should only be performed by
qualified, experienced HVAC technicians.
NNoottee:: Do not release refrigerant to the atmosphere! If
adding or removing refrigerant is required, the
service technician must comply with all federal,
state, and local laws.
This booklet describes the proper installation, startup,
operation, and maintenance procedures for TC_, TE_,
and YC_22.9 to 50 Ton CV (Constant Volume), VAV
(Variable Air Volume), and SZ VAV (Single Zone
Variable Air Volume) applications.
By carefully reviewing the information within this
manual and following the instructions, the risk of
improper operation and/or component damage will be
minimized.
It is important that periodic maintenance be performed
to help assure trouble free operation. A maintenance
schedule is provided at the end of this manual. Should
equipment failure occur, contact a qualified service
organization with qualified, experienced HVAC
technicians to properly diagnose and repair this
equipment.
Copyright
This document and the information in it are the
property of Trane, and may not be used or reproduced
in whole or in part without written permission. Trane
reserves the right to revise this publication at any time,
and to make changes to its content without obligation
to notify any person of such revision or change.
Trademarks
All trademarks referenced in this document are the
trademarks of their respective owners.
Factory Training
Factory training is available through Trane University™
to help you learn more about the operation and
maintenance of your equipment. To learn about
available training opportunities contact Trane
University™.
Online: www.trane.com/traneuniversity
Phone: 855-803-3563
Email: traneuniversity@trane.com
Revision History
• Added Space Pressure Setpoint and Space Pressure
Setpoint tables to Startup section
• Updated Unit Wiring Diagram Numbers
• Added “VFD Programming Parameters (Supply)”
Section
IInnttrroodduuccttiioonn
8. 8 RT-SVX34P-EN
Model Number Description
60 Hz Description
Digit 1, 2 — Unit Function
TC = DX Cooling, No Heat
TE = DX Cooling, Electric Heat
YC = DX Cooling, Natural Gas Heat
Digit 3 — Unit Airflow Design
D = Downflow Supply and Upflow Return
H = Horizontal Supply and Horizontal Return
F = Horizontal Supply and Upflow Return
R = Downflow Supply and Horizontal Return
Digit 4, 5, 6 — Nominal Cooling
Capacity
330 = 27½ Tons
360 = 30 Tons
420 = 35 Tons
480 = 40 Tons
600 = 50 Tons
Digit 7 — Major Development
Sequence
B = R-410A Refrigerant
Digit 8 — Power Supply1
E = 208/60/3
F = 230/60/3
4 = 460/60/3
5 = 575/60/3
Digit 9 — Heating Capacity2
0 = No Heat (TC Only)
L = Low Heat (YC Only)
H = High Heat (YC Only)
J = Low Heat-Stainless Steel Gas Heat
Exchanger (YC Only)
K = High Heat-Stainless Steel Gas Heat
Exchangers (YC Only)
M = Low Heat-Stainless Steel Gas Heat
Exchanger w/ Modulating Control (27.5-35
Tons YC only)
P = High Heat-Stainless Steel Gas Heat
Exchangers w/ Modulating Control (27.5-35
Tons YC Only)
R = Low Heat-Stainless Steel Gas Heat
Exchanger w/ Modulating Control (40-50 Tons
YC Only)
T = High Heat-Stainless Steel Gas Heat
Exchangers w/ Modulating Control (40-50
Tons YC Only)
Note: When second digit is “E” for Electric
Heat, the following values apply in the
ninth digit.
A = 36 kW (27 kW for 208v)
B = 54 kW (41 kW for 208v)
C = 72 kW
D = 90 kW
E = 108 kW
Digit 10 — Design Sequence
A = First
Digit 11 — Exhaust4
0 = None
1 = Barometric Relief (Available w/
Economizer only)
2 = 100% Power Exhaust Fan (Available w/
Economizer Only)
3 = 50% Power Exhaust Fan (Available w/
Economizer Only)
4 = 100% Fresh Air Tracking Power Exhaust
Fan (Available w/ Economizer Only)
5 = 50% Fresh Air Tracking Power Exhaust
Fan (Available w/ Economizer Only)
6 = 100% Power Exhaust w/ Statitrac™
7 = 100% Power Exhaust Fan w/ Ultra Low
Leak Exhaust Damper (Available w/
Economizer Only)
8 = 50% Power Exhaust Fan w/ Ultra Low
Leak Exhaust Damper (Available w/
Economizer Only)
9 = 100% Power Exhaust w/ Ultra Low Leak
Exhaust Damper w/ Statitrac™
Digit 12 — Filter
A = 2” MERV 4, Std Eff, Throwaway Filters
B = 2” MERV 8, High Eff, Throwaway Filters
C = 4” MERV 8, High Eff, Throwaway Filters
D = 4” MERV 14, High Eff, Throwaway Filters
Digit 13 — Supply Fan Motor, HP
1 = 7.5 HP
2 = 10 HP
3 = 15 HP
4 = 20 HP
Digit 14 — Supply Air Fan Drive
Selections
A = 550 RPM
B = 600 RPM
C = 650 RPM
D = 700 RPM
E = 750 RPM
F = 790 RPM
G = 800 RPM
H = 500 RPM
J = 525 RPM
K = 575 RPM
L = 625 RPM
M = 675 RPM
N = 725 RPM
Digit 15 — Outside Air Selection
A = No Outside Air
B = 0-25% Manual Damper
C = 0-100% Economizer, Dry Bulb Control
D = 0-100% Economizer, Reference Enthalpy
Control
E = 0-100% Economizer, Differential
Enthalpy Control
F = “C” Option and Low Leak Fresh Air
Damper
G = “D” Option and Low Leak Fresh Air
Damper
H = “E” Option and Low Leak Fresh Air
Damper
J = “C” Option and Ultra Low Leak Outside Air
Damper
K = “D” Option and Ultra Low Leak Outside Air
Damper
L = “E” Option and Ultra Low Leak Outside Air
Damper
1 = Option “C” with Traq
2 = Option “D” with Traq
3 = Option “E” with Traq
4 = Option “F” with Traq
5 = Option “G” with Traq
6 = Option “H” with Traq
7 = Option “C” with Traq w/ Ultra Low Leak
Outside Air Damper
8 = Option “D” with Traq w/ Ultra Low Leak
Outside Air Damper
9 = Option “E” with Traq w/ Ultra Low Leak
Outside Air Damper
Digit 16 — System Control
1 = Constant Volume w/ Zone Temperature
Control
2 = Constant Volume w/ Discharge Air
Control
4 = VAV Supply Air Temperature Control w/
Variable Frequency Drive w/o Bypass
5 = VAV Supply Air Temperature Control w/
Variable Frequency Drive and Bypass
6 = Single Zone VAV w/ VFD w/o Bypass
7 = Single Zone VAV w/ VFD w/ Bypass
A = VAV Supply Air Temperature Control w/
VFD w/o Bypass w/ Motor Shaft Grounding
Ring
B = VAV Supply Air Temperature Control w/
VFD w/ Bypass w/ Motor Shaft Grounding
Ring
C = Single Zone VAV w/ VFD w/o Bypass w/
Motor Shaft Grounding Ring
D = Single Zone VAV w/ VFD w/ Bypass w/
Motor Shaft Grounding Ring
Note: Zone sensors are not included with
option and must be ordered as a
separate accessory.
9. RT-SVX34P-EN 9
Miscellaneous Options
Digit 17
0 = No Service Valves
A = Service Valves
Std efficiency units excluding 40/50T
std efficiency CV: If Digit 17 = 0, no valves
will be provided. If Digit 17= A, service valves
will be provided in the suction and discharge
lines. High efficiency units including 40/
50T std efficiency CV: Digit 17 is not
selectable. Suction and discharge service
valves are included.
Digit 18
B = Through the Base Electrical Provision
Digit 19
C = Non-Fused Disconnect Switch w/ External
Handle
Digit 20
D = Factory-Powered 15A GFI Convenience
Outlet and Non-Fused Disconnect Switch w/
External Handle
Digit 21
E = Field-Powered 15A GFI Convenience
Outlet
Digit 22
F = Trane Communication Interface (TCI)
Digit 23
G = Ventilation Override
Digit 24
H = Hinged Service Access
Digit 25
H = Condenser Hail Guards
J = Condenser Coil Guards
Digit 26
K = LCI (LonTalk)
B = BACnet Communications Interface (BCI)
Digit 27
0 = 5kA SCCR
D = High Fault 65kA SCCR Disconnect5
E = High Fault 65kA SCCR Disconnect w/
Powered Convenience Outlet5
Digit 28
0 = Standard Drain Pan
M = Stainless Steel Drain Pan
1 = Standard Drain Pan w/ Condensate
Overflow Switch
2 = Stainless Steel Drain Pan w/ Condensate
Overflow Switch
Digit 29 — Efficiency/ Condenser Coil
Options
0 = Standard Efficiency Unit
J = Standard Efficiency Unit w/ Corrosion
Protected Condenser Coil
K = High Efficiency Unit (eStage)
L = High Efficiency Unit (eStage) w/
Corrosion Protected Condenser Coil
Digit 30, 31 — Miscellaneous Options
P = Discharge Temperature Sensor
R = Clogged Filter Switch
Digit 32 — Modulating Hot Gas Reheat
Option
T = Modulating Hot Gas Reheat
Digit 33 — Human Interface
5 = Touchscreen Human Interface, 5"
Model Number Notes
Notes:
1. All voltages are across the line starting
only.
2. Electric Heat KW ratings are based upon
voltage ratings of 208/240/480/ 600 V.
For a 240 V heater derated to 208 V, the
resulting kW rating decreases from 36
kW to 27 kW, and from 54 kW to 41 kW.
Voltage offerings are shown in following
table (see Table 22, p. 56 for additional
information).
3. The service digit for each model number
contains 33 digits; all 33 digits must be
referenced.
4. Ventilation override exhaust mode is not
available for the exhaust fan with fresh
air tracking power exhaust. VOM is
available for the exhaust fan without
fresh air tracking power exhaust.
5. 575 VAC option is 25kA.
Tons Elec.
Heat-
er
Rated
Volt.
KW
27/
36
41/
54
72 90 108
27½
to 35
208 x x
240 x x
480 x x x x
600 x x x
40
and
50
208 x
240 x
480 x x x x
600 x x x x
MMooddeell NNuummbbeerr DDeessccrriippttiioonn
10. 10 RT-SVX34P-EN
50 Hz Description
Digit 1, 2 — Unit Function
TC = DX Cooling, No Heat
TE = DX Cooling, Electric Heat
YC = DX Cooling, Natural Gas Heat
Digit 3 — Unit Airflow Design
D = Downflow Supply and Upflow Return
H = Horizontal Supply and Horizontal Return
F = Horizontal Supply and Upflow Return
R = Downflow Supply and Horizontal Return
Digit 4, 5, 6 — Nominal Cooling
Capacity
275 = 22.9 Tons (82 kW)
305 = 25.4 Tons (89 kW)
350 = 29.2 Tons (105 kW)
400 = 33.3 Tons (120 kW)
500 = 41.7 Tons (148 kW)
Digit 7 — Major Development
Sequence
B = R-410A Refrigerant
Digit 8 — Power Supply1
C = 380/50/3
D = 415/50/3
Digit 9 — Heating Capacity2
0 = No Heat (TC Only)
L = Low Heat (YC Only)
H = High Heat (YC Only)
Note: When second digit is “E” for Electric
Heat, the following values apply in the
ninth digit.
380V / 415V
A = 23 kW / 27 kW
B = 34 kW / 40 kW
C = 45 kW / 54 kW
D = 56 kW / 67 kW
E = 68 kW / 81 kW
Digit 10 — Design Sequence
A = First
Digit 11 — Exhaust4
0 = None
1 = Barometric Relief (Available w/
Economizer only)
2 = 100% Power Exhaust Fan (Available w/
Economizer Only)
3 = 50% Power Exhaust Fan (Available w/
Economizer Only)
4 = 100% Fresh Air Tracking Power Exhaust
Fan (Available w/ Economizer Only)
5 = 50% Fresh Air Tracking Power Exhaust
Fan (Available w/ Economizer Only)
6 = 100% Power Exhaust w/ Statitrac™
7 = 100% Power Exhaust Fan w/ Ultra Low
Leak Exhaust Damper (Available w/
Economizer Only)
8 = 50% Power Exhaust Fan w/ Ultra Low
Leak Exhaust Damper (Available w/
Economizer Only)
9 = 100% Power Exhaust w/ Ultra Low Leak
Exhaust Damper w/ Statitrac™
Digit 12 — Filter
A = 2” (51mm) MERV 4, Std Eff, Throwaway
Filters
B = 2” MERV (51mm) 8, High Eff, Throwaway
Filters
C = 4” (102mm) MERV 8, High Eff,
Throwaway Filters
D = 4” (102mm) MERV 14, High Eff,
Throwaway Filters
Digit 13 — Supply Fan Motor, HP
1 = 7.5 HP (5.6 Kw)
2 = 10 HP (7.5 kW)
3 = 15 HP (10 kW)
4 = 20 HP (15 kW)
Digit 14 — Supply Air Fan Drive
Selections
A = 458 RPM
B = 500 RPM
C = 541 RPM
D = 583 RPM
E = 625 RPM
F = 658 RPM
G = 664 RPM
H = 417 RPM
J = 437 RPM
K = 479 RPM
L = 521 RPM
M = 562 RPM
N = 604 RPM
Digit 15 — Outside Air Selection
A = No Outside Air
B = 0-25% Manual Damper
C = 0-100% Economizer, Dry Bulb Control
D = 0-100% Economizer, Reference Enthalpy
Control
E = 0-100% Economizer, Differential
Enthalpy Control
F = “C” Option and Low Leak Fresh Air
Damper
G = “D” Option and Low Leak Fresh Air
Damper
H = “E” Option and Low Leak Fresh Air
Damper
J = “C” Option and Ultra Low Leak Outside Air
Damper
K = “D” Option and Ultra Low Leak Outside Air
Damper
L = “E” Option and Ultra Low Leak Outside Air
Damper
1 = Option “C” with Traq
2 = Option “D” with Traq
3 = Option “E” with Traq
4 = Option “F” with Traq
5 = Option “G” with Traq
6 = Option “H” with Traq
7 = Option “C” with Traq w/ Ultra Low Leak
Outside Air Damper
8 = Option “D” with Traq w/ Ultra Low Leak
Outside Air Damper
9 = Option “E” with Traq w/ Ultra Low Leak
Outside Air Damper
Digit 16 — System Control
1 = Constant Volume w/ Zone Temperature
Control
2 = Constant Volume w/ Discharge Air
Control
4 = VAV Supply Air Temperature Control w/
Variable Frequency Drive w/o Bypass
5 = VAV Supply Air Temperature Control w/
Variable Frequency Drive and Bypass
6 = Single Zone VAV w/ VFD w/o Bypass
7 = Single Zone VAV w/ VFD w/ Bypass
A = VAV Supply Air Temperature Control w/
VFD w/o Bypass w/ Motor Shaft Grounding
Ring
B = VAV Supply Air Temperature Control w/
VFD w/ Bypass w/ Motor Shaft Grounding
Ring
C = Single Zone VAV w/ VFD w/o Bypass w/
Motor Shaft Grounding Ring
D = Single Zone VAV w/ VFD w/ Bypass w/
Motor Shaft Grounding Ring
Note: Zone sensors are not included with
option and must be ordered as a
separate accessory.
MMooddeell NNuummbbeerr DDeessccrriippttiioonn
11. RT-SVX34P-EN 11
Miscellaneous Options
Digit 17
0 = No Service Valves
A = Service Valves
Std efficiency units excluding 400/500
std efficiency CV: If Digit 17 = 0, no valves
will be provided. If Digit 17= A, service valves
will be provided in the suction and discharge
lines. High efficiency units including
400/500 std efficiency CV: Digit 17 is not
selectable. Suction and discharge service
valves are included.
Digit 18
B = Through the Base Electrical Provision
Digit 19
C = Non-Fused Disconnect Switch w/ External
Handle
Digit 20
* = Unused Digit
Digit 21
* = Unused Digit
Digit 22
F = Trane Communication Interface (TCI)
Digit 23
G = Ventilation Override
Digit 24
H = Hinged Service Access
Digit 25
H = Condenser Hail Guards
J = Condenser Coil Guards
Digit 26
K = LCI (LonTalk)
B = BACnet Communications Interface (BCI)
Digit 27
0 = 5kA SCCR
D = High Fault 65kA SCCR Disconnect
Digit 28
0 = Standard Drain Pan
M = Stainless Steel Drain Pan
1 = Standard Drain Pan w/ Condensate
Overflow Switch
2 = Stainless Steel Drain Pan w/ Condensate
Overflow Switch
Digit 29 — Efficiency/ Condenser Coil
Options
0 = Standard Efficiency Unit
J = Standard Efficiency Unit w/ Corrosion
Protected Condenser Coil
K = High Efficiency Unit (eStage)
L = High Efficiency Unit (eStage) w/
Corrosion Protected Condenser Coil
Digit 30, 31 — Miscellaneous Options
P = Discharge Temperature Sensor
R = Clogged Filter Switch
Digit 32 — Modulating Hot Gas Reheat
Option
T = Modulating Hot Gas Reheat
Digit 33 — Human Interface
5 = Touchscreen Human Interface, 5"
Model Number Notes
Notes:
1. All voltages are across the line starting
only.
2. Electric Heat KW ratings are based upon
voltage ratings of 380/415 V. Heaters A,
B, C, D are used with 22.9-29.2 ton (82-
105 kW) units only and heaters B, C, D, E
are used with 33.3-41.7 ton (120-148
kW) units only.
3. The service digit for each model number
contains 33 digits; all 33 digits must be
referenced.
4. Ventilation override exhaust mode is not
available for the exhaust fan with fresh
air tracking power exhaust. VOM is
available for the exhaust fan without
fresh air tracking power exhaust.
MMooddeell NNuummbbeerr DDeessccrriippttiioonn
12. 12 RT-SVX34P-EN
General Information
About the Unit
Overall unit dimensional data is illustrated in “Unit
Dimensions and Weights,” p. 13. Each package rooftop
unit ships fully assembled and charged with the proper
refrigerant quantity from the factory. They are
controlled by a microelectronic unit control processor.
Several solid state modules are grouped to form the
“Control System”. The number of modules within any
given control system will be dependent upon the
options and accessories ordered with the unit.
Acronyms are used extensively throughout this manual
when referring to the “Control System”.
Basic unit components include:
• Scroll compressors
• One (1) Intertwined Evaporator Coil
• One (1) Supply Fan
• Three (3) to Four (4) Condenser Fans
• Microchannel Condenser Coils
• Filters (type is dependent on option selection)
Unit Inspection
To protect against loss due to damage incurred in
transit, perform inspection immediately upon receipt of
the unit.
Exterior Inspection
If the job site inspection reveals damage or material
shortages, file a claim with the carrier immediately.
Specify the type and extent of the damage on the bill of
lading before signing. Notify the appropriate sales
representative.
IImmppoorrttaanntt:: Do not proceed with installation of a
damaged unit without sales
representative’s approval.
• Visually inspect the complete exterior for signs of
shipping damages to unit or packing material.
• Verify that the nameplate data matches the sales
order and bill of lading.
• Verify that the unit is properly equipped and there
are no material shortages.
• Verify that the power supply complies with the unit
nameplate specifications.
Inspection for Concealed Damage
Visually inspect the components for concealed damage
as soon as possible after delivery and before it is
stored.
Do NOT walk on the sheet metal base pans. Bridging
between the unit’s main supports may consist of
multiple 2 by 12 boards or sheet metal grating.
WWAARRNNIINNGG
NNoo SStteepp SSuurrffaaccee!!
FFaaiilluurree ttoo ffoollllooww iinnssttrruuccttiioonn bbeellooww ccoouulldd rreessuulltt iinn
ddeeaatthh oorr sseerriioouuss iinnjjuurryy..
DDoo nnoott wwaallkk oonn tthhee sshheeeett mmeettaall ddrraaiinn ppaann.. WWaallkkiinngg
oonn tthhee ddrraaiinn ppaann ccoouulldd ccaauussee tthhee ssuuppppoorrttiinngg mmeettaall
ttoo ccoollllaappssee aanndd rreessuulltt iinn tthhee ooppeerraattoorr//tteecchhnniicciiaann
ffaalllliinngg..
If concealed damage is discovered:
• Notify the carrier’s terminal of the damage
immediately by phone and by mail.
• Concealed damage must be reported within 15
days.
• Request an immediate, joint inspection of the
damage with the carrier and consignee.
• Stop unpacking the unit.
• Do not remove damaged material from receiving
location.
• Take photos of the damage, if possible.
• The owner must provide reasonable evidence that
the damage did not occur after delivery.
Repair
Notify the appropriate sales representative before
arranging unit installation or repair.
IImmppoorrttaanntt:: Do not repair unit until the damage has
been inspected by the carrier’s
representative.
Storage
Store unit in a level and dry location. Use adequate
blocking under the base rail. If unit is not level and
supported adequately, damage may occur when
removing screws and opening doors.
Take precautions to prevent condensate formation
inside the unit electrical components and motors when:
• The unit is stored before it is installed; or,
• The unit is set on the roof curb and temporary
auxiliary heat is provided in the building.
Isolate all side panel service entrances and base pan
openings (e.g., conduit holes, S/A and R/A openings,
and flue openings) to minimize ambient air from
entering the unit until it is ready for startup.
NNoottee:: Do not use the unit heater as temporary heat
without completing the startup procedures
detailed under Startup information.
The manufacturer will not assume responsibility for
equipment damage resulting from accumulation of
condensate on the unit electrical components.
13. RT-SVX34P-EN 13
Unit Dimensions and Weights
Recommended Clearances
Adequate clearance around and above each Voyager
Commercial unit is required to ensure proper operation
and to allow sufficient access for servicing.
If the unit installation is higher than the typical curb
elevation, a field constructed catwalk around the unit is
recommended to provide safe, easy access for
maintenance and servicing. , p. 19 lists the
recommended clearances for single and multiple unit
installation. These clearances are necessary to assure
adequate serviceability, cataloged capacities, and peak
operating efficiency.
If the clearances available on the job site appear to be
inadequate, review them with your Trane sales
representative.
Roof Curb and Ductwork
The curbs for the 27.5 to 50 Tons commercial rooftop
units enclose the entire unit base area. They are
referred to as “full perimeter” type curbs.
Step-by-step instructions for the curb assembly and
installation with curb dimensions and curb
configuration for “A”, “B”, and “C” cabinets ship with
each Trane accessory roof curb kit. (See the latest
edition of the curb installation guide) Follow the
instructions carefully to assure proper fit when the unit
is set into place.
The S/A and R/A ductwork adjoining the roof curb must
be fabricated and installed by the installing contractor
before the unit is set into place. Trane curbs include
flanges around the openings to accommodate duct
attachment.
Ductwork installation recommendations are included in
the instruction booklet that ships with each Trane
accessory roof curb kit.
NNoottee:: For sound consideration, cut only the holes in the
roof deck for the supply and return duct
penetration. Do not remove the roof decking
from the inside perimeter of the curb.
IIff aa TTrraannee ccuurrbb aacccceessssoorryy kkiitt iiss nnoott uusseedd::
• The ductwork can be attached directly to the S/A
and R/A openings. Be sure to use a flexible duct
connector at the unit.
• For “built-up” curbs supplied by others, gaskets
must be installed around the curb perimeter flange,
Supply Air opening, and Return Air openings.
• Insulation must be installed on the bottom of the
condenser section of the unit.
Horizontal Ductwork
When attaching the ductwork to a horizontal supply or
horizontal return unit, provide a water tight flexible
connector at the unit to prevent noise transmission
from the unit into the ductwork. Refer to figures
beginning on page for the S/A and R/A opening
dimensions.
All outdoor ductwork between the unit and the
structure should be weather proofed after installation is
completed.
If optional power exhaust is selected, an access door
must be field-installed on the horizontal return
ductwork to provide access to exhaust fan motors.
14. 14 RT-SVX34P-EN
Unit Dimensions
Figure 1. 60 Hz 27½-35, 50 Hz 23-29 Tons (TCD, TED, YCD low heat)
Figure 2. Rear view showing duct openings for horizontal supply and return, 60 Hz 27½-35, 50 Hz 23-29 Tons (TCH,
TEH, YCH low heat)
1 1/4
(32)
3 1/4
(81)
NNootteess::
• On horizontal units, the VFD is located between the supply and return ductwork, which makes access limited.
• For combination of horizontal and downflow openings (digit 3 = F or R) see for appropriate downflow/upflow
dimensions and Figure 2, p. 14 for appropriate horizontal dimensions.
UUnniitt DDiimmeennssiioonnss aanndd WWeeiigghhttss
15. RT-SVX34P-EN 15
Figure 3. 60 Hz 27½-35, 50 Hz 23-29 Tons (TC, TE, YC low heat)
NOTES:
1. SEE DETAIL HOOD DRAWING FOR HORIZONTAL /
DOWNFLOW UNITS FOR ADDITIONAL DIMENSION
AND LOCATION.
179 3/4"
4565.65mm
42"
1066.8mm
83 13/16"
2128.8mm
90 1/16"
2287.5mm
180 5/16"
4579.9mm
90 3/8"
2295.5mm
5 3/8"
136.5mm
7 9/16"
192.1mm
3.25 [82.55mm] TO TOP OF FAN GRILLE
70 7/16"
1789.1mm
40 3/16"
1020.7mm
6 7/8"
174.6mm
1 1/4" [31.7mm]
FEMALE PVC PIPE
3/4" [19.0mm] NPT
GAS INLET
SEE NOTE 2
CUSTOMER
CONNECTION POINT
NNoottee:: Dimensions in ( ) are mm, 1”= 25.4 mm.
Figure 4. 60 Hz 27½-35, 50 Hz 23-29 Tons (YCD high heat)
196
4991
UUnniitt DDiimmeennssiioonnss aanndd WWeeiigghhttss
16. 16 RT-SVX34P-EN
Figure 5. Duct openings, 60 Hz 27½-35, 50 Hz 23-29 Tons (YCH high heat)
1 1/4
(32)
3 1/4
(81)
NNootteess::
• On horizontal units, the VFD is located between the supply and return ductwork, which makes access limited.
• For combination of horizontal and downflow openings (digit 3 = F or R) see Figure 4, p. 15 for appropriate
downflow/upflow dimensions and Figure 5, p. 16 for appropriate horizontal dimensions.
Figure 6. 60 Hz 27½-35, 50 Hz 23-29 Tons (YC high heat)
5270.5mm
207 1/2"
42"
5 3/8"
83 13/16"
2128.8mm
7 9/16"
208 1/16"
5284.7mm
90 5/8"
2301.8mm
90 1/16"
70 7/16"
40 3/16"
6 15/16"
PVC PIPE FEMALE
1" [25.4MM] NPT
GAS INLET
NOTES:
1. SEE ROOFCURB DRAWING FOR DETAILS
ON FIELD DUCT FITUP AND CONNECTIONS
2. SEE DETAIL HOOD DRAWING FOR HORIZONTAL /
DOWNFLOW UNITS FOR ADDITIONAL DIMENSION
AND LOCATION.
SEE NOTE 2
CUSTOMER
CONNECTION POINT
1066.8mm
2287.5mm
136.5m
192.1m
3.25 [82.55mm] TO
TOP OF FAN GRILLE
1789.1mm
1020.7mm
174.6mm
1 1/4" [31.7mm]
NNoottee:: Dimensions in ( ) are mm, 1”= 25.4 mm.
UUnniitt DDiimmeennssiioonnss aanndd WWeeiigghhttss
17. RT-SVX34P-EN 17
Figure 7. 60 Hz 40-50, 50 Hz 33-42 Tons (TCD, TCD, YCD low and high heat)
Figure 8. Duct openings, 60 Hz 40-50, 50 Hz 33-42 Tons (TH, TH, YH low and high heat)
1 1/4
(32)
3 1/4
(81)
NNootteess::
• On horizontal units, the VFD is located between the supply and return ductwork, which makes access limited.
• For combination of horizontal and downflow openings (digit 3 = F or R) see Figure 7, p. 17 for appropriate
downflow/upflow dimensions and Figure 8, p. 17 for appropriate horizontal dimensions.
UUnniitt DDiimmeennssiioonnss aanndd WWeeiigghhttss
18. 18 RT-SVX34P-EN
Figure 9. 60 Hz 40-50, 50 Hz 33-42 Tons (TC, TE, YC low and high heat)
7 9/16"
232 3/8"
5902.3mm
232 3/4"
5911.8mm
90 5/8"
49 9/16"
1258.8mm
93 3/8"
2371.7mm
5 5/16"
90 1/16"
77"
1955.8mm
46 15/16"
1192.2mm
4 3/4"
120.6mm
NOTES:
1. SEE ROOFCURB DRAWING FOR DETAILS
ON FIELD DUCT FITUP AND CONNECTIONS
2. SEE DETAIL HOOD DRAWING FOR HORIZONTAL /
DOWNFLOW UNITS FOR ADDITIONAL DIMENSION
AND LOCATION.
SEE NOTE 2
CUSTOMER
CONNECTION POINT
2301.8mm
PVC PIPE FEMALE
1" [25.4MM] NPT
HIGH HEAT GAS INLET
2287.5mm
136.5m
192.1m
3.25 [82.55mm] TO
TOP OF FAN GRILLE
1 1/4" [31.7mm]
3/4" [19MM] NPT
LOW HEAT GAS INLET
NNoottee:: Dimensions in ( ) are mm, 1”= 25.4 mm.
Figure 10. Side view showing fresh air and power
exhaust hoods for downflow return (TC*, TE*, and YC*
units)
32 1/8"
(814)
2 7/16"
(62)
37 3/4"
(959)
Fresh Air
Hood
End of
Unit
Pow er
Exhaust
Hood
Figure 11. Side view showing power exhaust hoods
for horizontal return (TC*, TE*, and YC* units)
Pow er
Exhaust
Hoods End of
Unit
32 1/8”
(814)
2 7/16”
(62)
UUnniitt DDiimmeennssiioonnss aanndd WWeeiigghhttss
19. RT-SVX34P-EN 19
Figure 12. Location of “Ship With” items for TC*,
TE*, and YC* units
Unit Rigging and Placement
Use spreader bars as shown in the diagram. Refer to
the Installation manual or nameplate for unit weight.
Refer to the Installation instructions located inside the
control panel for further rigging information.
Verify that the roof curb has the proper gaskets
installed and is level and square to assure an adequate
curb-to-unit seal.
The units must be as level as possible in order to
assure proper condensate flow out of the unit. The
maximum side-to-side and end-to-end slope allowable
in any application is listed in Table 2, p. 19.
Figure 13. Unit rigging
Table 1. Minimum operating clearances installation
(horizontal, downflow, and mixed airflow
configurations)
Economizer/
Exhaust End
Condenser Coil
Orientation
End/Side
Service Side
Access
Single Unit
(Clearance)
6 feet 8 feet 4 feet
Multiple Units
(Distance
between
Units)
12 feet 16 feet 8 feet
Note: Condenser coil is located at the end and side of the unit.
Table 2. Maximum slope
Cabinet
End to End
(inches)
Side to
Side
(inches)
“A” (27.5 - 35 Ton Low Heat) 3 1/2 1 5/8
“B” (27.5 - 35 Ton High Heat) 4 1 5/8
“C” (All 40 and 50 Ton Units) 4 1/2 1 5/8
Note: Do not exceed these allowances. Correct the improper slope
by building up the curb base. The material used to raise the
base must be adequate to support both the curb and the
unit weight.
Table 3. Center of gravity
Unit
Model
Center-of-Gravity (inches)
YC Low Heat
Dimension
YC High
Heat
Dimension
TC/TE
Dimension
X Y Z X Y Z X Y Z
***330/
275*
41 76 33 41 84 33 42 76 33
***360/
305*
43 77 33 43 85 33 44 77 33
***420/
350*
42 78 33 42 86 33 43 78 33
***480/
400*
42
1-
11
35 42
1-
11
35 42
1-
11
35
***600/
500*
43
1-
08
35 43
1-
08
35 43
1-
08
35
Notes:
1. Center-of-gravity dimensions are approximate, and are
based on the unit equipped with: standard efficiency coils,
standard efficiency motors, economizer, and throwaway
filters.
2. Z dimension is upward from the base of the unit.
3. Example: Locating the center-of-gravity for a YC-360 MBH
High Heat unit with 100% exhaust; X = 43 inches inward
from the control panel side/ Y = 85 inches inward from the
compressor end/ Z = 33 inches upward from the base
UUnniitt DDiimmeennssiioonnss aanndd WWeeiigghhttss
20. 20 RT-SVX34P-EN
Figure 14. Center of gravity
X
Y
Z (see note 2)
Table 4. Approximate units operating weights — lbs./kg
Unit
Model
(60Hz/
50Hz)
Basic Unit Weights
YC Low
Heat
YC High
Heat
TC TE
330/275 3720 / 1687 4150 / 1882 3590 / 1628 3610 / 1637.5
360/305 3795 / 1721 4225 / 1916 3665 / 1662 3685 / 1671.5
420/350 3876 / 1758 4306 / 1953 3746 / 1699 3766 / 1708
480/400 4825 / 2189 4950 / 2245 4565 / 2071 4600 / 2086.5
600/500 5077 / 2303 5202 / 2360
4827 /
2189.5
4852 / 2201
Note: Weights shown represent approximate operating weights and
have a ±10% accuracy. To calculate weight for a specific unit
configuration, utilize TOPSS™ or contact the local Trane® sales
representative. ACTUAL WEIGHTS ARE STAMPED ON THE UNIT
NAMEPLATE.
Table 5. Point loading average weight— lbs./kg
Unit
Model
(60Hz/
50Hz)
A B C D E F
330/275
852 /
386
695 /
315
754 /
342
740 /
335
602 /
273
504 /
228
360/305
878 /
398
681 /
309
750 /
340
713 /
323
577 /
262
622 /
282
420/350
841 /
381
842 /
382
669 /
303
735 /
333
582 /
264
634 /
287
480/400
835 /
378
869 /
394
950 /
431
748 /
339
769 /
349
776 /
352
600/500
882 /
400
931 /
422
954 /
433
740 /
336
844 /
382
847 /
384
Notes:
1. Point loading is identified with corner A being the corner
with the compressors. As you move clockwise around the
unit as viewed from the top, mid-point B, corner C, corner
D, mid-point E and corner F.
2. Point load calculations provided are based on the unit
weight for YC high heat gas models.
UUnniitt DDiimmeennssiioonnss aanndd WWeeiigghhttss
22. 22 RT-SVX34P-EN
Pre-Installation
The checklist listed below is a summary of the steps
required to successfully install a Voyager Commercial
rooftop unit. This checklist is intended to acquaint the
installing personnel with what is required in the
installation process. It does not replace the detailed
instructions called out in the applicable sections of this
manual.
General Unit Requirements
Downflow/Upflow Models
• An optional roof curb, specifically designed for the
Voyager commercial rooftop units is available from
Trane. The roof curb kit must be field assembled
and installed according to the latest edition of the
curb installation guide.
• Assemble and install the roof curb, including
necessary gaskets. Make sure the curb is level.
• Install and secure the ductwork to the curb.
All Units
• Check unit for shipping damage and material
shortage. (Refer to “General Information,” p. 12).
• Rigging the unit. Refer to Figure 13, p. 19.
• Placing the unit on curb; check for levelness.
• Ensure that the unit-to-curb seal is tight and without
buckles or cracks.
• Install an appropriate drain line to the evaporator
condensate drain connections, as required. Refer to
, p. 23.
• Service Valve Option; See “Starting the
Compressor,” p. 89.
• Return/Fresh-air damper adjustment. Refer to
“Economizer (O/A) Dampers,” p. 85.
• Exhaust Fan Damper Stop Adjustment. Refer to
Exhaust Damper Adjustment figures, beginning
with , p. 83.
Electrical Requirements
WWAARRNNIINNGG
PPrrooppeerr FFiieelldd WWiirriinngg aanndd GGrroouunnddiinngg
RReeqquuiirreedd!!
FFaaiilluurree ttoo ffoollllooww ccooddee ccoouulldd rreessuulltt iinn ddeeaatthh oorr
sseerriioouuss iinnjjuurryy..
AAllll ffiieelldd wwiirriinngg MMUUSSTT bbee ppeerrffoorrmmeedd bbyy qquuaalliiffiieedd
ppeerrssoonnnneell.. IImmpprrooppeerrllyy iinnssttaalllleedd aanndd ggrroouunnddeedd
ffiieelldd wwiirriinngg ppoosseess FFIIRREE aanndd EELLEECCTTRROOCCUUTTIIOONN
hhaazzaarrddss.. TToo aavvooiidd tthheessee hhaazzaarrddss,, yyoouu MMUUSSTT ffoollllooww
rreeqquuiirreemmeennttss ffoorr ffiieelldd wwiirriinngg iinnssttaallllaattiioonn aanndd
ggrroouunnddiinngg aass ddeessccrriibbeedd iinn NNEECC aanndd yyoouurr llooccaall//
ssttaattee//nnaattiioonnaall eelleeccttrriiccaall ccooddeess..
• Verify that the electrical power supply
characteristics comply with the unit nameplate
specifications.
• Inspect all control panel components; tighten any
loose connections.
• Connect properly sized and protected power supply
wiring to a field supplied/installed disconnect and
unit power terminal block HTB1, or to the optional
unit-mounted disconnect switch.
• Properly ground the unit.
Field Installed Control Wiring
Refer to , p. 33 and Figure 22, p. 35.
Complete the field wiring connections for the constant
volume and variable air volume controls as applicable.
Refer to “Low Voltage Wiring,” p. 32.
IImmppoorrttaanntt:: All field-installed wiring must comply with
NEC and applicable local codes.
Gas Heat Requirements
Refer to “Installation Piping,” p. 40.
• Gas supply line properly sized and connected to the
unit gas train.
• All gas piping joints properly sealed.
• Drip leg Installed in the gas piping near the unit.
• Gas piping leak checked with a soap solution. If
piping connections to the unit are complete, do not
pressurize piping in excess of 0.50 psig or 14 inches
w.c. to prevent component failure.
• Main supply gas pressure adequate.
• Flue Tubes clear of any obstructions.
23. RT-SVX34P-EN 23
Installation General Requirements
Condensate Drain Connection
Each commercial rooftop unit is equipped with one (1)
1-1/4 inch Female NPT (threaded) drain connection.
Refer to “Unit Dimensions and Weights,” p. 13 for the
location of the connector. A condensate trap must be
installed due to the drain connection being on the
“negative pressure” side of the fan. Install a P-Trap at
the unit using the guidelines in , p. 23.
Pitch the drain line at least 1/2 inch for every 10 feet of
horizontal run to assure proper condensate flow.
Ensure that all condensate drain line installations
comply with applicable building and waste disposal
codes.
NNootteess::
• For units with optional Condensate
Overflow Switch (COF), the switch will not
work properly if unit is not level or slightly
sloped toward switch.
• To ensure proper condensate flow during
operation the unit and the curb must be
level.
Figure 15. Condensate trap installation
Condensate Overflow Switch
This switch protects building from condensate
overflow damage. It is factory-installed and tested.
Figure 16. Condensate overflow switch location
O/A Sensor & Tubing
Installation
An Outside Air Pressure Sensor is shipped with all
units designed to operate on traditional variable air
volume applications (non-SZ VAV) and units with
Statitrac™.
A duct pressure transducer and the outside air sensor
is used to control the discharge duct static pressure to
within a customer-specified controlband. Refer to the
illustration in , p. 24 and the following steps to install
the sensor and the pneumatic tubing.
1. Remove the O/A pressure sensor kit located inside
the fan section. The kit contains the following items;
• an O/A static pressure sensor
• a sensor mounting bracket
• 50’ of 3/16” O.D. pneumatic tubing
• mounting hardware
2. Using two #10-32 x 1-3/4” screws provided, install
the sensor's mounting bracket to the factory
provided bracket (near the fan section).
3. Using the #10-32 x 1/2” screws provided, install the
O/A static pressure sensor vertically to the sensor
bracket.
4. Remove the dust cap from the tubing connector
located below the sensor in the vertical support.
5. Attach one end of the 50' x 3/16” O.D. factory
provided pneumatic tubing to the sensor's top port,
and the other end of the tubing to the connector in
the vertical support. Discard any excess tubing.
24. 24 RT-SVX34P-EN
Units with Statitrac™™
1. Open the filter access door, and locate the Statitrac
Transducer Assembly illustrated in Figure 18, p. 25.
There are two tube connectors mounted on the left
of the solenoid and transducers. Connect one end
of the field provided 1/4” (length 50-100 ft.) or 3/8”
(length greater than 100 ft.) O.D. pneumatic tubing
for the space pressurization control to the fitting
indicated in the illustration.
2. Route the opposite end of the tubing to a suitable
location inside the building. This location should be
the largest open area that will not be affected by
sudden static pressure changes.
Figure 17. Pressure tubing
Atmospheric Pressure Sensing Kit
Top Port Connection
2’ X 3/16” OD
tubing factory
provided pneumatic
tubing field installed)
Tubing connector
(in vertical support)
Outside air
pressure sensor
Sensor mounting
bracket
Factory provided
bracket
Duct Pressure Transducer
Tubing Schematic
Duct static
transducer
Sensing tube
to outside air
reference
Sensing tube to
discharge static pressure
sensing location
Duct Pressure Control
Component Layout
Supply air
duct static
transducer
Atmospheric reference
tubing connects
here
IInnssttaallllaattiioonn GGeenneerraall RReeqquuiirreemmeennttss
25. RT-SVX34P-EN 25
Figure 18. Transducer assembly
LO HI
C NO
NC
Sensing Tube
to Traq LO Side
Pressure Port
Airflow
Transducer
Sensing Tube
to Traq HI Side
Pressure Port
NNoottee:: Statitrac and Traq transducer assembly shown.
IInnssttaallllaattiioonn GGeenneerraall RReeqquuiirreemmeennttss
26. 26 RT-SVX34P-EN
Installation Electrical
WWAARRNNIINNGG
HHaazzaarrddoouuss VVoollttaaggee!!
FFaaiilluurree ttoo ddiissccoonnnneecctt ppoowweerr bbeeffoorree sseerrvviicciinngg ccoouulldd
rreessuulltt iinn ddeeaatthh oorr sseerriioouuss iinnjjuurryy..
DDiissccoonnnneecctt aallll eelleeccttrriicc ppoowweerr,, iinncclluuddiinngg rreemmoottee
ddiissccoonnnneeccttss bbeeffoorree sseerrvviicciinngg.. FFoollllooww pprrooppeerr
lloocckkoouutt//ttaaggoouutt pprroocceedduurreess ttoo eennssuurree tthhee ppoowweerr
ccaann nnoott bbee iinnaaddvveerrtteennttllyy eenneerrggiizzeedd.. VVeerriiffyy tthhaatt nnoo
ppoowweerr iiss pprreesseenntt wwiitthh aa vvoollttmmeetteerr..
Disconnect Switch External
Handle (Factory Mounted
Option)
Units ordered with the factory mounted disconnect
switch come equipped with an externally mounted
handle. This allows the operator to disconnect power
from the unit without having to open the control panel
door. The handle location and its three positions are
shown below;
• ON - Indicates that the disconnect switch is closed,
allowing the main power supply to be applied at the
unit.
• OFF - Indicates that the disconnect switch is open,
interrupting the main power supply at the unit.
• OPEN COVER/RESET - Turning the handle to this
position releases the handle from the disconnect
switch, allowing the control panel door to be
opened.
Once the door has been opened, it can be closed with
the handle in any one of the three positions outlined
above, provided it matches the disconnect switch
position. The handle can be locked in the “OFF”
position. While holding the handle in the “OFF”
position, push the spring loaded thumb key, attached
to the handle, into the base slot. Place the lock shackle
between the handle and the thumb key. This will
prevent it from springing out of position.
Figure 19. Disconnect switch
Disconnect switch
external handle
Locking
slot (OFF)
Locking
thumb key Control Panel
Compressor Panel
An overall layout of the field required power wiring is
illustrated in . To insure that the unit supply power
wiring is properly sized and installed, follow the
guidelines outlined below.
NNoottee:: All field installed wiring must conform to NEC
guidelines as well as State and Local codes.
Verify that the power supply available is compatible
with the unit's name plate ratings for all components.
The available power supply must be within 10% of the
rated voltage stamped on the nameplate. Use only
copper conductors to connect the 3-phase power
supply to the unit.
Main Power Wiring
WWAARRNNIINNGG
PPrrooppeerr FFiieelldd WWiirriinngg aanndd GGrroouunnddiinngg
RReeqquuiirreedd!!
FFaaiilluurree ttoo ffoollllooww ccooddee ccoouulldd rreessuulltt iinn ddeeaatthh oorr
sseerriioouuss iinnjjuurryy..
AAllll ffiieelldd wwiirriinngg MMUUSSTT bbee ppeerrffoorrmmeedd bbyy qquuaalliiffiieedd
ppeerrssoonnnneell.. IImmpprrooppeerrllyy iinnssttaalllleedd aanndd ggrroouunnddeedd
ffiieelldd wwiirriinngg ppoosseess FFIIRREE aanndd EELLEECCTTRROOCCUUTTIIOONN
hhaazzaarrddss.. TToo aavvooiidd tthheessee hhaazzaarrddss,, yyoouu MMUUSSTT ffoollllooww
rreeqquuiirreemmeennttss ffoorr ffiieelldd wwiirriinngg iinnssttaallllaattiioonn aanndd
ggrroouunnddiinngg aass ddeessccrriibbeedd iinn NNEECC aanndd yyoouurr llooccaall//
ssttaattee//nnaattiioonnaall eelleeccttrriiccaall ccooddeess..
NNOOTTIICCEE
UUssee CCooppppeerr CCoonndduuccttoorrss OOnnllyy!!
FFaaiilluurree ttoo uussee ccooppppeerr ccoonndduuccttoorrss ccoouulldd rreessuulltt iinn
eeqquuiippmmeenntt ddaammaaggee aass tthhee eeqquuiippmmeenntt wwaass nnoott
ddeessiiggnneedd oorr qquuaalliiffiieedd ttoo aacccceepptt ootthheerr ttyyppeess ooff
ccoonndduuccttoorrss..
27. RT-SVX34P-EN 27
• , p. 28 to Table 14, p. 31 list the electrical service
sizing data. The electrical service must be protected
from over current and short circuit conditions in
accordance with NEC requirements. Protection
devices must be sized according to the electrical
data on the nameplate. Refer to “Electrical Wire
Sizing and Protection Device Equations,” p. 31 for
determining:
– The appropriate electrical service wire size
based on “Minimum Circuit Ampacity” (MCA),
– The “Maximum Over current Protection” (MOP)
device.
– The “Recommended Dual Element fuse size”
(RDE).
• If the unit is not equipped with an optional factory
installed Nonfused disconnect switch, a field
supplied disconnect switch must be installed at or
near the unit in accordance with the National
Electrical Code (NEC latest edition). Refer to DSS
calculations “Electrical Wire Sizing and Protection
Device Equations,” p. 31 for determining correct
size.
Location for the electrical service entrance is
shown in the unit dimensional drawings
beginning with Figure 1, p. 14. Complete the
unit's power wiring connections onto either the
main terminal block HTB1, or the factory
mounted nonfused disconnect switch inside the
unit control panel.
NNoottee:: When the factory installed through-the-base
option is not used, the installing contractor is
required to seal any holes made in the base
of the unit to prevent water from leaking into
the building.
• Provide proper grounding for the unit in accordance
with local and national codes.
Figure 20. Typical field power wiring
IInnssttaallllaattiioonn EElleeccttrriiccaall
28. 28 RT-SVX34P-EN
Through-the-Base Electrical
(Optional Accessory)
Liquid-tight conduit couplings are secured to the base
of the unit for both power and control wiring. Liquid-
tight conduit must be field installed between the
couplings and the unit control box to prevent water
leaks into the building.
NNoottee:: If the unit is set on the roof curb and temporary
auxiliary heat is provided in the building, it is
recommended that the electrical and control
wiring conduit opening in the control box be
temporarily sealed to provide a vapor barrier.
Electrical Service Sizing Data
Table 7. 27½-35 ton electrical service sizing data—60Hz
Model
Elec.
Specs
Allowa-
ble
Voltage
Range
Comp. Std Eff
Comp. High Eff,
eStage
Fan Motors
Supply Condenser Exhaust
No/
Ton
RLA
(Ea.)
LRA
(Ea.)
No/
Ton
RLA
(Ea.)
LRA
(Ea.)
HP FLA No HP
FLA
(Ea.)
50% 100%
HP
FLA
(Ea.)No.
TC/TE/
YC*330
208/60/3 187-229
1/12,
1/13
44.0/
50.5
304/
315
1/6,
2/9
28.0,
37.1
203,
267
7.5,
10
22.8,
29.5
3 1.1 7 1 2 1.0 4.1
230/60/3 207-253
1/12,
1/13
44.0/
50.5
304/
315
1/6,
2/9
28.0,
37.1
203,
267
7.5,
10
19.5,
25.2
3 1.1 7 1 2 1.0 4.1
460/60/3 414-506
1/12,
1/13
21.0/
23.0
147/
158
1/6,
2/9
14.1,
16.8
98,
142
7.5,
10
9.8,
12.6
3 1.1 3.5 1 2 1.0 1.8
575/60/3 517-633
1/12,
1/13
17.5/
19.0
122/
136
1/6,
2/9
12.2,
14.7
84,
103
7.5,
10
7.8,
10.1
3 1.1 2.8 1 2 1.0 1.4
TC/TE/
YC*360
208/60/3 187-229
0.15-
38
50.5
315/
315
1/6,
2/10
28.0,
40.9
203,
267
7.5,
10,
15
22.8,
29.5,
42.4
3 1.1 7 1 2 1.0 4.1
230/60/3 207-253
0.15-
38
50.5
315/
315
1/6,
2/10
28.0,
40.9
203,
267
7.5,
10,
15
19.5,
25.2,
36.0
3 1.1 7 1 2 1.0 4.1
460/60/3 414-506
0.15-
38
23
158/
158
1/6,
2/10
14.1,
18.6
98,
142
7.5,
10,
15
9.8,
12.6,
18.0
3 1.1 3.5 1 2 1.0 1.8
575/60/3 517-633
0.15-
38
19
136/
136
1/6,
2/10
12.2,
15.4
84,
103
7.5,
10,
15
7.8,
10.1,
15.0
3 1.1 2.8 1 2 1.0 1.4
TC/TE/
YC*420
208/60/3 187-229
1/13,
1/15
50.5/
56.0
315/
351
1/6,
2/11
28.0,
44.9
203,
304
7.5,
10,
15
22.8,
29.5,
42.4
3 1.1 7 1 2 1.0 4.1
230/60/3 207-253
1/13,
1/15
50.5/
56.0
315/
351
1/6,
2/11
28.0,
44.9
203,
304
7.5,
10,
15
19.5,
25.2,
36.0
3 1.1 7 1 2 1.0 4.1
460/60/3 414-506
1/13,
1/15
23.0/
27.5
158/
197
1/6,
2/11
14.1,
19.2
98,
147
7.5,
10,
15
9.8,
12.6,
18.0
3 1.1 3.5 1 2 1.0 1.8
575/60/3 517-633
1/13,
1/15
19.0/
23.0
136/
146
1/6,
2/11
12.2,
16.6
84,
122
7.5,
10,
15
7.8,
10.1,
15.0
3 1.1 2.8 1 2 1.0 1.4
Notes:
1. All customer wiring and devices must be installed in accordance with local and national electrical codes.
2. 100% Power Exhaust is with or without Statitrac™.
IInnssttaallllaattiioonn EElleeccttrriiccaall
29. RT-SVX34P-EN 29
Table 8. 40-50 ton electrical service sizing data—60Hz
Model
Elec.
Specs
Allowa-
ble
Voltage
Range
Comp. Std Eff VAV
Only
Comp. Std Eff CV
& High Eff
eStage
Fan Motors
Supply Condenser Exhaust
No/
Ton
RLA
(Ea.)
LRA
(Ea.)
No/
Ton
RLA
(Ea.)
LRA
(Ea.)
HP FLA No HP
FLA
(Ea.)
50% 100%
HP
FLA
(Ea.)No.
TC/TE/
YC*480
208/60/3 187-229
1/13,
1/20
50.5/
83.9
315/
485
1/8,
2/13
31.1,
50.5
203,
315
10,
15
29.5,
42.4
4 1.1 7 1 2 1.5 5.4
230/60/3 207-253
1/13,
1/20
50.5/
83.9
315/
485
1/8,
2/13
31.1,
50.5
203,
315
10,
15
25.2,
36.0
4 1.1 7 1 2 1.5 5.4
460/60/3 414-506
1/13,
1/20
23.0/
34.0
158/
215
1/8,
2/13
14.1,
23.0
98,
158
10,
15
12.6,
18.0
4 1.1 3.5 1 2 1.5 2.7
575/60/3 517-633
1/13,
1/20
19.0/
27.3
136/
175
1/8,
2/13
11.5,
19.0
84,
136
10,
15
10.1,
15.0
4 1.1 2.8 1 2 1.5 2.2
TC/TE/
YC*600
208/60/3 187-229
2/13,
1/15
50.5/
56.0
315/
351
1/10,
2/15
40.9,
58.5
267,
351
10,
15,
20
29.5,
42.4,
56.1
4 1.1 7 1 2 1.5 5.4
230/60/3 207-253
2/13,
1/15
50.5/
56.0
315/
351
1/10,
2/15
40.9,
58.5
267,
351
10,
15,
20
25.2,
36.0,
49.4
4 1.1 7 1 2 1.5 5.4
460/60/3 414-506
2/13,
1/15
23.0/
27.5
158/
197
1/10,
2/15
18.6,
27.5
142,
197
10,
15,
20
12.6,
18.0,
24.7
4 1.1 3.5 1 2 1.5 2.7
575/60/3 517-633
2/13,
1/15
19.0/
23.0
136/
146
1/10,
2/15
15.4,
23.0
103,
135
10,
15,
20
10.1,
15.0,
19.5
4 1.1 2.8 1 2 1.5 2.2
Notes:
1. All customer wiring and devices must be installed in accordance with local and national electrical codes.
2. 100% Power Exhaust is with or without Statitrac™.
Table 9. Electrical service sizing data — electric heat module (electric heat only) — 60 Hz
Models: TE(D,H,F,R) 330—600 Electric Heat FLA
Nominal
Unit Size
(Tons)
Nominal
Unit
Voltage
KW Heater (FLA)
36 54 72 90 108
27.5-35
208 74.9 112.4 NA NA NA
230 86.6 129.9 NA NA NA
460 43.3 65 86.6 108.3 NA
575 NA 52 69.3 86.6 NA
40-50
208 NA 112.4 NA NA NA
230 NA 129.9 NA NA NA
460 NA 65 86.6 108.3 129.9
575 NA 52 69.3 86.6 103.9
Note: All FLA in this table are based on heater operating at
208, 240, 480, and 600 volts.
Table 10. Electrical service sizing data — crankcase
heaters (heating mode only) — 60Hz
Nominal Unit
Size (Tons)
FLA Add Unit Voltage
200 230 460 575
27½ - 35 1 1 1 1
40, 50 2 2 1 1
IInnssttaallllaattiioonn EElleeccttrriiccaall
30. 30 RT-SVX34P-EN
Table 11. Electrical service sizing data — 275–350 units – 50Hz
Model
Elec.
Specs
Comp. Std Eff
Comp. High Eff,
eStage
Fan Motors
Supply Condenser Exhaust
No/
Ton
RLA
(Ea.)
LRA
(Ea.)
No/
Ton
RLA
(Ea.)
LRA
(Ea.)
HP
(kW)
FLA No
HP
(kW)
FLA
(Ea.)
50% 100% HP
(kW)
FLA
(Ea.)No.
TC/TE/
YC*275
380/415/
50/3
1/10,
1/11
21.0/
23.0
147/
158
1/6, 2/
9
14.1,
16.8
98, 142
7.5
(5.6),
10
(6.8)
12.1/
11.5,
15.2/
14.6
3
0.75
(0.56)
4.4 1 2
0.75
(0.56)
1.7
TC/TE/
YC*305
380-415/
50/3
0.1818 23 158
1/6, 2/
10
14.1,
18.6
98, 142
7.5
(5.6),
10
(6.8)
12.1/
11.5,
15.2/
14.6
3
0.75
(0.56)
4.4 1 2
0.75
(0.56)
1.7
TC/TE/
YC*350
380-415/
50/3
1/11,
1/12
23.0/
27.5
158/
197
1/6, 2/
11
14.1,
19.2
98, 147
7.5
(5.6),
10
(6.8),
15
(10.5)
12.1/
11.5,
15.2/
14.6,
22.0/
23.0
3
0.75
(0.56)
4.4 1 2
0.75
(0.56)
1.7
Notes:
1. All customer wiring and devices must be installed in accordance with local and national electrical codes.
2. Allowable voltage range for the 380V unit is 342-418V, allowable voltage range for the 415V unit is 373-456.
3. 100% Power Exhaust is with or without Statitrac™.
4. All condenser fan motors are single phase.
Table 12. Electrical service sizing data — 400–500 – 50Hz
Model
Elec.
Specs
Comp. Std Eff VAV
Only
Comp. Std Eff CV &
High Eff eStage
Fan Motors
Supply Condenser Exhaust
No/
Ton
RLA
(Ea.)
LRA
(Ea.)
No/
Ton
RLA
(Ea.)
LRA
(Ea.)
HP
(kW)
FLA No
HP
(kW)
FLA
(Ea.)
50% 100% HP
(kW)
FLA
(Ea.)No.
TC/TE/
YC*400
380-415/
50/3
1/11,
1/17
23.0/
34.0
158/
215
1/8, 2/
13
14.1,
23.0
98, 158
10
(6.8),
15
(10.5)
15.2/
14.6,
22.0/
23.0
4
0.75
(0.56)
4.4 1 2
1.0
(0.75)
2.5
TC/TE/
YC*500
380-415/
50/3
2/11,
1/12
23.0/
27.5
158/
197
1/10,
2/15
18.6,
27.5
142,
155
10
(6.8),
15
(10.5),
20
(12.8)
15.2/
14.6,
22.0/
23.0,
28.0/
28.0
4
0.75
(0.56)
4.4 1 2
1.0
(0.75)
2.5
Notes:
1. All customer wiring and devices must be installed in accordance with local and national electrical codes.
2. Allowable voltage range for the 380V unit is 342-418V, allowable voltage range for the 415V unit is 373-456.
3. 100% Power Exhaust is with or without Statitrac™.
4. All condenser fan motors are single phase.
IInnssttaallllaattiioonn EElleeccttrriiccaall
31. RT-SVX34P-EN 31
Table 13. Electrical service sizing data – electric heat
module (electric heat units only)—50Hz
Models: TE(D,H,F,R) 275 through 500 Electric Heat
FLA
Nominal
Unit Size
(Tons)
Nominal
Unit
Voltage
KW Heater (380/415V)
23/
27
34/
40
45/
54
56/
67
68/
81
23-29
380 34.5 51.1 68.9 85.5 –
415 37.6 55.6 – – –
33, 42
380 – 51.1 68.9 85.5
103-
.4
415 – 55.6 75.1 93.2
112-
.7
Note: All FLA in this table are based on heater operating at 380
or 415 volts as shown above.
Table 14. Electrical service sizing data — crankcase
heaters (heating mode only) — 50Hz
Nominal Unit
Size (Tons)
FLA Add
Unit Voltage
380 415
23 - 29 1 1
33 - 42 1 1
Electrical Wire Sizing and
Protection Device Equations
To correctly size the main power wiring based on MCA
(Minimum Circuit Ampacity), use the appropriate
equation listed below. Read the definitions that follow
and then use Calculation #1 for determining MCA
(Minimum Circuit Ampacity), MOP (Maximum Over
current Protection), and RDE (Recommended Dual
Element fuse size) for TC (Cooling Only) units and YC
(Cooling with Gas Heat) units. Use Calculation #2 for TE
(Cooling with Electric Heat) units.
Load Definitions:
• LOAD 1 = CURRENT OF THE LARGEST MOTOR
(Compressor or Fan Motor)
• LOAD 2 = SUM OF THE CURRENTS OF ALL
REMAINING MOTORS
• LOAD 3 = FLA (Full Load Amps) OF THE ELECTRIC
HEATER
• LOAD 4 = ANY OTHER LOAD RATED AT 1 AMP OR
MORE
• CRANKCASE HEATERS FOR HEATING MODE
ONLY:
– 208/230 VOLT
• 27.5 - 35 Ton Units, Add 1 Amp
• 40 - 50 Ton Units, Add 2 Amps
– 460/575 VOLT
• 27.5 - 35 Tons Units, Add 1 Amp
• 40 - 50 Ton Units, Add 1 Amp
Calculation #1 - TC*, YC* - 27.5 to 50 Ton
Units
• MCA = (1.25 x Load 1) + Load 2 + Load 4
• MOP = (2.25 x Load 1) + Load 2 + Load 4 (See Note
1)
NNoottee:: Select an over current protection device
equal to the MOP value. If the calculated
MOP value does not equal a standard size
protection device listed in NEC 240-6, select
the next lower over current protection device.
If the calculated MOP value is less than the
MCA value, select the lowest over current
protection device which is equal to or larger
than the MCA, providing the selected over
current device does not exceed 800 amps.
• RDE = (1.5 x Load 1) + Load 2 + Load 4 (See Note 2)
NNoottee:: Select a Dual Element Fuse equal to the RDE
value. If the calculated RDE value does not
equal a standard dual element fuse size listed
in NEC 240-6, select the next higher fuse size.
If the calculated RDE value is greater than the
MOP value, select a Dual Element fuse equal
to the calculated MOP (Maximum Over
current Protection) value.
Calculation #2 - TE* - 27.5 to 50 Ton
Units
NNoottee:: The following applies to single source power
units (all voltages).
To calculate the correct MCA (Minimum Circuit
Ampacity), MOP (Maximum Over current Protection),
and RDE (Recommended Dual Element fuse size), two
(2) sets of calculations must be performed:
• Calculate the MCA, MOP and/or RDE values using
the above equation as if the unit is operating in the
cooling mode.
• Calculate the MCA, MOP and/or RDE values as if the
unit is operating in the heating mode, as follows:
NNoottee:: When determining loads, the compressors and
condenser fan motors do not operate during the
heating cycle.
Units with Less than 50 KW Heaters
MCA = 1.25 x (Load 1 + Load 2 + Load 4) + (1.25 x Load
3)
Units with 50 KW or Larger Heaters
• MCA = 1.25 x (Load 1 + Load 2 + Load 4) + Load 3
NNoottee:: The MCA value stamped on the nameplate is
the largest of the two calculated values.
IInnssttaallllaattiioonn EElleeccttrriiccaall
32. 32 RT-SVX34P-EN
• MOP = (2.25 x Load 1) + Load 2 + Load 3 + Load 4
NNoottee:: The MOP value stamped on the nameplate is
the largest of the two calculated values.
• RDE = (1.5 x Load 1) + Load 2 + Load 3 + Load 4
NNoottee:: Select an over current protection device equal to
the MOP value. If the calculated MOP value does
not equal a standard size protection device listed
in NEC 240-6, select the next lower over current
protection device. If the calculated MOP value is
less than the MCA value, select the lowest over
current protection device which is equal to or
larger than the MCA, providing the selected over
current device does not exceed 800 amps.
NNoottee:: Select a Dual Element Fuse equal to the RDE
value. If the calculated RDE value does not equal
a standard dual element fuse size listed in NEC
240-6, select the next higher fuse size. If the
calculated RDE value is greater than the MOP
value, select a Dual Element fuse equal to the
calculated MOP (Maximum Over current
Protection) value.
Disconnect Switch Sizing (DSS)
• Calculation A — YC*, TC*, and TE* units:
– DSS = 1.15 X (LOAD1 + LOAD2 + LOAD4)
NNoottee:: For TE* units, use calculations A and B.
• Calculation B — TE* units:
– DSS = 1.15 X (LOAD3 + Supply Fan FLA +
Exhaust Fan FLA).
NNoottee:: Use the larger value of calculations A or B to size
the electrical disconnect switch.
Low Voltage Wiring
An overall layout of the various control options
available for a Constant Volume application is
illustrated in , p. 33. Figure 22, p. 35 illustrates the
various control options for a Variable Air Volume
application. The required number of conductors for
each control device are listed in the illustration.
A typical field connection diagram for the sensors and
other options are shown in the following section
“Remote Panels and Sensors”. These diagrams are
representative of standard applications and are
provided for general reference only. Always refer to the
wiring diagram that shipped with the unit for specific
electrical schematic and connection information.
NNoottee:: All field wiring must conform to NEC guidelines
as well as state and local codes.
Control Power Transformer
WWAARRNNIINNGG
HHaazzaarrddoouuss VVoollttaaggee!!
FFaaiilluurree ttoo ddiissccoonnnneecctt ppoowweerr bbeeffoorree sseerrvviicciinngg ccoouulldd
rreessuulltt iinn ddeeaatthh oorr sseerriioouuss iinnjjuurryy..
DDiissccoonnnneecctt aallll eelleeccttrriicc ppoowweerr,, iinncclluuddiinngg rreemmoottee
ddiissccoonnnneeccttss bbeeffoorree sseerrvviicciinngg.. FFoollllooww pprrooppeerr
lloocckkoouutt//ttaaggoouutt pprroocceedduurreess ttoo eennssuurree tthhee ppoowweerr
ccaann nnoott bbee iinnaaddvveerrtteennttllyy eenneerrggiizzeedd.. VVeerriiffyy tthhaatt nnoo
ppoowweerr iiss pprreesseenntt wwiitthh aa vvoollttmmeetteerr..
The 24 volt control power transformers are equipped
with internal circuit breakers. They are to be used only
with the accessories called out in this manual. If a
circuit breaker trips, be sure to turn off all power to the
unit before attempting to reset it.
On units equipped with the VFD option, an additional
control power transformer is used. The secondary is
protected with fuses. Should the fuse blow, be sure to
turn off all power to the unit before attempting to
replace it.
Field Installed AC Control Wiring
WWAARRNNIINNGG
HHaazzaarrddoouuss VVoollttaaggee!!
FFaaiilluurree ttoo ddiissccoonnnneecctt ppoowweerr bbeeffoorree sseerrvviicciinngg ccoouulldd
rreessuulltt iinn ddeeaatthh oorr sseerriioouuss iinnjjuurryy..
DDiissccoonnnneecctt aallll eelleeccttrriicc ppoowweerr,, iinncclluuddiinngg rreemmoottee
ddiissccoonnnneeccttss bbeeffoorree sseerrvviicciinngg.. FFoollllooww pprrooppeerr
lloocckkoouutt//ttaaggoouutt pprroocceedduurreess ttoo eennssuurree tthhee ppoowweerr
ccaann nnoott bbee iinnaaddvveerrtteennttllyy eenneerrggiizzeedd.. VVeerriiffyy tthhaatt nnoo
ppoowweerr iiss pprreesseenntt wwiitthh aa vvoollttmmeetteerr..
WWAARRNNIINNGG
PPrrooppeerr FFiieelldd WWiirriinngg aanndd GGrroouunnddiinngg
RReeqquuiirreedd!!
FFaaiilluurree ttoo ffoollllooww ccooddee ccoouulldd rreessuulltt iinn ddeeaatthh oorr
sseerriioouuss iinnjjuurryy..
AAllll ffiieelldd wwiirriinngg MMUUSSTT bbee ppeerrffoorrmmeedd bbyy qquuaalliiffiieedd
ppeerrssoonnnneell.. IImmpprrooppeerrllyy iinnssttaalllleedd aanndd ggrroouunnddeedd
ffiieelldd wwiirriinngg ppoosseess FFIIRREE aanndd EELLEECCTTRROOCCUUTTIIOONN
hhaazzaarrddss.. TToo aavvooiidd tthheessee hhaazzaarrddss,, yyoouu MMUUSSTT ffoollllooww
rreeqquuiirreemmeennttss ffoorr ffiieelldd wwiirriinngg iinnssttaallllaattiioonn aanndd
ggrroouunnddiinngg aass ddeessccrriibbeedd iinn NNEECC aanndd yyoouurr llooccaall//
ssttaattee//nnaattiioonnaall eelleeccttrriiccaall ccooddeess..
NNOOTTIICCEE
UUssee CCooppppeerr CCoonndduuccttoorrss OOnnllyy!!
FFaaiilluurree ttoo uussee ccooppppeerr ccoonndduuccttoorrss ccoouulldd rreessuulltt iinn
eeqquuiippmmeenntt ddaammaaggee aass tthhee eeqquuiippmmeenntt wwaass nnoott
ddeessiiggnneedd oorr qquuaalliiffiieedd ttoo aacccceepptt ootthheerr ttyyppeess ooff
ccoonndduuccttoorrss..
IInnssttaallllaattiioonn EElleeccttrriiccaall
33. RT-SVX34P-EN 33
NNOOTTIICCEE
CCoommppoonneenntt FFaaiilluurree!!
RReessiissttaannccee iinn eexxcceessss ooff 33 oohhmmss ppeerr ccoonndduuccttoorr
ccoouulldd rreessuulltt iinn ccoommppoonneenntt ffaaiilluurree dduuee ttoo
iinnssuuffffiicciieenntt AACC vvoollttaaggee ssuuppppllyy..
DDoo nnoott eexxcceeeedd tthhrreeee ((33)) oohhmmss ppeerr ccoonndduuccttoorr ffoorr
tthhee lleennggtthh ooff tthhee rruunn..
Before installing any connecting wiring, refer to Table
15, p. 33 for conductor sizing guidelines and;
• Use copper conductors unless otherwise specified.
• Ensure that the AC control voltage wiring between
the controls and the unit's termination point does
not exceed three (3) ohms/conductor for the length
of the run.
• Refer to dimensional information beginning with
Figure 1, p. 14 for the electrical access locations
provided on the unit.
• Do not run the AC low voltage wiring in the same
conduit with the high voltage power supply wiring.
Be sure to check all loads and conductors for grounds,
shorts, and miswiring. After correcting any
discrepancies, reset the circuit breakers by pressing the
black button located on the left side of the transformer.
Table 15. AC conductors size
Distance from unit to
control
Recommended wire
size
000-460 feet 18 gauge
461-732 feet 16 gauge
733-1000 feet 14 gauge
Field Installed DC Control Wiring
WWAARRNNIINNGG
HHaazzaarrddoouuss VVoollttaaggee!!
FFaaiilluurree ttoo ddiissccoonnnneecctt ppoowweerr bbeeffoorree sseerrvviicciinngg ccoouulldd
rreessuulltt iinn ddeeaatthh oorr sseerriioouuss iinnjjuurryy..
DDiissccoonnnneecctt aallll eelleeccttrriicc ppoowweerr,, iinncclluuddiinngg rreemmoottee
ddiissccoonnnneeccttss bbeeffoorree sseerrvviicciinngg.. FFoollllooww pprrooppeerr
lloocckkoouutt//ttaaggoouutt pprroocceedduurreess ttoo eennssuurree tthhee ppoowweerr
ccaann nnoott bbee iinnaaddvveerrtteennttllyy eenneerrggiizzeedd.. VVeerriiffyy tthhaatt nnoo
ppoowweerr iiss pprreesseenntt wwiitthh aa vvoollttmmeetteerr..
WWAARRNNIINNGG
PPrrooppeerr FFiieelldd WWiirriinngg aanndd GGrroouunnddiinngg
RReeqquuiirreedd!!
FFaaiilluurree ttoo ffoollllooww ccooddee ccoouulldd rreessuulltt iinn ddeeaatthh oorr
sseerriioouuss iinnjjuurryy..
AAllll ffiieelldd wwiirriinngg MMUUSSTT bbee ppeerrffoorrmmeedd bbyy qquuaalliiffiieedd
ppeerrssoonnnneell.. IImmpprrooppeerrllyy iinnssttaalllleedd aanndd ggrroouunnddeedd
ffiieelldd wwiirriinngg ppoosseess FFIIRREE aanndd EELLEECCTTRROOCCUUTTIIOONN
hhaazzaarrddss.. TToo aavvooiidd tthheessee hhaazzaarrddss,, yyoouu MMUUSSTT ffoollllooww
rreeqquuiirreemmeennttss ffoorr ffiieelldd wwiirriinngg iinnssttaallllaattiioonn aanndd
ggrroouunnddiinngg aass ddeessccrriibbeedd iinn NNEECC aanndd yyoouurr llooccaall//
ssttaattee//nnaattiioonnaall eelleeccttrriiccaall ccooddeess..
NNOOTTIICCEE
UUssee CCooppppeerr CCoonndduuccttoorrss OOnnllyy!!
FFaaiilluurree ttoo uussee ccooppppeerr ccoonndduuccttoorrss ccoouulldd rreessuulltt iinn
eeqquuiippmmeenntt ddaammaaggee aass tthhee eeqquuiippmmeenntt wwaass nnoott
ddeessiiggnneedd oorr qquuaalliiffiieedd ttoo aacccceepptt ootthheerr ttyyppeess ooff
ccoonndduuccttoorrss..
Before installing the connecting wiring between the
components utilizing a DC analog output/input signal
and the unit, refer to Table 16, p. 33 for conductor
sizing guidelines and;
• Use standard copper conductor thermostat wire
unless otherwise specified.
• Ensure that the wiring between the controls and the
unit's termination point does not exceed two and a
half (2-1/2) ohms/conductor for the length of the
run.
NNoottee:: Resistance in excess of 21/2 ohms per
conductor can cause deviations in the
accuracy of the controls.
• Refer to dimensional drawings beginning with
Figure 1, p. 14 for the electrical access locations
provided on the unit.
• Do not run the electrical wires transporting DC
signals in or around conduit housing high voltage
wires.
Table 16. DC conductors
Distance from unit to
control
Recommended wire
size
000-150 feet 22 gauge
151-240 feet 20 gauge
241-385 feet 18 gauge
386-610 feet 16 gauge
611-970 feet 14 gauge
Units equipped with the Trane Communication
Interface (TCI) option, which utilizes a serial
communication link;
IInnssttaallllaattiioonn EElleeccttrriiccaall
34. 34 RT-SVX34P-EN
• Must be 18 AWG shielded twisted pair cable Belden
8760 or equivalent).
• Must not exceed 5,000 feet maximum for each link.
• Must not pass between buildings.
Figure 21. Typical field wiring requirements for CV and SZ VAV control options
Space
Humidity
Sensor
Space
Humidistat
RTRM J7 Thermostat Inputs N/A for SZ VAV
LTB3
LTB5
LTB4
LTB6
LTB1
IInnssttaallllaattiioonn EElleeccttrriiccaall
35. RT-SVX34P-EN 35
Figure 22. Typical field wiring requirements for traditional VAV control options
Customer
Changeover for
VAV Htg (MOD
GAS ONLY)
*VAV Mode input: RTRM J6-2 to RTRM J6-4
If the unit does not have a Mode (Off, Auto) input from another source,
the following default applies: Short from J6-2 to J6-4 = AUTO mode,
Open from J6-2 to J6-4 = OFF mode.
Space
Humidity
Sensor
Space
Humidistat
LTB3
LTB5
LTB4
LTB6
LTB1
IInnssttaallllaattiioonn EElleeccttrriiccaall
36. 36 RT-SVX34P-EN
Figure 23. RTRM zone sensor/thermostat
connections
PROGRAMMABLE
ZSM INPUTS
CV/SZ VAV/VAV
CONVENTIONAL
THERMOSTAT (CV ONLY)
MECHANICAL
ZSM INPUTS
CONVENTIONAL
THERMOSTAT
INPUTS
Remote Panels and Sensors
Constant Volume and Single Zone VAV
Control Options
The RTRM must have a zone sensor or conventional
thermostat (CV only) to operate the rooftop unit. If
using a zone sensor, mode capability depends upon
the type of sensor and/or remote panel selected to
interface with the RTRM. The possibilities are: Fan
selection ON or AUTO, System selection HEAT, COOL,
AUTO, and OFF. Refer to Figure 23, p. 36 for
conventional thermostat connections on Constant
Volume units.
The following controls are available from the factory
for field installation on Constant Volume or Single
Zone VAV units.
Zone Panel (BAYSENS106*)
This electronic sensor features three system switch
settings (Heat, Cool, and Off) and two fan settings (On
and Auto). It is a manual changeover control with
single setpoint capability.
Figure 24. Zone panel (BAYSENS106*)
Zone Panel (BAYSENS108*)
This electronic sensor features four system switch
settings (Heat, Cool, Auto, and Off) and two fan settings
(On and Auto). It is a manual or auto changeover
control with dual setpoint capability. It can be used
with a remote zone temperature sensor BAYSENS077*.
Figure 25. Zone panel (BAYSENS108*)
Remote Panel W/O NSB (BAYSENS110*)
This electronic sensor features four system switch
settings (Heat, Cool, Auto, and Off) and two fan settings
(On and Auto) with four system status LED's. It is a
manual or auto changeover control with dual setpoint
capability. It can be used with a remote zone
temperature sensor BAYSENS077*.
Figure 26. Remote panel W/O NSB (BAYSENS110*)
Variable Air Volume (non-SZ VAV)
Control Options
The RTRM must have a mode input in order to operate
the rooftop unit. The normal mode selection used with
a remote panel with or without night setback, or ICS is
AUTO and OFF. , p. 37 lists the operating sequence
should a CV/SZ VAV zone sensor be applied to a
traditional VAV system having selectable modes; i.e.
Fan selection ON or AUTO. System selection HEAT,
COOL, AUTO, and OFF.
IInnssttaallllaattiioonn EElleeccttrriiccaall
37. RT-SVX34P-EN 37
Default Mode Input for Discharge Air Control
For unit stand-alone operation without a remote panel
or an ICS connected, jumper between terminals J6-2
and J6-4 on RTRM.
VHR Relay Output
For stand alone VAV unit operation, the VHR output
should be wired to drive VAV boxes to maximum
position during all heating modes and unoccupied
periods. The VHR contacts are shown in the de-
energized position and will switch (energize) during the
above mentioned operating modes.
Figure 27. VHR relay output
Heat mode/unoccupied mode relay output to VAV
Note:
Table 17. Variable air volume mode operation
System Mode Fan “Auto” Fan “On”
Heat
DWU Active DWU(a) DWU(a)
DWU Off Off(b) VAV Heating
(b)
Cool
VAV Cooling
(c)
VAV Cooling
Auto
DWU Active
DWU or
Cooling(c)(a)(b)
(d)
DWU or
Cooling(c)(a)(b)
(d)
DWU Off VAV Cooling
(c)
VAV Cooling
or Heating(c)
Off Off (b) Off (b)
(a) If Daytime Warmup is Activated, the supply fan will run continuously.
(b) The fan will be Off any time the system selection switch is “Off”.
(c) If Cooling is selected the supply fan will run continuously. If VAV
Heating is activated the supply fan will run continuously.
(d) Auto changeover between Cooling and Daytime Warmup depends
upon the DWU initiate setpoint.
VAV Controls Available from the Factory
for Field Installation
Remote Zone Sensor (BAYSENS016*)
This bullet type temperature sensor can be used for;
outside air (ambient) sensing, return air temperature
sensing, supply air temperature sensing, remote
temperature sensing (uncovered), and for VAV zone
reset. Wiring procedures vary according to the
particular application and equipment involved. Refer to
the unit wiring diagrams, engineering bulletins, and/or
any specific instructions for connections.
Remote Panel W/O NSB (BAYSENS021*)
This electronic sensor features two system switch
settings (Auto and Off), four system status LED's with
single setpoint capability. It can be used with a remote
zone temperature sensor BAYSENS077*.
Figure 28. Remote panel W/O NSB (BAYSENS021*)
CUT RESISTOR R69 LOCATED ON RTAM NEAR SUPPL Y AIR CO O LING
SETPOINT POTENTIOMETER WHEN OPTIONAL REMOTE PANEL IS USED.
CUT WIRE JUMPER ADJACENT T O THE TERMINAL 1 ON ZONE SENSOR
WHEN OPTIONAL REMOTE SENSOR IS USED.
1
2
*
Constant Volume or VAV (Traditional or
Single Zone) Controls Available from the
Factory for Field Installation
Remote Zone Sensor (BAYSENS073*)
This electronic sensor features remote zone sensing
and timed override with override cancellation. It is used
with a Trane Integrated Comfort™ building
management system.
Figure 29. Remote zone sensor (BAYSENS073*)
Remote Zone Sensor (BAYSENS074*)
This electronic sensor features single setpoint
capability and timed override with override
cancellation. It is used with a Trane Integrated
Comfort™ building management system.
IInnssttaallllaattiioonn EElleeccttrriiccaall
38. 38 RT-SVX34P-EN
Figure 30. Remote zone sensor (BAYSENS074*)
Remote Zone Sensor (BAYSENS077*)
This electronic sensor can be used with BAYSENS106*,
108*, 110*, 119*, or 021* Remote Panels. When this
sensor is wired to a BAYSENS119* Remote Panel,
wiring must be 18 AWG Shielded Twisted Pair (Belden
8760 or equivalent). Refer to the specific Remote Panel
for wiring details.
Remote Panel with NSB (BAYSENS119*)
This 7 day programmable sensor features four periods
for Occupied/Unoccupied programming per day. Either
one or all four periods can be programmed. If the
power is interrupted, the program is retained in
permanent memory. If power is off longer than 2 hours,
only the clock and day may have to be reset.
The front panel allows selection of Occupied/
Unoccupied periods with two temperature inputs
(Cooling Supply Air Temperature and Heating Warm-
up temperature) per occupied period. The occupied
supply air cooling setpoint ranges between 40º and 80º
F. The warm-up setpoint ranges between 50º and 90º F
with a 2 degrees deadband. The unoccupied cooling
setpoint ranges between 45º and 98ºF. The unoccupied
heating setpoint ranges between 43º and 96ºF.
NNoottee:: In modulating gas heat units, the supply air
heating setpoint is the active setpoint with a
BAYSENS119* and must be set for the heater to
function properly. The modulating furnace will
not react to the Discharge Heating Setpoint on
the NSB.
The liquid crystal display (LCD) displays zone
temperature, temperature setpoints, week day, time,
and operational mode symbols.
The options menu is used to enable or disable these
applicable functions: Morning warm-up, economizer
minimum position override during unoccupied status,
heat installed, remote zone temperature sensor, 12/24
hour time display, and daytime warm-up. See , p. 39
for the Temp vs Resistance coefficient if an optional
remote sensor is used.
During an occupied period, an auxiliary relay rated for
1.25 amps @ 30 volts AC with one set of single pole
double throw contacts is activated.
Figure 31. Remote sensor with night setback
BAYSENS119
Twisted/Shielded
Run Shield to
terminal 11
RTRM
High Temperature Sensor (BAYFRST003*)
Provides high limit “shutdown” of the unit.
The sensor is used to detect high temperatures due to
fire in the air conditioning or ventilation ducts. The
sensor is designed to mount directly to the sheet metal
duct. Each kit contains two sensors. The return air duct
sensor (X1310004001) is set to open at 135ºF. The
supply air duct sensor (X1310004002) is set to open at
240ºF. The control can be reset after the temperature
has been lowered approximately 25ºF below the cutout
setpoint.
Figure 32. High temperature sensor (BAYFRST003*)
Control Box
Remove factory
supplied jumper
Return duct
high limit control
Supply duct
high limit control
Remote Minimum Position Potentiometer
(BAYSTAT023*)
This device can be used with units with an economizer.
It allows the operator to remotely set the position of the
economizer dampers from 0% to 50% of fresh air
entering the space.
IInnssttaallllaattiioonn EElleeccttrriiccaall
39. RT-SVX34P-EN 39
Figure 33. Remote minimum position potentiometer
(BAYSTAT023)
Space Temperature Averaging
Space temperature averaging is accomplished by
wiring a number of remote sensors in a series/parallel
circuit.
The fewest number of sensors required to accomplish
space temperature averaging is four. Example #1
illustrates two series circuits with two sensors in each
circuit wired in parallel. Any number squared, is the
number of remote sensors required. Example #2
illustrates three sensors squared in a series/parallel
circuit. NSB panel remote sensors must use twisted/
shielded cable.
Figure 34. Space temperature averaging
To RTRM J6-1 and J6-2
or to ZSM terminals 1
and 2 or NSB panel terminals
S1 and S2. Shield to terminal 11.
Example #1
Example #2
Remote Sensor #1 Remote Sensor #2
Remote Sensor #3 Remote Sensor #4
Remote Sensor #1 Remote Sensor #2 Remote Sensor #3
Remote Sensor #4 Remote Sensor #5 Remote Sensor #6
Remote Sensor #7 Remote Sensor #8 Remote Sensor #9
Table 18. Temperature vs. resistance (temperature
vs. resistance coefficient is negative)
Degrees F°
Nominal
Resistance
-20° 170.1 K - Ohms
-15° 143.5 K - Ohms
-10° 121.4 K - Ohms
-5° 103.0 K - Ohms
0° 87.56 K - Ohms
5° 74.65 K - Ohms
10° 63.80 K - Ohms
15° 54.66 K - Ohms
20° 46.94 K - Ohms
25° 40.40 K - Ohms
30° 34.85 K - Ohms
35° 30.18 K - Ohms
40° 26.22 K - Ohms
45° 22.85 K - Ohms
50° 19.96 K - Ohms
55° 17.47 K - Ohms
60° 15.33 K - Ohms
65° 13.49 K - Ohms
70° 11.89 K - Ohms
75° 10.50 K - Ohms
80° 9.297 K - Ohms
85° 8.247 K - Ohms
90° 7.330 K - Ohms
95° 6.528 K - Ohms
100° 5.824 K - Ohms
IInnssttaallllaattiioonn EElleeccttrriiccaall