SlideShare ist ein Scribd-Unternehmen logo
1 von 18
Downloaden Sie, um offline zu lesen
AWCP PERMACULTURE PROJECT
Superadobe Root Cellar
Leandro “Nachie” Braga – 4/28/10
“Earth turns to gold in the hands of the wise” - Rumi
OVERVIEW AND PERSONAL PHILOSOPHY:
​The subject of this report will be the construction of a root cellar on the Alderleaf
campus, utilizing the north-facing earth cavity and drainage system already in place from
earlier plans and taking advantage of this niche as a exciting opportunity to bring Nader
Khalili’s visionary “superadobe” earthbag construction techniques to the property. Due to
the relative simplicity of design required by a root cellar as well as its limited size, this in
fact offers Alderleaf the best possible opportunity to learn the methods of superadobe
dome construction in a manner that presents the fewest possible difficulties in technical
design while enabling us to build confidence and experience towards future endeavors.
​For the purposes of this report it would seem useful to indulge in a short
discussion on the appropriateness of superadobe to permaculture design. Because the
superadobe dome (and in particular those constructed of mixed cement-stabilized earth)
functions essentially as a man-made cave, it lends itself perfectly to the idea of
underground cold storage. However there are perhaps more important, ideological aspects
to consider when choosing to bring superadobe into a permaculture design.
​At its heart, permaculture seeks to emulate natural systems and structure in an
attempt to re-envision humanity’s relationship with “Gaia” - an amazingly complex
sentient organism composed of all life on this planet, with an interconnected awareness
stretching beyond the dimensions of reality that even the most advanced modern quantum
physics are yet capable of shedding light on. This paradigm must always remain at the
forefront of all our design efforts; an intense humility in the face of nature’s mastery
should inform our every action, and in particular should prevent us from ever trying to
overcomplicate things. Though modern society is capable of building everything from
skyscrapers to steel roofing that will not need to be replaced for generations, none of
these things are “permanent” in the sense of coexisting with nature’s effortless dance.
None of them will survive the test of time, and more importantly none of them provide
for us a sense of truly belonging to the land we are interacting with. The more we seek to
seclude our living spaces from the earth which sustains us, the further we stray from what
it is to be truly human.
​Superadobe is a living sacred geometry that we may lay claim to with our bare
hands. The spiraling dome and hexagonal principles of weight distribution recall the most
successful fractal patterns of nature. The completely un-mechanized aspects of its
construction invite all layers of the community, without the artificial divisions of labor
imposed by civilization and specialized work, to come and recreate the world in their
own image. It learns a design lesson from the sea creatures that only follow their own
genetic instincts to make their shells, the most beautiful homes, with the best forms, from
the seawater itself. In the words of superadobe mastermind Nader Khalili, “If a little sea
creature, who does not claim as we do to be created in the image of God, can make a
home which is the best shell structure, best patterns, colors and texture, a home which is
in harmony with the ocean environment and which is all created from sea water and
waterproofed with water, then why shouldn’t we be able to pick up the earth and build a
home for ourselves that can resist the elements and works in harmony with nature?”
SUPERADOBE:
“I was searching for a way to create a building that was totally in harmony with nature,
that could be available to everybody around the world.” – Nader Khalili, interview with
AIA (American Institute of Architects)
Superadobe (also called Super Adobe) is a form of earthbag construction that was
developed by Iranian architect Nader Khalili. The technique uses layered long fabric
tubes or bags filled with adobe (“super” long tubes of adobe = superadobe) to form a
compression structure. The resulting beehive shaped shelters employ arches, domes, and
vaults to create single and double-curved shells that are strong and aesthetically pleasing.
Khalili originally developed the superadobe system in 1984 in response to NASA’s call
for housing designs for future human settlements on the Moon and on Mars. His proposal
was to use moon dust to fill the plastic superadobe tubes and Velcro together the layers
(instead of using barbed wire).
In response to refugees from the Persian Gulf War, in 1995 15 refugee shelters
were built in Iran by Nader Khalili with the United Nations Development Programme
(UNDP) and the United Nations High Commissioner for Refugees (UNHCR). According
to Khalili, that particular cluster of 15 domes could have been repeated into the
thousands, but the government dismantled the camp a few years later. Since then, the
superadobe method has been put to use in Canada, Mexico, Brazil, Belize, Costa Rica,
Chile, Iran, India, Siberia, Mali, and Thailand, as well as in the U.S.
Many different materials can be used to construct superadobe. Ideally one would
have barbed wire, earth or sand, cement or lime, and superadobe fabric tubing (available
from Cal-Earth), but the bags can be polypropylene, burlap, or some other material. What
is important is that they are UV resistant, or else quickly covered in plaster. In this regard
you can even use grocery bags that are twisted shut and formed into balls. Virtually any
fill material will work including un-stabilized sand, earth, gravel, crushed volcanic rock,
rice hulls, etc. If the fill material is weak the bags have to be extremely strong and UV
resistant, or else plastered right away. The material can be either wet or dry, but the
structure is more stable when the tube's contents have been moistened. Other materials
needed include water, shovels, tampers, scissors, large plugs or pipes (for windows), and
small buckets or coffee cans for filling the sacks.
The foundation for the structure is formed by digging a circular trench 12” deep
with a diameter of 8’-14’. Two or three layers of the filled polypropylene sand tubes
(superadobe fabric tubing) are set below the ground level in the foundation trench. A rope
is anchored to the ground in the center of the circle and used like a compass to trace the
shape of the base. Another rope is fastened to the ground on the inside base of the wall
and used as a guide to shape the interior radius of the opposite wall of the dome. Ropes
can be used from several points around the inside of the base to ensure accuracy of the
finished dome. Other “compass” systems exist utilizing a free-swiveling metal pipe, but
for the purposes of this plan we will assume ropes or chain.
On top of each layer of tamped, filled tubes, a loop of barbed wire is placed to
help stabilize the location of each consecutive layer. Doors and windows can be cut out of
the interior of the dome before the stabilized earth sets, or built around wooden forms.
PVC pipes can be sandwiched between different layers to create vents and small windows
with very little difficulty. Once the corbelled dome is complete, it can be covered in
several different kinds of exterior treatments, usually plaster. Khalili developed a system
that used 85% earth and 15% cement plaster and which “reptile”, a veneer of grapefruit
sized balls of concrete and earth, then covers. Reptile is easy to install and because the
balls create easy paths for stress, it doesn't crack with time. There are many different
possibilities, some more appropriate than others given climate and available building
materials.
Superadobe has also proven to be competitively strong by modern Western
construction standards. Strength and resiliency tests done at Cal-Earth under the
supervision of the ICBO (International Conference of Building Officials) showed that
under static load testing conditions simulating seismic, wind, and snow loads, the
superadobe system exceeded by 200 percent the 1991 Uniform Building Code
Requirements, actually causing the high-tension machines used for the testing to
themselves fail.
​Due to their impressive structural stability, relative ease of construction and
deeply insulated walls, superadobe presents itself as a perfect method by which to create
a root cellar.
ROOT CELLARS:
​Root cellars are at once one of the simplest and most practical aspects of
traditional and modern “off the grid” living. Constructed from a variety of materials,
either integrated into basements or as outbuildings as in this case, they provide an
invaluable means of storing food year round when more conventional means of
refrigeration may not be available. Particularly as suited to the needs of a farm where
mass quantities of food are likely to be harvested in periodic spurts and need to be
immediately stored – as opposed to in modern households where a small refrigerator will
(at a high cost in energy) preserve a limited amount of food until it’s time to go to the
grocery again – a root cellar makes it possible to enjoy fresh fruits and vegetables well
into the winter months and indeed opens up avenues of sustainability and self-
dependence that would otherwise be unimaginable.
​Cold cellars, as they are also known, are simply subterranean storage rooms -
often quite small - that use no power and rely upon the natural temperature and humidity
of the earth to preserve the harvest they contain. Ideally they have earthen floors to help
keep the humidity high: an aspect we will be incorporating into this design. A 4-inch vent
protrudes from the earth and sod-covered roof, dropping to just above the cellar floor and
allowing cold air in from outside. A “damper” can be constructed of wood or other
materials to block the vent and help regulate airflow. The door is insulated (often with
commercially available fiberglass material) and can even be doubled up into an airlock, in
which case a second vent can be added just under the ceiling to give warm air a place to
escape. In most scenarios the door would be found at the bottom of a short flight of stairs,
the top of which is also covered. These particular variations in design will be left up to
the property managers, and are covered below.
​While superadobe structures are readily adaptable to the needs of modern
plumbing and electrical wiring, for this design we will forego any such accoutrements -
keeping in mind our goal of simplicity and the need to move away from reliance of any
kind on the central power grid. Any number of solutions exist to the challenge of
providing adequate light in the cellar: my suggestion would be to paint the interior walls
white and keep a space inside for candles or a lantern. Given the small amount of
available space, sunlight from the doorway when entered in daytime may be sufficient to
illuminate the shelves if a two-door airlock is not used.
​Again, though superadobe can easily have shelves, stairs, and other complex
elements implemented into its structural design, the specific needs of a root cellar
preclude this. All shelving systems should be spaced at least one inch from the wall so as
to provide continual airflow. And while the rounded shape of the superadobe dome would
seem to provide quite an obstacle to convenient storage space, it is only a simple matter
of constructing rounded shelves from OSB board, with cinderblocks or other spacers in
between, building them up. The lower shelves could be made deeper to accommodate the
sloping wall face, and thus will serve as storage for large items such as bins of root
vegetables. Where possible I will try to highlight these various eccentricities in design in
the following pages on practical construction. I have avoided attempting to determine the
exact proportions and organization of interior storage units, as these will need to be
adapted to the final dimensions of the structure as well as the specific needs of what is to
be stored. An advantage to not making the shelves integral to the structure itself is that
they may be rearranged or completely overhauled as necessity dictates.
PRACTICAL ASPECTS OF CONSTRUCTION:
​In this section we will deal with the step-by-step construction of a superadobe
structure that will fulfill the basic needs of a root cellar for the farm. I would like to stress
that although some effort has been made to provide an accessible overview of the
construction and design process, as well as to highlight the specific areas of interest and
challenges inherent in this particular project, this text cannot stand alone as a guide
without either a detailed design manual such as the one referenced in Appendix III, or the
involvement of an experienced earthbag builder. For an accurate assessment of materials
that will be required as well as a generalized cost analysis for similar projects, see
Appendix II. It is important to note that while this project may be undertaken quite
similarly using traditional “small” sandbags, I would highly recommend investing in
several rolls of the Cal-Earth Institute’s (www.calearth.org) long bags for this and future
projects. In fact I believe it would be folly to proceed without these important tools,
seeing as how they are currently available and quite affordable, and would cut down
significantly on the necessary labor. In addition natural fiber bags, such as burlap or jute
fabric are normally sprayed with toxic chemical preservatives (formaldehyde) and are
prone to mold and insects. Other than the bags, cement, pipes for venting, optional
waterproofing material and the 4-point barbed wire, the only required tool that is not
currently present on the farm is a plumber’s tamp, and even that can be easily
manufactured with cement and a suitable handle – though of course I would recommend
purchasing a higher quality commercial tamper.
​By far the biggest obstacle to this project, as with most construction on this
property, will be the overabundance of water on site. This may make it relatively difficult
to lay a sturdy foundation, and further research may be needed to find other possibilities
(such as an added moisture barrier around the foundation bags) should the methods
outlined below seem insufficient. As always however, one must proceed with a strong
faith in the technical superiority of the superadobe system and its ability to amaze even
the most skeptical observer with its versatile nature and longevity. The amount of
research done on underground superadobe is not extensive, but seems to indicate that the
burmed earth provides a formidable safeguard to water damage, particularly when added
to the traditional exterior coatings. In fact, it is only the weight of the earth itself over the
dome that seems to pose any theoretical difficulties, though even that can be easily
overcome through use of the stabilized earth method, perhaps with cement at a greater
ratio than 10-15%. If desired the structure could be further waterproofed by adding eaves
of metal or wood at a downward slope off the dome once it has cleared the top of its
foundation. These would then be covered with any effective sheeting or shingles to
deflect water away from the dome itself. However given that the structure will be covered
in earth and there is already an effective French drain system built into the foundation, I
do not feel this to be necessary.
​Once again I would like to underscore how fortunate it is for us to be able to
introduce this amazing architectural system to the property via a relatively “bare bones”
structure such as the root cellar. The extreme simplicity called for by this design should
enable the entire core structure to be built in a week or less by a crew of 3-4 people,
allowing of course for unforeseen circumstances.
Getting Started – Soil Tests
​A couple simple field tests need to be undertaken with the soil on site to determine
how suitable it will be for this type of construction. We will presume to use as much of
the earth that has already been exhumed from the site as possible. Much as was
demonstrated in earlier permaculture classes with the “jar test”, samples of this soil
should be put in jars, which are then filled with water and shaken and then left to settle
out for several days. This will determine the ratio of clay (top layer) to sand and silt
(middle layer) and pebbles and coarse sand (bottom of the jar). For sandy soils, cement or
lime will work as the best stabilizing agents. For adobe/clay soils, lime or asphalt
emulsion is preferable.
Mixing the Stabilized Earth
​Next we will need to determine the optimal ratio of earth to stabilizer. This of
course can vary greatly, though traditionally a 10:1 ratio is used. As indicated above,
additional stabilizer may be added if budget and necessity dictates. We begin this test by
mixing the earth and stabilizing agent together and wetting it to a moist, muddy
consistency. This mixture is then packed firmly into three plastic cups and left to dry in
the shade. After several days, the cups are removed and the hardened samples are
submerged in a bucket of water. If the samples have not eroded after three days, then the
mix is suitable for filling the bags and creating the stabilized superadobe structure.
Obviously, the percentage of stabilizer should be reduced or increased to achieve the best
possible mixture.
​When mixing the stabilized earth in large quantities, you will want to remove any
large rocks, but keep the gravel. All organic material must also be removed. The cement
or lime must be consistently mixed with the earth and water. Cement is preferably mixed
with the earth before water is added, while lime must be mixed with water before being
added to the earth. The mixing may be done by hand or machine. The final mix should be
evenly moist, but not wet, to ensure maximum density of earth particles. When you
squeeze the mix in your hand it must form a ball that does not fall apart, yet does not drip
water. If too dry, the earth will fall apart when compacted, and will not harden inside the
bags. If it is too wet it will become fluid when tamped, making it difficult to build with
and weaker when hardened. Several balls of the stabilized earth should be tested in this
manner to ensure that it is suitable for building.
Laying the Foundation
​Traditionally, a foundation ring must be dug, leveled, and laid before the dome
itself can begin to take shape. For this project however, it will be sufficient to make sure
that the dome is sitting on level ground in the pre-dug root cellar pit. This can be done by
first removing all organic material and excess earth from the foundation, tamping it to
level, and then filling it up a foot or more with the available gravel. This gravel will serve
as a floor for the interior of the root cellar, allowing humidity to come up from the earth
but also ensuring that all water runoff from outside the dome flows smoothly into the
drain. Much like with the chicken coop project, it will also provide us with an easy level
surface over which to build the structure.
​We then determine where the center of the dome will be in relation to its
maximum diameter as allowed by the existing foundation, and mark out an even circle
for the exterior diameter of the dome. I would suggest that this be done with spray-paint,
since it will be difficult to mark the gravel in any other manner. The measurement is
made by driving a stake into the center of the pit and extending a rope horizontally off
from it that can be swiveled around the center stake to show an equal distance in all
directions. This will be our center compass. An inner circle is then marked, usually 12”
(depending on bag width) from the outer one. These lines demarcate where the first few
foundational rings of the superadobe dome will be laid. Though from this point a
foundation is usually dug 10” down and leveled, for this project we should be able to lay
the foundational rings at ground level to preserve water drainage.
​Trenches must also be dug for the entry buttress walls, though technically since
the entry is so much higher than the bottom of the root cellar itself, they could be made to
extend from the doorway only at ground level, trusting the mounded earth itself to serve
as enough for a buttress for the foundation. Since we’ll be building up several layers
before even getting to the entry level, this dome will also have a much stronger
foundation than is technically required. Care should be taken to make sure that the initial
foundation rings do not cut off the French drain, though with enough of a gravel bed this
should not be a problem.
Foundational Rings
Foundational Rings
​The foundation is made up of at least two complete rings of sandbag coils with a
layer of barbed wire in between. This is why the foundation is usually dug to 10” below
ground level, though that is not a concern here. These complete rings stabilize the
foundation of the dome, particularly against horizontal forces such as earthquake and
flood. The method described below for filling the foundational bags is to be repeated for
all subsequent layers.
​A length of sandbag tubing is cut from the roll using scissors (a knife may shred
the bag) and one end pinned closed or even just folded under itself and held closed by the
weight of stabilized earth as it is added. There are several methods for filling the
superadobe bags, with one of the most popular involving a chain of people passing the
earth down the bag or simply passing cans of earth from the point at which it is mixed to
the point at which it is put in the bag. The bag can also be turned inside out and
scrunched up against itself in order to bring the opening closer to the point where the
earth is being packed down. At first, the bag is filled vertically like a short column so that
gravity helps fill the start of the bag very full. This is important due to the tendency of
bags to get too thin at the end of a row. The builder then continues to fill the bag with
gravity’s assistance, sloped up against her/his leg or other prop, while walking backwards
along the circle.
​While the bag is being filled and placed by the builder, it is constantly checked
with the center compass to make sure that it is creating a perfect circle. At this stage, the
inside edge of the bag will be about half an inch or one finger width beyond the compass
line (this is because the bag will be flattened out during tamping). Tamping, or
compacting, is accomplished with a plumber’s tamper once the bag is completely full.
This will cause the bag to widen out and flatten. Before tamping, make sure that the bag
is still within the compass curve. Tamping should be done by dropping the tamper on the
bag and loosening one’s grip as it hits, using the weight of the tool itself to do the work
and minimizing arm and back strain. A brick may be used to compact smaller detail
areas, for the sides of bags, or for the whole dome if necessary. To check if your bag is
sufficiently compacted, press your finger to the outer edge. If it dimples, tamp some
more. The outer edge should be a smooth curve and feel firm. When the earth mixture is
not tamped enough the sides and ends of the bags will crumble and are weak. Stabilized
earth in particular will not stick together properly if it is not well tamped, since it is damp
but not wet like concrete.
​After one row is completed, barbed wire must be laid across it to act as the
“rebar”. Barbed wire is tensile reinforcement for the dome and resists the tension created
by the shape of the dome as well as live loads and seismic forces. There must not be any
break in the continuity of the wire: where strands end they must overlap by 2 feet and be
twisted together. The barbed wire must be four-point, two strand, and galvanized. If there
are only 2 points on each barb it will not grip well enough, and the double strand will
take up tension in the superadobe wall to resist diagonal cracks forming. The barbed wire
is placed in the center of the bag, not less than 3 inches from the edge. To attach it you
simply push the barbs down into the bag, and use bricks or other weights to hold it in
place while waiting for the next row. In order to “overbuild” the structure and make it
more likely to withstand the pressure of piled earth, the barbed wire may be doubled up
in a figure-8 pattern between each row, which will add extra tensile reinforcement.
Remember to keep the wire as continuous as possible, particularly in any areas where the
ends of two bags are meeting.
​The second foundation row of the dome is also one completed ring of superadobe
coil, laid over the barbed wire. Thus a continuous tension ring will run under the doorway
sill. Always remember to check the compass circle as you are laying the bags, and think
ahead by taking into account how the bags flatten when tamped. There must be a row of
barbed wire between every row of superadobe. The design must also prevent the barbed
wire from getting wet. Additionally, when it is sandwiched between inert plastic bags the
galvanized steel is less prone to oxidation.
Building the Base Walls
​Once enough vertical foundational rings have been build up to ground level where
the door entry will be, a couple more base rows will be added, together with the
foundation making a low cylinder that is kept circular by the compass. Since the base
rows sit directly on top of the foundation, they can be kept vertical using a carpenter’s
level. It may also be preferable to not build the foundational rings all the way up to the
ground surface, so that a step down into the root cellar may be created. After the last
foundation row a space must be left for the door opening in the base rings. For the
foundations or walls, not all layers need to be level horizontally and may undulate thicker
or thinner depending on the skill of the builder. To keep an overall level for the whole
building, the thickness of each layer may be adjusted row by row.
​As more walls are added, it is important to fill the bags on the wall itself or else
they will be too heavy to lift into place. The fuller the bag is made, the less work overall
since you will need fewer rows to complete the dome. Two separate builders can also fill
one long bag from both open ends at the same time, potentially completing each row in
half the time.
Creating a Doorway and Beginning the Buttress Walls
​Though a small doorway can be made in the dome without the use of buttress
walls, for the root cellar we will assume that we are hoping to use a traditional door that
an adult can walk through without having to hunch. When such a large opening is made
in a dome, buttress walls are needed on either side. These walls are perpendicular to the
dome and will also create a protected entryway with a door vault over the opening to
protect from rain. The buttress walls should be built at the same time as the dome so that
the barbed wires and bags can connect together. Buttress walls are usually two to three
feet long, and tied into the dome with barbed wire at each layer. If not using the figure-8
method, the barbed wire must be looped back at the end of each wall so as to create extra
strength. Obviously, it should also overlap from the bags creating the buttress walls onto
the bags forming the base walls.
​We will want to set in a frame (probably of wood) as a guide for the door opening
as the dome walls go up. The door should not be much more than 2ft wide by 6ft tall. The
frame can be tied into the dome walls using barbed wire loops, and should be leveled
horizontally and vertically. Building the walls on either side of this frame will continue
exactly as with the foundational rings, though of course the coils will now stop on either
side of the frame. As more bags are placed and tamped up against the frame it will be
firmly held in place. However, it should be temporarily braced open if the material is
flimsy. An insulated door of the correct dimensions should be acquired before the frame
is built and put into place, so that it will be sure to accommodate installation upon the
dome’s completion.
​Once a couple base walls are built up around the door frame, you are ready to
start the dome itself, which will gradually curve inwards to close at the top. The level
where the base ends and the dome begins is called the spring line. At this level the dome
needs a second compass to create the correct curve. This is called the “height compass”.
Establishing the Height Compass
​The height compass is positioned in the doorway on the outside of the foundation,
and like the center compass is made from a rope or chain. Its main function is to tell us
how much longer we need to make the center compass in order to correctly measure the
positioning of higher rows. Thus the height compass controls the shape of the Lancet
Arch. For practical reasons, we fix it on the outside of the door frame and draw the rope
out to the opposite inside face of the dome. Unlike the center compass, the height
compass always stays at the same length. Because the height of the finished dome is
approximately equal to its diameter, we are able to draw the height compass at its
established length up from the fixed point outside the doorway and determine the exact
inward slope of the dome walls as they get higher.
​As we begin constructing any row of superadobe above the vertical base rows, we
bring the two chains/ropes (height compass and center compass) together and adjust the
center compass length by matching it with the height compass. Therefore, at every row
the center compass increases in length to match the height compass. Once the center
compass length is set, the height compass is no longer needed for that row.
​A much more detailed step-by-step guide to the different uses of the compass and
how to accurately calculate the various angles necessary for different superadobe
applications can be found in Appendix IV of Nader Khalili’s book Emergency Sandbag
Shelter.
Building the Dome and Buttress Walls
​Once you have gotten the basics of the compass down, building up the dome
becomes a repetitive process of adding progressively smaller superadobe and barbed wire
rings over the last row, gradually “corbelling” inwards to create the dome shape. At this
stage in the process, the compass will do most of the work in helping you keep the tubes
at the appropriate position. Because the root cellar will only have one or two small vents
and no windows, for this process we will dispense with many of the more complex
techniques in superadobe such as putting windows or larger arched openings in the sides
of the dome. This is one of the major reasons why this root cellar provides us with such a
fantastic beginner’s project. We will, however, have to put in buttress walls for the large
door opening.
​As mentioned above, the buttress walls are generally 2-3 feet long, but can
certainly be longer if one wishes to extend them into a type of airlock, which will be
discussed below (personally I do not feel that this is necessary given the extreme
insulation of the superadobe and the extra work required). The walls begin at the level of
the foundation, or in this case at ground level. I might suggest digging a separate
foundation for the buttress walls so that they can be tied into the dome wall at an earlier
stage, but only if this can be done without disrupting the existing drain system.
​The buttress walls should be about one row higher than the door frame itself, and
about 3 feet apart for a doorway 2 feet wide. The door buttress bags connect to the dome
with barbed wire and by overlapping into the dome wall with every other row (think of
interlocking “teeth” like a zipper) During construction the buttress walls can be stepped
back and used as a staircase to climb up and down.
​If the door frame needs to be mechanically attached to the walls, barbed wire can
be nailed to the frame and sandwiched between the bags. The frame must fit snugly into
the dome walls, but if needed extra bags can be laid in vertically and filled from above to
close any gaps. Because the frame needs to be mechanically attached to the dome walls,
barbed wire must be nailed to it and sandwiched between the bags. This will allow for a
conventional door to be attached, later. For a flat lintel over the doorway as proposed
here, extra barbed wires should be tied into the outside of the dome/buttress walls from
several rows lower than the lintel, to support it. These wires must be at least six feet long,
and will support the lintel from below. The last two rows of the buttress walls should tie
directly into the dome wall.
Covering the Door Frame
​As mentioned, several strands of barbed wire must be laid across the door opening
and connected into the dome several rows below the layer at which a superadobe bag is to
cross over the door frame. Superadobe can be made into an un-reinforced lintel over a
rectangular door of no more than 2 feet when filled with stabilized earth (as is the case)
and supported from below by several barbed wire strands or materials such as a plank of
wood, steel pipes or rebar. These materials can be later removed or left in place as part of
the structure.
​The main challenge is to lay the first row over the door lintel, as it needs the most
support (particularly during tamping). Once that first row is laid, the rows above it
actually act as reinforcement by helping to carry the lintel row via the barbed wire
element - thus, it becomes an integral part of the overall dome. In effect, each succeeding
row makes a thicker and thicker beam element. The rows above the door are tied together
with two strands of barbed wire (if only one was being used from the beginning) to
provide extra resistance to tension. As always, the wire should be well sandwiched
between the rows of bags before tamping.
Finishing the Dome
​The upper rows of the dome are the trickiest to put into place, because the
compass will call for ever-increasing inward steps. When walking on the dome during
this stage, always make sure to step on the outside edge of the bags and try to stand a
couple of rows down from the top. It may help to leave the very upper rows to be built on
a separate day, so that the lower ones will have had time to cure and harden by the time
you need to be putting your weight on them. At first, the bag should be placed directly
over the lower row. As the coil is filled and twisted, it will work its way inward towards
the compass line. The bag should begin to be shaped with a brick right away, three or
four feet after it is filled, to stop it from slipping too far while the rest of it is coiled. You
should keep measuring with the compass, and if needed fill the bags with less earth to
make them flatter and wider. It is easy to tamp the bag inwards, but harder to push it
outwards.
​The finished bags should match exactly the compass line. If this is not the case, it
is better to remove an entire row and start over than to leave an unsafe base for the next
rows above. The outer part of the coil should be tamped first, as this is the only part with
supporting rows underneath. Tamping should be done to give the bags a gentle slope
towards the outside, which will help shed water and allow the next row to step in more. A
brick can be used to tamp the bags from below if a smoother look is desired on the inside
of the dome. Barbed wire should be placed on the inside edge of the bag and made sure to
be gripping both above and below. At this stage in the dome, windows are generally
unsafe to add, but small vents may still be put in (see next section).
​When the curve gets really tight towards the final rows, the bag should be filled
and shaped simultaneously, using a brick. This will help to keep the bag from moving
around and keeps it firmly on the curve until the whole row is tamped - one or two
persons can accomplish this. Experienced builders are able to put the last rows together
using a single spiral bag rather than individual circles. Just make sure to keep overlapping
and twisting the barbed wire together when more needs to be added. At the top of the
dome, the coils step in as much as 3 to 5 inches, and the curve is so tight that each coiled
ring is partly self-supporting. A small bag may be placed at the very top to close off any
remaining sunlight.
Considering the Vents
​Pipes are extremely easy to add into superadobe walls: one need only lay a section
that will protrude from either side of the wall over a given row, and then lay the next row
over it as usual. It is preferable to fill the upper tube on either side of the pipe and leave it
flat over the vent. Barbed wire must continue both above and below the pipe. Since these
are vents, they should actually slope inward rather than outward, as would usually be
done so as to keep out water. The rows of superadobe will be level again a few rows after
each pipe.
​Where exactly the vents are to be added will depend on the final design. The
requirements for root cellar vents were covered earlier in this text. I would suggest
making them entirely of 4” PVC pipe, held together with conventional plumber’s
chemical glue. Only the cold air sink is technically necessary, and this can be made by
attaching an angled elbow to the inside of the pipe to run it towards the floor. Another
elbow joint can be attached to the outside to extend the pipe out above the dome so that it
protrudes from the eventual earth mound covering. At the end of this pipe a T-joint could
be fitted with elbow pieces facing downward on either side, which would then be sealed
up with wire mesh and ¼” hardware cloth to prevent any little critters from getting in. A
second ventilation shaft is only really necessary if the door is made airtight.
The Door Entry Vault
​A small vault added over the buttress walls will protect the door opening from
wind and rain. A leaning arch technique can be used to cover over the buttress walls
without having to use a form. To build a leaning arch, first two short bags are set on the
buttress walls and pitched against the dome. Then two longer bags are shaped over the
small ones. Progressively longer bags are added until the two sides meet and form an
arch. Repeating the leaning arch makes the vault longer or shorter as needed. While the
bags for the arch are being filled with earth, they must be continuously shaped and
tamped with a brick, so that they maintain the ach shape for both side to meet in the
center. The barbed wires connect the upper layers of the buttress walls and the leaning
arch bag, and are placed between each leaning row.
​Each element of the entryway is somewhat flexible in relation to the other
elements. For example, depending on the dome size, the door and frame can be set into
the dome wall or set in the buttress wall and vault. The opening in the dome can have a
small flat lintel or be arched. However, the overall relationship of elements must be
consistent with the dome size and material strength.
​Since we’ll be using stabilized earth, a series of short lintels could be quickly
added to make a “mineshaft” style entrance, spanning across the buttress walls. This
would be necessary in the event that one wanted to make an airlock entrance into the root
cellar with an outer and inner door. The leaning arches, however, are more weather
resistant and aesthetically pleasing.
Waterproofing and Finish
​As a general rule, waterproofing layers must follow available local waterproofing
methods that have proven themselves over time. To be effective, the waterproofing must
be easy to repair or patch, adhere well to what is below it, be long lasting, and be flexible
for expansion and contraction with the building.
​
Asphalt seems to be the best all-around waterproofing material for a project such
as this, especially given the extremely wet climate in which we find ourselves. First a
scratch coat of exterior plaster is applied to the dome, filling in the coiled shape of the
dome to give a good “plaster key” and actually taking advantage of its geometry to make
its own structure. Two coats of liquid asphalt are then trowelled or brushed (cold
application) or hot-mopped over this scratch coat, generally focusing on the upper
surfaces and gutter areas. The first coat is usually more fluid and soaks into the plaster,
bonding well with it, while the second coat is thicker. Next, fabric strips are pressed into
the asphalt to make a reinforced layer. The strips will overlap to cover the entire roof
area, and can be made from cutting open the bag material itself. This layer will resist the
downward creep of the asphalt over time, and prevent cracking from settlement. The
fabric layer is then covered with a third, thick coat of asphalt, which is sprinkled with
sand to create texture for the finish plaster. The finish plaster may be done with the
“reptile” technique described earlier, or simply as a smooth coat of stabilized earth. In
climates such as ours water must not be allowed to collect on the surface of the dome to
avoid freeze/thaw damage. Reptile may be more effective at combating this. Porous,
breathable surfaces such as lime-sand plaster are traditionally used to resist frost better
than denser ones, since the denser materials will hold water for longer periods of time.
​A variety of industrial liquid sealants can be used instead of asphalt, depending on
budget and willingness to use more energy-inefficient chemicals. These could be applied
directly over the first plaster layer. It is of course also possible to make waterproofing
from clay and straw, but this would not be ideal for this application. The interior of the
dome can be plastered smooth in much the same manner, or even just left as exposed
bags. The bag material will start to decompose after 300 hours of sunlight, but this of
course won’t be a problem on the inside of the root cellar.
​A final thought should be given to whether or not to try and cover the dome with
earth. It should be able to resist moisture either way, though with an earth covering it may
not need as extensive a waterproofing layer. Old carpet can be laid over the dome to help
the earth stick while fast-growing and beneficial plants such as mint can be planted above
it, or sod can simply be laid down. It is of course a given that at least some part of the
entryway will remain exposed to the elements.
ADDITIONAL CONSIDERATIONS:
​One of the trickiest aspects of successfully using a root cellar is the specific crop
storage requirements of different fruits and vegetables. A thorough investigation of these
obstacles should be made before implementing any particular storage design. One major
factor affecting storage longevity is Ethylene gas, a naturally occurring compound in
plants. It acts to increase respiration and hasten aging and decomposition of food. While
providing adequate ventilation to the root cellar should be sufficient to keep the buildup
of Ethylene to a minimum, there is a concern in the case of attempting to store fruits and
vegetables together. Although temperature and moisture requirements may be similar
across various species, fruits such as apples and pears emit Ethylene gas as they ripen,
which decreases the storage life of vegetables. This may be especially evident in
potatoes.
For those reasons I would suggest that given the limited available space in the
root cellar, its final design focus specifically on the storage of either fruits or vegetables,
though both may be kept if sufficiently separated. As with all infrastructure projects,
some degree of physical experience via a testing period will be necessary to achieve the
correct balance. Although root vegetables as a rule are most easily stored, the massive
quantities of fruit already available via the Food Forest, cherry trees, and wild berries
make it imperative to find room for those, first. If sufficient efforts are made to can the
fruit produced by the farm for long-term storage, then this may not become an issue, as
the Ethylene gas should not affect the sealed preserves. This design may of course be
adapted in the future to the changing nature of the farm’s overall production. Below I
have provided a brief overview of the storage requirements for a typical sampling of
perishable foods:
Apples and pears – These fruits require a cool, moist environment with the temperature at
about 35-40 degrees and about 80-90% humidity. Remember not to store directly next to
vegetables.
Beets, parsnips, rutabagas, turnips – These root crops need a cool, moist environment.
Keep the temperature above freezing to about 40 degrees. The humidity needs to be at
about 90-95%.
about 90-95%.
Cabbage – Cabbages store well at 32-40 degrees with a relative humidity of about 90%.
Carrots – Another great cellar vegetable. High humidity (90-95%) and temperature
between freezing and 40 degrees.
Onions – Need a very cool temperature (35 degrees) and a slightly lower humidity level
(about 65%). Will do well hung from the ceiling, so incorporate hooks into the design if
planning for them (these can be wedged between rows of sandbags at the appropriate
heights).
Potatoes – Another crop that sores well in a cellar, but must be kept away from fruits. 38-
40 degrees is ideal, with a humidity of 80-90%. Storage in an outdoor potato mound
should be considered however, as it will not take up valuable space in the cellar.
Sweet potatoes – Need warmer conditions for long storage, must be kept above 50
degrees in high humidity, 80-90%
​If, in the final analysis, superadobe seems an impractical method for Alderleaf’s
root cellar, I would suggest procuring a pre-poured concrete septic tank, which usually
comes in two pieces and could be purchased and delivered to the site for a cost roughly
comparable to the construction of a dome. The septic tank form would make a very
effective root cellar with few modifications, assuming a form can be found which fits the
hole that has already been dug. The downside, of course, is that this option would be
about 3 billion times less awesome.
APPENDIX I – SUPERADOBE GUIDE FOR ON SITE REFERENCE:
APPENDIX I - CONTINUED
APPENDIX I – CONTINUED
APPENDIX II – UNITED NATIONS COST ANALYSIS:
APPENDIX III – RESOURCES USED:
Root Cellars by Charles Sanders; Issue #121 of Backwoods Home Magazine, pg. 62
Emergency Sandbag Shelter by Nader Khalili, Cal-Earth Press 2008 *****
Cermaic Houses and Earth Architecture by Nader Khalili, Cal-Earth Press 2008
Earthbag Building by Kaki Hunter and Donald Kiffmeyer, New Society Publishers 2004
Additional Resources:
Root Cellaring: Natural Cold Storage of Fruits and Vegetables by Mike and Nancy Bubel

Weitere ähnliche Inhalte

Was ist angesagt?

Was ist angesagt? (20)

Earth architecture
Earth architectureEarth architecture
Earth architecture
 
Adobe
AdobeAdobe
Adobe
 
Mud flooring
Mud flooringMud flooring
Mud flooring
 
Rammed earth
Rammed earthRammed earth
Rammed earth
 
ChouEmily- Cal Energy Corps Poster
ChouEmily- Cal Energy Corps PosterChouEmily- Cal Energy Corps Poster
ChouEmily- Cal Energy Corps Poster
 
strawbale
strawbalestrawbale
strawbale
 
Eart soil as building material
Eart soil as building materialEart soil as building material
Eart soil as building material
 
Mud
MudMud
Mud
 
Mud soil
Mud  soilMud  soil
Mud soil
 
Furzedon-en
Furzedon-enFurzedon-en
Furzedon-en
 
low cost mud construction
low cost mud constructionlow cost mud construction
low cost mud construction
 
Strawbale construction
Strawbale constructionStrawbale construction
Strawbale construction
 
Soil
SoilSoil
Soil
 
Mud in architecture
Mud in architectureMud in architecture
Mud in architecture
 
Straw bale construction (1)
Straw bale construction (1)Straw bale construction (1)
Straw bale construction (1)
 
Low cost construction
Low cost construction Low cost construction
Low cost construction
 
Pathways
PathwaysPathways
Pathways
 
Rubble Walls and Steps
Rubble Walls and StepsRubble Walls and Steps
Rubble Walls and Steps
 
Low cost building materials
Low cost building materials Low cost building materials
Low cost building materials
 
Update of DFID funded shelters: Oct 2012
Update of DFID funded shelters: Oct 2012Update of DFID funded shelters: Oct 2012
Update of DFID funded shelters: Oct 2012
 

Andere mochten auch

Andere mochten auch (13)

Plan de aula 2016 bibian
Plan de aula 2016 bibianPlan de aula 2016 bibian
Plan de aula 2016 bibian
 
Delhi mercantile-company
Delhi mercantile-companyDelhi mercantile-company
Delhi mercantile-company
 
Erin Imming resume updated 2017
Erin Imming resume updated 2017Erin Imming resume updated 2017
Erin Imming resume updated 2017
 
Mapa mental
Mapa mentalMapa mental
Mapa mental
 
F-Secure's Annual Report 2012
F-Secure's Annual Report 2012 F-Secure's Annual Report 2012
F-Secure's Annual Report 2012
 
Mastoplastica additiva
Mastoplastica  additivaMastoplastica  additiva
Mastoplastica additiva
 
Andrews Manpower Company Profile
Andrews Manpower Company ProfileAndrews Manpower Company Profile
Andrews Manpower Company Profile
 
Lógico Matemático
Lógico MatemáticoLógico Matemático
Lógico Matemático
 
Sesión I 30 de abril
Sesión I 30 de abrilSesión I 30 de abril
Sesión I 30 de abril
 
Ciclo de vida de un proyecto
Ciclo de vida de un proyectoCiclo de vida de un proyecto
Ciclo de vida de un proyecto
 
Cronica concluida
Cronica concluidaCronica concluida
Cronica concluida
 
Registro en tutellus
Registro en tutellusRegistro en tutellus
Registro en tutellus
 
060716 M3 Marine Group Capability Statement + Illustrative Projects Record
060716 M3 Marine Group Capability Statement  + Illustrative Projects Record060716 M3 Marine Group Capability Statement  + Illustrative Projects Record
060716 M3 Marine Group Capability Statement + Illustrative Projects Record
 

Ähnlich wie SuperAdobeRootCellar

Ecovillage proposal
Ecovillage proposalEcovillage proposal
Ecovillage proposaltalha7k
 
portfolio compressed
portfolio compressedportfolio compressed
portfolio compressedSanithra Raju
 
Flowbox BIG BOXY OVERCOAT Talking about your house; not your coffin.
Flowbox     BIG BOXY OVERCOAT  Talking about your house; not your coffin. Flowbox     BIG BOXY OVERCOAT  Talking about your house; not your coffin.
Flowbox BIG BOXY OVERCOAT Talking about your house; not your coffin. John Latham
 
Matthew_Martensen_Design_Portfolio_2016
Matthew_Martensen_Design_Portfolio_2016Matthew_Martensen_Design_Portfolio_2016
Matthew_Martensen_Design_Portfolio_2016Matthew Martensen
 
Integrated recovery & low-carbon reconstruction - and update from Pakistan
Integrated recovery & low-carbon reconstruction - and update from Pakistan Integrated recovery & low-carbon reconstruction - and update from Pakistan
Integrated recovery & low-carbon reconstruction - and update from Pakistan Magnus Wolfe Murray
 
العمارة الطينية في العالم العربي هل هي جيدة.pdf
العمارة الطينية في العالم العربي هل هي جيدة.pdfالعمارة الطينية في العالم العربي هل هي جيدة.pdf
العمارة الطينية في العالم العربي هل هي جيدة.pdfamadhor
 
Earth Homes- eamapct PDF.pdf
Earth Homes- eamapct PDF.pdfEarth Homes- eamapct PDF.pdf
Earth Homes- eamapct PDF.pdfeampact
 
MAJOR PROJECT SEMINAR 2.pptx
MAJOR PROJECT SEMINAR 2.pptxMAJOR PROJECT SEMINAR 2.pptx
MAJOR PROJECT SEMINAR 2.pptxGullaPriyanka
 
Sustainable architecture
Sustainable architectureSustainable architecture
Sustainable architectureTanzil Faraz
 
Passive Solar Design (Architecture)
Passive Solar Design (Architecture)Passive Solar Design (Architecture)
Passive Solar Design (Architecture)williamvanzyl94
 
Californa Science Center
Californa Science CenterCaliforna Science Center
Californa Science CenterMindi Schneider
 
The Earthship Project
The Earthship ProjectThe Earthship Project
The Earthship ProjectDawn Suiter
 
Godrej interiointeredge march 2010
Godrej interiointeredge march 2010Godrej interiointeredge march 2010
Godrej interiointeredge march 2010Dania Abdel-aziz
 
Hydrostatic pressure
Hydrostatic pressureHydrostatic pressure
Hydrostatic pressureUnion, Nj
 

Ähnlich wie SuperAdobeRootCellar (20)

Nader khalili
Nader khaliliNader khalili
Nader khalili
 
Ecovillage proposal
Ecovillage proposalEcovillage proposal
Ecovillage proposal
 
super adobe technology
super adobe technologysuper adobe technology
super adobe technology
 
portfolio compressed
portfolio compressedportfolio compressed
portfolio compressed
 
The Rrt of Recycling
The Rrt of RecyclingThe Rrt of Recycling
The Rrt of Recycling
 
Flowbox BIG BOXY OVERCOAT Talking about your house; not your coffin.
Flowbox     BIG BOXY OVERCOAT  Talking about your house; not your coffin. Flowbox     BIG BOXY OVERCOAT  Talking about your house; not your coffin.
Flowbox BIG BOXY OVERCOAT Talking about your house; not your coffin.
 
Matthew_Martensen_Design_Portfolio_2016
Matthew_Martensen_Design_Portfolio_2016Matthew_Martensen_Design_Portfolio_2016
Matthew_Martensen_Design_Portfolio_2016
 
Gattaca Book Report
Gattaca Book ReportGattaca Book Report
Gattaca Book Report
 
Integrated recovery & low-carbon reconstruction - and update from Pakistan
Integrated recovery & low-carbon reconstruction - and update from Pakistan Integrated recovery & low-carbon reconstruction - and update from Pakistan
Integrated recovery & low-carbon reconstruction - and update from Pakistan
 
العمارة الطينية في العالم العربي هل هي جيدة.pdf
العمارة الطينية في العالم العربي هل هي جيدة.pdfالعمارة الطينية في العالم العربي هل هي جيدة.pdf
العمارة الطينية في العالم العربي هل هي جيدة.pdf
 
Zen garden hole
Zen garden holeZen garden hole
Zen garden hole
 
Earth Homes- eamapct PDF.pdf
Earth Homes- eamapct PDF.pdfEarth Homes- eamapct PDF.pdf
Earth Homes- eamapct PDF.pdf
 
5mb
5mb5mb
5mb
 
MAJOR PROJECT SEMINAR 2.pptx
MAJOR PROJECT SEMINAR 2.pptxMAJOR PROJECT SEMINAR 2.pptx
MAJOR PROJECT SEMINAR 2.pptx
 
Sustainable architecture
Sustainable architectureSustainable architecture
Sustainable architecture
 
Passive Solar Design (Architecture)
Passive Solar Design (Architecture)Passive Solar Design (Architecture)
Passive Solar Design (Architecture)
 
Californa Science Center
Californa Science CenterCaliforna Science Center
Californa Science Center
 
The Earthship Project
The Earthship ProjectThe Earthship Project
The Earthship Project
 
Godrej interiointeredge march 2010
Godrej interiointeredge march 2010Godrej interiointeredge march 2010
Godrej interiointeredge march 2010
 
Hydrostatic pressure
Hydrostatic pressureHydrostatic pressure
Hydrostatic pressure
 

SuperAdobeRootCellar

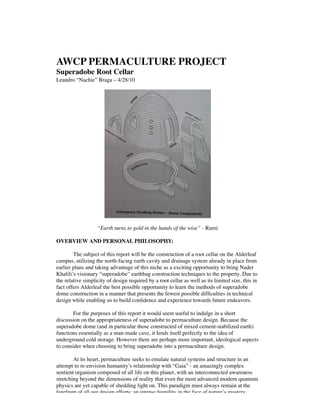
  • 1. AWCP PERMACULTURE PROJECT Superadobe Root Cellar Leandro “Nachie” Braga – 4/28/10 “Earth turns to gold in the hands of the wise” - Rumi OVERVIEW AND PERSONAL PHILOSOPHY: ​The subject of this report will be the construction of a root cellar on the Alderleaf campus, utilizing the north-facing earth cavity and drainage system already in place from earlier plans and taking advantage of this niche as a exciting opportunity to bring Nader Khalili’s visionary “superadobe” earthbag construction techniques to the property. Due to the relative simplicity of design required by a root cellar as well as its limited size, this in fact offers Alderleaf the best possible opportunity to learn the methods of superadobe dome construction in a manner that presents the fewest possible difficulties in technical design while enabling us to build confidence and experience towards future endeavors. ​For the purposes of this report it would seem useful to indulge in a short discussion on the appropriateness of superadobe to permaculture design. Because the superadobe dome (and in particular those constructed of mixed cement-stabilized earth) functions essentially as a man-made cave, it lends itself perfectly to the idea of underground cold storage. However there are perhaps more important, ideological aspects to consider when choosing to bring superadobe into a permaculture design. ​At its heart, permaculture seeks to emulate natural systems and structure in an attempt to re-envision humanity’s relationship with “Gaia” - an amazingly complex sentient organism composed of all life on this planet, with an interconnected awareness stretching beyond the dimensions of reality that even the most advanced modern quantum physics are yet capable of shedding light on. This paradigm must always remain at the forefront of all our design efforts; an intense humility in the face of nature’s mastery
  • 2. forefront of all our design efforts; an intense humility in the face of nature’s mastery should inform our every action, and in particular should prevent us from ever trying to overcomplicate things. Though modern society is capable of building everything from skyscrapers to steel roofing that will not need to be replaced for generations, none of these things are “permanent” in the sense of coexisting with nature’s effortless dance. None of them will survive the test of time, and more importantly none of them provide for us a sense of truly belonging to the land we are interacting with. The more we seek to seclude our living spaces from the earth which sustains us, the further we stray from what it is to be truly human. ​Superadobe is a living sacred geometry that we may lay claim to with our bare hands. The spiraling dome and hexagonal principles of weight distribution recall the most successful fractal patterns of nature. The completely un-mechanized aspects of its construction invite all layers of the community, without the artificial divisions of labor imposed by civilization and specialized work, to come and recreate the world in their own image. It learns a design lesson from the sea creatures that only follow their own genetic instincts to make their shells, the most beautiful homes, with the best forms, from the seawater itself. In the words of superadobe mastermind Nader Khalili, “If a little sea creature, who does not claim as we do to be created in the image of God, can make a home which is the best shell structure, best patterns, colors and texture, a home which is in harmony with the ocean environment and which is all created from sea water and waterproofed with water, then why shouldn’t we be able to pick up the earth and build a home for ourselves that can resist the elements and works in harmony with nature?” SUPERADOBE: “I was searching for a way to create a building that was totally in harmony with nature, that could be available to everybody around the world.” – Nader Khalili, interview with AIA (American Institute of Architects) Superadobe (also called Super Adobe) is a form of earthbag construction that was developed by Iranian architect Nader Khalili. The technique uses layered long fabric tubes or bags filled with adobe (“super” long tubes of adobe = superadobe) to form a compression structure. The resulting beehive shaped shelters employ arches, domes, and vaults to create single and double-curved shells that are strong and aesthetically pleasing. Khalili originally developed the superadobe system in 1984 in response to NASA’s call for housing designs for future human settlements on the Moon and on Mars. His proposal was to use moon dust to fill the plastic superadobe tubes and Velcro together the layers (instead of using barbed wire). In response to refugees from the Persian Gulf War, in 1995 15 refugee shelters were built in Iran by Nader Khalili with the United Nations Development Programme (UNDP) and the United Nations High Commissioner for Refugees (UNHCR). According to Khalili, that particular cluster of 15 domes could have been repeated into the thousands, but the government dismantled the camp a few years later. Since then, the superadobe method has been put to use in Canada, Mexico, Brazil, Belize, Costa Rica, Chile, Iran, India, Siberia, Mali, and Thailand, as well as in the U.S. Many different materials can be used to construct superadobe. Ideally one would have barbed wire, earth or sand, cement or lime, and superadobe fabric tubing (available from Cal-Earth), but the bags can be polypropylene, burlap, or some other material. What is important is that they are UV resistant, or else quickly covered in plaster. In this regard you can even use grocery bags that are twisted shut and formed into balls. Virtually any fill material will work including un-stabilized sand, earth, gravel, crushed volcanic rock, rice hulls, etc. If the fill material is weak the bags have to be extremely strong and UV resistant, or else plastered right away. The material can be either wet or dry, but the structure is more stable when the tube's contents have been moistened. Other materials needed include water, shovels, tampers, scissors, large plugs or pipes (for windows), and
  • 3. needed include water, shovels, tampers, scissors, large plugs or pipes (for windows), and small buckets or coffee cans for filling the sacks. The foundation for the structure is formed by digging a circular trench 12” deep with a diameter of 8’-14’. Two or three layers of the filled polypropylene sand tubes (superadobe fabric tubing) are set below the ground level in the foundation trench. A rope is anchored to the ground in the center of the circle and used like a compass to trace the shape of the base. Another rope is fastened to the ground on the inside base of the wall and used as a guide to shape the interior radius of the opposite wall of the dome. Ropes can be used from several points around the inside of the base to ensure accuracy of the finished dome. Other “compass” systems exist utilizing a free-swiveling metal pipe, but for the purposes of this plan we will assume ropes or chain. On top of each layer of tamped, filled tubes, a loop of barbed wire is placed to help stabilize the location of each consecutive layer. Doors and windows can be cut out of the interior of the dome before the stabilized earth sets, or built around wooden forms. PVC pipes can be sandwiched between different layers to create vents and small windows with very little difficulty. Once the corbelled dome is complete, it can be covered in several different kinds of exterior treatments, usually plaster. Khalili developed a system that used 85% earth and 15% cement plaster and which “reptile”, a veneer of grapefruit sized balls of concrete and earth, then covers. Reptile is easy to install and because the balls create easy paths for stress, it doesn't crack with time. There are many different possibilities, some more appropriate than others given climate and available building materials. Superadobe has also proven to be competitively strong by modern Western construction standards. Strength and resiliency tests done at Cal-Earth under the supervision of the ICBO (International Conference of Building Officials) showed that under static load testing conditions simulating seismic, wind, and snow loads, the superadobe system exceeded by 200 percent the 1991 Uniform Building Code Requirements, actually causing the high-tension machines used for the testing to themselves fail. ​Due to their impressive structural stability, relative ease of construction and deeply insulated walls, superadobe presents itself as a perfect method by which to create a root cellar. ROOT CELLARS: ​Root cellars are at once one of the simplest and most practical aspects of traditional and modern “off the grid” living. Constructed from a variety of materials,
  • 4. traditional and modern “off the grid” living. Constructed from a variety of materials, either integrated into basements or as outbuildings as in this case, they provide an invaluable means of storing food year round when more conventional means of refrigeration may not be available. Particularly as suited to the needs of a farm where mass quantities of food are likely to be harvested in periodic spurts and need to be immediately stored – as opposed to in modern households where a small refrigerator will (at a high cost in energy) preserve a limited amount of food until it’s time to go to the grocery again – a root cellar makes it possible to enjoy fresh fruits and vegetables well into the winter months and indeed opens up avenues of sustainability and self- dependence that would otherwise be unimaginable. ​Cold cellars, as they are also known, are simply subterranean storage rooms - often quite small - that use no power and rely upon the natural temperature and humidity of the earth to preserve the harvest they contain. Ideally they have earthen floors to help keep the humidity high: an aspect we will be incorporating into this design. A 4-inch vent protrudes from the earth and sod-covered roof, dropping to just above the cellar floor and allowing cold air in from outside. A “damper” can be constructed of wood or other materials to block the vent and help regulate airflow. The door is insulated (often with commercially available fiberglass material) and can even be doubled up into an airlock, in which case a second vent can be added just under the ceiling to give warm air a place to escape. In most scenarios the door would be found at the bottom of a short flight of stairs, the top of which is also covered. These particular variations in design will be left up to the property managers, and are covered below. ​While superadobe structures are readily adaptable to the needs of modern plumbing and electrical wiring, for this design we will forego any such accoutrements - keeping in mind our goal of simplicity and the need to move away from reliance of any kind on the central power grid. Any number of solutions exist to the challenge of providing adequate light in the cellar: my suggestion would be to paint the interior walls white and keep a space inside for candles or a lantern. Given the small amount of available space, sunlight from the doorway when entered in daytime may be sufficient to illuminate the shelves if a two-door airlock is not used. ​Again, though superadobe can easily have shelves, stairs, and other complex elements implemented into its structural design, the specific needs of a root cellar preclude this. All shelving systems should be spaced at least one inch from the wall so as to provide continual airflow. And while the rounded shape of the superadobe dome would seem to provide quite an obstacle to convenient storage space, it is only a simple matter of constructing rounded shelves from OSB board, with cinderblocks or other spacers in between, building them up. The lower shelves could be made deeper to accommodate the sloping wall face, and thus will serve as storage for large items such as bins of root vegetables. Where possible I will try to highlight these various eccentricities in design in the following pages on practical construction. I have avoided attempting to determine the exact proportions and organization of interior storage units, as these will need to be adapted to the final dimensions of the structure as well as the specific needs of what is to be stored. An advantage to not making the shelves integral to the structure itself is that they may be rearranged or completely overhauled as necessity dictates. PRACTICAL ASPECTS OF CONSTRUCTION: ​In this section we will deal with the step-by-step construction of a superadobe structure that will fulfill the basic needs of a root cellar for the farm. I would like to stress that although some effort has been made to provide an accessible overview of the construction and design process, as well as to highlight the specific areas of interest and challenges inherent in this particular project, this text cannot stand alone as a guide without either a detailed design manual such as the one referenced in Appendix III, or the involvement of an experienced earthbag builder. For an accurate assessment of materials
  • 5. involvement of an experienced earthbag builder. For an accurate assessment of materials that will be required as well as a generalized cost analysis for similar projects, see Appendix II. It is important to note that while this project may be undertaken quite similarly using traditional “small” sandbags, I would highly recommend investing in several rolls of the Cal-Earth Institute’s (www.calearth.org) long bags for this and future projects. In fact I believe it would be folly to proceed without these important tools, seeing as how they are currently available and quite affordable, and would cut down significantly on the necessary labor. In addition natural fiber bags, such as burlap or jute fabric are normally sprayed with toxic chemical preservatives (formaldehyde) and are prone to mold and insects. Other than the bags, cement, pipes for venting, optional waterproofing material and the 4-point barbed wire, the only required tool that is not currently present on the farm is a plumber’s tamp, and even that can be easily manufactured with cement and a suitable handle – though of course I would recommend purchasing a higher quality commercial tamper. ​By far the biggest obstacle to this project, as with most construction on this property, will be the overabundance of water on site. This may make it relatively difficult to lay a sturdy foundation, and further research may be needed to find other possibilities (such as an added moisture barrier around the foundation bags) should the methods outlined below seem insufficient. As always however, one must proceed with a strong faith in the technical superiority of the superadobe system and its ability to amaze even the most skeptical observer with its versatile nature and longevity. The amount of research done on underground superadobe is not extensive, but seems to indicate that the burmed earth provides a formidable safeguard to water damage, particularly when added to the traditional exterior coatings. In fact, it is only the weight of the earth itself over the dome that seems to pose any theoretical difficulties, though even that can be easily overcome through use of the stabilized earth method, perhaps with cement at a greater ratio than 10-15%. If desired the structure could be further waterproofed by adding eaves of metal or wood at a downward slope off the dome once it has cleared the top of its foundation. These would then be covered with any effective sheeting or shingles to deflect water away from the dome itself. However given that the structure will be covered in earth and there is already an effective French drain system built into the foundation, I do not feel this to be necessary. ​Once again I would like to underscore how fortunate it is for us to be able to introduce this amazing architectural system to the property via a relatively “bare bones” structure such as the root cellar. The extreme simplicity called for by this design should enable the entire core structure to be built in a week or less by a crew of 3-4 people, allowing of course for unforeseen circumstances. Getting Started – Soil Tests ​A couple simple field tests need to be undertaken with the soil on site to determine how suitable it will be for this type of construction. We will presume to use as much of the earth that has already been exhumed from the site as possible. Much as was demonstrated in earlier permaculture classes with the “jar test”, samples of this soil should be put in jars, which are then filled with water and shaken and then left to settle out for several days. This will determine the ratio of clay (top layer) to sand and silt (middle layer) and pebbles and coarse sand (bottom of the jar). For sandy soils, cement or lime will work as the best stabilizing agents. For adobe/clay soils, lime or asphalt emulsion is preferable. Mixing the Stabilized Earth ​Next we will need to determine the optimal ratio of earth to stabilizer. This of
  • 6. ​Next we will need to determine the optimal ratio of earth to stabilizer. This of course can vary greatly, though traditionally a 10:1 ratio is used. As indicated above, additional stabilizer may be added if budget and necessity dictates. We begin this test by mixing the earth and stabilizing agent together and wetting it to a moist, muddy consistency. This mixture is then packed firmly into three plastic cups and left to dry in the shade. After several days, the cups are removed and the hardened samples are submerged in a bucket of water. If the samples have not eroded after three days, then the mix is suitable for filling the bags and creating the stabilized superadobe structure. Obviously, the percentage of stabilizer should be reduced or increased to achieve the best possible mixture. ​When mixing the stabilized earth in large quantities, you will want to remove any large rocks, but keep the gravel. All organic material must also be removed. The cement or lime must be consistently mixed with the earth and water. Cement is preferably mixed with the earth before water is added, while lime must be mixed with water before being added to the earth. The mixing may be done by hand or machine. The final mix should be evenly moist, but not wet, to ensure maximum density of earth particles. When you squeeze the mix in your hand it must form a ball that does not fall apart, yet does not drip water. If too dry, the earth will fall apart when compacted, and will not harden inside the bags. If it is too wet it will become fluid when tamped, making it difficult to build with and weaker when hardened. Several balls of the stabilized earth should be tested in this manner to ensure that it is suitable for building. Laying the Foundation ​Traditionally, a foundation ring must be dug, leveled, and laid before the dome itself can begin to take shape. For this project however, it will be sufficient to make sure that the dome is sitting on level ground in the pre-dug root cellar pit. This can be done by first removing all organic material and excess earth from the foundation, tamping it to level, and then filling it up a foot or more with the available gravel. This gravel will serve as a floor for the interior of the root cellar, allowing humidity to come up from the earth but also ensuring that all water runoff from outside the dome flows smoothly into the drain. Much like with the chicken coop project, it will also provide us with an easy level surface over which to build the structure. ​We then determine where the center of the dome will be in relation to its maximum diameter as allowed by the existing foundation, and mark out an even circle for the exterior diameter of the dome. I would suggest that this be done with spray-paint, since it will be difficult to mark the gravel in any other manner. The measurement is made by driving a stake into the center of the pit and extending a rope horizontally off from it that can be swiveled around the center stake to show an equal distance in all directions. This will be our center compass. An inner circle is then marked, usually 12” (depending on bag width) from the outer one. These lines demarcate where the first few foundational rings of the superadobe dome will be laid. Though from this point a foundation is usually dug 10” down and leveled, for this project we should be able to lay the foundational rings at ground level to preserve water drainage. ​Trenches must also be dug for the entry buttress walls, though technically since the entry is so much higher than the bottom of the root cellar itself, they could be made to extend from the doorway only at ground level, trusting the mounded earth itself to serve as enough for a buttress for the foundation. Since we’ll be building up several layers before even getting to the entry level, this dome will also have a much stronger foundation than is technically required. Care should be taken to make sure that the initial foundation rings do not cut off the French drain, though with enough of a gravel bed this should not be a problem. Foundational Rings
  • 7. Foundational Rings ​The foundation is made up of at least two complete rings of sandbag coils with a layer of barbed wire in between. This is why the foundation is usually dug to 10” below ground level, though that is not a concern here. These complete rings stabilize the foundation of the dome, particularly against horizontal forces such as earthquake and flood. The method described below for filling the foundational bags is to be repeated for all subsequent layers. ​A length of sandbag tubing is cut from the roll using scissors (a knife may shred the bag) and one end pinned closed or even just folded under itself and held closed by the weight of stabilized earth as it is added. There are several methods for filling the superadobe bags, with one of the most popular involving a chain of people passing the earth down the bag or simply passing cans of earth from the point at which it is mixed to the point at which it is put in the bag. The bag can also be turned inside out and scrunched up against itself in order to bring the opening closer to the point where the earth is being packed down. At first, the bag is filled vertically like a short column so that gravity helps fill the start of the bag very full. This is important due to the tendency of bags to get too thin at the end of a row. The builder then continues to fill the bag with gravity’s assistance, sloped up against her/his leg or other prop, while walking backwards along the circle. ​While the bag is being filled and placed by the builder, it is constantly checked with the center compass to make sure that it is creating a perfect circle. At this stage, the inside edge of the bag will be about half an inch or one finger width beyond the compass line (this is because the bag will be flattened out during tamping). Tamping, or compacting, is accomplished with a plumber’s tamper once the bag is completely full. This will cause the bag to widen out and flatten. Before tamping, make sure that the bag is still within the compass curve. Tamping should be done by dropping the tamper on the bag and loosening one’s grip as it hits, using the weight of the tool itself to do the work and minimizing arm and back strain. A brick may be used to compact smaller detail areas, for the sides of bags, or for the whole dome if necessary. To check if your bag is sufficiently compacted, press your finger to the outer edge. If it dimples, tamp some more. The outer edge should be a smooth curve and feel firm. When the earth mixture is not tamped enough the sides and ends of the bags will crumble and are weak. Stabilized earth in particular will not stick together properly if it is not well tamped, since it is damp but not wet like concrete. ​After one row is completed, barbed wire must be laid across it to act as the “rebar”. Barbed wire is tensile reinforcement for the dome and resists the tension created by the shape of the dome as well as live loads and seismic forces. There must not be any break in the continuity of the wire: where strands end they must overlap by 2 feet and be twisted together. The barbed wire must be four-point, two strand, and galvanized. If there are only 2 points on each barb it will not grip well enough, and the double strand will take up tension in the superadobe wall to resist diagonal cracks forming. The barbed wire is placed in the center of the bag, not less than 3 inches from the edge. To attach it you simply push the barbs down into the bag, and use bricks or other weights to hold it in place while waiting for the next row. In order to “overbuild” the structure and make it more likely to withstand the pressure of piled earth, the barbed wire may be doubled up in a figure-8 pattern between each row, which will add extra tensile reinforcement. Remember to keep the wire as continuous as possible, particularly in any areas where the ends of two bags are meeting. ​The second foundation row of the dome is also one completed ring of superadobe coil, laid over the barbed wire. Thus a continuous tension ring will run under the doorway sill. Always remember to check the compass circle as you are laying the bags, and think ahead by taking into account how the bags flatten when tamped. There must be a row of barbed wire between every row of superadobe. The design must also prevent the barbed
  • 8. barbed wire between every row of superadobe. The design must also prevent the barbed wire from getting wet. Additionally, when it is sandwiched between inert plastic bags the galvanized steel is less prone to oxidation. Building the Base Walls ​Once enough vertical foundational rings have been build up to ground level where the door entry will be, a couple more base rows will be added, together with the foundation making a low cylinder that is kept circular by the compass. Since the base rows sit directly on top of the foundation, they can be kept vertical using a carpenter’s level. It may also be preferable to not build the foundational rings all the way up to the ground surface, so that a step down into the root cellar may be created. After the last foundation row a space must be left for the door opening in the base rings. For the foundations or walls, not all layers need to be level horizontally and may undulate thicker or thinner depending on the skill of the builder. To keep an overall level for the whole building, the thickness of each layer may be adjusted row by row. ​As more walls are added, it is important to fill the bags on the wall itself or else they will be too heavy to lift into place. The fuller the bag is made, the less work overall since you will need fewer rows to complete the dome. Two separate builders can also fill one long bag from both open ends at the same time, potentially completing each row in half the time. Creating a Doorway and Beginning the Buttress Walls ​Though a small doorway can be made in the dome without the use of buttress walls, for the root cellar we will assume that we are hoping to use a traditional door that an adult can walk through without having to hunch. When such a large opening is made in a dome, buttress walls are needed on either side. These walls are perpendicular to the dome and will also create a protected entryway with a door vault over the opening to protect from rain. The buttress walls should be built at the same time as the dome so that the barbed wires and bags can connect together. Buttress walls are usually two to three feet long, and tied into the dome with barbed wire at each layer. If not using the figure-8 method, the barbed wire must be looped back at the end of each wall so as to create extra strength. Obviously, it should also overlap from the bags creating the buttress walls onto the bags forming the base walls. ​We will want to set in a frame (probably of wood) as a guide for the door opening as the dome walls go up. The door should not be much more than 2ft wide by 6ft tall. The frame can be tied into the dome walls using barbed wire loops, and should be leveled
  • 9. frame can be tied into the dome walls using barbed wire loops, and should be leveled horizontally and vertically. Building the walls on either side of this frame will continue exactly as with the foundational rings, though of course the coils will now stop on either side of the frame. As more bags are placed and tamped up against the frame it will be firmly held in place. However, it should be temporarily braced open if the material is flimsy. An insulated door of the correct dimensions should be acquired before the frame is built and put into place, so that it will be sure to accommodate installation upon the dome’s completion. ​Once a couple base walls are built up around the door frame, you are ready to start the dome itself, which will gradually curve inwards to close at the top. The level where the base ends and the dome begins is called the spring line. At this level the dome needs a second compass to create the correct curve. This is called the “height compass”. Establishing the Height Compass ​The height compass is positioned in the doorway on the outside of the foundation, and like the center compass is made from a rope or chain. Its main function is to tell us how much longer we need to make the center compass in order to correctly measure the positioning of higher rows. Thus the height compass controls the shape of the Lancet Arch. For practical reasons, we fix it on the outside of the door frame and draw the rope out to the opposite inside face of the dome. Unlike the center compass, the height compass always stays at the same length. Because the height of the finished dome is approximately equal to its diameter, we are able to draw the height compass at its established length up from the fixed point outside the doorway and determine the exact inward slope of the dome walls as they get higher. ​As we begin constructing any row of superadobe above the vertical base rows, we bring the two chains/ropes (height compass and center compass) together and adjust the center compass length by matching it with the height compass. Therefore, at every row the center compass increases in length to match the height compass. Once the center compass length is set, the height compass is no longer needed for that row. ​A much more detailed step-by-step guide to the different uses of the compass and how to accurately calculate the various angles necessary for different superadobe applications can be found in Appendix IV of Nader Khalili’s book Emergency Sandbag Shelter. Building the Dome and Buttress Walls ​Once you have gotten the basics of the compass down, building up the dome becomes a repetitive process of adding progressively smaller superadobe and barbed wire
  • 10. becomes a repetitive process of adding progressively smaller superadobe and barbed wire rings over the last row, gradually “corbelling” inwards to create the dome shape. At this stage in the process, the compass will do most of the work in helping you keep the tubes at the appropriate position. Because the root cellar will only have one or two small vents and no windows, for this process we will dispense with many of the more complex techniques in superadobe such as putting windows or larger arched openings in the sides of the dome. This is one of the major reasons why this root cellar provides us with such a fantastic beginner’s project. We will, however, have to put in buttress walls for the large door opening. ​As mentioned above, the buttress walls are generally 2-3 feet long, but can certainly be longer if one wishes to extend them into a type of airlock, which will be discussed below (personally I do not feel that this is necessary given the extreme insulation of the superadobe and the extra work required). The walls begin at the level of the foundation, or in this case at ground level. I might suggest digging a separate foundation for the buttress walls so that they can be tied into the dome wall at an earlier stage, but only if this can be done without disrupting the existing drain system. ​The buttress walls should be about one row higher than the door frame itself, and about 3 feet apart for a doorway 2 feet wide. The door buttress bags connect to the dome with barbed wire and by overlapping into the dome wall with every other row (think of interlocking “teeth” like a zipper) During construction the buttress walls can be stepped back and used as a staircase to climb up and down. ​If the door frame needs to be mechanically attached to the walls, barbed wire can be nailed to the frame and sandwiched between the bags. The frame must fit snugly into the dome walls, but if needed extra bags can be laid in vertically and filled from above to close any gaps. Because the frame needs to be mechanically attached to the dome walls, barbed wire must be nailed to it and sandwiched between the bags. This will allow for a conventional door to be attached, later. For a flat lintel over the doorway as proposed here, extra barbed wires should be tied into the outside of the dome/buttress walls from several rows lower than the lintel, to support it. These wires must be at least six feet long, and will support the lintel from below. The last two rows of the buttress walls should tie directly into the dome wall. Covering the Door Frame ​As mentioned, several strands of barbed wire must be laid across the door opening and connected into the dome several rows below the layer at which a superadobe bag is to cross over the door frame. Superadobe can be made into an un-reinforced lintel over a rectangular door of no more than 2 feet when filled with stabilized earth (as is the case) and supported from below by several barbed wire strands or materials such as a plank of wood, steel pipes or rebar. These materials can be later removed or left in place as part of the structure. ​The main challenge is to lay the first row over the door lintel, as it needs the most support (particularly during tamping). Once that first row is laid, the rows above it actually act as reinforcement by helping to carry the lintel row via the barbed wire element - thus, it becomes an integral part of the overall dome. In effect, each succeeding row makes a thicker and thicker beam element. The rows above the door are tied together with two strands of barbed wire (if only one was being used from the beginning) to provide extra resistance to tension. As always, the wire should be well sandwiched between the rows of bags before tamping. Finishing the Dome ​The upper rows of the dome are the trickiest to put into place, because the compass will call for ever-increasing inward steps. When walking on the dome during
  • 11. compass will call for ever-increasing inward steps. When walking on the dome during this stage, always make sure to step on the outside edge of the bags and try to stand a couple of rows down from the top. It may help to leave the very upper rows to be built on a separate day, so that the lower ones will have had time to cure and harden by the time you need to be putting your weight on them. At first, the bag should be placed directly over the lower row. As the coil is filled and twisted, it will work its way inward towards the compass line. The bag should begin to be shaped with a brick right away, three or four feet after it is filled, to stop it from slipping too far while the rest of it is coiled. You should keep measuring with the compass, and if needed fill the bags with less earth to make them flatter and wider. It is easy to tamp the bag inwards, but harder to push it outwards. ​The finished bags should match exactly the compass line. If this is not the case, it is better to remove an entire row and start over than to leave an unsafe base for the next rows above. The outer part of the coil should be tamped first, as this is the only part with supporting rows underneath. Tamping should be done to give the bags a gentle slope towards the outside, which will help shed water and allow the next row to step in more. A brick can be used to tamp the bags from below if a smoother look is desired on the inside of the dome. Barbed wire should be placed on the inside edge of the bag and made sure to be gripping both above and below. At this stage in the dome, windows are generally unsafe to add, but small vents may still be put in (see next section). ​When the curve gets really tight towards the final rows, the bag should be filled and shaped simultaneously, using a brick. This will help to keep the bag from moving around and keeps it firmly on the curve until the whole row is tamped - one or two persons can accomplish this. Experienced builders are able to put the last rows together using a single spiral bag rather than individual circles. Just make sure to keep overlapping and twisting the barbed wire together when more needs to be added. At the top of the dome, the coils step in as much as 3 to 5 inches, and the curve is so tight that each coiled ring is partly self-supporting. A small bag may be placed at the very top to close off any remaining sunlight. Considering the Vents ​Pipes are extremely easy to add into superadobe walls: one need only lay a section that will protrude from either side of the wall over a given row, and then lay the next row over it as usual. It is preferable to fill the upper tube on either side of the pipe and leave it flat over the vent. Barbed wire must continue both above and below the pipe. Since these are vents, they should actually slope inward rather than outward, as would usually be done so as to keep out water. The rows of superadobe will be level again a few rows after each pipe. ​Where exactly the vents are to be added will depend on the final design. The requirements for root cellar vents were covered earlier in this text. I would suggest making them entirely of 4” PVC pipe, held together with conventional plumber’s chemical glue. Only the cold air sink is technically necessary, and this can be made by attaching an angled elbow to the inside of the pipe to run it towards the floor. Another elbow joint can be attached to the outside to extend the pipe out above the dome so that it protrudes from the eventual earth mound covering. At the end of this pipe a T-joint could be fitted with elbow pieces facing downward on either side, which would then be sealed up with wire mesh and ¼” hardware cloth to prevent any little critters from getting in. A second ventilation shaft is only really necessary if the door is made airtight. The Door Entry Vault ​A small vault added over the buttress walls will protect the door opening from wind and rain. A leaning arch technique can be used to cover over the buttress walls
  • 12. wind and rain. A leaning arch technique can be used to cover over the buttress walls without having to use a form. To build a leaning arch, first two short bags are set on the buttress walls and pitched against the dome. Then two longer bags are shaped over the small ones. Progressively longer bags are added until the two sides meet and form an arch. Repeating the leaning arch makes the vault longer or shorter as needed. While the bags for the arch are being filled with earth, they must be continuously shaped and tamped with a brick, so that they maintain the ach shape for both side to meet in the center. The barbed wires connect the upper layers of the buttress walls and the leaning arch bag, and are placed between each leaning row. ​Each element of the entryway is somewhat flexible in relation to the other elements. For example, depending on the dome size, the door and frame can be set into the dome wall or set in the buttress wall and vault. The opening in the dome can have a small flat lintel or be arched. However, the overall relationship of elements must be consistent with the dome size and material strength. ​Since we’ll be using stabilized earth, a series of short lintels could be quickly added to make a “mineshaft” style entrance, spanning across the buttress walls. This would be necessary in the event that one wanted to make an airlock entrance into the root cellar with an outer and inner door. The leaning arches, however, are more weather resistant and aesthetically pleasing. Waterproofing and Finish ​As a general rule, waterproofing layers must follow available local waterproofing methods that have proven themselves over time. To be effective, the waterproofing must be easy to repair or patch, adhere well to what is below it, be long lasting, and be flexible for expansion and contraction with the building. ​ Asphalt seems to be the best all-around waterproofing material for a project such as this, especially given the extremely wet climate in which we find ourselves. First a scratch coat of exterior plaster is applied to the dome, filling in the coiled shape of the dome to give a good “plaster key” and actually taking advantage of its geometry to make its own structure. Two coats of liquid asphalt are then trowelled or brushed (cold application) or hot-mopped over this scratch coat, generally focusing on the upper surfaces and gutter areas. The first coat is usually more fluid and soaks into the plaster, bonding well with it, while the second coat is thicker. Next, fabric strips are pressed into the asphalt to make a reinforced layer. The strips will overlap to cover the entire roof area, and can be made from cutting open the bag material itself. This layer will resist the downward creep of the asphalt over time, and prevent cracking from settlement. The fabric layer is then covered with a third, thick coat of asphalt, which is sprinkled with
  • 13. fabric layer is then covered with a third, thick coat of asphalt, which is sprinkled with sand to create texture for the finish plaster. The finish plaster may be done with the “reptile” technique described earlier, or simply as a smooth coat of stabilized earth. In climates such as ours water must not be allowed to collect on the surface of the dome to avoid freeze/thaw damage. Reptile may be more effective at combating this. Porous, breathable surfaces such as lime-sand plaster are traditionally used to resist frost better than denser ones, since the denser materials will hold water for longer periods of time. ​A variety of industrial liquid sealants can be used instead of asphalt, depending on budget and willingness to use more energy-inefficient chemicals. These could be applied directly over the first plaster layer. It is of course also possible to make waterproofing from clay and straw, but this would not be ideal for this application. The interior of the dome can be plastered smooth in much the same manner, or even just left as exposed bags. The bag material will start to decompose after 300 hours of sunlight, but this of course won’t be a problem on the inside of the root cellar. ​A final thought should be given to whether or not to try and cover the dome with earth. It should be able to resist moisture either way, though with an earth covering it may not need as extensive a waterproofing layer. Old carpet can be laid over the dome to help the earth stick while fast-growing and beneficial plants such as mint can be planted above it, or sod can simply be laid down. It is of course a given that at least some part of the entryway will remain exposed to the elements. ADDITIONAL CONSIDERATIONS: ​One of the trickiest aspects of successfully using a root cellar is the specific crop storage requirements of different fruits and vegetables. A thorough investigation of these obstacles should be made before implementing any particular storage design. One major factor affecting storage longevity is Ethylene gas, a naturally occurring compound in plants. It acts to increase respiration and hasten aging and decomposition of food. While providing adequate ventilation to the root cellar should be sufficient to keep the buildup of Ethylene to a minimum, there is a concern in the case of attempting to store fruits and vegetables together. Although temperature and moisture requirements may be similar across various species, fruits such as apples and pears emit Ethylene gas as they ripen, which decreases the storage life of vegetables. This may be especially evident in potatoes. For those reasons I would suggest that given the limited available space in the root cellar, its final design focus specifically on the storage of either fruits or vegetables, though both may be kept if sufficiently separated. As with all infrastructure projects, some degree of physical experience via a testing period will be necessary to achieve the correct balance. Although root vegetables as a rule are most easily stored, the massive quantities of fruit already available via the Food Forest, cherry trees, and wild berries make it imperative to find room for those, first. If sufficient efforts are made to can the fruit produced by the farm for long-term storage, then this may not become an issue, as the Ethylene gas should not affect the sealed preserves. This design may of course be adapted in the future to the changing nature of the farm’s overall production. Below I have provided a brief overview of the storage requirements for a typical sampling of perishable foods: Apples and pears – These fruits require a cool, moist environment with the temperature at about 35-40 degrees and about 80-90% humidity. Remember not to store directly next to vegetables. Beets, parsnips, rutabagas, turnips – These root crops need a cool, moist environment. Keep the temperature above freezing to about 40 degrees. The humidity needs to be at about 90-95%.
  • 14. about 90-95%. Cabbage – Cabbages store well at 32-40 degrees with a relative humidity of about 90%. Carrots – Another great cellar vegetable. High humidity (90-95%) and temperature between freezing and 40 degrees. Onions – Need a very cool temperature (35 degrees) and a slightly lower humidity level (about 65%). Will do well hung from the ceiling, so incorporate hooks into the design if planning for them (these can be wedged between rows of sandbags at the appropriate heights). Potatoes – Another crop that sores well in a cellar, but must be kept away from fruits. 38- 40 degrees is ideal, with a humidity of 80-90%. Storage in an outdoor potato mound should be considered however, as it will not take up valuable space in the cellar. Sweet potatoes – Need warmer conditions for long storage, must be kept above 50 degrees in high humidity, 80-90% ​If, in the final analysis, superadobe seems an impractical method for Alderleaf’s root cellar, I would suggest procuring a pre-poured concrete septic tank, which usually comes in two pieces and could be purchased and delivered to the site for a cost roughly comparable to the construction of a dome. The septic tank form would make a very effective root cellar with few modifications, assuming a form can be found which fits the hole that has already been dug. The downside, of course, is that this option would be about 3 billion times less awesome. APPENDIX I – SUPERADOBE GUIDE FOR ON SITE REFERENCE:
  • 15. APPENDIX I - CONTINUED
  • 16. APPENDIX I – CONTINUED
  • 17. APPENDIX II – UNITED NATIONS COST ANALYSIS: APPENDIX III – RESOURCES USED:
  • 18. APPENDIX III – RESOURCES USED: Root Cellars by Charles Sanders; Issue #121 of Backwoods Home Magazine, pg. 62 Emergency Sandbag Shelter by Nader Khalili, Cal-Earth Press 2008 ***** Cermaic Houses and Earth Architecture by Nader Khalili, Cal-Earth Press 2008 Earthbag Building by Kaki Hunter and Donald Kiffmeyer, New Society Publishers 2004 Additional Resources: Root Cellaring: Natural Cold Storage of Fruits and Vegetables by Mike and Nancy Bubel