
Empfohlen
Weitere ähnliche Inhalte
Was ist angesagt?
Was ist angesagt? (20)
Ähnlich wie Basics to Excel
Ähnlich wie Basics to Excel (20)
Mehr von Kimberly Grieger
Basics to Excel
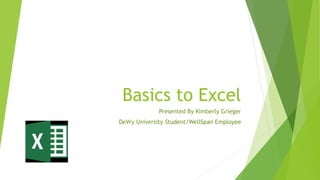
- 1. Basics to Excel Presented By Kimberly Grieger DeVry University Student/WellSpan Employee
- 2. Topics to Cover How to Create or Retrieve an Excel Spreadsheet Format of Spreadsheet Additional Tab Options Make a Basic Weekly View Format Multiple Worksheets in one Workbook How to Save the Spreadsheet How to Print the Spreadsheet
- 3. To open up the Microsoft Excel program, you will need to be logged onto the computer. The lower left corner of your desktop screen will be a Windows icon, this is where you will click on ALL PROGRAMS, then MICROSOFT OFFICE 2013, and then choose EXCEL. If you have a document already saved that you want to open, then you will want to choose the document saved by selecting the document name shown. If you are starting a document, choose the BLANK template.
- 6. Home Tab
- 8. Insert Tab Insert is exactly what is sounds like…you are inserting an item. This can be tables, pictures, charts, maps, graphs, timelines, web hyperlinks, or different text options.
- 9. Page Layout
- 10. Review Tab
- 11. So go ahead now and type up a weekly Planner with Sunday through Sat and SUNDAY MONDAY TUESDAY WEDNESDAY THURSDAY FRIDAY SATURDAY MORNING LUNCH AFTERNOON TRIAL RUN
Hinweis der Redaktion
- Today we will be going over the Basics to Microsoft Excel.
- The topics we will discuss are: How to Open or Retrieve an Excel Spreadsheet Format of Spreadsheet Multiple Worksheets in one Workbook How to Save the Spreadsheet How to Print the Spreadsheet
- To open up the Microsoft Excel program, you will need to be logged onto the computer. You will see in the lower left corner of your desktop screen will be a Windows icon, this is where you will click on ALL PROGRAMS, then MICROSOFT OFFICE 2013, and then choose EXCEL. If you have a document already saved that you want to open and retrieve, then you will want to choose the document saved by selecting the document name shown. If you are starting a document, choose the BLANK template.
- As you look at this screen you notice there are several tabs at the top. First one is FILE. This option will allow you to save or print your document. If you want to save the document, make sure you select SAVE AS. This will allow you to save it to an area you can retrieve it from later. If you want to print the document, you can select PRINT and choose your printer option. Second tab is HOME. This is your default tab. It shows you the most basic options available. You can cut, copy, and paste information. You can change the font style and size, or make it bold, italicized, or underlined. If you have too much information in one CELL, then you can click WRAP TEXT to show all the content. If you want to combine cells to make it have a better appearance, you can choose MERGE & CENTER. Third is the INSERT option. This allows you to insert a graph, picture, link, symbols, maps, or many others. Once the item is inserted you can choose its placement. Page Layout is used to dress up the look of the document. This can involve the color theme, the page margins, page orientation, background pictures, and how to align items used in the spreadsheet. We won’t worry about the Formulas or Data options today. The next tab we will discuss is the REVIEW. This is where you can use spell check, the thesaurus, research tool, or translate the information highlighted. View is an option to see what it would appear like when it is printed out.
- In Excel, there are blocks that are called CELLS. These cells can hold any information you type in them and can be expanded by row or column of your choice. You will notice there are three arrows, red, green and purple. They are all pointing to areas you can reference to know where you are typing and what cell holds the information you just typed. The Green arrow is referencing A1. That is because that is the default location for where a new spreadsheet will begin. If you choose another cell location it will be referenced in that area with the letter first, followed by the number. It’s the coordinates for the spreadsheet. The columns are the letters, and the numbers are the rows.
- You will notice that there are multiple icons and they change with each tab that is selected. In the HOME tab, there are options to copy, cut, and paste an item. These are the first options on the left. Paste is the clipboard, Cut is the scissors, and copy is the 2 sheets of paper. The next section is to make changes to the font. The weird names you may see are the font names. The number is the font size. The font size can also be changed by hitting the A directly to the right of the number for increased size, or the second A for decreased size. B is to make something BOLD, I is to make it ITALICISIZED, U is to UNDERLINE. When you highlight the word selection you want to change, and then hit the options I just mentioned, it will apply that affect to the text. Then you will see an icon that looks like a window with solid lines or dotted lines. This is to make your selection have borders. You can choose they type of border you want by clicking on the arrow next to the window icon. The next options are to customize the text color and the background color of that area, also known as the cell. The paint can icon is for the cell, the letter A next to it is for the text color. Again, these areas need to be highlighted to apply these changes. There are extra options that are more advanced if you click on the lower right arrows in each section.
- On the left side of this section you will see 6 options for positioning the data within a cell area. This is to format the information to look pretty and uniform depending on what document you are working on. The top shows the positions for height in the cell, and the bottom shows the positions for width in the cell. If you like your data to be positioned at a different angle, you can select that cell and click on the icon ab with the arrow. It will give you several options on how the data can be displayed. TAB means there are a set number of spaces to show an INDENT. If you want this appearance, place your curser at the location you want to have indented, and click on the INCREASE INDENT or DECREASE INDENT icon located below the angle icon. This also works well when you are using bullet points for outline purposes. Sometime you will have information that does not all fit within one cell area. To format the cell to show all the information, select the cell or area that you want and click on WRAP TEXT. If you want to format cells so that 2 are combined without effecting the other cells, you can select the ones you want and click on MERGE & CENTER. This will connect the two or more cells you wanted and center the data. There are extra options that are more advanced if you click on the lower right arrows in each section.
- Insert is exactly what is sounds like…you are inserting an item. This can be tables, pictures, charts, maps, graphs, timelines, web hyperlinks, or different text options.
- Under the PAGE LAYOUT tab, you will find several options on how to apply options to the paper printout. There are themes which use preset color options, or you can customize the options by picking each one separately for colors, fonts, and effects. Margins will determine the amount of space NOT used on each side of the paper to give it a uniform compartmentalized look. Orientation will determine if the information is sideways or upright. Size will only change if you are using different size paper in the printer; for example if you are printing a flyer or business cards that are not 8.5x11. Print Area is if you want the information to be printed in a certain location on the paper, example is upper right or lower right corner. This is good if you are making templates or cards. Breaks are used if you want to make sure no other information is used past a certain point on the paper. If any information is entered after that, it will automatically be on a separate page. Background is used for more decorative things, such as logos. Printing titles, are for when you want the title names of columns or rows to be named on each page. This applied if you have a large document.
- There are other tabs but they are not needed for basic use. The next important tab to cover is REVIEW. For any document you make, you always want to make sure it looks professional and has no errors. The spell check option is the ABC icon to the left. If you want to change wording or use a thesaurus, these options are right under this tab as well. If you need something in a different language, you can select the information and hit TRANSLATE and choose the language you need it translated into. For each cell, the data you enter is able to be seen and printed out as you see it. If you want to make a comment on the document in a particular section that doesn’t need to be shown, you can click the area you want the comment and click NEW COMMENT. Be careful though, it is still able to be seen by anyone who can access the document, it just won’t be printed out. If you want to see all the comments that are on a document, click the SHOW ALL COMMENTS. This will bring up a text box to the right with all the comments and where they are located within the document.
- Sheets are pages within the Spreadsheet or Workbook that you are working on. You can have many sheets so that you can see all the different pages you are working on without the need to scroll through and miss any pertinent data. I have above and example of things you can do. This can be found at the bottom left side of your document. If you hit the plus sign, it will open another tab. You can NAME this tab if you move your curser over the tab, right click the mouse, and choose RENAME. You may also use the same method to change the color of the tab to make it more appealing. If you want to change the order these sheets are in, you can drag them to the location you desire.
- Once you are finished and ready to save, go to the top left corner and click on the FILE tab. This will allow you to click on SAVE AS and choose the file you can retrieve it from later. You may choose ONEDRIVE or one of your computer files, the choice is yours. Then click SAVE.
- You are all finished with your document! Thank you so much for allowing me to present this information to you today. Do you have any questions?