3. 88
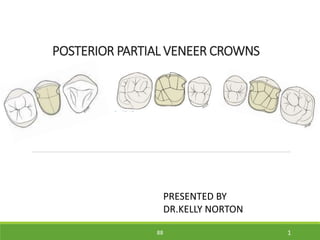
• Partial veneer crowns generally include all tooth surfaces
except the buccal or labial wall in the preparation.
• Whenever feasible, a partial-coverage restoration should be
selected, rather than a complete veneer, because it preserves
more of the tooth’s coronal surface.
• However, the preparation is more demanding and is not
routinely provided by practitioners.
• When carefully prepared, they can produce an exceptionally
long-lasting restoration.
INTRODUCTION
3
4. Definition
A restoration that restores all but one coronal surface of a tooth
or dental implant abutment, usually not covering the facial
surface – GPT 8
A partial veneer crown is a restoration covering two or more
surfaces of a tooth. The surfaces usually covered are the
lingual, proximal, occlusal, or incisal. - Tylman
88 4
5. 88
• Conservation of tooth structure.
• Reduced pulpal and periodontal insult during tooth preparation
• Access to supragingival margins is rather easy and allows the
operator to perform selected finishing procedures
• Access is also better for oral hygiene.
• Verification of seating and cement removal are simple.
• Cement can escape more easily, allowing more complete seating.
• The remaining intact facial or buccal tooth structure permits electric
vitality testing.
ADVANTAGES
5
6. DISADVANTAGES
Less retention and resistance than complete cast crowns
Limited adjustments can be made in the path of placement
Requires dexterity of the operator
Some metal is displayed in the completed restoration, which may be
unacceptable to patients with high cosmetic expectations
88 6
7. 88
INDICATIONS
• if the buccal wall is intact and
well supported by sound tooth
structure
• minimal caries
• Teeth with sufficient bulk
• good oral hygiene
• Short span fixed partial dentures
• As retainers, to reestablish
anterior guidance, and to splint
teeth.
CONTRAINDICATIONS
• Gross destruction of tooth structure
• Active caries or periodontal disease
• Poor oral hygiene
• Long span fixed partial dentures
• Short crowns
• Endodontically treated teeth
• Poorly aligned abutment teeth.
• Teeth that are bulbous proximally
7
12. 88
• Cut the index in half in the midsagittal
plane of the tooth being prepared.
• Seat the distal half in the mouth to
check for adaptation of the index to the
unprepared tooth under it
PUTTY INDEX
12
13. 88
DEPTH ORIENTATION GROOVES
• Place depth grooves for the occlusal
reduction using a tapered carbide or
narrow diamond in the
developmental grooves of the
mesial and distal fossae and on the
crest of the triangular ridge.
• In the central groove, they should be
slightly less (about 0.2 mm) than 1
mm deep to allow for finishing; on
the functional (lingual) cusp they
should be slightly less than 1.5 mm
deep in the location of the occlusal
contacts.
13
14. 88
• Reduction will be
• 1.5 mm on the functional cusp (the PALATAL cusp )
• 1.0 mm on the non-functional cusp ( the FACIAL).
• to minimize the display of metal at the occlusal margin in
the final restoration the cuts will be only 0.5 mm deep at
the line angle.
14
15. 88
FUNCTIONAL CUSP BEVEL:
• five depth-orientation grooves
approximately 1.5 mm deep on
the lingual incline of the
maxillary lingual cusp.
• 45 degrees to the long axis of the
preparation.
• The grooves will fade out at their
apical ends.
• ROUND-END TAPERED DIAMOND
• NO. 171 BUR
15
16. 88
• Bevel should extend from the central
groove on one proximal surface around to
the central groove on the other proximal
surface
• Provides necessary bulk of metal
• Place the mid-sagittal index on the
teeth to check the clearance.
• Plane the occlusal reduction and
functional cusp bevel smooth with a no.
171 L bur.
16
17. 88
LINGUAL AXIAL REDUCTION:
TORPEDO DIAMOND
• Common error is over inclining
the palatal wall
• maxillary molars, and especially
premolars, have natural facial
inclinations
• inadequate reduction in the
occlusal one-third of the lingual
wall is not a concern if the lingual
wall is kept upright.
• The functional cusp bevel has
provided the needed space in that
area.
17
18. 88
PROXIMAL AXIAL REDUCTION:
• SHORT NEEDLE AND TORPEDO DIAMONDS.
• NEXT TO AN EDENTULOUS
AREA
• The diamond must cut into tooth
structure so that the instrument
tip is coincident with the finish
line
• ensures the removal of an amount
of tooth structure at the finish
line that is equal to one-half the
diameter of the diamond, or 0.5
mm
18
19. 88
• NEXT TO AN ADJACENT
TOOTH
• Short needle diamond
• up and down "sawing" motion.
19
20. 88
• Underextension of the proximal reduction in a facial direction : shortened
grooves
• Inadequate extension in a gingival direction on the proximal surface
opposite from the pontic can lead to premature failure of a fixed bridge
because of poor retention and resistance
• underextension is caused by a tendency to pull occlusally with the
diamond as it is pushed facially.
• identified as the most likely area of the three-quarter crown margin to fail
20
21. 88
AXIAL FINISHING:
TORPEDO BUR.
• Go over all the axial surfaces and the entire
length of the chamfer with a torpedo-shaped
12-fluted carbide finishing bur.
• The nearly completed preparation is seen in
this occlusal view before the grooves and
occlusal offset are added.
• minimal extension at the mesiofacial corner
of the tooth.
21
22. 88
PROXIMAL GROOVES: NO. 171 BUR.
• Alignment and position are important aspects
of groove placement.
22
24. 88
• The groove is extended to its full length, as far gingivally
as possible, ending about 0.5 mm above the chamfer
finish line.
• It should form a definite step, rather than fading out
• The groove need not be deeper than 1 mm at its cervical
end but may be deeper near its occlusal end.
• Since one of the groove's functions is to provide
resistance to lingual tipping it is important that it have a
definite lingual wall.
• Allowing it to tip axially results in excessive taper
between opposing proximal grooves, which is a common
error.
POINTS TO REMEMBER
24
25. 88
PROXIMAL FLARES:
FLAME DIAMOND AND FLAME BUR
• The facial flare is cut from the groove
outward to prevent overextension
• The flare should be extended far enough
to be reached by explorer and
toothbrush, but not so far as to cause a
noticeable display of metal.
• The flare is a flat geometric plane which
is cut equally at the expense of the facial
wall of the groove and the outer surface
of the tooth.
25
26. 88
• Use crisp, short strokes of the
handpiece and bur in one direction
only.
• Moving the bur back and forth is
likely to round over the finish line.
• Removing the last lip of
unsupported tooth structure with a
chisel is often a better option
26
27. 88
OCCLUSAL OFFSET: NO. 171 AND NO. 957 BURS.
• The offset is a 1.0-mm-wide
ledge or flat "terrace" on the
lingual incline of the facial
cusp.
• It connects the grooves and
stays a uniform distance
away from the occluso-facial
finish line, assuming the
shape of an inverted V.
• Plays a major role in casting
rigidity by tying together the
proximal grooves to form a
reinforcing staple
27
28. 88
FACIAL BEVEL: FLAME
DIAMOND AND NO. 170 BUR
• Place a narrow occlusal finish
bevel along the occluso-facial
line angle, taking care to keep it
perpendicular to the path of
insertion.
• The bevel should be no more
than 0.5 mm wide
• Removes any unsupported
enamel and thereby protect the
buccal cusp tip from chipping
during function.
28
30. 88
• This maxillary first premolar
bridge abutment was a little
shorter than ideal
• Double grooves were used on
each proximal surface.
• The fact that the proximal
surfaces were free of caries or
previous restorations
precluded the use of boxes.
• The tooth had a short
clinical crown, multiple
grooves were used to
enhance retention and
resistance
30
31. 88
MANDIBULAR POSTERIOR
THREE-QUARTER CROWNS
• It differs from the maxillary three-
quarter crown because the functional
cusps are the facial rather than the
lingual ones.
• The biggest differences is the location
of the occlusal finish line on the facial
surface, gingival to the occlusal
contacts.
• The occlusal shoulder serves the same
purpose as the occlusal offset of the
maxillary preparation tying the
grooves together and strengthening the
bucco-occlusal margin.
31
32. 88
• The reverse three-quarter crown, with complete coverage of the
facial surface, is used only occasionally and is usually reserved for
one or two situations:
(1)it is ideal for restoration of mandibular molars that are severely
inclined lingually
(2) it can also be used on molars that have suffered destruction of the
facial surface, but not of the lingual
• Bridge retainer or single-tooth restoration on second premolars and
1st molars for patients who do not object to displaying some metal.
INDICATIONS
32
33. 88
1. The mandibular first premolar is a poor candidate for use of the three-
quarter crown:
• This tooth is often too short or too small in girth to provide adequate
retention and resistance to a fixed bridge retainer.
• Its position in the arch makes the use of a standard three-quarter
crown esthetically unacceptable for most patients
2. The three-quarter crown should not be used on mesially tipped molars
because it is impossible to compensate for the over-tapered mesial
and distal walls
CONTRAINDICATIONS
33
34. 88
MANDIBULAR THREE QUARTER CROWN –
STEPS OF TOOTH PREPARATION
Round-end tapered diamond and no.
171 bur.
PLANAR OCCLUSAL REDUCTION:
• 1.5 mm deep on the facial cusps
• 1.0 mm deep on the lingual cusps.
34
36. 88
OCCLUSAL SHOULDER:
NO. 171 AND NO. 957 BURS.
• Place the occlusal shoulder with a no. 171
bur following the termination line drawn
previously.
• Plane the occlusal shoulder with a no. 957
bur.
• Be sure that the entire shoulder is the full
1.0 mm width of the instrument.
• When this preparation is used on a
mandibular premolar, the extensions are kept
minimal for esthetics, and there may not be
space for a shoulder.
• An accentuated chamfer should be used
rather than a shoulder.
36
37. 88
LINGUAL AXIAL REDUCTION:
TORPEDO DIAMOND
• Sweep the torpedo diamond from mesial to
distal
• Diamond is aligned with the intended path
of insertion of the preparation.
• Initially produce reduction of only the
occlusal portion of the lingual wall
• the end of the torpedo diamond will
produce a chamfer as the lingual
gingival finish line
37
38. 88
PROXIMAL AXIAL REDUCTION: SHORT
NEEDLE AND TORPEDO DIAMONDS
• An up and down sawing motion is used
• Limited access is better compensated for by tilting the diamond facially
or lingually.
• The torpedo diamond is now used to finish the axial reduction on the
proximal surfaces
38
39. 88
AXIAL FINISHING:
TORPEDO BUR.
• Go over all of the axial surfaces
with the torpedo bur, paying
particular attention to redefining
and smoothing the chamfer finish
line itself.
39
40. 88
PROXIMAL GROOVES:
NO. 171 BUR.
• draw the outline of the grooves on the occlusal surface with a pencil
• Begin the mesial groove with a no. 170 bur, cutting it to a length 0.5
mm short of the chamfer finish line.
40
41. 88
PROXIMAL FLARE:
FLAME DIAMOND AND FLAME
BUR.
• The flare should form an essentially flat plane
• wider at the occlusal than at the gingival, with a definite finish line
41
42. 88
FACIAL BEVEL:
FLAME DIAMOND AND NO. 170 BUR.
• flame diamond used for the initial
instrumentation of the bevel
• final preparation of this 45-degree bevel
should be accomplished with a no. 170 bur,
or with the flame carbide bur
• round over the angle between the
facial occlusal bevel and the
proximal flare
42
43. 88
• proximal view of the finished
preparation
• continuity of finish line from
occlusal bevel to flare to chamfer
• adequacy of the occlusal reduction
• Occlusal view of the
complete preparation.
43
45. 88
Three-quarter crown preparation was
made on this mandibular second
molar to accommodate a bridge
retainer. A stone cast of this typical
preparation is shown on the right.
• A three-quarter crown design was
selected for a single tooth restoration
on this mandibular first molar after
placement of a rather large amalgam
core.
• The small box form added to
incorporate a defective facial groove
45
46. 88
A reverse three quarter
crown preparation done on
mandibular second molar
with facial caries and
unblemished lingual surface
The grooves at the
linguoproximal line angles are
joined by an occlusal offset on
the buccal slope of the lingual
cusps.
46
47. 88
SEVEN EIGHTHS CROWNS
The mesial aspect of this preparation
resembles that of a three-quarter
crown;
the distal aspect resembles that of a
complete crown
47
48. 88
INDICATIONS
• It is suitable for use on teeth having an intact
mesiofacial cusp but restoration, caries,
decalcification, or fracture of the distofacial cusp
• The classic indication -- maxillary first molar, in
which a large distal or distofacial restoration
precludes the use of three-quarter crown
• For a bridge retainer on an abutment whose short
crown length might make the retention or
resistance of a three-quarter crown insufficient.
• As a retainer for bridges whose span exceeds one
pontic, when the greater retention of a full-
coverage retainer is not needed but esthetics is a
consideration
48
49. 88
• Simple and practical modification of the standard three-quarter crown
• Tooth preparation is easier - the mesial extension of the vertical
distofacial finish line provides better access for groove placement and
margin finishing by the dentist
• Easier for the patient to maintain hygiene
• Esthetics- contours of the mesiofacial cusp will obscure the view of metal
covering the distofacial cusp
• Covers the distofacial surface of the tooth, it has significantly better
retention and resistance than does the three-quarter crown
ADVANTAGES
49
50. 88
PLANAR OCCLUSAL REDUCTION:
ROUND-END TAPERED DIAMOND AND
NO. 171 BUR
• 1.5 mm on the triangular ridges and in the
major developmental grooves of the lingual
cusps
• grooves on the facial cusps are 1.0 mm deep
• made shallower as they approach the
occlusofacial line angle of the mesiofacial
cusp.
50
51. 88
FUNCTIONAL CUSP BEVEL:
ROUND-END TAPERED DIAMOND AND
NO. 171 BUR
• Depth-orientation grooves are also made on the lingual
inclines of the lingual cusps with the round-end tapered
diamond. The diamond is oriented so that it parallels the
inclination of the opposing cusps.
51
52. 88
FACIALAND LINGUALAXIAL REDUCTION:
TORPEDO DIAMOND.
• When the tooth being prepared is a bridge
abutment, extend the axial reduction onto
the mesial surface to terminate in the
vicinity of the mesiofacial line angle.
• keep the diamond upright and parallel with
the path of insertion
• The tendency to lean it mesially to place
the entire length of the diamond in contact
with the mesial wall can produce an
undercut mesial wall
• A frequent error is to overtaper the buccal
wall segment, with resulting loss of
retention.
52
53. 88
• The Disto-facial axial reduction
should end about 1.0 mm mesial
to the facial groove.
• Extend it as far as possible into
the inter-proximal area without
nicking the adjacent tooth
• An intact distal contact area,
with facial and lingual axial
reduction ending just short of
contact with the adjacent tooth.
53
54. 88
COMPLETE AXIAL REDUCTION:
SHORT-NEEDLE AND TORPEDO
DIAMONDS
• lay the diamond horizontally, parallel with the distal surface of the
tooth being prepared.
• Then draw the instrument across the marginal ridge
54
55. 88
AXIAL FINISHING: TORPEDO BUR
• Smoothen the axial surface the chamfer finish line with the
carbide finishing bur, which matches the size and
configuration of the torpedo diamond
55
56. 88
GROOVES:
NO. 171 BUR
• Align a tapered fissure bur with the long axis of the preparation.
• The groove should be made to the full diameter of a no. 171 bur,
parallel with the path of insertion of the preparation and extending to
within 0.5 mm of the gingival finish line.
• Place the buccal groove parallel to the mesial groove and perpendicular
to the buccoaxial wall.
56
57. 88
FLARES:
FLAME DIAMOND AND CARBIDE
BUR.
• mesial flare is formed with a
flame diamond.
• It will be narrow at its gingival
end, becoming progressively
wider occlusally
57
58. 88
• the facial surface does not exhibit a
marked convexity
• this flare will be only slightly wider
at the occlusal end than at the
gingival end
• A flame-shaped bur whose size and
shape match the flame diamond
should be used to finish the flares
• A paper- or plastic-backed abrasive
disk can be used to form and finish
the flares when there is adequate
access
58
59. 88
OCCLUSAL OFFSET:
NO. 171 BUR
• Its floor is perpendicular to the path of
insertion and forms a level "terrace" on
the lingual slope of the mesiofacial cusp.
• Provides space for a bulk of metal which
will reinforce the margin.
• Connects the lingual walls of the grooves.
• In this way the metal in the
corresponding area of the casting will
connect the bulk of metal in the grooves
to provide the "truss effect"
OCCLUSAL OFFSET:
NO. 171 BUR.
59
60. 88
OCCLUSAL FINISHING BEVEL:
FLAME DIAMOND AND
NO. 170 BUR.
• The instrument of choice is the no. 170 bur or the long-flame carbide bur
• The bevel is made at a right angle to the path of insertion and 0.5 mm
width on the ridge of the mesiobuccal cusp
• The bevel is rounded over the proximal occlusal line angle to blend in with
the proximal flares.
60
63. 88
• A seven-eighths crown
was selected for this
second molar because
the linguoversion of the
first molar makes the
second molar more
visible than usual
• A groove was placed on
the distolingual aspect
of the tooth for added
resistance and for relief
for the distolingual
groove in the wax
pattern.
63
64. 88
• maxillary first molar bridge
abutment shows the inclusion of
mesial and distal boxes to
accommodate caries and a
previous restoration
• Facial view
• Occlusal view
64
65. 88
• It is a three-quarter crown which has been
rotated 90 degrees so that a proximal
surface, rather than the facial, is left
unveneered.
• It can be employed if the tooth has been
damaged only slightly.
• Two criteria must be met :
1. The distal surface must be caries-free.
2. There should be minimal interproximal
caries throughout the rest of the mouth.
PROXIMAL HALF CROWNS
65
66. 88
PLANAR OCCLUSAL REDUCTION:
ROUND-END TAPERED DIAMOND
AND NO. 171 BUR.
DISTAL MESIAL
The grooves and the reduction that will
follow may not be as deep in the mesial
portion of the occlusal surface, since this
segment of the tooth has dropped below
the occlusal plane.
66
67. 88
• The normal occlusal reduction will be required if the
tooth opposing the edentulous space has supraerupted
into the space.
• Correction of the occlusal plane to prevent occlusal
disharmony will require placement of a restoration with
occlusal coverage on that opposing tooth.
67
68. 88
FUNCTIONAL CUSP BEVEL:
ROUND-END TAPERED DIAMOND AND NO.
171 BUR
• Begin the functional cusp bevel by
placing depth-orientation grooves
with the round-end tapered diamond.
• Grooves, as well as the bevel which
will follow, often will be shorter and
shallower on the mesial cusp than on
the distal
68
69. 88
MESIAL AXIAL REDUCTION:
TORPEDO DIAMOND
• Begin the axial reduction by making the path of insertion of the mesial
surface parallel with the long axis of the premolar abutment.
• Do not attempt to produce a mesial gingival finish line at this point, or an
undercut will be produced
69
70. 88
FACIAL AND LINGUAL AXIAL
REDUCTION:
TORPEDO DIAMOND.
• End the extension 1.0 mm or more
mesial to the distofacial embrasure
• Overextension distally will leave the
vertical finish line in a position
where it will be difficult to capture
in the impression
• hard to finish
• impossible for the patient to keep
clean.
70
71. 88
• mesially tipped molars also
frequently exhibit some lingual
inclination
• take care to keep the diamond as
upright as possible to avoid
excessive facial wall inclination
and resultant loss of retention
• Round off the mesiofacial line
angle from facial to mesial
direction
• make sure that the chamfer does not
have a "scallop" or a rise occlusally
at the angle
71
72. 88
AXIAL FINISHING:
TORPEDO BUR.
• Smooth the planes and angles of
the occlusal surface with a no.
171 bur
• Go over all three axial surfaces
with a torpedo-shaped carbide
finishing bur
72
73. 88
• Now finish the functional cusp bevel with the same carbide bur.
• This finishing step is delayed to this time because of the large
quantities of tooth structure removed during the uprighting of the
mesial surface.
• Going over the functional cusp bevel now enables the operator to
better blend it with the other occlusal and axial features of the
preparation.
73
75. 88
• A countersink is added to the distal fossa with the no. 171 bur.
• This feature not only supplements retention and resistance
• Also provides greater bulk to the casting in the critical area near
the distal occlusal margin.
75
76. 88
FACIAL AND LINGUAL GROOVES:
NO. 171 BUR.
• The groove should parallel the
mesial surface of the tooth and the
long axis of the other abutment
tooth
• must be upright facio-lingually
and should not lean to the lingual
• Repeat the process on the lingual
surface, paralleling that groove
with the one on the facial surface
76
77. 88
DISTAL OCCLUSAL OFFSET: NO.
171 BUR
• Create a V-shaped offset 0.5 to 1.0
mm from the distal occlusal finish
line
• It should connect the lingual groove
to the countersink to the facial
groove
• it will produce a rigid staple with
the grooves to reinforce the distal
marginal area of the casting
77
78. 88
FLARES AND OCCLUSAL BEVEL:
FLAME DIAMOND AND FLAME BUR
The flare will be a flat plane,
wider at the occlusal end than
at the gingival
Repeat the process on the lingual
surface, creating a flare distal to
the lingual groove, tying it in with
the gingival chamfer
78
81. 88
• A proximal half-crown was used
on this tipped mandibular second
molar as a retainer for a fixed
bridge.
• An occlusolingual view of the
bridge shows the conservative
extensions of the occlusal and
distolingual margins.
81
82. 88
A SURVEY OF CROWN AND FIXED PARTIAL DENTURE FAILURES:
LENGTH OF SERVICE AND REASONS FOR REPLACEMENT
• Caries was the most common cause of failure, affecting 22.0% of the units
failed and leading to the necessity for replacement of 24.3% of the units
observed.
• Mechanical problems accounted for 69.5% of the failed units as opposed to
28.5% for oral disease.
• Resin veneer metal crowns provided the longest service of all crown types
observed 13.9 years
• This was closely followed by the partial veneer retainer (14.3 years),
• while the ceramic-metal retainer had the shortest life span (6.3 years)
1. Walton J, Gardner F, Agar J. The Journal of Prosthetic Dentistry. 1986;56(4):416-421.
82
83. 88
MARGINAL ADAPTATION OF PARTIAL CROWNS CAST IN PURE TITANIUM AND IN A GOLD
ALLOY – AN IN VIVO STUDY
• The aim of the present study was to assess in vivo the marginal integrity of
partial crowns cast in pure titanium and in a gold alloy.
• For this purpose, two groups of 25 molars were prepared for partial crowns and
then restored with partial crowns cast in gold alloy and in pure titanium.
• At a subsequent session, replicas were produced using a special impression-
taking technique.
• The scanning electron microscope (SEM) technique was used to perform
quantitative margin analysis (Tiffmess 1·8 program).
• The results show that better marginal integrity can be achieved with gold
alloy than with titanium partial crowns.
• However, in practical terms the difference in marginal quality is only slight, so
that the use of pure titanium for single-tooth restorations is justified.
3. Stoll R, Fischer C, Springer M, Stachniss V. Journal of Oral Rehabilitation. 2002;29(1):1-6.
83
84. 88
LONG-TERM CLINICAL PERFORMANCE AND LONGEVITY OF
GOLD ALLOY VS CERAMIC PARTIAL CROWNS
The aim of the present study was to investigate retrospectively the long-
term clinical performance and survival of CGPC and compare the results
to the ones already reported for ceramic partial crowns (CPC).
Both types of restoration were done by one experienced dentist. Another
two experienced dentists who were not involved in performing the
restorations rated both kinds of partial crowns using the modified United
State Public Health Service (USPHS) criteria
No statistically significant difference among survival functions of CGPC
and CPC was found.
The longevity of CPC is not inferior to that of gold alloys.
2. Wagner J, Hiller K, Schmalz G Clinical Oral Investigations. 2003;7(2):80-85.
84
85. 88
CONCLUSION
• Although retention and resistance of partial veneer crowns is
less but the conservative design makes them a restoration of
choice wherever possible.
• Addition of retentive grooves and other features increases the
retention and resistance, still it remains less than the complete
coverage crown.
• When carefully prepared, they can produce an exceptionally
long-lasting restoration.
85
86. 88
REFERENCES
• Shillingburg. Fundamentals of fixed prosthodontics. 3rd ed.
• Tylman’s theory and practice of fixed prosthodontics. 8th ed.
• Rosenstiel, land, fujimoto. Contemporary fixed prosthodontics.
4th ed.
• Shillingburg. Fundamentals of tooth preparations handbook
86
87. CROSS REFERENCES
1. Walton J, Gardner F, Agar J. A survey of crown and fixed partial
denture failures: Length of service and reasons for replacement. The
Journal of Prosthetic Dentistry. 1986;56(4):416-421.
2. Wagner J, Hiller K, Schmalz G. Long-term clinical performance and
longevity of gold alloy vs ceramic partial crowns. Clinical Oral
Investigations. 2003;7(2):80-85.
3. Stoll R, Fischer C, Springer M, Stachniss V. Marginal adaptation of
partial crowns cast in pure titanium and in a gold alloy - an in vivo study.
Journal of Oral Rehabilitation. 2002;29(1):1-6.
88 87
of the gingivofacial angle
Keep the finish line at the same level apically throughout its entire length
Groove mad e- 1st more innaccesible proximal surface of molar – distal or more esthetically critical in premolar - mesial
The grooves should be placed as far facially as possible without undermining the facial surface
should parallel the long axis of the tooth
Begin the occlusal offset with the end of a no. 171 bur. Go over the occlusal offset with a no. 957 end-cutting bur. This will smooth the offset, insuring that it will be a flat ledge and not a V-shaped groove. Use a no. 170 bur to round over the angle formed between the upright wall of the offset and the lingual slope of the facial cusp.
Place putty index to check the adequacy of preparation
use a pencil to trace the outline of the opposing maxillary facial cusps onto the facial surfaces of the mandibular tooth
Place depth-orientation grooves 1.5 mm deep at the occlusal line angle, roughly following the termination line traced in the previous step. Complete the functional cusp bevel by removing the tooth structure remaining between the depth-orientation grooves with a round-end tapered diamond
A 1.0 mm extension facial to the area of actual contact is acceptable
Access is more difficult on the distal surface, and visibility is limited. Novices have a tendency to incline the instrument mesially to accommodate limited opening and, unconciously, to avoid cutting the mesial surface of the adjacent tooth
The distal groove of a three-quarter crown preparation on a mandibular molar is one of the most difficult features to prepare intraorally due to poor accessibility and poor visibility.
Insufficient reduction of the occluding surfaces resulting in a cast restoration that is less rigid and flexes under occlusal forces. In addition, inadequate occlusal clearance can lead to a perforation in the casting or to an overcontoured restoration with poor occlusion.
b. Excessive reduction of the occlusal or incisal edge leads to an unnecessary display of metal, while decreasing retention and resistance form.
Be sure that there is ample reduction in the vicinity of the disto-lingual groove, or the thickness of the wax pattern will be compromised in this area.
The remaining interproximal tooth structure is removed with the tip of the short-needle diamond.
Be sure to round the corners between the proximal surfaces and the facial and lingual surfaces. There is a tendency to leave them "squared off," and inadequate reduction at the angles of the tooth is one of the leading causes of overcontouring in cast restorations
bottom of the groove should have a definite, flat seat.
If the flare assumes a convex shape with a "rounded" finish line, the disk has worn out. Replace it and retouch the flare.
"two-force member" is a structural component where force is applied to only two points.
Cut a bevel along the distal mar-ginal ridge with the flame diamond, taking care not to extend into the distal occiusal embrasure,
Go over both of the flares with the flame carbide bur to produce the sharpest finish line possible.