

Empfohlen
Weitere ähnliche Inhalte
Was ist angesagt?
Was ist angesagt? (20)
Andere mochten auch
Andere mochten auch (14)
Ähnlich wie Notability user guide v4.3
Ähnlich wie Notability user guide v4.3 (20)
Kürzlich hochgeladen
Kürzlich hochgeladen (20)
Notability user guide v4.3
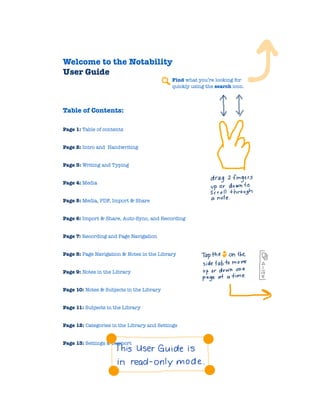
- 1. Welcome to the Notability User Guide Find what you’re looking for quickly using the search icon. Table of Contents: Page 1: Table of contents Page 2: Intro and Handwriting Page 3: Writing and Typing Page 4: Media Page 5: Media, PDF, Import & Share Page 6: Import & Share, Auto-Sync, and Recording Page 7: Recording and Page Navigation Page 8: Page Navigation & Notes in the Library Page 9: Notes in the Library Page 10: Notes & Subjects in the Library Page 11: Subjects in the Library Page 12: Categories in the Library and Settings Page 13: Settings & Support
- 2. The Basics To create a note tap in the library. A new note will open. Tap the bookshelf to return to the Library at anytime. Your note is automatically saved in the Library. Use two fingers to scroll through a note Handwriting Basics: Tap the pencil to handwrite. Tap it a second time to select color and width. Tap the highlighter to highlight information. Tap it a second time to select color and width. Tap the eraser to erase handwriting or drawings.
- 3. Tap the palm rest to give your palm a place to rest while writing. Drag the palm rest to a height that works best for you. Works in normal and zoom mode. Now on to some more awesome handwriting features Zoom view provides a window to write in large and have the writing appear small on the page. Tap and hold to enter zoom mode when handwriting or tap zoom. You can resize the target box of zoom view by dragging the lower right corner or two-finger pinching it to make the box smaller or larger while you are in handwriting mode. Tap anywhere on the screen to place the target box where you want it. Use the scissors to move or cut/copy/paste/restyle handwritten information between pages or notes. Once you have selected the lasso, use your finger or a stylus to circle the information you wish to move, tap and hold inside of the shape you have created to drag the content or, simply tap to pull up the cut/copy menu. To paste, tap and hold where you want the information. Undo & Redo make sure you're never left saying doh! Left handed writing mode can be found in settings in the Library Now onto typing features Typing Basics:
- 4. Tap text to type. Tap outline to select your style outline: bullets or numbers. Tap font to select font, color, size, and style. To create a preset of your favorite font style: set the font size, style and color, then tap and hold a font preset button. Tap the keyboard to lock it. The keyboard needs to be closed for the button to appear. Perfect for reviewing your notes. Tap tab left or tab right to move text left or right on a line. A text box is a great way to fill out forms or move text anywhere on the page. Located under media, text boxes come in very handy. See the media section for more information. COOL Feature You can customize your keyboard toolbar. Tap and hold the toolbar above the keyboard to open the tool window. Drag the tools on and off the keyboard toolbar to create your ideal tool set. These tools include font presets, bold, italic, underline, cursor controls and bullet or numbered outline styles. Now onto Media Media Basics: Tap media to insert web clips, photos, figures, text and writing boxes into your note. Even take photos with the iPad camera. Add captions to any media
- 5. Tap and hold to select any media object. In the selected state you can move or resize media. Deselect media by tapping outside of it. Write or draw in any media when media is deselected. Even zoom write in media by placing the target box into the media object. Text automatically flows around media. How cool is that? To crop media select it and tap edit. This action takes you to the figure editor where you can use the crop tool, prebuilt shapes, or a pen to edit media. 123 Pacific Ocean Text boxes are incredibly useful for filling out forms and annotating PDFs. There are two ways to insert these media objects. In typing mode, tap and hold to insert a text box (+Text Box). Or tap media, then select the text box. You can immediately start to type in the box when it's inserted. If a text box isn't selected, tap once to select a text box and a second time to start typing. You can move the text box using the drag handle any time it is selected. Or you can tap and hold to move it when the box is not selected. Text boxes can also be resized using the resize handles. To choose the paper background or cut/copy/paste/disable text wrap, single tap the text box when it's not selected. All text tools can be used to type inside of a text box.
- 6. Now onto PDF files PDF Basics: In the Library, tap import to import a PDF from a cloud service. You can also use "open in" to import a PDF from email, the web, or another app. Tap the PDF to preview, then select open in. All of Notability’s tools can be used for annotation: writing, typing, highlighting, adding media. Tap share to share notes as PDFs to the cloud or in an email for viewing on any device at anytime. Continuing with import & share Import & Share: Import RTF, PDF, and .Note files from cloud services in the Library. You can import a single document or several at a time. “open in” is another way to import these file types from email, the web, or another app. Tap the file to preview it, then tap open in. This feature supports creating new notes or adding PDFs or other documents to already existing notes.
- 7. Share notes in a style that fits your needs. Note file - Notability's custom file type.• RTF - Rich Text Format - Apple and PC computers support this file type.• RTF with Images and/or Recording - Apple computers support this file type.• PDF - Standard PDF that includes all text and images and can be viewed on any device.• PDF with Recording - Includes the recording with the PDF.• To share from within a note, tap share, and choose the destination folder and file type: email, print, or cloud service. The share menu will store your last destination and file type. To share from the Library, tap share, select the note or notes you wish to share by tapping them, tap share, and choose the destination and file type: email, print, or cloud service. Hint: Tap the subject to select all of its notes. Auto-Sync: The best way to protect your notes! We strongly recommend using this feature. Set up auto-sync in settings, which is located in the bottom right hand corner of the Library. You choose the cloud destination and file type. This feature is also a great way to make your notes viewable on any device. Recordings can be exported with RTF or PDF files.
- 8. Now for more on Recording Tap the mic to start recording. Tap to stop recording. Tap playback to listen to the recording. In playback mode, tap any text or media object to hear what was said at that point in the recording. There are several additional cool features available in playback mode. Tap the cassette to see all of your recordings. Tap edit to delete a recording or swipe with a finger. Tap the speaker to change the volume. Tap tune when the speaker is selected to change the advanced amplification features. Now for awesome Page navigation
- 9. To open page navigation, tap or drag the pages on the page tab located on the right hand side of the screen. Hint: Tap the top number in the tab to enter the desired page number. To search your note for a word or phrase, tap the search icon and enter the desired search term. To add a page, tap the plus and select above or below the selected page. To delete a page, tap the X and select delete. To clear a page, tap the X and select clear. To move a page, tap and hold the page icon, then drag it to the desired location. Onwards to the Library A brief overview: - Notes are listed on the right hand side of the screen with thumbnails.
- 10. - Subject are listed on the left and have a color and possibly an icon. - Subjects hold notes. - Categories are listed on the left without a color and are marked by a folder or a + / - - Categories only hold subjects. Now for more on Notes: Tap the sort icon above the notes, next to search, to sort within a subject. Notes can be sorted by... Name Date Size Subject Exported Select the sort method a second time to reverse the sort order. Search for notes by title or content. To move a note into a subject, tap and hold the preview thumbnail and drag it into the the desired subject. To move several notes, tap EDIT, tap the thumbnails of the notes you want to move, and drag one thumbnail to the desired subject. All the selected notes will move together.
- 11. Remember: categories hold subjects and subjects hold notes. Notes can only be placed into subjects. Subjects are marked by a color and an icon. To delete a note, swipe with your finger and tap delete. To delete several notes, tap EDIT, select the notes you wish to delete, and tap the trashcan. To rename a note tap EDIT, and then tap the name. To change the date of a note, tap EDIT, and then tap the date. To share a note or notes, tap share, select the note or notes you want to share, tap share, and select destination and file format. There are two ways to copy or duplicate notes. 1. To copy or duplicate a note, tap and hold on the note title. 2. To copy or duplicate a note or notes, tap EDIT, select a note or notes for duplication by tapping them and then tap duplicate.
- 12. Now for more on subjects: Tap a subject to see its notes. The selected subject will appear as a banner on the right with its notes listed beneath. To add a subject, tap the plus, type the name of the new subject, make sure "subject" is selected (not "category"), and tap done on the keyboard. The new subject will appear at the bottom of the list. To delete a subject, swipe with your finger, and tap delete. Deleting a subject will delete the notes in that subject. To move a subject, tap EDIT, use the three bar drag handle on the right side of the name to move the subject. Place the subject beneath the desired category. A category will contain all the subjects underneath it until the next category. To change the name of a subject, tap EDIT, then tap the name. To password protect, change the color of, or the icon of a subject, tap EDIT, then tap the gear in the banner next to the name of the subject. To password protect a subject, tap the padlock and set your password. A padlock will now appear next to the subject on the left. Tap the padlock to lock or unlock it. Please note: There is no way to recover a password if you forget. To change the color of a subject, tap the color palette, and select a new color.
- 13. To change the icon of a subject, tap the icon button, and select a new icon. Auto-Sync is a great way to back up your notes in the cloud. Tap settings in the bottom right corner, and tap auto-sync to set this feature up. You choose the subjects you want to sync to the cloud. Now for more on categories: To add a category, tap the plus, type the name of the new category, make sure "category" is selected (not "subject"), and tap done on the keyboard. To delete a category, swipe the name with a finger, and tap delete. To change the name of a category, tap EDIT, tap the category’s name and change it.
- 14. To move a category, tap EDIT, then use the three bar drag handle to move. A closed category will move with its subjects. An open category will move without its subjects. Now for the Settings Settings are located in the bottom right hand corner of the Library and look like a gear. Below is a list of what you can do in settings: Set up Auto-Sync• Change to Left Handed Mode• Select your favorite Theme• Choose your default Paper• Set your default Text Settings• Set your default Figure Editor Settings• To log into or out of a Cloud Service• Set up your default Note Title• Turn Spell Check on or off• Turn Typing Start Position on or off• Turn iOS Sleep Timer on or off• Onto the support page
- 15. Tap the question mark in the Library to go to the support center. Read the FAQs on Notes, the Library, Import / Share, and even some very cool Tips. Send an email to support if you can't find the answer, and we will do everything we can to answer your question quickly and completely. Thanks and we hope Notability is becoming your favorite app!