2. 2
Copyright 2006 – 2018 StoneFly, Inc.
All rights are reserved. No part of this document may be photocopied or reproduced without the prior
written consent of StoneFly.
The information contained in this document is subject to change without notice. StoneFly shall not be
liable for errors contained herein or for consequential damages in connection with the furnishing,
performance, or use of this material.
StoneFly, the StoneFly logo, Storage Concentrator, Integrated Storage Concentrator, ISC, Modular Storage
Concentrator, StoneFly Backup Advantage, StoneFusion, StoneFly Replicator CDP, ValueSAN, Unified Scale
Out, USO, Twin Scale Out, TSO, Unified Storage & Server, USS, Unified Deduplicated Storage, UDS, Unified
Encrypted Storage, UES, OptiSAN, StoneFly Voyager, StoneFly Mirroring, Storage Concentrator Virtual
Machine, SCVM, Software-Defined Unified Storage and SDUS are property of StoneFly, Inc., a wholly
owned subsidiary of Dynamic Network Factory, Inc.
Other brands and their products are trademarks or registered trademarks of their respective holders.
3. 3
Table of Contents
Getting Started..............................................................................................................................................4
About this Manual ....................................................................................................................................4
Initial Connectivity Checklist.........................................................................................................................5
Operation......................................................................................................................................................6
System Interface ...........................................................................................................................................7
Control Panel Buttons...............................................................................................................................8
Control Panel LEDs....................................................................................................................................8
Chassis Setup and Maintenance ...................................................................................................................9
Removing Power from the System ...........................................................................................................9
Removing and Installing Hard Drives........................................................................................................9
Troubleshooting..........................................................................................................................................12
4. 4
Getting Started
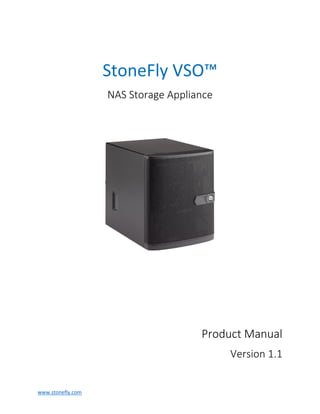
StoneFly’s VSO™ features a unique and highly optimized design, allowing most configuration of the chassis
to be accomplished without tools or screws. The VSO™ is equipped with high-efficiency power supply. A
high-performance fan provides ample optimized cooling for FB-DIMM memory modules, and four hot-
swap drive bays offer maximum storage capacity.
About this Manual
The purpose of this manual is to guide the user through the steps required to setup a StoneFly VSO™. It
provides information for the installation and use of the VSO™. The initial connectivity checklist, operation
and troubleshooting of the StoneFly VSO™ are described in this document.
5. 5
Initial Connectivity Checklist
Perform the following connectivity tasks before powering up the VSO™:
1. Connect video display to the 15 pin video port, DVI, HDMI or display port (DP).
2. Connect keyboard to the USB port.
3. Connect mouse to the USB port.
4. Connect power to the power supply(s) via the provided power cable.
5. Connect network cable (preferably CAT-6 or CAT-5e) to a network port (See Figure 1).
Audio Jacks DVI DP – HDMI
Figure 1: System Connections
6. 6
Operation
1. Power on the system and login with the provided login information. The login information can
be found on the read me note attached to the system.
The Log in information is as follows:
UOsername: administrator
Password: Stonefly
2. Fill out the end user registration form that will pop up on startup. If you wish to register at a
later date, you could use the link on the desktop.
Please note that support will not be provided until the form is completed and submitted.
3. You will also find the following links on the system desktop:
Raid management GUI (if applicable)
Product Registration Form (For faster support assistance we recommend that you
register your product)
4. Your storage is set up with Raid 1
5. The factory preset system information for the VSO™ is as follows:
Username: administrator
Password: Stonefly
IP Address: DHCP
Workgroup: Servgroup
7. 7
System Interface
The VSO™ includes a control panel which is located on the front of the chassis, behind the front bezel.
This panel features power buttons and status monitoring lights. These elements are described in this
section with possible responses that you may need to take.
Figure 2: Front Chassis Panels
8. 8
Control Panel Buttons
Power Button
The main power switch is used to apply or remove power from the power supply to the server system.
Turning off system power with this button removes the main power, but keeps standby power supplied
to the system. Therefore, you must unplug system before performing most maintenance tasks.
Reset Button
The reset button is located below the power button and allows you to manually reset the system.
Control Panel LEDs
There are four control panel LEDs that provide status information about the system.
Power LED
This LED Indicates that power is being supplied to the system's power supply units. This LED should
normally be illuminated when the system is operating.
HDD LED
Indicates activity on the HDDs or peripheral drives when flashing.
NIC 1 LED
Indicates network activity when flashing.
Information LED
Alerts operator of several states (See troubleshooting section).
9. 9
Chassis Setup and Maintenance
This section covers the steps required to install components and perform maintenance on the chassis.
Most components of the VSO™ do not require tools or screws to set them up. Those components which
must be secured with screws require only a Phillips screwdriver.
Removing Power from the System
Before performing setup or maintenance tasks, use the following procedure to ensure that power has
been removed from the system.
1. Use the operating system to power down the system, following the on-screen prompts.
2. After the system has completely shut-down, carefully grasp the head of the power cord and
gently pull it out of the back of the power supply. If your system has dual power supplies,
remove the cords from both power supplies.
3. Disconnect the cord from the power strip or wall outlet.
Removing and Installing Hard Drives
Figure 3: Removing the Hard Drive Carrier from the Hard Drive Chassis
10. 10
The VSO™ chassis supports four 3.5" hot-swappable hard drives in hard drive carriers. These hard drives
can be removed from the chassis without powering down the system.
Removing 3.5" Hot-Swap Hard Drives
1. Unlock the front bezel and swing it open.
2. Press the release tab on the hard drive carrier, this will extend the hard drive carrier handle.
3. Use the hard drive carrier handle to pull the hard drive out of the chassis.
Figure 4: Installing a Hard Drive into Hard Drive Carrier
Installing a Hard Drive into the Hard Drive Carrier
1. Remove the six screws which secure the dummy drive into the hard drive carrier.
2. Remove the dummy drive from the hard drive carrier.
3. Install a new hard drive into the hard drive carrier with the printed circuit board side facing
down so that the mounting holes in the drive align with those in the carrier.
4. Secure the hard drive by tightening all six screws.
11. 11
Figure 5: Installing a Hard Drive into Hard Drive Carrier
Installing 3.5" Hot-Swap Hard Drives
1. Insert the new hard drive into the hard drive carrier as described on the previous page.
2. Insert the hard drive carrier into the hard drive cage, sliding it towards the back of the hard drive
cage until it clicks into a locked position.
3. Use the drive carrier handle to push the hard drive and hard drive carrier into the chassis hard
drive bay and close the handle until the drive carrier clicks into the locked position.
4. Close and lock the front bezel.
12. 12
Troubleshooting
In this section we describe some of the most commonly encountered issues. If you cannot resolve your
hardware problems using the information provided in this section, please contact StoneFly support at
the number listed on the README page attached to the system, or by using the information provided at
the end of this document.
Q : The unit is beeping what do I do?
A: Make sure that all the cables, specially the power cables are connected. Check to see if any of
the disk drives has failed. Check to see if a power supply has failed.
Q: One of my power supplies has failed, what do I do?
A: Please contact StoneFly support at the number listed on the README page, which was shipped
with the system, and request an RMA for the failed drive.
Q: When I power the system on, I get a message “No Operating system found”. What should I do?
A: Navigate to the BIOS settings and set your OS disk as first boot device. If it still doesn’t work,
contact StoneFly Support.
Q: The System is overheating.
A: If the system overheats:
1. Use the LEDs to determine the nature of the overheating condition.
2. Confirm that the chassis cover is installed properly.
3. Check the routing of the cables and make sure all fans are present and operating normally.
4. Verify that the heatsinks are installed properly.
Information LED
Status Description
Solid red An overheat condition has occurred.
(This may be caused by cable congestion).
Blinking red (1Hz) Fan failure, check for an inoperative fan.
Blinking red (0.25Hz) Power failure, check for a non-operational power
supply.
Solid blue Local Local UID has been activated. Use this function to
locate the server in a rack mount environment.
Blinking blue (300 msec) Remote UID is on. Use this function to identify
the server from a remote location.
13. StoneFly, Inc.
26250 Eden Landing Road
Hayward, CA 94545, USA.
(510) 265-1616
Support@stonefly.com
www.stonefly.com
www.iscsi.com