Learn to Make This LED Light Irish Flag for St. Patrick's Day
•Als PPTX, PDF herunterladen•
1 gefällt mir•722 views

Step-by-step "how to" tutorial for making your own decorative Irish Flag for St. Patrick's Day using LED holiday light strings. Not only are LEDs energy-efficient, but they stay cool, which is ideal for a project featuring close bundles of bulbs.

Empfohlen
Weitere ähnliche Inhalte
Andere mochten auch
Kürzlich hochgeladen
Kürzlich hochgeladen (15)
Learn to Make This LED Light Irish Flag for St. Patrick's Day
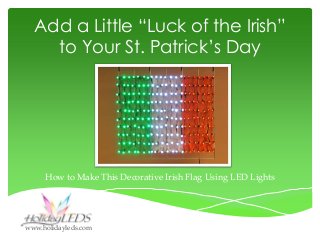
- 1. Add a Little “Luck of the Irish” to Your St. Patrick’s Day How to Make This Decorative Irish Flag Using LED Lights www.holidayleds.com
- 2. What We Need for the Project 1 Wire Grid approximate size 22 ¼” x 23 ¾”, square holes are 3 ¾” x 2” We got this at a local hardware store (replacement wire utility shelf rack) 3 Sets of G12 Raspberry-Shaped Lights 1 Premium Grade G12 Orange 70 ct LEDs (#34607R-B at holidayleds.com) 1 Premium Grade G12 Pure White 70 ct LEDs (#34613R-B at holidayleds.com) 1 Premium Grade G12 Green 70 ct LEDs (#34614R-B at holidayleds.com) Zip Ties www.holidayleds.com we used 3 packs of 4” zip ties (100/pack) We also added sheer ribbon to this display to fill in the spaces between the bulbs and add color. We used 1 spool each—orange, white, and green—of sheer, non-wired ribbon (1 ½” x 10 yards)
- 3. Step 1: Preparing the Lights Before starting each color, you will want to open the set of LEDs—Stretching out the set, making it easier to work with. TIP: Work on a flat surface, with the rack overhanging the edge. This will allow you to access both the top and bottom of the rack as you are working. We found it easiest to have the “back side” of the rack facing up, so you could tighten the zip ties properly.
- 4. Step 2: Assemble the Design TIP: Use needle nosed pliers to tighten the zip ties—a lot tighter than you can get with your fingers, keeping the bulbs nice and straight. Position rack the “long way” (Fig. 1). Start first bulb (following either the male or female plug), at either the top or the bottom. Start 1 cross bar in from the top/bottom, and just inside the outside edge of the rack. (We left an empty border at the top and bottom of the flag for ease of hanging.) Once satisfied with the layout and design, zip-tie the light sets to the wire grid. Fig. 1 Grid. Fig. 2 First bulb. Fig. 3 First bulb close-up.
- 5. Step 2: Assemble the Design Zip tie each bulb to the rack to keep them “standing up,” and spaced evenly. Place the bulb on the crossbar of the rack, zip tying the wires coming out of either side of the bottom of the bulb to each other, making sure the cross bar of the racking is in between the lighting wires (Figs 2 & 3). The bulb will end up on the front of the rack, positioned over the top of a cross bar on the rack. If you are using our assembly tip above, this will be the underside, as you are assembling. Fig. 2 Fig. 3
- 6. Step 2: Assemble the Design Go up and down the rack in a line, zip tying each bulb to the crossbars. Once you get to the bottom, you will place a bulb next to the one you just did, and then go back up the frame. Repeat this process until you have finished your first color (Figs. 4 & 5). Repeat the steps above with your second and third color, making sure you are starting with the correct plug end. You will be plugging these sets end-to-end to power them, and you need to make sure that if your first color ends with the female plug, start your second color with the male plug. Fig. 4 Fig. 5
- 7. Step 3: Finishing Up TIP: We took our LED sets with us to the craft store so we could pick out ribbon that matched the bulb colors. Fig. 7 Fig. 6 www.holidayleds.com Display completed with all 3 colors (Figs. 6 & 7). Once you have attached all of your bulbs, you can add the ribbon to the display.
- 8. Step 3: Finishing Up TIP: You may need to “re-fluff” your ribbon, making sure it is loose and not pulled tight. Once you have attached all of your bulbs, you can add the ribbon to the display. Loosely weave it in and out of the cross bars, making sure to start your ribbon going over the top of the first cross bar (Fig. 8). Tie the cut/starting end of the ribbon to the top crossbar that your bulbs are attached to. Make sure this tie is pulled to the backside of the display, so you cannot see it (Fig. 9). Fig. 8 Fig. 9
- 9. Step 3: Finishing Up The end of the ribbon that is still attached to the spool will be pulled around the back side of the display and tied to itself at the tie you just made to attach the ribbon to the racking (Fig. 10). Continue this process until you have filled in each space between the bulbs with the appropriate color ribbon. TIP: You will want to alternate the side you start your ribbon, as this will give you a fuller look. Fig. 10
- 10. Completed Irish Flag Hang your display… plug it in… and enjoy! www.holidayleds.com
- 11. We hope you enjoyed this step-by-step tutorial! For more great tips and the largest selection of LED holiday lights, visit us at www.HolidayLEDs.com! www.holidayleds.com facebook.com/ledchristmaslights twitter.com/holidayleds pinterest.com/holidayleds © 2014 Holiday LEDs