
Empfohlen
Weitere ähnliche Inhalte
Was ist angesagt?
Was ist angesagt? (20)
Andere mochten auch
Andere mochten auch (20)
Ähnlich wie Green hectares rural tech factsheet computer basics
Ähnlich wie Green hectares rural tech factsheet computer basics (20)
Mehr von Green Hectares
Mehr von Green Hectares (20)
Kürzlich hochgeladen
Kürzlich hochgeladen (20)
Green hectares rural tech factsheet computer basics
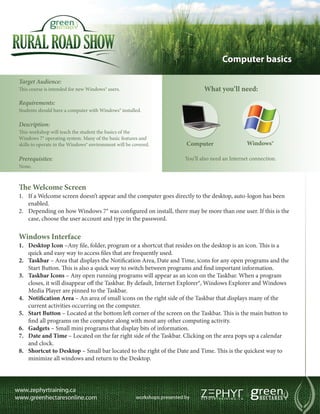
- 1. Computer basics Target Audience: This course is intended for new Windows® users. What you’ll need: Requirements: Students should have a computer with Windows® installed. Description: This workshop will teach the student the basics of the Windows 7® operating system. Many of the basic features and skills to operate in the Windows® environment will be covered. Computer Windows® Prerequisites: You’ll also need an Internet connection. None. The Welcome Screen 1. If a Welcome screen doesn’t appear and the computer goes directly to the desktop, auto-logon has been enabled. 2. Depending on how Windows 7® was configured on install, there may be more than one user. If this is the case, choose the user account and type in the password. Windows Interface 1. Desktop Icon –Any file, folder, program or a shortcut that resides on the desktop is an icon. This is a quick and easy way to access files that are frequently used. 2. Taskbar – Area that displays the Notification Area, Date and Time, icons for any open programs and the Start Button. This is also a quick way to switch between programs and find important information. 3. Taskbar Icons – Any open running programs will appear as an icon on the Taskbar. When a program closes, it will disappear off the Taskbar. By default, Internet Explorer®, Windows Explorer and Windows Media Player are pinned to the Taskbar. 4. Notification Area – An area of small icons on the right side of the Taskbar that displays many of the current activities occurring on the computer. 5. Start Button – Located at the bottom left corner of the screen on the Taskbar. This is the main button to find all programs on the computer along with most any other computing activity. 6. Gadgets – Small mini programs that display bits of information. 7. Date and Time – Located on the far right side of the Taskbar. Clicking on the area pops up a calendar and clock. 8. Shortcut to Desktop – Small bar located to the right of the Date and Time. This is the quickest way to minimize all windows and return to the Desktop.
- 2. Clicking the Mouse 1. Single Clicks - To select items, open menus and drop-down menus, check boxes and many other features. Move the mouse over the item and left click once to select it. 2. Double Clicks - To open files, windows and programs, left click twice quickly and with authority. If a double click of the mouse is too slow, Windows will think the user meant two single clicks. 3. Right Clicks - Move the mouse over an item or the Desktop and click with the right mouse button. A pop up will appear with a shortcut menu and / or alternative options. The menu may change and have different options depending on the location of the right click and if a program is in use. 4. Click and Drag - To move items or select one or more items. Click and hold the mouse button and drag the mouse until the action desired is completed. Release the button. Depending on whether you clicked the left of right mouse button, different reactions will occur. The right button will always give you a menu, so you will be in control of the end result. Customizing Mouse Options - There are many mouse options that can be adjusted. To adjust these setting: 1. Click the Start Button. 2. Click the Control Panel. 3. Click Mouse Properties. Understanding Floating Windows When a program is launched it shows up as a floating stand alone window. All the basic features for any program or an Explorer Window are going to be the same. 1. Title Bar – Displays the program name and the name of the open document. You can click and hold on this area to move the position of the window if the window is not maximized. 2. Menu Bar – Area that contains drop down menus with all available options. 3. Minimize Button – Button that hides the window. The program will stay open but out of sight. To access the program again go to the taskbar and click on the program’s icon. 4. Maximize Button – Maximizes the window to full screen size. Pressing it again will take the window back to the previous size (Restore). 5. Close Button – Button represented by the X. This will exit out of the program / window and shut it down. 6. Scroll Bar – When more information is available than can fit in the window, a scroll bar will appear on the right side of the window. Left Click and Drag to view the remaining content. Start Menu 1. A quick and easy way to find programs, games, pictures, music and computer controls. 2. Programs that are frequently used will show up on the left hand side of the Start menu for easy access. 3. All Programs displays a list of all available programs on the computer. 4. The Control Panel is on the right side of the Start Menu list. 5. A useful Search box at the bottom helps to quickly find a program or file.
- 3. Task Bar 1. Hold the Start button, all open programs as icons, the Notification Area, Volume Controls, Date and Time and a Shortcut to the Desktop at the far right. 2. Right Click on empty space in the Taskbar to get available options. Toolbars can turned on to display specific information on the Taskbar and clicking on Properties will open a dialog box to change how the Taskbar works. Switching Between Programs 1. Press and hold down the Alt key on your keyboard. Tap on the Tab key to cycle through open windows. 2. Clicking on a program icon in the Taskbar is another way. Program/Document Files Program files almost always have a file extension of .exe and they launch a program to work in. Document files are created inside a program so you can save the work you do inside that program. Saving a Document File 1. In any program, click on the File Menu and choose Save. You can navigate to a specific location to keep things organized by double clicking on folders. 2. Click on the File Name: box and type in a name for the file. 3. Click on Save. Windows Explorer Windows Explorer is a window that helps navigate through files, documents and programs. It can also be used to search on a network or a removable disk. When a location is selected on the left, all available content will display on the right. Clicking on the columns arranges available files in the list. Content can be also be displayed as Icons, List View, Details View, Tiles and Content View by clicking on the View button. 1. To open Windows Explorer, click on the Start button. 2. Click on Computer.
- 4. Opening Documents 1. Double Click on a Document file icon on the Desktop or in a Explorer Window. Files can also be opened from the File Menu in any Program. 2. Click on File. 3. Click on Open. Moving Files 1. Select the file(s), right click, and choose Cut. Navigate to the location. Right Click and choose Paste. This removes the file(s) from the original location and pastes the file(s) in its new location. Use Copy instead of Cut to paste a copy of the file so they are in both locations. Clicking and dragging files is another way to move them. Deleting Files 1. Select the file, right click and choose Delete. This moves the file into the Recycle Bin. 2. If the Recycle Bin is visible, the file can also be dragged and dropped into the Recycle Bin. 3. To completely remove files from the computer, right click on the Recycle Bin and choose Empty Recycle Bin. Recovering a Deleted File 1. f a file was accidently deleted, double click on the Recycle Bin on the Desktop to open it. I 2. Right click on the file and click on Restore. 3. This will put the file back in the previous location before it was deleted. Renaming 1. ight click on a File or Folder. R 2. Click on Rename. The current name will be highlighted. Start typing and the highlighted name will be replaced with the new name. 3. Press Enter when finished to accept the changes. Viewing Disk Space 1. Right click on the Start button. 2. Click on Open Explorer Window. 3. Click on Computer on the left. This will display all current available drives and storage space available. If external devices are plugged in, they will also be displayed. Using the Control Panel 1. Click on the Start Menu. 2. Click Control Panel on the right. This is the location to change any of the computer’s settings. Personalization is the area to change the Desktop photo.
- 5. Help and Support 1. Click on the Start menu. 2. Click on Help and Support on the right just below the Control Panel. 3. Click on any of the three options to find to a specific topic. There is also a Search Help box at the top of the window. Online Help 1. At the bottom of the Help window is a link to search online for Windows Help and Support at Microsoft’s Windows websites. 2. Other Microsoft Online support areas include: http://support.microsoft.com http://windowshelp.microsoft.com These materials are copyrighted with all rights are reserved. This document may not in whole or in part be copied, photocopied, reproduced, or reduced to any electronic medium or machine-readable form without prior consent, in writing, from Zephyr Software Training Ltd. and Green Hectares Corp. Any software, computer, and product names mentioned are manufacturer and publisher trademarks and are used only for the purpose of identification. Microsoft, Explorer, Outlook, Windows , are either registered trademarks or trademarks of Microsoft Corporation in the United States and/or other countries. All other trademarks are property of their respective owners.