SlideShare ist ein Scribd-Unternehmen logo
1 von 6
Downloaden Sie, um offline zu lesen
Gazebo Replacement Canopy
                                        Owner’s manual

                GRAND CASUAL GAZEBO                            G-GZ073PAL-2JS


1. WARNING

  1. When assembling and using this product, basic safety precautions should always be followed to
     reduce the risk of personal injury and damage to equipment. Please read all instructions before
     assembly and use.
  2. Some parts may contain sharp edges, wear protective gloves if necessary. At least two or more people
     are recommended for safe assembly.
  3. Keep all children and pets away from assembly area.
  4. Begin assembly not less than 6 feet from any obstruction such as fence, garage, house, overhanging
     branches, laundry line or electrical wires.
  5. Install on level ground. This gazebo cannot be permanently staked or attached to concrete floor or
     platform. This gazebo is intended for decorative and sunshade purposes only and is not meant to
     withstand inclement weather including high winds, rain and snow. Gazebo fabric is water resistant, not
     water proof and may leak during exposure to precipitation.
  6. Check all nuts and bolts for tightness before and during usage.
  7. Keep all flame and heat sources away from this gazebo fabric. This gazebo is made with fabric that
     meets cpai-84 specifications for flame resistance. It is not fire proof. The fabric will burn if left in
     continuous contact with any flame source. The application of any foreign substance to the gazebo
     fabric may render the flame-resistant properties ineffective.

2. ASSEMBLY INSTRUCTION
Gazebo Replacement Canopy
2.1 Part list:
(Pay attention to part # 1, 2, 4 & 5 below, you should quote the correct left/right part when ordering a
replacement part from our customer service representative.)

MAIN FRAME PARTS
1. Long Siderails (70.5") – (4) (inclusive of 2 left & 2 right siderails with label of 1L or 1R on each one)
2. Short Siderails (58.4") -- (4 ) (inclusive of 2 left & 2 right siderails with label of 2L or 2R on each one)

3. Column -- (4)
4. Long gutter -- (4) (inclusive of 2 left & 2 right gutter with label of 4L or 4R on each one)

5. Short gutter -- (4) (inclusive of 2 left & 2 right gutter with label of 5L or 5R on each one)

6.    Aluminum pipe (weld on gutter) -- (8)
7.    Long roof support bar (pre-assembled snap link) -- (4)
8.    Short roof support bar (pre-assembled snap link and one end weld outer connector) -- (4)
9.    Center fitting -- (1)
10.   Big center bar -- (1)
11.   4-way fitting -- (2)
12.   Column base -- (4)
13.   Column top connector -- (4) (composed of A & B)
14.    Bend -- (4)
15.   Plastic connector -- (4)
16.   Inner connector -- (8)
17.   Corner connector -- (8)
18.   Finial -- (2)
19.   Slip hook – (32)
20.   Stake -- (12)
21.   Big Canopy -- (1)
22.   Hook (pre-assembled on big canopy rim) -- (32)
23.   Top panel -- (4)
24.   Side panel -- (1)
25.   Mosquito net -- (4)
26.   Small center bar -- (1)
27.   3-way fitting -- (2)
28.   Small top frame -- (4)
29.   Small canopy – (1)

ASSEMBLY HARDWARE
30. Screw M6*15 -- (8)                             31. Screw M8*15 -- (4) (pre-assembled on #13A)
32. Screw M6*35 -- (8)                            33. Screw M6*30 -- (32)
34. Screw M6*10 -- (64) (4 pcs pre-assembled on plastic insert of gutter)
35. Wrench – (2)                                   36. Nut M6 -- (16) (8 pcs pre-assembled on plastic insert
                                                        of gutter)
37. Round-head nut M8 -- (4)                      38. Round-head nut M6 -- (20)
39. Nut M8 -- (4) (pre-assembled on #13A)          40. Screw M6*25 – (4)
41. Tapping screw ST3.5*14 – (8) (pre-assembled on gutter bottom)
Gazebo Replacement Canopy
2.2 Assembly: (Tools required for assembly: a screwdriver)
Step1. Check all parts and hardware listed in the parts list. Lay them on a clear and level surface prior to
assembly. Ideally, the gazebo frame should be set up in its desired location to avoid moving it after assembly.

Step2. Assemble gazebo big top frame.
Attach long gutter (#4) to long siderail (#1) with screw M6*30 (#33), fix them by screwdriver. Repeat same way
to attaching the short gutter (#5) to short siderail (#2) (Fig. 1 & 2).

Warning: ensure the length of siderail and gutter is matching, misplaying might result in assembly
failure.


Step3. As Fig. 2 shows, the gutter and siderail have been assembled into one-piece after finishing step 2.
Before you connect two adjacent gutter & siderail sets, you should screw off the pre-assembled screw M6*10
(#34) from the plastic insert of gutter; then inert inner connector (#16) to one end of the assembled siderail
(#1), make sure the screw holes on siderail & inner connector are lined up. Then fix two siderails by inserting
screws M6*10 (#34) through siderail and inner connector, tighten them by screwdriver (Fig. 3 & 4). Meanwhile,
push two adjacent gutters directly opposite to connect them together (Fig. 5).

Note: when screw off the pre-assembled screw M6*10 (#34) from the plastics insert of gutter, DO NOT
SCREW OFF PRE-ASSEMBLED NUTS at this time since the nuts are used to fix short roof support bar (#8) to
gutters in next steps, screw them off now may result in assembly failure.


Step4. Repeat step 3 to attach other sets of siderail & gutter. Ensure long parts (#1 & #4) are connected with
long parts (#1 & #4); short parts (#2 & #5) are connected with short parts (#2 & #5); mis-connecting the long
parts to short parts will lead to assembly failure.

Step5. Combine 4 assembled gutter & siderail sets into a rectangle frame. Insert corner connecter (#17)
to one of two adjacent siderails (#1 or #2) (Fig. 6), then insert plastic connector (#15) into one of the gutter (#4
or #5) (Fig. 7); fix siderails by screws M6*10 (#34), join gutters by plastic connector (#15) (Fig. 8 & 9).
Gazebo Replacement Canopy
Step6. Repeat step 5 to assemble other sets of siderails (#1 & #2) and gutters (#4 & #5) into a full rectangle
frame.

Step7. Attach A part of column top connector (#13A) to B part (#13B), fix them by two
screws M6*10 (#34) and round-head nut M6 (#38) (Fig. 10).

Step8. Attach whole column top connector (#13) to the corner of assembled top rectangle
frame by inserting screws M6*30 (#33) through #13B into the screw hole of siderail, fix
them in place with round-head nuts M6 (#38), tighten screws by screwdriver (Fig. 11).
Repeat step 7&8 to attach rest three column top connectors to assembled top rectangle
frame.

Step9. Assemble supporting parts of gazebo big top.
Insert big center bar (#10) through center fitting (#9), make sure the snap links of big
center bar (#10) are locked into center fitting (#9). Then join two 4-way fittings ((#11) to the big center bar (#10)
Fig. 12 & Fig.13 is the appearance of an assembled top center.


                  (Upward)                                          (Downward)

Step10. Insert one end of short roof support bar (#8) to the middle branch of 4-way
fitting (#11), then attach another end with outer connector to the assembled top
rectangle frame by inserting screws M6*10 (#34) to pre-assembled nut that on plastic
insert of gutters, through screw holes of outer connector and gutter (Fig.14), fix screws
with a screwdriver. Use the same way to attach remaining short roof support bars (#8) to
the remaining 4-way fitting (#11), center fitting and top rectangle frame.

Step11. Insert one end of long roof support bar (#7) to 4-way fitting (#11) side branch, insert another end of
support bar to part A of column top connector (#13). Make sure the snap links of long roof support bar (#7) are
locked into the 4-way fitting (#11) & column top connector (#13) properly.

Step12. Repeat step 11 to connect remaining 4-way fitting (#11) & column top
connectors (#13) with rest long roof support bars (#7). Fig. 15 is the appearance
of an assembled gazebo big top skeleton. You may put big top skeleton aside.

Step13. Assemble gazebo small top.
Attach two 3-way fittings (#27) to small center bar (#26) respectively (Fig. 16), make sure the snap links of
small center bar (#26) are locked into pre-drilled holes of 3-way fittings (#27). Then Attach small top frames
(#28) to 3-way fittings (Fig.17), make sure the snap links of small top frame are locked into pre-drilled holes of
3-way fittings. Repeat same way to assemble remaining small top frames to 3-way fittings.
Gazebo Replacement Canopy
Step14. Place big canopy (#21) on the assembled big top skeleton slackly, leaving
the center of big top skeleton uncovered. Then attach small top frames (#28) to
long roof support bars (#7), fix them by screws M6*25 (#40) and round-head nuts
M6 (#38) (Fig.18).


Step15. Put small canopy (#29) on assembled small top frame (#28), pull it tightly
over the frame. Then screw on two finials (#18) on small canopy (Fig.19).

Step16. Tighten big canopy (#21) to fit big top skeleton, leaving the screw (#31) outside
of pre-assembled brass ring of canopy corner; then screw on round-head nut (#37) to
screw M8*15 (#31), tighten nut a few revolutions (Fig. 20).


Step 17 Fix big canopy rim to gazebo top frame by pre-assembled hooks (#22).

Now your gazebo top is finished, you may put it aside standby. Fig.21 is the
appearance of an assembled gazebo top.

Step18. Assemble gazebo columns (#3).
Attach the column base (#12) to one end of column (#3) with screws M6*15 (#30),
fix them by screwdriver (Fig. 22). Repeat the same step to assemble remaining three
columns (#3).

Warning: must ask four helpers (at least) to do following procedure together; do
not attempt to assemble it alone.

Step19. Ask your helpers put up whole assembled gazebo top, let the column (#3)
through the column top connector (#13), then attach column to gazebo top by  bend
(#14), screws M6*35 (#32) and nuts M6 (#36) (Fig. 23). Tighten them by screwdriver.

Step20. Repeat step 19 to attach remaining 3 columns (#3) to gazebo top. Then
secure the column base (#12) to the ground with stakes (#20).

Step21. Stick top panels (#23) to siderails by pre-sewed Velcro straps (Fig. 24 & 25).
Gazebo Replacement Canopy
Step22. Install mosquito net (#25) to gazebo.
Attach slip hook (#19) to mosquito net border as Fig. 26.

Step23. Screw off the tapping screws ST3.5*14 (#41) that pre-assembled on gutter
then put slip hook (with mosquito net) into the slot of gutter orderly from the enlarged
hole of the gutter bottom (Upward View Fig. 27, 28 & 29).


Step24. Tighten tapping screws ST3.5*14 (#41) with screwdriver after installing all slip hooks (#19) in slot to
avoid hooks sliding out (Upward View Fig. 30).


Step25. Install side panel (#24) to gazebo. Hang the side panel (#24) on bottom line of siderail; fix it by
The pre-sewn Velcro straps on the inside of the side panel (#24) (Fig. 31).


Now your gazebo is ready for use.

Weitere ähnliche Inhalte

Mehr von Giller Doit

Baby Monitor Reviews.pdf
Baby Monitor Reviews.pdfBaby Monitor Reviews.pdf
Baby Monitor Reviews.pdfGiller Doit
 
Fisher Price Baby Monitor.pdf
Fisher Price Baby Monitor.pdfFisher Price Baby Monitor.pdf
Fisher Price Baby Monitor.pdfGiller Doit
 
MTD Lawn Mowers.pdf
MTD Lawn Mowers.pdfMTD Lawn Mowers.pdf
MTD Lawn Mowers.pdfGiller Doit
 
Electric Lawnmowers.pdf
Electric Lawnmowers.pdfElectric Lawnmowers.pdf
Electric Lawnmowers.pdfGiller Doit
 
Electric Lawn Trimmers.pdf
Electric Lawn Trimmers.pdfElectric Lawn Trimmers.pdf
Electric Lawn Trimmers.pdfGiller Doit
 
Cordless Trimmer.pdf
Cordless Trimmer.pdfCordless Trimmer.pdf
Cordless Trimmer.pdfGiller Doit
 
Murray Riding Mower.pdf
Murray Riding Mower.pdfMurray Riding Mower.pdf
Murray Riding Mower.pdfGiller Doit
 
Greenhouse Glass.pdf
Greenhouse Glass.pdfGreenhouse Glass.pdf
Greenhouse Glass.pdfGiller Doit
 
Green House Designs.pdf
Green House Designs.pdfGreen House Designs.pdf
Green House Designs.pdfGiller Doit
 
Modern Outdoor Furniture.pdf
Modern Outdoor Furniture.pdfModern Outdoor Furniture.pdf
Modern Outdoor Furniture.pdfGiller Doit
 
Gazebo Covers Replacement.pdf
Gazebo Covers Replacement.pdfGazebo Covers Replacement.pdf
Gazebo Covers Replacement.pdfGiller Doit
 
Lowes Gazebo.pdf
Lowes Gazebo.pdfLowes Gazebo.pdf
Lowes Gazebo.pdfGiller Doit
 
John Deere Mowers.pdf
John Deere Mowers.pdfJohn Deere Mowers.pdf
John Deere Mowers.pdfGiller Doit
 
Exmark Lawn Mowers.pdf
Exmark Lawn Mowers.pdfExmark Lawn Mowers.pdf
Exmark Lawn Mowers.pdfGiller Doit
 
Riding Mowers.pdf
Riding Mowers.pdfRiding Mowers.pdf
Riding Mowers.pdfGiller Doit
 
Portable Gazebo Canopy.pdf
Portable Gazebo Canopy.pdfPortable Gazebo Canopy.pdf
Portable Gazebo Canopy.pdfGiller Doit
 
Replacement Canopies For Gazebos.pdf
Replacement Canopies For Gazebos.pdfReplacement Canopies For Gazebos.pdf
Replacement Canopies For Gazebos.pdfGiller Doit
 
Snapper Mowers.pdf
Snapper Mowers.pdfSnapper Mowers.pdf
Snapper Mowers.pdfGiller Doit
 
electric lawn trimmers.pdf
electric lawn trimmers.pdfelectric lawn trimmers.pdf
electric lawn trimmers.pdfGiller Doit
 

Mehr von Giller Doit (20)

Baby Monitor Reviews.pdf
Baby Monitor Reviews.pdfBaby Monitor Reviews.pdf
Baby Monitor Reviews.pdf
 
Fisher Price Baby Monitor.pdf
Fisher Price Baby Monitor.pdfFisher Price Baby Monitor.pdf
Fisher Price Baby Monitor.pdf
 
MTD Lawn Mowers.pdf
MTD Lawn Mowers.pdfMTD Lawn Mowers.pdf
MTD Lawn Mowers.pdf
 
Electric Lawnmowers.pdf
Electric Lawnmowers.pdfElectric Lawnmowers.pdf
Electric Lawnmowers.pdf
 
Electric Lawn Trimmers.pdf
Electric Lawn Trimmers.pdfElectric Lawn Trimmers.pdf
Electric Lawn Trimmers.pdf
 
Cordless Trimmer.pdf
Cordless Trimmer.pdfCordless Trimmer.pdf
Cordless Trimmer.pdf
 
Murray Riding Mower.pdf
Murray Riding Mower.pdfMurray Riding Mower.pdf
Murray Riding Mower.pdf
 
Greenhouse Glass.pdf
Greenhouse Glass.pdfGreenhouse Glass.pdf
Greenhouse Glass.pdf
 
Green House Designs.pdf
Green House Designs.pdfGreen House Designs.pdf
Green House Designs.pdf
 
Modern Outdoor Furniture.pdf
Modern Outdoor Furniture.pdfModern Outdoor Furniture.pdf
Modern Outdoor Furniture.pdf
 
Cub Cadet.pdf
Cub Cadet.pdfCub Cadet.pdf
Cub Cadet.pdf
 
Gazebo Covers Replacement.pdf
Gazebo Covers Replacement.pdfGazebo Covers Replacement.pdf
Gazebo Covers Replacement.pdf
 
Lowes Gazebo.pdf
Lowes Gazebo.pdfLowes Gazebo.pdf
Lowes Gazebo.pdf
 
John Deere Mowers.pdf
John Deere Mowers.pdfJohn Deere Mowers.pdf
John Deere Mowers.pdf
 
Exmark Lawn Mowers.pdf
Exmark Lawn Mowers.pdfExmark Lawn Mowers.pdf
Exmark Lawn Mowers.pdf
 
Riding Mowers.pdf
Riding Mowers.pdfRiding Mowers.pdf
Riding Mowers.pdf
 
Portable Gazebo Canopy.pdf
Portable Gazebo Canopy.pdfPortable Gazebo Canopy.pdf
Portable Gazebo Canopy.pdf
 
Replacement Canopies For Gazebos.pdf
Replacement Canopies For Gazebos.pdfReplacement Canopies For Gazebos.pdf
Replacement Canopies For Gazebos.pdf
 
Snapper Mowers.pdf
Snapper Mowers.pdfSnapper Mowers.pdf
Snapper Mowers.pdf
 
electric lawn trimmers.pdf
electric lawn trimmers.pdfelectric lawn trimmers.pdf
electric lawn trimmers.pdf
 

Kürzlich hochgeladen

GD Birla and his contribution in management
GD Birla and his contribution in managementGD Birla and his contribution in management
GD Birla and his contribution in managementchhavia330
 
VIP Call Girl Jamshedpur Aashi 8250192130 Independent Escort Service Jamshedpur
VIP Call Girl Jamshedpur Aashi 8250192130 Independent Escort Service JamshedpurVIP Call Girl Jamshedpur Aashi 8250192130 Independent Escort Service Jamshedpur
VIP Call Girl Jamshedpur Aashi 8250192130 Independent Escort Service JamshedpurSuhani Kapoor
 
Call Girls Navi Mumbai Just Call 9907093804 Top Class Call Girl Service Avail...
Call Girls Navi Mumbai Just Call 9907093804 Top Class Call Girl Service Avail...Call Girls Navi Mumbai Just Call 9907093804 Top Class Call Girl Service Avail...
Call Girls Navi Mumbai Just Call 9907093804 Top Class Call Girl Service Avail...Dipal Arora
 
Enhancing and Restoring Safety & Quality Cultures - Dave Litwiller - May 2024...
Enhancing and Restoring Safety & Quality Cultures - Dave Litwiller - May 2024...Enhancing and Restoring Safety & Quality Cultures - Dave Litwiller - May 2024...
Enhancing and Restoring Safety & Quality Cultures - Dave Litwiller - May 2024...Dave Litwiller
 
Cash Payment 9602870969 Escort Service in Udaipur Call Girls
Cash Payment 9602870969 Escort Service in Udaipur Call GirlsCash Payment 9602870969 Escort Service in Udaipur Call Girls
Cash Payment 9602870969 Escort Service in Udaipur Call GirlsApsara Of India
 
Mysore Call Girls 8617370543 WhatsApp Number 24x7 Best Services
Mysore Call Girls 8617370543 WhatsApp Number 24x7 Best ServicesMysore Call Girls 8617370543 WhatsApp Number 24x7 Best Services
Mysore Call Girls 8617370543 WhatsApp Number 24x7 Best ServicesDipal Arora
 
Call Girls in Gomti Nagar - 7388211116 - With room Service
Call Girls in Gomti Nagar - 7388211116  - With room ServiceCall Girls in Gomti Nagar - 7388211116  - With room Service
Call Girls in Gomti Nagar - 7388211116 - With room Servicediscovermytutordmt
 
Socio-economic-Impact-of-business-consumers-suppliers-and.pptx
Socio-economic-Impact-of-business-consumers-suppliers-and.pptxSocio-economic-Impact-of-business-consumers-suppliers-and.pptx
Socio-economic-Impact-of-business-consumers-suppliers-and.pptxtrishalcan8
 
A DAY IN THE LIFE OF A SALESMAN / WOMAN
A DAY IN THE LIFE OF A  SALESMAN / WOMANA DAY IN THE LIFE OF A  SALESMAN / WOMAN
A DAY IN THE LIFE OF A SALESMAN / WOMANIlamathiKannappan
 
MONA 98765-12871 CALL GIRLS IN LUDHIANA LUDHIANA CALL GIRL
MONA 98765-12871 CALL GIRLS IN LUDHIANA LUDHIANA CALL GIRLMONA 98765-12871 CALL GIRLS IN LUDHIANA LUDHIANA CALL GIRL
MONA 98765-12871 CALL GIRLS IN LUDHIANA LUDHIANA CALL GIRLSeo
 
Call Girls Pune Just Call 9907093804 Top Class Call Girl Service Available
Call Girls Pune Just Call 9907093804 Top Class Call Girl Service AvailableCall Girls Pune Just Call 9907093804 Top Class Call Girl Service Available
Call Girls Pune Just Call 9907093804 Top Class Call Girl Service AvailableDipal Arora
 
Progress Report - Oracle Database Analyst Summit
Progress  Report - Oracle Database Analyst SummitProgress  Report - Oracle Database Analyst Summit
Progress Report - Oracle Database Analyst SummitHolger Mueller
 
Creating Low-Code Loan Applications using the Trisotech Mortgage Feature Set
Creating Low-Code Loan Applications using the Trisotech Mortgage Feature SetCreating Low-Code Loan Applications using the Trisotech Mortgage Feature Set
Creating Low-Code Loan Applications using the Trisotech Mortgage Feature SetDenis Gagné
 
It will be International Nurses' Day on 12 May
It will be International Nurses' Day on 12 MayIt will be International Nurses' Day on 12 May
It will be International Nurses' Day on 12 MayNZSG
 
The Coffee Bean & Tea Leaf(CBTL), Business strategy case study
The Coffee Bean & Tea Leaf(CBTL), Business strategy case studyThe Coffee Bean & Tea Leaf(CBTL), Business strategy case study
The Coffee Bean & Tea Leaf(CBTL), Business strategy case studyEthan lee
 
Ensure the security of your HCL environment by applying the Zero Trust princi...
Ensure the security of your HCL environment by applying the Zero Trust princi...Ensure the security of your HCL environment by applying the Zero Trust princi...
Ensure the security of your HCL environment by applying the Zero Trust princi...Roland Driesen
 
Monthly Social Media Update April 2024 pptx.pptx
Monthly Social Media Update April 2024 pptx.pptxMonthly Social Media Update April 2024 pptx.pptx
Monthly Social Media Update April 2024 pptx.pptxAndy Lambert
 

Kürzlich hochgeladen (20)

GD Birla and his contribution in management
GD Birla and his contribution in managementGD Birla and his contribution in management
GD Birla and his contribution in management
 
VIP Call Girl Jamshedpur Aashi 8250192130 Independent Escort Service Jamshedpur
VIP Call Girl Jamshedpur Aashi 8250192130 Independent Escort Service JamshedpurVIP Call Girl Jamshedpur Aashi 8250192130 Independent Escort Service Jamshedpur
VIP Call Girl Jamshedpur Aashi 8250192130 Independent Escort Service Jamshedpur
 
Call Girls Navi Mumbai Just Call 9907093804 Top Class Call Girl Service Avail...
Call Girls Navi Mumbai Just Call 9907093804 Top Class Call Girl Service Avail...Call Girls Navi Mumbai Just Call 9907093804 Top Class Call Girl Service Avail...
Call Girls Navi Mumbai Just Call 9907093804 Top Class Call Girl Service Avail...
 
Enhancing and Restoring Safety & Quality Cultures - Dave Litwiller - May 2024...
Enhancing and Restoring Safety & Quality Cultures - Dave Litwiller - May 2024...Enhancing and Restoring Safety & Quality Cultures - Dave Litwiller - May 2024...
Enhancing and Restoring Safety & Quality Cultures - Dave Litwiller - May 2024...
 
Nepali Escort Girl Kakori \ 9548273370 Indian Call Girls Service Lucknow ₹,9517
Nepali Escort Girl Kakori \ 9548273370 Indian Call Girls Service Lucknow ₹,9517Nepali Escort Girl Kakori \ 9548273370 Indian Call Girls Service Lucknow ₹,9517
Nepali Escort Girl Kakori \ 9548273370 Indian Call Girls Service Lucknow ₹,9517
 
Cash Payment 9602870969 Escort Service in Udaipur Call Girls
Cash Payment 9602870969 Escort Service in Udaipur Call GirlsCash Payment 9602870969 Escort Service in Udaipur Call Girls
Cash Payment 9602870969 Escort Service in Udaipur Call Girls
 
Mysore Call Girls 8617370543 WhatsApp Number 24x7 Best Services
Mysore Call Girls 8617370543 WhatsApp Number 24x7 Best ServicesMysore Call Girls 8617370543 WhatsApp Number 24x7 Best Services
Mysore Call Girls 8617370543 WhatsApp Number 24x7 Best Services
 
Call Girls in Gomti Nagar - 7388211116 - With room Service
Call Girls in Gomti Nagar - 7388211116  - With room ServiceCall Girls in Gomti Nagar - 7388211116  - With room Service
Call Girls in Gomti Nagar - 7388211116 - With room Service
 
Socio-economic-Impact-of-business-consumers-suppliers-and.pptx
Socio-economic-Impact-of-business-consumers-suppliers-and.pptxSocio-economic-Impact-of-business-consumers-suppliers-and.pptx
Socio-economic-Impact-of-business-consumers-suppliers-and.pptx
 
A DAY IN THE LIFE OF A SALESMAN / WOMAN
A DAY IN THE LIFE OF A  SALESMAN / WOMANA DAY IN THE LIFE OF A  SALESMAN / WOMAN
A DAY IN THE LIFE OF A SALESMAN / WOMAN
 
MONA 98765-12871 CALL GIRLS IN LUDHIANA LUDHIANA CALL GIRL
MONA 98765-12871 CALL GIRLS IN LUDHIANA LUDHIANA CALL GIRLMONA 98765-12871 CALL GIRLS IN LUDHIANA LUDHIANA CALL GIRL
MONA 98765-12871 CALL GIRLS IN LUDHIANA LUDHIANA CALL GIRL
 
Call Girls Pune Just Call 9907093804 Top Class Call Girl Service Available
Call Girls Pune Just Call 9907093804 Top Class Call Girl Service AvailableCall Girls Pune Just Call 9907093804 Top Class Call Girl Service Available
Call Girls Pune Just Call 9907093804 Top Class Call Girl Service Available
 
Progress Report - Oracle Database Analyst Summit
Progress  Report - Oracle Database Analyst SummitProgress  Report - Oracle Database Analyst Summit
Progress Report - Oracle Database Analyst Summit
 
Creating Low-Code Loan Applications using the Trisotech Mortgage Feature Set
Creating Low-Code Loan Applications using the Trisotech Mortgage Feature SetCreating Low-Code Loan Applications using the Trisotech Mortgage Feature Set
Creating Low-Code Loan Applications using the Trisotech Mortgage Feature Set
 
KestrelPro Flyer Japan IT Week 2024 (English)
KestrelPro Flyer Japan IT Week 2024 (English)KestrelPro Flyer Japan IT Week 2024 (English)
KestrelPro Flyer Japan IT Week 2024 (English)
 
Forklift Operations: Safety through Cartoons
Forklift Operations: Safety through CartoonsForklift Operations: Safety through Cartoons
Forklift Operations: Safety through Cartoons
 
It will be International Nurses' Day on 12 May
It will be International Nurses' Day on 12 MayIt will be International Nurses' Day on 12 May
It will be International Nurses' Day on 12 May
 
The Coffee Bean & Tea Leaf(CBTL), Business strategy case study
The Coffee Bean & Tea Leaf(CBTL), Business strategy case studyThe Coffee Bean & Tea Leaf(CBTL), Business strategy case study
The Coffee Bean & Tea Leaf(CBTL), Business strategy case study
 
Ensure the security of your HCL environment by applying the Zero Trust princi...
Ensure the security of your HCL environment by applying the Zero Trust princi...Ensure the security of your HCL environment by applying the Zero Trust princi...
Ensure the security of your HCL environment by applying the Zero Trust princi...
 
Monthly Social Media Update April 2024 pptx.pptx
Monthly Social Media Update April 2024 pptx.pptxMonthly Social Media Update April 2024 pptx.pptx
Monthly Social Media Update April 2024 pptx.pptx
 

Sunjoy Grand Casual Gazebo Assembly and Instructions Manual

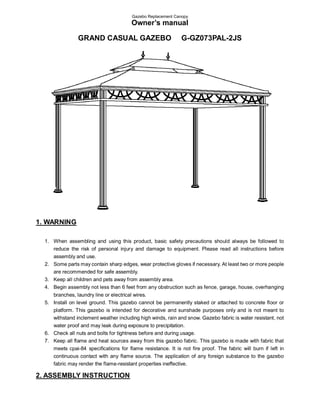
  • 1. Gazebo Replacement Canopy Owner’s manual GRAND CASUAL GAZEBO G-GZ073PAL-2JS 1. WARNING 1. When assembling and using this product, basic safety precautions should always be followed to reduce the risk of personal injury and damage to equipment. Please read all instructions before assembly and use. 2. Some parts may contain sharp edges, wear protective gloves if necessary. At least two or more people are recommended for safe assembly. 3. Keep all children and pets away from assembly area. 4. Begin assembly not less than 6 feet from any obstruction such as fence, garage, house, overhanging branches, laundry line or electrical wires. 5. Install on level ground. This gazebo cannot be permanently staked or attached to concrete floor or platform. This gazebo is intended for decorative and sunshade purposes only and is not meant to withstand inclement weather including high winds, rain and snow. Gazebo fabric is water resistant, not water proof and may leak during exposure to precipitation. 6. Check all nuts and bolts for tightness before and during usage. 7. Keep all flame and heat sources away from this gazebo fabric. This gazebo is made with fabric that meets cpai-84 specifications for flame resistance. It is not fire proof. The fabric will burn if left in continuous contact with any flame source. The application of any foreign substance to the gazebo fabric may render the flame-resistant properties ineffective. 2. ASSEMBLY INSTRUCTION
  • 2. Gazebo Replacement Canopy 2.1 Part list: (Pay attention to part # 1, 2, 4 & 5 below, you should quote the correct left/right part when ordering a replacement part from our customer service representative.) MAIN FRAME PARTS 1. Long Siderails (70.5") – (4) (inclusive of 2 left & 2 right siderails with label of 1L or 1R on each one) 2. Short Siderails (58.4") -- (4 ) (inclusive of 2 left & 2 right siderails with label of 2L or 2R on each one) 3. Column -- (4) 4. Long gutter -- (4) (inclusive of 2 left & 2 right gutter with label of 4L or 4R on each one) 5. Short gutter -- (4) (inclusive of 2 left & 2 right gutter with label of 5L or 5R on each one) 6. Aluminum pipe (weld on gutter) -- (8) 7. Long roof support bar (pre-assembled snap link) -- (4) 8. Short roof support bar (pre-assembled snap link and one end weld outer connector) -- (4) 9. Center fitting -- (1) 10. Big center bar -- (1) 11. 4-way fitting -- (2) 12. Column base -- (4) 13. Column top connector -- (4) (composed of A & B) 14.  Bend -- (4) 15. Plastic connector -- (4) 16. Inner connector -- (8) 17. Corner connector -- (8) 18. Finial -- (2) 19. Slip hook – (32) 20. Stake -- (12) 21. Big Canopy -- (1) 22. Hook (pre-assembled on big canopy rim) -- (32) 23. Top panel -- (4) 24. Side panel -- (1) 25. Mosquito net -- (4) 26. Small center bar -- (1) 27. 3-way fitting -- (2) 28. Small top frame -- (4) 29. Small canopy – (1) ASSEMBLY HARDWARE 30. Screw M6*15 -- (8) 31. Screw M8*15 -- (4) (pre-assembled on #13A) 32. Screw M6*35 -- (8) 33. Screw M6*30 -- (32) 34. Screw M6*10 -- (64) (4 pcs pre-assembled on plastic insert of gutter) 35. Wrench – (2) 36. Nut M6 -- (16) (8 pcs pre-assembled on plastic insert of gutter) 37. Round-head nut M8 -- (4) 38. Round-head nut M6 -- (20) 39. Nut M8 -- (4) (pre-assembled on #13A) 40. Screw M6*25 – (4) 41. Tapping screw ST3.5*14 – (8) (pre-assembled on gutter bottom)
  • 3. Gazebo Replacement Canopy 2.2 Assembly: (Tools required for assembly: a screwdriver) Step1. Check all parts and hardware listed in the parts list. Lay them on a clear and level surface prior to assembly. Ideally, the gazebo frame should be set up in its desired location to avoid moving it after assembly. Step2. Assemble gazebo big top frame. Attach long gutter (#4) to long siderail (#1) with screw M6*30 (#33), fix them by screwdriver. Repeat same way to attaching the short gutter (#5) to short siderail (#2) (Fig. 1 & 2). Warning: ensure the length of siderail and gutter is matching, misplaying might result in assembly failure. Step3. As Fig. 2 shows, the gutter and siderail have been assembled into one-piece after finishing step 2. Before you connect two adjacent gutter & siderail sets, you should screw off the pre-assembled screw M6*10 (#34) from the plastic insert of gutter; then inert inner connector (#16) to one end of the assembled siderail (#1), make sure the screw holes on siderail & inner connector are lined up. Then fix two siderails by inserting screws M6*10 (#34) through siderail and inner connector, tighten them by screwdriver (Fig. 3 & 4). Meanwhile, push two adjacent gutters directly opposite to connect them together (Fig. 5). Note: when screw off the pre-assembled screw M6*10 (#34) from the plastics insert of gutter, DO NOT SCREW OFF PRE-ASSEMBLED NUTS at this time since the nuts are used to fix short roof support bar (#8) to gutters in next steps, screw them off now may result in assembly failure. Step4. Repeat step 3 to attach other sets of siderail & gutter. Ensure long parts (#1 & #4) are connected with long parts (#1 & #4); short parts (#2 & #5) are connected with short parts (#2 & #5); mis-connecting the long parts to short parts will lead to assembly failure. Step5. Combine 4 assembled gutter & siderail sets into a rectangle frame. Insert corner connecter (#17) to one of two adjacent siderails (#1 or #2) (Fig. 6), then insert plastic connector (#15) into one of the gutter (#4 or #5) (Fig. 7); fix siderails by screws M6*10 (#34), join gutters by plastic connector (#15) (Fig. 8 & 9).
  • 4. Gazebo Replacement Canopy Step6. Repeat step 5 to assemble other sets of siderails (#1 & #2) and gutters (#4 & #5) into a full rectangle frame. Step7. Attach A part of column top connector (#13A) to B part (#13B), fix them by two screws M6*10 (#34) and round-head nut M6 (#38) (Fig. 10). Step8. Attach whole column top connector (#13) to the corner of assembled top rectangle frame by inserting screws M6*30 (#33) through #13B into the screw hole of siderail, fix them in place with round-head nuts M6 (#38), tighten screws by screwdriver (Fig. 11). Repeat step 7&8 to attach rest three column top connectors to assembled top rectangle frame. Step9. Assemble supporting parts of gazebo big top. Insert big center bar (#10) through center fitting (#9), make sure the snap links of big center bar (#10) are locked into center fitting (#9). Then join two 4-way fittings ((#11) to the big center bar (#10) Fig. 12 & Fig.13 is the appearance of an assembled top center. (Upward) (Downward) Step10. Insert one end of short roof support bar (#8) to the middle branch of 4-way fitting (#11), then attach another end with outer connector to the assembled top rectangle frame by inserting screws M6*10 (#34) to pre-assembled nut that on plastic insert of gutters, through screw holes of outer connector and gutter (Fig.14), fix screws with a screwdriver. Use the same way to attach remaining short roof support bars (#8) to the remaining 4-way fitting (#11), center fitting and top rectangle frame. Step11. Insert one end of long roof support bar (#7) to 4-way fitting (#11) side branch, insert another end of support bar to part A of column top connector (#13). Make sure the snap links of long roof support bar (#7) are locked into the 4-way fitting (#11) & column top connector (#13) properly. Step12. Repeat step 11 to connect remaining 4-way fitting (#11) & column top connectors (#13) with rest long roof support bars (#7). Fig. 15 is the appearance of an assembled gazebo big top skeleton. You may put big top skeleton aside. Step13. Assemble gazebo small top. Attach two 3-way fittings (#27) to small center bar (#26) respectively (Fig. 16), make sure the snap links of small center bar (#26) are locked into pre-drilled holes of 3-way fittings (#27). Then Attach small top frames (#28) to 3-way fittings (Fig.17), make sure the snap links of small top frame are locked into pre-drilled holes of 3-way fittings. Repeat same way to assemble remaining small top frames to 3-way fittings.
  • 5. Gazebo Replacement Canopy Step14. Place big canopy (#21) on the assembled big top skeleton slackly, leaving the center of big top skeleton uncovered. Then attach small top frames (#28) to long roof support bars (#7), fix them by screws M6*25 (#40) and round-head nuts M6 (#38) (Fig.18). Step15. Put small canopy (#29) on assembled small top frame (#28), pull it tightly over the frame. Then screw on two finials (#18) on small canopy (Fig.19). Step16. Tighten big canopy (#21) to fit big top skeleton, leaving the screw (#31) outside of pre-assembled brass ring of canopy corner; then screw on round-head nut (#37) to screw M8*15 (#31), tighten nut a few revolutions (Fig. 20). Step 17 Fix big canopy rim to gazebo top frame by pre-assembled hooks (#22). Now your gazebo top is finished, you may put it aside standby. Fig.21 is the appearance of an assembled gazebo top. Step18. Assemble gazebo columns (#3). Attach the column base (#12) to one end of column (#3) with screws M6*15 (#30), fix them by screwdriver (Fig. 22). Repeat the same step to assemble remaining three columns (#3). Warning: must ask four helpers (at least) to do following procedure together; do not attempt to assemble it alone. Step19. Ask your helpers put up whole assembled gazebo top, let the column (#3) through the column top connector (#13), then attach column to gazebo top by  bend (#14), screws M6*35 (#32) and nuts M6 (#36) (Fig. 23). Tighten them by screwdriver. Step20. Repeat step 19 to attach remaining 3 columns (#3) to gazebo top. Then secure the column base (#12) to the ground with stakes (#20). Step21. Stick top panels (#23) to siderails by pre-sewed Velcro straps (Fig. 24 & 25).
  • 6. Gazebo Replacement Canopy Step22. Install mosquito net (#25) to gazebo. Attach slip hook (#19) to mosquito net border as Fig. 26. Step23. Screw off the tapping screws ST3.5*14 (#41) that pre-assembled on gutter then put slip hook (with mosquito net) into the slot of gutter orderly from the enlarged hole of the gutter bottom (Upward View Fig. 27, 28 & 29). Step24. Tighten tapping screws ST3.5*14 (#41) with screwdriver after installing all slip hooks (#19) in slot to avoid hooks sliding out (Upward View Fig. 30). Step25. Install side panel (#24) to gazebo. Hang the side panel (#24) on bottom line of siderail; fix it by The pre-sewn Velcro straps on the inside of the side panel (#24) (Fig. 31). Now your gazebo is ready for use.