
Empfohlen
Empfohlen
Weitere ähnliche Inhalte
Was ist angesagt?
Was ist angesagt? (20)
Ähnlich wie Urban Vegetable Gardening For the Texas High Plains and Surrounding Regions
Ähnlich wie Urban Vegetable Gardening For the Texas High Plains and Surrounding Regions (20)
Mehr von Frida85y
Mehr von Frida85y (20)
Kürzlich hochgeladen
Kürzlich hochgeladen (20)
Urban Vegetable Gardening For the Texas High Plains and Surrounding Regions
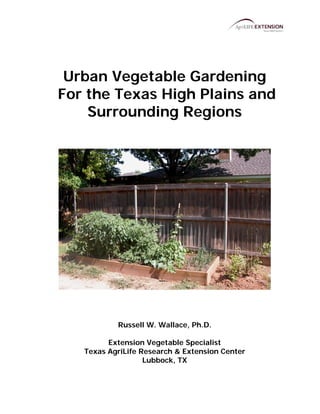
- 1. Urban Vegetable Gardening For the Texas High Plains and Surrounding Regions Russell W. Wallace, Ph.D. Extension Vegetable Specialist Texas AgriLife Research & Extension Center Lubbock, TX
- 2. Table of Contents Page No. Introduction ……………………………………………………………………………………………………. 3 Developing a garden plan ……………………………………………..…………………………………. 3 Site selection …………………………..……………………………………………………………………… 3 Variety selection …………………………..…….…………………………………………………………… 4 Soil preparation ……………………………..……………………………………………………………….. 5 Fertilization ………………………….…………………………………………………………………………. 6 Sunlight ………………………………..……………………………………………………………………….. 7 Seeding, transplanting and spacing requirements …………………..………………………….. 7 Wind protection ………………………….………………………………………………………………….. 9 Plastic mulches ……………………….………………………………………………………………………. 11 High temperatures (heat) ………………………………………………………………………………… 12 Severe weather ……………………………….……………………………………………………………… 13 Soil moisture and irrigation ………………………………….…………………………………………… 14 Pest control ……………………………………………………………………………………………………. 15 Weed control …………………………..……………………………………………………………………… 17 Harvest and storage ………………………………………………………………………………………… 18 2
- 3. Introduction The goal of this guide is to offer tips and suggestions based on research and personal experiences on growing vegetables on the Texas High Plains and surrounding areas. Growing vegetables can be enjoyable and equally frustrating when efforts do not equal the reward. The suggestions contained herein are “guidelines” to improve your chances for success; however, your results may vary depending on localized environmental, moisture and nutritional conditions, as well as efforts taken in pest management. It is best to remember that every good thing takes time, and that sincere efforts will be rewarded. For excellent information on vegetable gardening in Texas, or to find nearby Texas AgriLife Extension Service Horticulture Agents, go online at http://aggie-horticulture.tamu.edu/. It is important to know that while the information accessed from aggie-horticulture is very useful, much of that information may not be ideal for High Plains gardeners. With that in mind, this booklet offers insights into successful vegetable gardening for the Texas High Plains. A typical alleyway garden in Lubbock (left) with a few tomato cages wrapped in white plastic, and other vegetables. The soil is amended with compost and sphagnum peat to improve drainage and root growth; and (right) a larger open-area garden with non-amended soil during the mid-season irrigated with drip tubing. Develop a garden plan Prior to planting vegetable gardens, it is important to develop a garden plan (or a blueprint) to improve its successful growth. It is important to plant vegetables with similar growth habits near each other to avoid overcrowding and shading of small-sized vegetables. For example, do not plant snap beans or carrots next to pumpkins, squash or sweet corn. If space is limited, then do not plant tall vegetables or ones with spreading growth habits. These will limit the growth and quality of other vegetables. It is a good idea to draw up a garden plan on a piece of paper or the computer prior to planting. Draw an outline of the exact garden measurements including row spacing and row length. If planning to grow vegetables in a raised bed garden, good information on design, irrigation and construction can be obtained by going to the following website: (http://aggie- horticulture.tamu.edu/publications/guides/E-560_raised_bed_garden.pdf). Site selection For urban High Plains gardeners, there may be little choice in garden site selection; however, some areas are better suited for gardening than others. Ideally, an alleyway garden should be placed on the south side of a fence for maximum sunlight or placed in the open where no shade from trees or buildings will prevent adequate sunlight. Additionally, many soils on newly developed housing sites has been mixed with concrete, asphalt, chemicals, caliche soil, or other construction materials to assist in building the home’s foundation. These soils can impact vegetable growth and 3
- 4. such soils should be cleaned and amended prior to planting any garden. It is ideal to plant a cover crop as a preliminary test to determine if there are any poor spots in the garden. This can be done with fast growing vegetables or grain crops. Additionally, if pets are able to wander into the area, consider using a fence around the site to prevent wandering pets from entering and destroying plants or urinating on ready-to-pick vegetables, and to keep unwanted neighbors and children out. Variety selection Selecting the right varieties to grow is critical to producing quality and high-yielding vegetables. Vegetable variety performance may be enhanced by selected varieties that are better adapted to the mid-summer high temperatures and cooler nights found on the High Plains. Generalized information can be obtained by reading descriptions associated with varieties sold in seed catalogs or online, or may be obtained by calling distributors. Additional local information can be found at http://aggie- horticulture.tamu.edu/ or by calling local County Agents and Specialists to request information. Critical characteristics to consider when purchasing vegetable varieties include: 1) cold and/or heat tolerance [adaptability to growing zones], 2) disease resistance, 3) adaptability to High Plain’s soil and pH levels and 4) garden water quality. The majority of seed packets will list growing zone requirements. The USDA has designated the Texas High Plains and surrounding areas to be Plant Hardiness Zone 7a. Typically, the last frost of the year in the spring will be around April 10, though in years past frosts have occurred later, and thus, this is not an exact date. Killing frosts may occur a week or so later for more northern counties. Tolerance to heat, especially for tomatoes and cool- season vegetables is important for successful gardening on the High Plains. Varieties that grow well in other areas of Texas may not do well on the High Plains. Keep a list of varieties that do well and test new varieties annually to determine those best-suited for High Plains conditions and soils. Disease resistance is important for optimal vegetable growth, especially with tomatoes. Many tomato varieties are genetically bred to have resistance or tolerance to specific root and foliar diseases. Varieties with genetic disease resistance typically have a series of letters like V, F, N or a variation of those letters following the variety name, or located somewhere on the seed packet. The letters indicate different disease resistances that particular varieties have and include the following: V = Verticillium wilt, F (races 1, 2, 3) = Fusarium wilt (races 1, 2 or 3), N = Rootknot nematodes, T = Tobacco mosaic virus, A = Alternaria, TYLCV = tomato yellow leaf curl virus and TSWV = tomato spotted wilt virus. Other vegetables may have genetic resistance to typical diseases found on the High Plains, and should have these listed on seed packets or in catalogs. Selecting disease resistant varieties is important for successful production of vegetables. Pumpkins (left) show different levels powdery mildew resistance, while tomatoes (right) show susceptibility to Tomato Spotted Wilt Virus. 4
- 5. Many gardeners love to grow heirloom varieties which offer unique characteristics as well as different colors and shapes. These are varieties that have been on the market or re-introduced after many years (possibly even more than a century!). Most heirloom varieties are typically found in tomatoes and watermelons, though other vegetables may have listed heirloom as well. One thing to keep in mind is that most heirloom varieties do not have or have very little resistance to diseases; therefore, other measures should be considered to reduce the potential for disease infection. Which variety of vegetable is best? There is no easy answer to that question. It depends on many factors including garden location, soil type, wind and frost protection, and how much effort gardeners are willing to expend after planting. Also, perhaps the best criteria for selecting vegetable varieties are taste and appearance. For example, if a particular tomato variety grows well on the High Plains but has no taste, then it should not be grown. However, it is best to first grow several varieties that have disease resistance and heat tolerance, and then select for taste and appearance. It is a good idea is to plant several varieties or types to extend harvesting, as well as reduce the potential for plant failures due to disease and heat. Varieties continue to come and go, and it is important to understand that at times the varieties desired are not available (due to crop failure) or are no longer produced and sold. For urban gardeners, contact local nurseries and County Agents or Specialists for up-to-date varieties. Soil preparation Every few years, before planting it is wise to take soil samples from the garden site and have them tested for nutrients, soil pH and percent organic matter. Contact local county Texas AgriLife Extension Agents for advice and download the soil test form at the following Texas AgriLife website: http://soiltesting.tamu.edu/files/soilwebform.pdf. In many areas within city limits, housing developments have been built on the former shores of playa lakes. These areas may have highly alkaline materials that were mixed with the surrounding soils during building and landscaping. Urban garden soils near new homes may contain construction leftovers (concrete, brick mortar and caliche (hard rock-like soils of calcium sulfate). Soil test results will help to determine how best to treat soils before planting. Adding cattle or chicken composted manure (left) greatly enhances soil quality, and improves overall soil health. Adding grass clippings (right) can also improve soils and add significant amounts of nitrogen to the garden. Soils are improved by adding organic matter (dead or decomposed plant materials), which may be applied as compost and composted manures. Composted organic amendments can improve soil nitrogen management, increase soil organic matter, soil microbial activity, and soil water holding capacity, as well as decrease erosion by water and wind. Composts can be tilled and incorporated 5
- 6. into soil. Compost should be mixed so that the soil structure is not affected, which might interfere with overall root growth and water movement. Compost may be applied safely to the garden at a rate of 50 lbs per 100 square feet (see photo on left, above). The composition of compost can vary widely and therefore it is important to know what it is made from. Too much highly fertile compost can actually hurt plant roots by raising soluble salt concentrations in the soil to toxic levels. Sphagnum peat is another source organic matter, though it adds little to no available nutrients. However, it will be a storehouse for plant-available essential elements applied prior to or during the gardening season. Use no more than 50 – 60 lbs of sphagnum peat per 100 square feet spread evenly throughout the garden area. Other sources of nitrogen and organic matter include grass clippings (see photo on right, above). Most lawns are over-fertilized to create a lush green look. Gardeners can take advantage of that excess nitrogen by saving the grass clippings and spreading them out between rows of vegetables. Be sure to use clean clippings that are free of weed seeds and reproductive rhizomes. If weeds seeds are present, kill them by placing clippings inside a black plastic bag and leave it out in the hot sun for several days, then spread as described above. When adding compost or sphagnum peat, use a rototiller or spade fork to work it into the soil to a depth of 12” or more. Break up any clods to provide a more granular structure to the soil. Also, it is a good idea to till in approximately 5 lbs of agricultural sulfur per 100 square feet of garden area if a soil test indicates it is needed. If the garden area contains heavy, compacted sandy loam or a clay loam soils with a high pH 7.8 or higher, and/or if a local alkaline water source is used, it will be beneficial to till in 5 – 6 lbs of gypsum per 100 square feet. This will assist in lowering the sodium salt concentration. Make sure to rototill the soil when it is properly moist (when it breaks apart easily), but not when it is so wet that it sticks to the garden tools. Compost can be obtained at retail nurseries and gardening chain stores, or local products may be purchased in Lubbock (small amounts or by the truck/trailer load) at South Plains Compost/Back to Nature (see www.backtonaturecompost.com) or in Tulia at SoilMender Products (www.soilmender.com). Fertilization Proper soil fertility is very important to successful vegetable gardening, and soil tests may indicate where deficiencies should be corrected (see website above). Soil sampling kits with forms, instructions and sampling bags may be available at Texas AgriLife Extension offices. If specific nutrient recommendations are not included in the results of the soil test, before planting or transplanting apply a balanced (13-13-13) fertilizer, and till in to a 6” depth. Fertilize at least 25 (5’ x 5’) square feet of garden area for larger plants (e.g. tomatoes, peppers, okra and spreading vine crops). Use a water-soluble fertilizer (e.g. Miracle-Gro, etc.) when transplanting vegetables to improve quick root initiation and growth. Ammonium sulfate fertilizer may also aid in reducing soil pH if that is a problem. Nitrogen is generally the main limiting nutrient in soils on the Texas High Plains. If the leaves of vegetables are chlorotic or yellow, then nitrogen may be lacking. Add a source of nitrogen to the soil to see if leaves become green. Additionally, it could be that zinc, iron or manganese levels are deficient. Avoid applying any fertilizer directly to the roots of plants as this may cause root pruning and leaf burn. Some vegetables will require more nitrogen than others. Over-fertilizing some vegetables (e.g. tomatoes) may cause the plant to grow more leaves and stems and less fruit. Planting legume crops (beans, southern peas) in rotation will benefit by adding nitrogen to the soil. Remember, applying small amounts of fertilizer extended over the season is better than applying it all at the beginning. 6
- 7. Average Amounts of Nitrogen and Irrigation Water Needed for Growing Vegetables on the Texas High Plains* Lbs. Lbs. Lbs. Nitrogen Water Nitrogen Water Nitrogen Water Vegetables /100 ft2 (in.) Vegetables /100 ft2 (in.) Vegetables /100 ft2 (in.) Asparagus 0.25 10 - 18 Cucumber 0.20 20 - 25 Potato 0.40 20 - 40 Beans 0.15 10 - 15 Eggplant 0.30 20 - 35 Pumpkin 0.20 25 - 30 Beets 0.20 10 - 15 Garlic 0.25 15 - 20 Radish 0.15 5-6 Broccoli, Cabbage, 0.35 20 - 30 Lettuce, Leaf 0.20 8 - 12 Spinach 0.30 10 - 15 Cauliflower & and Head Kohlrabi Carrot 0.20 10 - 15 Muskmelon 0.30 15 - 20 Squash 0.20 7 - 10 & Honeydew Chard, Swiss 0.30 10 - 15 Okra 0.20 15 - 20 Sweet potato 0.20 10 - 20 Cilantro 0.25 6 -12 Onions 0.30 25 - 30 Tomato 0.35 20 - 25 Collards, Kale, Mustard & 0.20 12 - 14 Peas, 0.10 10 - 20 Watermelon 0.20 10 - 15 Turnip greens southern Corn, sweet 0.25 20 - 35 Pepper (hot 0.35 25 - 30 and bell) * Note: Rate is in lbs of nitrogen (N) per 100 ft2 and product amount may vary depending on fertilizer or compost formulation. Adapted from: Commercial Vegetable Production, Recommendations for Texas. 2005. F. Dainello and J. Anciso, Ed. Texas AgriLife Extension Service Pub. No. B-6159. Sunlight The Texas High Plains do not lack in sunlight; however it is important to remember that while vegetables grow best in full sun, they only require a minimum of 6 – 7 hours of full sunlight. Vegetables grown in urban gardens are more likely to get sufficient sunlight when the garden is placed on the east side of a north/south-running fence, or on the south side of an east/west running fence. It is critical to prune any overhanging tree limbs or remove anything that will cause excessive shading. If sunlight is inadequate, vegetable plants may survive but will be leggy, pale in color and yield less. If using cages, use plastic or cloth wrapping that allows for maximum sunlight penetration (75% or higher is best). Do not wrap cages in colored plastics as they may alter plant growth. Seeding, transplanting and spacing requirements Many gardeners want to get out early and seed or transplant vegetables into their gardens, but planting too early has its risks. Proper soil temperatures are needed to ensure good seed germination and seedling emergence. Most cool-season vegetables such as beets, broccoli, cabbage, lettuce, radishes, spinach and leafy greens require a minimum soil temperature of 50 oF. Warm- season vegetables like tomatoes, peppers, eggplant, cucumbers, squash, sweet potatoes, etc. require warmer soils, generally around 65 oF. These temperatures should be found in the garden soil at a depth of 6” for approximately one week prior to seeding or transplanting. When these temperatures are followed, seedling emergence times are greatly enhanced. On the High Plains, proper soils temperatures for seeding cool-season vegetables generally occurs in mid- to late April, while in surrounding areas to the north or south it may occur a week earlier or later, respectively. Adequate plant spacing is important to raise high quality vegetables and the requirements vary depending on the vegetable and the variety. The growing method may also determine the spacing requirements for certain vegetables. For example, trellised tomatoes should be spaced 24” apart within the row, and 4 – 6 feet between rows, while caged tomatoes may be spaced 2.5 – 3’ apart in- row (this allows space for cages). Correct plant spacing allows for higher quality vegetables and is important to maximize yields. Additionally, adequate spacing will allow gardeners and visitors to walk between rows for scouting, weeding, pest control, fertilization, or harvesting and should allow room for rototillers in larger garden areas. 7
- 8. When seeding vegetables, it is critical to know the proper depth of planting for each type of plant. Some vegetables require shallow seeding depths (0.5”) to allow for adequate germination and emergence. Planting too deep may reduce overall stands as the germinating seedlings may not be able to push up towards the surface to emerge. Planting too shallow may also reduce stands due to soil being too dry or windblown. This is critical in the High Plains! It is also critical to watch out for heavy rains which can compact the soil surface and reduce emergence of small-seeded vegetables. If that occurs, it is important to break the crusted surface with a light scratching of the surface or use an tool such as a “Garden Weasel”. Be extremely careful not to go too heavy as germinating seedlings are very tender and shoots can break easily. Another easy method to break up surface crusting is to inter-seed small-seeded vegetables with a rapidly germinating vegetable like radish. The radish seed will germinate quickly and easily and break the surface crust allowing for weaker emerging vegetables to emerge more easily. A general rule of thumb for seeding vegetables is to plant them at a depth approximately 4 times the length of the seed itself. Also, most seed packets purchased at the nurseries will contain information on seeding depths; therefore it is important to read each seed packet label. Plant vegetable seeds (left) approximately 4 times the length of the seed to ensure proper depth. Transplants should be planted deep enough to cover the root ball (right). Some vegetables are best when transplanted into the soil rather than seeding. Vegetables that are best transplanted are those with small seeds that would have difficulty emerging through the tough High Plains soils. Vegetables that are best transplanted include tomatoes, peppers, broccoli, cabbage, cauliflower, eggplant. Other small-seeded vegetables like collards, kale and leaf lettuce may also be transplanted, though they often emerge quickly. Many of these types of vegetables are readily available at local and national retail nurseries, though variety selection is limited to what is sold. If the desired variety is not available locally, gardeners may purchase seed from catalogs or online and if possible, local retailers may grow the seed (at your cost) or gardeners may grow the transplants by starting seed indoors. If starting seed indoors, be sure to provide enough sunlight or artificial light to prevent the seedlings from becoming elongated. It is critical when transplanting vegetables to use plants that have well-developed root systems (see photo on right above). A well-developed root system will allow for more rapid moisture and nutrient uptake at transplanting. Be sure to place the roots deep enough in the soil to prevent moisture from “wicking” out of the root ball, but be careful not to cover any growing points on the seedling transplant. Cover the roots and press firmly into the soil, but cautious not to break the stems or damage roots. Use a readily-soluble starter fertilizer to provide nutrients for quick uptake by the transplants for rapid growth and development. Finally, with all transplants placed in gardens on the High Plains, “transplant shock” is expected. Most transplants will wilt somewhat, even if provided plenty of water at transplanting. This should correct itself within a few days after 8
- 9. transplanting. Potted seedlings can be placed outside for a few days prior to transplanting to harden plants to cooler temperatures and prepare them for more adverse conditions in the garden. Proper spacing of vegetables, both in the row and between the rows will maximize space and allow for higher quality yields. Photo on the left shows adequately-spaced sweet potatoes and tomatoes, while on the right, closer spacing is used for leafy vegetables like cilantro. Typical between-row and in-row spacing, and seeding depth requirements for commonly-grown vegetables on the High Plains are found in the table below. These are generalized requirements, and gardeners may alter spacing if needed due to garden size limitations. However, if spacing is changed, fruit quality, maturity and other factors may limit vegetable growth. Spacing requirements for commonly-grown vegetables on the Texas High Plains Seeding Seeding Vegetable In Between Depth Vegetable In Between Depth All measurements in inches Beans 3-4 30 - 36 1 - 1.5 Leaf Lettuce 2-3 18 - 24 0.5 Beets 2 14 - 24 1 Muskmelon 24 - 36 60 - 96 1 Broccoli* 14 - 24 24 - 36 --- Mustard 6 - 12 14 - 24 0.5 Cabbage* 14 - 24 24 - 36 --- Okra 12 - 24 36 - 42 1 Carrot 2 14 – 24 0.5 Onions sets 2-3 14 - 24 1-2 Cauliflower* 14 - 24 24 - 36 --- Peas, southern 4-6 24 - 36 2-3 Chard 6 18 - 30 1 Pepper* 18 - 24 30 - 36 --- Collards 6 - 12 18 - 36 0.5 Pumpkin 36 - 48 60 - 96 1-2 Corn, sweet 9 - 12 24 - 36 1–2 Radish 1 14 - 24 0.5 Cucumber 8 - 12 48 - 72 0.5 Squash 18 - 48 36 - 96 1-2 Eggplant* 18 - 24 30 - 36 --- Spinach 3-4 14 - 24 1-2 Garlic 2-4 14 - 24 1-2 Tomato* 36 - 48 36 - 48 --- Kale 6 – 12 18 - 36 0.5 Turnip greens 2-3 14 - 24 0.5 Kohlrabi 4-6 14 - 24 0.5 Watermelon 36 - 72 72 - 96 1-2 * = transplants only Adapted from “Texas Home Gardening Guide”, Cotner and Dainello, Texas AgriLife Extension Service. Wind protection All vegetables grown on the Texas High Plains will benefit from some protection against environmental extremes such as high winds and dust storms. Wind protection is critical to ensure healthy and quality growth. Row-cover cloth wrapped around cages covering a single plant will give limited protection against high winds, but will also allow for sunlight penetration. For smaller plants and determinate tomato varieties, cages should be 18” - 24” in diameter and 3 - 5 feet high (use taller cages when planting indeterminate tomatoes. For support, use a concrete rebar tied to the inside of the cages, buried about one foot. Following transplanting, wrap the cages with clear plastic 9
- 10. or row-cover cloth and clamp/tie the material to the wire cages with clothes pins. Row-covers can be used once or multiple years. Wrapped cages reduce wind speed, and keep the air and soil surrounding vegetable transplants warmer. Transplants wrapped in cages may be protected from flying insects. Row-cover cloth will allow rainfall to penetrate inside the cage. Unwrap cages when the leaves begin to push out. The cloth should be removed entirely at this point. Wind-damaged pepper plant (left) which was left with no wind protection after transplanting. The injured plant has torn, misshapen outer leaves and compact newer growth in center of plant. Although damaged, this plant eventually will outgrow these symptoms. On the right, tomato plants grown in cages wrapped with row cover cloth for wind protection. Other wind protection strategies can also be used including using living (companion) or killed plant cover crops/mulches and using reusable or permanent structures called windbreaks. Elbon rye, triticale, or tall-growing wheat started the previous fall will work very well. However, to keep from competing with vegetables, it should be killed, chemically or mechanically, approximately 2 weeks before planting the garden. Tall-growing sorghum, sunflowers and sweet corn also make excellent windbreaks when seeded several weeks before planting vegetables. Small transplants may be protected from the wind with shingles, 6” PVC pipes, boards, fencing, hotcaps (temporary for small seedlings) or anything that will block the wind and not shade out the plant. Windbreaks are also valuable protection for cages to prevent them from blowing over and breaking the plants inside. A general rule of thumb is for every foot taller that windbreak plants are compared to vegetables there will be protection outward for at least 10 feet from the windbreak row. A sweet corn windbreak (left) helps prevent excessive damage to more sensitive vegetables while hotcaps placed on tomato seedlings (right) at transplanting can prevent wind and frost damage to cold-sensitive vegetables. 10
- 11. Vegetables such as tomatoes, peppers, eggplant, cucumbers and pole beans can be staked or grown on trellises. If you use trellises, support the growing plants with twine woven around wooden stakes and also interwoven between plants. It is generally best to use 2” x 2” wooden stakes cut approximately 4’ in length. Space the stakes so that there are at least 2 plants between each stake (see photo below). Cattle panels or fencing wired to t-posts can also offer excellent support when trellising vine crops such as cucumbers and even melons. Trellised tomatoes (left) using wooden stakes and (right) cucumbers trellised on cattle panel fencing provide excellent means to keep fruit off the ground and allow air movement through the canopy to reduce disease potential. Plastic mulches Plastic (polyethylene) mulches are beneficial for increasing soil temperatures, reducing soil evaporation and improving weed control. Foliar and fruit disease reduction may also occur by keeping leaves and fruit from touching the soil and becoming infected. Black plastic mulches may raise soil temperatures 15 – 30 oF during the early season allowing vegetables to increase their growth and resulting in earlier and higher yields (possibly 20% or more) compared to the bare ground. Black plastic mulch is most common, though other colors are used commercially and can be found in seed catalogs. Other colored mulches may offer specific benefits to gardeners, but may not be as good at preventing weeds. If the weeds yellow or purple nutsedge are found in the garden area, plastic mulches (including black plastic) will not control them. Brown or olive colors offer similar results as black plastic; and silver mulches have been found to deter certain flying insects by causing their disorientation. University research suggests that silver reflective mulch can also reduce virus infections by decreasing the presence of disease-carrying insects (see photo on left, next page). Red plastic mulch has been shown to give earlier tomato yields in USDA trials and in other states, but not in gardens on the Texas High Plains. Research in Lubbock showed that tomatoes grown on red plastic mulch performed poorly with lower yields when compared to black plastic mulch. Yellow and blue plastic mulches increased plant growth and early watermelon yields in tests conducted on the High Plains; however, overall yields were equal to black plastic. Other mulch types may also be available and include paper mulches made from recycled paper fibers, and recent developments have improved the quality of biodegradable mulches produced from grain by-products (see photo on right, next page). These products offer similar benefits to black plastic mulches, but do not have to be removed by hand at season’s end, or following harvest. Biodegradable mulches have the advantage of being rototilled into the soil and will break down into inert byproducts such as CO2, water and biomass. Several of these products may be found in seed or farm supply catalogs. 11
- 12. Use of a silver reflective mulch combined with a black stripe for warming the soil in peppers (left) and biodegradable mulch in eggplants on right. Regardless of mulch type, if they are used, it is critical that all edges of the plastic mulch are buried at least 6” deep in the soil to prevent the West Texas winds from pulling the mulch up and damaging plants. When placing the mulch in the garden, it is best to do it on a non-windy day, and when the soil is moist so that the edges will have some weight. Following burial of the edges, seal them with water but be careful not to move soil off of the mulch edges. When transplanting into the holes in the mulch, place soil around each plant and cover the mulch hole to prevent winds from getting under and lifting the plastic. If using plastic mulches for more than one year, it is essential to plant a different vegetable family into the same holes to reduce potential for increasing root diseases. Soil compaction can be a significant problem with leaving mulches for more than one year. When the garden soil is compacted and it is tough to plant, reduced root penetration may occur. If that happens, mulches should be removed and the soil underneath rototilled or worked with a spade. Several commercial seed catalogs sell both plastic mulches and biodegradable mulches in small quantities for home gardeners. High temperatures (heat) Most vegetables are very sensitive to the high temperatures that predominate during the spring and summer months on the Texas High Plains and the surrounding areas. Mid-summer temperatures average in the mid- to low- 90’s every year, and occasionally temperatures reach over 100 oF (see graph below). When high temperatures are greater than 90 oF, and when they occur over an extended period, flowers of heat-sensitive vegetables may abort or the blossoms may drop off. This can occur especially if the night-time temperatures remain above 75 oF (see photo below). Aborted flowers generally occur due to a lack of pollination during high daytime and night temperatures, or the heat kills the pollen. When this happens, fruit development may be delayed, even if the plants appear to be healthy. This is particularly damaging to corn pollination where kernals within the ears may not fully develop. Tomatoes are also very sensitive to heat, and transplants placed in the garden during late April or early May, if temperatures remain hot for extended periods, may have their harvest delayed until late August to mid-September. In addition, overall plant growth may be delayed. When available, it is a good idea to use heat tolerant varieties. Cool-season vegetables such as beets, broccoli, cabbage, cauliflower, lettuce and leafy greens should be planted in early spring or early fall to allow for best growth. Vegetables sensitive to high temperatures on the High Plains and surrounding areas include tomatoes, snap beans, squash, pumpkins, watermelons and sweet corn. Warm-season vegetables like eggplant, chile peppers, okra and southern peas generally fair well through high temperature periods. Heat tolerant varieties of tomatoes and other vegetables are 12
- 13. available through seed catalogs, though they are likely not found in retail garden centers or even local nurseries. When consistent high temperatures occur, it is critical to keep the soil moist with uniform irrigations, and this may help in reducing plant stress. Plants may become so stressed that they reach the “permanent wilting point”, and the whole plant or part of the plant (leaves, flowers, etc.) may wilt, die and become necrotic. If this happens, remove the dead plant parts and continue to water as needed. When transplanting vegetables during hot periods, keep the leaves and stems off the soil as this may result in unnecessary leafburn or death to small seedlings. Average daily high and low temperatures for Lubbock, Texas 100 90 80 70 60 oF 50 Daily Highs 40 Daily Lows 30 20 10 0 Graph showing average daily high and low temperatures (oF) in Lubbock, Texas (left) and (right) temperature sensitive flower buds have dropped off a tomato plant during high temperatures. Severe weather Vegetables that are protected by windbreaks and/or cages will likely have less damage from the high winds, dust storms and hail that occur seasonally on the Texas High Plains. Newly transplanted seedlings should be protected with wire cages wrapped with row-cover cloth (tomatoes, peppers and eggplant) or hoops covered with polyethylene plastic (broccoli and cabbage, etc.). If cages are not wrapped and there is a risk of high winds, hail or frost damage, temporarily cover the plants with a blanket until the threat passes. If non-caged or unprotected plants are hailed upon, there is the possibility that the plants could survive (see photo on left below). If the plant’s main stem is broken and it is likely that it will not survive, and there is still time to replant, replace the transplants. If the main stem is fine, and only a few lateral branches and leaves are damaged, prune the broken branches and leaves to the point where no damage is observed. Within a week there should be new growth of undamaged buds (leaves and branches), but if not, remove the entire plant and start with new seedlings. Plants which can survive light to moderate hail damage and continue to grow include tomatoes, peppers, eggplant, squash, leafy greens, sweet corn, okra, watermelons, and cantaloupe amongst others. While new growth may continue, plant maturity will likely be delayed. Also, depending on the timing of the hailstorm, the majority of all vegetables will likely have some damage that will cause lower quality yields. If chemicals are used, damaged plants should be sprayed with a broad-spectrum fungicide and bactericide to reduce the potential for leaf and root diseases. Finally, if fruit was present and damaged on the plants during severe weather, remove it from the plant and discard so that new healthy fruit can emerge and grow. If damaged fruit is left on the plant, it will take nutrients and other resources away from the new plant growth. 13
- 14. Summer squash plant (left) one day following a severe hail storm. This plant was able to continue growing and squash was harvested later in the season. Broccoli plants (right) are protected from wind inside a plastic tunnel. Soil moisture and irrigation Water is essential for all vegetables to produce a quality and abundant harvest. However, keeping High Plains soils moist enough at critical vegetable growth stages is essential. Inadequate or irregular watering may lead to physiological disorders or may result in damaged plant reproductive buds (see photo below). Consequences of low soil moisture include aborted flowers or blossoms, misshapen fruit and stems, reduced size of harvested fruit, stems or heads, and ultimately lower yields. Drought stress may result in restricted leaf growth leading to higher incidence of sunburned tomatoes, peppers and eggplant when exposed to high-intensity sunlight on the High Plains. It is best to maintain optimum soil moisture from the center of the planted rows outward at least 2’, depending on the vegetable and its size. Larger tomato plants may require at least a 3 – 4’ wet zone to encourage maximum root development. Irrigating in this manner will optimize plant health and increase yield quality and reduce the potential for physiological fruit disorders. As plant growth and increases, the volume of water required may also increase. In the spring to mid-summer, water every 3 days to maintain adequate soil moisture. Plastic mulch or a layer of organic mulch over the soil surface covering from the base of the plants outward will decrease water loss and increase overall water use efficiency. Overwatering may lead to increased root and foliar diseases (see photo below), and may also decrease plant growth by leaching soluble nutrients like nitrogen from the root zone. Uniform or consistent irrigation is best for quality vegetable production. Flooding rows in gardens is typical in the area, but is less efficient and may increase potential for root diseases. Using drip tape or soaker hoses is preferable to hand-watering with hoses or using overhead sprinklers which may increase foliar disease potential to susceptible vegetables. Timers on soaker hoses and drip irrigation can greatly improve irrigation uniformity and reduce the need to constantly water by hand. Do not use overhead sprinklers during windy days as this is very inefficient and much of the water will evaporate before reaching the plants. Irrigation should occur long enough to push water down to a level of 6 – 8” deep in order to reach the most actively growing roots. Water sources should be periodically checked for salt levels and other contaminants that may damage garden plants, especially if garden is located near cattle and other feedlots. City water is fine to use. Captured rainwater is an excellent source for irrigating gardens, and can be easily done with a 50 gallon barrel set strategically where rainfall accumulates off houses. Be sure to cover barrels with a lid to avoid mosquito egg laying and reproduction. Rainwater capture kits are available online, and additional information is available at http://rainwaterharvesting.tamu.edu/. 14
- 15. Typical radial fruit cracking of tomatoes, a physiological disorder from non-uniform watering (left); and Phytophthora root rot of peppers (right) from over-watering. Note the progressive movement of the disease down the row. Pest control It is important to inspect vegetable gardens often (at least once weekly) for common insect and disease pests, as well as any emerging weeds. In addition, weekly scouting will allow gardeners to inspect for any other physiological or mechanical problems in the garden. Insects and diseases may attack all or selected parts of the growing vegetable plant and this may occur either during early, mid- or late-season growth and development. Affected plant parts may include the leaves, stems, fruits, roots and tubers. Failure to inspect and subsequently control pests throughout the entire season may result in a complete defoliation (loss of leaves), or a total loss of the fruit. Some diseases may kill an entire plant or set of plants within a day or two. If assistance is needed in identifying insects or disease symptoms for watermelons, squash, cantaloupe and cucumbers, there are many university online services available including the Texas AgriLife Extension Service website - http://aggie-horticulture.tamu.edu/publications/cucurbitproblemsolver/; for tomatoes go to - http://aggie-horticulture.tamu.edu/publications/tomatoproblemsolver/). For other insect pest problems, additional online help may be found at http://vegipm.tamu.edu/. Disease samples may be sent to the Texas Plant Disease Diagnostic Lab in College Station (http://plantclinic.tamu.edu/), but there will be a fee charged per sample tested. Additional help identifying insects, diseases and weeds may be obtained by calling or emailing photos to local County Agents and Specialists. Many small flying insects are annually blown onto the Texas High Plains with the southerly winds from Mexico. Insects such as aphids, leafhoppers, thrips and psyllids can carry viruses and bacteria in their saliva or mouthparts which on feeding will infect vegetables or similar plants and weeds. Preventive measures should be the first line of defense to reduce insects in vegetable gardens including the use of silver reflective mulches, row-cloth coverings wrapped around cages and polyethylene plastic covered hoops. Intercropping vegetables or using mixed plantings may also reduce infestations by causing confusion and reduced reproduction. When preventative measures are not successful, chemical sprays and dusts may be needed to prevent further damage. Always be sure to use proper safety procedures and equipment when spraying vegetables, and be aware of any possible non-target pets and children that may wander into a garden. On the following page is a table of common insects and diseases found on garden vegetables for the state of Texas and the High Plains. 15
- 16. Important insects and diseases of vegetables in Texas Vegetable Insects Diseases Asparagus Asparagus beetles, cutworm, grasshopper Crown rot, Cercospora leaf spot, rust, nematodes Beans Aphids, Thrips, Stinkbug, Cutworm, Cabbage Anthracnose, Botrytis blight, Downy mildew, Halo blight, looper, Corn earworm, Cowpea curculio, Powdery mildew, Pythium (Damping-off), Rhizoctonia, Leafhopper, Cucumber beetle, Mites Rust, White mold, Nematodes Beets Aphids, Beet armyworm, Webworm, Flea beetle, Downy mildew, Leaf spot, Pythium (Damping-off), Leafhopper, Wireworm, White grub, Stink bug, Nematodes Mites Broccoli, cabbage, Cabbage root maggot, Cabbage looper, Black rot, Black leg, Bacterial soft rot, Rhizoctonia, Cauliflower & Kohlrabi Diamondback moth, Beet armyworm, Aphids, Alternaria, Downy mildew, Brown bud, Tipburn, Hollow Harlequin bug, Whiteflies, Mites stem (heart), Nematode Carrot Carrot weevil, Wireworm, White Grub, Aphid, Leaf blights, Powdery mildew, Pythium (Damping-off), Leafhopper, Flea beetle, Cutworm, Mites Cotton root rot, Nematodes Chard, Swiss Beet armyworm, Webworm, Aphids, Flea beetle, Pythium (Damping-off), Downy mildew, Powdery Leafminer mildew, Leaf spots, Heart rot Cilantro Armyworm, Aphids Leaf spots, Nematodes Collards, Kale, Cabbage looper, Diamondback moth, Aphids, Flea Black rot, Alternaria, Downy mildew, Nematodes Mustard & Turnip beetle, Whiteflies greens Corn, sweet Seed corn maggot, Wireworm, Southern corn Corn leaf blight, Rusts, Smut, Bacterial wilt, Viruses, rootworm, Corn earworm, Fall armyworm, Corn Nematodes aphid, Southern corn borer, Mites Cucumber Cucumber beetle, Leafminer, Aphids, Pickleworm, Downy mildew, Powdery mildew, Anthracnose, Fruit Melonworm, Whiteflies, Mites belly rot, Viruses, Nematodes Eggplant Whiteflies, Aphids, Colorado potato beetles, Flea Phomopsis fruit rot, Anthracnose, Pythium (Damping- beetle, Leafminer, lacebug, Armyworm, Mites off), Phytophthora crown rot, Nematodes Garlic Thrips, Cutworm, Armyworm, Mites White rot, Botrytis, Purple blotch, Powdery mildew, Downy mildew, Pink root, Nematode Lettuce, Leaf and Cabbage looper, Corn earworm, Armyworm, Downy mildew, Sclerotinia drop, Pythium (Damping- Head Aphids, Grasshopper, Cricket, Leafhopper, off), Cercospora leaf spot, Gray mold, Viruses, Tip Burn, Leafminer Nematodes Muskmelon & Cucumber beetle, Leafminer, Aphids, Downy mildew, Powdery mildew, Alternaria, Gummy Honeydew Pickleworm/melonworm, Whiteflies, Mites stem blight, Vine decline, Viruses, Nematodes Okra Aphids, Corn earworm, Stink bug, Mites Leaf spots, Fusarium wilt, Cotton root rot, Nematodes Onions Onion maggot, Thrips, Armyworm, Cutworm, Purple blotch, Stemphyllium blight, Pink root, Downy White grub, Wireworm mildew, Botrytis blast and neck rot, Basal rot, Nematodes Peas, southern Cowpea cucurlio, Cutworm, Armyworm, Aphids Powdery mildew, Rust, Fusarium wilt, Viruses, Nematodes Pepper (hot and bell) Flea beetle, Leafminer, Aphids, Mites, Thrips, Corn Alternaria, Anthracnose, Phytophthora blight, Bacterial earworm, Beet armyworm, Pepper weevil leaf spot, Southern blight, Viruses, Nematodes Potato Leafhopper, Psyllid, Aphids, European corn borer, Seed decay, Blackleg, Early blight, Late blight, Tuber Colorado potato beetle, Mites rot, Nematodes Pumpkin Cucumber beetle, Leafminer, Aphids, Squash bug, Powdery mildew, Downy mildew, Alternaria, Squash vine borer, Whiteflies, Mites Anthracnose, Gummy stem blight, Ascochyta fruit rot, Viruses, Nematodes Radish Flea beetle, Cabbage looper, Aphids Downy mildew, White rust, Pythium (Damping-off), Choanephora fruit rot, Viruses, Nematodes Squash Cucumber beetle, Leafminer, Aphids, Squash bug, Powdery mildew, Downy mildew, Gummy stem blight, Squash vine borer, Pickleworm, Melonworm, Ascochyta fruit rot, Viruses, Nematodes Whiteflies, Mites Spinach Cabbage looper, Beet armyworm, Aphids, Flea Pythium (Damping-off), White rust, Downy mildew (blue beetle, Leafminer mold), Cercospora leaf spot, Viruses, Nematodes Sweet potato Sweet potato weevil, Wireworm, White grub, Scurf, Black rot, Stem rot, Surface rot, Soil pox/soil rot, Sweet potato flea beetle, Mites Leaf spots, Nematodes Tomato Aphids, Whiteflies, Cutworm, Fruitworm, Pinworm, Early blight, Late blight, Bacterial spot, Powdery mildew, Leafminer, Stinkbug, Mites Verticillium wilt, Fusarium wilt, Blossom end rot, Nematodes Watermelon Cucumber beetle, Leafminer, Aphids, Whiteflies, Downy mildew, Powdery mildew, Alternaria, Gummy Pickleworm, Melonworm, Mites stem blight, Fusarium wilt, Viruses, Nematodes Adapted from: Commercial Vegetable Production, Recommendations for Texas. 2005. F. Dainello and J. Anciso, Ed. Texas AgriLife Extension Service Pub. No. B-6159. 16
- 17. There are many alternative methods for controlling pests, but most important is vegetable rotation. Vegetables of the same genetic family should not be grown in the same spot for at least 3 years or longer. However, if space is limited, such as in an alleyway garden, rotational planting to the same spot every other year should be minimal. As mentioned in a previous section, the first line of defense should be planting resistant varieties. However, if chemical pesticides are used for controlling pests, several important steps must be taken to ensure good control. First, the pest must be correctly identified. If the pest is not identified, the chemical used may not be adequate. Second, when using chemicals, it is critical to choose the right pesticide product for right pest. Foliar sprays are generally most effective, but this may depend on the pest and where it is located on the plant. If foliar sprays are used, excellent leaf coverage and canopy penetration is needed for contact insecticide and fungicide sprays. Third, always use the recommended concentration (or rate) of the pesticide to prevent under- or overdosing of edible vegetables. Always make sure that the label is followed regarding spraying limits for days before harvest. This should be available on the container or label, or can be found online. Many pesticides cannot be sprayed within a specified time limit as printed on the label before a vegetable can be harvested to eat. Never take short cuts when using pesticides! Before applying any pesticide, READ THE ENTIRE PESTICIDE LABEL and follow all instructions carefully. For up-to-date pesticide information, please consult control guides available from local Texas AgriLife Extension Service offices and local garden centers, or visit company websites online. Pesticides must be stored properly to prevent accidental contact of children, unprotected gardeners, family members or neighbors. Follow all safety procedures listed on pesticide labels including wearing chemical resistant gloves, long sleeved shirts, hats, eye protection, and protective footwear. Be careful about inhalation of pesticides from drift due to winds, and never spray on windy days or drift and non-target plant injury may occur. All spray equipment should be cleaned and rinsed out immediately following any applications and stored properly where children or animals cannot come in contact. If accidental exposure to pesticides does occur, rinse contaminated skin immediately for 15 minutes. Wash contaminated clothing separately from other clothing to prevent cross-contamination. If any pesticide is ingested, read and follow label instructions for proper safety procedures and call local emergency professionals immediately. Weed control Weeds are unsightly in any garden, and they also interfere with vegetable productivity. Weeds compete for space, light, nutrients and soil moisture. Proper spacing of vegetables within a garden will improve control by shading out small weeds, and should be the first line of defense. Black plastic mulch or spreading grass clippings, newspaper, etc., may also help to suppress weeds. In small gardens use hand-held hoes or other tools to remove weeds, or remove weeds by hand. For thorny weeds or those that may cause skin irritations, be sure to wear rubberized hand gloves. Identifying weeds and understanding their biology is very important for their control in any garden. Weeds generally can be classified into categories such as grasses (bermudagrass, crabgrass, sandbur, etc.), broadleaves (carelessweed, dandelion, khaki weed, nightshade, etc.) and sedges (yellow or purple nutsedge, sometimes incorrectly called nutgrass). In addition, all weeds have life cycles that are either annual (live only for one year) or perennial (live for multiple years). A basic knowledge of weed biology will improve the chances for successful control. Deep-rooted perennial weeds will respond differently to either weed removal or chemical sprays than will annual weeds. Pulling perennial weeds will leave unseen reproductive parts below ground which will eventually emerge and continue to compete within the garden. Therefore, a chemical herbicide containing glyphosate or a grass-specific chemical would be good choices for perennials. Also, perennial weeds that are under stress are less likely to be killed than healthy weeds! 17
- 18. When spraying broad-spectrum herbicides containing glyphosate or similar products, be careful not to drift any product on vegetable leaves or other plant parts as this may kill or severely stunt plants. A carefully-placed paintbrush or “Q-Tip” dipped in the concentrated herbicide and wiped on several leaves of the weeds around the garden will help where drift is a concern. Avoid using any broadleaf weed-killers that contain volatile active ingredients as these be taken up by susceptible plants (tomatoes are very sensitive). Do not use the same sprayer for fungicides and insecticides after spraying herbicides as this may cause injury to non-target vegetables. Most herbicide injury is seen as deformed leaves and/or twisted plants. Sprayed plants may overcome symptoms and survive, but there is usually nothing that can be done to alleviate the problem. Always READ AND FOLLOW THE LABEL INSTRUCTIONS FOR ANY HERBICIDE. For urban gardeners, there are many herbicide choices available for use, including several organic herbicides. Contact local County Agents or Specialists for available choices, or visit local retail nurseries for best options. Six important weeds infesting home gardens on the Texas High Plains and surrounding areas include: (top row); left, Carelessweed; middle, Goathead; and right, Common purslane. Bottom row; left, Nutsedge; middle, Russian thistle, and right, Silverleaf nightshade. Harvesting and storage Harvesting vegetables at the right time is important for high quality and good taste. When picked too early or too late, vegetables may not have the best flavor or consistency. Vegetable gardeners should realize the following 3 critical aspects of harvesting vegetables: temperature, humidity and ventilation. The harvested vegetable continues to carry on life processes after it has been picked from the plant. To keep vegetables at their peak of freshness, it is important to limit these processes by quickly cooling the harvested part. Storing vegetables will not improve their quality, except for ripening in some cases. All vegetables are susceptible to damage when harvested, though some may be more susceptible than others. It is important to limit bruising and cuts when handling the harvested vegetable from the time it is cut to the time it is stored. If possible, remove any decaying portions of the vegetable so that increased rotting does not occur. Adding humidity along with adequate ventilation will prolong storage. The table below has information on harvesting and storing of home-grown vegetables. 18
- 19. Harvesting and storing vegetables Vegetable Harvesting Storage Conditions Asparagus Cut 6 – 8” shoots below soil line. Stalks should be Refrigerate without washing. firm, with closed tips. Beans Pick before maturity when pods are almost full size Keep cold (45 oF) and humid. Washing before storage helps before seeds begin to bulge. retain moisture. Beets Pull when approximately 2” in diameter. Remove tops Wash and refrigerate immediately. leaving 1.5” on late crops. Broccoli, cabbage & Harvest broccoli when head is fully developed before Chill immediately following harvest. Store broccoli, cabbage cauliflower flower buds open. Harvest cabbage when heads are and cauliflower in refrigerator crisper. firm and solid. Harvest cauliflower when curds are full size (6 – 8”). Carrot Harvest when small and succulent, do not let them Remove tops, wash and store in refrigerator. get over 1” diameter. Chard, Swiss Harvest leaves when 4 – 6”, place immediately in cold Store in refrigerator in plastic bags. water to keep fresh while in garden. Cilantro Collards, Kale, Mustard & Cut when leaves are 6 – 10” long before they start to Wash and chill immediately. Turnip greens yellow. Avoid wilted or flabby leaves. Corn, sweet Watch for signs of early harvest. Corn silks will dry Susceptible to sugar-to-starch conversion, reducing and darken. Pick when corn is in the milk stage sweetness. Some varieties (super sweet) can be stored for (when milky juice exudes from crushed kernals. up to 2 weeks in refrigerator. Chill immediately following harvest. Cucumber Harvest when fruit is bright, firm and green. Length Store up to 5 days in refrigerator. Do not pickle fresh or depends on how eaten or processed for pickling. salad-type cucumbers. Eggplant Pick when near full size (6 – 8” diameter) with firm Keep cool and humid, but not too cold. but bright skin. Old fruit is dull and soft. Garlic Pull bulbs when foliage loses color or when 50% of Store in a cool, dry location. tops fall over. Lettuce, Leaf and Head Harvest when outer, older leaves are 4 – 6” long. Place immediately in cold water when picked in the garden. Older leaves may be removed. Head lettuce should Wash and store in refrigerator. be moderately firm. Muskmelon & Honeydew Harvest muskmelon when the stem is at ¾ slip, or Store in cool area. when it is almost ready to fall off the vine. Outer rind should not have any green color. Honeydew should be yellowish to creamy white, velvety, and rind should be slightly soft at blossom end. Okra Pick pods when 3 – 4” long, before they reach the Chill immediately. hollow, puffy stage. Should break off easily. Onions Ideal bulbs are 2 – 4” in size, pull when tops have Store in a cool, dry location. fallen over and remove soil from bulb and roots. Let dry for a day or two before storage. Peas, southern Harvest pods when shiny green and fully developed. Wash and chill immediately. May deteriorate rapidly in high temperatures. Pepper (hot and bell) Harvest bell peppers (4 – 5”) when they have well- Store between 45 and 50 oF. formed lobes, thick-walled. Some bell varieties turn yellow or red when mature. Harvest jalapenos when 2 – 2.5” long. Potato Dig potatoes when tubers are 2 – 3” in diameter. Do not wash before storing in a cool, dry location. New potatoes can be smaller. Let tubers dry for several hours and remove any remaining soil. Pumpkin Pick when fruits are full size and have turned Store in cool, dry area. appropriate colors. Rind should be firm and glossy and bottom is cream to orange colored. Radish Harvest when diameters reach 1”. Wash and chill immediately. Squash Harvest when fruit are 4 – 6” long for yellow Summer squash is susceptible to chilling injury. Do not crookneck, 6 – 8” long for straightneck. Harvest store for more than 3 days. Winter squash can tolerate winter squash when rind is full, firm and glossy, some frosts. creamy-orange bottom. Spinach Cut leaves when they are 4 – 6” long. Pull off larger, Wash leaves and store in bags in refrigerator. older leaves to allow new growth for later harvest. Sweet potato Harvest in late fall before first frost. Lift out of ground Store in a cool, dry location. to avoid bruising and cuts. Remove soil, do not wash. Tomato Pick when fully colored but still firm. Harvest red Store ripe tomatoes in refrigerator or in a cool dry location. tomatoes for fresh cooking and eating. Do not process overripe tomatoes. May pick mature green fruit and leave at room temperature to ripen. Watermelon Pick fruit when underbelly has a creamy to orange Refrigerate or store in cool, dry location. color, or when it has a dull sound when thumped. Some varieties are ready when the tendril (curly stem) at the stem end has dried down. Adapted from: Harvesting and Handling Vegetables, A. Wagner and S. Cotner, Texas AgriLife Extension Service, http://aggie- horticulture.tamu.edu/extension/harvest/harvest.html. 19