Enerit ISO 50001 Document Management Training Presentation
•
1 gefällt mir•1,091 views

Enerit ISO 50001 is the only software that manages all aspects of a systematic energy management system based on ISO 50001 standard and Superior Energy Performance (SEP). The document management module also covers all aspects for compliance for ISO 14001 and ISO 9001.
![© 2007 Ltd.
© 2014 Ltd.
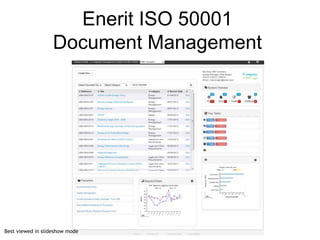
Software Login
1. Open Web browser ([your Enerit url])
3. Enter username and password
4. Click “Sign In”](data:image/gif;base64,R0lGODlhAQABAIAAAAAAAP///yH5BAEAAAAALAAAAAABAAEAAAIBRAA7)
Empfohlen
Empfohlen
Weitere ähnliche Inhalte
Was ist angesagt?
Ähnlich wie Enerit ISO 50001 Document Management Training Presentation
Ähnlich wie Enerit ISO 50001 Document Management Training Presentation (20)
Mehr von Arantico Ltd
Mehr von Arantico Ltd (20)
Kürzlich hochgeladen
Kürzlich hochgeladen (20)
Enerit ISO 50001 Document Management Training Presentation
- 1. © 2007 Ltd. © 2014 Ltd. Enerit ISO 50001 Document Management Best viewed in slideshow mode
- 2. © 2007 Ltd. © 2014 Ltd. Software Login 1. Open Web browser ([your Enerit url]) 3. Enter username and password 4. Click “Sign In”
- 3. © 2007 Ltd. © 2014 Ltd. 1. Click “Create New…” 2. Click “Document Management” 3. Click “Document” Creating a Document 4. A blank form opens in a new window.
- 4. © 2007 Ltd. © 2014 Ltd. Data Entry: Document • Title: Enter the title. This field is mandatory. • Building/Location & Sub-Location: Select from the list of pre-defined locations. The list of locations is configured in the Administration section. This field is mandatory. • Document Type: Select from list the type of document (e.g. Work Instruction, Procedure, SOP etc.) The list of Document Types can be configured in the Admin section. (*The document type selected will determine who the document is submitted to for review – see later and also the Administration help) • Category & Sub-category: select from list of categories and sub- categories. This allows further filtering and sorting of documents in views and report charts. • Standard & Section: Select the standard that you want to cross reference this document to which will show in the issued documents view. • Version: This is automatically assigned. A fully issued document is always a whole number (e.g. 1,2,3,) In progress documents will always be in between whole numbers (e.g. 1.02, 2.03, etc.) • Owner: Click on the icon and select the person(s) responsible for this document. • Format: You can enter information: • a) directly into the form; • b) as an attachment; or • c) using a URL link. (more details in later slides) • Attachment: If “Format” is “”Document” or “Attachment” this button is used to attach the document Creating a Document
- 5. © 2007 Ltd. © 2014 Ltd. Creating an document (Format = Document) 1. Insert and format text 2. Insert images directly into the document
- 6. © 2007 Ltd. © 2014 Ltd. Creating a document (Format = Attachment) 1. Click button to add an attachment. See detailed instructions in next slides. 2. Click “Save” if you want save your document. Click Cancel if you want to quit working on the document. Click “Submit” button if you are ready to send document to the document controller(s)* for review When document type is “Attachment” and the document is issued, the attachment will be automatically launched. Note: Some browser security settings may cause some additional selections. Note: Attachment can only be created when document has been saved. NOTE: *The document controller(s) are defined in the Location document and are determined based on the “Document Type” selected. See Administration help for more details.
- 7. © 2007 Ltd. © 2014 Ltd. 1. Click on browse Button Creating a document (Adding an Attachment) 3. Click Close button when finished adding attachments 2. Click attachment button. The attachment name appears as shown. To add more attachment repeat steps 1 & 2. To delete an attachment select the attachment by clicking in the tick box and then click on the waste basket icon
- 8. © 2007 Ltd. © 2014 Ltd. Creating a document (Format = URL Link) 2. Click “Save” if you want save your document. Click Cancel if you want to quit working on the document. Click “Submit” button if you are ready to send document to the document controller(s)* for review When document type is “URL Link” and the document is issued, the link will be automatically opened. NOTE: *The document controller(s) are defined in the Location document and are determined based on the “Document Type” selected. See Administration help for more details.
- 9. © 2007 Ltd. © 2014 Ltd. Viewing a Document Edit • If a user has sufficient privileges they can edit a document (See next slide for more information) History • Information on the history of the document can be viewed by clicking on the History symbol. Save & Close (S&C) • A user can Save and close the document by clicking this button. Edit History S&C
- 10. © 2007 Ltd. © 2014 Ltd. Editing a Document 2. Edit Edit • If a user has sufficient privileges they can edit a document by clicking on the Edit button circled above or • when they have opened the document by clicking on it (Step 1), the user can then click the Edit symbol in the top left corner (Step 2).
- 11. © 2007 Ltd. © 2014 Ltd. In Progress Documents In Progress • If a user has sufficient privileges they can view IN Progress documents using the Docs button in the System Overview section. Your Tasks • If a user has been assigned to review, authorize or issue a document then a task should also appear in the Your Tasks area.
- 12. © 2007 Ltd. © 2014 Ltd. Exercise – New Document • Create a new document (Create New.. button) • Enter details (select location, category etc.) • Select Format (enter text or add an attachment or a URL) • Save document (using the save button on top bar or at bottom of document) • Find document in the Dashboard (Your Tasks, System Overview) • Select someone else on the training today as a reviewer and authoriser • Click submit • • Email to review. Click on Link and click Accept • • Find where the documents are in the dashboard? • • • Alfred will have to do the final issue of the document.
- 13. © 2007 Ltd. © 2014 Ltd. Document Management Workflow
- 14. © 2007 Ltd. © 2014 Ltd. Document Management Workflow
- 15. © 2007 Ltd. © 2014 Ltd. Requesting a new Document 2. Click “Document Management” See your Docs Details on creating a new document and entering content etc. in previous slides.
- 16. © 2007 Ltd. © 2014 Ltd. Submitting a Document for Review 1. Choose “Submit for Review” option. 2. Click on button and select person to assign. Select Review by Date. 3. Enter any comments for the assignee. 4. Click the “Yes “or “No” depending on whether you want to submit for authorisation .
- 17. © 2007 Ltd. © 2014 Ltd. Submitting a Document for Authorisation 2. Click on button and select person to assign. Select Review by Date. 3. Enter any comments for the assignee. 4. Click the “Submit “button.
- 18. © 2007 Ltd. © 2014 Ltd. Review/Authorise a Document 1. Choose Either “Accept” or “Reject” 2. Enter “Summary” of your comments 3. Enter “Details” of your comments 4. Add an attachment if necessary
- 19. © 2007 Ltd. © 2014 Ltd. Exercise – Document Workflow Submit for Review/Authorisation • Find your document in the Dashboard (Your Tasks, System Overview) • Select someone from todays training session as a reviewer and authoriser • Click Submit Review/Authorise • Find review/authorise email and click on link in email (check Spam/Junk folder!) Or • Find the documents in the dashboard (“Your Tasks” or “System Overview”) • Click on “Accept” or “Reject” and leave a comment (enable site Submit for Issue (Only “Energy Manager” role allowed to issue document)
- 20. © 2007 Ltd. © 2014 Ltd. Issue a Document 1. Choose “Issue Now” or “Reject” Documents can also be viewed by “Next Review Date”