Dwarf Apple Fruiting Wall Guide
•
0 gefällt mir•6 views

The dwarf apple fruiting wall system was developed at Oregon State University over 25 years. Trees are planted on dwarfing rootstocks and trained to a central leader using a trellis system. Rows are planted 12-16 feet apart with trees spaced 4-6 feet within rows. The system produces early and heavy crops of 35-45 tons per acre through precise pruning to maintain an open tree shape that facilitates harvesting. Advantages include high yields, mechanized pruning for some varieties, and ease of harvesting. Disadvantages require investment in trellising and irrigation.

Empfohlen
Weitere ähnliche Inhalte
Was ist angesagt?
Was ist angesagt? (18)
Ähnlich wie Dwarf Apple Fruiting Wall Guide
Ähnlich wie Dwarf Apple Fruiting Wall Guide (20)
Mehr von Boonyong Chira
Mehr von Boonyong Chira (16)
Kürzlich hochgeladen
Kürzlich hochgeladen (20)
Dwarf Apple Fruiting Wall Guide
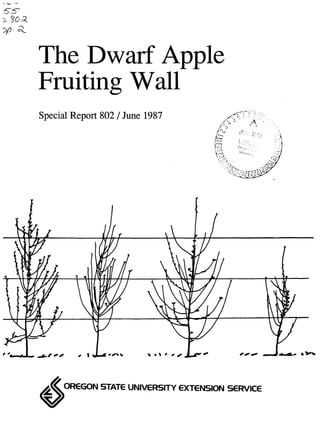
- 1. The Dwarf Apple Fruiting Wall Special Report 802 / June 1987 4OREGON STATE UNIVERSITY EXTENSION SERVICE
- 2. THE DWARF APPLE FRUITING WALL R.L. Stebbins Background The dwarf fruiting wall system evolved at Oregon State University over a period of about 25 years. The axis training system that we sug- gest be used with it was developed in France. Alfred N. Roberts started with the basic concept of a dwarf hedgerow that would not require the intensity of labor characteristic of European systems at that time. He planted his first hedgerows in 1948, using the fully-dwarfing Mailing 9 rootstock; his scion varieties were Starking Delicious, Golden Deli- cious, and Gravenstien. The early results were so promising that he planted a 1-acre experimental plot (alternate rows of Golden and Starking on M9) in winter 1955-56. Rows were 15 feet apart; and trees were 4, 6, or 8 feet. Only 2-foot stakes were used for support. After the 1962 "big blow" took out about 25% of the trees, he installed a 10-foot high, three-wire trellis and trained the trees to central leaders. Even before the storm, it had become obvious that high production could only be achieved if the trees were fully supported throughout the life of the orchard. Production levels of 35 to 45 tons per acre for Golden Delicious, and slightly less for Starking, have frequently been realized between the tenth and thirtieth years. An average annual yield of 1,000 loose boxes per acre was obtained during the first 10 years. Since then, several commercial orchards in western Oregon have been developed, following this system. French growers had developed a quite similar system called the "axis central." While in France in 1977, I discussed our results with the developers of the axis system, Jean M. Lespinasse and Ralph Ellis; we noted the near-identical conclusions we had reached through independent research. Jean Lespinasse developed the "central axis" training system that we now recommend for use with the fruiting wall. Procedure Use only dwarf trees. Very vigorous varieties, such as Gravenstien and Mutsu, require M9 or even M27 roots for adequate dwarfing. Mark rootstock, which gives trees of size similar to M9, should also be satis- factory. Moderately vigorous varieties like Newtown and Golden Delicious can be grown on M26 roots. Weak growers like Starkrimson Delicious and Spur Golden can be grown on M106 or M111 roots in this system. On shallow or infertile soils, more vigorous rootstocks may be used. Robert L. Stebbins, Extension horticulture specialist, Oregon State University. 2
- 3. Because bees tend to work down the rows, and seldom cross over them, it's best to place pollinizer trees in the rows of the main variety, unless every other row is a pollinizer row. One pollinizer for every 50 feet of row should be sufficient for most varieties. Try to match the vigor of the pollinizer and main variety through judicious choice of rootstocks. If practical, orient the fruiting wall in a north-south direction. In fruiting walls oriented east-west, the north sides are less productive than the south sides, and the entire orchard is less productive than one with rows running north-south. However, the direction of the slope of your land may dictate your row orientation. If the slope of your land is so steep that a tractor and sprayer or mower will slide sideways when the cover crop is wet, orient the rows up and down hill. This is safer for the operator, and it will help to avoid tree damage. There's another advantage, if you expect air drainage during frosty nights to be a limiting factor: Running rows across the slope would result in cold air trapped between the rows, which is a poor situation. A disadvantage to the up-and-down plan is that cultivated or herbicide treated strips running continuously down the rows could lead to severe erosion. To avoid such erosion, allow the cover crop to cross the row in places. Install a permanent trellis at least 8 (preferably 10) feet high that contains three or four wires at planting time. The trellis requires strong, treated posts set 3 feet in the ground and well-anchored to a "dead man" on the end. Use copper-treated posts so they'll last the life of the orchard. Twelve-gauge galvanized wire is satisfactory. Several kinds of devices can be used to tension the wires, including eye bolts through the end posts. The maximum distance between intermediate posts is 50 feet; 40 feet is better. Between-row spacings may be as close as 12 feet and as far as 16 feet. In-row spacings do not exceed 6 feet except for the most vigorous varieties. Plant weaker-growing varieties at 4 feet. Buy the largest nursery stock you can get. Vigorous nursery stock is well worth the extra cost! A good nursery stock has six side shoots above 28 inches and isn't over 6 feet tall. Be sure to plant the trees directly in line with the trellis and precisely vertical. Bending the axis to the wire can destroy the symmetry of the tree. Leave all nursery stock unheaded after planting, provided you remove most side shoots. If you plant good nursery trees early, and solid-set irrigation is available, you can leave about six or seven good side shoots to produce a crop in the second season. However, it's more impor- tant to grow the leader to the top wire by the end of the second season than to have a small crop in the second season. 3
- 4. Even if the nursery stocks are 6 feet tall after planting, don't head them. Such unheaded trees will grow satisfactorily only if you install a solid-set irrigation system at planting time. Plant trees as early as possible, so that their roots may become established before the tops start to grow. Train the trees to a central leader, in the manner of the "axis- intensive" system, as follows. As soon as shoots appear in summer, remove only those that threaten to compete with the leader (vigorous ones that have an acute angle with the leader). Most training is done through summer removal of shoots. If wider-angled shoots are vigorous enough to significantly compete with the leader, remove them, too. Leave on the tree all other shoots that form reasonably wide angles with the leader, until after the first one or two crops. When you remove a shoot in the dormant season, make a horizontal cut, so that latent buds at the point where the underside of the shoot joined the leader can form weak, wide-angled shoots. Never head shoots. Once cropping has com- menced (usually in the third season), begin a process of gradually thinning out the excess side limbs. Fasten the leader to the wires as soon as it's about 1 foot above the wire. At first, do this with ties, but as soon as the leader is thick enough to hold them, replace the ties with staples. The leader gradually grafts itself to the wire. This doesn't hurt the tree. Except for varieties with very upright growth habits such as Newtown and Northern Spy, don't spread or position side limbs. You can use growth regulators in the second season to induce flowering on these late- producing varieties. Rely on fruiting to spread limbs. Your objective is to get the central leader to the top wire as soon as possible. Bare spots along the central leader will fill in with shoots in later years. Where natural side branching is deficient, you can stimulate it with notching above buds. In general, control the height of the trees by fruiting on the leader--not by pruning. Before the leader has been permanently fastened to the top wire, usually in the third growing season, remove the fruit from the upper part of the leader so that it continues to grow. After it's permanently attached to the top wire, allow it to fruit. In this manner, apples are used as "growth regulators." As the trees begin to settle into bearing, remove enough limbs on the leader by cutting them off at the leader, so that light can penetrate to it. You can head lower limbs, which should be longer. It's better to remove the larger limbs, and leave the shorter ones. Don't remove any limb until fruiting has bent it to horizontal or below. Where it's needed, shorten side limbs so that the fruiting wall is widest at the bottom, and not more than 6 feet through after pruning. It's best to do this by cutting to a side limb, or into 2-year-old wood. 4
- 5. Cut the wall so that it narrows from 6 feet at the base to no more than 2 feet through at the top. With varieties that must have red color, space the limbs farther apart than with yellow or green varieties. Prune red varieties and tip bearers like Granny Smith by thinning, not head- ing. With some varieties like Golden Delicious, mowing and very little thinning may be all that's required. However, if you allow the wall to become too thick with branches, harvesting may be very difficult. Bearing trees of varieties like Delicious (especially the spur-type strains, which tend to grow strongly from the base) need pruning near the base to keep the upper half of the leader strong. Varieties that grow strongly in the tops, like Granny Smith, will need more pruning near the top to maintain lower limbs. Once the trees are permanently attached to the upper two wires, you can remove the lowest wire. This would allow a person to pass from one row into the next, if you prune out spaces at certain intervals along the fruiting wall. Follow your regular production practices much as you would in any conventional orchard--controlling diseases, insects, and weeds; thinning; and harvesting. Use nitrogen fertilizer in small amounts, about 40 pounds per acre, in the first year. Increase the dose in later years. Avoid these situations and practices: • Don't start the orchard with budded or grafted rootstocks; grow the trees in the nursery first. Never head the central axis. • Don't head shoots in the dormant season before the tree is in full production. • Don't let the upper limbs become larger than lower ones--preserve the conical tree shape. • Don't develop so many vigorous low limbs that the central axis is stunted. Advantages of the fruiting-wall system include: 1. early, heavy bearing; 2. large, well-colored fruit; 3. high production in the mature orchard; 4. trees not over 12 feet tall; 5. partial mechanical pruning with some varieties; 6. less time required for pruning than in conventional orchards; 7. ease of ladder placement; and 8. use of conventional orchard tractors and sprayers. Disadvantages of the system include: 1. high cost for trees per acre, 2. cost of tall trellis, 3. required solid-set irrigation, and 4. difficulty of walking through the wall into another aisle. 5
- 6. APPLE TREES AT CORVALLIS TRAINED TO THE CENTRAL AXIS SYSTEM. PHOTOS TAKEN BEFORE BLOOM, START OF THIRD SEASON. TREES WERE NOT HEADED AT PLANTING OR AFTERWARD. SITE IS A REPLANTED APPLE ORCHARD. o GRANNY SMITH NEWTOWN MUTSU ACE DELICIOUS Many flowers. Few flowers. Most vigor. Low vigor. Spreading is Spreading Spreading is Spreading not needed. is needed. not needed. is needed.
- 7. Extension Service, Oregon State University, Corvallis, O.E. Smith, director. This publication was produced and distributed in furtherance of the Acts of Congress of May 8 and June 30, 1914. Extension work is a cooperative program of Oregon State University, the U.S. Department of Agriculture, and Oregon counties. Oregon State University Extension Service offers educational programs, activities, and materials--without regard to race, color, national origin, sex, or disability--as required by Title VI of the Civil Rights Act of 1964, Title IX of the Education Amendments of 1972, and Section 504 of the Rehabilitation Act of 1973. Oregon State University Extension Sevice is an Equal Opportunity Employer.