Quick Setup Guide for RFXtrx 433MHz Devices with Vera
•
0 gefällt mir•4,604 views

Quick start vera with rfx_com

Empfohlen
Weitere ähnliche Inhalte
Was ist angesagt?
Was ist angesagt? (20)
Ähnlich wie Quick Setup Guide for RFXtrx 433MHz Devices with Vera
Ähnlich wie Quick Setup Guide for RFXtrx 433MHz Devices with Vera (20)
Mehr von Domotica daVinci
Mehr von Domotica daVinci (20)
Kürzlich hochgeladen
Kürzlich hochgeladen (20)
Quick Setup Guide for RFXtrx 433MHz Devices with Vera
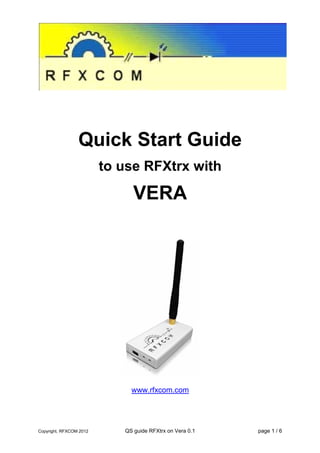
- 1. Quick Start Guide to use RFXtrx with VERA www.rfxcom.com Copyright, RFXCOM 2012 QS guide RFXtrx on Vera 0.1 page 1 / 6
- 2. Table of Contents 1. 2. 3. 4. 5. 6. 7. Introduction ....................................................................................................................................... 2 Connect the RFXCOM ..................................................................................................................... 2 Upload device files ........................................................................................................................... 3 Create Master device ....................................................................................................................... 4 Restart Luup ..................................................................................................................................... 4 Setup the serial port ......................................................................................................................... 5 Additional Setup ............................................................................................................................... 6 7.1. Setup of received protocols ..................................................................................................... 6 7.2. Creation of Vera devices ......................................................................................................... 6 8. References ....................................................................................................................................... 6 9. Thanks to .......................................................................................................................................... 6 10. Revision History ........................................................................................................................... 6 1. Introduction If you would like Vera to work with non Z-Wave wireless home automation equipment (such as the LightwaveRF devices) then look no further than the RFXCOM RFXtrx433. This little unit gives you the ability to communicate with a large number of products that operate within in the 433.92 MHz spectrum. The picture below shows you what the USB Transceiver device looks like, oh and by the way, the picture might suggest it’s huge, but actually, it’s really very small. OK so let’s get started, the first thing we need to do is… 2. Connect the RFXCOM Plug the USB cable of the RFXCOM Transceiver into the back of Vera™, which can be done either directly or via a hub (preferably a powered version). Copyright, RFXCOM 2012 QS guide RFXtrx on Vera 0.1 page 2 / 6
- 3. 3. Upload device files Once connected we need to upload all the required device files onto our Vera via Apps / Develop Apps / Luup Files . These files can be found by looking here: http://code.mios.com/trac/mios_rfxtrx/browser/tags/alpha6# Please note: Due to the number of files that need to be uploaded you will need to do them in a couple of batches, make sure you restart Luup after each batch you do by checking the box “Restart Luup after upload”. Make sure you wait for Vera to finish the reboot process (Unit busy) by observing the Vera message window before you initiate the next batch upload. Copyright, RFXCOM 2012 QS guide RFXtrx on Vera 0.1 page 3 / 6
- 4. 4. Create Master device With the files uploaded, we now need to Create the master device using Apps / Develop Apps / Create Device, and enter the D_RFXtrx.xml file name into the Upnp Device Filename. Once done you will have to restart Luup. Please note – A device named “RFXtrx controller device” has been created, however it will not be fully functional until we configure the USB serial port. 5. Restart Luup Restart Luup using SETUP / Net & Wi-Fi / Reboot , the Vera will now restart Luup, check the message window to wait for the process to finish Copyright, RFXCOM 2012 QS guide RFXtrx on Vera 0.1 page 4 / 6
- 5. 6. Setup the serial port To setup the serial port, stay under Apps / Develop Apps / and this time choose Serial Port configuration, where you need to change the speed value to 38400 bauds and also select the device named “RFXtrx controller device” from the field “Used by device”. Once done, go back and repeat chapter 5 to restart Luup. Result – That’s it !! You should now have the RFXtrx433 up and running and working from within the MIOS Vera UI. And depending on your set up at home, some new compatible devices may even start to find their way automatically onto your device listings. Something that’s a very different to the include/exclude process required by Z-Wave. Copyright, RFXCOM 2012 QS guide RFXtrx on Vera 0.1 page 5 / 6
- 6. 7. Additional Setup 7.1. Setup of received protocols Once you have the RFXtrx controller and plug-in installed you now need to start looking at the RF protocols you want the RFXtrx device to receive and you can do this by accessing the Settings tab of the RFXtrx Controller device. By default, you may notice a number already switched on, it matches what is currently saved in the RFXtrx memory. But it’s now time to think about which protocols you actually want to use, because • not all can coexist, • too many can affect the performance. So it’s recommended that you only enable those ones you need to use. For a better understanding of the protocols and those that are sensitive/conflict read the chapter titled "Sensitivity influenced by enabled protocols" of the RFXtrx433 user manual. Once you have finished to enable/disable several protocols, save your settings in the memory of the RFXtrx. This new configuration will now be restored every time after a power up. To do that, just push the button titled "Save RFXtrx Settings". Please note that this memory is limited to a maximum of 10000 write cycles so don't save when it is not necessary. These settings are lost after a firmware update of the RFXtrx and need to be set again. 7.2. Creation of Vera devices By default, the devices are created automatically by the plugin accordingly to the messages received from the RFXtrx. To disable the automatic creation of devices, you can access the Advanced tab of the RFXtrx Controller device and set the value of the variable named "AutoCreate" to 0. Then push the red button "Save" at top right in the dashboard to validate your change. Few devices can be created manually by the user using the Device creation tab of the RFXtrx Controller device. ... 8. References To keep up with the latest on this amazing plug-in, I recommend you check in every now and again with the forum http://forum.micasaverde.com/index.php/topic,9563.0.html And the Wiki http://code.mios.com/trac/mios_rfxtrx/wiki/WikiStart#InstallationSetup 9. Thanks to Huge thanks have to go out to lolodomo for bringing this particular USB transceiver to the Vera MIOS platform, and also to all the contributors who help it to continually grow. With thanks to Chris Parker the author of this document. 10. Revision History Version 0.1 November 12, 2012 Elaborated the restart procedure of Luup Additional setup added Copyright, RFXCOM 2012 QS guide RFXtrx on Vera 0.1 page 6 / 6