
Empfohlen
Empfohlen
Weitere ähnliche Inhalte
Was ist angesagt?
Was ist angesagt? (14)
Ähnlich wie Birch bark grips
Ähnlich wie Birch bark grips (20)
Kürzlich hochgeladen
Kürzlich hochgeladen (10)
Birch bark grips
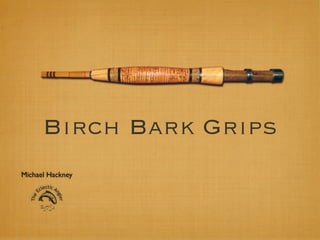
- 1. Birch Bark Grips Michael Hackney
- 2. Birch Bark Birch Trees are native to the North East Valuable building material since pre-historic times Can be cut, bent & sewn Strong & water resistant cardboard-like bark Paper-like outer skin used for paper Medicinal properties - preservative, anti-bacterial
- 3. Why Birch Bark Grips? birch bark grips are attractive they transmit more “feel” than cork they are great in the hand; not slippery, not rough lightweight they can easily be kept looking like new high quality cork is so #$%^ expensive birch bark is cheap and “Made in America”
- 4. Anatomy of a Birch Bark Grip Olive Wood Butt Birch Bark Olive Wood Tip Burnt & Burl Cork Burnt & Burl Cork
- 5. Birch Bark Collection Please do not cut bark from living trees downed trees yield excellent bark Use a box cutter to cut a “vertical” slit through the bark Slit around the tree in 2 places 6” apart Use a putty knife to peel the bark starting at the vertical slit Avoid limbs and other large scars Collect a LOT of bark!
- 6. Birch Bark Preparation The bark will tend to curl and needs to be flattened & dried stack the bark between 2 pieces of 20” long 1x8 pine cut strips to 18” long use 4 clamps to flatten the bark allow to dry for a few weeks Once dry, the bark can be cut in to circles with a hole saw peel off the white paper layer use a 1 1/2” diameter hole saw with a 1/4” pilot drill bit sand rings lightly with 220 grit sandpaper
- 7. Making Birch Bark Stacks Glue up 1 to 1 1/2” tall stacks of bark rings Use the short stacks as accents or to build a grip Tools & Supplies Several sets (10) of ring clamps: one 1/4” x 2 1/2” hex head bolt two 1 1/2” diameter fender washers or 2 plywood disks one 1/4” nut or wingnut Tightbond 3 or epoxy
- 8. Making Birch Bark Stacks Glue up a stack of rings coat 1 side of birch bark ring with glue slide it glue facing up on to the 1/4” bolt coat next birch bark ring with glue slide it glue facing up on to bolt orient grain 90° to previous ring add enough rings to make a 1 to 1 1/2” stack Use 2 wrenches to clamp the stack tightly When dry remove from clamp ream stack with a 1/4” drill
- 9. Making Birch Bark Stacks First disk glued Second disk - note grain orientation Completed stack
- 10. Building the Grip From this point, the grip is basically made like a cork grip use the short stacks of birch bark like cork rings birch bark is very fragile until it is glued onto a core difficult to remove from a mandrel difficult to ream to fit rod Birch Bark Grip Design use contrasting materials & colors all bark is a little boring since bark is a medium brown, darker and lighter contrasting elements work well
- 11. Turning the Grip Two choices for turning the grip: 1. glue up on a mandrel and turn on the lathe 2. glue up on the rod and turn the rod on a lathe
- 12. Turning the Grip use a sharp gouge to rough the grip into a cylinder be careful at the transitions between bark, cork & wood go slow and let the tool do the work birch bark is harder than cork but softer than pine be careful that voids don’t tear out rough grip to within 1/16” of final dimensions perform final shaping with sandpaper - from 100 to 400 grit don’t worry about small imperfections/voids in bark
- 13. Finishing the Grip Apply the finish after the grip is glued on the rod When turning on a mandrel, the grip WILL break in several places when you remove it, don’t fret! carefully mark breaks with a pencil so you can realign glue the breaks when you glue the grip to the rod lightly sand with 400 grit once glue has cured
- 14. Finishing the Grip Apply Tung oil with 600 grit wet/dry sandpaper The slurry fills in the imperfections birch bark absorbs a lot of finish let dry and apply 2 more coats Use Tru-Oil for the final finish 8 light coats applied with a cotton cloth
- 15. Grips Birch Bark reel seats too
- 16. Now for Something Completely Different
- 17. Faux Birch Bark
- 18. Turning the Grip
- 19. Cigar Shape Works Best
- 20. Burning in the Tip & Butt Sections
- 21. Undercoat with White Acrylic
- 22. Drybrush “Maple Sugar Tan” & White Blotches
- 23. Drybrush “Mudstone” & “Maple Sugar Tan” Stripes
- 24. Drybrush thin “Rain Grey” stripes
- 25. fan brush “Burnt Umber” & Black Crescent Scars
- 26. Topcoat with Matte Acrylic Varnish
- 27. Guide Wraps and Ferrule Wraps Too
- 28. The Aspen
Hinweis der Redaktion
- \n
- \n
- \n
- \n
- \n
- \n
- \n
- \n
- \n
- \n
- \n
- \n
- \n
- \n
- \n
- \n
- \n
- \n
- \n
- \n
- \n
- \n
- \n
- \n
- \n
- \n
- \n
- \n