Voicethread Handout
•
0 gefällt mir•1,205 views

The document provides step-by-step instructions for creating and sharing a VoiceThread presentation using the Voicethread.com website. It explains how to register for a Voicethread account, upload images and other media, record audio and video comments, and publish the VoiceThread for sharing either by inviting specific people or making the presentation public. The instructions break the process down into 10 simple steps and include screenshots to illustrate each step.

Empfohlen
Weitere ähnliche Inhalte
Was ist angesagt?
Was ist angesagt? (17)
Andere mochten auch
Ähnlich wie Voicethread Handout
Ähnlich wie Voicethread Handout (20)
Mehr von Michele Berner
Mehr von Michele Berner (18)
Kürzlich hochgeladen
Kürzlich hochgeladen (20)
Voicethread Handout
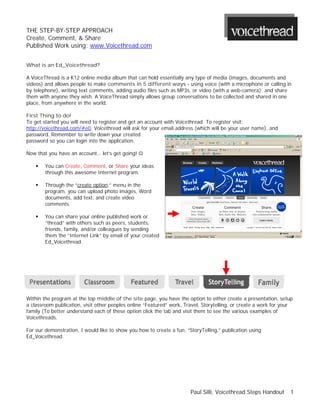
- 1. THE STEP-BY-STEP APPROACH Create, Comment, & Share Published Work using: www.Voicethread.com What is an Ed_Voicethread? A VoiceThread is a K12 online media album that can hold essentially any type of media (images, documents and videos) and allows people to make comments in 5 different ways - using voice (with a microphone or calling in by telephone), writing text comments, adding audio files such as MP3s, or video (with a web-camera); and share them with anyone they wish. A VoiceThread simply allows group conversations to be collected and shared in one place, from anywhere in the world. First Thing to do! To get started you will need to register and get an account with Voicethread. To register visit: http://voicethread.com/#e0. Voicethread will ask for your email address (which will be your user name), and password. Remember to write down your created password so you can login into the application. Now that you have an account… let’s get going! You can Create, Comment, or Share your ideas through this awesome Internet program. Through the “create option,” menu in the program, you can upload photo images, Word documents, add text, and create video comments. You can share your online published work or “thread” with others such as peers, students, friends, family, and/or colleagues by sending them the “Internet Link” by email of your created Ed_Voicethread. Within the program at the top middle of the site page, you have the option to either create a presentation, setup a classroom publication, visit other peoples online “Featured” work, Travel, Storytelling, or create a work for your family (To better understand each of these option click the tab and visit them to see the various examples of Voicethreads. For our demonstration, I would like to show you how to create a fun, “StoryTelling,” publication using Ed_Voicethread. Paul Silli, Voicethread Steps Handout 1
- 2. STEP BY STEP: CREATING A VOICETHREAD For samples and further info visit: http://voicethread.com/about/ Step 1 After you have clicked the option “StoryTelling,” then press or click “Create” which will be highlighted in yellow. Next you will have the choice to upload an image (See screenshot) from “My Computer,” Facebook, Flickr, My Media, and/or a URL link… Step 2 Next you will select, for our example, a picture taken from “My Computer.” You will need to have a picture located somewhere on your computer to use for this example. If you do not have any pics on your computer contact me for further assistance at gatorball@qwest.net. Step 3 After you select a pic from your computer, it will be selected and created as a “jpeg” which is a standard image format for online work. You should see the picture (pic) at the bottom of the page (See screenshot). I selected a Greece Ruins pic. Step 4 Next you will select at the top of the menu “Add a title and description” to your picture” (See red arrow). After you created/write a title/description for your pic… press the SAVE button. Step 5 Now, if you wanted to upload more pictures you could do so repeating the same steps as before. Voicethread allows to you upload many pics. For this example, let’s continue… Step 6 After you uploaded your pic, you are now ready to add comments to your picture. Press the comment menu at number 2 (See red arrow in screenshot). Here you can record using a microphone, call in a comment about the picture by telephone (add your phone number and Voicethread will actually call you, and then record your comment into your thread), or type (text) a comment (A brief description of the pic etc)… If your microphone is not set up for with your computer to record your voice visit “Setting up your external mic:” http://voicethread.com/#u119940.b415.i3151 Paul Silli, Voicethread Steps Handout 2
- 3. Step 7 If you press the record button and use a microphone, Voicethread will easily record your voice comments onto the site page/thread. While you are recording you can use the “cursor” (It looks like a white pencil) button to highlight, circle, or draw on the image to explain things or add effects while you make comments. After you are finished press the “play button” to hear your comments. You can keep them or press delete to record a new comment. Once you are finished typing (text) or recording your microphone comments, remember to press save where the green check is located. If you do not like your recording simply press the cancel button, and then press the record button again to make a new comment etc. Step 8 Lastly, at the end of your Voicethread you will be asked if you want to “share” your work with friends etc. You can Invite them by adding their email address into the inserted box, or just send your Voicethread work to them as an email link (All they have to do is click the link to see your thread). Also, of the threads that you create will be stored in the MyVoice tab within Voicethread. It is here will you can edit, delete, share… etc, your threads. Step 9 Remember if your friends want to join or create their own Voicethread, they must register and get a user password. Step 10 (Sharing) You have the option to Invite friends to your Voicethread. By clicking “Invite Friends” you can type in your friends email addresses and share your work. Just remember to make your work “Public.” You need to change the “This Voicethread is “Private” to Public if you want others to see your Voicethread. (See red arrows for area). For more help/info visit: http://voicethread.com/help/faq/ Comment Moderation: To control made comments just go into your created Voicethread, click edit and press the share option which is below the left comment button, and then go to the right side to “Comment Moderation” and click on. This will allow you to filter comments & delete those that are inappropriate. ENJOY! Paul Silli, Voicethread Steps Handout 3