SlideShare une entreprise Scribd logo
1  sur  2
Télécharger pour lire hors ligne
Expedition Water Microfilter
(Model #2050000)
Expedition Replacement Cartridge
(Model #1040)
1. Mise en service
1.1 Retirer soigneusement le filtre de la housse
portative.
1.2 Amener le filtre avec la pompe à la hauteur
désirée, en desserrant la vis de fixation 120179
qui se trouve sur le support 120165. Resserrer la
vis.
1.3 Desserrer les écrous à ailes 20672, descendre
les fermetures des deux côtés, retirer le couvercle
120170 dans lequel est vissé I'élément filtrant
1040. Contrôler si I'élément filtrant est bien
vissé, le joint 20674 (6) devant assurer
I'étanchéité complète. Eviter de serrer trop fort
pour éviter de faire sortir le joint.
1.4 PIonger dans I'eau le tuyau d'aspiration 22315
avec les tamis 22306.
1.5 Tourner vers I'avant le tube de sortie 120172,
contrôler s'il est propre et serrer I'écrou120171.
1.6 Pomper à l'aide de la manivelle 22316 de la
pompe. Après 20 coups de pompe I'eau potable
sortira du tube 120172, désinfectée.
2. Nettoyage
La céramique devra être nettoyée quand après un
certain temps de service la résistance du filtre
augmente, diminuant ainsi son débit, ou que la
soupape de sécurité 22307 s'active (à 8 bar au
maximum). Plus I'eau est sale, plus le nettoyage doit
être fréquent :
2.1 Desserrer les écrous à ailes 20672, descendre
les fermetures des deux côtés.
2.2 Retirer du carter I'élément filtrant avec le
couvercle et le tube de sortie et le nettoyer à
l'aide de l'éponge qui se trouve dans la poche
de la housse en toile. Brosser pour enlever les
impuretés jusqu'à ce que la couleur naturelle
claire de la céramique éapparaisse sur toute sa
surface. Ne pas employer de produits abrasifs
ou à récurer. Ne pas utiliser des produits de
nettoyage ou de désinfection, ne pas faire
bouillir ou stériliser à la vapeur, ne pas sécher
sur des surfaces chaudes, dans des fours ou des
appareils à microondes.
2.3 Nettoyer régulièrement le carter 22314 des
dépôts d'impuretés dûs à I'eau à filtrer.
2.4 Nettoyer la céramique comme indiqué (voir 2.2)
si le filtre ne devait pas être utilisé pendant un
certain temps. Ensuite la faire sécher complète-
ment à l'air libre, évitant ainsi le développement
d'une odeur de moisi.
2.5 Contrôler si I'élément filtrant est bien vissé (voir
sous 1.3). Remonter le filtre.
2.6 Démonter et nettoyer régulièrement le clapet de
surpression 22307 afin d'assurer son fonction-
nement correct. Prenez deux clefs de 20 mm
pour ouvrir le clapet le surpression. Retenir la vis
6-pans inférieure avec une clef et dévisser la tête
du clapet avec l’autre, dans le sens contraire des
aiguilles d’une montre. Nettoyer la surface du
joint et de son logement et revisser la tête du
clapet. Attention à ne pas tourner le petit écrou
sur la tête du clapet : il est utilisé pour augmenter
le niveau de pression afin d'ouvrir le clapet.
2.7 Veillez à ce que le tube d'évacuation de la
céramique et le tube de sortie soient protégés de
I'eau non filtreé et d'autres impuretés.
3. Dérangements
Si le filtre ne produisait pas d'eau après 20 coups de
pompe, contrôlez que :
- le tuyau d'aspiration 22315 ne soit pas plié
- les tamis d'aspiration 22306 ne soient pas
bouchés ou ne collent pas au fond
- la vis du côte supérieur du tuyau d'aspiration soit
suffisamment serrée
- le joint du piston 20674 (2) ne soit pas
défectueux
- la boule dans le clapet anti-retour 22303 puisse
bouger librement.
Si de I'eau devait sortir le long de la barre à piston
22316, serrer la vis (fig. au-dessus du joint 20674
(1)). Si malgré cela elle continue de couler, remplacer
le joint 20674 (1).
4. Contrôle de I'élément filtrant
Vérifier le diamètre minimal (38 mm) de I'élément
filtrant a I'aide de la jauge de contrôle 100181. S'il
est possible de faire glisser sans effort la jauge de
contrôle pardessus la céramique, cela signifie que le
diamètre minimal est dépassé et qu'il faut remplacer
I'élément filtrant. Si un élément filtrant présente des
fissures, la désinfection n'est plus assurée et il doit
être immédiatement remplacé.
5. Remplacement de I'élément filtrant
Si I'élément est défectueux suite à une usure normale
ou une détérioration quelconque, il devra immédiate-
ment être remplacé par un élément filtrant Katadyn
1040. Remplacez régulièrement le joint en
caoutchouc 20674 (6).
Transport de l'élément: Attention fragile!
1. Puesta en servicio
1.1 Sacar el filtro cuidadosamente del estuche de
lona.
1.2 Aflojar el tornillo 120179 que sujeta el pié
120165, alzar el filtro con la bomba a la altura
deseada y apretar el tornillo.
1.3 Aflojar los tornillos de aletas 20672, bajar las
tuercas en ambos lados, retirar la tapa 120170
en la cual està atornillada el elemento filtrante
1040. Examinar si el elemento filtrante esta
correctamente apretado. La junta de la cerámica
20674 (6) no debe dejar pasar el agua. Debe
evitarse de apretar con exceso porque en este
caso la junta se aplasta, sale y ya no cierra.
1.4 Sumergir el tubo de aspiración 22315 con los
tamices 22306 en el agua por filtrar.
1.5 Volver hacia delante el tubo de salida 120172,
controlar si està limpio y apretar el tornillo
120171.
1.6 Bombear moviendo la varilla del embolo 22316
hacia arriba y abajo.
Después de 20 novimientos sale el agua filtrada
y purificada del tubo de salida 120172.
2. Limpieza
EI elemento filtrante debéra limpiarse cuando,
después de cierto tiempo de funcionamiento
aumenta su resistencia a la filtración y sale menos
agua o si la vàlvula de seguridad 22307 se descarga
(en 8 bar màximo). Cuanto más sucia esté el agua,
tanto más frecuentemente deberà efectuarse la
limpieza.
2.1 Aflojar los tornillos de aletas 20672, bajar las
tuercas en ambos lados.
2.2 Retirar del caparaz6n el elemento con la tapa y
el tubo de salidad y limpiarla con la esponja que
se encuentra en el bolsillo del estuche de lona.
Cepillar hasta que reaparezca el color original
claro de la bujia en toda su superficie. No
utilizar ningún medio abrasivo. Ne tratar con
productos de limpieza o desinfectantes. No
hervir ni esterilizar con vapor, no secar sobre
superficies calientes ni en hornos o aparatos de
microondas.
2.3 Limpiar el caparazón 22314 periódicamente de
los depósitos formados par el agua a filtrarse.
2.4 Limpiar la cerámica según indicaciones bajo 2.2
en caso de no usar el filtro par cierto tiempo y
después déjelo secar al aire. Esto evitarà la
formación de un olor desagradable en el filtro.
2.5 Controlar si el elemento está bien atornillado
(véase bajo 1.3). Montar nuevamente el filtro.
2.6 Para garantizar el funcionamiento de la válvula
de sobrepresión 22307 hay que desmontarla y
limpiarla regularmente. Para abrir la válvula dos
llaves de boca de 20 mm se conviene. Agarre
firmemente el tornillo hexagonal más bajo con
una llave mientras que desatornilla la cabeza de
la válvula con la otra llave a la izquierda. Limpie
la superficie de goma y su punto de contacto.
Apriete la cabeza de la válvula otra vez. No
cambie la posición del tornillo pequeño respecto
a la cabeza de la válvula. Se utiliza para fijar la
presión llana para que la válvula del relevar se
abra. El equipo especial es necesario comprobar
el ajuste apropiado.
2.7 Proteger la boquilla de la cerámica y el tubo de
salida del agua sucia, del barro, etc.
3. Averías
Si después de 20 movimientos el filtro no produce
agua, contrólese si:
- está doblado el tubo de aspiración 22315
- están obstruidos los tamices 22306 o han
quedado adheridos al fondo
- la tuerca en la parte superior del tubo de
aspiracion no está suficientemente apretada
- la empaquetadura 20674 (2) esta dañada
- la bola en la válvula de retencion 22303 puede
moverse libremente.
En caso de que salga agua a lo largo dei vastago
22316 del piston hay que atornillar la tuerca de
racor (fig. sobre la junta 20674 (1 )). Si sigue
saliendo agua hay que cambiar la junta 20674 (1).
4. Control dei elemento filtrante
Controlar el diámetro mínimo (38 mm) del elemento
filtrante con el calibre 100181. En caso de que, sin
ejercer fuerza, el calibre pueda ser deslizado por
cualquier parte del elemento filtrante, éste ya no tiene
el diámetro minimo requerido. Hay que cambiar el
elemento filtrante.
Si el elemento filtrante presenta grietas o rajaduras la
desinfección del agua ya no está garantizada. No
seguir utilizando el elemento filtrante agrietado. Hay
que cambiarlo.
5. Cambio del elemento filtrante
Si el elemento está defectuoso, sea par desgaste o
daño, debe ser reemplazado inmediatemente por un
elemento Katadyn 1040. Tenga presente de colocar
correctamente la junta 20674 (6).
Transporte del elemento:
con cuidado y protegido.
PrintNr.129032/2
Limited Warranty
Your Katadyn Expedition Microfilter is warranted for two
(2) years from the date of purchase against defects in
materials and workmanship. Should your Katadyn
Expedition prove defective within the warranty period,
return it to the Katadyn retailer from whom it was purcha-
sed. If you have any questions please contact Katadyn at
+41 1 839 21 11. Katadyn, at its discretion, will replace
or repair the damaged item. Please retain your purchase
receipt as proof of date purchased.
Garantie
Le micro-filtre Expedition de Katadyn est garanti 2 ans à
compter de la date d'achat contre tout défaut matériel ou
de fabrication. Si votre filtre Expediton de Katadyn
s'avérait défectueux pendant la période sous garantie,
adressez-vous à votre revendeur. Pour toutes questions
complémentaires, veuillez téléphoner à Katadyn au
+ 41 1 839 21 11. Katadyn procédera à l'échange ou à
la réparation du produit. Veuillez conserver votre preuve
d'achat qui tient lieu de certificat de garantie.
Garantie
Auf den Katadyn Expedition geben wir eine Garantie von
2 Jahren ab Kaufdatum auf Material oder
Verarbeitungsfehler. Sollte der Katadyn Expedition wäh-
rend dieser Zeit einen Defekt aufweisen, wenden Sie sich
mit Ihren Garantieansprüchen an den Händler, bei dem
das Produkt erworben wurde. Für weitere Fragen wenden
Sie sich bitte an Katadyn unter der Nummer
+41 1 839 21 11. Katadyn wird das Produkt reparieren
oder ersetzen. Bitte bewahren Sie den Kaufbeleg als
Garantieschein auf.
Garantía
El microfiltro Katadyn Expediton está garantizado duran-
te 2 años a partir de la fecha de compra por defectos de
materiales o fabricación. Si el Katadyn Expedition pre-
senta algún defecto durante ese periodo, diríjase al esta-
blecimiento donde lo adquirió para reclamar las presta-
ciones de garantía. Para cualquier pregunta adicional,
consulte con Katadyn en el teléfono +41 1 839 21 11.
Katadyn reparará o sustituirá el producto. Conserve el
justificante de compra como certificado de garantía.
Contact International:
Katadyn Products Inc.
Birkenweg 4
8304 Wallisellen / Switzerland
info@katadyn.ch / www.katadyn.ch
120172
120171
120170
20672
22314
120179
100181
20542
120165
1040
22316
20674
20674 (2)
20674 (1)
22307
22303
22315
22306
20674 (6)
1. Operation
1.1 Carefully remove Katadyn Expedition filter from
canvas carrying bag.
1.2 Loosen hight adjustment arm 120179 and then
adjust the pump body at a comfortable
operating level on the suport 120165.
1.3 Loosen wing nut 20672; turn locking device
down on both sides; raise lid 120170 with the
ceramic filter 1040 screwed in. Make sure that
the filter element is properly screwed in; gasket
20674 (6) must seal tight. Be careful not to over-
tighten, as this may cause a bypass between the
lid and the rubber gasket.
1.4 Immerse input hose 22315 and pre filter 22306
into the raw water.
1.5 Turn outlet tube 120172 to front; this tube should
be kept clean; fasten cap nut 120171.
1.6 Start pumping by moving the pump handle
22316 up and down. After about 20 pumping
strokes the clean, filtered water will flow through
outlet tube 120172. Use the first liter to flush the
system
2. Cleaning
Ceramic capacity depends on water quality. The
dirtier the water the more often you will have to clean
the element. The Filter element must be cleaned when
the flowrate becomes insufficient, or the pressure relief
valve 22307 is discharging (at 112 Ibs p.s.i./8 bar).
2.1 Loosen wing nut 20672 and turn locking device
down on both sides.
2.2 Lift the ceramic element 1040 with lid and outlet
tube out of the filter housing and clean with the
abrasive sponge (contained in the inner packet
of the canvas bag), until the natural ceramic
colour reappears. Use no other abrasive or
scouring agents. Do not boil the filter, nor
sterilise it with steam. Do not use ovens or
microwavers to speed up the drying process.
2.3 Clean the filter housing 22314 periodically.
2.4 Should the filter not be used for some time,
remove the ceramic filter and clean it as
described under 2.2. Allow it to air dry com-
pletely in a ventilated room. This will prevent the
ceramic filter from building up a musty smell.
2.5 Make sure that the filter element is screwed in
tightly (see under 1.3). Reassemble the filter.
2.6 To ensure proper functioning of the pressure
relief valve 22307, regularly remove and clean
this valve. To open the valve, two 20 mm
wrenches are ideal.
Grip firmly the lower hexagonal screw with one
wrench while unscrewing the valve-head with the
other wrench counter-clock wise. Clean rubber
surface and its contact point. Tighten valve-head
again. Do not change position of small screw on
valve-head. It is used to set the pressure level for
the relieve valve to open. Special equipment is
needed to check the proper setting.
2.7 Protect clean water outlet of the Filter element
and outlet tube against pollution.
3. Trouble Shooting
Should, after approximately 20 pumping strokes, no
water flow through the outlet tube, please check:
- if input hose 22315 is bent
- if pre filter 22306 is clogged, or is sticking to the
ground
- if screw cap at the upper end of the input hose is
tightened properly
- if piston gasket 20674 (2) is defective; lubricated
- if the ball in the check valve 22303 can move
freely.
If water squirts out along the piston handle 22316,
tighten the wing nut (Diag. above gasket 20674 (1)).
If still leaking, the gasket 20674 (1) has to be
replaced.
4. Checking the Filter element
Check the filter element for the minimum diameter (38
mm) with the measuring gauge 100181. If the gap in
the measuring gauge fits over the ceramic filter
without being forced, then the filter must be replaced.
Inspect the ceramic for cracks after cleaning, if you
dropped the filter or if you had freezing temperatures.
If the filter shows cracks it will no longer protect you
from microorganisms.
5. Replacing the Filter element
As soon as the ceramic filter has reached the minimal
diameter or is damaged, it has to be replaced by a
new Katadyn ceramic filter 1040. Take care that the
rubber gasket 20674 (6) is inserted properly.
Transporting the element: gently with care!
1. Betrieb
1.1 Filter vorsichtig aus der Tragtasche nehmen.
1.2 Filter samt Pumpe durch Lösen und Befestigen
der Klemmschraube 120179 am Ständer
120165 auf Arbeitshöhe bringen.
1.3 Flügelmuttern 20672 lösen. Verschluss beidseitig
herunterklappen. Deckel 120170 mit einge-
schraubtem Filterelement 1040 hochziehen und
überprüfen, ob das Filterelement gut einge-
schraubt ist. Die Dichtung 20674 (6) muss dicht
abschliessen. Übermässiges Anziehen ist jedoch
zu vermeiden, weil sonst die Dichtung herausge-
quetscht wird und daher nicht mehr abdichten
könnte.
1.4 Ansaugschlauch 22315 und Sieb 22306 in
Rohwasser eintauchen.
1.5 Auslaufrohr 120172 nach vorne drehen, auf
Sauberkeit kontrollieren und Überwurfmutter
120171 anziehen.
1.6 Pumpen, indem der Pumpenstössel 22316 auf-
und ab bewegt wird. Nach ca. 20 Pumpstössen
fliesst das saubere, entkeimte Trinkwasser aus
dem Auslaufrohr 120172. Erster Liter immer zum
Durchspülen des Filters verwenden.
2. Reinigung
Wenn nach einer gewissen Betriebszeit der Filter-
widerstand steigt und weniger Wasser fliesst oder das
Überdruckventil 22307 abbläst (bei max. 8 bar), ist
die Keramik zu reinigen. Je schmutziger das Wasser,
umso häufiger die Reinigung:
2.1 Flügelmuttern 22314 lösen und Verschluss beid-
seitig herunterklappen.
2.2 Filterelement zusammen mit Deckel und
Auslaufrohr aus dem Filtergehäuse heben und
mit Schwamm (im Innenfach der Tragtasche
untergebracht) reinigen. Schlammbelag weg-
bürsten bis die helle Naturfarbe der Keramik
wieder überall erscheint. Keine anderen Kratz
und Scheuermittel verwenden. Nicht mit
Reinigungs- oder Desinfektionsmitteln behandeln,
nicht auskochen oder dampfsterilisieren, nicht
auf heissen Oberflächen, in Öfen oder
Mikrowellengeräten trocknen.
2.3 Das Gehäuse 20677 periodisch von den
Schmutzablagerungen des Rohwassers reinigen.
2.4 Wird der Filter für längere Zeit nicht mehr
gebraucht, Keramik reinigen wie unter 2.2 und
anschliessend an der Luft komplett trocknen
lassen. Dies verhindert muffigen Geruch im Filter.
2.5 Prüfen, ob das Filterelement gut eingeschraubt ist
(siehe unter 1.3). Filter wieder zummensetzen.
2.6 Um die Funktion des Überdruckventils 22307 zu
gewährleisten, Ventil regelmässig demontieren
und reinigen. Zum Öffnen eignen sich zwei
Schlüssel mit einer Schlüsselweite 20. Mit einem
Schlüssel die untere Sechskantschraube festhalten
und mit dem anderen den Ventilkopf im Gegen-
uhrzeigersinn aufdrehen. Gummifläche und
Auflagepunkt reingen. Ventilkopf wieder auf-
schrauben. Bitte kleine Schraube am Ventilkopf
nicht drehen, damit wird eingestellt, bei welchem
Druck das Ventil ansprechen soll. Druckmess-
geräte sind nötig, um den Punkt einzustellen.
2.7 Keramikmundstück und Auslaufrohr vor Schmutz-
wasser und anderer Verschmutzung schützen.
3. Störungen
Liefert der Filter nach 20 Pumpenstössen kein Wasser,
bitte prüfen:
- ob Ansaugschlauch 22315 geknickt ist
- ob Ansaugsiebe 22306 verstopft sind oder am
Boden festkleben
- ob Überwurfmutter am oberen Ende des
Ansaugschlauches zu wenig angezogen ist
- ob Kolbendichtung 20674 (2) defekt ist; fetten
- ob die Ventilkugel im Rückschlagventil 22303
frei beweglich ist.
Falls Wasser der Kolbenstange 22316 entlang austritt,
Überwurfmutter (Abb. oberhalb Dichtung 20674 (1))
anziehen. Wenn trotzdem noch undicht, ist die
Dichtung 20674 (1) zu ersetzen.
4. Kontrolle des Filterelementes
Filterelement mit Masslehre 100181 auf Minimal-
durchmesser (38 mm) prüfen. Lässt sich die Masslehre
ohne Kraftaufwand an einer beliebigen Stelle über
das Filterelement schieben, ist der Minimaldurch-
messer unterschritten und das Filterelement muss
ersetzt werden. Hat ein Filterelement Risse, ist die
Entkeimung nicht mehr gewährleistet. Ein solches
Element darf nicht mehr benützt und muss ersetzt
werden.
5. Auswechseln des Filterelementes
Ist das Filterelement durch Abnützung oder
Beschädigung defekt, so muss es sofort durch ein
Katadyn-Element 1040 ersetzt werden.
Transport des Elementes: Vorsichtig,
schonend!

Contenu connexe

En vedette

Presentación1.pptx juliana
Presentación1.pptx julianaPresentación1.pptx juliana
Presentación1.pptx julianalujupe
 
Deute català i pressupostos 2014
Deute català i pressupostos 2014Deute català i pressupostos 2014
Deute català i pressupostos 2014PACD Barcelona
 
Psicologia i obesitat
Psicologia i obesitatPsicologia i obesitat
Psicologia i obesitatrosa1069
 
Taller sistemas tecnológicos
Taller sistemas tecnológicosTaller sistemas tecnológicos
Taller sistemas tecnológicosCRISTIANBUCHELI
 
La pedagogía waldorf power
La pedagogía waldorf powerLa pedagogía waldorf power
La pedagogía waldorf poweresther1993pg
 
Parcial2 barreto adrian
Parcial2 barreto adrianParcial2 barreto adrian
Parcial2 barreto adrianBarreto92
 
Primera investigacion de vale
Primera investigacion  de valePrimera investigacion  de vale
Primera investigacion de valevalegom
 
Catanese jardim europa silvestre i e vi (3)
Catanese jardim europa silvestre i e vi (3)Catanese jardim europa silvestre i e vi (3)
Catanese jardim europa silvestre i e vi (3)rcatanese
 

En vedette (15)

Almacenes sofomes
Almacenes sofomesAlmacenes sofomes
Almacenes sofomes
 
Presentación1.pptx juliana
Presentación1.pptx julianaPresentación1.pptx juliana
Presentación1.pptx juliana
 
Deute català i pressupostos 2014
Deute català i pressupostos 2014Deute català i pressupostos 2014
Deute català i pressupostos 2014
 
Psicologia i obesitat
Psicologia i obesitatPsicologia i obesitat
Psicologia i obesitat
 
Reti. endoplasm. clase 6
Reti. endoplasm. clase 6Reti. endoplasm. clase 6
Reti. endoplasm. clase 6
 
Taller sistemas tecnológicos
Taller sistemas tecnológicosTaller sistemas tecnológicos
Taller sistemas tecnológicos
 
La pedagogía waldorf power
La pedagogía waldorf powerLa pedagogía waldorf power
La pedagogía waldorf power
 
Parcial2 barreto adrian
Parcial2 barreto adrianParcial2 barreto adrian
Parcial2 barreto adrian
 
paraboide hiperbolica
paraboide hiperbolicaparaboide hiperbolica
paraboide hiperbolica
 
Proyecto de vida diana
Proyecto de vida dianaProyecto de vida diana
Proyecto de vida diana
 
Primera investigacion de vale
Primera investigacion  de valePrimera investigacion  de vale
Primera investigacion de vale
 
Colonização do brasil
Colonização do brasilColonização do brasil
Colonização do brasil
 
Catanese jardim europa silvestre i e vi (3)
Catanese jardim europa silvestre i e vi (3)Catanese jardim europa silvestre i e vi (3)
Catanese jardim europa silvestre i e vi (3)
 
Libras trab&u apres
Libras trab&u apresLibras trab&u apres
Libras trab&u apres
 
история культуры древней руси
история культуры древней русиистория культуры древней руси
история культуры древней руси
 

Similaire à Manual katadyn expediton

Oscaro - Conseils mecaniques - Pompe à eau
Oscaro - Conseils mecaniques - Pompe à eauOscaro - Conseils mecaniques - Pompe à eau
Oscaro - Conseils mecaniques - Pompe à eauOscaro
 
Mode d'emploi batteur électrique PR021A Studio by Riviera et Bar
Mode d'emploi batteur électrique PR021A Studio by Riviera et BarMode d'emploi batteur électrique PR021A Studio by Riviera et Bar
Mode d'emploi batteur électrique PR021A Studio by Riviera et Barhabiague
 
Water savings in public swimming pool with filtration on trays by CIFEC
Water savings in public swimming pool with filtration on trays  by CIFECWater savings in public swimming pool with filtration on trays  by CIFEC
Water savings in public swimming pool with filtration on trays by CIFECGL events
 
Mode d'emploi Machine à glaçon Lagrange
Mode d'emploi Machine à glaçon LagrangeMode d'emploi Machine à glaçon Lagrange
Mode d'emploi Machine à glaçon Lagrangehabiague
 
Notice utilisation Bouilloire Celia Riviera et Bar
Notice utilisation Bouilloire Celia Riviera et BarNotice utilisation Bouilloire Celia Riviera et Bar
Notice utilisation Bouilloire Celia Riviera et Barhabiague
 
Freezer fagor 0109 zfa101 - Servicio Tecnico Fagor
Freezer fagor 0109   zfa101 - Servicio Tecnico FagorFreezer fagor 0109   zfa101 - Servicio Tecnico Fagor
Freezer fagor 0109 zfa101 - Servicio Tecnico Fagorserviciotecnicofagor
 
Notre catalogue 2016 - Filtration de l'eau
Notre catalogue 2016 - Filtration de l'eauNotre catalogue 2016 - Filtration de l'eau
Notre catalogue 2016 - Filtration de l'eauTéréva
 
Canalisation plomberie - Filtration eau
Canalisation plomberie - Filtration eauCanalisation plomberie - Filtration eau
Canalisation plomberie - Filtration eauAudrey Clamecy
 

Similaire à Manual katadyn expediton (14)

Oscaro - Conseils mecaniques - Pompe à eau
Oscaro - Conseils mecaniques - Pompe à eauOscaro - Conseils mecaniques - Pompe à eau
Oscaro - Conseils mecaniques - Pompe à eau
 
Portfilo
PortfiloPortfilo
Portfilo
 
Campana Balay 3BF745XP
Campana Balay 3BF745XPCampana Balay 3BF745XP
Campana Balay 3BF745XP
 
Campana Balay 3BF747XP
Campana Balay 3BF747XPCampana Balay 3BF747XP
Campana Balay 3BF747XP
 
Notice calor
Notice calorNotice calor
Notice calor
 
Mode d'emploi batteur électrique PR021A Studio by Riviera et Bar
Mode d'emploi batteur électrique PR021A Studio by Riviera et BarMode d'emploi batteur électrique PR021A Studio by Riviera et Bar
Mode d'emploi batteur électrique PR021A Studio by Riviera et Bar
 
Water savings in public swimming pool with filtration on trays by CIFEC
Water savings in public swimming pool with filtration on trays  by CIFECWater savings in public swimming pool with filtration on trays  by CIFEC
Water savings in public swimming pool with filtration on trays by CIFEC
 
Mode d'emploi Machine à glaçon Lagrange
Mode d'emploi Machine à glaçon LagrangeMode d'emploi Machine à glaçon Lagrange
Mode d'emploi Machine à glaçon Lagrange
 
Groupe de potabilisation solaire
Groupe de potabilisation solaireGroupe de potabilisation solaire
Groupe de potabilisation solaire
 
Notice utilisation Bouilloire Celia Riviera et Bar
Notice utilisation Bouilloire Celia Riviera et BarNotice utilisation Bouilloire Celia Riviera et Bar
Notice utilisation Bouilloire Celia Riviera et Bar
 
Freezer fagor 0109 zfa101 - Servicio Tecnico Fagor
Freezer fagor 0109   zfa101 - Servicio Tecnico FagorFreezer fagor 0109   zfa101 - Servicio Tecnico Fagor
Freezer fagor 0109 zfa101 - Servicio Tecnico Fagor
 
Ariston aml125-fr
Ariston aml125-frAriston aml125-fr
Ariston aml125-fr
 
Notre catalogue 2016 - Filtration de l'eau
Notre catalogue 2016 - Filtration de l'eauNotre catalogue 2016 - Filtration de l'eau
Notre catalogue 2016 - Filtration de l'eau
 
Canalisation plomberie - Filtration eau
Canalisation plomberie - Filtration eauCanalisation plomberie - Filtration eau
Canalisation plomberie - Filtration eau
 

Plus de FerreHogar

Catalogo Esbit 2016 / Catalogue 2016 Esbit
Catalogo Esbit 2016 / Catalogue 2016 EsbitCatalogo Esbit 2016 / Catalogue 2016 Esbit
Catalogo Esbit 2016 / Catalogue 2016 EsbitFerreHogar
 
Catalogo Rite in the Rain 2016
Catalogo Rite in the Rain 2016Catalogo Rite in the Rain 2016
Catalogo Rite in the Rain 2016FerreHogar
 
Catalogo Ortlieb 2016
Catalogo Ortlieb 2016Catalogo Ortlieb 2016
Catalogo Ortlieb 2016FerreHogar
 
Nuevos productos Travel Safe 2016.
Nuevos productos Travel Safe 2016.Nuevos productos Travel Safe 2016.
Nuevos productos Travel Safe 2016.FerreHogar
 
Catalogo Laken 2015
Catalogo Laken 2015 Catalogo Laken 2015
Catalogo Laken 2015 FerreHogar
 
Petromax 2014 actualizado
Petromax 2014 actualizadoPetromax 2014 actualizado
Petromax 2014 actualizadoFerreHogar
 
Catalogo Highlander 2014
Catalogo Highlander 2014Catalogo Highlander 2014
Catalogo Highlander 2014FerreHogar
 
Catalogo Brettschneider 2014-2015
Catalogo Brettschneider 2014-2015Catalogo Brettschneider 2014-2015
Catalogo Brettschneider 2014-2015FerreHogar
 
Catalogo Ortlieb 2014
Catalogo Ortlieb 2014Catalogo Ortlieb 2014
Catalogo Ortlieb 2014FerreHogar
 
Catalogo Esbit 2014 Outdoor
Catalogo Esbit 2014 Outdoor Catalogo Esbit 2014 Outdoor
Catalogo Esbit 2014 Outdoor FerreHogar
 
Catalogo laken 2014
Catalogo laken 2014Catalogo laken 2014
Catalogo laken 2014FerreHogar
 
Catalogo petromax 2014
Catalogo petromax 2014Catalogo petromax 2014
Catalogo petromax 2014FerreHogar
 
Catalogo lurbel 2013-14
Catalogo lurbel 2013-14Catalogo lurbel 2013-14
Catalogo lurbel 2013-14FerreHogar
 
Catalogo Vargo Outdoors
Catalogo Vargo OutdoorsCatalogo Vargo Outdoors
Catalogo Vargo OutdoorsFerreHogar
 
Catalogo Light my Fire 2013
Catalogo Light my Fire 2013Catalogo Light my Fire 2013
Catalogo Light my Fire 2013FerreHogar
 
Catalogo petromax 2013 d gb_fr
Catalogo petromax 2013 d gb_frCatalogo petromax 2013 d gb_fr
Catalogo petromax 2013 d gb_frFerreHogar
 
Catalogo Esbit 2012-2013 Deutsch
Catalogo Esbit 2012-2013 DeutschCatalogo Esbit 2012-2013 Deutsch
Catalogo Esbit 2012-2013 DeutschFerreHogar
 
Catalogo 2012 Laken, let's flow home
Catalogo 2012 Laken, let's flow homeCatalogo 2012 Laken, let's flow home
Catalogo 2012 Laken, let's flow homeFerreHogar
 

Plus de FerreHogar (20)

Catalogo Esbit 2016 / Catalogue 2016 Esbit
Catalogo Esbit 2016 / Catalogue 2016 EsbitCatalogo Esbit 2016 / Catalogue 2016 Esbit
Catalogo Esbit 2016 / Catalogue 2016 Esbit
 
Catalogo Rite in the Rain 2016
Catalogo Rite in the Rain 2016Catalogo Rite in the Rain 2016
Catalogo Rite in the Rain 2016
 
Catalogo Ortlieb 2016
Catalogo Ortlieb 2016Catalogo Ortlieb 2016
Catalogo Ortlieb 2016
 
Nuevos productos Travel Safe 2016.
Nuevos productos Travel Safe 2016.Nuevos productos Travel Safe 2016.
Nuevos productos Travel Safe 2016.
 
Catalogo Laken 2015
Catalogo Laken 2015 Catalogo Laken 2015
Catalogo Laken 2015
 
Petromax 2015
Petromax 2015Petromax 2015
Petromax 2015
 
Petromax 2014 actualizado
Petromax 2014 actualizadoPetromax 2014 actualizado
Petromax 2014 actualizado
 
Catalogo Highlander 2014
Catalogo Highlander 2014Catalogo Highlander 2014
Catalogo Highlander 2014
 
Petromax 2014
Petromax 2014Petromax 2014
Petromax 2014
 
Catalogo Brettschneider 2014-2015
Catalogo Brettschneider 2014-2015Catalogo Brettschneider 2014-2015
Catalogo Brettschneider 2014-2015
 
Catalogo Ortlieb 2014
Catalogo Ortlieb 2014Catalogo Ortlieb 2014
Catalogo Ortlieb 2014
 
Catalogo Esbit 2014 Outdoor
Catalogo Esbit 2014 Outdoor Catalogo Esbit 2014 Outdoor
Catalogo Esbit 2014 Outdoor
 
Catalogo laken 2014
Catalogo laken 2014Catalogo laken 2014
Catalogo laken 2014
 
Catalogo petromax 2014
Catalogo petromax 2014Catalogo petromax 2014
Catalogo petromax 2014
 
Catalogo lurbel 2013-14
Catalogo lurbel 2013-14Catalogo lurbel 2013-14
Catalogo lurbel 2013-14
 
Catalogo Vargo Outdoors
Catalogo Vargo OutdoorsCatalogo Vargo Outdoors
Catalogo Vargo Outdoors
 
Catalogo Light my Fire 2013
Catalogo Light my Fire 2013Catalogo Light my Fire 2013
Catalogo Light my Fire 2013
 
Catalogo petromax 2013 d gb_fr
Catalogo petromax 2013 d gb_frCatalogo petromax 2013 d gb_fr
Catalogo petromax 2013 d gb_fr
 
Catalogo Esbit 2012-2013 Deutsch
Catalogo Esbit 2012-2013 DeutschCatalogo Esbit 2012-2013 Deutsch
Catalogo Esbit 2012-2013 Deutsch
 
Catalogo 2012 Laken, let's flow home
Catalogo 2012 Laken, let's flow homeCatalogo 2012 Laken, let's flow home
Catalogo 2012 Laken, let's flow home
 

Manual katadyn expediton

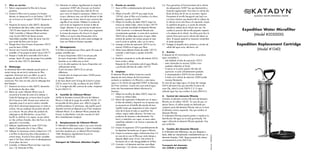
  • 1. Expedition Water Microfilter (Model #2050000) Expedition Replacement Cartridge (Model #1040) 1. Mise en service 1.1 Retirer soigneusement le filtre de la housse portative. 1.2 Amener le filtre avec la pompe à la hauteur désirée, en desserrant la vis de fixation 120179 qui se trouve sur le support 120165. Resserrer la vis. 1.3 Desserrer les écrous à ailes 20672, descendre les fermetures des deux côtés, retirer le couvercle 120170 dans lequel est vissé I'élément filtrant 1040. Contrôler si I'élément filtrant est bien vissé, le joint 20674 (6) devant assurer I'étanchéité complète. Eviter de serrer trop fort pour éviter de faire sortir le joint. 1.4 PIonger dans I'eau le tuyau d'aspiration 22315 avec les tamis 22306. 1.5 Tourner vers I'avant le tube de sortie 120172, contrôler s'il est propre et serrer I'écrou120171. 1.6 Pomper à l'aide de la manivelle 22316 de la pompe. Après 20 coups de pompe I'eau potable sortira du tube 120172, désinfectée. 2. Nettoyage La céramique devra être nettoyée quand après un certain temps de service la résistance du filtre augmente, diminuant ainsi son débit, ou que la soupape de sécurité 22307 s'active (à 8 bar au maximum). Plus I'eau est sale, plus le nettoyage doit être fréquent : 2.1 Desserrer les écrous à ailes 20672, descendre les fermetures des deux côtés. 2.2 Retirer du carter I'élément filtrant avec le couvercle et le tube de sortie et le nettoyer à l'aide de l'éponge qui se trouve dans la poche de la housse en toile. Brosser pour enlever les impuretés jusqu'à ce que la couleur naturelle claire de la céramique éapparaisse sur toute sa surface. Ne pas employer de produits abrasifs ou à récurer. Ne pas utiliser des produits de nettoyage ou de désinfection, ne pas faire bouillir ou stériliser à la vapeur, ne pas sécher sur des surfaces chaudes, dans des fours ou des appareils à microondes. 2.3 Nettoyer régulièrement le carter 22314 des dépôts d'impuretés dûs à I'eau à filtrer. 2.4 Nettoyer la céramique comme indiqué (voir 2.2) si le filtre ne devait pas être utilisé pendant un certain temps. Ensuite la faire sécher complète- ment à l'air libre, évitant ainsi le développement d'une odeur de moisi. 2.5 Contrôler si I'élément filtrant est bien vissé (voir sous 1.3). Remonter le filtre. 2.6 Démonter et nettoyer régulièrement le clapet de surpression 22307 afin d'assurer son fonction- nement correct. Prenez deux clefs de 20 mm pour ouvrir le clapet le surpression. Retenir la vis 6-pans inférieure avec une clef et dévisser la tête du clapet avec l’autre, dans le sens contraire des aiguilles d’une montre. Nettoyer la surface du joint et de son logement et revisser la tête du clapet. Attention à ne pas tourner le petit écrou sur la tête du clapet : il est utilisé pour augmenter le niveau de pression afin d'ouvrir le clapet. 2.7 Veillez à ce que le tube d'évacuation de la céramique et le tube de sortie soient protégés de I'eau non filtreé et d'autres impuretés. 3. Dérangements Si le filtre ne produisait pas d'eau après 20 coups de pompe, contrôlez que : - le tuyau d'aspiration 22315 ne soit pas plié - les tamis d'aspiration 22306 ne soient pas bouchés ou ne collent pas au fond - la vis du côte supérieur du tuyau d'aspiration soit suffisamment serrée - le joint du piston 20674 (2) ne soit pas défectueux - la boule dans le clapet anti-retour 22303 puisse bouger librement. Si de I'eau devait sortir le long de la barre à piston 22316, serrer la vis (fig. au-dessus du joint 20674 (1)). Si malgré cela elle continue de couler, remplacer le joint 20674 (1). 4. Contrôle de I'élément filtrant Vérifier le diamètre minimal (38 mm) de I'élément filtrant a I'aide de la jauge de contrôle 100181. S'il est possible de faire glisser sans effort la jauge de contrôle pardessus la céramique, cela signifie que le diamètre minimal est dépassé et qu'il faut remplacer I'élément filtrant. Si un élément filtrant présente des fissures, la désinfection n'est plus assurée et il doit être immédiatement remplacé. 5. Remplacement de I'élément filtrant Si I'élément est défectueux suite à une usure normale ou une détérioration quelconque, il devra immédiate- ment être remplacé par un élément filtrant Katadyn 1040. Remplacez régulièrement le joint en caoutchouc 20674 (6). Transport de l'élément: Attention fragile! 1. Puesta en servicio 1.1 Sacar el filtro cuidadosamente del estuche de lona. 1.2 Aflojar el tornillo 120179 que sujeta el pié 120165, alzar el filtro con la bomba a la altura deseada y apretar el tornillo. 1.3 Aflojar los tornillos de aletas 20672, bajar las tuercas en ambos lados, retirar la tapa 120170 en la cual està atornillada el elemento filtrante 1040. Examinar si el elemento filtrante esta correctamente apretado. La junta de la cerámica 20674 (6) no debe dejar pasar el agua. Debe evitarse de apretar con exceso porque en este caso la junta se aplasta, sale y ya no cierra. 1.4 Sumergir el tubo de aspiración 22315 con los tamices 22306 en el agua por filtrar. 1.5 Volver hacia delante el tubo de salida 120172, controlar si està limpio y apretar el tornillo 120171. 1.6 Bombear moviendo la varilla del embolo 22316 hacia arriba y abajo. Después de 20 novimientos sale el agua filtrada y purificada del tubo de salida 120172. 2. Limpieza EI elemento filtrante debéra limpiarse cuando, después de cierto tiempo de funcionamiento aumenta su resistencia a la filtración y sale menos agua o si la vàlvula de seguridad 22307 se descarga (en 8 bar màximo). Cuanto más sucia esté el agua, tanto más frecuentemente deberà efectuarse la limpieza. 2.1 Aflojar los tornillos de aletas 20672, bajar las tuercas en ambos lados. 2.2 Retirar del caparaz6n el elemento con la tapa y el tubo de salidad y limpiarla con la esponja que se encuentra en el bolsillo del estuche de lona. Cepillar hasta que reaparezca el color original claro de la bujia en toda su superficie. No utilizar ningún medio abrasivo. Ne tratar con productos de limpieza o desinfectantes. No hervir ni esterilizar con vapor, no secar sobre superficies calientes ni en hornos o aparatos de microondas. 2.3 Limpiar el caparazón 22314 periódicamente de los depósitos formados par el agua a filtrarse. 2.4 Limpiar la cerámica según indicaciones bajo 2.2 en caso de no usar el filtro par cierto tiempo y después déjelo secar al aire. Esto evitarà la formación de un olor desagradable en el filtro. 2.5 Controlar si el elemento está bien atornillado (véase bajo 1.3). Montar nuevamente el filtro. 2.6 Para garantizar el funcionamiento de la válvula de sobrepresión 22307 hay que desmontarla y limpiarla regularmente. Para abrir la válvula dos llaves de boca de 20 mm se conviene. Agarre firmemente el tornillo hexagonal más bajo con una llave mientras que desatornilla la cabeza de la válvula con la otra llave a la izquierda. Limpie la superficie de goma y su punto de contacto. Apriete la cabeza de la válvula otra vez. No cambie la posición del tornillo pequeño respecto a la cabeza de la válvula. Se utiliza para fijar la presión llana para que la válvula del relevar se abra. El equipo especial es necesario comprobar el ajuste apropiado. 2.7 Proteger la boquilla de la cerámica y el tubo de salida del agua sucia, del barro, etc. 3. Averías Si después de 20 movimientos el filtro no produce agua, contrólese si: - está doblado el tubo de aspiración 22315 - están obstruidos los tamices 22306 o han quedado adheridos al fondo - la tuerca en la parte superior del tubo de aspiracion no está suficientemente apretada - la empaquetadura 20674 (2) esta dañada - la bola en la válvula de retencion 22303 puede moverse libremente. En caso de que salga agua a lo largo dei vastago 22316 del piston hay que atornillar la tuerca de racor (fig. sobre la junta 20674 (1 )). Si sigue saliendo agua hay que cambiar la junta 20674 (1). 4. Control dei elemento filtrante Controlar el diámetro mínimo (38 mm) del elemento filtrante con el calibre 100181. En caso de que, sin ejercer fuerza, el calibre pueda ser deslizado por cualquier parte del elemento filtrante, éste ya no tiene el diámetro minimo requerido. Hay que cambiar el elemento filtrante. Si el elemento filtrante presenta grietas o rajaduras la desinfección del agua ya no está garantizada. No seguir utilizando el elemento filtrante agrietado. Hay que cambiarlo. 5. Cambio del elemento filtrante Si el elemento está defectuoso, sea par desgaste o daño, debe ser reemplazado inmediatemente por un elemento Katadyn 1040. Tenga presente de colocar correctamente la junta 20674 (6). Transporte del elemento: con cuidado y protegido. PrintNr.129032/2
  • 2. Limited Warranty Your Katadyn Expedition Microfilter is warranted for two (2) years from the date of purchase against defects in materials and workmanship. Should your Katadyn Expedition prove defective within the warranty period, return it to the Katadyn retailer from whom it was purcha- sed. If you have any questions please contact Katadyn at +41 1 839 21 11. Katadyn, at its discretion, will replace or repair the damaged item. Please retain your purchase receipt as proof of date purchased. Garantie Le micro-filtre Expedition de Katadyn est garanti 2 ans à compter de la date d'achat contre tout défaut matériel ou de fabrication. Si votre filtre Expediton de Katadyn s'avérait défectueux pendant la période sous garantie, adressez-vous à votre revendeur. Pour toutes questions complémentaires, veuillez téléphoner à Katadyn au + 41 1 839 21 11. Katadyn procédera à l'échange ou à la réparation du produit. Veuillez conserver votre preuve d'achat qui tient lieu de certificat de garantie. Garantie Auf den Katadyn Expedition geben wir eine Garantie von 2 Jahren ab Kaufdatum auf Material oder Verarbeitungsfehler. Sollte der Katadyn Expedition wäh- rend dieser Zeit einen Defekt aufweisen, wenden Sie sich mit Ihren Garantieansprüchen an den Händler, bei dem das Produkt erworben wurde. Für weitere Fragen wenden Sie sich bitte an Katadyn unter der Nummer +41 1 839 21 11. Katadyn wird das Produkt reparieren oder ersetzen. Bitte bewahren Sie den Kaufbeleg als Garantieschein auf. Garantía El microfiltro Katadyn Expediton está garantizado duran- te 2 años a partir de la fecha de compra por defectos de materiales o fabricación. Si el Katadyn Expedition pre- senta algún defecto durante ese periodo, diríjase al esta- blecimiento donde lo adquirió para reclamar las presta- ciones de garantía. Para cualquier pregunta adicional, consulte con Katadyn en el teléfono +41 1 839 21 11. Katadyn reparará o sustituirá el producto. Conserve el justificante de compra como certificado de garantía. Contact International: Katadyn Products Inc. Birkenweg 4 8304 Wallisellen / Switzerland info@katadyn.ch / www.katadyn.ch 120172 120171 120170 20672 22314 120179 100181 20542 120165 1040 22316 20674 20674 (2) 20674 (1) 22307 22303 22315 22306 20674 (6) 1. Operation 1.1 Carefully remove Katadyn Expedition filter from canvas carrying bag. 1.2 Loosen hight adjustment arm 120179 and then adjust the pump body at a comfortable operating level on the suport 120165. 1.3 Loosen wing nut 20672; turn locking device down on both sides; raise lid 120170 with the ceramic filter 1040 screwed in. Make sure that the filter element is properly screwed in; gasket 20674 (6) must seal tight. Be careful not to over- tighten, as this may cause a bypass between the lid and the rubber gasket. 1.4 Immerse input hose 22315 and pre filter 22306 into the raw water. 1.5 Turn outlet tube 120172 to front; this tube should be kept clean; fasten cap nut 120171. 1.6 Start pumping by moving the pump handle 22316 up and down. After about 20 pumping strokes the clean, filtered water will flow through outlet tube 120172. Use the first liter to flush the system 2. Cleaning Ceramic capacity depends on water quality. The dirtier the water the more often you will have to clean the element. The Filter element must be cleaned when the flowrate becomes insufficient, or the pressure relief valve 22307 is discharging (at 112 Ibs p.s.i./8 bar). 2.1 Loosen wing nut 20672 and turn locking device down on both sides. 2.2 Lift the ceramic element 1040 with lid and outlet tube out of the filter housing and clean with the abrasive sponge (contained in the inner packet of the canvas bag), until the natural ceramic colour reappears. Use no other abrasive or scouring agents. Do not boil the filter, nor sterilise it with steam. Do not use ovens or microwavers to speed up the drying process. 2.3 Clean the filter housing 22314 periodically. 2.4 Should the filter not be used for some time, remove the ceramic filter and clean it as described under 2.2. Allow it to air dry com- pletely in a ventilated room. This will prevent the ceramic filter from building up a musty smell. 2.5 Make sure that the filter element is screwed in tightly (see under 1.3). Reassemble the filter. 2.6 To ensure proper functioning of the pressure relief valve 22307, regularly remove and clean this valve. To open the valve, two 20 mm wrenches are ideal. Grip firmly the lower hexagonal screw with one wrench while unscrewing the valve-head with the other wrench counter-clock wise. Clean rubber surface and its contact point. Tighten valve-head again. Do not change position of small screw on valve-head. It is used to set the pressure level for the relieve valve to open. Special equipment is needed to check the proper setting. 2.7 Protect clean water outlet of the Filter element and outlet tube against pollution. 3. Trouble Shooting Should, after approximately 20 pumping strokes, no water flow through the outlet tube, please check: - if input hose 22315 is bent - if pre filter 22306 is clogged, or is sticking to the ground - if screw cap at the upper end of the input hose is tightened properly - if piston gasket 20674 (2) is defective; lubricated - if the ball in the check valve 22303 can move freely. If water squirts out along the piston handle 22316, tighten the wing nut (Diag. above gasket 20674 (1)). If still leaking, the gasket 20674 (1) has to be replaced. 4. Checking the Filter element Check the filter element for the minimum diameter (38 mm) with the measuring gauge 100181. If the gap in the measuring gauge fits over the ceramic filter without being forced, then the filter must be replaced. Inspect the ceramic for cracks after cleaning, if you dropped the filter or if you had freezing temperatures. If the filter shows cracks it will no longer protect you from microorganisms. 5. Replacing the Filter element As soon as the ceramic filter has reached the minimal diameter or is damaged, it has to be replaced by a new Katadyn ceramic filter 1040. Take care that the rubber gasket 20674 (6) is inserted properly. Transporting the element: gently with care! 1. Betrieb 1.1 Filter vorsichtig aus der Tragtasche nehmen. 1.2 Filter samt Pumpe durch Lösen und Befestigen der Klemmschraube 120179 am Ständer 120165 auf Arbeitshöhe bringen. 1.3 Flügelmuttern 20672 lösen. Verschluss beidseitig herunterklappen. Deckel 120170 mit einge- schraubtem Filterelement 1040 hochziehen und überprüfen, ob das Filterelement gut einge- schraubt ist. Die Dichtung 20674 (6) muss dicht abschliessen. Übermässiges Anziehen ist jedoch zu vermeiden, weil sonst die Dichtung herausge- quetscht wird und daher nicht mehr abdichten könnte. 1.4 Ansaugschlauch 22315 und Sieb 22306 in Rohwasser eintauchen. 1.5 Auslaufrohr 120172 nach vorne drehen, auf Sauberkeit kontrollieren und Überwurfmutter 120171 anziehen. 1.6 Pumpen, indem der Pumpenstössel 22316 auf- und ab bewegt wird. Nach ca. 20 Pumpstössen fliesst das saubere, entkeimte Trinkwasser aus dem Auslaufrohr 120172. Erster Liter immer zum Durchspülen des Filters verwenden. 2. Reinigung Wenn nach einer gewissen Betriebszeit der Filter- widerstand steigt und weniger Wasser fliesst oder das Überdruckventil 22307 abbläst (bei max. 8 bar), ist die Keramik zu reinigen. Je schmutziger das Wasser, umso häufiger die Reinigung: 2.1 Flügelmuttern 22314 lösen und Verschluss beid- seitig herunterklappen. 2.2 Filterelement zusammen mit Deckel und Auslaufrohr aus dem Filtergehäuse heben und mit Schwamm (im Innenfach der Tragtasche untergebracht) reinigen. Schlammbelag weg- bürsten bis die helle Naturfarbe der Keramik wieder überall erscheint. Keine anderen Kratz und Scheuermittel verwenden. Nicht mit Reinigungs- oder Desinfektionsmitteln behandeln, nicht auskochen oder dampfsterilisieren, nicht auf heissen Oberflächen, in Öfen oder Mikrowellengeräten trocknen. 2.3 Das Gehäuse 20677 periodisch von den Schmutzablagerungen des Rohwassers reinigen. 2.4 Wird der Filter für längere Zeit nicht mehr gebraucht, Keramik reinigen wie unter 2.2 und anschliessend an der Luft komplett trocknen lassen. Dies verhindert muffigen Geruch im Filter. 2.5 Prüfen, ob das Filterelement gut eingeschraubt ist (siehe unter 1.3). Filter wieder zummensetzen. 2.6 Um die Funktion des Überdruckventils 22307 zu gewährleisten, Ventil regelmässig demontieren und reinigen. Zum Öffnen eignen sich zwei Schlüssel mit einer Schlüsselweite 20. Mit einem Schlüssel die untere Sechskantschraube festhalten und mit dem anderen den Ventilkopf im Gegen- uhrzeigersinn aufdrehen. Gummifläche und Auflagepunkt reingen. Ventilkopf wieder auf- schrauben. Bitte kleine Schraube am Ventilkopf nicht drehen, damit wird eingestellt, bei welchem Druck das Ventil ansprechen soll. Druckmess- geräte sind nötig, um den Punkt einzustellen. 2.7 Keramikmundstück und Auslaufrohr vor Schmutz- wasser und anderer Verschmutzung schützen. 3. Störungen Liefert der Filter nach 20 Pumpenstössen kein Wasser, bitte prüfen: - ob Ansaugschlauch 22315 geknickt ist - ob Ansaugsiebe 22306 verstopft sind oder am Boden festkleben - ob Überwurfmutter am oberen Ende des Ansaugschlauches zu wenig angezogen ist - ob Kolbendichtung 20674 (2) defekt ist; fetten - ob die Ventilkugel im Rückschlagventil 22303 frei beweglich ist. Falls Wasser der Kolbenstange 22316 entlang austritt, Überwurfmutter (Abb. oberhalb Dichtung 20674 (1)) anziehen. Wenn trotzdem noch undicht, ist die Dichtung 20674 (1) zu ersetzen. 4. Kontrolle des Filterelementes Filterelement mit Masslehre 100181 auf Minimal- durchmesser (38 mm) prüfen. Lässt sich die Masslehre ohne Kraftaufwand an einer beliebigen Stelle über das Filterelement schieben, ist der Minimaldurch- messer unterschritten und das Filterelement muss ersetzt werden. Hat ein Filterelement Risse, ist die Entkeimung nicht mehr gewährleistet. Ein solches Element darf nicht mehr benützt und muss ersetzt werden. 5. Auswechseln des Filterelementes Ist das Filterelement durch Abnützung oder Beschädigung defekt, so muss es sofort durch ein Katadyn-Element 1040 ersetzt werden. Transport des Elementes: Vorsichtig, schonend!