1. Increase the Quality and Durability
of Your Next Composite Repair*
With the growing use of composite components on a broad The freshness of the abraded and cleaned surface directly
range of aircraft today, maintenance technicians must be affects the durability of the repair. If damage is removed and
thoroughly skilled in composite repair procedures. Complicating the part is covered for repair the next day, the patch will not be
this requirement is the rapid proliferation of advanced materials as strong as a patch installed immediately after the part was
used in manufacturing and repairing aircraft. abraded and cleaned.
Among the key parameters that affect the quality and durability For thorough cleaning of abraded areas, wipe surfaces using a
of a composite repair are resin selection, damage removal and clean, lint-free cloth and a reagent-grade solvent. Conventional
surface preparation, and fabricating methods and materials. solvents, even when dispensed from a new can, can contain
The following guidelines have been developed to assist traces of oil that will contaminate rather than clean the area.
technicians in wet lay-up repair of laminated aircraft parts.
Laminate Patch Lay-up
Resin Selection To prevent stretching
In preparation for repairing a composite component, select an and fraying of fabric and
appropriate resin system from the list of approved products facilitate application of
in the structural repair manual (SRM). In evaluating specific successive plies on the
resins, technicians should review the physical properties of the repair area, a preferred
potential systems along with the handling and performance method for patch
requirements of the project. Primary factors in material preparation is pre-
selection include: impregnating cloth with
• Size of the repair mixed laminating resin
• Work life of the resin system as follows:
• Flow of the resin system • Cut templates to
size for each layer of
Damage Removal and Surface Preparation the repair.
When delamination is located on a part, carefully rout out • Place a section of
and/or sand the area until the damage is completely removed. cloth large enough for
Then clean surfaces thoroughly. During these processes, the full repair on top of a
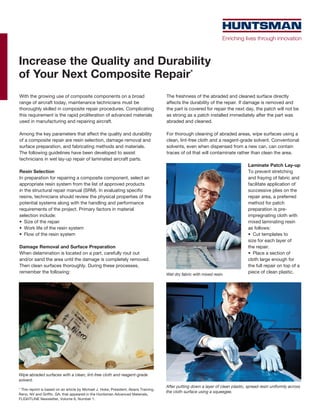
remember the following: Wet dry fabric with mixed resin.
piece of clean plastic.
Wipe abraded surfaces with a clean, lint-free cloth and reagent-grade
solvent.
After putting down a layer of clean plastic, spread resin uniformly across
* This reprint is based on an article by Michael J. Hoke, President, Abaris Training,
the cloth surface using a squeegee.
Reno, NV and Griffin, GA, that appeared in the Huntsman Advanced Materials,
FLIGHTLINE Newsletter, Volume 6, Number 1.
2. Many different bagging materials are used in vacuum
compaction. Selection of specific product types and
combinations must be made according to the requirements of
each project. If the wrong sequence of materials is used, it can
ruin the repair by, for example, bleeding out too much resin. Key
factors affecting choice and application of bagging materials are
the type of resin being used for the repair and the temperature
and pressure under which the part will cure. Typical bagging
materials selected for aircraft composite repair include:
• Peel ply facilitates separation of bagging materials from
the laminate after compaction. This ply leaves a matte finish
on the part that is easy to paint. NOTE: If the component will
be bonded, the surface may require further preparation even
if peel ply is used.
Cut repair plies from pre-impregnated fabric after using prepared
templates to mark required sizes on the plastic.
Breather material is added over peel ply, release film and a bleeder to
permit a vacuum to be pulled evenly over the laminate surface.
• Perforated release film controls resin bleed and air removal
Put pre-cut repair plies down on the prepared surface. from the laminate. Holes are either pierced or perforated and
a variety of center distance spacings is available. Some films
bleed a percentage of the resin and allow air to escape while
• Pour mixed resin onto the cloth and cover with a second others retain nearly the full resin content.
piece of plastic.
• Spread resin uniformly over the fabric with a squeegee.
• Using the templates, cut plies required for the repair.
• Put down each fabric layer following the orientation schedule
called for in the SRM until the damaged area is filled.
NOTE: Preparing the resin system is a critical step in fabricating
a durable laminate. Begin by verifying the precise ratio of resin to
hardener called for on package labels. Then, use an accurate scale
to weigh system components. Mix resin and hardener completely for
about three minutes or until a uniform color has been attained. During
the blending process, scrape container bottom and sidewalls frequently
to incorporate any unmixed resin or hardener. After the resin system is
fully mixed, apply it to the reinforcing fabric.
Vacuum Bagging Process
When the lay-up is complete, vacuum compact the laminate
to reduce air voids that can cause blistering and delamination.
This procedure also helps control resin bleed within the
laminate layers to maximize repair strength. For elevated temperature curing, add a heat blanket over the repair area.
3. • Non-perforated release film retains all resin and air. • Complete bagging and place the part under vacuum before
The film is usually used to separate the bleeder and breather the resin system begins to gel.
layers or to prevent resin from bonding to the caul plate • Install thermocouples so that they do not directly contact the
or heat blanket that may be added after the bleeder and metal caul plate to prevent calibration errors that can interfere
breather materials are installed. with temperature readings.
• Bleeder absorbs excess resin during compaction. A number • Insert thermocouples adjacent to the repair area. If they are
of fabrics, including fiberglass, are used in this application. too far from the patch, readings will be inaccurate. If they are
• Breather allows a vacuum to be drawn over the entire too close, they may print through the caul plate causing an
laminate. During installation, the breather must completely indentation in the repair surface.
cover the area being vacuum bagged to ensure uniform
pressure and to optimize air removal. Vacuum Compaction
• Caul plate can be placed over the breather blanket to Start with a low vacuum of approximately 10 inches of mercury
produce a flat surface and promote uniform heat transfer from to permit easy repositioning of the bag and fitting into corners
the heat blanket across the composite surface. as necessary. Then increase the vacuum to 22 to 26 inches of
• Heat blanket can be used to elevate the temperature of the mercury until compaction is complete.
laminate, thereby decreasing cure time.
• Bagging film acts as a leak-proof membrane that is sealed NOTE: Some resins may require use of less vacuum to prevent
frothing and bubbling that can produce porous bondlines. Follow SRM
over the part to vacuum compact the laminate. Use of a
instructions carefully.
bagging film that is not coated with any oils is imperative.
• Sealant tape holds the vacuum bag securely to the edges of
the part and seals splices and folds in the bag.
• Miscellaneous. Thermocouples monitor cure temperature
and vacuum ports pull vacuum. In addition, a necessity
for high-temperature curing of composites is a portable,
computerized process controller. This equipment permits
pre-programming of specific ramp and soak cycles and
precise control of cure temperatures.
NOTE: The film and fabrics mentioned above are supplied in a
number of grades and sizes with varied temperature and elongation
characteristics to suit the requirements of individual applications.
Bagging Tips
During the vacuum bagging process, as with the rest of the
composite repair, attention to technique is crucial. Tips to
remember:
• Cover sharp areas on the caul plate to prevent puncture of
the bag.
Once cured, the repaired part is prepared for painting before being
reinstalled on the aircraft.
Curing
Cure parts at the lowest temperature compatible with the
resin system in use. If the SRM permits, it is preferable to cure
composites at a temperature below 180ºF (83ºC). When high
temperatures (350ºF/177ºC) are required, residual moisture in
the composite part may form steam that can create enough
pressure to disbond the laminate skin from the core.
Conclusion
Effective repair of composite parts is not difficult. But, it
requires a careful analysis of project requirements, a thorough
understanding of materials being used, and close attention to
techniques employed in each phase of the repair. The quality
During vacuum compaction and curing, excess resin is drawn up and reliability of repairs are directly related to strict adherence
through the bleeder/breather materials. to proper fabricating methods.