

Empfohlen
Weitere ähnliche Inhalte
Andere mochten auch
Andere mochten auch (13)
Ähnlich wie Low Cost Kitchen Crafts
Ähnlich wie Low Cost Kitchen Crafts (20)
Mehr von Ranelle Cole
Mehr von Ranelle Cole (20)
Kürzlich hochgeladen
Kürzlich hochgeladen (9)
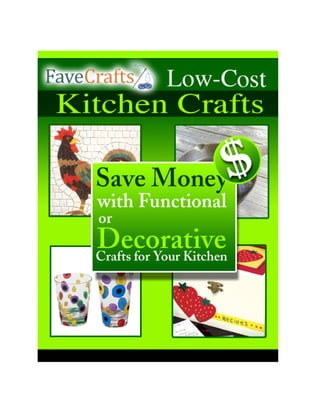
Low Cost Kitchen Crafts
- 2. Low‐Cost Kitchen Craft eBook The contents of this eBook, including all craft projects, are the property of FaveCrafts.com and cannot be distributed or published without permission from FaveCrafts. Any syndication requests may be directed to FaveCrafts. © 2009, Prime Publishing LLC, All Rights Reserved. Find thousands of free crafts, decorating ideas, handmade gifts and more at www.FaveCrafts.com. 2
- 3. Low‐Cost Kitchen Craft eBook Letter from the Editors Dear Reader, For many people, the kitchen is the room in the house that they spend the most time, whether cooking, eating or interacting with friends and family. We all want to have a kitchen in which we feel comfortable and which reflects our personalities. Luckily, decorating the kitchen does not have to be expensive. The FaveCrafts editors have put together this collection of low‐cost crafts just for the kitchen, including kitchen crochet patterns, easy kitchen painting projects and even some fridge magnet crafts for that dose of fun. Many of these projects double as functional kitchen items, including hot pads, trivets and clocks. We even have a section for decorative kitchen storage. Redecorate your kitchen or create handy kitchen tools with these 39 low‐cost kitchen crafts. You can find more low‐cost craft projects, great activities for kids and extensive decorating ideas at www.FaveCrafts.com. Our eBooks, like all our craft projects, are absolutely FREE to members of our crafting community. Please feel free to share with family and friends and ask them to sign up at our website for our free e‐mail newsletter. Sincerely, The Editors of FaveCrafts www.FaveCrafts.com www.FaveCraftsBlog.com Find thousands of free crafts, decorating ideas, handmade gifts and more at www.FaveCrafts.com. 3
- 4. Low‐Cost Kitchen Craft eBook Low‐Cost Kitchen Craft Table of Contents Kitchen Clock Crafts .................................................................................................................... 6 Papercrafted Art Clock .............................................................................................................................. 6 Classic Scroll Clock..................................................................................................................................... 8 Wood Button Clock ................................................................................................................................. 10 Kitchen Crochet Patterns ........................................................................................................... 12 Easy Oven Mitts ...................................................................................................................................... 12 Crochet Stash Baskets ............................................................................................................................. 14 Easy Checkerboard Placemat .................................................................................................................. 16 Crochet Springtime Cloth ........................................................................................................................ 18 Kitchen Cross-Stitch ................................................................................................................... 20 Waste Canvas Leaf Place Mats ............................................................................................................... 20 . Cherries Cross Stitch Oven Pad ............................................................................................................... 22 Cherries Cross Stitch Tea Bag .................................................................................................................. 23 Kitchen Décor Crafts .................................................................................................................. 26 Bistro Window Sign ................................................................................................................................. 26 Cheery Cherry Kitchen Cornice ............................................................................................................... 28 Rooster Mosaic ....................................................................................................................................... 31 Rustic Country Chicken Figurines ............................................................................................................ 33 Spice Girls of the Old World .................................................................................................................... 36 Plastic Cup Vase ...................................................................................................................................... 38 Get the look of Beautiful Flowers without the Upkeep .......................................................................... 39 Fridge Magnet Crafts ................................................................................................................. 41 Cosmic Orange Magnet .......................................................................................................................... 41 . Find thousands of free crafts, decorating ideas, handmade gifts and more at www.FaveCrafts.com. 4
- 5. Low‐Cost Kitchen Craft eBook Felt Watering Can Magnet with Flowers ................................................................................................ 43 Vintage Refrigerator Magnets ................................................................................................................ 45 Beeswax Magnet ..................................................................................................................................... 46 Photo Fabric Button Magnets ................................................................................................................. 47 Kitchen Knitting Patterns .......................................................................................................... 52 Amazing Felted Knit Coffee Cozies ......................................................................................................... 52 . Rugged Camper Cooking Set ................................................................................................................... 54 Easy Knit Dishcloths ................................................................................................................................ 57 Felted Teapot Cozy ................................................................................................................................. 58 . Kitchen Organization Crafts ..................................................................................................... 60 Great Garden Ladybug Memo Board ...................................................................................................... 60 Colorful Message Board .......................................................................................................................... 63 Magnet Board with Matching Magnets .................................................................................................. 64 Strawberry Recipe Box ............................................................................................................................ 69 Kitchen Painting Projects........................................................................................................... 70 Painted Pots for the Kitchen ................................................................................................................... 70 Spotted Tumblers .................................................................................................................................... 72 Swirls of Spring Plate .............................................................................................................................. 73 . Fruit Serving Tray .................................................................................................................................... 74 Funky Pitcher and Glasses ...................................................................................................................... 76 . Cocktail Serving Tray ............................................................................................................................... 77 Kitchen Sewing Projects ............................................................................................................. 79 Embellish a Tea Towel ............................................................................................................................ 79 . Wear your Little Black Dress in the Kitchen Now Too ............................................................................ 80 Pretty Mom ............................................................................................................................................. 82 Find thousands of free crafts, decorating ideas, handmade gifts and more at www.FaveCrafts.com. 5
- 6. Low‐Cost Kitchen Craft eBook Kitchen Clock Crafts Papercrafted Art Clock By: Kathleen George for STYROFOAM™ Brand Foam Impress everyone with this handmade paper crafted art clock that is easy and inexpensive to make. Your friend will never believe you didn't buy this paper clock from a fancy department store and you'll love knowing that you have a homemade clock decor for your shelf or nightstand. Materials: • STYROFOAM Brand Foam: o Sheet, 12" x 12" x 1" • Art or scrapbook papers, assorted coordinating colors, several sheets • Battery‐operated clock mechanism with extra long shank • Aluminum wire, 1/8" diameter • Silver jewelry findings: chain, 3" length; jump ring; 5 mm beads, four • Ruler • Paraffin or candle stub • Fine‐line black permanent marker • Pencil, sharp • Serrated knife • Wire cutters • Straight pins, Extra‐long • Scissors • Smooth needlenose pliers • Utility knife with sharp blade • Low‐temperature glue gun and glue sticks • Paper appliqué glue • Tracing paper (Optional) Download Pattern Find thousands of free crafts, decorating ideas, handmade gifts and more at www.FaveCrafts.com. 6
- 7. Low‐Cost Kitchen Craft eBook Steps: 1. Trace heart pattern outline onto foam sheet, omitting dashed line. Flip pattern over to complete heart. Wax serrated knife with candle stub or paraffin; cut out heart. Smooth rough edges with fingertips. Use pencil to poke hole through center of heart as shown for clock mechanism. 2. Refer to photo/pattern to cover heart with various papers. Trace heart onto wrong side of desired paper for front (landscape scene used here, marked "a"); cut 1 1/4" wide strips to cover sides. Glue strips to heart sides, folding excess over foam edges. Glue front cover in place; let dry. 3. Next, trace, cut, and glue three "b" areas (brown/blue print shown here) to heart. Note: Pattern markings are for first side of heart only, and are only suggested shapes. 4. Trace, cut, and glue scalloped "c" area to bottom of heart. Cut several 1/2"‐wide strips from same paper to glue around heart edges. Trace and cut out "d" pattern from rice paper or similar translucent material; glue to heart. 5. Let heart dry flat, pinning papers to foam to secure until glue dries. 6. Use pliers to bend two wire arms and one wire stand as shown. When heart is dry, use glue gun to glue arms to heart as shown. Glue small paper pieces over wire to conceal glue. 7. Cut a 2" square from paper of choice. Fold two edges to meet at center, to measure 1" x 2". Wrap paper around top, straight edge of wire stand; glue paper ends together, allowing wire to pivot freely. Hold heart upright on work surface to ensure proper placement of stand. Glue paper ends only to back of clock, below hole for mechanism; let dry. 8. Glue one end of chain directly to foam below top of stand. Add jump ring to free end of chain and join to stand, connecting it just above intersection of wire ends. 9. Follow manufacturer's instructions to insert clock mechanism. Glue beads into foam surface to mark quarter‐hour positions. Purchased clock face or numerals may also be used. ®™ Trademark of The Dow Chemical Company ("Dow") or an affiliated company of Dow. For more project ideas, please see styrofoamstyle.com. Find thousands of free crafts, decorating ideas, handmade gifts and more at www.FaveCrafts.com. 7
- 8. Low‐Cost Kitchen Craft eBook Classic Scroll Clock By: Dawn Hathaway for STYROFOAM™ Brand Foam Make moments more memorable with a stylish timepiece you create yourself. Gold finishes and an embossed, rubber‐stamped rose add gorgeous color and texture to this easy DIY project. Materials: • STYROFOAM Brand Foam: o Block, 12" x 10" x 1" OR 18" x 12" x 1" if making matching shelf (see link below) • Metallic gold paints: acrylic; spray • Ivory crackle‐finish spray paint • Metallic gold wax finish • Matte‐finish spray varnish • Pre‐mixed spackling • Battery‐powered gold clock movement, 3/4" • Rose rubber stamp • Gold pigment stamp pad • Clear embossing powder • Serrated knife • Candle stub or paraffin • Fine‐line black permanent marker • Pencil • Ruler • Wooden items: skewer; toothpicks • Metal tablespoon • Paintbrushes: medium flat; small round • Disposable palette • Water basin • Paper towels • Scissors • Sandpaper • Transfer paper • Heat gun • Thick, white craft glue Find thousands of free crafts, decorating ideas, handmade gifts and more at www.FaveCrafts.com. 8
- 9. Low‐Cost Kitchen Craft eBook • Optional: STYRO Wonder Cutter® Plus For pattern, click here. Steps: Note: Follow manufacturer's instructions throughout. 1. Wax serrated knife with candle stub or paraffin. Cut one 7" x 11" and one 2" x 5" rectangle from foam block. Use scrap foam to lightly sand edges until smooth. Set aside small block for clock stand. 2. Mark center of foam, 4‐1/2" up from bottom 7" edge, for clock hands. Use skewer to poke hole through foam. Place clock hands into hole, enlarging hole with skewer as needed. 3. Trace around clock works onto back of foam. Use tablespoon or knife tip to carve out 3/8"‐deep area for clock works; check depth to be sure clock hands move freely. Remove clock parts. 4. Transfer clock top pattern to opposite end of foam. Use waxed knife or Wonder Cutter to cut foam. Use scrap foam to round off clock and stand edges. 5. Cut two toothpicks in half. Refer to diagram to glue each piece halfway into stand. Glue opposite ends into back of clock at bottom edge; let dry. 6. Apply spackling to clock, avoiding center hole; let dry. Sand smooth. Repeat to fill in open areas as needed. Spray paint clock gold, then ivory crackle while gold is still wet. For smaller cracks, apply one to two coats of crackle finish; for larger cracks, apply three to four coats. Let dry. 7. Stamp gold rose over hole in center of clock. While still wet, sprinkle with embossing powder. Use heat gun to emboss image. 8. Use pencil to mark 12 equally‐spaced dots around clock face as shown. Transfer numerals to clock in appropriate positions. Use round brush to paint numerals gold and brush handle to dot remaining hours gold. 9. Use fingers to lightly rub two coats gold wax finish on foam edges and curves for aged, distressed look. Spray clock with varnish; let dry. Repeat. 10. Assemble clock according to package directions. ®™ Trademark of The Dow Chemical Company ("Dow") or an affiliated company of Dow. For more project ideas, please see styrofoamstyle.com. Find thousands of free crafts, decorating ideas, handmade gifts and more at www.FaveCrafts.com. 9
- 10. Low‐Cost Kitchen Craft eBook Wood Button Clock By: Rebekah Meier for Walnut Hollow Simple buttons designate the hours in this fun clock craft. Turn any round piece of wood into a clock with the right hardware and a bit of decorative paper or paint. Materials: • Walnut Hollow® #3526 Round Plate, Basswood • Walnut Hollow® #TQ700P Clock Movement with Hands • Walnut Hollow® 23092 Designer Series™ Clock Hands • Drill with 3/8” drill bit • Paint • 8”x8” decorative paper • 12 buttons • Other Supplies: AA battery, brush, glue, paper towel, pliers, ruler, sandpaper, scissors, spray varnish Instructions: 1. To change wood surface into a clock, use ruler to determine the center of plate. Use drill with 3/8” drill bit to drill a hole in the center of plate. 2. To prepare wood for painting, use sandpaper to lightly sand entire wood surface. Remove dust with paper towel. Find thousands of free crafts, decorating ideas, handmade gifts and more at www.FaveCrafts.com. 10
- 11. Low‐Cost Kitchen Craft eBook 3. Use brush to apply paint to entire wood surface. Let dry and apply second coat if necessary. Let dry. 4. Apply 2‐3 coats of spray varnish for a protective finish. 5. Use scissors to cut a circle from the decorative paper the size of the indented surface of the plate. Use glue to secure paper in place. Use scissors to remove the paper from the clock movement opening. 6. Attach clock movement to opening according to directions on packaging. Use pliers to tighten hex nut. Attach designer hands. These may be painted, if desired, to coordinate with decorative paper or paint. 7. Use glue to attach buttons to designate each hour. 8. Insert AA battery. Find thousands of free crafts, decorating ideas, handmade gifts and more at www.FaveCrafts.com. 11
- 12. Low‐Cost Kitchen Craft eBook Kitchen Crochet Patterns Easy Oven Mitts By: Bernat Crochet your own oven mitts to match the rest of your kitchen with this free pattern. These beautiful oven mitts are quick and easy to make and are also useful. Materials: • Bernat Handicrafter Cotton Twists (340 g/12 oz) or yarn of your choice. o 1 ball of #42116 (Country Twists). • Size 9 mm (U.S. M or 13) crochet hook or size needed to obtain gauge. Gauge: 7 sc and 8 1/2 rows = 4" [10 cm] with 4 strands of yarn. Pattern: Mitts (make 2): With 4 strands tog, ch 18. Join with sl st to form a ring. 1st rnd: Ch 1. 1 sc in each ch around. Join with sl st to first sc. 18 sc. 2nd rnd: Ch 1. 1 sc in each sc around. Join with sl st to first sc. Rep last rnd 6 times more. Shape thumb gusset: 1st rnd: Ch 1. 1 sc in each of next 8 sc. (2 sc in next sc) twice. 1 sc in each of next 8 sc. Join with sl st to first sc. 2nd rnd: Ch 1. 1 sc in each of next 8 sc. 2 sc in next sc. 1 sc in each of next 2 sc. 2 sc in next sc. 1 sc in each of next 8 sc. Join with sl st to first sc. 3rd rnd: Ch 1. 1 sc in each of next 8 sc. 2 sc in next sc. 1 sc in each of next 4 sc. 2 sc in next sc. 1 sc in each of next 8 sc. Join with sl st to first sc. 4th rnd: Ch 1. 1 sc in each of next 8 sc. 2 sc in next sc. 1 sc in each of next 6 sc. 2 sc in next sc. 1 sc in each of next 8 sc. Join with sl st to first sc. 5th rnd: Ch 1. 1 sc in each of next 9 sc. (Place marker for thumb). Miss next 8 sc. 1 sc in each of next 9 sc. Find thousands of free crafts, decorating ideas, handmade gifts and more at www.FaveCrafts.com. 12
- 14. Low‐Cost Kitchen Craft eBook Crochet Stash Baskets By: Lily Yarns Use this free beginner crochet pattern to create these handy baskets that can be used to store any number of household objects. Materials: • Lily® Sugar’n Cream (70.9 g / 2.5 oz) • SMALL: #00001 (White) or #00062 (Emerald) 2 balls • MEDIUM: #00095 (Red) 3 balls Size 3.5 mm (U.S. E or 4) crochet hook or size needed to obtain gauge. Optional: Fabric stiffener. Measurements: Small: Approx 5 x 5 x 6 ins 12.5 x 12.5 x 15 cm, with top unfolded. Medium: Approx 5 x 10 x 6 ins 12.5 x 25.5 x 15 cm, with top unfolded. Gauge: 8 sc and 20 rows = 4 ins 10 cm. Steps: The instructions are written for small basket. If changes are necessary for medium basket the instructions will be written thus ( ). Sides Ch 28. Find thousands of free crafts, decorating ideas, handmade gifts and more at www.FaveCrafts.com. 14
- 16. Low‐Cost Kitchen Craft eBook Easy Checkerboard Placemat By: Bernat Use your favorite colors and this free pattern to crochet a contrasting checkerboard placemat. These placemats are the perfect way to add a quick and easy burst of color and your own style to your kitchen. Measurements: Approx 14 x 18 1/2" [35.5 x 47 cm]. Materials: • Bernat Handicrafter Cotton (Solids: 50 g/1.75 oz) or (Ombres: 42.5 g/1.5 oz) or yarn of your choice. o Main Color (MC): 5 balls. o Contrast A: 5 balls. o Contrast B: 1 ball. • Size 4.5 mm (U.S. 7) crochet hook or size needed to obtain gauge. Gauge: 20 sts and 15 1/2 rows = 4" [10 cm] in pat. Pattern: Note: Wind small balls of the colors to be used, one for each area of color in the design. Start new colors at appropriate points. To change color, draw new color through last 2 loops of previous color as indicated. Find thousands of free crafts, decorating ideas, handmade gifts and more at www.FaveCrafts.com. 16
- 18. Low‐Cost Kitchen Craft eBook Crochet Springtime Cloth By: Bernat This free crochet pattern combines triangular shapes and vibrant colors to create a quick and easy cloth. Use it in your kitchen to celebrate the arrival of spring. Measurement: Approx 12 1/2" 32 cm each side of triangle. Gauge: 13 sc and 14 rows = 4" 10 cm. Materials: Bernat® Handicrafter Cotton (Solids: 50 g / 1.75 oz or Ombres: 42.5 g / 1.5 oz) or cotton of your choice. Main Color (MC): (00001 White) or (13712 Hot Green) or (13742 Hot Blue) or color of your choice 1 ball Contrast A: (00089 Banana), (00001 White), (13742 Hot Blue) or (23743 Summer Splash) or (00018 Lemon Swirl) or colors of your choice 1 ball Size 5 mm (U.S. H or 8) crochet hook or size needed to obtain gauge. Pattern: Center Triangle: With MC, ch 21. 1st row: (RS). 1 sc in 2nd ch from hook. 1 sc in each ch to end of ch. Turn. 20 sc. 2nd row: Ch 1. 1 sc in each st to end of row. Turn. 3rd row: Ch 1. 1 sc in each sc to last 2 sc. Draw up a loop in each of next 2 sts. Yoh and draw through all 3 loops on hook ‐ sc2tog over last 2 sc made. Turn. 4th to 18th rows: As 3rd row 15 times. 4 sts at end of last row. 19th row: Ch 1. (Sc2tog over next 2 sc) twice. Turn. 20th row: Ch 1. Sc2tog over next 2 sts. Fasten off. First Triangle: 1st row: With RS of work facing, join A with sl st to corner ch of foundation chain of Center Triangle. Ch Find thousands of free crafts, decorating ideas, handmade gifts and more at www.FaveCrafts.com. 18
- 20. Low‐Cost Kitchen Craft eBook Kitchen CrossStitch Waste Canvas Leaf Place Mats By: Dimensions Needlecrafts Sew up four easy place mats in a plain fabric with a different cross‐stitch leaf on each. These elegant leaf place mats are great for autumn entertaining. Waste canvas helps you to cross‐stitch on any fabric. These place mats match the cross‐stitch Leaf Table Runner. Materials: • one Leaves of Autumn kit #35014 • one package 14 count waste canvas: 12" x 18" • 1 yard of medium weight fabric for the place mats • 1 yard of lightweight fabric for the lining • 8 yards of coordinating piping • sewing thread • permanent fi ne tip marker • zipper foot for all machine stitching • Patterns and Diagrams [pdf] Instructions: Wash and dry the fabrics to preshrink them. Wash and air dry the thread from the kit to preshrink it. Mark four 20" x 15" rectangles on the place mat fabric with a pencil or the permanent marker. By not cutting your fabric right away, you can use a hoop to stitch if you like. Print one copy of the pattern sheet (pdf). Use diagram (pdf) to identify the leaves on the chart from the instruction sheet. Find thousands of free crafts, decorating ideas, handmade gifts and more at www.FaveCrafts.com. 20
- 22. Low‐Cost Kitchen Craft eBook Cherries Cross Stitch Oven Pad By: DMC If you want an easy way to use your completed cross stitch motif, turn the motif into an oven hot pad to proudly display in your kitchen. This example features a cherries motif created with a free cross stitch chart. Materials: • Cherris cross‐stitch motif on Aida fabric • DMC RS 442 oven pad • Size: 18 x 18 cm. • Aida fabric for stitching (5.5 stitches per cm). How to prepare the cross‐stitch motif Measure the maximum height and width of the part in Aida fabric to find the centre, and mark it each time with a pin (see diagram). Also find the centre of the diagram and mark it with a pencil. Calculate the number of stitches horizontally and vertically to be sure you can stitch the entire motif. Start stitching from the middle of the diagram. Each square represents a cross stitch and each symbol a colour. Work with two threads of Embroidery Floss. Find thousands of free crafts, decorating ideas, handmade gifts and more at www.FaveCrafts.com. 22
- 23. Low‐Cost Kitchen Craft eBook Cherries Cross Stitch Tea Bag By: DMC Brighten up your daily cup with a homemade tea tag with cherries cross stitch motif. The free cross stitch chart for cherries helps you create the motif. Materials: • Cherries cross stitch motif on Aida fabric: 35 cm x 31 cm. • Maroon gingham: 35 cm x 22 cm. • A piece of fusible fabric: 35 cm x 31 cm. • A spool of white and maroon thread • A sewing machine Size of the finished tea bag: 15.5 cm x 32 cm. How to prepare the cross‐stitch motif Cut a rectangle measuring 35 cm x 31 cm out of the Aida fabric, making sure the cross‐stitch motif is well centred (piece A). Overcast the 4 sides by machine (see diagram). How to mount the application Cut a square measuring 35 cm x 31 cm out of the fusible fabric. Apply this fabric with the help of an iron, placing the fusible side against the fabric on the back of the cross‐stitch motif (see diagram). Find thousands of free crafts, decorating ideas, handmade gifts and more at www.FaveCrafts.com. 23
- 24. Low‐Cost Kitchen Craft eBook How to prepare the revers Cut a rectangle measuring 35 cm x 22 cm (piece B) out of the maroon gingham. Overcast all around by machine (see diagram). How to assemble parts A and B Place the front of the cross‐stitch motif towards you and then the gingham on top of it, edge to edge along the 35 cm width. Pin and then machine stitch a seam 1 cm from the edge (see diagram). Flatten the seam with an iron. How to make the bag Work on the back. Fold the fabric in two along the height, placing the cross‐stitch motif on the inside (see diagram), to obtain a surface of 17.5 cm x 51 cm. How to make the bag (contd) Sew a side seam 1 cm from the edge along the height of 51 cm (see diagram on the left) Fasten the stitch at each end. Place the seam that has just been sewn, centred, on one face, and flatten it with an iron at the back. Also mark the side pleats. Pin the bottom of the bag and then sew the bottom seam 1 cm from the edge (see diagram on the right). Find thousands of free crafts, decorating ideas, handmade gifts and more at www.FaveCrafts.com. 24
- 25. Low‐Cost Kitchen Craft eBook How to make the width of the bottom At one end of the bottom of the bag, place the side seam over the bottom seam to obtain a triangular shape. Make sure the fabric is completely flat and machine stitch a straight seam 2 cm from the point all along the width forming the base of the triangle. Proceed in the same way for the other side (see diagram). How to finish the bottom of the bag Fold over the triangles inside and hold in place with whip stitches (see diagram). How to make the revers at the top Work on the front. Tuck the gingham inside the bag, leaving at the top a 6 cm border in the same fabric (see diagram). Mark the pleat with an iron. Machine stitch a seam all round the edge 5 mm from the pleat marked by the iron. Fix the gingham inside the bag, making whip stitches to hold the revers in place. How to finish Fold back 5.5 cm of gingham to form the revers at the top (see diagram). Iron the finished bag. Find thousands of free crafts, decorating ideas, handmade gifts and more at www.FaveCrafts.com. 25
- 26. Low‐Cost Kitchen Craft eBook Kitchen Décor Crafts Bistro Window Sign By: DecoArt Turn your kitchen into a chic French bistro with this cute block sign. The materials are inexpensive and the project is quick and easy. Materials: DecoArt Products Required Americana Acrylics • DAO8 ‐ Yellow Ochre • DAO67 ‐ Lamp (Ebony) Black • DA164 ‐ Light Buttermilk • DA169 ‐ Tomato Red Americana Multi‐Purpose Sealer • DS17 ‐ Multi‐Purpose Sealer Supplies • 6 and 12 flat brushes • Liner brush • Water container • Palette or plastic plate • Paper towels • Low temp hot glue gun and glue sticks • Polka dot grosgrain ribbon Find thousands of free crafts, decorating ideas, handmade gifts and more at www.FaveCrafts.com. 26
- 27. Low‐Cost Kitchen Craft eBook • Scissors • Red chenille stem • Dylite cubes • Styrofoam sheet (31/2" x 12") • 1/8" dowels Instructions: Preparation (Optional): Basecoat Dylite cubes and Styrofoam base with Multi‐Purpose Sealer or mix Multi‐Purpose Sealer with basecoat colors. 1. Paint as follows: cubes, Tomato Red; dowels and Styrofoam base, Yellow Ochre. Let dry. 2. Use 6 flat brush and Lamp Black to paint small checks around front of cubes. 3. Use 12 flat brush and Lamp Black to paint large checks around Styrofoam base. Let dry. 4. Use liner brush and Light Buttermilk to paint letters on each cube. NOTE: letters can be stenciled or copied from computer font if desired. 5. Cut dowels at various heights. Insert dowels into cube bottoms. Position and push other dowel end into Styrofoam. 6. Cut 3 ribbon pieces 7" long with angled ends. Gather center of each ribbon piece and secure with a small piece of chenille stem. Adhere ribbon under "B" cube. Repeat with "s" and "r" cubes. 7. Cut piece of ribbon to fit across Styrofoam base. Position and secure with glue. Find thousands of free crafts, decorating ideas, handmade gifts and more at www.FaveCrafts.com. 27
- 28. Low‐Cost Kitchen Craft eBook Cheery Cherry Kitchen Cornice By: Annabelle Keller for STYROFOAM™ Brand Foam Here's a fun, inexpensive, no‐sew makeover for any window in your home. Simply glue batting and fabric to cornice sections cut from foam sheets. How versatile! Materials: • STYROFOAM Brand Foam: o Sheets, 36" x 12" x 1", two • Cotton print fabrics, 45" wide, 2 yds. each: pillow panel (8" tall motif); coordinating small print • Unbleached muslin, 90" wide, 3/4 yd. • Quilt batting, crib size or 45" wide, 1‐5/8 yds. • Iron‐on adhesive: 17" x 1‐5/8 yds.; 3/8" and 7/8" wide, one package each • Grosgrain ribbon to match fabrics, 3‐1/8 yds. each: color A, 3/8" and 7/8" widths; color B, 3/8" • Floral supplies: t‐pins, six; wooden picks with wires removed, 3" long, 35 • Angle brackets with screws, 5", two • Serrated knife • Candle stub or paraffin • Fine‐line black permanent marker • Yardstick or ruler • Scissors • Straight pins • Iron and ironing board • Low‐temp glue gun and glue sticks • Glue for plastic foam Find thousands of free crafts, decorating ideas, handmade gifts and more at www.FaveCrafts.com. 28
- 29. Low‐Cost Kitchen Craft eBook For pattern, click here. Steps: 1. Wash and dry fabrics without fabric softener; press. 2. Refer to cutting layout to draw cornice sections onto one foam sheet; label sections. Wax serrated knife with candle stub or paraffin. Cut sections from foam. 3. Use glue gun to glue three floral picks, equally spaced, halfway into short end of one TOP. Apply foam glue to foam edge around picks. Use glue gun to glue protruding pick ends into short end of remaining TOP, so sections fit tightly together. Finished cornice top should measure 5" x 38". 4. Refer to Fig. 1 to join sides to top. Use glue gun to glue three picks into each short end of cornice top, leaving 3/4" pick end protruding from foam. Apply foam glue to foam edge. Use glue gun to apply glue to protruding pick ends. Press upper 5" edges of ENDS flush with cornice top as shown. Top of cornice should measure 5" x 40". 5. Repeat Step 3 to join FRONT to remaining foam sheet along one 12" edge. Refer to Fig. 2; picks are indicated by short black lines. Finished cornice front should measure 12" x 40". 6. Use glue gun to glue remaining picks halfway into front edge of top/sides assembly, spacing picks about 3" apart. Apply foam glue to foam edge around picks. Gently press cornice front onto pick tips. Using glue gun, spot glue foam edges between picks. Quickly and firmly press cornice front flush with cornice top/sides assembly. Let dry completely. 7. Cut one 23" x 57" rectangle from batting. Center cornice front on batting. Smooth batting over outside of cornice, allowing excess to overlap bottom and back edges (where cornice will rest against wall). Pin batting to outside of cornice to secure. Wrap batting smoothly around cornice edges to inside, trimming and mitering corners as needed. Pin to secure. Trim excess batting, allowing 1‐1/2" overlap inside each edge. Use glue gun to secure batting to inside of cornice. Let dry completely. Remove pins. 8. Cut one 23‐1/2" x 57‐1/2" rectangle from muslin. Repeat Step 7, gluing muslin over batting. 9. Cut one each from small‐print fabric for cornice lining: 5‐1/2" x 60" (inside top and sides); 11‐ 1/2" x 39" (inside front). Press 1/2" hem in both short and one long edge of 60" fabric piece. With fabric right side out, pin long hemmed edge inside cornice, 3/4" from back open edge. Use glue gun to glue fabric to inside of muslin‐covered cornice. Remove pins. Smooth lining with hands. Press 1/2" hem in all sides of front lining piece. Use glue gun to glue fabric, right side out, to inside cornice front, covering raw edge of top/side lining. 10. Cut vertical row of panels from pillow panel fabric. Using photo as guide, center fabric over cornice front and sides; pin to secure. Cut two fabric strips for top and bottom borders if needed, each approximately 3" x 56". Pin borders to front and sides of cornice. Find thousands of free crafts, decorating ideas, handmade gifts and more at www.FaveCrafts.com. 29
- 30. Low‐Cost Kitchen Craft eBook 11. Cut ribbon lengths to fit and position as desired along top and bottom panel and cornice edges, hiding raw fabric edges, and around panel motifs. Pin to secure. Note: Model pictured uses wide green ribbon, narrow green ribbon, and narrow red ribbon to complement fabrics. For upper and lower panel borders, center narrow ribbon over wide ribbon as shown. 12. When pleased with arrangement, carefully transfer fabric pieces and ribbon to work surface. Following manufacturer's instructions, apply iron‐on adhesive to wrong side of fabric and ribbon lengths. Beginning with panel, remove paper backing from fabric and iron on to cornice. Trim excess length and spot glue to back edge of cornice. Repeat for borders and ribbon lengths. 13. Follow manufacturer's instructions to attach brackets to top back edges of cornice. ®™ Trademark of The Dow Chemical Company ("Dow") or an affiliated company of Dow. For more project ideas, please see styrofoamstyle.com. Find thousands of free crafts, decorating ideas, handmade gifts and more at www.FaveCrafts.com. 30
- 31. Low‐Cost Kitchen Craft eBook Rooster Mosaic By: Diamond Tech This mosaic feathered friend will make a perfect trivet or tray for your breakfast. Remember, the early bird gets the worm! Materials: • 1 package each 3/4” Jennifer’s Mosaic™ Tile Mixes: Desert, Fire • 1 package each 3/4” Jennifer’s Mosaic™ Tiles: Green, White • package Mosaic Glass Nippers or Tile Nippers • Sponge • Mosaic Adhesive • Newspaper • 12” x 12” acrylic or chipboard surface • Optional: grout, colorant, bowl, spoon, latex gloves, spatula, soft cloth Click here for pattern. Steps: 1. Prepare surface to be mosaiced by cleaning it and removing any oil. Wood surfaces can be slightly sanded. To create the mosaic panel use 12” square chipboard available at hardware and home suppliers. 2. Lay newspaper over the working area. If grouting, also have a disposable bowl, rubber gloves, spatula and sponge. Find thousands of free crafts, decorating ideas, handmade gifts and more at www.FaveCrafts.com. 31
- 32. Low‐Cost Kitchen Craft eBook 3. Modify design to fit the surface. Pattern can be reduced or enlarged to fit any flat surface. 4. Transfer design to work surface using carbon paper. 5. Work in sections, begin with the main subject, nip tile to fit pattern guidlines. Use the photo of the finished project for color and tile shape reference. Featured project was not grouted. If you wish to grout your project, leave 1/8” spacing between tiles. Cut tiles over a wide, empty, shallow box or bowl to collect tile shards. 6. Once you have nipped the tile to fit a particular section, apply adhesive to the textured side of the tile and apply, adhesive side down, onto the surface. If making a project for outdoors be sure to use waterproof adhesive. Repeat nipping and gluing application until design is complete. Let project dry for 24 hours. 7. No grouting is needed to achieve the look of the featured panel. However, if you evenly space tile 1/8” apart when gluing, this should leave enough room for grout. 8. To apply grout, mix according to package directions, consistency should be equal to oatmeal. 9. Grout can not be saved so mix as needed. Be creative ‐ experiment with colored grouts or color your own grout with Jennifer’s Mosaics™ Colorants. Spread grout over project with a spatula or by hand wearing latex gloves. Make sure that every space is filled. Remove excess grout with a moist sponge. 10. Wipe off the grout haze with a cloth, buff and shine tiles. Allow grout to dry. A sealer may be used to keep grout clean and protected. If the piece is to be used outdoors a transparent sealer is recommended to protect it from humidity. 11. If making a panel, finish piece with your favorite frame, hang and enjoy the compliments. Find thousands of free crafts, decorating ideas, handmade gifts and more at www.FaveCrafts.com. 32
- 33. Low‐Cost Kitchen Craft eBook Rustic Country Chicken Figurines By: Lee Lindeman for STYROFOAM Brand Foam Let these funky fabric chickens strut their stuff in your kitchen or family room. They are so easy to make and such a great country theme living room home decor idea! Materials: • STYROFOAM Brand Foam: o Block, 1" x 10" x 12" o Sheet, 1/2" x 12" x 36" o Disc (standing chicken only), 6" x 1" • 45‐inch cotton fabrics: check, polka‐dot, or mini‐print for body, 1/3 yd.; gold tone‐on‐tone print for feet, 1/8 yd; solid green for base (standing chicken only), 1/4 yd. • Red synthetic suede or felt for head and wattle, 9" x 12" • Green self‐adhesive felt (standing chicken only), 9" x 12" • Needled cotton batting, 3" x 6" • Fusible web • Pencil • Craft knife • Iron • Scissors • Ruler • Sandpaper or pencil sharpener • Straight pins • Sewing machine and matching thread OR needle and matching thread • Wood dowels: 14" x 5/8"; 2" x 1/4" • Acrylic paint, light yellow • Natural raffia • 1/4" half‐round black beads for eyes, two • Straw doll hat (sitting chicken only) • White craft glue • Serrated knife and old candle OR coping saw Find thousands of free crafts, decorating ideas, handmade gifts and more at www.FaveCrafts.com. 33
- 34. Low‐Cost Kitchen Craft eBook For pattern, click here. Steps: Standing Chicken: 1. Using pattern, trace chicken body onto 1" foam block and cut out serrated knife or coping saw (if using serrated knife, wax knife blade first with old candle). 2. Place foam chicken on body print fabric. Cut out fabric 1" beyond edges of foam. Spread thin layer of glue on front of foam chicken; center and adhere fabric on front. Ref er to diagram to cut tabs in fabric allowance around entire chicken. Fold tabs onto 1" foam edge and glue. Repeat, covering back of chicken. 3. Fuse web to a 2" x 45" strip of body print fabric. Trim 1/2" from each long edge, resulting in a 1" x 45" strip. (Hint: Fusible web prevents fabric from raveling.) Glue fused strip to 1" edge of chicken, covering fabric tabs; trim as necessary. 4. Cut a 3" x 6" rectangle of body print fabric and a 3" square of needled cotton batting. Fold print fabric in half widthwise, right sides together, forming a 3" square; place on top of batting. Using pattern, trace wing onto doubled fabric and sew on traced line, completely around shape. Carefully cut a slit in top layer of fabric only and turn wing right side out. Repeat to make a second wing. Glue wings with slit face down to opposite sides of chicken (refer to photo). 5. Using patterns, cut two heads (reverse one), two wattles, and one 1" x 3‐1/4" strip from red suede or felt. Align and glue heads, wattles, and bead eyes to opposite sides of fabric‐covered chicken (refer to photo). Glue red strip to head along corresponding 1" edge. 6. Sand or sharpen one end of 1/4" dowel to a point for beak. Paint beak light yellow and let dry. Use craft knife to cut a tiny X in suede/felt head on 1" edge to attach beak (refer to photo). Glue and insert beak into foam. 7. Cut two 7" legs from 5/8" dowel. Paint light yellow and let dry. Cut two tiny X's in center bottom of chicken on 1" edge, approximately 1" apart to attach legs. Use a pencil point to start holes in foam at X's. Glue and insert legs, making sure they're even. 8. Using pattern, trace two feet onto 1/2" foam and cut out with craft knife. Follow Step 2 to cut gold print fabric 1/2" beyond foam and cover feet. 9. Cover top and sides of 6" disc with solid green fabric. Trace disc onto paper side of self‐adhesive felt. Cut out and adhere circle to bottom of disc. 10. Stand legs on feet at center back and mark placement by gently pressing to create impressions in fabric and foam. Cut X's in fabric and insert legs. Stand chicken on disc base and mark placement. Cut X's in fabric, start holes, and glue legs with attached feet to base. Find thousands of free crafts, decorating ideas, handmade gifts and more at www.FaveCrafts.com. 34
- 35. Low‐Cost Kitchen Craft eBook 11. Cut a small hole in tip of chicken's tail. Glue several lengths of raffia in hole and trim lengths as desired (refer to photo). Sitting Chicken: Follow Steps 1‐8 of Standing Chicken with following modifications. Glue eyes, one wattle, and beak to front of chicken head (refer to photo). Follow Step 9 to attach legs to center bottom front of chicken in sitting position, then feet to legs. Glue hat angled on head. ®™ Trademark of The Dow Chemical Company ("Dow") or an affiliated company of Dow. For more project ideas, please see styrofoamstyle.com. Find thousands of free crafts, decorating ideas, handmade gifts and more at www.FaveCrafts.com. 35
- 36. Low‐Cost Kitchen Craft eBook Spice Girls of the Old World By: Kathleen George for STYROFOAM™ Brand Foam These aren't your modern day Spice Girls, these ladies hail all the way from the Old World. This creative and easy project makes a great decoration idea for the kitchen. Or makes a nice gift to give to your friend who loves cooking and spends a lot of time in the kitchen. These girls are sure to bring a smile to everyone's face. Materials: • STYROFOAM Brand Products: o Balls: 2 1/2" and 5" • Doll curls • Black beads, two 3mm to 4mm • Thread • Powdered blush • Stocking ‐ White • small amount of Fiberfil • Acrylic craft paint: black, rose • Fabric: 1/4 yd. small cotton print (dress); 1/8 yd. each of two coordinating prints (apron and scarf) • Ribbon, 1/2" x 30" • Buttons, three 3/8" • Accessories: Silk flowers, bay leaves, cinnamon sticks, mini basket, mini clothes pins • Serrated knife • Scissors • Wooden spoon • Utility knife with sharp blade • Fabric glue • Thick white craft glue or low temperature glue gun and glue sticks Download pattern Steps: Find thousands of free crafts, decorating ideas, handmade gifts and more at www.FaveCrafts.com. 36
- 37. Low‐Cost Kitchen Craft eBook 1. Cut small slice from top and bottom of 5" ball and small slice from bottom of 2 1/2" ball. Place 2 1/2" ball on 5" square of white stocking; pull stocking tightly to back of head, gathering edges and tying off. Glue flat sides of two balls together, forming head and body. Position head slightly toward the back of 5" ball to emphasize chubbiness. 2. To form bust area and waistline, use handle of a wooden spoon to create an indentation around 5" ball, starting about 1" from neck in the front and ending about 2‐1/2" from neck in the back. Enlarge indentation slightly by cutting away a small amount of foam with the utility knife. Smooth edges of the indentation with the bowl of the wooden spoon. 3. Cut the following pieces from dress fabric: four 2" x 6"; one 2 1/2" x 6"; one 6" square; and two 3 1/4" x 2". Glue 6" square to bottom of ball; glue 2" x 6" pieces around back and sides of ball, overlapping edges. Glue 2 1/2" x 6" strip to the front. Cover any gaps with small scraps of fabric. Glue two 3 1/4" x 2" pieces in half, forming two 3 1/4" x 1" sleeves. 4. Cut two, 2" x 2" squares from white stocking for hands. Place small amount of fiberfill in center of each square, draw up edges and tie securely. Glue hand onto end of each sleeve. Glue arms to body in desired position. 5. Cut 8" x 2 3/4" piece of coordinating fabric for apron. Run a gathering stitch along the top and pull slightly; glue ribbon to top of apron, covering gathering stitch. Round edges, if desired. When dry, tie apron around the waist. 6. Cut small pieces of hair and glue to front and lower back of head (head scarf will cover sides and top). Glue on eyes. Paint on eyebrows and small, rosebud mouth; blush cheeks. 7. Using Pattern A, cut scarf from coordinating fabric. Tie around head. Glue three buttons to front of dress. 8. Accessorize doll with basket filled with silk flowers, cinnamon sticks or bay leaves. Add mini clothes pins where desired. ®™ Trademark of The Dow Chemical Company ("Dow") or an affiliated company of Dow. For more project ideas, please see styrofoamstyle.com. Find thousands of free crafts, decorating ideas, handmade gifts and more at www.FaveCrafts.com. 37
- 38. Low‐Cost Kitchen Craft eBook Plastic Cup Vase By: Lonnie Kester for Krylon Recycle an old plastic cup into a decorative vase with a coat of Fusion for Plastic®. Materials: • Krylon Fusion for Plastic® Metallic Shimmer ‐ Blonde (#2339) • Vase or large plastic cup • Ammonia‐based cleaner or paint thinner • Drop cloth • Low‐tack masking tape • Drop cloth Steps: 1. Using ammonia‐based cleaner, wipe down vase to remove any dust or particles. If the plastic is new, wipe down with paint thinner for best results. 2. Completely tape off any area that you do not wanted painted. A low tack tape is preferred. 3. Shake Fusion can for 2 minutes or more. 4. Applying in a well‐ventilated area, hold can 8 to 10 inches from surface and spray in a sweeping motion from side to side. 5. EZ Touch Fan Spray tip can be adjusted to spray vertically or horizontally‐ see back label instructions. 6. Apply a thin coat and allow to dry for 30 seconds. 7. Apply multiple thin coats until surface is completely covered. 8. Remove tape immediately after spraying. 9. Fusion dries in 15 minutes or less, and can be handled in about 1 hour. 10. Fusion must cure a full seven days to become fully chip and scratch resistant. For more project ideas, please visit www.krylon.com/projects. Find thousands of free crafts, decorating ideas, handmade gifts and more at www.FaveCrafts.com. 38
- 39. Low‐Cost Kitchen Craft eBook Get the look of Beautiful Flowers without the Upkeep By: Edwin R. Smith for Styrofoam Brand Foam With this Ever Blooming Topiary you can fill your home with beautiful flowers without worrying about watering them or cleaning up the fallen petals. It makes for a great housewarming gift. Materials: • STYROFOAM Brand Products: o Sheet: 2" x 12" x 36", green • Oval woven basket, 16" x 6" x 6" • Twigs such as birch, curly willow, or red twig dogwood, 16" lengths, 24 • Green sheet moss, 8 oz. • Silk flowers and greenery: lilies, 10; open roses, eight; lilacs, five; hydrangeas, three; small blossoms, four; berry sprays, two; variegated ivy, one bunch • Greening pins, 24 • Wired floral picks, 1‐1/2" • Craft knife or serrated kitchen knife • Old candle (optional) • Wire cutters • Ruler • Low‐temp glue gun and glue sticks Steps: 1. Using craft knife or serrated knife, cut two pieces of foam 2" x 4" x 14"; set aside. (If using serrated knife, wax blade with old candle for smoother, easier cutting.) Trim remaining foam sheet to fit inside basket. Stack and glue foam in layers until top layer is flush with top of basket. 2. Stack and glue 2" x 4" x 14" foam pieces to form one piece, 4" x 4" x 14". Find thousands of free crafts, decorating ideas, handmade gifts and more at www.FaveCrafts.com. 39
- 40. Low‐Cost Kitchen Craft eBook 3. Working one at a time, apply glue to bottom 2" of each twig and press it into foam inside basket, forming a row along center. Trim top of twigs 14" above foam. 4. Center 4" x 4" x 14" layered foam on top of twigs and press down firmly until foam is 12" above top of basket. Turn topiary upside down with basket at the top. Carefully glue top of twigs to foam; let dry. 5. Turn topiary right side up. Trim corners of foam block, forming an oval shape. Cover oval and foam inside basket with a layer of sheet moss, pinning and gluing to secure. 6. Cut flower stems approximately 2" from blossoms. If necessary, attach wooden picks to flowers for added length. 7. When arranging flowers, use photo as a guide. Dip stems into glue before inserting them into foam. Insert stems into top of topiary, starting with largest flowers. Note: Reserve two large lilies for base of arrangement. Continue adding flowers until topiary is covered, working from large to medium to small blossoms. Fill in between flowers with ivy and berries. 8. Insert reserved lilies in basket at base of twigs. Add sprigs of ivy and berries around lilies. ®™ Trademark of The Dow Chemical Company ("Dow") or an affiliated company of Dow. For more project ideas, please see styrofoamstyle.com. Find thousands of free crafts, decorating ideas, handmade gifts and more at www.FaveCrafts.com. 40
- 41. Low‐Cost Kitchen Craft eBook Fridge Magnet Crafts Cosmic Orange Magnet By: Kelly Yzaguirre and Jeanne Baruth for Diamond Tech This cosmic orange magnet is the perfect "out of this world" accessory for your fridge! It makes a great gift and a unique decoration for any kitchen. Materials: • Magnet • 1 piece Fuseworks™ Clear Sheet Glass • Fuseworks™ Milliefiori slices • Fuseworks™ Dichroic small scraps, frit and/or confetti • Fuseworks™ Kiln Paper • Fuseworks™ Microwave Kiln • E6000® or other glass glue • Fuseworks™ Glass Cutter • Microwave ‐ 1100 Watt Instructions: 1. Using a glass cutter, cut a 1” X 1 1/2”piece of clear sheet glass. 2. Cut a 2” X 2” piece of kiln paper. Remove the lid from the Fuseworks™ Kiln. Place the kiln paper on the kiln base. Kiln paper should only be used for one firing. 3. Place the 1” X 1 1/2” clear glass on the kiln paper. Sprinkle with frit and small bits of confetti, leaving some of the clear glass showing. Randomly place several small pieces of scrap dichroic on top as the final layer. Find thousands of free crafts, decorating ideas, handmade gifts and more at www.FaveCrafts.com. 41
- 42. Low‐Cost Kitchen Craft eBook 4. Carefully set the base with glass inside the microwave. Cover kiln base and glass with kiln lid. 5. Fuse* at 70% power for 2 minutes. Change the power to 100% and fuse at 1 minute 40 seconds. *Every microwave oven and kiln will vary. You will need to test and log what time will be suited for your combination. After time is up, open microwave and, using Hot Mitts, carefully lift the lid enough to inspect the fusing process. Add additional time in 30 second increments until desired results are achieved. Remove kiln from microwave using the Hot Mitts and place on a heat resistant surface. Cool the kiln on a heat resistant surface for at least 40 minutes with the lid on. Removing the lid or peeking under the lid during the cooling will result in your piece cracking. Glass remains hot for a long time and should be handled with great caution. 6. Cool your glass and kiln completely, approximately 30‐40 minutes. 7. After your pieces are completely cooled, adhere a magnet to the back of the fused piece using a glass adhesive such as E6000®. Allow the adhesive to dry according to glue manufacturer direction. Hot Tips: • Never throw away your small scraps of fusing glass, use scraps to embellish other fused glass projects. • For better visability, store scraps in a clear container. • Use tweezers to pick up scraps and glass pieces. Find thousands of free crafts, decorating ideas, handmade gifts and more at www.FaveCrafts.com. 42
- 43. Low‐Cost Kitchen Craft eBook Felt Watering Can Magnet with Flowers By: Angie Wilhite for Kreinik A whimsical felt watering can and button‐center flowers are a cute addition to the fridge door. Kids can play at "watering the flowers" and make their own flower additions. Materials: • Kreinik Very Fine (#4) Braid in 091, 008, 012, 092 • CPE felt: 10" x 10" #0495 Billiard Green • CPE felt: 3" x 3" #0070 Neon Yellow • CPE felt: 6" x 6" #0186 Pink • CPE felt: 6" x 6" #0093 Lavender • 3" x 6" Pellon® Wonder‐Under® transfer fusing web • 5" x 10 Pellon® Wonder‐Under® transfer fusing web • 4" x 4" Pellon® Craft‐Bond® • 3" x 6" Pellon® Fusible Fleece • 6" x 6" Pellon® Fusible Fleece • 3" x 3" Pellon® Sof‐Shape® fusible interfacing • 1/2" x 2" magnetic strip • Beacon™ FABRI‐TAC™ permanent adhesive • Beacon™ GEM‐TAC™ permanent adhesive • Pressing cloth • Watering Can and Flower Template Instructions: Watering Can Magnet: 1. Cut green felt into two 5" x 10" pieces. Following manufacturer's instructions, apply transfer web to one piece of green felt. Remove paper backing. Apply fusible fleece to the other piece of Find thousands of free crafts, decorating ideas, handmade gifts and more at www.FaveCrafts.com. 43
- 44. Low‐Cost Kitchen Craft eBook green felt. Position felt pieces wrong sides together and fuse. Cut watering can and handle from fused felt. 2. Following manufacturer's instructions, apply fusible interfacing to yellow felt. Apply transfer web to yellow felt. Trace heart pattern on paper side of felt. Cut out heart. Remove paper backing. 3. Position heart on watering can front; fuse. 4. Blanket‐stitch around handle and can with Kreinik Very Fine (#4) Braid in 091 Star Yellow. Blanket stitch around heart with Kreinik Very Fine (#4) Braid in 008 Green. 5. Glue handle to can with fabric adhesive. 6. Glue magnetic strip to wrong side of magnet with jewel adhesive. Folk Art Flower Magnets: 1. Cut lavender felt into two 3" x 3" pieces. Cut pink felt into two 3" x 3" pieces. Following manufacturer's instructions, apply transfer web to one piece of lavender felt and one piece of pink felt. Remove paper backing. Apply fusible fleece to the other pieces of pink and lavender felt. Position felt pieces wrong sides together. Cover with pressing cloth and fuse. 2. Blanket‐stitch around pink flower with purple braid. Blanket‐stitch around lavender flower with pink braid. 3. Apply craft‐bond® to 2" x 2" pink felt and 2" x 2" lavender felt. Trace circle pattern on bonded felt. Cut out circles. Sew pink circle to center of lavender flower by stitching an 'x' with purple braid. Sew lavender circle to center of pink flower by stitching an 'x' with pink braid. 4. Cut magnetic strip into two 1/2" x 1 1/4" pieces. Glue a magnetic strip to the back of each flower. Find thousands of free crafts, decorating ideas, handmade gifts and more at www.FaveCrafts.com. 44
- 45. Low‐Cost Kitchen Craft eBook Vintage Refrigerator Magnets By: Jennie Stagliano for Glue Dots Everyone needs refrigerator magnets, so why not create these vintage ephemeral magnets for a decked‐ out fridge? With just a few materials and embellishments you can create an artsy present for someone else or yourself! Materials: • Craft Glue Dots • 1" Glue lines • Various ephemeral cards • Sanding block • Magnetic stripping • Sepia inks • Rubber mallet • Embellishments: o Ephemera stickers o Watch faces o Dominos o Various fibers o Buttons o Bottle caps Instructions: 1. Sand ephemeral cards along edges using a sanding block. 2. Drag ephemeral cards at their edges in sepia inks. 3. Cut magnet stips and place on back of ephemeral cards. 4. With the rubber mallet, pound the bottle cap until it is flat and add a ephemeral sticker. 5. Adhere all embellishments using Craft Glue Dots. 6. Secure fibers with 1" Glue Lines. Find thousands of free crafts, decorating ideas, handmade gifts and more at www.FaveCrafts.com. 45
- 46. Low‐Cost Kitchen Craft eBook Beeswax Magnet By: Arnold Grummer's These cute refrigerator magnets are totally buzz‐worthy and only seven simple steps! Materials: • Arnold Grummer's Sunflower Ceramic Casting Mold • Vegetable Oil • Beeswax • Double boiler • Gold pearlescent paint • Spray fixative • Magnet Steps: 1. Brush mold with oil. 2. Melt wax in double boiler. 3. Spoon wax carefully into mold image. 4. Let cool and remove. 5. Brush cast with pearlescent paint, seal. 6. Cover two cardboard squares with paper, wrap larger one in mesh. 7. Glue cast on top, magnet on back. Find thousands of free crafts, decorating ideas, handmade gifts and more at www.FaveCrafts.com. 46
- 47. Low‐Cost Kitchen Craft eBook Photo Fabric Button Magnets By: Corinne of So September Corinne of So September shares this clever little gift idea for Mother's Day. Transfer personal photos onto fabric and then use to make fabric button magnets. Embroidery adds a bit of lovely decoration to the magnets. Check out Corrine's amazing embroidery in her Etsy shop. Materials: • Inkjet iron‐on transfer paper for fabric (the kind used for making your own t‐shirts) • cotton fabric (I used plain white ) • embroidery floss, needle and hoop • button cover kit (I used sz. 75 or 1 7/8 inches but any size is fine) • magnet (I use "super magnets" made by "the magnet source" brand that I get at my local hardware store) • strong glue like E6000 If you are using a light colored or thin fabric you may want to use a piece lightweight interfacing on the back so that there is no glare from the metal button underneath) Directions: 1. Choose the photo you want to use. If you do not already have a digital file of the photo you will need to scan it. Your button cover kit instructions will tell you what size your fabric needs to be in order to make the button. You will want to resize your photo to fit that size. This is the point when you will want to do any photo editing. For example, I made my images black and white at this point. 2. Review the instructions that came with your inkjet transfer paper. Most will instruct you to reverse your image. If so, then reverse your image at this point. 3. I always print out a test sheet on plain paper before I print onto my transfer paper just to make sure everything looks okay. If it looks allright then go ahead and print out your image onto your Find thousands of free crafts, decorating ideas, handmade gifts and more at www.FaveCrafts.com. 47
- 48. Low‐Cost Kitchen Craft eBook transfer paper. 4. Trim the image to the correct size (the circle size indicated on your button kit). 5. Iron your image onto your fabric according to the instructions that came with your transfer paper. Allow the fabric to cool. 6. Peel off backing paper. Place fabric in your embroidery hoop and embroider any details and embellishments you choose. 7. Remove fabric from your embroidery hoop. Find thousands of free crafts, decorating ideas, handmade gifts and more at www.FaveCrafts.com. 48
- 49. Low‐Cost Kitchen Craft eBook Trim excess fabric. 8. Using a pair of pliers remove the shanks from your button backs. 9. Center your fabric circle on your button maker and place button front on top. Use the plastic presser to push the front down. Find thousands of free crafts, decorating ideas, handmade gifts and more at www.FaveCrafts.com. 49
- 50. Low‐Cost Kitchen Craft eBook Tuck all your surrounding fabric toward the center and place the button back on top. Use the plastic presser again to press the back down until it pops into place. Push your button out of the rubber positioner. 10. Use a strong glue to attach a magnet onto the back. Allow to dry for several hours (I usually wait overnight) before use. Find thousands of free crafts, decorating ideas, handmade gifts and more at www.FaveCrafts.com. 50
- 51. Low‐Cost Kitchen Craft eBook Find thousands of free crafts, decorating ideas, handmade gifts and more at www.FaveCrafts.com. 51