Stone Works Canada Alan Block garden walls install catalog
•
1 like•1,131 views

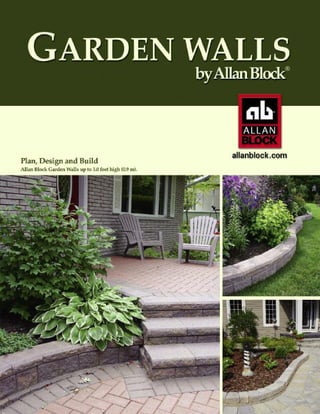
This document provides information about building garden walls using Allan Block products. It describes three block options for garden walls - AB Garden Accent, AB Junior, and AB Jumbo Junior. For each block, it provides details on features, estimating quantities needed, and instructions for laying out, building, and capping the walls. It emphasizes planning the project, including site considerations like soils, drainage, and utilities before installation. Diagrams demonstrate techniques for building straight walls, corners, and curved walls with each block type.

More Related Content
What's hot
What's hot (20)
Similar to Stone Works Canada Alan Block garden walls install catalog
Similar to Stone Works Canada Alan Block garden walls install catalog (20)
More from Stone Works Canada
More from Stone Works Canada (8)
Recently uploaded
Recently uploaded (20)
Stone Works Canada Alan Block garden walls install catalog
- 2. 1
- 4. 3 The Garden Wall Collection by Allan Block® allanblock.com The Garden Wall Collection gives you three choices for building Great Gardens!
- 5. 4 Choose the Right Block. Select the block with the right size and style for your gardening project. AB Garden Accent Textured on both sides, our lightest block is the right choice for sturdy, garden beds and borders that last a lifetime. AB Garden Accent is available in two finishes - Classic Cut Stone and Old World Tumbled. Walls up to 24 inches (610 mm) high. Old World Tumbled Classic Cut Stone Walls up to 30 inches (750 mm) high. AB Junior Experienced gardeners prefer AB Junior for its versatility and performance. Beautiful fit and finish, and all the design details you will need for custom gardening with a Classic Cut Stone finish. AB Jumbo Junior For larger, more challenging projects, AB Jumbo Junior delivers the sturdy, rugged qualities you need. Our winged-back design lets you build both straight and curved walls with one block and have a Classic Cut Stone finish. Walls up to 36 inches (900 mm) high. Want to think BIGGER? If you have a larger landscape project in mind, take a look at our Retaining Wall Collections - a full line of larger block designed and engineered for full-scale construction. Just go to allanblock.com for more details, or call your local Allan Block dealer today.
- 6. PPllaann aanndd DDeessiiggnn YYoouurr PPrroojjeecctt A set of simple tools is all you need to build great Allan Block walls. Job SSiittee CCoonnssiiddeerraattiioonnss 5 Before Installation Begins A little bit of planning will make your project go faster and turn out right. Soils Soil conditions are important in any garden or landscape. Check to see what kind of soil you have before starting. • Sandy soils are easy to work with and drain well too. • Clay soils are harder to work with and drain poorly. • Good organic soils are always best for planting beds. If you have poor soil conditions, consider removal and replacement. Planting beds need to have 6-12 in. (150 to 305 mm) of well-drained organic soils. The Wall Base / Wall Rock To build a good wall, you need a firm foundation, or base. Plan on using clean, granular rock underneath the base row. Good drainage and compaction will add to the quality and performance of your finished wall. We refer to the material used for the base, within and behind the block as "Wall Rock". Crushed or smooth stone, ranging in size from 0.25 in. to 1 in. (5 to 25 mm) is ideal. Your AB dealer will have what you need. Lot Lines and Utilities • Confirm lot lines and wall location. Your local municipality will have a copy of your lot survey on file. The survey will identify property lines and provide a scaled template to help with your site plan. • Call your local utility companies to confirm the location of underground utilities. Buried utility lines are not only dangerous, they may prevent you from locating your project where you want. Drainage Managing water around your gardens is important for two reasons: your plantings require good moisture conditions, and proper drainage will prevent water from ponding or running into areas it's not wanted - like your basement. • Always grade your beds to move water away from the house foundation. • Make sure water moves freely off of walkways and patios. • Slope areas above the walls to send rain water around the sides if possible. • Check sprinkler lines before and after construction. See page 18 for more information on drainage. 4 ft and Torpedo level Gloves & Knee pads Rake & Shovel Wheel barrow Broom Chisel and hammer Wooden stakes Hand tamper Safety glasses Tape measure Rubber mallet String line
- 7. Design Options Structure Be careful not to try and retain too much with the garden wall line of blocks. These lighter duty blocks are great for smaller wall projects. AB Garden Accent up to 24 in. (600 mm), AB Junior up to 30 in. (750 mm), and AB Jumbo up to 36 in. (900 mm) - with sandy soils and no extra weight above the wall. AB Junior AB Jumbo The maximum wall heights above are for walls with level grades above and below the wall, and no added weight - "surcharges" - from driveways, swimming pools, etc… If your project has steep slopes above or below the wall, or extra weight from surcharges, ask your AB Dealer about our heavier duty products found in the Landscape Wall Collection. Be sure to follow our recommended maximum wall heights. 6 Straight Lines and Curves Mother Nature rarely draws a straight line. Not only will curved designs feel more natural, they are actually easier to build too! Free flowing curves will grace any garden or landscape. If straight lines and corners are your choice, use AB Junior or AB Jumbo Junior - both offer corner blocks, making 90° turns easy to build. Curves Corners The colours of the house, AB Junior and pavers go together beautifully. Terraces Consider a layered look in your garden design. You'll love the way Allan Blocks flow. Create a series of raised garden beds, or tackle a tricky slope by turning one wall into two. Surcharge Slopes allanblock.com AB Garden Accent Maximum heights shown in sandy soil 24 in. (610 mm) 30 in. (750 mm) 36 in. (900 mm) Colours Colour selection is key to a great design. Be sure to consider the total composition - house, pavements, and bed mulch - and find the look that's right for you. Contact your local rep-resentative for available colours.
- 8. 7 allanblock.com AB Garden Accent is the ideal choice for beautiful beds and borders.
- 9. Our smallest block comes up BIG in features and performance! At about 15 pounds per block (7 kg), AB Garden Accent stacks fast and locks together great. The blocks are coloured and textured on two sides, so you can create beautiful raised beds with less work. Standards Caps Soft, sweeping curves, straight lines, or tight radiuses AB Garden Accent Estimating Chart Wall Height (NOT Including the Cap) Wall Length 5 ft (1.5 m) 10 ft (3.0 m) 15 ft (4.5 m) 20 ft (6.0 m) 25 ft (7.5 m) 1 course 4 in. (100 mm) 9 17 26 34 43 2 courses 8 in. (200 mm) 18 34 52 68 86 3 courses 12 in. (305 mm) 27 51 78 102 129 4 courses 16 in. (405 mm) 36 68 104 136 172 5 courses 20 in. (505 mm) 45 85 130 170 215 Caps 4 in. (100 mm) Number of Caps needed 9 17 26 34 43 Amount of Wall Rock needed Wall Rock 100 lbs (45 kg) 200 lbs (90 kg) 300 lbs (135 kg) 400 lbs (180 kg) 500 lbs (230 kg) Approximate Dimensions: H: 4 in. (100 mm) W: 8 in. (200 mm) front face 6 in. (150 mm) back face D: 7 1/4 in. (180 mm) By adjusting the position of the standard blocks, you can get the line and look you want. Tight radiuses can be formed by placing the long sides of the blocks together. Minimum Radius Chart Outside Radius 30 in (760 mm) Blocks Needed For A Full Circle 23 blocks AB Garden Accent is a vertical stacking block, so the radius is the same on every course. 8 Both are textured on two sides. Both sides are textured, so you don’t have to backfill up all the way to the top. Setback: 0° Straight lines are formed by alternating the long and short sides of the block. Form soft curves by adjusting the block as you go. Try to keep the blocks tight together at the front of the wall. Radius AB Garden Accent Maximum Wall Height Chart Sandy Soil 24 in. (610 mm) Clay Soil 16 in. (400 mm) 6 in. (150 mm) maximum soil retention
- 10. Build AB Garden Accent Walls 1. Prepare The Base • Temporarily lay out the first course of blocks. Adjust the blocks to minimize the gaps between them. This will allow the caps on top to fit snug, and provide a nice, tight finish to the wall. • Mark the layout with a shovel, and remove the sod and other surface material from the bed. Dig a shallow trench, 10 - 12 in. (255 - 305 mm) wide and at least 4 in. (100 mm) deep. • Use a large level to check the trench for level as you dig. On sloped sites, "step up" the base when it gets more than 6 in. (150 mm) deep. • Place 2 in. (50 mm) of rock in the trench, level and compact with a hand tamper. It is essential that the base is level at this point, as errors will multiply as each new row is added. Layout and mark wall location Remove sod and dig trench 9 As Easy As 1-2-3... After Before Install wall rock, level and compact Stepped Base Finished Grade allanblock.com
- 11. 2. Install The Block • Set the base course of block in the trench and make sure the edges all touch on the forward side of the block. Tap the blocks into place with a rubber mallet, leveling each block as you go. As a rule, the base block should be set at least 2 in. (50 mm) below the finished grade. • Fill in behind the blocks with soil, and carefully compact to lock them in place. Fill the blocks with wall rock for additional stability. Sweep the blocks clean, and check again to make sure the blocks are level. • Stack the next course of AB Garden Accent, and offset the seams from the blocks below. Keeping the seams staggered will lock the block together and make the wall stronger. • Check the blocks for level, adjust as needed, and add more courses until you reach the height you want for your wall. 3. Cap the Wall • Top off your wall with AB Garden Accent Caps. Alternate the long and short faces to match the design of your wall. Apply construction adhesive between and underneath the caps to secure them in place. Install base course, level Filling the blocks gives additional stability to the wall. Install additional courses, level Glue caps to secure in place Corner Details • The Garden Accent corner units are available in a left and right configuration. They have a notch on one side for inter-locking and a smooth side for a finished cap. Your project should always start from the corner and build out from there. • The corner unit used in the first course is placed so the notch is facing up. There will be a slight height adjustment as the corners do not have the bottom notch that the standard units and caps have. This is approximately 3/8 in. (9.5 mm), add crushed rock to this area on the base course to make up this amount or use 3 pieces of roofing shingles cut to size. • Once this adjustment is completed you can continue to build your wall by alternating the left and right hand corners per course. Capping Corners • Using the Garden Accent corner unit, place the block with the smooth side facing up to cap the corner. Apply con-struction adhesive between and underneath the caps to secure them in place. If any adjustments or cutting needs to be made try to locate it in an area that is not as noticeable. Garden Accent Corner Unit 1st Course Glue caps in place to secure Shim under block to adjust for height difference. Place corner block smooth side up Notch 10 2nd Course Capping a Corner Approximate Dimensions: H: 4 in. (100 mm) W: 7 1/4 in. (180 mm) D: 9 3/8 in. (230 mm) Weight: 18 lbs (8.1 kg)
- 13. AB Junior will take your Garden Design AB Junior Radius The 3° setback creates a coning effect in curved walls. The tightest curve you can build has a 28 in. (700 mm) radius. With each course you add below, the radius will need to be 1 in. (25 mm) larger. Outside Radius # of blocks for full circle 28 in (700 mm) 22 blocks 29 in (725 mm) 23 blocks 30 in (750 mm) 24 blocks 31 in (780 mm) 25 blocks AB Junior Approximate Dimensions: H: 6 in. (150 mm) W: 7 5/8 in. (190 mm) D: 7 5/8 in. (190 mm) Weight: 22 lbs. (10 kg) Corner blocks make linear designs crisp and clean. AB Junior Estimating Chart Wall Length 5 ft (1.5 m) 10 ft (3.0 m) 15 ft (4.5 m) 20 ft (6.0 m) 25 ft (7.5 m) 1 course 6 in. (150 mm) 8 16 24 32 40 2 courses 12 in. (305 mm) 16 32 48 64 80 3 courses 18 in. (460 mm) 24 48 72 96 120 4 courses 24 in. (610 mm) 32 64 96 128 160 5 courses 30 in. (760 mm) 40 80 120 160 200 Caps 2 1/4 in. (55 mm) Number of Junior Caps needed 9 17 26 35 43 Amount of Wall Rock needed for base material Wall Rock 250 lbs (115 kg) 450 lbs (205 kg) 650 lbs (295 kg) 900 lbs (410 kg) 1100 lbs (500 kg) 12 wherever you want it to GO! The three blocks provide every combination of line and form a designer wants. Fan them apart to form great inside curves. Standard blocks are a perfect fit on straight walls. Remove the wings to turn the tightest, cleanest outside curve you'll ever need. Radius Minimum Radius Chart Wall Height H: 6 in. (150 mm) W: 11 3/8 in. (285 mm) D: 7 5/8 in. (190 mm) Weight: 35 lbs. (15.9 kg) AB Junior Maximum Wall Height Chart Sandy Soil 30 in. (750 mm) Clay Soil 24 in. (600 mm) You can't find more potential, more possibilities, and more performance in a lightweight, easy to use block. AB Junior offers a world of design opportunity - and delivers professional results. Corners Available in left and right hand. Setback: 3° Amount of wall rock needed for blocks cores and behind block 20 lbs. per block (9 kg)
- 14. 1. Prepare The Base • Use a garden hose to mark the location of the wall. Remove the sod and other surface material. • Dig a shallow trench 10 - 12 in. (255 - 305 mm) wide and at least 6 in. (150 mm) deep, checking for level as you dig. On sloped sites, "step up" the trench when it gets more than 8 in. (200 mm) deep. • Place 4 in. (100 mm) of wall rock in the trench, level and compact thoroughly with a hand tamper. It is essential that the base is level at this point, as errors will multiply as each new row is added. On larger projects, consider using a mechanical plate compactor for best results. 2. Install the Block • Starting at the lowest point of the trench, begin placing the first course of block on the base with the raised front lip fac-ing up and forward. Level each block from side to side and front to back, using the rubber mallet to make adjustments. • With the base course in place, carefully fill in and behind the blocks with wall rock, including a 4 - 6 in. (100 - 150 mm) space behind the block. Use on-site soil to fill in front of the block, and behind the wall rock to the same level as the top of the block. If installing pavers behind the block, be sure to pre-pare the paver base properly. Install wall rock, level and compact Backfill behind and in blocks, level and compact. Sweep top of blocks. Build AB Junior Walls As Easy As 1-2-3... After Before Layout and mark wall location 13 allanblock.com
- 15. • Compact thoroughly with a hand tamper or plate com-pactor. Good compaction is key to a quality job. Sweep the top of the blocks clean, and check again for level. • Place the next course of blocks with the seams offset from the course below by 2 - 4 in. (50 - 100 mm). This will make the wall stronger and lock each course more tightly in place. Backfill again with wall rock and appro-priate soils to the top of the second row. • Compact again and repeat to the top of the wall. Backfill behind and in blocks, level and com-pact. Sweep top of blocks. 3. Finish the Wall • AB Junior has several options for finishing the top of the wall. Choose the one that's right for your design. • Fill in the top course with plant-ing soil or mulch, and use the raised front lip as a finished edge. No caps required. • Use the Two-Way for a clean, fin-ished look. Glue the caps in place. • Mitred corners will give 90° corners a perfect finish with some cutting. • AB 12 in. Straight Caps provide the extra depth need-ed for comfortable stair treads. Be sure to fasten securely with adhesive. Offset the blocks If installing pavers behind the block, be sure to prepare the paver base properly. Two-Way Cap AB 12 in. Straight Cap Use with Junior Use with Jumbo Use with Jumbo Approximate Dimensions: H: 2 1/2 in. (65 mm) W: 5 5/8 in. (140 mm) 7 5/8 in. (190 mm) D: 8 3/8 in. (210 mm) Weight: 10 lbs. each (4.5 kg) H: 3 5/8 in. (90 mm) W: 11 1/4 in. (280 mm) D: 11 1/4 in. (280 mm) Weight: 35 lbs. (16 kg) Check for availability. AB Stone 18 in. Cap H: 3 5/8 in. (90 mm) W: 11 7/8 in. (300 mm) D: 17 5/8 in. (440 mm) Weight: 50 lbs. (23 kg) Check for availability. Cutting Caps For A Mitre Joint Look 14 Cap Options For more information on caps and corners see page 21. • Using four of the Two-Way caps and with some cutting you can create a mitre joint at the corner for a custom look. Be sure to wear safety glasses when cutting, and operate power saws carefully. • Using a power saw Cut caps A and B 6 in. from each corner with a masonry Discard all blade, make 45° areas in red cuts in blocks A & A B B and place on the C 6 in. 6 in. wall at the corner. • Place block C D B A against block B on C D the wall, mark the area to be removed. Repeat this same process for block D. • Use construction adhesive to secure pieces in place.
- 16. Choose AB Jumbo Junior for taller garden wall projects. 15 allanblock.com
- 17. AB Jumbo Junior stacks up more Setback: 6° AB Jumbo Junior Radius The 6° setback creates a coning effect in curved walls. The tightest curve you can build has a 30 in. (760 mm) radius. With each course you add below, the radius will need to be 1.5 in. (40 mm) larger. Amount of wall rock needed for blocks cores and behind block 40 lbs. per block (18 kg) Outside Radius # of blocks for full circle 30 in (760 mm) 22 blocks 31.5 in (800 mm) 24 blocks 33 in (840 mm) 25 blocks 34.5 in (875 mm) 26 blocks AB Jumbo Junior Approximate Dimensions: H: 7 5/8 in. (190 mm) W: 8 1/2 in. (210 mm) D: 9 1/2 in. (240 mm) Weight: 35 lbs. (16 kg) H: 7 5/8 in. (190 mm) W: 11 5/8 in. (290 mm) D: 7 5/8 in. (190 mm) Weight: 47 lbs. (21.3 kg) AB Jumbo Junior Maximum Wall Height Chart Sandy Soil 36 in. (910 mm) Clay Soil 22 in. (560 mm) wall in less time! At 35 pounds (16 kg), these larger blocks handle tougher projects with ease. The "wing-back" design lets you build both straight and curved walls with one simple block. Corners are also available. Corners Available in left and right hand. Radius Fan the back of the blocks for inside curves. AB Jumbo Junior Estimating Chart Wall Height Wall Length 5 ft (1.5 m) 10 ft (3.0 m) 15 ft (4.5 m) 20 ft (6.0 m) 25 ft (7.5 m) 1 course 7.5 in. (190 mm) 7 14 21 28 35 2 courses 15 in. (380 mm) 14 28 42 56 70 3 courses 22.5 in. (570 mm) 21 42 63 84 105 4 courses 30 in. (760 mm) 28 56 84 112 140 5 courses 37.5 in. (940 mm) 35 70 105 140 175 Caps 3 5/8 in. (90 mm) 4 8 12 16 20 Amount of Wall Rock needed for base material Wall Rock 250 lbs (115 kg) 450 lbs (205 kg) 650 lbs (295 kg) 900 lbs (410 kg) 1100 lbs (500 kg) Straight walls and corners are a snap. 16 To make outside curves, break the "wings" off the back of the blocks. Minimum Radius Chart Number of AB Garden Caps needed
- 18. 1. Prepare The Base • Use a garden hose to mark the location of the wall. Remove the sod and other surface material. • Dig a shallow trench 12 in. (305 mm) wide and at least 6 in. (150 mm) deep, checking for level as you dig. On sloped sites, "step up" the trench when it gets more than 10 in. (255 mm) deep. • Place 4 in. (100 mm) of wall rock in the trench, level and compact thoroughly. Use a mechanical plate compactor for best results. It is essential that the base is level at this point, as errors will multiply as each new row is added. 2. Install the Block • Starting at the lowest point of the trench, begin placing the first course of block on the base with the raised front lip facing up and forward. Level each block from side to side and front to back, using the rubber mallet to make adjustments. 17 Build AB Jumbo Junior Walls As Easy As 1-2-3... After Before Install base course, level. Install wall rock, level and compact Layout and mark wall location allanblock.com
- 19. • With the base course in place, carefully fill in and behind the blocks with wall rock, including a 4 - 6 in. (100 - 150 mm) space behind the block. Use on-site soil to fill in front of the block, and behind the wall rock to the same level as the top of the block. • Compact thoroughly with a plate compactor. Good compaction is key to a quality job. Sweep the tops of the blocks clean, and check again for level. • Place the next course of blocks with the seams offset from the course below by 2 - 4 in. (50 - 100 mm). This will make the wall stronger and lock each course more tightly in place. Backfill again with wall rock and soils to the top of the second row. • Compact again and repeat to the top of the wall. Building on Slopes Walls built on a sloping grade require a "stepped base". Begin at the lowest point of the wall. • Dig the trench into the slope until it reaches a depth of 12 in. (305 mm). • "Step up" 7.5 in. (190 mm) and continue digging until the trench is again 12 in. (305 mm) deep. • Repeat the process along the entire slope. The "stepped up" trench should be deep enough to allow for the 4 in. (100 mm) of base and one full buried block before jumping up to the next course. 3. Finish The Wall • AB Jumbo Junior has a raised front-lip which provides a perfect built-in edging to complete your project. AB Cap work well as does as rock, mulch or grass. For more details, see page 14. 18 Backfill behind and in blocks, level and compact. Sweep top of blocks. Bury one full block before “Stepping Up” Drainage Good drainage practices are important in any garden or landscape. Slope foundation beds away from the house. Route the downspouts into the bed and under the wall to a drainage basket or drywell. Redirecting any concentrated water sources above or at the base of a garden wall will ensure that your wall lasts a lifetime. Finished Grade Offset the blocks Downspout Flex Pipe Basket Drain
- 20. Stair Applications Stairs can be designed with flowing curves or straight lines. Curved sidewalls create a softer, natural look. Straight sidewalls and corners offer a crisp, traditional style; however they require AB Corner Blocks and take more time to build. Stairs can be built using the AB Junior or the AB Jumbo Junior. How Many Steps? To find the number of steps needed in a wall, measure the total rise of your slope in inches and divide by the height of the block. AB Jumbo Junior = 7.5 in. high (190 mm) Rise - 30 in. (750 mm) 30 in. ÷ 7.5 in. = 4 AB Junior steps Tackle Your Slope Match your stairway design to the natural grade of your slope. • On steep slopes, keep the steps close together and use our AB Capstone for a 12 in. (305 mm) tread. • On gentle slopes, add pavers or other materials to increase the depth of the tread and length of the run. • Landings can soften a long stairway and provide an easy way to tie the sets of steps together. 19 allanblock.com
- 21. Basic Stair Construction Once you've picked a stair design, remove any sod or other surface materials and begin to rough in the grades. Be sure to install side walls first if they are part of your design, and make sure to bury enough of the base blocks so the side walls are fully covered by the finished steps. Tight Stairs With Cap Blocks This arrangement will give you 7.5 in. (190 mm) risers and 11 in. (280 mm) treads using the AB Jumbos. • Excavate the area for the stairway. Make the bottom trench 12 in. (300 mm) wide. At the back of the trench, step up 6 in. (150 mm) and excavate back another 12 in. (300 mm). Step up again to the top of the slope. • Place 4 in. (100 mm) of wall rock in the trench and compact thoroughly. Set the AB Jumbos in place to form the first riser. Fill the block and behind with more wall rock and carefully compact again to lock in place. Check for level and adjust if needed. • Install the cap blocks on the first course. Place the second riser to fit snugly against the back of the cap block on the first riser. The bottom of the blocks should be set at the same height as the top of the lower set of blocks. This arrangement will give you a the same rise in each step. • Fill the blocks and behind to the back of the trench, and compact again to lock the second riser in place. Wider Steps • To build wider steps, simply excavate the back of each trench to allow for additional tread depth. It is a good idea to make each tread uniform in width. If you are using pavers to complete the surface of the treads, try to set the depth so full size pavers will fill it in. This will eliminate cutting. Be sure to slope the treads slightly downward to allow for proper drainage. Taller Steps • If you have steeper slopes, use the same construction shown above. Be sure to check your local building codes to make sure the taller steps meet code. Stair Tread Options AB Capstone AB Garden Cap and Pavers Excavate slope and place first step on compacted base 6 in. (150 mm) Install AB Capstone and second riser Repeat to top of slope Space steps apart on gentle slopes 20 Allan Block’s patented front lip provides a built-in edging that works well when installing the stair tread material. Allan Block Caps, pavers, crushed rock, mulches and flag-stone are good stair tread examples. Ensure that stair treads are glued in place for safe use. 12 in. (305 mm)
- 22. Caps & Corners - AB Jumbo Junior Corner Details Step 1 Step 3 Modified blocks Inside Corners Standard blocks are easily modified to build inside corners. You will need a power saw with a masonry blade to make the necessary cuts (a good chisel will work too). • Using your saw or chisel, remove the raised lip from one block, and the left third from another. Set them in place at the beginning of the base course. • Locate the adjoining wall so that the raised lip on the modified block is lined up with the raised lips on the two blocks. Finish installing the entire base course in both directions. • Modify two more blocks, this time removing the right third of the raised lip from one of them, and use these blocks to start the second course. • Continue the process to the top of the wall, alternating as you go. • Cut caps at 45 degree angles to complete the inside corner. Outside Corners AB corner blocks come in right and left hand versions, and are all you need to make a perfect outside corner. Always build your walls by starting at the corners and working out. • Set the first corner block in place and install the two perpendicular base courses. Level, backfill and compact. • Place an alternating corner on the second course and set the entire second course of block in both directions. Level, backfill and compact again. • Repeat as often as needed to the top of the wall. • Mitre cut a cap block to give the wall a custom finished look. Modified blocks Step 2 Cutting Caps Capping a curved wall takes a bit of cutting and fitting, but produces a beautiful finish. Be sure to wear safety glasses when cutting, and operate power saws carefully. • Place two caps on top of the wall spaced so a third cap will fit tightly between their widest point. • Set another cap on top of the first two caps and mark where they overlap on the bottom of the center cap. • Remove the center cap and cut along the marks. • Set the middle cap back in place so the three fit tightly together. • Repeat as often as needed to cap the entire curve. • It's a good idea to secure caps with a high strength construction adhesive once they are all cut. • On tighter curves both caps equally will give a cleaner look.
- 23. 22
- 24. © 2011-2010, 2008, 2006 Allan Block Corporation, Bloomington, MN phone - 952-835-5309 fax - 952-835-0013 DOC. #L0618-0512