SlideShare ist ein Scribd-Unternehmen logo
1 von 10
Downloaden Sie, um offline zu lesen
How to Create a Digital Story in PowerPoint
TIE 2006

Step 1: Write a Story

It is important to start with the story. There are different schools of thought but I tend to belong to the Center for
Digital Storytelling school of thought in that I think that the power in digital storytelling lies primarily in the
story. If the story isn’t written first, often the story is shaped around images and video rather than the other way
around.

Step 2: Storyboard

Storyboarding can provide needed structure and reflection prior to getting on a computer. The following is an
example of what a storyboard might look like. It can be downloaded at: http://www.digital-
story.org/tie/storyboardppt.doc

The more detail the better. Students should think through what each slide will look like, what pictures or video
will be needed, the transitions, and most important—what part of the story will be told on each slide.


Step 3. Gather Materials

At this stage, students need to think about what they need to complete their story.
  Pictures from home that need to be scanned
  Digital camera
  Copyright free digital images or clipart
  Music clips
  Drawings
  Other: _________________________________________________________

Step 4. Computer Time

Phase I: Create the Slides & Images for the Story

1. Create a folder on your desktop called “Digital Story”
     With your mouse on the            While “New Folder is             Type in “Digital Story” and hit
     desktop, right click your mouse   highlighted, hit the backspace   enter
                                                                                                                    1
click “New”   “Folder”    key to type in a new name


2. Create two folders in the “Digital Story” folder. One called “images” & one called “audio”

   It should look like this


3. Open a blank Presentation in PowerPoint.
   By default PowerPoint should open a blank presentation. If it doesn’t, create a blank presentation by going
   to “File” “New” “Blank Presentation”

4. Save the presentation in the “Digital Story” Folder.
   Follow whatever naming convention works for you. Typically including your name and / or the title is a
   good idea. I named mine, “lowenthal_first_computer”


5. Copy all the images you scanned in or got from the web into the “images folder”

6. Working from the storyboard, type the title on the first slide and your name


                                                                                                                 2
7. Based on the storyboard, adjust the background color (& font if needed).

Click on “Format”    “Background”              Click the drop down arrow, click on a color or select
                                               “more colors”. Click “Apply to All” if the entire
                                               story will have the same background.


8. Insert a new slide.
This can be done by clicking on “Insert”     “New Slide” or the “New Slide” button


9. Change the layout of the new slide to a blank presentation layout


10. Insert your first picture according to your storyboard
Click “Insert”   “Picture”   “From File…”              Click on the picture and click “Insert”


                                                                                                       3
11. Adjust picture as needed
To enlarge, click on picture   Put your mouse over the white    Or put your mouse over the image right click the
                               circle until it turns into an    mouse format picture. Then adjust the picture or size
                               double sided arrow. Click down   tab.
                               and drag to adjust size


12. Repeat steps 8 & 11 for each slide and picture needed according to your story board.
I created eight more slides based on my storyboard


Phase II: Narration

13. Record your narration (note: if you plan to transfer your story into another tool like M.S. Producer, you
    might want to think about recording your narration outside of PowerPoint to enable more control). Before
    you can record the narration, you will need to plug in a microphone in a computer.
▪ Go to the first slide of the PowerPoint, then click on “Slide Show” and then “Record Narration”


                                                                                                                        4
▪   Click on “Set Microphone Level…” to adjust your microphone level and click on “Change Quality…” to
    adjust the sound quality.


▪   To create separate audio files when narrating, click on “Browse” and then select the audio folder and click
    “Select”


▪   Click “OK” to start recording


                                                                                                                  5
▪   Click the mouse (or space bar) to move to the next slide while recording your story into the microphone.
    Your storyboard should guide how the story and the slides align. This might take a few times to get the
    hand of it.
▪   To delete a narration, click on each slide, click on the audio icon, and press the delete key.


    Then open the audio folder and delete each of the audio tracks


Phase III: Transitions

14. Add Slide Transition(s) to the story. For simplicity sake, one type of transition will be added to all the
    slides and then adjusted on each slide
15. Click on “Slide Show” then “Slide Transition”


Then select a transition, adjust the speed, click “Automatically after” and pick a time (note: this will need to be
adjusted later to coincide with your narration) and click “Apply to All Slides”


                                                                                                                      6
16. Preview your slide show. Make notes of what slides the timing needs to be adjusted.
Now go slide by slide and adjust the timing of each slide to align with your narration by clicking on the slide
and adjusting the timing. Click “Play” to preview


                                                                                                                  7
Phase IV: Add a Soundtrack

17. Add a soundtrack
Click on the first slide and click on “Insert”   “Movies and Sounds”   “Sound File…”


18. Find your soundtrack in your audio folder and click “OK”


                                                                                       8
19. When prompted when to start the sound, click “Automatically”


20. To adjust the sound so it will play correctly, go to “Slide Show” and then “Custom Animation…”


21. Click on the drop down arrow on your soundtrack clip and click on “Effect Options…”


22. Click on “Stop Playing” … “After” and adjust the number to the total number of slides in your story. Click
    “OK”


                                                                                                             9
23. Preview your story. To adjust the level of the narration or the soundtrack, click on the sound icon and right
    click your mouse and select “Edit Sound Object”.


Adjust the volume by clicking on “Sound Volume”


Click on “Hide sound icon during slide show” to hide the icon


24. Preview and save your story


                                                                                                               10

Weitere ähnliche Inhalte

Was ist angesagt?

Using A Video Off The Internet
Using A Video Off The InternetUsing A Video Off The Internet
Using A Video Off The Internetvera.weber
 
Power pointlabs quick tutorial
Power pointlabs quick tutorialPower pointlabs quick tutorial
Power pointlabs quick tutorialDa Huang
 
Tegrity Basics
Tegrity BasicsTegrity Basics
Tegrity Basicsmcculloe
 
Sirodgze colorfoundation firstyear
Sirodgze colorfoundation firstyearSirodgze colorfoundation firstyear
Sirodgze colorfoundation firstyearAngelo Lao
 
Sample presentation for library
Sample presentation for librarySample presentation for library
Sample presentation for libraryMichele Zenkowich
 
Pre survery
Pre survery Pre survery
Pre survery caratozn
 
Alice Start Part Four
Alice Start Part FourAlice Start Part Four
Alice Start Part FourCraig Perkins
 
Alice startpartfour
Alice startpartfourAlice startpartfour
Alice startpartfoursumidahilo
 
The games factory 2 alien wars
The games factory 2 alien warsThe games factory 2 alien wars
The games factory 2 alien warsChaffey College
 
Adjusting brightness/contrast and colour
Adjusting brightness/contrast and colourAdjusting brightness/contrast and colour
Adjusting brightness/contrast and colourMichaelaHead
 
How to create stunning slideshows (PL)
How to create stunning slideshows (PL)How to create stunning slideshows (PL)
How to create stunning slideshows (PL)ictforteach
 
Smart Board Reference
Smart Board ReferenceSmart Board Reference
Smart Board Referencejcalvert
 

Was ist angesagt? (19)

Using A Video Off The Internet
Using A Video Off The InternetUsing A Video Off The Internet
Using A Video Off The Internet
 
Power pointlabs quick tutorial
Power pointlabs quick tutorialPower pointlabs quick tutorial
Power pointlabs quick tutorial
 
Tegrity Basics
Tegrity BasicsTegrity Basics
Tegrity Basics
 
Xn View Usage Guide
Xn View Usage GuideXn View Usage Guide
Xn View Usage Guide
 
Keynote
KeynoteKeynote
Keynote
 
Tutorial
TutorialTutorial
Tutorial
 
Sirodgze colorfoundation firstyear
Sirodgze colorfoundation firstyearSirodgze colorfoundation firstyear
Sirodgze colorfoundation firstyear
 
Iphoto08basics
Iphoto08basicsIphoto08basics
Iphoto08basics
 
Sample presentation for library
Sample presentation for librarySample presentation for library
Sample presentation for library
 
Pre survery
Pre survery Pre survery
Pre survery
 
Alice Start Part Four
Alice Start Part FourAlice Start Part Four
Alice Start Part Four
 
Alice startpartfour
Alice startpartfourAlice startpartfour
Alice startpartfour
 
The games factory 2 alien wars
The games factory 2 alien warsThe games factory 2 alien wars
The games factory 2 alien wars
 
Adjusting brightness/contrast and colour
Adjusting brightness/contrast and colourAdjusting brightness/contrast and colour
Adjusting brightness/contrast and colour
 
Prezi Manual
Prezi ManualPrezi Manual
Prezi Manual
 
How to create stunning slideshows (PL)
How to create stunning slideshows (PL)How to create stunning slideshows (PL)
How to create stunning slideshows (PL)
 
Smart Board Reference
Smart Board ReferenceSmart Board Reference
Smart Board Reference
 
Photo Story
Photo StoryPhoto Story
Photo Story
 
Edtech PP.
Edtech PP.Edtech PP.
Edtech PP.
 

Ähnlich wie How to Create Digital Stories in PowerPoint

Mr. Wirtz's Powerpoint Booklet
Mr. Wirtz's Powerpoint BookletMr. Wirtz's Powerpoint Booklet
Mr. Wirtz's Powerpoint Bookletwirtzma
 
Ms power point book
Ms power point bookMs power point book
Ms power point bookSally Garza
 
Beginners' Guide to Powerpoint
Beginners' Guide to PowerpointBeginners' Guide to Powerpoint
Beginners' Guide to PowerpointLaura Hampton
 
Power point
Power point   Power point
Power point Ash-Leigh
 
Weaving The Story Of Learning
Weaving The Story Of LearningWeaving The Story Of Learning
Weaving The Story Of LearningJennifer Dorman
 
Working With Photo Story 3b
Working With Photo Story 3bWorking With Photo Story 3b
Working With Photo Story 3bStacy Susic
 
Power point tutorial
Power point tutorialPower point tutorial
Power point tutorialdmakk767
 
Multimedia Using Video In Powerpoint. Manual
Multimedia   Using Video In Powerpoint. ManualMultimedia   Using Video In Powerpoint. Manual
Multimedia Using Video In Powerpoint. ManualDavid Deubelbeiss
 
Directors Cut - Photo Story and Movie Maker
Directors Cut - Photo Story and Movie MakerDirectors Cut - Photo Story and Movie Maker
Directors Cut - Photo Story and Movie MakerJennifer Dorman
 
Easy -how-to-power-point
Easy -how-to-power-pointEasy -how-to-power-point
Easy -how-to-power-pointEileen Brinker
 

Ähnlich wie How to Create Digital Stories in PowerPoint (20)

Mr. Wirtz's Powerpoint Booklet
Mr. Wirtz's Powerpoint BookletMr. Wirtz's Powerpoint Booklet
Mr. Wirtz's Powerpoint Booklet
 
Ms power point book
Ms power point bookMs power point book
Ms power point book
 
Microsoft Powerpoint part 1
Microsoft Powerpoint part 1Microsoft Powerpoint part 1
Microsoft Powerpoint part 1
 
Beginners' Guide to Powerpoint
Beginners' Guide to PowerpointBeginners' Guide to Powerpoint
Beginners' Guide to Powerpoint
 
Power point
Power point   Power point
Power point
 
Weaving The Story Of Learning
Weaving The Story Of LearningWeaving The Story Of Learning
Weaving The Story Of Learning
 
Working With Photo Story 3b
Working With Photo Story 3bWorking With Photo Story 3b
Working With Photo Story 3b
 
Digital story photo_story
Digital story photo_storyDigital story photo_story
Digital story photo_story
 
Power point tutorial
Power point tutorialPower point tutorial
Power point tutorial
 
Rock that Power Point
Rock that Power PointRock that Power Point
Rock that Power Point
 
Multimedia Using Video In Powerpoint. Manual
Multimedia   Using Video In Powerpoint. ManualMultimedia   Using Video In Powerpoint. Manual
Multimedia Using Video In Powerpoint. Manual
 
Directors Cut - Photo Story and Movie Maker
Directors Cut - Photo Story and Movie MakerDirectors Cut - Photo Story and Movie Maker
Directors Cut - Photo Story and Movie Maker
 
Digital story moviemaker
Digital story moviemakerDigital story moviemaker
Digital story moviemaker
 
Easy -how-to-power-point
Easy -how-to-power-pointEasy -how-to-power-point
Easy -how-to-power-point
 
Practicepowerpoint
PracticepowerpointPracticepowerpoint
Practicepowerpoint
 
Practicedopowerpoint
PracticedopowerpointPracticedopowerpoint
Practicedopowerpoint
 
TEST
TESTTEST
TEST
 
Practicepowerpointsddsd
PracticepowerpointsddsdPracticepowerpointsddsd
Practicepowerpointsddsd
 
Practicepowerpoint
PracticepowerpointPracticepowerpoint
Practicepowerpoint
 
TEST
TESTTEST
TEST
 

Mehr von Patrick Lowenthal

Developing construct maps for attentiveness
Developing construct maps for attentivenessDeveloping construct maps for attentiveness
Developing construct maps for attentivenessPatrick Lowenthal
 
Social Presence, Identity and Online Learning
Social Presence, Identity and Online LearningSocial Presence, Identity and Online Learning
Social Presence, Identity and Online LearningPatrick Lowenthal
 
In search of a better understanding of social presence: An investigation into...
In search of a better understanding of social presence: An investigation into...In search of a better understanding of social presence: An investigation into...
In search of a better understanding of social presence: An investigation into...Patrick Lowenthal
 
10 simple guidelines to improve your PowerPoint
10 simple guidelines to improve your PowerPoint10 simple guidelines to improve your PowerPoint
10 simple guidelines to improve your PowerPointPatrick Lowenthal
 
Northwest eLearn 2016 Keynote
Northwest eLearn 2016 KeynoteNorthwest eLearn 2016 Keynote
Northwest eLearn 2016 KeynotePatrick Lowenthal
 
Open Access Journals in Educational Technology: Results of a Survey of Exper...
Open Access Journals in Educational Technology:  Results of a Survey of Exper...Open Access Journals in Educational Technology:  Results of a Survey of Exper...
Open Access Journals in Educational Technology: Results of a Survey of Exper...Patrick Lowenthal
 
Social Presence in Online Courses -- Webinar
Social Presence in Online Courses -- WebinarSocial Presence in Online Courses -- Webinar
Social Presence in Online Courses -- WebinarPatrick Lowenthal
 
AECT 2015 - Defining social presence
AECT 2015 - Defining social presenceAECT 2015 - Defining social presence
AECT 2015 - Defining social presencePatrick Lowenthal
 
AECT 2015 Creating an intentional web presence
AECT 2015 Creating an intentional web presenceAECT 2015 Creating an intentional web presence
AECT 2015 Creating an intentional web presencePatrick Lowenthal
 
In Search of Quality: Using Quality Matters to Analyze the Quality of Massive...
In Search of Quality: Using Quality Matters to Analyze the Quality of Massive...In Search of Quality: Using Quality Matters to Analyze the Quality of Massive...
In Search of Quality: Using Quality Matters to Analyze the Quality of Massive...Patrick Lowenthal
 
Getting graphic About Infographics: Design Lessons Learned From Popular Infog...
Getting graphic About Infographics: Design Lessons Learned From Popular Infog...Getting graphic About Infographics: Design Lessons Learned From Popular Infog...
Getting graphic About Infographics: Design Lessons Learned From Popular Infog...Patrick Lowenthal
 
Distance Teaching & Learning 2015 -- Social Presence and Online Video
Distance Teaching & Learning 2015 -- Social Presence and Online VideoDistance Teaching & Learning 2015 -- Social Presence and Online Video
Distance Teaching & Learning 2015 -- Social Presence and Online VideoPatrick Lowenthal
 
Intentional Web Presence for Research and Technology Professionals
Intentional Web Presence for Research and Technology ProfessionalsIntentional Web Presence for Research and Technology Professionals
Intentional Web Presence for Research and Technology ProfessionalsPatrick Lowenthal
 
Reaching out and Being There: What we know and don't know about social presence
Reaching out and Being There: What we know and don't know about social presenceReaching out and Being There: What we know and don't know about social presence
Reaching out and Being There: What we know and don't know about social presencePatrick Lowenthal
 
Learn it2015 keynote infographics
Learn it2015   keynote infographicsLearn it2015   keynote infographics
Learn it2015 keynote infographicsPatrick Lowenthal
 
AERA 2015 Instructional Design Lessons Learned From Reviewing Popular Infogra...
AERA 2015 Instructional Design Lessons Learned From Reviewing Popular Infogra...AERA 2015 Instructional Design Lessons Learned From Reviewing Popular Infogra...
AERA 2015 Instructional Design Lessons Learned From Reviewing Popular Infogra...Patrick Lowenthal
 
AERA 2015 social presence and video
AERA 2015 social presence and videoAERA 2015 social presence and video
AERA 2015 social presence and videoPatrick Lowenthal
 
Intentional Web Presence for Educational Technology Professionals
Intentional Web Presence for Educational Technology ProfessionalsIntentional Web Presence for Educational Technology Professionals
Intentional Web Presence for Educational Technology ProfessionalsPatrick Lowenthal
 
PASSHE 2015: If You Record It, Will They Watch It? And Will It Matter? Explor...
PASSHE 2015: If You Record It, Will They Watch It? And Will It Matter? Explor...PASSHE 2015: If You Record It, Will They Watch It? And Will It Matter? Explor...
PASSHE 2015: If You Record It, Will They Watch It? And Will It Matter? Explor...Patrick Lowenthal
 

Mehr von Patrick Lowenthal (20)

Developing construct maps for attentiveness
Developing construct maps for attentivenessDeveloping construct maps for attentiveness
Developing construct maps for attentiveness
 
Social Presence, Identity and Online Learning
Social Presence, Identity and Online LearningSocial Presence, Identity and Online Learning
Social Presence, Identity and Online Learning
 
In search of a better understanding of social presence: An investigation into...
In search of a better understanding of social presence: An investigation into...In search of a better understanding of social presence: An investigation into...
In search of a better understanding of social presence: An investigation into...
 
10 simple guidelines to improve your PowerPoint
10 simple guidelines to improve your PowerPoint10 simple guidelines to improve your PowerPoint
10 simple guidelines to improve your PowerPoint
 
Northwest eLearn 2016 Keynote
Northwest eLearn 2016 KeynoteNorthwest eLearn 2016 Keynote
Northwest eLearn 2016 Keynote
 
Open Access Journals in Educational Technology: Results of a Survey of Exper...
Open Access Journals in Educational Technology:  Results of a Survey of Exper...Open Access Journals in Educational Technology:  Results of a Survey of Exper...
Open Access Journals in Educational Technology: Results of a Survey of Exper...
 
Social Presence in Online Courses -- Webinar
Social Presence in Online Courses -- WebinarSocial Presence in Online Courses -- Webinar
Social Presence in Online Courses -- Webinar
 
AECT 2015 - Defining social presence
AECT 2015 - Defining social presenceAECT 2015 - Defining social presence
AECT 2015 - Defining social presence
 
AECT 2015 Creating an intentional web presence
AECT 2015 Creating an intentional web presenceAECT 2015 Creating an intentional web presence
AECT 2015 Creating an intentional web presence
 
In Search of Quality: Using Quality Matters to Analyze the Quality of Massive...
In Search of Quality: Using Quality Matters to Analyze the Quality of Massive...In Search of Quality: Using Quality Matters to Analyze the Quality of Massive...
In Search of Quality: Using Quality Matters to Analyze the Quality of Massive...
 
Getting graphic About Infographics: Design Lessons Learned From Popular Infog...
Getting graphic About Infographics: Design Lessons Learned From Popular Infog...Getting graphic About Infographics: Design Lessons Learned From Popular Infog...
Getting graphic About Infographics: Design Lessons Learned From Popular Infog...
 
Distance Teaching & Learning 2015 -- Social Presence and Online Video
Distance Teaching & Learning 2015 -- Social Presence and Online VideoDistance Teaching & Learning 2015 -- Social Presence and Online Video
Distance Teaching & Learning 2015 -- Social Presence and Online Video
 
Intentional Web Presence for Research and Technology Professionals
Intentional Web Presence for Research and Technology ProfessionalsIntentional Web Presence for Research and Technology Professionals
Intentional Web Presence for Research and Technology Professionals
 
Reaching out and Being There: What we know and don't know about social presence
Reaching out and Being There: What we know and don't know about social presenceReaching out and Being There: What we know and don't know about social presence
Reaching out and Being There: What we know and don't know about social presence
 
Learn it2015 keynote infographics
Learn it2015   keynote infographicsLearn it2015   keynote infographics
Learn it2015 keynote infographics
 
AERA 2015 Instructional Design Lessons Learned From Reviewing Popular Infogra...
AERA 2015 Instructional Design Lessons Learned From Reviewing Popular Infogra...AERA 2015 Instructional Design Lessons Learned From Reviewing Popular Infogra...
AERA 2015 Instructional Design Lessons Learned From Reviewing Popular Infogra...
 
AERA 2015 social presence and video
AERA 2015 social presence and videoAERA 2015 social presence and video
AERA 2015 social presence and video
 
Intentional Web Presence for Educational Technology Professionals
Intentional Web Presence for Educational Technology ProfessionalsIntentional Web Presence for Educational Technology Professionals
Intentional Web Presence for Educational Technology Professionals
 
PASSHE 2015: If You Record It, Will They Watch It? And Will It Matter? Explor...
PASSHE 2015: If You Record It, Will They Watch It? And Will It Matter? Explor...PASSHE 2015: If You Record It, Will They Watch It? And Will It Matter? Explor...
PASSHE 2015: If You Record It, Will They Watch It? And Will It Matter? Explor...
 
WCET 2014
WCET 2014WCET 2014
WCET 2014
 

How to Create Digital Stories in PowerPoint

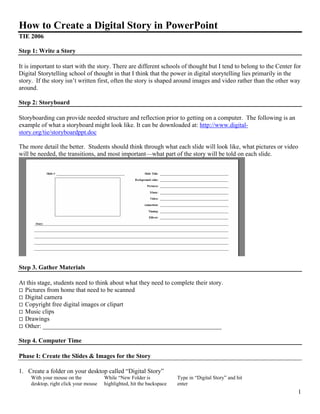
  • 1. How to Create a Digital Story in PowerPoint TIE 2006 Step 1: Write a Story It is important to start with the story. There are different schools of thought but I tend to belong to the Center for Digital Storytelling school of thought in that I think that the power in digital storytelling lies primarily in the story. If the story isn’t written first, often the story is shaped around images and video rather than the other way around. Step 2: Storyboard Storyboarding can provide needed structure and reflection prior to getting on a computer. The following is an example of what a storyboard might look like. It can be downloaded at: http://www.digital- story.org/tie/storyboardppt.doc The more detail the better. Students should think through what each slide will look like, what pictures or video will be needed, the transitions, and most important—what part of the story will be told on each slide. Step 3. Gather Materials At this stage, students need to think about what they need to complete their story. Pictures from home that need to be scanned Digital camera Copyright free digital images or clipart Music clips Drawings Other: _________________________________________________________ Step 4. Computer Time Phase I: Create the Slides & Images for the Story 1. Create a folder on your desktop called “Digital Story” With your mouse on the While “New Folder is Type in “Digital Story” and hit desktop, right click your mouse highlighted, hit the backspace enter 1
  • 2. click “New” “Folder” key to type in a new name 2. Create two folders in the “Digital Story” folder. One called “images” & one called “audio” It should look like this 3. Open a blank Presentation in PowerPoint. By default PowerPoint should open a blank presentation. If it doesn’t, create a blank presentation by going to “File” “New” “Blank Presentation” 4. Save the presentation in the “Digital Story” Folder. Follow whatever naming convention works for you. Typically including your name and / or the title is a good idea. I named mine, “lowenthal_first_computer” 5. Copy all the images you scanned in or got from the web into the “images folder” 6. Working from the storyboard, type the title on the first slide and your name 2
  • 3. 7. Based on the storyboard, adjust the background color (& font if needed). Click on “Format” “Background” Click the drop down arrow, click on a color or select “more colors”. Click “Apply to All” if the entire story will have the same background. 8. Insert a new slide. This can be done by clicking on “Insert” “New Slide” or the “New Slide” button 9. Change the layout of the new slide to a blank presentation layout 10. Insert your first picture according to your storyboard Click “Insert” “Picture” “From File…” Click on the picture and click “Insert” 3
  • 4. 11. Adjust picture as needed To enlarge, click on picture Put your mouse over the white Or put your mouse over the image right click the circle until it turns into an mouse format picture. Then adjust the picture or size double sided arrow. Click down tab. and drag to adjust size 12. Repeat steps 8 & 11 for each slide and picture needed according to your story board. I created eight more slides based on my storyboard Phase II: Narration 13. Record your narration (note: if you plan to transfer your story into another tool like M.S. Producer, you might want to think about recording your narration outside of PowerPoint to enable more control). Before you can record the narration, you will need to plug in a microphone in a computer. ▪ Go to the first slide of the PowerPoint, then click on “Slide Show” and then “Record Narration” 4
  • 5. Click on “Set Microphone Level…” to adjust your microphone level and click on “Change Quality…” to adjust the sound quality. ▪ To create separate audio files when narrating, click on “Browse” and then select the audio folder and click “Select” ▪ Click “OK” to start recording 5
  • 6. Click the mouse (or space bar) to move to the next slide while recording your story into the microphone. Your storyboard should guide how the story and the slides align. This might take a few times to get the hand of it. ▪ To delete a narration, click on each slide, click on the audio icon, and press the delete key. Then open the audio folder and delete each of the audio tracks Phase III: Transitions 14. Add Slide Transition(s) to the story. For simplicity sake, one type of transition will be added to all the slides and then adjusted on each slide 15. Click on “Slide Show” then “Slide Transition” Then select a transition, adjust the speed, click “Automatically after” and pick a time (note: this will need to be adjusted later to coincide with your narration) and click “Apply to All Slides” 6
  • 7. 16. Preview your slide show. Make notes of what slides the timing needs to be adjusted. Now go slide by slide and adjust the timing of each slide to align with your narration by clicking on the slide and adjusting the timing. Click “Play” to preview 7
  • 8. Phase IV: Add a Soundtrack 17. Add a soundtrack Click on the first slide and click on “Insert” “Movies and Sounds” “Sound File…” 18. Find your soundtrack in your audio folder and click “OK” 8
  • 9. 19. When prompted when to start the sound, click “Automatically” 20. To adjust the sound so it will play correctly, go to “Slide Show” and then “Custom Animation…” 21. Click on the drop down arrow on your soundtrack clip and click on “Effect Options…” 22. Click on “Stop Playing” … “After” and adjust the number to the total number of slides in your story. Click “OK” 9
  • 10. 23. Preview your story. To adjust the level of the narration or the soundtrack, click on the sound icon and right click your mouse and select “Edit Sound Object”. Adjust the volume by clicking on “Sound Volume” Click on “Hide sound icon during slide show” to hide the icon 24. Preview and save your story 10