SlideShare ist ein Scribd-Unternehmen logo
1 von 94
Downloaden Sie, um offline zu lesen
1 
Image by Yanick Dusseault aka Dusso
Digital Matte Painting 
Techniques, Tutorials & Walk-Throughs 
Collected and Compiled from a wide range of Online-Resources 
Being in love with the art of Matte Painting, I collected these tutorials over one year from numerous online-resources 
and eventually compiled them into this document. Originally intended for personal use only, I thought 
that maybe some people out there might be interested too, so I deceided to relase them to the public. No big thing, 
and defenitely nothing new – I just gathered these tutorials to have them all in one place. And if any – or all – of 
these tutorials happen to be new to you – even better! 
A great thanks goes out to all the artist who put a lot of their time and energy into the creation of these tutorials. 
Happy painting! 
MBP aka Bass.T , 12/04 
1
2 
Image by Dylan Cole
The Photoshop 7 Paint Engine 
Part 1 
Defining a custom brush tip shape 
by David Nagel 
Slap on your smocks and bust out your easels! We're getting down and 
dirty with some natural media effects in Photoshop 7's Paint Engine. Yes, 
this week we leave the timid realm of compositing for a while and kick 
off a new series exploring the sloppy side of digital art. 
This new series was prompted, I suppose, by the overwhelming interest in 
the Nagel Series 1 Brushes I posted here on DMN a few weeks back. (My 
DMN subscribers can access the ad-free version of that story here.) 
Rather than answering every single "How'd you do that?" e-mail I've 
received on the subject, I thought I'd take the opportunity to walk you 
through the process and hopefully teach you some tricks with the 
Photoshop 7 Paint Engine along the way. 
We begin today with a look at creating custom tip shapes for our paint 
brushes. Granted, the tip shapes are just minor details in the overall functionality of the Paint Engine. But they do 
constitute the first step along the way of creating your own brushes that can go way beyond those included in the 
default Photoshop 7 brush sets. 
The basics 
The creation of a custom tip shape can be as simple as placing a few dots on the canvas or as complex as 
generating recursive tips that build upon the foundation of a basic brush tip shape. For our example today, we'll 
look at the method used to create some of the "cloth" shapes used in the Nagel Series 1 Brushes. begin with a fairly 
large canvas--say 300 x 300 pixels--so that you can have some maneuvering room for the tip shape creation 
process. Then follow these steps. 
1. First, define an irregular area on the canvas using the Lasso tool. After you've created the shape, hold down the 
Option key and use the Lasso tool to cut into the shape to create something of the effect of creases or gaps. 
3
2. Fill the shape with black or dark gray using the Paint Bucket tool. You can use other colors, but keep in mind that 
when we actually get to the step of defining our shape as a brush, Photoshop will use luminosity information as 
part of the shape's definition. Grays and black are the easiest to work with for this purpose. 
3. Choose Select > Feather, and feather the shape by about 15 pixels. 
4. Choose Select > Inverse, and then hit your Delete or Backspace key two or three times. This will soften up the 
outer edges of our shape, which is essential for this process. 
4
5. Do some touch-up work. Go in with your Eraser tool to soften up the inner edges a bit. A well defined shape is 
not going to work well for our purposes, so try to create some subtle gradations on the creases, while leaving 
others intact. You might also go in with a soft-edged brush and add some black back into the shape. 
6. Run a few filters on the current image. I like the Grain filter (Filter > Texture > Grain). I'll run it once with the 
"Vertical" setting and once with the "Horizontal" setting. Then I'll apply the Texturizer filter to the image (Filter > 
Texture > Texturizer) using the Canvas texture. Apply whatever other filters you think might make for a decent 
cloth look. 
7. Now choose Edit > Define Brush. When the dialog box pops up, name it "Phase 1," owing to the fact that we're 
not done yet. At this stage, you now have a fully functional cloth-like brush. 
5
Getting recursive 
Now we want to do more with this tip shape, so we'll do a little recursion. There are several ways to accomplish 
this, and I'm not going to get to all of them here. I want to save some of this for future installments in this series. 
Now, what do I mean by "recursion?" I mean we want to use our "Phase 1" brush as the basis for building a more 
interesting tip shape. It's decent in and of itself, but we can certainly create variations with more detail and less of 
a pre-defined look. 
To begin, save your current document in case you want to work on it more later. Then open up a new, blank 
document with transparency. You might want to make this one a little bigger than the first, say 500 x 500 pixels to 
give yourself more arbeitsraum. 
The first method you can use is to paint on your canvas using the Phase 1 brush. Just draw a few overlapping 
strokes, trying to obliterate some of the repetitive details in the process. 
When you're done, once again choose Edit > Define Brush, and call it "Phase 2." You'll have a whole new tip shape 
based on the first tip shape. 
Another method--and one that I much prefer--is to play with Photoshop's dynamics before doing this. I'll give you 
three good methods for doing this. 
Open up your Brushes palette, and choose "Shape Dynamics." Set "Size Jitter" down to 0%, but crank "Angle Jitter" 
up to 100%. Next, go to the Scattering settings in the Brushes palette, and turn on Scattering. Leave it around 90% 
to 100%. You don't want to go nuts with this, or your brushes will go off the canvas, and you'll be left with hard 
edges. Finally, go to Opacity Jitter in the Brushes palette. If you have a Wacom tablet, turn the jitter to 0%, but set 
the control to "Pen Pressure." This will allow you to control the opacity of your stroke with your pen. If you don't 
have a tablet, turn the control off, but set the jitter to some value between 50% and 100%. 
6
7 
Now position your cursor near the center of your canvas and draw a short stroke. 
Notice how the texture in your tip shape is more random? This makes for a much better natural media look. You 
might then also go in with a white color on top of the black to bring out some of the detail that can be lost in the 
center of the stroke.
When you're done, select Edit > Define Brush, and call it "Phase 3." Using this new brush, you can now produce 
some pretty decent natural media effects. 
Be sure to experiment with these techniques to create other shapes as well. 
8
9 
Part 2 
Dual brush dynamics 
Last time around in our exploration of the Photoshop Paint Engine, we 
looked at methods for creating custom brush tip shapes using paint tools 
and filters. Now we'll begin a new section covering paint brush dynamics, 
a set of features that help to make the Paint Engine in Photoshop 7 far 
superior to anything seen in Photoshop previously for creating custom 
brushes for emulating "natural" media (as if chemical-based paints were 
any more natural than digital paint tools). 
Why? 
Certainly, you can create custom brush tip shapes in Photoshop 6. But what happens when you apply them to a 
canvas? No mater what shape your tip, the stokes come out solid and flat except on the leading edges. There's no 
texture and certainly no sense of interacting with the canvas beyond drawing the shape of the stroke. So then to 
create nothing more than the "look" of texture, you turn to filters and become even further removed from the 
process, at which point you might as well give up on painting. It's all about the process. 
But the dynamics in the Photoshop 7 Paint Engine allow you to move beyond this limit. 
We'll begin with a brush tip shape designed to look like a small wedge of charcoal. If you'd not care to design your 
own to follow along with this tutorial, feel free to download mine here: 
http://images.digitalmedianet.com/2002/10_oct/tutorials/pspainteng2021030/NagelCharcoalTip.abr. 
Now, if you look at the example below, you'll see that applying the brush in a single dab (the white dot in the 
middle) does indeed reveal some of the texture detail of the brush.
However, when you draw a stroke with it, the texture is lost, except along the leading edges. 
There are several things you can do about this problem using dynamics. But there's only one thing you can do that 
doesn't alter the texture, color or shape of your brush tip: the Dual Brush dynamic. 
Dual Brush is an option that allows you to intersect a second brush tip shape with your primary brush tip shape. 
You can use either your current brush in the dual brush mode or any of the presets currently loaded on your system. 
For purposes of this tutorial, we'll simply be using the same brush tip as the primary and dual brush tips in order to 
preserve the appearance of the original. 
To activate it, simply click on the Dual Brush name in the Brushes palette, and then choose the tip you want to use 
as the second brush. 
Unfortunately, selecting a dual brush is not all that simple. The Dual Brush preview does not give you the option of 
viewing the brush tips with names,, so you'll have to be able to pick out the one you want from a pretty crowded 
selection. In my case, I know what the brush tip shape looks like and its diameter, so I'm able to locate it after a 
little effort. 
10
The default settings (shown above) do not give us much in the way of revealing our brush texture. So we need to 
make some adjustments. First, change the spacing to something like 15 percent or so. This will reveal your texture 
more or less, depending on the velocity of your stroke. (The example below begins with a slow stroke and then 
speeds up.) 
Next, adjust the Scatter up to 1000 percent (the maximum). Try the brush with and without the "Both Axes" option 
selected. Below you'll see the brush without (left) and with the "Both Axes" option. 
11
You can also reduce or enlarge the diameter of the dual brush in order to reveal the texture of the brush in patterns. 
Here's I've reduced the dual brush diameter to 10 pixels, creating a dotted effect. 
Finally, you can change the "Mode" of the dual brush to create variations. Each one changes the way in which the 
underlying dual brush reveals the primary brush. Below, from left to right, you'll see Multiply (default), Darken, 
Overlay, Color Dodge, Color Burn, Linear Burn and Hard Mix. 
Note that scattering affects the ways in which the blending modes change your brush's appearance, as does the 
particular dual brush tip involved. But the most dramatic difference can be seen when adjusting the primary brush 
tip's spacing, which you can access in the "Brush Tip Shape" parameter. Bellow are the same examples as above, 
but with the primary brush tip's spacing set to 62 percent. 
12
13 
So, to recap, we've gone from this: 
To this: 
simply by adjusting the values in a single parameter in the Photoshop 7 Paint Engine. Not a bad start.
Part 3 
Creating custom brushes with size, angle and roundness dynamics 
By now you know that Adobe Photoshop isn't just for image manipulation 
anymore. Far more than any other release of Photoshop to date, version 
7.0 offers artists and designers functional tools for using the program as 
a painting application, for emulating "natural media" and for designing 
some pretty far-out brushes for creating original works of art. (Did I just 
use the phrase "far out?" 
Over the last month or so, we've explored Photoshop 7's Paint Engine in some detail, covering some specific 
techniques for creating our own custom brushes. These have included techniques for designing brush tip shapes 
and also using two brushes at the same time, known in Photoshop parlance as "Dual Brush." (You can find both of 
our previous articles on the Photoshop Paint Engine in our Tutorials section on the left.) 
The creation of custom brush tip shapes is obviously more a matter of individual talent that merely pushing a few 
buttons to achieve an effect. And, in a sense, so is the use of the Dual Brush dynamic, which will often involve the 
use of self-created brush tip shapes. But today we begin to look at uses of the more automated dynamics of the 
Paint Engine--size, angle and roundness--for creating your own custom brushes. 
The Shape dynamic is probably the most important for those of us who use pressure-sensitive tablets. It allows for 
the interactive resizing of a brush tip and also provides other shape parameters that can be assigned random values, 
numerical values or interactive values based on input from your Wacom tablet. 
After you've designed your new brush tip shape, open up the Brushes palette (above) and click on the Shape 
Dynamics button to check it. Here's you'll see three "jitter" dynamics: Size, Angle and Roundness. Each one of these 
also has sub-settings, which you can use to provide additional controls. 
In most cases, you'll want to be able to control the size of the brush tip through your tablet. However, for some 
brushes, you might want the jitter to be random or even remain constant. For no jitter, set the percentage to zero. 
And for control over the size of the brush, set the control to one of the available options, most likely Pen Pressure 
or, if you have a Wacom Intuos tablet, Pen Tilt or Airbrush Wheel. (You can also use Fade, if you don't have a tablet, 
which simply evolves a given parameter over a fixed number of steps, as with earlier versions of Photoshop.) 
14
But that's fairly obvious. What isn't as obvious is that you can also use jitter in combination with pen pressure or 
tilt to vary the size of the brush tip even as you're controlling it with an input device. This means that, as you use 
pressure (or tilt), the jitter of the size of the tip will tend toward the size of the stroke indicated by your input 
device. More pressure will provide a larger stroke with some jitter on the large side, while less pressure will do the 
inverse. 
(Note that if you use tilt as the controlling parameter, you can also adjust the "Scale" of the tilt to increase or 
decrease Photoshop's tilt sensitivity. 
Now, to expand on shape dynamics, you can also add controls for angle and roundness. Roundness determines the 
obliqueness of the brush tip and can be controlled in the same ways as size. So, in other words, you can create 
random roundness, pressure-controlled roundness or a combination of the two. 
And then, probably the most useful of all parameters for emulating natural media, we also have angle jitter. Now, 
the angle of your brush tip will be more or less apparent depending on the shape of the tip, of course, but you can 
also combine the angle dynamic with roundness for a more natural-looking stroke and a stroke with better 
differentiation in directionality. 
15
Fortunately, with the angle dynamic, Photoshop 7 gives you two additional control parameters: Direction and Initial 
Direction. As their names imply, they allow you to control the angle of the brush by the direction of the stroke, 
which is certainly more natural than other methods and also frees up your input device for controlling other 
parameters. 
Using Initial Direction, Photoshop attempts to determine the angle of your stroke based on your initial input. This 
can be hit or miss, particularly with a graphics tablet, as your initial touch on the tablet might be slightly off your 
desired angle. But it is useful in particular for calligraphic brushes. And the plain old Direction parameter is useful 
for other types of brush effects where you need Photoshop to track the direction of your stroke interactively. 
As you saw from the example above, the effect can look somewhat striated, but this is owing to the spacing in the 
particular brush stroke I'm using, as well as the size of the brush tip. Both can be modified in the Brush Tip Shape 
pane. 
16
Roundness settings can also affect the look of an angle-controlled stroke. Below you'll see examples with size, 
spacing and roundness altered. 
All of the dynamics above are for tightly controlling the appearing of your brush tips and overall strokes. But there 
are numerous occasions where tight control is undesirable and accident plays a more important role in the look 
you're trying to achieve. 
17
Part 4 
Working with color dynamics to preserve texture and add depth 
It's difficult to say which aspect of Photoshop's Paint Engine is the most 
important. Custom brush tip shapes, textures, shape dynamics: They're all 
important for creating custom brushes, especially for natural media 
emulation. But what do all of these matter if you lose the texture and 
shape of your brush when you're painting? 
Enter Color dynamics. 
Let me give you an example of what I'm talking about. Let's say you go to 
the trouble of creating a brush tip that's designed to resemble cloth. You 
get it looking just right, apply some shape and dual-brush dynamics to it, 
and then start painting. But what happens? 
You go from this starting brush: 
To this flat painting: 
But using Color dynamics with your brush, you can avoid this mess and preserve all or some of your original brush 
tip shape. 
18
Start by opening up a brush that you've creating using any of our previous tutorials, which you can access by 
clicking the Tutorials button on the left. Then open up the Brushes palette, and click on the Color Dynamics option. 
Here you'll find a number of settings for modifying the color of your strokes, each one valuable for different 
purposes. Each of the "Jitter" settings allows you to modify the color of your stroke. With the 
Foreground/Background setting, you can set your strokes to fade between foreground and background colors, and 
you can also set the amount of fade to be based upon input from your drawing device (such as a pressure-sensitive 
tablet) through pressure, tilt or airbrush wheel. You can also set it to fade over a set number of steps. 
Setting the jitter to zero will cause Photoshop to blend between the foreground and background only through your 
specified control. Increasing the jitter will through randomness into the blending in addition to any controls you've 
set. Or, if you se the controls to "off," you can have a purely random jitter. In the example below, you see the 
foreground (red) blending with the background (blue) resulting in purple with a medium amount of pen pressure. 
19
The other jitter settings in the Color Dynamics parameters don't allow for any control whatsoever. They're totally 
random, with jitter based exclusively on the percentage of jitter you apply. Below you see two examples of Hue 
Jitter, the first set to 100 percent, the second at 15 percent. Both allow you to maintain the original texture of your 
brush but offer some widely varying results. (Both use red--186,2,2--as the starting color.) 
The Saturation Jitter, on the other hand, produces much more painterly results, fading the color from full saturation 
to no saturation, as in the example below with a setting of 100 percent. 
And finally, the Brightness Jitter setting allows you to alternate between fully saturated shades of your primary 
color. The examples below show the jitter at 100 percent and 15 percent, respectively. 
20
All of these jitters can be used in conjunction with one another not only to preserve the look and texture of your 
custom brush, but also to create a feeling of depth with very few strokes. The following example is a single short 
stroke over a white background using a red color. The settings are: Hue Jitter, 6; Saturation Jitter, 67; Brightness 
Jitter, 17. 
There's one last setting in the Color Dynamics palette called "Purity." This is a setting for moving away from or 
toward even RGB values. The default zero purity leaves your colors as they are. Increasing the value leaves the 
dominant color alone and decreases the secondary and tertiary values. For example, a color consisting of 
255,150,150 will fall off to 255,0,0 at a purity setting of 100 percent, while a setting of -100 percent will give you 
a color of 255,255,255. The example below show the original, the 100 percent and the -100 percent Purity values. 
Purity can also affect the individual jitter settings by forcing them to conform to a certain range of values. 
21
Part 5 
Delving into directionality to create 'Spirographic' brushes 
This is our fifth exploration into the Paint Engine in 
Adobe Photoshop 7. Since so many of the remaining 
parameters in this program are self-explanatory, I 
thought we'd break away for a while from simple 
feature explanations to a more practical look at what 
you can do with some of the Paint Engine's dynamics- 
-in this case directionality for creating geometric and 
"Spirographic" line effects. 
The goal of this particular tutorial is to work with 
various directionality settings in Photoshop 7 to create 
two sorts of effects: intertwining lines and 
"Spirographic" patterns, similar to what you could 
produce with a Hasbro Spirograph game. That is, 
effects that produce repeating, overlapping lines like 
meshes. This needn't be applied simply to lines, 
however. You can use this same trick on ore complex 
brushes for producing repeating, but shifting patterns 
out of any brush tip shape, including images. In the 
end, we'll wind up with a paint brush that can 
accomplish this effect interactively by simple freehand drawing or through path stroking. 
Creating line-effect brushes 
Since the goal of this tutorial is to produce brushes that create line effects, we'll begin with the creation of a 
single-pixel-wide brush. But, again, you can use any brush tip shape for this process. (Later in this tutorial we'll 
look at more "Spirographic" brushes as well.) 
Open Photoshop, and create a new document. Switch to the Single-Column Marquee Tool, and click somewhere in 
your canvas. Then choose Edit > Stroke. In the dialog that pops up, enter a one-pixel stroke width using black as 
the stroke color. 
22
Deselect your column (Command-D Macintosh, Control-D Windows), and you should be left with a simple vertical 
line. 
Now switch to the Paint Brush Tool and then choose Edit > Define Brush. This will use all of the visible pixels in 
your image to create a brush tip shape. 
Now open up your Brushes palette. The currently selected brush should be the one you just defined. If you try to 
use it at this stage, you'll get sort of a scrolling effect. But we want to take this a step farther. 
23
So click on the dynamic in the Brushes palette called "Shape Dynamics." Turn everything off, and then switch the 
Angle setting to "Direction." (Leave the Jitter at 0.) 
Now you can draw with it at this point, but the result isn't too pretty. 
24
So, in the Brushes palette, click on the Brush Tip Shape option. Here you can do two things to improve the look of 
your brush. First, you can set the spacing to 1,000 percent, which will give your strokes a much more delicate 
appearance. 
And you can also switch the Diameter down to about half of what you started with to produce lines that use a 
stroke less than one pixel wide. 
25
And, finally, if you want to cover a wide area with your line-effect brush, you can select the Scattering dynamic. 
Set it to "Both Axes," and adjust the amount of scatter to about 400 percent. Set the "Count" to 8 or so. Now when 
you draw on your canvas with a couple of curly strokes, you quickly wind up with an image full of web-like, 
intersecting lines. 
Very nice. But maybe a bit less mesh-like than what you had hoped for. This is owing to the fact that we used a 
single-line brush tip shape in our initial brush tip shape creation phase. But we can apply limitless variations to this. 
For example, instead of a simple line, we could create an X-shaped brush tip to produce this effect with a single 
stroke. (Of course, you'd want Scattering turned off for this.) 
26
27 
Or a double-X for this effect. 
Getting 'Spirographic' 
Get the idea? The more complex the initial brush tip shape, the more complex the geometric effects you can create 
quickly. But for even more of a Spirographic effect, create your brush tip shape using circles. You can do this 
several ways. The easiest is simply to draw a circle with the circular Marquee tool, and then stroke it, as we did 
with our original line brush. Then duplicate this layer to create double or triple intersecting circles.
Now, making sure that only the layers containing your circles are visible, choose Edit > Define Brush. And, again, 
apply your Brush Tip Shape options to make the circles more delicate, and apply your directionality setting in the 
Shape Dynamics parameter. You may or may not want to adjust spacing, but that's up to you. 
And you will hopefully wind up with a brush that can create an effect like this. 
28
29 
Or this. 
Pretty fancy, eh?
Working with geometric brushes 
Of course, there are multiple ways you can work these sorts of brushes into your production. I think the first set of 
brushes we worked on are geared well for freehand drawing. That is, you can scatter them freely to produce 
complex, web-like, irregular strokes. The second set, however, seems better geared toward stroking paths, which is 
what I've obviously done with the previous two examples. 
This is a fairly simple procedure. Save the brush you have created. You can do this in the Brushes palette by 
selecting the flyaway menu on the top right and choosing "New Brush." This will save not only your brush tip shape, 
but also any dynamics you've applied to it. 
Make sure that you then select your newly saved brush in the Brushes palette. 
Now create the shape you want to stroke. You can do this semi-freehand using one of the path tools, or you can 
load up a shape using one of the Shape tools. If you do use one of the shape tools, make sure the "Paths" option is 
selected up in the Tool Options palette, as shown below. 
30
Now draw your shape onto your canvas. When you're done, open up the Paths palette, and make sure your path is 
selected. Then choose the "Stroke Path" option from the flyaway menu. 
31 
When the dialog pops up, choose "Brush" as your stroke, and then hit OK. 
Your path will then be stroked using your custom Spirographic brush, and you can go off and impress your friends 
and colleagues with the geometric complexity of your work.
Painting clouds 
I used Photoshop, but any paint program should work. 
32 
(Left, cropped from a larger image.) 
I start with a ramp like the one on 
the right; be careful not to use full 
saturation here. Up to your 
preference, if you want to make the 
background a little more purple. 
Start painting with max saturation 
and max value a 'peachy' color on a 
large default brush (sharp edge, 
pressure-sensitive opacity). Quickly 
block in the rough shapes where 
light would fall on your cloud. 
Take special care here (and any time 
you're painting something in nature) 
to not be too predictable, 
symmetrical or regular. 
Go down in brush size and do some 
more detailed strokes.
33 
The shadow color is added, a purple 
so dull it's almost gray. Then add 
the darker orange/red color 
wherever the peach meets the 
shadow. Also, normally, clouds will 
be brighter at the top so add it at 
the base too. 
Now the highlight color, a 
slightly lighter peach. Use the 
finest brush and squiggle it on 
wherever there's a left-hand 
facing edge of the cloud. Again, 
don't be predictable and regular. 
We need to soften the right-hand 
side edges of all these 
squiggles, while trying to keep 
the left sides as sharp as 
possible. You can use a small 
blur brush, or a smear, or simply 
paint back the base color into 
the highlight. 
Go back and forth, adding more 
highlight squiggles, softening 
some parts, bringing the shadow 
color in with a finer brush too in 
some places, etc. 
On the right is the finished cloud.
Here's a cloud similar to one I saw today, around noon, near the horizon, through my office window. The light is 
coming not from the side or above, but about 45 degrees or so. This changes where you need to put the highest 
values; instead of at the edge of each blob of cloud the highest value ends up pretty much centered. So a different 
technique will be more efficient. 
34 
Use a similar ramp to the above, 
just a bit lighter. 
Create a new layer and paint with a 
sharp edged brush a value slightly 
lighter and less saturated than the 
lightest sky color. Darken it a bit at 
the bottom. 
Turn on 'Preserve Transparency' for 
the layer and paint full white with 
the airbrush like this. Vary the 
brush size quite a lot. The goal is to 
get this kind of 'cauliflower' look. 
Then add another layer and paint 
with a fully opaque sharp edged 
brush the original cloud color, like 
on the right.
35 
Same thing again, switch on 
'Preserve Transparency' and paint 
white with the airbrush. 
Repeat this cycle until the whole 
cloud area is filled up. Remember 
to try to get the edges of each layer 
a little closer in the beginning, and 
more widely spaced towards the 
end (due to the perspective). 
On the right is the finished cloud, 
note that you can tweak it very 
easily by using 'Curves' on each 
layer. I darkened the first layers, 
also changed the coloring a 
little. Other tweaks included some 
added detail on the bottom layer, 
and airbrushing more white here 
and there. 
Of course instead of the airbrush 
you could try this with all sharp 
edged brushes, for a more painterly 
expressive style.
Creating a Spiritual City 
Jaime Jasso 
Award-winning CG artist Jaime Jasso takes us 
through the creation of a superbly-integrated 
2D environment made almost entirely from 
photographic elements, hand-tweaked and 
painstakingly retouched in Photoshop to fit 
the scene. 
My idea behind this painting was to create a 
place where the viewer would feel spiritual 
peace, but at the same time have a sense that 
the place is dangerous. I made this image by 
joining more than 70 photos together with 
some 100% painted elements too. All the 
elements were heavily edited from the original 
to be integrated into the composition because I needed them for a specific purpose. 
Admittedly, some of the perspectives in the image appear out-of-whack to our critical eyes, but the focus of this 
article is to demonstrate how I worked the composition up to this point, despite the corrections that could be made 
to make the composition more physically accurate. 
Concept Sketches 
The idea was born when a friend of mine 
returned from Argentina and gave me this cool 
postcard of Iguaçu Falls. Inspired by this I 
started sketching out this land of waterfalls and 
moody jungle. In the first sketch, I considered 
including a huge gothic castle connected by 
bridges to smaller structures. Then I designed 
the look and composition of the image, playing 
with the architecture between the waterfalls. 
Later, I realized that the scale of the castle was 
too big for the falls, because I wanted the landscape to look huge and menacing as well. So I decided to change the 
design of the castle for a cluster of smaller temples linked together to build a ‘spiritual city'. In my following 
sketches I played with mood and color. I decided to use an overcast and mysterious complexion for the composition 
instead of a night shot; otherwise I would lose a lot of the detail in the waterfalls, foliage and temples. 
36
37 
Composition 
The first step was to set 
my working resolution. I 
chose to work at about 
3500 pixels wide, mainly 
because I was working 
with images from the 
Internet. 
Reference Gathering 
Atmospheric Effects 
I looked for real photos to 
use as reference to see 
how a gloomy and hazy 
outdoor atmosphere 
affects the saturation and 
shape of elements as they 
become more distant. 
After studying these 
photos, I noticed that 
causes faraway shapes to 
lose contrast and gain in 
brightness. When it came 
to working on the image 
though, I didn't attempt 
to completely render the 
faraway elements with 
this realistic haziness 
because I wanted the shot 
clearly defining some of 
the distant details. Overall 
though, I did try to mimic 
this weather as accurately 
as in reality except for 
one little cheat in the 
final image to retain some 
of the detail.
Architecture 
I did a lot of research into the sorts of architecture I was going to work with. Looking to some mosques in 
Jerusalem and Turkey I found great references for buildings to make perfectly the architecture I had in mind. I 
started a longer search for high resolution photos of mosques and similar architecture. It took me quite a few days 
to get all the photos I was going to need. 
Waterfalls 
In this phase, I also gathered a lot of high-resolution waterfalls photos that I knew I'd need. I found some great 
material of the Niagara Falls, and of course Iguaçu Falls, that would help me achieve the desired perspective and 
feel. 
Finally I managed to gather together a collection of over 150 high resolution images from different websites. Now, 
how would I use these photos in my image? Where does each belong? And where can each image blend best with 
respect to the others? 
Compositing – Natural Environment 
I began to create the waterfalls using 
almost 20 different photos. I did a lot of 
cloning to get the water and falls blend 
seamlessly. To get the effect of distance 
in the water, I had to scale down some 
layers and paint the far distance water 
by cloning more water. 
38
Once I had the falls done, I began to work on some of the details such as the little foliage islands in the water. 
These I manufactured by cloning a small jungle and foliage area in a photo. Later, most of the foliage was 
retouched and detailed with extra touches like branches, shadows and special reactions in the area where the 
foliage touched the water. Done with this, I had to add the turbulent water buffeting these little foliage islands to 
show the water is really being affected by these pieces of land on its way to the falls, completing the integration of 
the foliage and water. 
Later I created the sky by mixing two layers I found on the net. I desaturated both a little bit and added some 
lightness to it, making it clearer and less contrasting. The background mountains were hand-painted. Taking care to 
reflect the haze and lightness values of distance, I did the mountain shapes with a solid color that later was 
replaced by the correctly-colored gradient. (see image above) 
The rear waterfalls where added later, after the city and temples, along some of the steam. It was painted in by 
hand to give the effect of a huge amount of water falling and crashing down in to a river that we don't see. (see 
image below) 
39
Compositing – City and Temples 
I then worked with some of the architecture photos, 
and started patching together some composites over 
the landscape. The foreground tower was something I 
didn't have in the original sketches, but the idea came 
out when I was looking for appropriate images on the 
Internet and found a special photo that gave me the 
idea. I modified the shape and color, and removed the 
direct sunshine with its hard shadows from the original 
photo, so it would fit in the composite. 
The temple at the end of the bridge was entirely hand-painted 
40 
because I never found a photo with the correct 
perspective. I took values from other photos I had 
composited there to paint it more accurately. 
For the middle-ground city I had to be very careful 
about what architecture and micro composition I was 
going to use. I selected the photos and began to do 
experiments to trial structural arrangements in that 
area of the image. 
There was clear evidence in the image of the 
peculiarities of the original photos I used to build this 
middle-ground part of the city. I had to make these 
buildings blend in with the overall weather. I 
desaturated the colors to push back some of the 
temples. I then altered the brightness/contrast and 
hue/saturation to make them hazier, as they are further 
away from the viewer. I also reduced the contrast 
where the sun was hiding behind the clouds and added 
a lens flare to help me get the buildings integrating 
into the haze of the overall atmosphere.
I joined together more and more photos to create the background part of the city. I applied the same techniques to 
lighten and lower the contrast of these layers. However, I still had to take some steps to better match these images 
with their environment. First I painted the highlights, which was very important because the sun light was coming 
from the left. Then, in a fresh layer, I painted rough highlights with colors taken from other layers used for the 
middle-ground. Later, I set this layer to the blending mode ‘Color'. So the highlights layer and base building layers 
were now filtered through this color layer that was set to be only partially opaque. Thus, the colors in the whole 
image were desaturated as part of the effect of distance. 
41 
Compositing – Foreground Additions and Haze 
To give it a more natural and ‘alive' look, I added three flying birds that I took from a photo, with a small amount of 
directional blur to convey the effect of motion. 
In the original sketches I had a foreground tree, but with the new foreground tower I thought it less necessary. I 
still thought I'd put some branches in to frame the image, but not the whole tree. These branches were hand-painted, 
and while it may not be strictly correct, I used a black to brown gradient going down to the thinner 
branches. I just wanted to give some translucency to the slender twigs. (see image below) 
As the final touch, to give it a generally hazy mood, I added a new layer at the top of my composite that simply had 
a white to transparent gradient over it, making the sky and upper elements blend together in the homogenous 
weather and atmosphere. 
Post-processing 
In the post-processing I made a little color correction, 
with green being the main color of my palette. I also 
added a bit of film grain to give that special 
photographic touch. 
Final Image 
The hand painting and editing used no custom brushes, 
and the rest just involved changing opacity, colors, 
modes, and resizing. The image was done completely in 
Photoshop.
Here’s another of Jaime’s works: 
42
43 
Digital Matte Painting Using Photoshop 
In the past 4-5 years visual effects stopped being something extraordinary and became a part of almost any 
production regardless of the scale. Would it be a 100 million dollar Hollywood feature, TV series or an independent 
film project, ability to enhance visuals with computer generated imagery (CGI) have become accessible to almost 
everyone. In today’s world of money and profit, producer thinks of a cheaper way to achieve something that used to 
cost millions. Visual effects come in place when the world we live in cannot provide us with imagery we need or 
the cost of recreating certain phenomena would jump over budged. 
One of the most important parts in visual effects, and also one of the easiest and cheaper one to do is a matte 
painting. Regardless of whether it is painted on a piece of glass or generated on computer it serves one purpose – 
creating or extending the virtual space of the scene. As every art, this one has its secrets and cheats. Unlike 
traditional art, where “cheating” is considered to be a bad manner, matte painting requires final product to be done 
in the most efficient way possible. Don’t be afraid to make shortcuts if they are possible, because time always 
works against you. 
In this tutorial I will cover a process of enhancing footage to fulfill the needs of story. It all begins with the script 
that calls for some change in original footage. After agreeing that the best way to specific shot is to enhance it 
digitally, I start to create a concept of how to incorporate these enhancements in original footage. There are many 
small details that have to be overlooked for the purpose of a smooth compositing. First I have to think of a camera 
movements and composition. In my case, the idea to create a matte painting came before we started filming, so I 
didn’t face any problems related with an unexpected change of plans during production. 
The story called for a remote location covered with snow for all outside scenes. As the film has mainly interior shots, 
we decided not to go to Colorado, but shoot background plates here in California and just paint the snow in. The 
example I use here is a test that was done to prove that it would be financially better to make a painting. We shot 
a background plate using still camera then replicated lighting conditions on a green screen stage in Ventura, 
California for our foreground plates, which had actors and a car in it. We decided not to have any camera 
movements to speed up production, because outside shots weren’t important on the bigger scale and had to be 
simple.
I started with a picture I took in Santa Barbara, a very nice and worm city, were snow is something that people 
don’t see very often. 
First I had to clean the picture by eliminating all of the unnecessary objects and paint parts of the plate that were 
obscured by the removed parts of the picture. This process requires a vision of the final product. Without 
understanding what the final image is going to be it is very hard to make decisions on what has to be left. The main 
rule I learned while doing matte paintings is that if you can leave specific parts of the picture intact or use a photo 
to replace it – then do so. Nothing will look as realistic as a real life source. For the final touch up, I darkened the 
color of the road to add wetness to it. 
44
As an empty background color I always use the dominant color for specific painting. In this case it is the color of 
the snow – white. The purpose of this is to being able to visualize your final product in the early stages. In this case 
it is also the color of the sky, so I add a little gradient by darkening the horizon line. 
Speaking of a horizon line, it is good to make one early on, so you won’t have and unexpected perspective artifacts. 
This is done finding existing perspective lines (blue) and drawing the line through the point of their intersection 
(red) which will be our horizon. After we have established all necessary elements it is time to start painting. The 
next step would be to create a ground plane. I painted some free strokes using mainly three shades of snow from 
light to dark gray. The idea behind the matte painting is the same as behind impressionistic painting. You just 
create an impression, but on close-ups the reality breaks on strokes and colors. 
45
46 
As in real world, there can’t be any flat colors. Of course there are 
exceptions, but the nature is full of texture that mixes colors in a very 
organic way. I said before that if you can use photos the use them. I 
applied a black and white photo of a grass field on top of the ground 
plane to create imperfection in color. To do so, I placed a layer of grass 
on top of ground layer in photoshop and overlayed top layer over the 
bottom one. 
This creates a more dynamic range of shades as well as adds a texture to 
the ground plane. 
Next step is actually painting snow on our plane. Before doing any matte painting it is always good to do research 
on a subject of your painting. In this case it is snow. Snow might seam a very easy subject, but in fact it has a very 
interesting nature. Under different weather conditions, snow has different color, shape and interaction with 
environment. In my case it hasn’t snowed for couple days, as well as it is not windy, so the snow is not blowed off 
the house.
If you look closer you can see the simplicity of technique I used. I projected the snow on every surface as if it was 
falling down directly from the sky. I added little imperfections, but the underlying idea is very simple. 
. 
With a little help of imaginations you can predict which areas would be exposed to the snow in case if the snow 
was falling in the straight vertical direction. The ground in front of the house has a little different technique then 
the snow on the roof. Again, the method I use for specific areas of this painting is used on research I do. I can’t 
stress enough how important to the your “homework”. In the case of the snow in front of the house, I chose areas 
that would be physically blended with the underlying ground plane. I assumed that outside temperature is very 
close to 0 Celsius. Hence, the areas where the snow is not thick are more “wet” and thus blended with the ground. 
47
I used this blending technique on the areas where snow meets ground areas and sometimes on the snow itself to 
create uneven texture. Besides snow I added small vegetation, like frozen grass and small bushes. This added more 
realism to the flat areas of snow. Another reason for this was to create an atmosphere for this painting. I think that 
trees and the way they branch can greatly affect the mood of the scene. 
On this picture you can see a relatively simple tree behind the house. This is the first step in changing direction for 
this painting. As with snow, I used plain color, after I finished the tree structure, I moved to adding snow with the 
same technique I used for the house roof. Since we have a foggy atmosphere, this tree has to be a little lighter. If I 
had a plain background with no intention of having something behind this tree I would change the opacity. Rather 
then doing it I went to Image->Adjustments->Levels to reduce output black level. 
If the background was something other then gray color, I also had to tweak its color palette. 
48
Next I would fill out the background plane. I usually create 2-3 trees that I’d scale flip to randomize it a bit. 
Depending on the type of a matte painting you have to put different amount of dedication. If the painting will be 
slightly out of focus, or the camera will have some movement, I don’t spend much time on background objects, or 
on something that doesn’t have viewer’s attention. As with the previous tree I changed output black level to match 
the fog depth. 
Then I paint the rest of the forest, recycling the trees I used before plus using some photos. I painted some snow on 
the fir trees and then put several of those on the background. Final ouch is to make some foreground trees. It’s 
good if you can get some photos. I finished them by painting snow and adjusting levels. For these fir trees I didn’t 
worry much that they looked duplicated, as I painted snow on individual trees differently. 
49
Now, when the painting is done, you can change it to whatever the shot requires you to use it with. 
By using simple color correction techniques, I was being able to change the time of day or the mood of this 
particular painting. 
Here is what I ended up using for production purposes. 
50
Matte Painting in Photoshop 
Part 1: Maison 
This tutorial is actually a "making of" where I explain how I proceeded to achieve this matte painting. 
I use a Wacom Intuos² A4 board, if you don't have any graphic board this is going to be hard but not impossible. 
At each step of the matte painting, useless to remind you to create a new layer so that the work will be easier and 
mistakes avoided ! 
First of all, find a good res 
picture. I chose to use a 
picture of a house I found 
on the web. You can find 
very nice pics for free, just 
look around ! 
51 
The first step is to isolate 
the house by putting it on 
a separate layer and by 
erasing the rest. In this 
example I used the 
polygonal lasso tool for 
the house, and a soft 
eraser for the bushes.
Now you need a new 
background. You can 
either find a good pic, 
either paint one yourself. 
I chose the former because 
it is less time consuming, 
and the result is far better 
than what I would have 
gotten had I painted a 
background myself. I 
found this image on the 
web, unfortunately I do 
not remember the site I 
got it from. 
Put the sky behind the 
house (by putting the sky 
layer under the house 
layer), and apply a little 
perspective effect to give 
more depth to the sky, 
make it less flat. 
Here the house picture 
was taken from a low 
angle, which makes our 
work easier. 
Now look at the edges of 
the house. They still are 
the color of the original 
sky. We'll fix that. 
52
53 
Using the magic wand tool, 
select the empty zone of 
the house layer. Then, 
Select > Modify > Expand, 
to make your selection 
wider. Pick a value that 
includes the zone we need 
to color correct. 
In the menu : Image > 
Adjust > Hue / Saturation 
and color correct the 
edges by matching them 
with the color of the roof. 
Still using Hue / 
Saturation and also Color 
Balance, adjust the colors 
of the house and sky 
layers so that they 
perfectly blend together. 
Now we want to get rid of 
that palm tree that hides a 
part of the house. That 
tree has nothing to do 
there since we want to 
create a morbid mood. 
This is probably the most 
delicate step because we 
have to hand paint the 
missing part of the house. 
For that I mostly used the 
clone stamp tool, tool that 
allows you to paint 
something using another 
part of the picture for 
reference. 
For instance, the tiles 
located between the lower 
and middle windows were 
painted using similar tiles 
of the house, using the 
clone stamp tool.
Why not add a lightning 
bolt to make the scene a 
little more disturbing ? 
Using the simple non 
feathered brush, this is 
simple. Draw your 
lightning, duplicate the 
layer, and blur the copies 
to make the lightning 
glow. Then, use the Dodge 
tool to brighten the clouds 
from where the lightning 
is originating. 
Paint dead trees behind 
the house, or use existing 
ones from pictures. Of 
course, make the colors 
and luminosity match. 
The fun part, now ! Let's 
break down the house. 
Well, not all of it. 
To make it look older, I 
added a hole in the rood, 
painted with brushes. 
54
55 
Don't be afraid to add broken parts ! The house is 
supposed to still be standing, so don't go too far. 
You can see that I broke a wooden beam, a pipe, a 
board, another part of the roof, and a window. When 
you break something, use the clone stamp tool to fill in 
the empty space you created. 
Make it look dirty. First of 
all, the windows. I used a 
non regular brush and 
painted the windows with 
a matte color. Then, 
change the transfer mode 
of the dirt layer to make 
sure that dirt and windows 
blend nicely together. For 
this example I chose the 
Luminosity mode.
Repeat that step, only do it 
on the entire house. Paint 
with a dirtier color and set 
your layer to Multiply. 
Make sure you make joints 
and edges look filthy too, 
because that's where dirt 
appears most. This is one 
of the longest steps, but 
take your time and don't 
mindlessly add dirt 
everywhere ! 
Here, the porch, zoomed in. 
The last step is to create a 
Levels adjustment layer to 
get the final contrast of 
the matte painting. 
56
Matte Painting in Photoshop 
Part 2: Snow 
This is my second matte painting tutorial. Here I wanted to change the season of a scene from summer to winter. 
57 
First of all, find a good res 
picture. I chose to use a picture 
of a house I found on the web. 
You can find very nice pics for 
free, just look around ! 
Alright, first let's modify the 
colors. Using Image > Adjust > 
Hue / Saturation, try to get softer 
colors with less contrasts and 
saturation. Make it look cold !
Create a new layer 
Now we can begin painting the 
snow. Use a rough brush to 
create irregular shapes. In the 
tools window, set the foreground 
color to pure white, and the 
background color to a blue-tinted 
58 
white which will be used 
to add shadows on the snow. All 
steps involve working 
alternatively with these two 
colors. 
Begin by adding snow on the 
edges of the house where the 
snow would naturally fall onto. 
With the blueish white, paint the 
inferior part of the snow (the 
shadows). This will add depth and 
will simulate the way snow 
reacts to light. 
Create a new layer 
With the same brush and same 
white, paint the windows to give 
them a frosted look. Set this 
layer's transfer mode to Overlay 
to make it match.
59 
Create a new layer 
Same principle, on the roof this 
time. 
Make sure you stay true to the 
original lighting. Parts where the 
sun directly hits the roof should 
be a lot brighter than the darker 
spots, which will blueish. This is 
important especially on the cone 
shaped parts.When everything 
will be painted, you can then use 
the Blur tool and make a smooth 
transition between pure white 
and blueish white. After that, use 
the Burn and Dodge tools to 
increase or decrease contrasts. If 
you use Burn on the blue-tinted 
whites, it will give you an ice 
look, which can be interesting. 
Create a new layer 
Now we are going to paint the 
ground. I used an irregular brush 
so that the grass wasn't entirely 
covered. Then using the blueish 
color I added nuances to simulate 
an undulating look. I also left a 
clean way that goes to the door. 
Same principle to add snow 
applies to the trees and bushes in 
the garden. 
Now let's do something to avoid 
boredom from only adding snow! 
Using the Dodge tool, on the 
house layer, brighten spots here 
and there to add frosted parts, as 
well as to lighten up the dark 
parts of the house (like the inside 
of the porch). Do not forget that 
snow is a reflective surface, it 
will bounce light off pretty much 
everywhere. 
Using the same method, brighten 
up the rest of the scene like the 
trees and sky. 
Subtle, but necessary since it 
adds the important detail that 
sells the overall effect and makes the image look natural.
Create a new layer 
Now on to the extremely boring 
step : powder snow over the 
trees. Powder is subtle, so don't 
overdo it! Still using the same 
method, add snow accumulations 
on branches, the most difficult 
part being to actually see where 
those branches are. It depends on 
the quality of your picture. If you 
have chosen a picture without 
trees you are a cheater !! 
For the big branches in the 
foreground, we can see leaves. I 
chose to add snow on groups of 
leaves, which can be time 
consuming, but you should not 
choose the shortest way over 
quality work. 
Create a new adjustment layer: 
Brightness/Contrast 
This step is optional, but I 
created a layer and have applied 
a linear gradient from top to 
bottom to increase the contrast 
at the bottom of the pic. 
60
Matte Painting in Photoshop 
Part 3: Castle 
Here is the making of my third matte painting, this time it is the Oratoire Saint-Joseph (in Montreal) under the rain! 
I use a Wacom Intuos² A4 board. For each step of the matte painting, useless to remind you to create a new layer 
so that the work will be easier and mistakes avoided! 
First of all choose a photograph of 
good resolution. I found the 
photograph of "l'Oratoire St- 
Joseph" (in Montréal). 
61 
Here is a perfect sky, found on the 
Net, which will go very well for 
what I want to make. 
First of all, start by isolating the 
castle by putting it in a layer and by 
erasing the original sky. Here I used 
the tool polygonal lasso for the 
building, and a soft gum for the 
foliages.
Now one will erase all that should 
not be there a few centuries ago, i.e. 
the cars, the tourists, the standard 
lamps and the barriers. For that, use 
the tool Clone Stamp. It is not very 
complicated, nor very long with this 
example. 
I want that this scene occurs in 
stormy weather, therefore it is 
necessary to erase the shadows 
created by the sun. 
Always with the Clone Stamp erase 
the shadows on the ground of the 
shrubs and the trees. With the 
Dodge tool erase a little the 
contrasts of the elements by 
clearing up the zones of shadows in 
order to create an ambient light. 
Now one can add the Cloud layer 
behind that of the castle. 
62
63 
One will accentuate the contrast of 
the sky while insisting on the clear 
zones as if a storm lit the clouds by 
the top. For that duplicate the 
Cloud layerand pass the copy in 
mode Color Dodge. 
Now it is necessary to harmonize 
the colors of the two elements: sky 
and castle. Modify the color of the 
castle with menu Image > 
Adjustment > Color Balance, and 
make your best so that the tone of 
colors correspond. 
Then select the Castle layer, and in 
menu Layer > New Adjustment 
Layer choose Color Balance. Thanks 
to this adjustment layer which is 
created on top of the others, one 
will be able to change the general 
color. Give a distressing atmosphere 
to the scene.
Profit finally to obscure the areas 
on left of the building with the 
Burn tool, because they are not 
exposed to the light of the clouds 
of right-hand side... hum does it 
make any sens LOL? It is a rather 
subtle effect, but that brings a 
small significant detail. 
Here is a zoom to understand better. 
Now one will add a little grain to the Castle layer by adding noise. 
64 
Before After
65 
One now will add a small detail, 
that can be anything, I chose an old 
carriage found on google. Place this 
layer below the adjustment layer, 
thus its color will be automatically 
adjusted with that of the scene. If 
there are still differences correct 
that by going in Color Balance. 
Still a thing with the carriage, it is 
necessary to give it a shadow. So 
select the Castle layer and with the 
Burn tool slightly obscure the 
ground below the carriage. Subtle 
effect but important one. 
Here is the result ! Not that bad, 
but now I want to add rain. 
Obviously for a matte painting 
made for a movie the rain would be 
created in compositing and 
animated. But here it is simply to 
make a still image, so we don't care 
if the rain remains frozen !
Let's work on the rain. Create a new 
layer and fill it with black with the 
Paint Bucket tool. In menu Filter > 
Noise apply Add Noise, choose 
Gaussian and Monochromatic, 10 
or 15 should suffy for Amount. Go 
in Image > Adjustments > Levels 
and tweak it to erase some noise 
and to make it more visible. Finally 
in Filter > Blur apply a Blur Motion, 
which simulates a basic rain. 
Change the Rain layer mode to 
Screen mode in order to blend it in 
the scene. Play with the opacity of 
the layer to adjust it with your 
scene. 
Repeat the creation of a second 
Rain layer but with a little more 
noise to get a denser rain. Lower 
the opacity of this second Rain 
layer to simulate the rain in the 
background. 
66
67 
Now one will create large water 
drops on the image as if the scene 
was seen from behind a window. 
Create a new Drops layer filled with 
black, add noise. 
In menu Filter > Pixelate choose 
Crystallize in order to obtain large 
crystals of noise instead of the 
small points. 
Adjust the number of crystals in 
menu Levels.
Then apply the Filter effect > 
Stylize > Glowing Edges, which will 
create circles around each crystal. It 
looks more like water drops now. 
Here the result which I obtained 
with this method. 
Now change the layer mode to 
Color Dodge, which will make the 
drops less visible in dark areas of 
the scene. 
We leave for the moment the drops 
like that, we'll return there at the 
end. 
68
69 
Here we'll create reflexions on the 
wet ground. Start by duplicating 
the Castle layer and Clouds layer 
and merge them together. Now in 
Edit > Transform choose Vertical 
Flip to reverse the Reflexions layer. 
Move it so that the bottom of the 
stairs is the line of symmetry. 
Finally you can cut out this layer so 
that it is only visible on the 
principal alley of the castle. 
Change this layer mode to Darken 
and opacity to 30%. 
Here is the very light reflexion but 
which brings a small key of realism.
Finally I added the filter Filter> 
Distort > Glass in order to scramble 
the reflexion a little. It is not really 
essential, but if one wants to look 
more closely at the image we'll see 
that water disturbs the reflexion. 
Now do the same with the carriage ! 
We return to our water drops! For 
this final effect it is necessary to 
flatten all the layers of the scene, 
so make a copy of your file and 
choose Layer > Flatten Image. The 
image is now made of one single 
layer, we will be able to apply 
effects to the whole image now. In 
menu Filter choose Liquify. Click on 
the Bloat tool in the toolbar on the 
left of the Liquify window. Setup 
your brush radius and its density 
and paint on each drop in order to 
simulate an effect of diffraction. It 
is not very easy at the beginning so 
do not hesitate to start again as 
many time as you want. 
70
71 
Once that you made all the drops 
you can also create water trails 
behind the drops which run along 
the window. I used a mix of several 
tools of the Liquify module like 
Forward Warp or Turbulence. Leave 
Liquify. Finally we will accentuate 
the light and dark areas of the 
drops by painting with the tools 
Dodge and Burn. This water drops 
effect is oviously not essential, but 
in fact I especially wanted to test it. 
So here’s the final result:
Modern Ruins 
By Tocath 
How to turn a modern day city into decaying ruins. 
Part 1 : Overview 
This tutorial will show you the steps and tricks I used in turning Hong Kong harbor into a wasted reflection of itself. 
Basically, we're going to turn this: Into this: 
Let's begin! 
72
73 
Part 2: Planning 
Any photoshopped image must start with a great source. Ruins are no exception. For my H2H with Norrit, we were 
limited to Non-American, Non-European cities. I chose Hong Kong. Ideally, you want a city with a recognizable 
landmark or building. This can get tricky, as your contest may have 18 New York entries and 20 from Paris. So, be 
aware that whatever city you choose may be duplicated. Impirnt your own style on whatever city you choose. 
After selecting a city, find a picture that displays a good view of the features you want to destroy. I would suggest 
using only images greater than 1024x768 in size. Using a tiny source image for this contest will make things very 
difficult when it comes time to put in detail. 
Here is our source image, a small crop for tutorial purposes: 
Let's talk for a moment about the source pictures for our 
destruction. I can almost guarantee you that typing "ruins" into 
Google will get you nothing better than the Parthenon or the 
Pyramids. While these are certainly ruins, they don't offer much 
help to those of us who have to ruin modern buildings. Modern 
materials require modern ruins. So, here is a quick list of words 
that will bring us modern destruction: 
• bombed 
• bombed out 
• destroyed 
• gutted 
• rubble 
It also helps to know your geopolitics. These words brought me 
the most useful images: 
• Belgrade 
• Grozny 
• Kosovo 
• Lebanon 
• Sarejevo 
• WTC 
I used 24 different images of rubble and destruction in my Hong Kong image. You don't need nearly that many, but 
you'll be happier with a greater variety to work from.
We're almost ready to start butchering our buildings. First 
though, I find it helpful to have some organization. My final 
Photoshop file was over 50 layers deep, and I would have been 
lost had I not given the buildings names, like this: 
You can see that I only know the real name for one building. It 
doesn't matter, just as long as you can remember it. 
Part 3: Preparation 
Let's start destroying! 
The first thing is to identify areas where you will be taking large 
chunks out of the building: 
74 
Create a new layer. Set the Clone tool to "Use all Layers" and 
clone the sky and ground to create what we would see if a piece 
of the building wasn't there. Notice that the sky behind the 
Bank of China building isn't perfect. For this building, I was 
aware that I would be putting some rubble over that, so I didn't 
spend a ton of time getting it just right. You only need a nice 
backdrop to work from.
75 
Part 4: Bash 
Creating the destruction and rubble is perhaps the most time consuming bit of work. 
The first thing I'll show you is creating false structure. This is not always necessary, but it can add a sense of 
realism. Let's create some struts for the Bank of China building. I came across a picture on the net of this building 
under construction, so I have a good idea of what the insides looked like. 
Grab a rubble pick to make our 
struts. This'll do: 
Then, cloning from the rubble, create strips. These are the floors 
of the building. Copy these until you have a good amount, then 
rotate and place over the Bank like so: 
Pay close attention to the angles when creating false structure. 
You want it to match as closely as possible to the angle of the 
building. 
Next, eliminate a portion of the struts. This is where you get to 
be creative. Try to think as you are doing it what consequences 
your actions have. If you erase a floor here, the mass from the 
floor must have fallen somewhere, right? Maybe it took out a 
floor below. Maybe it just landed on the floor below, depositing 
rubble. Be creative, but don't be completely random. It's an 
interesting balancing act between chaos and structure.
Part 5: Bash continued 
Now that you've created any false structure necessary, lets get to the real chaos. 
Open your rubble images, say, 
these three: 
Now this next part will be much 
easier if you have a tablet. A 
tablet's best feature is the ability 
to sense pressure. If you have a 
tablet, set your clone brush to 
"Shape Dynamics" with the Size 
jitter controled by the pen 
pressure. This will let you make 
very thin, light strokes. If you 
don't have a tablet, that's ok. 
Simply control the size of your 
brush by tapping quickly on the 
bracket keys. [ = decrease brush 
size, ] = increase brush size. 
76
77 
Ok, create a new layer and clone some chaos from your rubble 
pile, like this: 
Use varying widths of stroke to create areas of light and 
darkness. Pay close attention to your shadows. You need to be 
aware of where the light in your scene is coming from, and 
where it will cast the shadows. In my scene, as in most, the light 
comes from above. Notice that in areas where surviving 
structure overhangs destroyed buildings, I have added shadows. 
I prefer to use cloned shadow area instead of simply painting 
black or using the burn tool. Using cloned shadow from a rubble 
pile will give you a more realistic effect. 
Continue cloning until you have something like this: 
Create new layers for each building, or set of buildings. This will 
help you control what you see, and will avoid destroying detail 
you have worked hard on. 
Try to pick a different source rubble pic for each building. Even 
before you start cloning, it can be helpful to adjust the hue and 
saturation on the rubble pic to more closely match the building 
you're destroying. 
Note also that I took some liberties with the actual look of the 
brick building as well as the short and busted. If you need to 
make adjustments to allow for more destruction, do so. This is 
your image. Who knows what kind of upgrades the buildings 
have had!
Part 6: Trash 
Now that we have destroyed some facades and collapsed floors, lets add an element of age. The first thing to 
remember is that destruction is dirty. Clouds of dust in the air, acid rain and soot can make a place look absolutely 
filthy. Let's throw some on! 
I like to apply dirt and grime on a new layer, set to 'multiply' or 
'darken' blend mode. Eyedrop a shadow color from your building. 
It's best to use this method instead of straight black, since the 
eyedrop will pick up on any hue present. Create a new layer and 
paint thin strips of color on and around ledges. Next, use the 
smudge tool to grab that color and smear it down, simulating 
the effect of rain carrying particles downward. You should come 
up with something like this: 
After you've done that, I like to apply some nice color to get a 
rust and soot effect. For my Hong Kong pic, I used a sheet of 
paper with coffee and tea stains. A texture like this will have 
lots of great detail that will further grime up the image. Select a 
few buildings and paste it over like this: 
78
79 
Selectively erase in areas and get rid of anything that is jarring. 
Then, set the new texture layer to 'color burn', and drag the 
opacity down just a bit until it looks good, like so: 
Part 7: Trash continued 
Next, we want to simulate some oxidization and salt deposits 
from rain and sea. Grab a new texture pic. For mine, I used an 
image of white paint cracking on a wooden fence. Again, create 
a new layer and paste in the texture, like so:
Erase any detail you don't want and set the layer's blend mode 
to 'soft light'. Decrease the opacity until you're happy with it. 
This should leave your building looking like this: 
Next, we're going to work on the water. First off, realize that 
any boats in the water may be sunk, or sitting lower. Raise the 
water level so that the boat appears to be taking on water. 
Additionally, remove any white water that exists. Your boat is 
not moving, and should not be creating a wake. Next, select a 
brownish color and paint some detail onto the water itself. Set 
the layer to darken mode to achieve this: 
80
81 
Next, you're going to want to add some rust and age to the boat. 
Grab a new texture map. I used the paper with the coffee stains. 
Paste that over the boat and erase any unwanted detail. Set the 
layer at 'color burn' and decrease the opacity to arrive at this: 
Part 8: Finishing up 
You're almost done. We've got a good image, but we want to 
bring it all together with some post-effects. 
Use ctrl+shift+c to copy the entire image merged, or go to 'Edit 
>> Copy Merged'. Paste this at the top of your layers list. 
The first thing we want to adjust is saturation. Crank down the 
saturation about 25% to simulate a somewhat overcast day:
Next, we want to make the image a bit more contrasty. I prefer 
to use 'Image >> Adjustments >> Selective color'. Using 
'Brightness and Contrast' can affect saturation, and we don't 
want that. Selectively darken the blacks first, adding 5%. Next, 
edit the Neutrals, taking out 10% black. Additionally, for my 
image, I corrected a slight blue cast by taking out 3% cyan and 
adding 3% yellow. You should arrive at something like this: 
Finally, to give the entire image a sense of cohesiveness, and 
further add to the grimy feel, use 'Filters >> Sharpen' and 
'Filters >> Noise' to sharpen the image and add a little noise. 
Don't go overboard, use sparingly to add some dirt. Do a final 
once over, selectively desaturating anything that pops too much. 
You've now got a finished product: 
82
83 
Matte Painting: Mystic Night Scene 
We will be creating an mystic night scene with rainy atmosphere. Few preprations are required before you start. 
First basic step is a concept and where will be the matte paint used? Always start with rough thumbnails. Bring 
down your thoughts on paper. Scan it if needed.Try to colour them roughly with simple patches of colours 
considering the atmosphere you want. Once you are happy with the result its time to finalize! 
Before we start our final work we need to collect refrences and high resolution images. Refrences and image library 
is very important. Dont just look for sources on the net but also from books, photographs or click some good snaps 
yourself. 
This the final matte. Before I start I normally divide my page, if the matte has to be fully generated on the 
computer. Normally horizon line should be off center so that it dose not divide the picture into 2 parts. 
Step 1 
I start colouring the water first with an airbrush with an textured brush so that it gives me no sharp edges. 
everything should be smooth. Opacity of the brush is 50%. This gives me overall idea of the placements. 
Step 2 
Now in a new layer above the water layer I start adding details. some mountains foreground mountains dark and 
background ones light. some debris floating on thewater or some small plants.
Step 3 
Now here I start adding details on the right side of the scene. I have merged hand painted mountains with some 
photographs. 
Step 4 
I continue adding details with some more photographs of rock and painting over for the desired effect. Finally we 
get the basic layer of the matte. now we need some depth and more details! It's time for some rainy clouds. 
Step 5 
Ok, now you must be wondering how did I get this? yes, its again merging of photographsand and hand painted 
clouds equally. Eraser, air brush and rubberstamp are the main tools I used here. 
Step 6 
Ok, now I place the cloud layer over sea layer. Slightly overlapped at the edge ofhorizon so we get smooth 
blending! :) I know you still see the unfinished edgesbut dont worry we will fix it ahead. 
84
85 
Step 7 
To create some more interest, I added an tower like mountain. and painted itdark blue. Also, some extension of the 
picture is done with help of some snapsand I hand painted over the rocks a bit. 
Step 8 
The final desired effect I need was something blue and mono colour feel with different tonal value. so firstly I 
converted the step 7 picture to black and whitegradient map and then I played around with colour balance and 
variation tool.Finally we are done to composite this shot. 
Tips:A. Keep all the pictures or references or ur painted layers in different sets in the layer tool-box. name the sets 
clouds, ground, mountains etc. so its easy tonavigate when it comes to the point of some changes in the picture. B. 
If you plan to animate it in after effects, with some subtle cloud movements, thenbe carefully you dont merge the 
layers into one.
The Haunted House 
Daniele Montella, 7 December 2004 
The Haunted House was developed during Halloween, when I wanted to express the idea of an eerie-looking house. 
Matte painting has always fascinated me, and with the help of digital tools today, it is possible to enrich 
environments more easily than ever before. 
Study of the Image 
The general process employed for this image is to use photographic elements, combine them and enhance them in 
original ways. My intention was to express anxiety, isolation and the frustration felt during a horror movie. There’s 
a cliché in these movies where a group of friends stand in front of a haunted mansion in awe. The main details of 
the haunted house required: dry and twisted trees, a cloudy dark sky that created the most horrible feeling of 
isolation and different types of gravestones. I used these photographic elements with the intention to modify and 
enhance them later on. 
86
Composition 
To compose my collage of images, I use the ‘Rule of Thirds’ which is a photographic composition dividing the space 
into 9 identical pieces on a grid (thirds). I insert the house on the right third and a twisted tree on the left third. In 
terms of depth, the image is divided into four planes of depth. The closest is on the twisted tree to the left, then the 
gravestones, the tree on the right, and the house almost in the background. This way, your eye is moved around the 
image in an anti-clockwise direction for a dizzying effect. 
Tone and Colour 
The house is neglected by humans and infested by ghosts. To portray this, I opted for a green-yellow tone, which is 
associated with illness. It is the colour of decomposing human skin, urine, mucus and many other repulsive things. 
Using the Brightness/Contrast settings in Corel PhotoPaint, and tweaking the tone curve, I was able to totally 
change the original photograph (which was in broad daylight) to a washed-out house that looked like it was 
photographed on an overcast, rainy day. I recovered a bit of colour by using the Hue/Saturation settings to make 
the house a slight green-yellow colour. 
87
Painting 
Once the total view of the composition was in place, I begin painting the missing details and adjusting the existing 
ones. This is the most complex and time-consuming part of the project. Starting with the house, I repainted entire 
portions of it such as replacing the stairs, removing the lush green foliage and replacing it with dead or dying 
shrubs. 
88
Then I began to “ruin” the house and give it a sense of weathering over time by staining it. First with a light black 
brush using the Colour Burn filter and then digging holes in the walls and roof where I painted rotten and 
destroyed wooden boards. I also extended parts of the veranda and roof by hand-painting them in. 
I managed to find images of dirty trees that I cloned to create the background forest behind the house. This, 
however, didn’t work that well to begin with because it looked totally flat. With a grey colour and a thin brush, I 
painted branches and trunks in with differing tones of grey to give a sense of depth to the forest. I also did the 
same with the plants, bushes and shrubs surrounding the house. 
89
Returning to the two main trees in the foreground, I used the Clone tool to paint in more branches using the 
texture from the original image. 
For the gravestones, I employed similar techniques used on the house to give them a weathered look, and also 
painted in two new ones. For additional effect, I painted the shadows of the tree branches on the ground and 
gravestones. 
90
Effects 
This is where I begin enhancing the basic image. Using the Effect Tool/Custom Sharpen feature in Photo Paint, I 
begin to sharpen portions that I have just painted in, such as the broken wooden boards, the branches, bushes and 
twigs. 
To make the image more interesting, I made one of the windows in the house light up by hand painting the effect 
with a light yellow. To create the glow of the light, I used a soft circle brush to paint the area on a new layer, with 
a much lighter yellow (almost white) with no transparency, but the layer mode set to “Add”. 
91
The sky is the result of many tests using green to grey colours and a big brush. Details such as the clouds were 
painted in using a thinner brush and setting some brushes to Colour Dodge and Colour Burn modes. 
Final Image 
The final image is a pseudo-photo-real haunted mansion, employing clever digital techniques and photographic 
elements! 
92

Weitere ähnliche Inhalte

Ähnlich wie Photoshop.digital.matte.painting. .techniques

Comp illustration brushsettings_speedpainting
Comp illustration brushsettings_speedpaintingComp illustration brushsettings_speedpainting
Comp illustration brushsettings_speedpaintingnombre thera
 
Photoshop Tutorial
Photoshop TutorialPhotoshop Tutorial
Photoshop TutorialChristieAnn
 
How to learn photoshop
How to learn photoshopHow to learn photoshop
How to learn photoshopjazza patrick
 
Double page spread drafts
Double page spread draftsDouble page spread drafts
Double page spread draftszoetoase
 
Photoshop: Tips and tricks for working with images that are too small
Photoshop: Tips and tricks for working with images that are too smallPhotoshop: Tips and tricks for working with images that are too small
Photoshop: Tips and tricks for working with images that are too smallWeb Ascender
 
Development pro forma
Development pro formaDevelopment pro forma
Development pro formaSeb Webster
 
3 d color at photoshop
3 d color at photoshop3 d color at photoshop
3 d color at photoshopnova arianty
 
Developmentproforma(wasbroken)
Developmentproforma(wasbroken)Developmentproforma(wasbroken)
Developmentproforma(wasbroken)Seb Webster
 
Developmentproforma new
Developmentproforma newDevelopmentproforma new
Developmentproforma newSeb Webster
 
How to Scan Large Artwork
How to Scan Large ArtworkHow to Scan Large Artwork
How to Scan Large ArtworkDavid Denton
 
3 d polaroid effect
3 d polaroid effect3 d polaroid effect
3 d polaroid effectsyncmaster92
 
3 d polaroid effect
3 d polaroid effect3 d polaroid effect
3 d polaroid effectNader Belal
 
Photoshop tips online class version 2015
Photoshop tips online class version 2015Photoshop tips online class version 2015
Photoshop tips online class version 2015arteachertech
 
Development pro forma
Development pro formaDevelopment pro forma
Development pro formaSeb Webster
 
Idiots guide-to-photoshop
Idiots guide-to-photoshopIdiots guide-to-photoshop
Idiots guide-to-photoshopMarcela Conroy
 
Digital work station intro
Digital work station introDigital work station intro
Digital work station introWhitney Brooks
 
Create a Photo Collage in Photoshop.pdf
Create a Photo Collage in Photoshop.pdfCreate a Photo Collage in Photoshop.pdf
Create a Photo Collage in Photoshop.pdfPinkverge
 

Ähnlich wie Photoshop.digital.matte.painting. .techniques (20)

photoshop tutorial
photoshop tutorialphotoshop tutorial
photoshop tutorial
 
Comp illustration brushsettings_speedpainting
Comp illustration brushsettings_speedpaintingComp illustration brushsettings_speedpainting
Comp illustration brushsettings_speedpainting
 
Ilustración Digital
Ilustración DigitalIlustración Digital
Ilustración Digital
 
Photoshop Tutorial
Photoshop TutorialPhotoshop Tutorial
Photoshop Tutorial
 
How to learn photoshop
How to learn photoshopHow to learn photoshop
How to learn photoshop
 
Double page spread drafts
Double page spread draftsDouble page spread drafts
Double page spread drafts
 
Photoshop: Tips and tricks for working with images that are too small
Photoshop: Tips and tricks for working with images that are too smallPhotoshop: Tips and tricks for working with images that are too small
Photoshop: Tips and tricks for working with images that are too small
 
Development pro forma
Development pro formaDevelopment pro forma
Development pro forma
 
3 d color at photoshop
3 d color at photoshop3 d color at photoshop
3 d color at photoshop
 
Developmentproforma(wasbroken)
Developmentproforma(wasbroken)Developmentproforma(wasbroken)
Developmentproforma(wasbroken)
 
Developmentproforma new
Developmentproforma newDevelopmentproforma new
Developmentproforma new
 
How to Scan Large Artwork
How to Scan Large ArtworkHow to Scan Large Artwork
How to Scan Large Artwork
 
3 d polaroid effect
3 d polaroid effect3 d polaroid effect
3 d polaroid effect
 
3 d polaroid effect
3 d polaroid effect3 d polaroid effect
3 d polaroid effect
 
Photoshop tips online class version 2015
Photoshop tips online class version 2015Photoshop tips online class version 2015
Photoshop tips online class version 2015
 
Development pro forma
Development pro formaDevelopment pro forma
Development pro forma
 
3 d effects in ps
3 d effects in ps3 d effects in ps
3 d effects in ps
 
Idiots guide-to-photoshop
Idiots guide-to-photoshopIdiots guide-to-photoshop
Idiots guide-to-photoshop
 
Digital work station intro
Digital work station introDigital work station intro
Digital work station intro
 
Create a Photo Collage in Photoshop.pdf
Create a Photo Collage in Photoshop.pdfCreate a Photo Collage in Photoshop.pdf
Create a Photo Collage in Photoshop.pdf
 

Kürzlich hochgeladen

Rückenfigur ... back figure in paintings.ppsx
Rückenfigur ... back figure in paintings.ppsxRückenfigur ... back figure in paintings.ppsx
Rückenfigur ... back figure in paintings.ppsxguimera
 
UNIT 5-6 anh văn chuyên nganhhhhhhh.docx
UNIT 5-6 anh văn chuyên nganhhhhhhh.docxUNIT 5-6 anh văn chuyên nganhhhhhhh.docx
UNIT 5-6 anh văn chuyên nganhhhhhhh.docxssuser519b4b
 
Americana Motel, Motel/Residence, Tucumcari, NM
Americana Motel, Motel/Residence, Tucumcari, NMAmericana Motel, Motel/Residence, Tucumcari, NM
Americana Motel, Motel/Residence, Tucumcari, NMroute66connected
 
Escort Service in Al Barsha +971509530047 UAE
Escort Service in Al Barsha +971509530047 UAEEscort Service in Al Barsha +971509530047 UAE
Escort Service in Al Barsha +971509530047 UAEvecevep119
 
Kristy Soto's Industrial design Portfolio
Kristy Soto's Industrial design PortfolioKristy Soto's Industrial design Portfolio
Kristy Soto's Industrial design PortfolioKristySoto
 
ReverseEngineerBoards_StarWarsEpisodeIII
ReverseEngineerBoards_StarWarsEpisodeIIIReverseEngineerBoards_StarWarsEpisodeIII
ReverseEngineerBoards_StarWarsEpisodeIIIartbysarahrodriguezg
 
Indian Escorts In Al Mankhool 0509430017 Escort Agency in Al Mankhool
Indian Escorts In Al Mankhool 0509430017 Escort Agency in Al MankhoolIndian Escorts In Al Mankhool 0509430017 Escort Agency in Al Mankhool
Indian Escorts In Al Mankhool 0509430017 Escort Agency in Al Mankhoolqueenbanni425
 
The Masque of the Red Death Storyboard 2023
The Masque of the Red Death Storyboard 2023The Masque of the Red Death Storyboard 2023
The Masque of the Red Death Storyboard 2023magalybtapia
 
STAR Scholars Program Brand Guide Presentation
STAR Scholars Program Brand Guide PresentationSTAR Scholars Program Brand Guide Presentation
STAR Scholars Program Brand Guide Presentationmakaiodm
 
Escort Service in Abu Dhabi +971509530047 UAE
Escort Service in Abu Dhabi +971509530047 UAEEscort Service in Abu Dhabi +971509530047 UAE
Escort Service in Abu Dhabi +971509530047 UAEvecevep119
 
Al Barsha Housewife Call Girls +971509530047 Al Barsha Call Girls
Al Barsha Housewife Call Girls +971509530047 Al Barsha Call GirlsAl Barsha Housewife Call Girls +971509530047 Al Barsha Call Girls
Al Barsha Housewife Call Girls +971509530047 Al Barsha Call Girlshayawit234
 
Element of art, Transcreation and usions and overlapping and interrelated ele...
Element of art, Transcreation and usions and overlapping and interrelated ele...Element of art, Transcreation and usions and overlapping and interrelated ele...
Element of art, Transcreation and usions and overlapping and interrelated ele...jheramypagoyoiman801
 
Dxb Call Girl +971509430017 Indian Call Girl in Dxb By Dubai Call Girl
Dxb Call Girl +971509430017 Indian Call Girl in Dxb By Dubai Call GirlDxb Call Girl +971509430017 Indian Call Girl in Dxb By Dubai Call Girl
Dxb Call Girl +971509430017 Indian Call Girl in Dxb By Dubai Call GirlYinisingh
 
Bai tap thuc hanh Anh 6 Mai Lan Huong.docx
Bai tap thuc hanh Anh 6 Mai Lan Huong.docxBai tap thuc hanh Anh 6 Mai Lan Huong.docx
Bai tap thuc hanh Anh 6 Mai Lan Huong.docxbichthuyt81
 
Zoo_championship_Wrestling (action/comedy sample)
Zoo_championship_Wrestling (action/comedy sample)Zoo_championship_Wrestling (action/comedy sample)
Zoo_championship_Wrestling (action/comedy sample)DavonBrooks
 
Roadrunner Motel, Motel/Residence. Tucumcari, NM
Roadrunner Motel, Motel/Residence. Tucumcari, NMRoadrunner Motel, Motel/Residence. Tucumcari, NM
Roadrunner Motel, Motel/Residence. Tucumcari, NMroute66connected
 
layered-cardboard-sculptures-miika-nyyssonen.pdf
layered-cardboard-sculptures-miika-nyyssonen.pdflayered-cardboard-sculptures-miika-nyyssonen.pdf
layered-cardboard-sculptures-miika-nyyssonen.pdfbaroquemodernist
 
My Morning Routine - Storyboard Sequence
My Morning Routine - Storyboard SequenceMy Morning Routine - Storyboard Sequence
My Morning Routine - Storyboard Sequenceartbysarahrodriguezg
 
Costume Breakdown for Olivia Cox 23.pdf
Costume Breakdown for Olivia Cox  23.pdfCostume Breakdown for Olivia Cox  23.pdf
Costume Breakdown for Olivia Cox 23.pdfLauraFagan6
 

Kürzlich hochgeladen (20)

Rückenfigur ... back figure in paintings.ppsx
Rückenfigur ... back figure in paintings.ppsxRückenfigur ... back figure in paintings.ppsx
Rückenfigur ... back figure in paintings.ppsx
 
UNIT 5-6 anh văn chuyên nganhhhhhhh.docx
UNIT 5-6 anh văn chuyên nganhhhhhhh.docxUNIT 5-6 anh văn chuyên nganhhhhhhh.docx
UNIT 5-6 anh văn chuyên nganhhhhhhh.docx
 
Americana Motel, Motel/Residence, Tucumcari, NM
Americana Motel, Motel/Residence, Tucumcari, NMAmericana Motel, Motel/Residence, Tucumcari, NM
Americana Motel, Motel/Residence, Tucumcari, NM
 
Escort Service in Al Barsha +971509530047 UAE
Escort Service in Al Barsha +971509530047 UAEEscort Service in Al Barsha +971509530047 UAE
Escort Service in Al Barsha +971509530047 UAE
 
Kristy Soto's Industrial design Portfolio
Kristy Soto's Industrial design PortfolioKristy Soto's Industrial design Portfolio
Kristy Soto's Industrial design Portfolio
 
ReverseEngineerBoards_StarWarsEpisodeIII
ReverseEngineerBoards_StarWarsEpisodeIIIReverseEngineerBoards_StarWarsEpisodeIII
ReverseEngineerBoards_StarWarsEpisodeIII
 
Indian Escorts In Al Mankhool 0509430017 Escort Agency in Al Mankhool
Indian Escorts In Al Mankhool 0509430017 Escort Agency in Al MankhoolIndian Escorts In Al Mankhool 0509430017 Escort Agency in Al Mankhool
Indian Escorts In Al Mankhool 0509430017 Escort Agency in Al Mankhool
 
The Masque of the Red Death Storyboard 2023
The Masque of the Red Death Storyboard 2023The Masque of the Red Death Storyboard 2023
The Masque of the Red Death Storyboard 2023
 
STAR Scholars Program Brand Guide Presentation
STAR Scholars Program Brand Guide PresentationSTAR Scholars Program Brand Guide Presentation
STAR Scholars Program Brand Guide Presentation
 
Escort Service in Abu Dhabi +971509530047 UAE
Escort Service in Abu Dhabi +971509530047 UAEEscort Service in Abu Dhabi +971509530047 UAE
Escort Service in Abu Dhabi +971509530047 UAE
 
Al Barsha Housewife Call Girls +971509530047 Al Barsha Call Girls
Al Barsha Housewife Call Girls +971509530047 Al Barsha Call GirlsAl Barsha Housewife Call Girls +971509530047 Al Barsha Call Girls
Al Barsha Housewife Call Girls +971509530047 Al Barsha Call Girls
 
Element of art, Transcreation and usions and overlapping and interrelated ele...
Element of art, Transcreation and usions and overlapping and interrelated ele...Element of art, Transcreation and usions and overlapping and interrelated ele...
Element of art, Transcreation and usions and overlapping and interrelated ele...
 
Dxb Call Girl +971509430017 Indian Call Girl in Dxb By Dubai Call Girl
Dxb Call Girl +971509430017 Indian Call Girl in Dxb By Dubai Call GirlDxb Call Girl +971509430017 Indian Call Girl in Dxb By Dubai Call Girl
Dxb Call Girl +971509430017 Indian Call Girl in Dxb By Dubai Call Girl
 
Bai tap thuc hanh Anh 6 Mai Lan Huong.docx
Bai tap thuc hanh Anh 6 Mai Lan Huong.docxBai tap thuc hanh Anh 6 Mai Lan Huong.docx
Bai tap thuc hanh Anh 6 Mai Lan Huong.docx
 
Zoo_championship_Wrestling (action/comedy sample)
Zoo_championship_Wrestling (action/comedy sample)Zoo_championship_Wrestling (action/comedy sample)
Zoo_championship_Wrestling (action/comedy sample)
 
Roadrunner Motel, Motel/Residence. Tucumcari, NM
Roadrunner Motel, Motel/Residence. Tucumcari, NMRoadrunner Motel, Motel/Residence. Tucumcari, NM
Roadrunner Motel, Motel/Residence. Tucumcari, NM
 
layered-cardboard-sculptures-miika-nyyssonen.pdf
layered-cardboard-sculptures-miika-nyyssonen.pdflayered-cardboard-sculptures-miika-nyyssonen.pdf
layered-cardboard-sculptures-miika-nyyssonen.pdf
 
My Morning Routine - Storyboard Sequence
My Morning Routine - Storyboard SequenceMy Morning Routine - Storyboard Sequence
My Morning Routine - Storyboard Sequence
 
Costume Breakdown for Olivia Cox 23.pdf
Costume Breakdown for Olivia Cox  23.pdfCostume Breakdown for Olivia Cox  23.pdf
Costume Breakdown for Olivia Cox 23.pdf
 
School :)
School                                 :)School                                 :)
School :)
 

Photoshop.digital.matte.painting. .techniques

  • 1.
  • 2. 1 Image by Yanick Dusseault aka Dusso
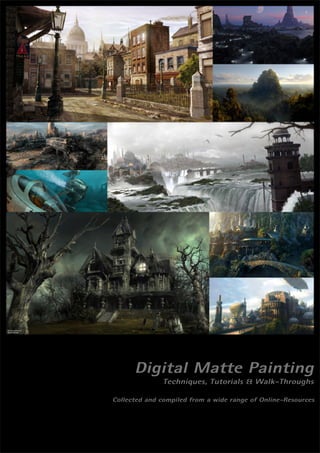
  • 3. Digital Matte Painting Techniques, Tutorials & Walk-Throughs Collected and Compiled from a wide range of Online-Resources Being in love with the art of Matte Painting, I collected these tutorials over one year from numerous online-resources and eventually compiled them into this document. Originally intended for personal use only, I thought that maybe some people out there might be interested too, so I deceided to relase them to the public. No big thing, and defenitely nothing new – I just gathered these tutorials to have them all in one place. And if any – or all – of these tutorials happen to be new to you – even better! A great thanks goes out to all the artist who put a lot of their time and energy into the creation of these tutorials. Happy painting! MBP aka Bass.T , 12/04 1
  • 4. 2 Image by Dylan Cole
  • 5. The Photoshop 7 Paint Engine Part 1 Defining a custom brush tip shape by David Nagel Slap on your smocks and bust out your easels! We're getting down and dirty with some natural media effects in Photoshop 7's Paint Engine. Yes, this week we leave the timid realm of compositing for a while and kick off a new series exploring the sloppy side of digital art. This new series was prompted, I suppose, by the overwhelming interest in the Nagel Series 1 Brushes I posted here on DMN a few weeks back. (My DMN subscribers can access the ad-free version of that story here.) Rather than answering every single "How'd you do that?" e-mail I've received on the subject, I thought I'd take the opportunity to walk you through the process and hopefully teach you some tricks with the Photoshop 7 Paint Engine along the way. We begin today with a look at creating custom tip shapes for our paint brushes. Granted, the tip shapes are just minor details in the overall functionality of the Paint Engine. But they do constitute the first step along the way of creating your own brushes that can go way beyond those included in the default Photoshop 7 brush sets. The basics The creation of a custom tip shape can be as simple as placing a few dots on the canvas or as complex as generating recursive tips that build upon the foundation of a basic brush tip shape. For our example today, we'll look at the method used to create some of the "cloth" shapes used in the Nagel Series 1 Brushes. begin with a fairly large canvas--say 300 x 300 pixels--so that you can have some maneuvering room for the tip shape creation process. Then follow these steps. 1. First, define an irregular area on the canvas using the Lasso tool. After you've created the shape, hold down the Option key and use the Lasso tool to cut into the shape to create something of the effect of creases or gaps. 3
  • 6. 2. Fill the shape with black or dark gray using the Paint Bucket tool. You can use other colors, but keep in mind that when we actually get to the step of defining our shape as a brush, Photoshop will use luminosity information as part of the shape's definition. Grays and black are the easiest to work with for this purpose. 3. Choose Select > Feather, and feather the shape by about 15 pixels. 4. Choose Select > Inverse, and then hit your Delete or Backspace key two or three times. This will soften up the outer edges of our shape, which is essential for this process. 4
  • 7. 5. Do some touch-up work. Go in with your Eraser tool to soften up the inner edges a bit. A well defined shape is not going to work well for our purposes, so try to create some subtle gradations on the creases, while leaving others intact. You might also go in with a soft-edged brush and add some black back into the shape. 6. Run a few filters on the current image. I like the Grain filter (Filter > Texture > Grain). I'll run it once with the "Vertical" setting and once with the "Horizontal" setting. Then I'll apply the Texturizer filter to the image (Filter > Texture > Texturizer) using the Canvas texture. Apply whatever other filters you think might make for a decent cloth look. 7. Now choose Edit > Define Brush. When the dialog box pops up, name it "Phase 1," owing to the fact that we're not done yet. At this stage, you now have a fully functional cloth-like brush. 5
  • 8. Getting recursive Now we want to do more with this tip shape, so we'll do a little recursion. There are several ways to accomplish this, and I'm not going to get to all of them here. I want to save some of this for future installments in this series. Now, what do I mean by "recursion?" I mean we want to use our "Phase 1" brush as the basis for building a more interesting tip shape. It's decent in and of itself, but we can certainly create variations with more detail and less of a pre-defined look. To begin, save your current document in case you want to work on it more later. Then open up a new, blank document with transparency. You might want to make this one a little bigger than the first, say 500 x 500 pixels to give yourself more arbeitsraum. The first method you can use is to paint on your canvas using the Phase 1 brush. Just draw a few overlapping strokes, trying to obliterate some of the repetitive details in the process. When you're done, once again choose Edit > Define Brush, and call it "Phase 2." You'll have a whole new tip shape based on the first tip shape. Another method--and one that I much prefer--is to play with Photoshop's dynamics before doing this. I'll give you three good methods for doing this. Open up your Brushes palette, and choose "Shape Dynamics." Set "Size Jitter" down to 0%, but crank "Angle Jitter" up to 100%. Next, go to the Scattering settings in the Brushes palette, and turn on Scattering. Leave it around 90% to 100%. You don't want to go nuts with this, or your brushes will go off the canvas, and you'll be left with hard edges. Finally, go to Opacity Jitter in the Brushes palette. If you have a Wacom tablet, turn the jitter to 0%, but set the control to "Pen Pressure." This will allow you to control the opacity of your stroke with your pen. If you don't have a tablet, turn the control off, but set the jitter to some value between 50% and 100%. 6
  • 9. 7 Now position your cursor near the center of your canvas and draw a short stroke. Notice how the texture in your tip shape is more random? This makes for a much better natural media look. You might then also go in with a white color on top of the black to bring out some of the detail that can be lost in the center of the stroke.
  • 10. When you're done, select Edit > Define Brush, and call it "Phase 3." Using this new brush, you can now produce some pretty decent natural media effects. Be sure to experiment with these techniques to create other shapes as well. 8
  • 11. 9 Part 2 Dual brush dynamics Last time around in our exploration of the Photoshop Paint Engine, we looked at methods for creating custom brush tip shapes using paint tools and filters. Now we'll begin a new section covering paint brush dynamics, a set of features that help to make the Paint Engine in Photoshop 7 far superior to anything seen in Photoshop previously for creating custom brushes for emulating "natural" media (as if chemical-based paints were any more natural than digital paint tools). Why? Certainly, you can create custom brush tip shapes in Photoshop 6. But what happens when you apply them to a canvas? No mater what shape your tip, the stokes come out solid and flat except on the leading edges. There's no texture and certainly no sense of interacting with the canvas beyond drawing the shape of the stroke. So then to create nothing more than the "look" of texture, you turn to filters and become even further removed from the process, at which point you might as well give up on painting. It's all about the process. But the dynamics in the Photoshop 7 Paint Engine allow you to move beyond this limit. We'll begin with a brush tip shape designed to look like a small wedge of charcoal. If you'd not care to design your own to follow along with this tutorial, feel free to download mine here: http://images.digitalmedianet.com/2002/10_oct/tutorials/pspainteng2021030/NagelCharcoalTip.abr. Now, if you look at the example below, you'll see that applying the brush in a single dab (the white dot in the middle) does indeed reveal some of the texture detail of the brush.
  • 12. However, when you draw a stroke with it, the texture is lost, except along the leading edges. There are several things you can do about this problem using dynamics. But there's only one thing you can do that doesn't alter the texture, color or shape of your brush tip: the Dual Brush dynamic. Dual Brush is an option that allows you to intersect a second brush tip shape with your primary brush tip shape. You can use either your current brush in the dual brush mode or any of the presets currently loaded on your system. For purposes of this tutorial, we'll simply be using the same brush tip as the primary and dual brush tips in order to preserve the appearance of the original. To activate it, simply click on the Dual Brush name in the Brushes palette, and then choose the tip you want to use as the second brush. Unfortunately, selecting a dual brush is not all that simple. The Dual Brush preview does not give you the option of viewing the brush tips with names,, so you'll have to be able to pick out the one you want from a pretty crowded selection. In my case, I know what the brush tip shape looks like and its diameter, so I'm able to locate it after a little effort. 10
  • 13. The default settings (shown above) do not give us much in the way of revealing our brush texture. So we need to make some adjustments. First, change the spacing to something like 15 percent or so. This will reveal your texture more or less, depending on the velocity of your stroke. (The example below begins with a slow stroke and then speeds up.) Next, adjust the Scatter up to 1000 percent (the maximum). Try the brush with and without the "Both Axes" option selected. Below you'll see the brush without (left) and with the "Both Axes" option. 11
  • 14. You can also reduce or enlarge the diameter of the dual brush in order to reveal the texture of the brush in patterns. Here's I've reduced the dual brush diameter to 10 pixels, creating a dotted effect. Finally, you can change the "Mode" of the dual brush to create variations. Each one changes the way in which the underlying dual brush reveals the primary brush. Below, from left to right, you'll see Multiply (default), Darken, Overlay, Color Dodge, Color Burn, Linear Burn and Hard Mix. Note that scattering affects the ways in which the blending modes change your brush's appearance, as does the particular dual brush tip involved. But the most dramatic difference can be seen when adjusting the primary brush tip's spacing, which you can access in the "Brush Tip Shape" parameter. Bellow are the same examples as above, but with the primary brush tip's spacing set to 62 percent. 12
  • 15. 13 So, to recap, we've gone from this: To this: simply by adjusting the values in a single parameter in the Photoshop 7 Paint Engine. Not a bad start.
  • 16. Part 3 Creating custom brushes with size, angle and roundness dynamics By now you know that Adobe Photoshop isn't just for image manipulation anymore. Far more than any other release of Photoshop to date, version 7.0 offers artists and designers functional tools for using the program as a painting application, for emulating "natural media" and for designing some pretty far-out brushes for creating original works of art. (Did I just use the phrase "far out?" Over the last month or so, we've explored Photoshop 7's Paint Engine in some detail, covering some specific techniques for creating our own custom brushes. These have included techniques for designing brush tip shapes and also using two brushes at the same time, known in Photoshop parlance as "Dual Brush." (You can find both of our previous articles on the Photoshop Paint Engine in our Tutorials section on the left.) The creation of custom brush tip shapes is obviously more a matter of individual talent that merely pushing a few buttons to achieve an effect. And, in a sense, so is the use of the Dual Brush dynamic, which will often involve the use of self-created brush tip shapes. But today we begin to look at uses of the more automated dynamics of the Paint Engine--size, angle and roundness--for creating your own custom brushes. The Shape dynamic is probably the most important for those of us who use pressure-sensitive tablets. It allows for the interactive resizing of a brush tip and also provides other shape parameters that can be assigned random values, numerical values or interactive values based on input from your Wacom tablet. After you've designed your new brush tip shape, open up the Brushes palette (above) and click on the Shape Dynamics button to check it. Here's you'll see three "jitter" dynamics: Size, Angle and Roundness. Each one of these also has sub-settings, which you can use to provide additional controls. In most cases, you'll want to be able to control the size of the brush tip through your tablet. However, for some brushes, you might want the jitter to be random or even remain constant. For no jitter, set the percentage to zero. And for control over the size of the brush, set the control to one of the available options, most likely Pen Pressure or, if you have a Wacom Intuos tablet, Pen Tilt or Airbrush Wheel. (You can also use Fade, if you don't have a tablet, which simply evolves a given parameter over a fixed number of steps, as with earlier versions of Photoshop.) 14
  • 17. But that's fairly obvious. What isn't as obvious is that you can also use jitter in combination with pen pressure or tilt to vary the size of the brush tip even as you're controlling it with an input device. This means that, as you use pressure (or tilt), the jitter of the size of the tip will tend toward the size of the stroke indicated by your input device. More pressure will provide a larger stroke with some jitter on the large side, while less pressure will do the inverse. (Note that if you use tilt as the controlling parameter, you can also adjust the "Scale" of the tilt to increase or decrease Photoshop's tilt sensitivity. Now, to expand on shape dynamics, you can also add controls for angle and roundness. Roundness determines the obliqueness of the brush tip and can be controlled in the same ways as size. So, in other words, you can create random roundness, pressure-controlled roundness or a combination of the two. And then, probably the most useful of all parameters for emulating natural media, we also have angle jitter. Now, the angle of your brush tip will be more or less apparent depending on the shape of the tip, of course, but you can also combine the angle dynamic with roundness for a more natural-looking stroke and a stroke with better differentiation in directionality. 15
  • 18. Fortunately, with the angle dynamic, Photoshop 7 gives you two additional control parameters: Direction and Initial Direction. As their names imply, they allow you to control the angle of the brush by the direction of the stroke, which is certainly more natural than other methods and also frees up your input device for controlling other parameters. Using Initial Direction, Photoshop attempts to determine the angle of your stroke based on your initial input. This can be hit or miss, particularly with a graphics tablet, as your initial touch on the tablet might be slightly off your desired angle. But it is useful in particular for calligraphic brushes. And the plain old Direction parameter is useful for other types of brush effects where you need Photoshop to track the direction of your stroke interactively. As you saw from the example above, the effect can look somewhat striated, but this is owing to the spacing in the particular brush stroke I'm using, as well as the size of the brush tip. Both can be modified in the Brush Tip Shape pane. 16
  • 19. Roundness settings can also affect the look of an angle-controlled stroke. Below you'll see examples with size, spacing and roundness altered. All of the dynamics above are for tightly controlling the appearing of your brush tips and overall strokes. But there are numerous occasions where tight control is undesirable and accident plays a more important role in the look you're trying to achieve. 17
  • 20. Part 4 Working with color dynamics to preserve texture and add depth It's difficult to say which aspect of Photoshop's Paint Engine is the most important. Custom brush tip shapes, textures, shape dynamics: They're all important for creating custom brushes, especially for natural media emulation. But what do all of these matter if you lose the texture and shape of your brush when you're painting? Enter Color dynamics. Let me give you an example of what I'm talking about. Let's say you go to the trouble of creating a brush tip that's designed to resemble cloth. You get it looking just right, apply some shape and dual-brush dynamics to it, and then start painting. But what happens? You go from this starting brush: To this flat painting: But using Color dynamics with your brush, you can avoid this mess and preserve all or some of your original brush tip shape. 18
  • 21. Start by opening up a brush that you've creating using any of our previous tutorials, which you can access by clicking the Tutorials button on the left. Then open up the Brushes palette, and click on the Color Dynamics option. Here you'll find a number of settings for modifying the color of your strokes, each one valuable for different purposes. Each of the "Jitter" settings allows you to modify the color of your stroke. With the Foreground/Background setting, you can set your strokes to fade between foreground and background colors, and you can also set the amount of fade to be based upon input from your drawing device (such as a pressure-sensitive tablet) through pressure, tilt or airbrush wheel. You can also set it to fade over a set number of steps. Setting the jitter to zero will cause Photoshop to blend between the foreground and background only through your specified control. Increasing the jitter will through randomness into the blending in addition to any controls you've set. Or, if you se the controls to "off," you can have a purely random jitter. In the example below, you see the foreground (red) blending with the background (blue) resulting in purple with a medium amount of pen pressure. 19
  • 22. The other jitter settings in the Color Dynamics parameters don't allow for any control whatsoever. They're totally random, with jitter based exclusively on the percentage of jitter you apply. Below you see two examples of Hue Jitter, the first set to 100 percent, the second at 15 percent. Both allow you to maintain the original texture of your brush but offer some widely varying results. (Both use red--186,2,2--as the starting color.) The Saturation Jitter, on the other hand, produces much more painterly results, fading the color from full saturation to no saturation, as in the example below with a setting of 100 percent. And finally, the Brightness Jitter setting allows you to alternate between fully saturated shades of your primary color. The examples below show the jitter at 100 percent and 15 percent, respectively. 20
  • 23. All of these jitters can be used in conjunction with one another not only to preserve the look and texture of your custom brush, but also to create a feeling of depth with very few strokes. The following example is a single short stroke over a white background using a red color. The settings are: Hue Jitter, 6; Saturation Jitter, 67; Brightness Jitter, 17. There's one last setting in the Color Dynamics palette called "Purity." This is a setting for moving away from or toward even RGB values. The default zero purity leaves your colors as they are. Increasing the value leaves the dominant color alone and decreases the secondary and tertiary values. For example, a color consisting of 255,150,150 will fall off to 255,0,0 at a purity setting of 100 percent, while a setting of -100 percent will give you a color of 255,255,255. The example below show the original, the 100 percent and the -100 percent Purity values. Purity can also affect the individual jitter settings by forcing them to conform to a certain range of values. 21
  • 24. Part 5 Delving into directionality to create 'Spirographic' brushes This is our fifth exploration into the Paint Engine in Adobe Photoshop 7. Since so many of the remaining parameters in this program are self-explanatory, I thought we'd break away for a while from simple feature explanations to a more practical look at what you can do with some of the Paint Engine's dynamics- -in this case directionality for creating geometric and "Spirographic" line effects. The goal of this particular tutorial is to work with various directionality settings in Photoshop 7 to create two sorts of effects: intertwining lines and "Spirographic" patterns, similar to what you could produce with a Hasbro Spirograph game. That is, effects that produce repeating, overlapping lines like meshes. This needn't be applied simply to lines, however. You can use this same trick on ore complex brushes for producing repeating, but shifting patterns out of any brush tip shape, including images. In the end, we'll wind up with a paint brush that can accomplish this effect interactively by simple freehand drawing or through path stroking. Creating line-effect brushes Since the goal of this tutorial is to produce brushes that create line effects, we'll begin with the creation of a single-pixel-wide brush. But, again, you can use any brush tip shape for this process. (Later in this tutorial we'll look at more "Spirographic" brushes as well.) Open Photoshop, and create a new document. Switch to the Single-Column Marquee Tool, and click somewhere in your canvas. Then choose Edit > Stroke. In the dialog that pops up, enter a one-pixel stroke width using black as the stroke color. 22
  • 25. Deselect your column (Command-D Macintosh, Control-D Windows), and you should be left with a simple vertical line. Now switch to the Paint Brush Tool and then choose Edit > Define Brush. This will use all of the visible pixels in your image to create a brush tip shape. Now open up your Brushes palette. The currently selected brush should be the one you just defined. If you try to use it at this stage, you'll get sort of a scrolling effect. But we want to take this a step farther. 23
  • 26. So click on the dynamic in the Brushes palette called "Shape Dynamics." Turn everything off, and then switch the Angle setting to "Direction." (Leave the Jitter at 0.) Now you can draw with it at this point, but the result isn't too pretty. 24
  • 27. So, in the Brushes palette, click on the Brush Tip Shape option. Here you can do two things to improve the look of your brush. First, you can set the spacing to 1,000 percent, which will give your strokes a much more delicate appearance. And you can also switch the Diameter down to about half of what you started with to produce lines that use a stroke less than one pixel wide. 25
  • 28. And, finally, if you want to cover a wide area with your line-effect brush, you can select the Scattering dynamic. Set it to "Both Axes," and adjust the amount of scatter to about 400 percent. Set the "Count" to 8 or so. Now when you draw on your canvas with a couple of curly strokes, you quickly wind up with an image full of web-like, intersecting lines. Very nice. But maybe a bit less mesh-like than what you had hoped for. This is owing to the fact that we used a single-line brush tip shape in our initial brush tip shape creation phase. But we can apply limitless variations to this. For example, instead of a simple line, we could create an X-shaped brush tip to produce this effect with a single stroke. (Of course, you'd want Scattering turned off for this.) 26
  • 29. 27 Or a double-X for this effect. Getting 'Spirographic' Get the idea? The more complex the initial brush tip shape, the more complex the geometric effects you can create quickly. But for even more of a Spirographic effect, create your brush tip shape using circles. You can do this several ways. The easiest is simply to draw a circle with the circular Marquee tool, and then stroke it, as we did with our original line brush. Then duplicate this layer to create double or triple intersecting circles.
  • 30. Now, making sure that only the layers containing your circles are visible, choose Edit > Define Brush. And, again, apply your Brush Tip Shape options to make the circles more delicate, and apply your directionality setting in the Shape Dynamics parameter. You may or may not want to adjust spacing, but that's up to you. And you will hopefully wind up with a brush that can create an effect like this. 28
  • 31. 29 Or this. Pretty fancy, eh?
  • 32. Working with geometric brushes Of course, there are multiple ways you can work these sorts of brushes into your production. I think the first set of brushes we worked on are geared well for freehand drawing. That is, you can scatter them freely to produce complex, web-like, irregular strokes. The second set, however, seems better geared toward stroking paths, which is what I've obviously done with the previous two examples. This is a fairly simple procedure. Save the brush you have created. You can do this in the Brushes palette by selecting the flyaway menu on the top right and choosing "New Brush." This will save not only your brush tip shape, but also any dynamics you've applied to it. Make sure that you then select your newly saved brush in the Brushes palette. Now create the shape you want to stroke. You can do this semi-freehand using one of the path tools, or you can load up a shape using one of the Shape tools. If you do use one of the shape tools, make sure the "Paths" option is selected up in the Tool Options palette, as shown below. 30
  • 33. Now draw your shape onto your canvas. When you're done, open up the Paths palette, and make sure your path is selected. Then choose the "Stroke Path" option from the flyaway menu. 31 When the dialog pops up, choose "Brush" as your stroke, and then hit OK. Your path will then be stroked using your custom Spirographic brush, and you can go off and impress your friends and colleagues with the geometric complexity of your work.
  • 34. Painting clouds I used Photoshop, but any paint program should work. 32 (Left, cropped from a larger image.) I start with a ramp like the one on the right; be careful not to use full saturation here. Up to your preference, if you want to make the background a little more purple. Start painting with max saturation and max value a 'peachy' color on a large default brush (sharp edge, pressure-sensitive opacity). Quickly block in the rough shapes where light would fall on your cloud. Take special care here (and any time you're painting something in nature) to not be too predictable, symmetrical or regular. Go down in brush size and do some more detailed strokes.
  • 35. 33 The shadow color is added, a purple so dull it's almost gray. Then add the darker orange/red color wherever the peach meets the shadow. Also, normally, clouds will be brighter at the top so add it at the base too. Now the highlight color, a slightly lighter peach. Use the finest brush and squiggle it on wherever there's a left-hand facing edge of the cloud. Again, don't be predictable and regular. We need to soften the right-hand side edges of all these squiggles, while trying to keep the left sides as sharp as possible. You can use a small blur brush, or a smear, or simply paint back the base color into the highlight. Go back and forth, adding more highlight squiggles, softening some parts, bringing the shadow color in with a finer brush too in some places, etc. On the right is the finished cloud.
  • 36. Here's a cloud similar to one I saw today, around noon, near the horizon, through my office window. The light is coming not from the side or above, but about 45 degrees or so. This changes where you need to put the highest values; instead of at the edge of each blob of cloud the highest value ends up pretty much centered. So a different technique will be more efficient. 34 Use a similar ramp to the above, just a bit lighter. Create a new layer and paint with a sharp edged brush a value slightly lighter and less saturated than the lightest sky color. Darken it a bit at the bottom. Turn on 'Preserve Transparency' for the layer and paint full white with the airbrush like this. Vary the brush size quite a lot. The goal is to get this kind of 'cauliflower' look. Then add another layer and paint with a fully opaque sharp edged brush the original cloud color, like on the right.
  • 37. 35 Same thing again, switch on 'Preserve Transparency' and paint white with the airbrush. Repeat this cycle until the whole cloud area is filled up. Remember to try to get the edges of each layer a little closer in the beginning, and more widely spaced towards the end (due to the perspective). On the right is the finished cloud, note that you can tweak it very easily by using 'Curves' on each layer. I darkened the first layers, also changed the coloring a little. Other tweaks included some added detail on the bottom layer, and airbrushing more white here and there. Of course instead of the airbrush you could try this with all sharp edged brushes, for a more painterly expressive style.
  • 38. Creating a Spiritual City Jaime Jasso Award-winning CG artist Jaime Jasso takes us through the creation of a superbly-integrated 2D environment made almost entirely from photographic elements, hand-tweaked and painstakingly retouched in Photoshop to fit the scene. My idea behind this painting was to create a place where the viewer would feel spiritual peace, but at the same time have a sense that the place is dangerous. I made this image by joining more than 70 photos together with some 100% painted elements too. All the elements were heavily edited from the original to be integrated into the composition because I needed them for a specific purpose. Admittedly, some of the perspectives in the image appear out-of-whack to our critical eyes, but the focus of this article is to demonstrate how I worked the composition up to this point, despite the corrections that could be made to make the composition more physically accurate. Concept Sketches The idea was born when a friend of mine returned from Argentina and gave me this cool postcard of Iguaçu Falls. Inspired by this I started sketching out this land of waterfalls and moody jungle. In the first sketch, I considered including a huge gothic castle connected by bridges to smaller structures. Then I designed the look and composition of the image, playing with the architecture between the waterfalls. Later, I realized that the scale of the castle was too big for the falls, because I wanted the landscape to look huge and menacing as well. So I decided to change the design of the castle for a cluster of smaller temples linked together to build a ‘spiritual city'. In my following sketches I played with mood and color. I decided to use an overcast and mysterious complexion for the composition instead of a night shot; otherwise I would lose a lot of the detail in the waterfalls, foliage and temples. 36
  • 39. 37 Composition The first step was to set my working resolution. I chose to work at about 3500 pixels wide, mainly because I was working with images from the Internet. Reference Gathering Atmospheric Effects I looked for real photos to use as reference to see how a gloomy and hazy outdoor atmosphere affects the saturation and shape of elements as they become more distant. After studying these photos, I noticed that causes faraway shapes to lose contrast and gain in brightness. When it came to working on the image though, I didn't attempt to completely render the faraway elements with this realistic haziness because I wanted the shot clearly defining some of the distant details. Overall though, I did try to mimic this weather as accurately as in reality except for one little cheat in the final image to retain some of the detail.
  • 40. Architecture I did a lot of research into the sorts of architecture I was going to work with. Looking to some mosques in Jerusalem and Turkey I found great references for buildings to make perfectly the architecture I had in mind. I started a longer search for high resolution photos of mosques and similar architecture. It took me quite a few days to get all the photos I was going to need. Waterfalls In this phase, I also gathered a lot of high-resolution waterfalls photos that I knew I'd need. I found some great material of the Niagara Falls, and of course Iguaçu Falls, that would help me achieve the desired perspective and feel. Finally I managed to gather together a collection of over 150 high resolution images from different websites. Now, how would I use these photos in my image? Where does each belong? And where can each image blend best with respect to the others? Compositing – Natural Environment I began to create the waterfalls using almost 20 different photos. I did a lot of cloning to get the water and falls blend seamlessly. To get the effect of distance in the water, I had to scale down some layers and paint the far distance water by cloning more water. 38
  • 41. Once I had the falls done, I began to work on some of the details such as the little foliage islands in the water. These I manufactured by cloning a small jungle and foliage area in a photo. Later, most of the foliage was retouched and detailed with extra touches like branches, shadows and special reactions in the area where the foliage touched the water. Done with this, I had to add the turbulent water buffeting these little foliage islands to show the water is really being affected by these pieces of land on its way to the falls, completing the integration of the foliage and water. Later I created the sky by mixing two layers I found on the net. I desaturated both a little bit and added some lightness to it, making it clearer and less contrasting. The background mountains were hand-painted. Taking care to reflect the haze and lightness values of distance, I did the mountain shapes with a solid color that later was replaced by the correctly-colored gradient. (see image above) The rear waterfalls where added later, after the city and temples, along some of the steam. It was painted in by hand to give the effect of a huge amount of water falling and crashing down in to a river that we don't see. (see image below) 39
  • 42. Compositing – City and Temples I then worked with some of the architecture photos, and started patching together some composites over the landscape. The foreground tower was something I didn't have in the original sketches, but the idea came out when I was looking for appropriate images on the Internet and found a special photo that gave me the idea. I modified the shape and color, and removed the direct sunshine with its hard shadows from the original photo, so it would fit in the composite. The temple at the end of the bridge was entirely hand-painted 40 because I never found a photo with the correct perspective. I took values from other photos I had composited there to paint it more accurately. For the middle-ground city I had to be very careful about what architecture and micro composition I was going to use. I selected the photos and began to do experiments to trial structural arrangements in that area of the image. There was clear evidence in the image of the peculiarities of the original photos I used to build this middle-ground part of the city. I had to make these buildings blend in with the overall weather. I desaturated the colors to push back some of the temples. I then altered the brightness/contrast and hue/saturation to make them hazier, as they are further away from the viewer. I also reduced the contrast where the sun was hiding behind the clouds and added a lens flare to help me get the buildings integrating into the haze of the overall atmosphere.
  • 43. I joined together more and more photos to create the background part of the city. I applied the same techniques to lighten and lower the contrast of these layers. However, I still had to take some steps to better match these images with their environment. First I painted the highlights, which was very important because the sun light was coming from the left. Then, in a fresh layer, I painted rough highlights with colors taken from other layers used for the middle-ground. Later, I set this layer to the blending mode ‘Color'. So the highlights layer and base building layers were now filtered through this color layer that was set to be only partially opaque. Thus, the colors in the whole image were desaturated as part of the effect of distance. 41 Compositing – Foreground Additions and Haze To give it a more natural and ‘alive' look, I added three flying birds that I took from a photo, with a small amount of directional blur to convey the effect of motion. In the original sketches I had a foreground tree, but with the new foreground tower I thought it less necessary. I still thought I'd put some branches in to frame the image, but not the whole tree. These branches were hand-painted, and while it may not be strictly correct, I used a black to brown gradient going down to the thinner branches. I just wanted to give some translucency to the slender twigs. (see image below) As the final touch, to give it a generally hazy mood, I added a new layer at the top of my composite that simply had a white to transparent gradient over it, making the sky and upper elements blend together in the homogenous weather and atmosphere. Post-processing In the post-processing I made a little color correction, with green being the main color of my palette. I also added a bit of film grain to give that special photographic touch. Final Image The hand painting and editing used no custom brushes, and the rest just involved changing opacity, colors, modes, and resizing. The image was done completely in Photoshop.
  • 44. Here’s another of Jaime’s works: 42
  • 45. 43 Digital Matte Painting Using Photoshop In the past 4-5 years visual effects stopped being something extraordinary and became a part of almost any production regardless of the scale. Would it be a 100 million dollar Hollywood feature, TV series or an independent film project, ability to enhance visuals with computer generated imagery (CGI) have become accessible to almost everyone. In today’s world of money and profit, producer thinks of a cheaper way to achieve something that used to cost millions. Visual effects come in place when the world we live in cannot provide us with imagery we need or the cost of recreating certain phenomena would jump over budged. One of the most important parts in visual effects, and also one of the easiest and cheaper one to do is a matte painting. Regardless of whether it is painted on a piece of glass or generated on computer it serves one purpose – creating or extending the virtual space of the scene. As every art, this one has its secrets and cheats. Unlike traditional art, where “cheating” is considered to be a bad manner, matte painting requires final product to be done in the most efficient way possible. Don’t be afraid to make shortcuts if they are possible, because time always works against you. In this tutorial I will cover a process of enhancing footage to fulfill the needs of story. It all begins with the script that calls for some change in original footage. After agreeing that the best way to specific shot is to enhance it digitally, I start to create a concept of how to incorporate these enhancements in original footage. There are many small details that have to be overlooked for the purpose of a smooth compositing. First I have to think of a camera movements and composition. In my case, the idea to create a matte painting came before we started filming, so I didn’t face any problems related with an unexpected change of plans during production. The story called for a remote location covered with snow for all outside scenes. As the film has mainly interior shots, we decided not to go to Colorado, but shoot background plates here in California and just paint the snow in. The example I use here is a test that was done to prove that it would be financially better to make a painting. We shot a background plate using still camera then replicated lighting conditions on a green screen stage in Ventura, California for our foreground plates, which had actors and a car in it. We decided not to have any camera movements to speed up production, because outside shots weren’t important on the bigger scale and had to be simple.
  • 46. I started with a picture I took in Santa Barbara, a very nice and worm city, were snow is something that people don’t see very often. First I had to clean the picture by eliminating all of the unnecessary objects and paint parts of the plate that were obscured by the removed parts of the picture. This process requires a vision of the final product. Without understanding what the final image is going to be it is very hard to make decisions on what has to be left. The main rule I learned while doing matte paintings is that if you can leave specific parts of the picture intact or use a photo to replace it – then do so. Nothing will look as realistic as a real life source. For the final touch up, I darkened the color of the road to add wetness to it. 44
  • 47. As an empty background color I always use the dominant color for specific painting. In this case it is the color of the snow – white. The purpose of this is to being able to visualize your final product in the early stages. In this case it is also the color of the sky, so I add a little gradient by darkening the horizon line. Speaking of a horizon line, it is good to make one early on, so you won’t have and unexpected perspective artifacts. This is done finding existing perspective lines (blue) and drawing the line through the point of their intersection (red) which will be our horizon. After we have established all necessary elements it is time to start painting. The next step would be to create a ground plane. I painted some free strokes using mainly three shades of snow from light to dark gray. The idea behind the matte painting is the same as behind impressionistic painting. You just create an impression, but on close-ups the reality breaks on strokes and colors. 45
  • 48. 46 As in real world, there can’t be any flat colors. Of course there are exceptions, but the nature is full of texture that mixes colors in a very organic way. I said before that if you can use photos the use them. I applied a black and white photo of a grass field on top of the ground plane to create imperfection in color. To do so, I placed a layer of grass on top of ground layer in photoshop and overlayed top layer over the bottom one. This creates a more dynamic range of shades as well as adds a texture to the ground plane. Next step is actually painting snow on our plane. Before doing any matte painting it is always good to do research on a subject of your painting. In this case it is snow. Snow might seam a very easy subject, but in fact it has a very interesting nature. Under different weather conditions, snow has different color, shape and interaction with environment. In my case it hasn’t snowed for couple days, as well as it is not windy, so the snow is not blowed off the house.
  • 49. If you look closer you can see the simplicity of technique I used. I projected the snow on every surface as if it was falling down directly from the sky. I added little imperfections, but the underlying idea is very simple. . With a little help of imaginations you can predict which areas would be exposed to the snow in case if the snow was falling in the straight vertical direction. The ground in front of the house has a little different technique then the snow on the roof. Again, the method I use for specific areas of this painting is used on research I do. I can’t stress enough how important to the your “homework”. In the case of the snow in front of the house, I chose areas that would be physically blended with the underlying ground plane. I assumed that outside temperature is very close to 0 Celsius. Hence, the areas where the snow is not thick are more “wet” and thus blended with the ground. 47
  • 50. I used this blending technique on the areas where snow meets ground areas and sometimes on the snow itself to create uneven texture. Besides snow I added small vegetation, like frozen grass and small bushes. This added more realism to the flat areas of snow. Another reason for this was to create an atmosphere for this painting. I think that trees and the way they branch can greatly affect the mood of the scene. On this picture you can see a relatively simple tree behind the house. This is the first step in changing direction for this painting. As with snow, I used plain color, after I finished the tree structure, I moved to adding snow with the same technique I used for the house roof. Since we have a foggy atmosphere, this tree has to be a little lighter. If I had a plain background with no intention of having something behind this tree I would change the opacity. Rather then doing it I went to Image->Adjustments->Levels to reduce output black level. If the background was something other then gray color, I also had to tweak its color palette. 48
  • 51. Next I would fill out the background plane. I usually create 2-3 trees that I’d scale flip to randomize it a bit. Depending on the type of a matte painting you have to put different amount of dedication. If the painting will be slightly out of focus, or the camera will have some movement, I don’t spend much time on background objects, or on something that doesn’t have viewer’s attention. As with the previous tree I changed output black level to match the fog depth. Then I paint the rest of the forest, recycling the trees I used before plus using some photos. I painted some snow on the fir trees and then put several of those on the background. Final ouch is to make some foreground trees. It’s good if you can get some photos. I finished them by painting snow and adjusting levels. For these fir trees I didn’t worry much that they looked duplicated, as I painted snow on individual trees differently. 49
  • 52. Now, when the painting is done, you can change it to whatever the shot requires you to use it with. By using simple color correction techniques, I was being able to change the time of day or the mood of this particular painting. Here is what I ended up using for production purposes. 50
  • 53. Matte Painting in Photoshop Part 1: Maison This tutorial is actually a "making of" where I explain how I proceeded to achieve this matte painting. I use a Wacom Intuos² A4 board, if you don't have any graphic board this is going to be hard but not impossible. At each step of the matte painting, useless to remind you to create a new layer so that the work will be easier and mistakes avoided ! First of all, find a good res picture. I chose to use a picture of a house I found on the web. You can find very nice pics for free, just look around ! 51 The first step is to isolate the house by putting it on a separate layer and by erasing the rest. In this example I used the polygonal lasso tool for the house, and a soft eraser for the bushes.
  • 54. Now you need a new background. You can either find a good pic, either paint one yourself. I chose the former because it is less time consuming, and the result is far better than what I would have gotten had I painted a background myself. I found this image on the web, unfortunately I do not remember the site I got it from. Put the sky behind the house (by putting the sky layer under the house layer), and apply a little perspective effect to give more depth to the sky, make it less flat. Here the house picture was taken from a low angle, which makes our work easier. Now look at the edges of the house. They still are the color of the original sky. We'll fix that. 52
  • 55. 53 Using the magic wand tool, select the empty zone of the house layer. Then, Select > Modify > Expand, to make your selection wider. Pick a value that includes the zone we need to color correct. In the menu : Image > Adjust > Hue / Saturation and color correct the edges by matching them with the color of the roof. Still using Hue / Saturation and also Color Balance, adjust the colors of the house and sky layers so that they perfectly blend together. Now we want to get rid of that palm tree that hides a part of the house. That tree has nothing to do there since we want to create a morbid mood. This is probably the most delicate step because we have to hand paint the missing part of the house. For that I mostly used the clone stamp tool, tool that allows you to paint something using another part of the picture for reference. For instance, the tiles located between the lower and middle windows were painted using similar tiles of the house, using the clone stamp tool.
  • 56. Why not add a lightning bolt to make the scene a little more disturbing ? Using the simple non feathered brush, this is simple. Draw your lightning, duplicate the layer, and blur the copies to make the lightning glow. Then, use the Dodge tool to brighten the clouds from where the lightning is originating. Paint dead trees behind the house, or use existing ones from pictures. Of course, make the colors and luminosity match. The fun part, now ! Let's break down the house. Well, not all of it. To make it look older, I added a hole in the rood, painted with brushes. 54
  • 57. 55 Don't be afraid to add broken parts ! The house is supposed to still be standing, so don't go too far. You can see that I broke a wooden beam, a pipe, a board, another part of the roof, and a window. When you break something, use the clone stamp tool to fill in the empty space you created. Make it look dirty. First of all, the windows. I used a non regular brush and painted the windows with a matte color. Then, change the transfer mode of the dirt layer to make sure that dirt and windows blend nicely together. For this example I chose the Luminosity mode.
  • 58. Repeat that step, only do it on the entire house. Paint with a dirtier color and set your layer to Multiply. Make sure you make joints and edges look filthy too, because that's where dirt appears most. This is one of the longest steps, but take your time and don't mindlessly add dirt everywhere ! Here, the porch, zoomed in. The last step is to create a Levels adjustment layer to get the final contrast of the matte painting. 56
  • 59. Matte Painting in Photoshop Part 2: Snow This is my second matte painting tutorial. Here I wanted to change the season of a scene from summer to winter. 57 First of all, find a good res picture. I chose to use a picture of a house I found on the web. You can find very nice pics for free, just look around ! Alright, first let's modify the colors. Using Image > Adjust > Hue / Saturation, try to get softer colors with less contrasts and saturation. Make it look cold !
  • 60. Create a new layer Now we can begin painting the snow. Use a rough brush to create irregular shapes. In the tools window, set the foreground color to pure white, and the background color to a blue-tinted 58 white which will be used to add shadows on the snow. All steps involve working alternatively with these two colors. Begin by adding snow on the edges of the house where the snow would naturally fall onto. With the blueish white, paint the inferior part of the snow (the shadows). This will add depth and will simulate the way snow reacts to light. Create a new layer With the same brush and same white, paint the windows to give them a frosted look. Set this layer's transfer mode to Overlay to make it match.
  • 61. 59 Create a new layer Same principle, on the roof this time. Make sure you stay true to the original lighting. Parts where the sun directly hits the roof should be a lot brighter than the darker spots, which will blueish. This is important especially on the cone shaped parts.When everything will be painted, you can then use the Blur tool and make a smooth transition between pure white and blueish white. After that, use the Burn and Dodge tools to increase or decrease contrasts. If you use Burn on the blue-tinted whites, it will give you an ice look, which can be interesting. Create a new layer Now we are going to paint the ground. I used an irregular brush so that the grass wasn't entirely covered. Then using the blueish color I added nuances to simulate an undulating look. I also left a clean way that goes to the door. Same principle to add snow applies to the trees and bushes in the garden. Now let's do something to avoid boredom from only adding snow! Using the Dodge tool, on the house layer, brighten spots here and there to add frosted parts, as well as to lighten up the dark parts of the house (like the inside of the porch). Do not forget that snow is a reflective surface, it will bounce light off pretty much everywhere. Using the same method, brighten up the rest of the scene like the trees and sky. Subtle, but necessary since it adds the important detail that sells the overall effect and makes the image look natural.
  • 62. Create a new layer Now on to the extremely boring step : powder snow over the trees. Powder is subtle, so don't overdo it! Still using the same method, add snow accumulations on branches, the most difficult part being to actually see where those branches are. It depends on the quality of your picture. If you have chosen a picture without trees you are a cheater !! For the big branches in the foreground, we can see leaves. I chose to add snow on groups of leaves, which can be time consuming, but you should not choose the shortest way over quality work. Create a new adjustment layer: Brightness/Contrast This step is optional, but I created a layer and have applied a linear gradient from top to bottom to increase the contrast at the bottom of the pic. 60
  • 63. Matte Painting in Photoshop Part 3: Castle Here is the making of my third matte painting, this time it is the Oratoire Saint-Joseph (in Montreal) under the rain! I use a Wacom Intuos² A4 board. For each step of the matte painting, useless to remind you to create a new layer so that the work will be easier and mistakes avoided! First of all choose a photograph of good resolution. I found the photograph of "l'Oratoire St- Joseph" (in Montréal). 61 Here is a perfect sky, found on the Net, which will go very well for what I want to make. First of all, start by isolating the castle by putting it in a layer and by erasing the original sky. Here I used the tool polygonal lasso for the building, and a soft gum for the foliages.
  • 64. Now one will erase all that should not be there a few centuries ago, i.e. the cars, the tourists, the standard lamps and the barriers. For that, use the tool Clone Stamp. It is not very complicated, nor very long with this example. I want that this scene occurs in stormy weather, therefore it is necessary to erase the shadows created by the sun. Always with the Clone Stamp erase the shadows on the ground of the shrubs and the trees. With the Dodge tool erase a little the contrasts of the elements by clearing up the zones of shadows in order to create an ambient light. Now one can add the Cloud layer behind that of the castle. 62
  • 65. 63 One will accentuate the contrast of the sky while insisting on the clear zones as if a storm lit the clouds by the top. For that duplicate the Cloud layerand pass the copy in mode Color Dodge. Now it is necessary to harmonize the colors of the two elements: sky and castle. Modify the color of the castle with menu Image > Adjustment > Color Balance, and make your best so that the tone of colors correspond. Then select the Castle layer, and in menu Layer > New Adjustment Layer choose Color Balance. Thanks to this adjustment layer which is created on top of the others, one will be able to change the general color. Give a distressing atmosphere to the scene.
  • 66. Profit finally to obscure the areas on left of the building with the Burn tool, because they are not exposed to the light of the clouds of right-hand side... hum does it make any sens LOL? It is a rather subtle effect, but that brings a small significant detail. Here is a zoom to understand better. Now one will add a little grain to the Castle layer by adding noise. 64 Before After
  • 67. 65 One now will add a small detail, that can be anything, I chose an old carriage found on google. Place this layer below the adjustment layer, thus its color will be automatically adjusted with that of the scene. If there are still differences correct that by going in Color Balance. Still a thing with the carriage, it is necessary to give it a shadow. So select the Castle layer and with the Burn tool slightly obscure the ground below the carriage. Subtle effect but important one. Here is the result ! Not that bad, but now I want to add rain. Obviously for a matte painting made for a movie the rain would be created in compositing and animated. But here it is simply to make a still image, so we don't care if the rain remains frozen !
  • 68. Let's work on the rain. Create a new layer and fill it with black with the Paint Bucket tool. In menu Filter > Noise apply Add Noise, choose Gaussian and Monochromatic, 10 or 15 should suffy for Amount. Go in Image > Adjustments > Levels and tweak it to erase some noise and to make it more visible. Finally in Filter > Blur apply a Blur Motion, which simulates a basic rain. Change the Rain layer mode to Screen mode in order to blend it in the scene. Play with the opacity of the layer to adjust it with your scene. Repeat the creation of a second Rain layer but with a little more noise to get a denser rain. Lower the opacity of this second Rain layer to simulate the rain in the background. 66
  • 69. 67 Now one will create large water drops on the image as if the scene was seen from behind a window. Create a new Drops layer filled with black, add noise. In menu Filter > Pixelate choose Crystallize in order to obtain large crystals of noise instead of the small points. Adjust the number of crystals in menu Levels.
  • 70. Then apply the Filter effect > Stylize > Glowing Edges, which will create circles around each crystal. It looks more like water drops now. Here the result which I obtained with this method. Now change the layer mode to Color Dodge, which will make the drops less visible in dark areas of the scene. We leave for the moment the drops like that, we'll return there at the end. 68
  • 71. 69 Here we'll create reflexions on the wet ground. Start by duplicating the Castle layer and Clouds layer and merge them together. Now in Edit > Transform choose Vertical Flip to reverse the Reflexions layer. Move it so that the bottom of the stairs is the line of symmetry. Finally you can cut out this layer so that it is only visible on the principal alley of the castle. Change this layer mode to Darken and opacity to 30%. Here is the very light reflexion but which brings a small key of realism.
  • 72. Finally I added the filter Filter> Distort > Glass in order to scramble the reflexion a little. It is not really essential, but if one wants to look more closely at the image we'll see that water disturbs the reflexion. Now do the same with the carriage ! We return to our water drops! For this final effect it is necessary to flatten all the layers of the scene, so make a copy of your file and choose Layer > Flatten Image. The image is now made of one single layer, we will be able to apply effects to the whole image now. In menu Filter choose Liquify. Click on the Bloat tool in the toolbar on the left of the Liquify window. Setup your brush radius and its density and paint on each drop in order to simulate an effect of diffraction. It is not very easy at the beginning so do not hesitate to start again as many time as you want. 70
  • 73. 71 Once that you made all the drops you can also create water trails behind the drops which run along the window. I used a mix of several tools of the Liquify module like Forward Warp or Turbulence. Leave Liquify. Finally we will accentuate the light and dark areas of the drops by painting with the tools Dodge and Burn. This water drops effect is oviously not essential, but in fact I especially wanted to test it. So here’s the final result:
  • 74. Modern Ruins By Tocath How to turn a modern day city into decaying ruins. Part 1 : Overview This tutorial will show you the steps and tricks I used in turning Hong Kong harbor into a wasted reflection of itself. Basically, we're going to turn this: Into this: Let's begin! 72
  • 75. 73 Part 2: Planning Any photoshopped image must start with a great source. Ruins are no exception. For my H2H with Norrit, we were limited to Non-American, Non-European cities. I chose Hong Kong. Ideally, you want a city with a recognizable landmark or building. This can get tricky, as your contest may have 18 New York entries and 20 from Paris. So, be aware that whatever city you choose may be duplicated. Impirnt your own style on whatever city you choose. After selecting a city, find a picture that displays a good view of the features you want to destroy. I would suggest using only images greater than 1024x768 in size. Using a tiny source image for this contest will make things very difficult when it comes time to put in detail. Here is our source image, a small crop for tutorial purposes: Let's talk for a moment about the source pictures for our destruction. I can almost guarantee you that typing "ruins" into Google will get you nothing better than the Parthenon or the Pyramids. While these are certainly ruins, they don't offer much help to those of us who have to ruin modern buildings. Modern materials require modern ruins. So, here is a quick list of words that will bring us modern destruction: • bombed • bombed out • destroyed • gutted • rubble It also helps to know your geopolitics. These words brought me the most useful images: • Belgrade • Grozny • Kosovo • Lebanon • Sarejevo • WTC I used 24 different images of rubble and destruction in my Hong Kong image. You don't need nearly that many, but you'll be happier with a greater variety to work from.
  • 76. We're almost ready to start butchering our buildings. First though, I find it helpful to have some organization. My final Photoshop file was over 50 layers deep, and I would have been lost had I not given the buildings names, like this: You can see that I only know the real name for one building. It doesn't matter, just as long as you can remember it. Part 3: Preparation Let's start destroying! The first thing is to identify areas where you will be taking large chunks out of the building: 74 Create a new layer. Set the Clone tool to "Use all Layers" and clone the sky and ground to create what we would see if a piece of the building wasn't there. Notice that the sky behind the Bank of China building isn't perfect. For this building, I was aware that I would be putting some rubble over that, so I didn't spend a ton of time getting it just right. You only need a nice backdrop to work from.
  • 77. 75 Part 4: Bash Creating the destruction and rubble is perhaps the most time consuming bit of work. The first thing I'll show you is creating false structure. This is not always necessary, but it can add a sense of realism. Let's create some struts for the Bank of China building. I came across a picture on the net of this building under construction, so I have a good idea of what the insides looked like. Grab a rubble pick to make our struts. This'll do: Then, cloning from the rubble, create strips. These are the floors of the building. Copy these until you have a good amount, then rotate and place over the Bank like so: Pay close attention to the angles when creating false structure. You want it to match as closely as possible to the angle of the building. Next, eliminate a portion of the struts. This is where you get to be creative. Try to think as you are doing it what consequences your actions have. If you erase a floor here, the mass from the floor must have fallen somewhere, right? Maybe it took out a floor below. Maybe it just landed on the floor below, depositing rubble. Be creative, but don't be completely random. It's an interesting balancing act between chaos and structure.
  • 78. Part 5: Bash continued Now that you've created any false structure necessary, lets get to the real chaos. Open your rubble images, say, these three: Now this next part will be much easier if you have a tablet. A tablet's best feature is the ability to sense pressure. If you have a tablet, set your clone brush to "Shape Dynamics" with the Size jitter controled by the pen pressure. This will let you make very thin, light strokes. If you don't have a tablet, that's ok. Simply control the size of your brush by tapping quickly on the bracket keys. [ = decrease brush size, ] = increase brush size. 76
  • 79. 77 Ok, create a new layer and clone some chaos from your rubble pile, like this: Use varying widths of stroke to create areas of light and darkness. Pay close attention to your shadows. You need to be aware of where the light in your scene is coming from, and where it will cast the shadows. In my scene, as in most, the light comes from above. Notice that in areas where surviving structure overhangs destroyed buildings, I have added shadows. I prefer to use cloned shadow area instead of simply painting black or using the burn tool. Using cloned shadow from a rubble pile will give you a more realistic effect. Continue cloning until you have something like this: Create new layers for each building, or set of buildings. This will help you control what you see, and will avoid destroying detail you have worked hard on. Try to pick a different source rubble pic for each building. Even before you start cloning, it can be helpful to adjust the hue and saturation on the rubble pic to more closely match the building you're destroying. Note also that I took some liberties with the actual look of the brick building as well as the short and busted. If you need to make adjustments to allow for more destruction, do so. This is your image. Who knows what kind of upgrades the buildings have had!
  • 80. Part 6: Trash Now that we have destroyed some facades and collapsed floors, lets add an element of age. The first thing to remember is that destruction is dirty. Clouds of dust in the air, acid rain and soot can make a place look absolutely filthy. Let's throw some on! I like to apply dirt and grime on a new layer, set to 'multiply' or 'darken' blend mode. Eyedrop a shadow color from your building. It's best to use this method instead of straight black, since the eyedrop will pick up on any hue present. Create a new layer and paint thin strips of color on and around ledges. Next, use the smudge tool to grab that color and smear it down, simulating the effect of rain carrying particles downward. You should come up with something like this: After you've done that, I like to apply some nice color to get a rust and soot effect. For my Hong Kong pic, I used a sheet of paper with coffee and tea stains. A texture like this will have lots of great detail that will further grime up the image. Select a few buildings and paste it over like this: 78
  • 81. 79 Selectively erase in areas and get rid of anything that is jarring. Then, set the new texture layer to 'color burn', and drag the opacity down just a bit until it looks good, like so: Part 7: Trash continued Next, we want to simulate some oxidization and salt deposits from rain and sea. Grab a new texture pic. For mine, I used an image of white paint cracking on a wooden fence. Again, create a new layer and paste in the texture, like so:
  • 82. Erase any detail you don't want and set the layer's blend mode to 'soft light'. Decrease the opacity until you're happy with it. This should leave your building looking like this: Next, we're going to work on the water. First off, realize that any boats in the water may be sunk, or sitting lower. Raise the water level so that the boat appears to be taking on water. Additionally, remove any white water that exists. Your boat is not moving, and should not be creating a wake. Next, select a brownish color and paint some detail onto the water itself. Set the layer to darken mode to achieve this: 80
  • 83. 81 Next, you're going to want to add some rust and age to the boat. Grab a new texture map. I used the paper with the coffee stains. Paste that over the boat and erase any unwanted detail. Set the layer at 'color burn' and decrease the opacity to arrive at this: Part 8: Finishing up You're almost done. We've got a good image, but we want to bring it all together with some post-effects. Use ctrl+shift+c to copy the entire image merged, or go to 'Edit >> Copy Merged'. Paste this at the top of your layers list. The first thing we want to adjust is saturation. Crank down the saturation about 25% to simulate a somewhat overcast day:
  • 84. Next, we want to make the image a bit more contrasty. I prefer to use 'Image >> Adjustments >> Selective color'. Using 'Brightness and Contrast' can affect saturation, and we don't want that. Selectively darken the blacks first, adding 5%. Next, edit the Neutrals, taking out 10% black. Additionally, for my image, I corrected a slight blue cast by taking out 3% cyan and adding 3% yellow. You should arrive at something like this: Finally, to give the entire image a sense of cohesiveness, and further add to the grimy feel, use 'Filters >> Sharpen' and 'Filters >> Noise' to sharpen the image and add a little noise. Don't go overboard, use sparingly to add some dirt. Do a final once over, selectively desaturating anything that pops too much. You've now got a finished product: 82
  • 85. 83 Matte Painting: Mystic Night Scene We will be creating an mystic night scene with rainy atmosphere. Few preprations are required before you start. First basic step is a concept and where will be the matte paint used? Always start with rough thumbnails. Bring down your thoughts on paper. Scan it if needed.Try to colour them roughly with simple patches of colours considering the atmosphere you want. Once you are happy with the result its time to finalize! Before we start our final work we need to collect refrences and high resolution images. Refrences and image library is very important. Dont just look for sources on the net but also from books, photographs or click some good snaps yourself. This the final matte. Before I start I normally divide my page, if the matte has to be fully generated on the computer. Normally horizon line should be off center so that it dose not divide the picture into 2 parts. Step 1 I start colouring the water first with an airbrush with an textured brush so that it gives me no sharp edges. everything should be smooth. Opacity of the brush is 50%. This gives me overall idea of the placements. Step 2 Now in a new layer above the water layer I start adding details. some mountains foreground mountains dark and background ones light. some debris floating on thewater or some small plants.
  • 86. Step 3 Now here I start adding details on the right side of the scene. I have merged hand painted mountains with some photographs. Step 4 I continue adding details with some more photographs of rock and painting over for the desired effect. Finally we get the basic layer of the matte. now we need some depth and more details! It's time for some rainy clouds. Step 5 Ok, now you must be wondering how did I get this? yes, its again merging of photographsand and hand painted clouds equally. Eraser, air brush and rubberstamp are the main tools I used here. Step 6 Ok, now I place the cloud layer over sea layer. Slightly overlapped at the edge ofhorizon so we get smooth blending! :) I know you still see the unfinished edgesbut dont worry we will fix it ahead. 84
  • 87. 85 Step 7 To create some more interest, I added an tower like mountain. and painted itdark blue. Also, some extension of the picture is done with help of some snapsand I hand painted over the rocks a bit. Step 8 The final desired effect I need was something blue and mono colour feel with different tonal value. so firstly I converted the step 7 picture to black and whitegradient map and then I played around with colour balance and variation tool.Finally we are done to composite this shot. Tips:A. Keep all the pictures or references or ur painted layers in different sets in the layer tool-box. name the sets clouds, ground, mountains etc. so its easy tonavigate when it comes to the point of some changes in the picture. B. If you plan to animate it in after effects, with some subtle cloud movements, thenbe carefully you dont merge the layers into one.
  • 88. The Haunted House Daniele Montella, 7 December 2004 The Haunted House was developed during Halloween, when I wanted to express the idea of an eerie-looking house. Matte painting has always fascinated me, and with the help of digital tools today, it is possible to enrich environments more easily than ever before. Study of the Image The general process employed for this image is to use photographic elements, combine them and enhance them in original ways. My intention was to express anxiety, isolation and the frustration felt during a horror movie. There’s a cliché in these movies where a group of friends stand in front of a haunted mansion in awe. The main details of the haunted house required: dry and twisted trees, a cloudy dark sky that created the most horrible feeling of isolation and different types of gravestones. I used these photographic elements with the intention to modify and enhance them later on. 86
  • 89. Composition To compose my collage of images, I use the ‘Rule of Thirds’ which is a photographic composition dividing the space into 9 identical pieces on a grid (thirds). I insert the house on the right third and a twisted tree on the left third. In terms of depth, the image is divided into four planes of depth. The closest is on the twisted tree to the left, then the gravestones, the tree on the right, and the house almost in the background. This way, your eye is moved around the image in an anti-clockwise direction for a dizzying effect. Tone and Colour The house is neglected by humans and infested by ghosts. To portray this, I opted for a green-yellow tone, which is associated with illness. It is the colour of decomposing human skin, urine, mucus and many other repulsive things. Using the Brightness/Contrast settings in Corel PhotoPaint, and tweaking the tone curve, I was able to totally change the original photograph (which was in broad daylight) to a washed-out house that looked like it was photographed on an overcast, rainy day. I recovered a bit of colour by using the Hue/Saturation settings to make the house a slight green-yellow colour. 87
  • 90. Painting Once the total view of the composition was in place, I begin painting the missing details and adjusting the existing ones. This is the most complex and time-consuming part of the project. Starting with the house, I repainted entire portions of it such as replacing the stairs, removing the lush green foliage and replacing it with dead or dying shrubs. 88
  • 91. Then I began to “ruin” the house and give it a sense of weathering over time by staining it. First with a light black brush using the Colour Burn filter and then digging holes in the walls and roof where I painted rotten and destroyed wooden boards. I also extended parts of the veranda and roof by hand-painting them in. I managed to find images of dirty trees that I cloned to create the background forest behind the house. This, however, didn’t work that well to begin with because it looked totally flat. With a grey colour and a thin brush, I painted branches and trunks in with differing tones of grey to give a sense of depth to the forest. I also did the same with the plants, bushes and shrubs surrounding the house. 89
  • 92. Returning to the two main trees in the foreground, I used the Clone tool to paint in more branches using the texture from the original image. For the gravestones, I employed similar techniques used on the house to give them a weathered look, and also painted in two new ones. For additional effect, I painted the shadows of the tree branches on the ground and gravestones. 90
  • 93. Effects This is where I begin enhancing the basic image. Using the Effect Tool/Custom Sharpen feature in Photo Paint, I begin to sharpen portions that I have just painted in, such as the broken wooden boards, the branches, bushes and twigs. To make the image more interesting, I made one of the windows in the house light up by hand painting the effect with a light yellow. To create the glow of the light, I used a soft circle brush to paint the area on a new layer, with a much lighter yellow (almost white) with no transparency, but the layer mode set to “Add”. 91
  • 94. The sky is the result of many tests using green to grey colours and a big brush. Details such as the clouds were painted in using a thinner brush and setting some brushes to Colour Dodge and Colour Burn modes. Final Image The final image is a pseudo-photo-real haunted mansion, employing clever digital techniques and photographic elements! 92