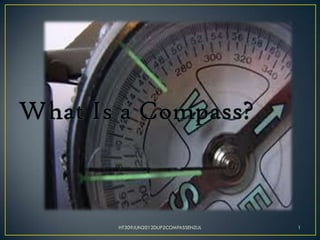
4. PARTS OF COMPASS
• Baseplate- hard, flat surface on which
the rest of the compass is mounted. It
has a rulers on its edges for measuring
distances on maps. It's edge is straight
and useful for laying lines on a map
• Scales -each edge of a compass may
have different rulers for use with
different map scales
• Direction-of Travel Arrow-
marked on the base plate. You point this
the way you will be traveling
• Magnifier- for seeing small map
features better
HT309JUN2012DUP2COMPASSENZUL 4
5. • Index Pointer- butt end of the
direction-of-travel arrow. It ends right at the
edge of the dial and is where you take degree
readings
• Dial- ring around the housing that has
degree markings engraved. You hold the dial
and rotate it to rotate the entire housing
• Declination -Marks use to orient the
compass in an area with known declination
• Orienting Arrow- marked on the
floor of the housing. It rotates with the housing
when the dial is turned. You use it to orient a
compass to a map
HT309JUN2012DUP2COMPASSENZUL 5
6. • Orienting Lines- series
of parallel lines marked on the floor of
the housing and on the base plate
• Needle magnetized- piece
of metal that has one end painted red to
indicate North. It sits on a fine point
that is nearly frictionless so it rotates
freely when the compass is held fairly
level and steady
• Housing- main part of the
compass. It is a round plastic container
filled with liquid and has the compass
needle inside
HT309JUN2012DUP2COMPASSENZUL 6
7. • Bubble -a bubble of air in the
housing liquid is useful for making
sure you are holding the compass fairly
level
• Mirror- lets you see the compass
face and distant objects at the same
time. Useful for emergency signaling
• Sight -improves aiming your
compass at distant objects
HT309JUN2012DUP2COMPASSENZUL 7
8. • There is a huge magnetic field around the earth. It is
huge, but it is not very strong. The magnetized needle in a
compass is aligned with this magnetic field. As the image
below shows, the composition of the earth acts as a huge
bar magnet sitting upside down in the middle of the
planet. Since its South end is at the north pole and its North
end is at the south pole, the North end of a compass
needle is pulled north
HT309JUN2012DUP2COMPASSENZUL 8
10. • The mountaineering compass, also called the orienteering
compass
• "Card Compasses“-
HT309JUN2012DUP2COMPASSENZUL 10
11. • Good compasses have a fluid-filled housing: the fluid
dampens the motion of the needle
• The compass needle is painted in two colors: red end
points(north) and the white(south)
• Good compass will last a long time
HT309JUN2012DUP2COMPASSENZUL 11
12. • On our mountaineering compasses, it is almost always the
RED end, but its a good idea to test your compass before
starting to use it.
HT309JUN2012DUP2COMPASSENZUL 12
13. This compass is pointing due
• Hold your compass steadily in your North (also 0 degrees)
hand so the baseplate is level and
the direction-of-travel arrow is
pointing straight away from you.
• Hold it about halfway between
your face and waist in a
comfortable arm position with your
elbow bent and compass held close
to your stomache.
• Look down at the compass and see
where the needle points.
HT309JUN2012DUP2COMPASSENZUL 13
14. • Turn your body while keeping This compass is pointing East
the compass right in front of (90 degrees)
you.
• Notice that as the compass
rotates, the needle stays
pointing the same direction.
• Keep turning until the needle
points East like the picture
below, keeping the direction-
of-travel arrow and North
mark facing straight in front of
you.
HT309JUN2012DUP2COMPASSENZUL 14
15. RED IN THE
SHED
Now we know we are really
heading West (270 degrees)
HT309JUN2012DUP2COMPASSENZUL 15
16. The image above is
a heading of about
250 degrees.
HT309JUN2012DUP2COMPASSENZUL 16
17. • Using your compass, take a few bearings. Move your body
until the direction-of-travel arrow points at the following
items and then turn the dial until "RED is in the Shed".
Then, read the bearing at the Index Pointer:
• You computer screen: ____________ degrees
• Your window: ____________ degrees
• Your door: ____________ degrees
• A lightswitch: ____________ degrees
HT309JUN2012DUP2COMPASSENZUL 17
18. • Points
• Degrees
• Mils
• Grads-There are 400 grads in a circle
HT309JUN2012DUP2COMPASSENZUL 18
19. Main Compass Uses
• The main functions of using a compass are:
• tell which direction you are traveling - your heading
• tell which direction an object is from you - its bearing
• keep you following a straight line of travel
• orient a map - aligning a map with the actual land
• triangulation - determining your location with a map
• plan routes - determine directions and distances to travel on
a map
HT309JUN2012DUP2COMPASSENZUL 19
22. • Graphic representation of the earth
• It users colors, symbols and labels to represent
the features found on the ground
• provides information-the location, distance,
populated places and routes of travel and
communication
• Indicates variations in terrain, heights of natural
features and vegetation cover
HT309JUN2012DUP2COMPASSENZUL 22
23. • Should carried waterproof case, in a pocket, or some other
place where it is handy for use but still protected
• Use pencil
• Fold technique
HT309JUN2012DUP2COMPASSENZUL 23
24. Whether a charcoal and
parchment treasure map
or multi-colored, plastic-
coated, trail map, maps
tell a story of the world
around us. Maps help us
to locate places, measure
distances, and find where
we are on the earth.
HT309JUN2012DUP2COMPASSENZUL 24
26. • This simple road direction map contains a lot of
information:
• North is marked in the upper-left corner so you
know which way this map relates to the world.
• The Scale is marked. One inch equals 5 miles, so
you can tell it is about 15 miles from Seattle to
Woodinville.
• Main roads are included so you can find the best
route direction between two locations.
• Roads are labeled so you know what to look for
when navigating.
• Bodies of water are colored blue.
• So, you can see even a simple road map is packed
with good direction and navigation information.
The maps we use for hiking are even more packed
with details.
HT309JUN2012DUP2COMPASSENZUL 26
27. The topo map on the right represents the land in the aerial photo on the left. Notice the
buildings and roads on the map can be seen in the photo. Move your mouse over the
photo to see the objects highlighted.
A navigation map is actually more useful than a photograph since it can highlight
HT309JUN2012DUP2COMPASSENZUL 27
important items and ignore clutter like trees and shadows.
32. • Timing. In jungle or place where walking speed is more
difficult, including un even trail you must estimate your
team slower speed
• Stepping. For shorter distances, stepping ideal and can be
one of the most accurate methods to estimate distances.
Measurement is done by walking at your normal speed and
counting your steps as you walk. Normally 2 steps equal to
meter
HT309JUN2012DUP2COMPASSENZUL 32
42. 1. If unfamiliar with the terrain, be certain to walk.
2. Stay within designated boundaries set by the instructor.
3. Wear appropriate clothing.
a. Pants
b. Long Sleeve Shirt
c. Hiking boots/tennis shoes
4. Wear a watch to keep track of time.
5. If you become lost, stay in one place (out of danger).
6. If crossing the street, look both ways & abide by all traffic rules.
7. Report accidents immediately to the instructor.
8. Return all equipment to the designated area.
HT309JUN2012DUP2COMPASSENZUL 42
43. plan organize lead Evaluate
HT309JUN2012DUP2COMPASSENZUL 43