
Recommended
More Related Content
What's hot
What's hot (18)
Viewers also liked
Viewers also liked (20)
Similar to Media blog final
Similar to Media blog final (20)
Recently uploaded
Recently uploaded (20)
Media blog final
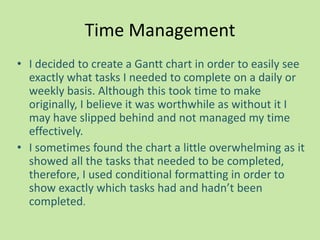
- 1. Time Management • I decided to create a Gantt chart in order to easily see exactly what tasks I needed to complete on a daily or weekly basis. Although this took time to make originally, I believe it was worthwhile as without it I may have slipped behind and not managed my time effectively. • I sometimes found the chart a little overwhelming as it showed all the tasks that needed to be completed, therefore, I used conditional formatting in order to show exactly which tasks had and hadn’t been completed.
- 2. 180 Degree Rule • The 180 degree rule is a rule that is set for when filming a conversation or shot- reverse-shot. The person filming has to imagine that there is a straight line that they are not allowed to cross. The reason for this is that if the camera crosses the 180 degree line, the characters appear to switch sides on the screen. Therefore, when filming a conversation or shot-reverse-shot sequence, the camera should not cross the imaginary line in order to create a logical and coherent scene.
- 3. Match On Action • This is where the camera jumps from view of something to another whilst still forming a coherent, continuous order. During our preliminary task, the match on action sequence will be when the character enters the room. Therefore, the sequence will be made up of different shots of the actor opening the door and entering the room. • The picture below illustrates the match on action sequence when walking through a door. The top two images show the character walking towards the door and opening it from one angle and then the camera films the character coming through the door from the other side (bottom two images).
- 4. Using iMovie to Edit • I edited the preliminary task which involved using software called iMovie. This is a program on the Apple Macs at College which is used to edit and put together small projects. • I found that the program was a bit daunting at first as there are many different icons on the screen, whereas I am used to words on Microsoft programs such as ‘print’ or ‘insert’. • However, after practicing for a little while, I soon got the hang of it and managed to effectively edit our preliminary task using transitions and reducing the sound in order to create a professional look to the task. • On the right is a screenshot of iMovie.
- 5. Shooting Schedule • We decided to do a brief run through of what and how we were going to film. We did this for Ali’s (the other actress) sake so that she would know what she had to do. In addition to this, it gave Anna and I a chance to check that we could carry out all our ideas in the space that was available and to know whether we needed to adjust the lighting or the lay out of the room. Below is a brief shooting schedule that Anna and I devised together to make sure that we kept to time and that we included everything. 16.15 Run through without filming 16.20 Film walking through door – behind 16.22 Film walking through door – infront (sitting down also) 16.26 Watch back – film more if needed 16.30 Choose 180⁰ position for tripod – make markings on floor 16.35 Film all of my speech 16.40 Film all of Ali’s speech 16.45 Watch back and film any more if needed 17.00 Finish
- 6. Location, Props and Costume The location was Anna’s house as it was We chose for myself and Ali central to both of us as had a dining (Anna’s Mum) to be dressed in table close to a window which is what casual dress as we were in a home we wanted for natural light. environment and we were acting The props that we used in the as if we knew each other. If we preliminary task were a crossword were dressed in smart dress then puzzle book and a pen. We chose these the preliminary task would appear as it showed a relaxed atmosphere and illogical. This involved a casual it meant the storyline could be simple dress and jeans and a t-shirt. I feel and light-hearted. We originally used a that costume was an important pencil to fill in the crossword, however, factor to tell the audience that this the pencil was too faint when filmed so was just a friendly conversation in we decided to use a pen instead. This a home environment. showed up clearly on the footage so I am confident that we made the right decision to change the prop used. We also filled in half of the crossword puzzle to make it look more realistic.
- 7. Script • The script for the preliminary was quite short as we wanted to focus mainly on getting the camera techniques correct. However, we included enough conversation to show that we understand the 180 degree rule and match on action. Below is the script for the preliminary task. Ali “Hi Lydia!” Lydia “Oh thank god you‟re here, can you help me with my crossword?” Ali “What is it?” Lydia “Starts with a „B‟ 5 letters, the clue‟s emblem” Ali “Ooh! It‟s badge!” Lydia “Thanks!” [Writes it in]
- 8. Camera Experiments • During the preliminary task, there were set criteria by which we had to follow. This limited how experimental we could be with the cameras. We did, however, use a tracking dolly for the first time as it meant we could track Ali and pan more steadily. Without the use of the tracking dolly, the tracking shots of Ali at the start looked as if we were trying to use the hand-held camera effect which was not fitting with our storyline. Therefore, I believe experimenting with the tracking dolly was a good idea. However, it should be used with caution as on laminate or tiled flooring it is very noisy and it requires quite a lot of space to use effectively. • We also learnt that if you pan too quickly, the camera can looked blurred as it goes out of focus. This is something we will make sure we avoid in the main task in order to achieve a professional quality to our production.
- 9. Lighting Issues Gold side • On the day of filming a bulb blew in the ceiling lamp right above where myself and Ali were going to be sitting. We ensured that we fixed this by replacing the bulb before we filmed. • Furthermore, we filmed at around 4 o’clock which was when it began to get dark so we used a lamp to lighten the faces and the setting that appeared in the frame. We also tried using a photographers reflector. It gave the film a homely feel as the gold side complimented the actors skin. Silver side • However, we decided not to use the photographers reflector as it was very difficult to make sure that it didn’t appear in the corners of the frame. Also, it was hard to hold the reflector still enough so that the light reflector gave a steady glow on the face of the actors.
- 10. Health and Safety • The health and safety issues we had to cover whilst filming for the preliminary task were minimal as we were shooting in my home with no obvious dangers. • I had to tape down wires on the floor so they weren’t an obstruction when walking around so people didn’t trip over.
- 11. Final Preliminary Task Here is the link to our finished preliminary task in which I edited.
- 12. Podcast • After filming the preliminary task, we decided to create a short podcast in order to discuss how we thought the filming went. We briefly discuss the techniques we used and the things we had to take into consideration whilst filming. • Here is a link to the podcast on YouTube.
- 13. Audience Research • We conducted a questionnaire in order to help us find out the wants and needs of our audience so that we could take these into consideration when producing our main task which was a teen-thriller. Question 1 – what age bracket Question 2 – what is your do you fit into? favourite sub-genre of a thriller? Knowing the ages of our The answers to this question will audience means that we can greatly shape our plot further to accurately define and target a incorporate whichever shows as specific social or age group the most popular. 7 out of 10 were 15-19 6 out of 10 said psychological 3 out of 10 were 20-23 4 out of 10 said horror
- 14. Questionnaire Results 2 Question 4 – do you enjoy Question 3 – does the title of a film seeing similar themes and influence you to see it? plotlines in films? This shows us what to call our film It’s important to understand if when we have produced it. the audience enjoy seeing certain genre conventions 5 out of 10 felt that the title does repeated in different films. influence them. 7 out of 10 said they want to see new themes and plots. From our questionnaire, we were able to make conclusions that led us to creating a certain type of opening sequence. Therefore, we then chose to analyse two opening sequences in order to better understand their conventions.
- 15. Opening Analysis of I Know Who Killed Me (Unfortunately the link to this opening sequence has since been removed from Youtube.com) • 00.01 The film creates mystery from the start with dark water rippling . The reflection of the neon lights are in the shape of a woman, however, it is not clear at first that this is being portrayed. • 00.15 As the water becomes still, there is a high angle shot pointing straight at the lights. • 00.18 A males voice starts singing which creates an eerie feel as the bell chimes to signify each passing second. • 00.23 Close up of the lower legs of the neon woman flashing • 00.25 Cut to the hand of the woman flashing too • 00.31 Fades to black and shows the name of the lead actor with the colour red signifying danger and blood. • 00.38 Curtains are opened dramatically to reveal a female with warm lights behind her. • 00.44 Music gets louder and can see the females face as the title of the film appears. • 00.51 Camera dips in and out of blurriness (rack focus) and the woman walks up to a platform. • 01.00 Standing girl is dressed in a red outfit and red lighting – convention of a horror/thriller as signifies danger. • 01.04 Slow motion as she walks around an illuminated gold pole. • 01.13 Bright red and orange lighting shows the dark silhouette of the lady which adds to the sense of mystery. 00.15 00.44 01.00 01.14
- 16. Opening Analysis of I Know Who Killed Me Part 2 • 01.27 The inverted coloured shot of the same shot flashes up. This makes the audience aware that there is more to the plot than meets the eye. • 01.28 The pole dancer seductively slide down with her back against the pole. It cuts to a long shot at 1.34 and flashes to inverted colours again • 01.44 We see a point of view shot looking at her audience with direct eye contact with another bald man whilst also receiving a glare from a woman sitting very unladylike with her leg up on a table. • 02.27 She tilts her head back which leaves us watching her throat which makes her appear vulnerable, foreshadowing the rest of the movie. At the same time as this the music dies down and a new slower brassier sound plays. • 02.29 Her hand is shown with her red glove on with a dark thick liquid on – blood presumably. Her hand glides down the pole till it’s out of shot and we see the liquid continue to drip down 01.27 01.28 02.27
- 17. Opening Analysis of Sorority Row • 00.20 Graphic match from Summit Entertainment logo with the trees which blends the movie into reality. This makes it more real for the audience • 00.26 Quiet sounds, sound of crickets heightens senses. Sense of climax as music gets louder as the camera gets closer to the house. • 00.34 There is a smashing sound followed by a scream and movement in an upstairs room which breaks the quiet – grabs the attention of the audience. The light on in the house makes the audience want to know what is happening inside. • 00.40 Camera zoom gets quicker – building the suspense. • 00.50 Still the same shot, it becomes apparent that there is a party going on inside. • Within the first minute of the film, the audience is already aware of the setting, the genre and the title of the film. Even during the opening sequences, the audience is taken on a rollercoaster of emotions as they have been startled by the screams and the smashing sounds and then their feelings pick up as they are brought into the party. The camera almost acts for the audience in that they feel like they are in the party and everything that is in the frame is what they are seeing as they walk through. 00.20 00.34 00.50
- 18. Conclusion of Opening Sequence Analysis Both of the films we chose to analyse were teen psychological thrillers yet they both had aspects of the horror genre. I chose this as we decided this was the genre that we had chosen for our main task. Originally, we were going with the plot of girl going missing which is why we chose to look at these two opening sequences. However, as our ideas matured, we decided that we wanted to use something normal that all teenagers are familiar with and turn it into a horrible scary thing. This is where the idea of using Facebook as a killing device came from. This is a current, contemporary theme which responded to our audience feedback as many people said that they are sick of seeing the same themes and plotlines being recycled again and again. After analysing these film openings, we decided that our production must contain a production logo, subtitled names throughout, conventions and props that lead the audience to certain feelings and thoughts and it should start quite calmly and then the story will start to unravel.
- 19. Typography • We decided to look at the fonts that have been used in existing films in the same/similar genres as this would give us an indication of how best to use writing in our production. Below are 2 films that we decided to look at. These both have similarities in that the text is very plain. The font used here stand out as the colour red contrasts with the dark black This font is nearly exactly the same. This also stands background. The font is simple capital letters out against the background despite the fact the which draws attention to itself. I think we colouring is different. should ensure that the colouring of our production logo stands out against the colour of the background.
- 20. Brainstorm of Initial Ideas • In order to come up with a plot for our main task, myself and Anna brainstormed together different locations and genres and our ideas spread from the brainstorm. Here is a copy of the brainstorm we created.
- 21. Production Logo • Based on the typography we analysed, we decided to create a very simple production logo in a colour that contrasted the background. Therefore, we choose white writing on a black background as this draws attention to itself. • We chose not to use all capital letters for the whole logo as it contains the initials ‘AL’ and we wanted them to be read as initial rather than a word ‘al’. • We also chose to reduce the spacing between the letters as it gave the logo a unique yet professional feel. It also created a sense of unknown as to what genre the film would be which I felt was effective in creating the mysterious feeling that one should experience throughout a thriller. • Below is a screenshot of the final production logo.
- 22. Storyboard for the Main Task • Together we created a rough storyboard of how we were going to shoot our main task.
- 24. Shooting Schedule • We aimed to shoot all of the main task in one in order to avoid continuity errors with actor’s appearance, lighting and the positioning of props. This meant that we chose to do the filming when it was already dark so that the changing of the outside lighting couldn’t affect the quality of the filming. • Due to this decision, we create a schedule in order to complete all the filming in one sitting. We chose to film the main task in chronological order as this meant that it would be very difficult to accidently miss out sections of the filming. We could also control the continuity of our film as props wouldn’t be moved around when shooting different scenes when they weren’t needed. Schedule 15 mins – practise run through 10 mins - outside filming 10 mins – match on action on door 15 mins – taking off jacket and pouring a drink 20 mins – film sequence to the computer 10 mins – footage of computer from different angles 10 mins – filming from inside the cupboard 30 mins – apply ketchup to face and create a contrazoom shot.
- 25. Location, Props and Costume We used my house to film the main task. This was because we wanted believed that Anna was dressed in very normal a house would be a typical environment clothes as we were trying to give the where someone would be using Facebook. impression that the character in the It also makes it easier to film we weren’t opening sequence was just like an limited by time or access to the rooms or other ordinary teenager. This meant props. This also meant that the lighting that Anna had the freedom to naturally had a homely feel to it so we choose any outfit she wanted. didn’t have to artificially create home style lighting. When filming, we used a laptop as a prop in order to access Facebook. We also used a glass of Ribena as the colour of the squash signifies the danger that is about to happen in the film. We also used a set of keys so that the actor could enter the house. This suggests to the audience that the character has returned home which is normally considered to be a safe environment. I chose to film the last part of our opening sequence from inside my cupboard. The doors acted as a prop as they framed Anna on her computer and highlighted the fact that there was someone/something lurking in the cupboard.
- 26. Risk Assessment • Because we were filming in my house, the risks that we were exposed to were moderately low. When filming, I made sure that any wires (e.g. laptop charger) were tucked away or stuck to the floor so that there was a reduced risk of tripping. • I also ensured that there was nothing on the floor so when I had to run with the camera at the end, I was less likely to fall over . • We also made sure that the room we filmed in was big enough that we could move around without hitting into things as some of the shots we used required a bit of space to move around in.
- 27. Final Main Task Here is the link to our finished main task in which I filmed.
- 28. Evaluation Videos • In what ways does your media product use, develop or challenge form and conventions of real media products? • How does your media product represent particular social groups? • What kind of media institution might distribute your media product and why? • Who would be the audience for your media product? • How did you attract/address your audience? • What have you learnt about technologies from the process of constructing this product? • Looking back at your preliminary task, what do you feel you have learnt in the progression from it to the full product?
- 29. Bibliography Where was it used? Link Picture http://www.google.co.uk/imgres?q=imovie&hl=en&biw=136 Using iMovie to Edit 6&bih=643&gbv=2&tbm=isch&tbnid=9YIKuvx3Sb1L8M:&imgr efurl=http://compare-video-editing- software.burnworld.com/l/1/iMovie&docid=UucFTszBuGgiA M&imgurl=http://compare-video-editing- software.burnworld.com/sites/default/files/727/media/imag es/iMovie_2.jpg&w=600&h=396&ei=pzZ2T56ZJtGS8gOd2PSX DQ&zoom=1&iact=rc&dur=258&sig=10351570872577839037 8&page=1&tbnh=127&tbnw=176&start=0&ndsp=18&ved=1t: 429,r:5,s:0&tx=89&ty=90 Camera Experiments http://www.clker.com/clipa rt-map-symbols-camera- white.html http://www.google.co.uk/imgres?q=prom+night&hl=en&gbv Typography =2&biw=1366&bih=643&tbm=isch&tbnid=of_EMrVwlalEFM: &imgrefurl=http://www.entertainmentwallpaper.com/downl oad/10012824/&docid=- i7ixyNMGQAjpM&imgurl=http://www.entertainmentwallpap er.com/images/desktops/movie/prom_night01.jpg&w=1280 &h=1024&ei=Kz12T9_MOsWX8QO67oWXDQ&zoom=1&iact= hc&vpx=828&vpy=178&dur=818&hovh=201&hovw=251&tx= 100&ty=103&sig=103515708725778390378&page=1&tbnh=1 30&tbnw=163&start=0&ndsp=21&ved=1t:429,r:4,s:0 http://www.google.co.uk/imgres?q=sorority+row&hl=en&sa Typography =X&gbv=2&biw=1366&bih=643&tbm=isch&tbnid=GLV3L2g_u aG_BM:&imgrefurl=http://www.movienewz.com/sorority- row-dvd-and-blu- ray/&docid=NtJj9UCrRS5RoM&imgurl=http://www.moviene wz.com/img/disc/large/sorority- row_dvd.jpg&w=450&h=639&ei=mD12T- bXGZSw8QPawfjWDQ&zoom=1&iact=hc&vpx=524&vpy=262 &dur=1535&hovh=268&hovw=188&tx=120&ty=257&sig=103 515708725778390378&page=1&tbnh=122&tbnw=86&start=0 &ndsp=22&ved=1t:429,r:17,s:0
- 30. Bibliography Where was it used? Link Picture http://www.google.co.uk/imgres?q=180+degree+rule&um=1 180 Degree Rule &hl=en&sa=N&biw=1366&bih=643&tbm=isch&tbnid=hr3suQ lWuW7bPM:&imgrefurl=http://en.wikipedia.org/wiki/180_de gree_rule&docid=SIEME1SdNxImHM&imgurl=http://upload. wikimedia.org/wikipedia/commons/thumb/b/be/180_degree _rule.svg/300px- 180_degree_rule.svg.png&w=300&h=265&ei=m0d2T7zVB4Sn 8QP5s- zXDQ&zoom=1&iact=rc&dur=271&sig=103515708725778390 378&page=1&tbnh=129&tbnw=146&start=0&ndsp=18&ved= 1t:429,r:0,s:0&tx=86&ty=42 http://www.google.co.uk/imgres?q=match+on+action Match On Action +through+a+door&um=1&hl=en&biw=1366&bih=643 &tbm=isch&tbnid=xgR6BBIPqREGHM:&imgrefurl=http ://thomasmcnamara3127asfilmproject.blogspot.com/ 2011/02/match-on- action.html&docid=wKWN0yXwlMb9QM&imgurl=http ://2.bp.blogspot.com/_lhIHLZYGAGk/TUqX_yInu- I/AAAAAAAAABY/z4i2cjdhDog/s1600/untitled.bmp&w =655&h=495&ei=- kh2T6jlB5Tv8QO82o2zDQ&zoom=1&iact=rc&dur=181 &sig=103515708725778390378&page=1&tbnh=137&t bnw=182&start=0&ndsp=18&ved=1t:429,r:4,s:0&tx=8 8&ty=74