A form in Access is a database object that you can use to create a user interface for a database application. A "bound" form is one that is directly connected to a data source such as a table or query, and can be used to enter, edit, or display data from that data source. Alternatively, you can create an "unbound" form that does not link directly to a data source, but which still contains command buttons, labels, or other controls that you need to operate your application.
This article focuses primarily on bound forms. You can use bound forms to control access to data, such as which fields or rows of data are displayed. For example, certain users might need to see only several fields in a table with many fields. Providing those users with a form that contains only those fields makes it easier for them to use the database. You can also add command buttons and other features to a form to automate frequently performed actions.
Think of bound forms as windows through which people see and reach your database. An effective form speeds the use of your database, because people don't have to search for what they need. A visually attractive form makes working with the database more pleasant and more efficient, and it can also help prevent incorrect data from being entered.
FabGreen Technologies provides JustBill Billing Software to wide range of customers. This software can be installed in Windows Computer and Tablet. JustBill ensure full security to your data. JustBill is an extensive product for any small scale business. It is integrated with tally. This is specially designed for small and medium scale Retail and Traders.
Recording and running macros in the office applicationputiadetiara
berikut adalah penjelasan bagaimana record macros pada office application.
Ade Tiara Putri
Program Studi S1 Sistem Informasi
Fakultas Sains dan Teknologi
Universitas Islam Negeri Sultan Syarif Kasim Riau
please visit
http://sif.uin-suska.ac.id/
http://fst.uin-suska.ac.id/
http://www.uin-suska.ac.id/
Page 1 of 11 A. Lab # BSBA BIS245A-5B B.docxjoyjonna282
Page 1 of 11
A. Lab # : BSBA BIS245A-5B
B. Lab 5B of 7: Completing Forms
C. Lab Overview--Scenario/Summary
TCO(s):
5. Given a physical database containing tables and relationships, create
forms which demonstrate effective user-interface design and allow for
efficient entry and retrieval of data.
Scenario/Summary
The lab begins with creating a form in Access using the Form Wizard. After the
form is created, the user can use Themes to change the appearance of the form.
The second part of the lab uses Form Design to create a form. Finally, the form
will be customized.
Upon completing this lab, you should be able to
• create a form using the Form Tool;
• create a form using Form Design; and
• create a form using the Form Wizard.
D. Deliverables
Submit the MS Access Database file that contains the forms created in this lab.
Step Deliverable Points
1 Form 1 – Form Tool - step-by-step 5
2 Form 2 – Form Design – step-by-step 5
3 Form 3 – Form Wizard—Employee/Customers Multi-Table Form
– step-by-step
5
4 Form 4 – Suppliers and Products Multi-Table Form 10
E. Lab Steps
Preparation
1. Get the Database from Doc Sharing
Page 2 of 11
a. Download the Lab5_Start.accdb Northwind database file from your
course Doc Sharing panel (Labs view), and Save the file to your local
drive.
2. Using Citrix for MS Visio and/or MS Access
a. If you are using the Citrix remote lab, follow the login instructions
located in the iLab tab in Course Home.
b. You will have to upload the Lab5_Start.accdb file to your Citrix folder.
Follow the instructions located on the iLab tab in Course Home.
3. Start MS Access
a. If you are using Citrix, click on Microsoft Office Applications folder.
b. If you are using Visio on a local computer, select Microsoft Office from your
Program Menu.
Lab
Step 1: Using the Form Tool
Select Employees table as in the following figure. You will see the Employees
table highlighted.
Click the Create tab, and then click the Form tool.
Page 3 of 11
After clicking the Form button, a new form is created by Access.
The appearance of the form can be easily modified using the Themes option on
the Design ribbon. As you move your cursor over the various themes, the form
will adjust to preview how the modified form would look. You may select any
theme for your form.
Click the Save button to save the form. Name it Lab5_Form1, and then close the
form.
Step 2: Using the Form Design
Page 4 of 11
Click the Create tab; then, click on Form Design. (Make sure that you do not
have any of the tables selected in the Tables list on the left side of the screen.)
After clicking the Form Design, a new form will be shown as the following
Page 5 of 11
Click the Add Existing Fields
option, and then click Show All
Tables to show all the tables in
the database. Drag and drop
fields from the Custo ...
More information on OnEdu Learning Management System for business and educational institutions: http://www.matleenalaakso.fi/p/in-english.html and http://www.onedu.fi/en/
Essentials of Automations: Optimizing FME Workflows with ParametersSafe Software
Are you looking to streamline your workflows and boost your projects’ efficiency? Do you find yourself searching for ways to add flexibility and control over your FME workflows? If so, you’re in the right place.
Join us for an insightful dive into the world of FME parameters, a critical element in optimizing workflow efficiency. This webinar marks the beginning of our three-part “Essentials of Automation” series. This first webinar is designed to equip you with the knowledge and skills to utilize parameters effectively: enhancing the flexibility, maintainability, and user control of your FME projects.
Here’s what you’ll gain:
- Essentials of FME Parameters: Understand the pivotal role of parameters, including Reader/Writer, Transformer, User, and FME Flow categories. Discover how they are the key to unlocking automation and optimization within your workflows.
- Practical Applications in FME Form: Delve into key user parameter types including choice, connections, and file URLs. Allow users to control how a workflow runs, making your workflows more reusable. Learn to import values and deliver the best user experience for your workflows while enhancing accuracy.
- Optimization Strategies in FME Flow: Explore the creation and strategic deployment of parameters in FME Flow, including the use of deployment and geometry parameters, to maximize workflow efficiency.
- Pro Tips for Success: Gain insights on parameterizing connections and leveraging new features like Conditional Visibility for clarity and simplicity.
We’ll wrap up with a glimpse into future webinars, followed by a Q&A session to address your specific questions surrounding this topic.
Don’t miss this opportunity to elevate your FME expertise and drive your projects to new heights of efficiency.
Future Visions: Predictions to Guide and Time Tech Innovation, Peter Udo DiehlPeter Udo Diehl
I'm excited to share my latest predictions on how AI, robotics, and other technological advancements will reshape industries in the coming years. The slides explore the exponential growth of computational power, the future of AI and robotics, and their profound impact on various sectors.
Why this matters:
The success of new products and investments hinges on precise timing and foresight into emerging categories. This deck equips founders, VCs, and industry leaders with insights to align future products with upcoming tech developments. These insights enhance the ability to forecast industry trends, improve market timing, and predict competitor actions.
Highlights:
▪ Exponential Growth in Compute: How $1000 will soon buy the computational power of a human brain
▪ Scaling of AI Models: The journey towards beyond human-scale models and intelligent edge computing
▪ Transformative Technologies: From advanced robotics and brain interfaces to automated healthcare and beyond
▪ Future of Work: How automation will redefine jobs and economic structures by 2040
With so many predictions presented here, some will inevitably be wrong or mistimed, especially with potential external disruptions. For instance, a conflict in Taiwan could severely impact global semiconductor production, affecting compute costs and related advancements. Nonetheless, these slides are intended to guide intuition on future technological trends.
State of ICS and IoT Cyber Threat Landscape Report 2024 previewPrayukth K V
The IoT and OT threat landscape report has been prepared by the Threat Research Team at Sectrio using data from Sectrio, cyber threat intelligence farming facilities spread across over 85 cities around the world. In addition, Sectrio also runs AI-based advanced threat and payload engagement facilities that serve as sinks to attract and engage sophisticated threat actors, and newer malware including new variants and latent threats that are at an earlier stage of development.
The latest edition of the OT/ICS and IoT security Threat Landscape Report 2024 also covers:
State of global ICS asset and network exposure
Sectoral targets and attacks as well as the cost of ransom
Global APT activity, AI usage, actor and tactic profiles, and implications
Rise in volumes of AI-powered cyberattacks
Major cyber events in 2024
Malware and malicious payload trends
Cyberattack types and targets
Vulnerability exploit attempts on CVEs
Attacks on counties – USA
Expansion of bot farms – how, where, and why
In-depth analysis of the cyber threat landscape across North America, South America, Europe, APAC, and the Middle East
Why are attacks on smart factories rising?
Cyber risk predictions
Axis of attacks – Europe
Systemic attacks in the Middle East
Download the full report from here:
https://sectrio.com/resources/ot-threat-landscape-reports/sectrio-releases-ot-ics-and-iot-security-threat-landscape-report-2024/
UiPath New York Community Day in-person eventDianaGray10
UiPath Community Day is a unique gathering designed to foster collaboration, learning, and networking with automation enthusiasts. Whether you're an automation developer, business analyst, IT professional, solution architect, CoE lead, practitioner or a student/educator excited about the prospects of artificial intelligence and automation technologies in the United States, then the UiPath Community Day is definitely the place you want to be.
Join UiPath leaders, experts from the industry, and the amazing community members and let's connect over expert sessions, demos and use cases around AI in automation as we highlight our technology with a special speaker on Document Understanding.
📌Agenda
3:00 PM Registrations
3:30 PM Welcome note and Introductions | Corina Gheonea (Senior Director of Global UiPath Community)
4:00 PM Introduction to Document Understanding
How to build and deploy Document Understanding process
Where would Document Understanding be used.
Demo
Q&A
4:45 PM Customer/Partner showcase
Accelirate
Intro to Accelirate and history with UiPath
Why are we excited about the new AI features of UiPath?
Customer highlight
a. Document Understanding – BJs Case Study
b. Document Understanding + generative AI
5.30 PM Networking
"Impact of front-end architecture on development cost", Viktor TurskyiFwdays
I have heard many times that architecture is not important for the front-end. Also, many times I have seen how developers implement features on the front-end just following the standard rules for a framework and think that this is enough to successfully launch the project, and then the project fails. How to prevent this and what approach to choose? I have launched dozens of complex projects and during the talk we will analyze which approaches have worked for me and which have not.
Slack (or Teams) Automation for Bonterra Impact Management (fka Social Soluti...Jeffrey Haguewood
Sidekick Solutions uses Bonterra Impact Management (fka Social Solutions Apricot) and automation solutions to integrate data for business workflows.
We believe integration and automation are essential to user experience and the promise of efficient work through technology. Automation is the critical ingredient to realizing that full vision. We develop integration products and services for Bonterra Case Management software to support the deployment of automations for a variety of use cases.
This video focuses on the notifications, alerts, and approval requests using Slack for Bonterra Impact Management. The solutions covered in this webinar can also be deployed for Microsoft Teams.
Interested in deploying notification automations for Bonterra Impact Management? Contact us at sales@sidekicksolutionsllc.com to discuss next steps.
Software Delivery At the Speed of AI: Inflectra Invests In AI-Powered QualityInflectra
In this insightful webinar, Inflectra explores how artificial intelligence (AI) is transforming software development and testing. Discover how AI-powered tools are revolutionizing every stage of the software development lifecycle (SDLC), from design and prototyping to testing, deployment, and monitoring.
Learn about:
• The Future of Testing: How AI is shifting testing towards verification, analysis, and higher-level skills, while reducing repetitive tasks.
• Test Automation: How AI-powered test case generation, optimization, and self-healing tests are making testing more efficient and effective.
• Visual Testing: Explore the emerging capabilities of AI in visual testing and how it's set to revolutionize UI verification.
• Inflectra's AI Solutions: See demonstrations of Inflectra's cutting-edge AI tools like the ChatGPT plugin and Azure Open AI platform, designed to streamline your testing process.
Whether you're a developer, tester, or QA professional, this webinar will give you valuable insights into how AI is shaping the future of software delivery.
From Daily Decisions to Bottom Line: Connecting Product Work to Revenue by VP...
Creating forms word 2003
1. Create forms that users complete or print in Word
Microsoft Office Word 2003
You need to complete several tasks to create forms for users to view and
complete in Microsoft Word.
1. Create a template.
How?
1. Start a new document, or open the document or template that you
want to base the template on.
2. On the File menu, click Save As.
3. In the Save as type box, click Document Template.
4. In the File name box, type a name for the new template, and then
click Save.
Note The new template appears on the General tab.
2. Design the form by sketching a layout first, or use an existing form as
a guide.
Note In your form, you can use form fields, form controls, tables and
nested tables, and text boxes.
3. On the View menu, point to Toolbars, and then click Forms to open
the Forms toolbar.
4. Add form fields for text boxes, check boxes, and drop-down lists.
How?
1. In the document, click where you want to insert the form field.
2. Do any of the following:
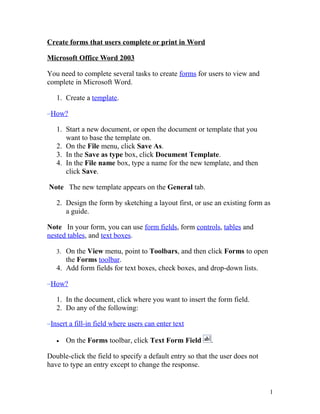
Insert a fill-in field where users can enter text
• On the Forms toolbar, click Text Form Field .
Double-click the field to specify a default entry so that the user does not
have to type an entry except to change the response.
1
2. Insert a check box next to an independent option that users select or clear
• On the Forms toolbar, click Check Box Form Field .
You can also use this button to insert a check box next to each item in a
group of choices that are not mutually exclusive — that is, users can select
more than one.
Insert a drop-down list box that restricts available choices to those you
specify
1. On the Forms toolbar, click Drop-Down Form Field .
2. Double-click the drop-down form field.
3. To add an item, type the name of the item in the Drop-down item
box, and then click Add.
5. If necessary, edit the appearance of the fields. Do any of the
following:
Remove or change the order of items in a drop-down list form field
1. Double-click the drop-down form field you want to change.
2. Do any of the following, and then click OK:
• To delete an item, click the item in the Items in drop-down list box,
and then click Remove.
• To move an item, click the item in the Items in drop-down list box,
and then click the Move arrow buttons.
Change the formatting of form field results
1. Select the form field you want to format.
2. On the Format menu, click Font.
3. Select the options you want.
Display or remove shading
• Click Form Field Shading on the Forms toolbar.
Note The shading appears on the screen so users can quickly identify the
fields they need to respond to. This shading does not print.
2
3. 6. Set or edit properties for the form field.
How?
1. Double-click the form field you want to change.
2. Change the options you want, and then click OK.
7. Add Help or automation to the form. Do any of the following:
Add Help text to a form control
1. Double-click the form field to which you want to add Help text.
2. Click Add Help Text.
3. To display Help text in the status bar, click the Status Bar tab, click
Type your own, and then type your Help text in the box.
To display Help text in a message box when a user presses F1, click the
Help Key (F1) tab, click Type your own, and then type your Help text in
the box.
Automate your form
1. Create the macros you want to use, and store them in the form
template.
If another template contains macros you want to use, copy them into the
form template.
Security Use caution when you are adding macros to your form. Macros
may be designed in such a way that their use could pose a security risk. We
recommend that you use macros from trusted sources only.
2. Double-click the form field you want to assign a macro to.
3. To run a macro when the insertion point enters the form field, click
the macro in the Entry box.
To run a macro when the insertion point exits the form field, click the macro
in the Exit box.
Note If you store the entry and exit macros in your Normal template and
then distribute a form to others, the entry and exit macros may not run
3
4. because the macros won't be available to the users. You must store the
macros that you use in a form in the form template.
8. Add protection to the form. Users cannot fill out a form until you add
protection to it. Word provides several types of protection. Do any
one of the following:
Add protection to test a form as you design or change it
• On the Forms toolbar, click Protect Form .
Note You can manually reset form fields by clicking Reset Form Fields
on the Forms toolbar.
Add protection to help prevent users from changing a form
Note When you follow these steps to add protection to a document, the
form fields are reset.
1. On the Tools menu, click Protect Document.
2. In the Protect Document task pane, under Editing restrictions,
select the Allow only this type of editing in the document check
box, and then click Filling in forms in the list of editing restrictions.
3. To add protection to only parts of a form, click Select sections, and
then clear the check boxes for the sections you don't want to add
protection to.
Note To add protection to only parts of a form, those parts must be in
separate sections. (On the Insert menu, click Break to create section
breaks.)
4. Click Yes, Start Enforcing Protection.
5. To assign a password to the form so that users who know the
password can remove the protection and change the form, type a
password in the Enter new password (optional) box, and then
confirm the password. Users who don't know the password can still
enter information in the form fields.
9. Save the form, and then distribute it as you would any other document
that you send for review.
4
5. Tips
• You can also create a form by starting with a sample template. Many
are available on the Microsoft Office Online Web site.
• If you want, you can test the form prior to distributing it. Open the
form, fill it out as the user would, and then save a copy in the
designated location.
5
6. Tips
• You can also create a form by starting with a sample template. Many
are available on the Microsoft Office Online Web site.
• If you want, you can test the form prior to distributing it. Open the
form, fill it out as the user would, and then save a copy in the
designated location.
5