This article will change your life actually hosted plahing is a hosting site for owners sites and blogging, where the Bluhost company offers a group of outstanding services and is one of the best global hosting services. Bluhost hosting is very competitive as the core hosting package is less than $ 3 a month hosted plash is a hosting site for owners sites and blogs, where the Bluhost company offers a group of outstanding services
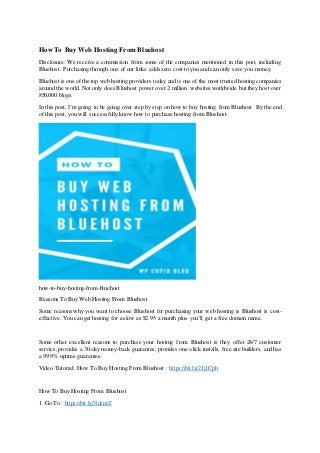
1. How To Buy Web Hosting From Bluehost
Disclosure: We receive a commission from some of the companies mentioned in this post, including
Bluehost. Purchasing through one of our links adds zero cost to you and can only save you money.
Bluehost is one of the top web hosting providers today and is one of the most trusted hosting companies
around the world. Not only does Bluehost power over 2 million websites worldwide but they host over
850,000 blogs.
In this post, I’m going to be going over step by step on how to buy hosting from Bluehost. By the end
of this post, you will successfully know how to purchase hosting from Bluehost.
how-to-buy-hosting-from-bluehost
Reasons To Buy Web Hosting From Bluehost
Some reasons why you want to choose Bluehost for purchasing your web hosting is Bluehost is cost-
effective. You can get hosting for as low as $2.95 a month plus you’ll get a free domain name.
Some other excellent reasons to purchase your hosting from Bluehost is they offer 24/7 customer
service,provides a 30-day money-back guarantee,provides one-click installs, free site builders, and has
a 99.9% uptime guarantee.
Video Tutorial: How To Buy Hosting From Bluehost : https://bit.ly/2Jj1Cph
How To Buy Hosting From Bluehost
1. Go To : https://bit.ly/3ldsnrZ
2. 2. The first step in buying web hosting with Bluehost is to visit the Bluehost site by clicking here.You’ll
now be on their website to continue in the steps on buying your web hosting.
You’ll see a get started button. Click the button to proceed to the next step in this how to buy hosting
from Bluehost guide.
bluehost-home-page
2. Select A Hosting Plan
3. You’ll now be on a page where you want to choose the Bluehost hosting plan that best suits you.
You’ll see a Basic, Plus, Choice Plus, and a Pro plan.
4. If you’d like to have unlimited domains or email accounts you’ll want to go with the Plus plan. The
Plus plan also comes with Spam Experts. Spam Experts is an email filtering system to make sure emails
coming in don’t have viruses or are spam emails.
bluehost-plus-plan
The Choice Plus plan comes with all the things the Plus plan comes with and also includes Domain
Privacy + Protection and Site Backup – Codeguard Basic.
Domain Privacy + Protection protects your personal contact information so that you aren’t bugged by
telemarketers and spam.
The Site Backup – Codeguard Basic backups your site daily and allows you to restore your site to a
previous version in case something happens and you need a version from before.
5. bluehost-choice-plus-plan
The Pro Plan comes with everything the Choice Plus plan comes with along with a free Dedicated IP
and 2 Spam Experts to protect 2 email addresses from viruses or spam.
I don’t recommend the Pro plan unless you have a big site and lots of revenue already. The Pro plan is
a good plan to upgrade too when your site grows and has lots of traffic and revenue.
When you choose the plan, you want to purchase click the select button to continue with our how to
buy hosting from Bluehost guide.
6. bluehost-pro-plan
3. Choose A Domain Name
4. You are now on the page where you want to select a domain name for your site. The awesome part
is you are going to get a free domain name. You’ll see on the left-hand side a box where you can enter
the domain name that you would like to have.
If you already purchased your domain from another company, you can enter the domain name over on
the right-hand side where it says ‘I have a domain name.’
7. If you aren’t sure what domain name you would like to have you can click the I’ll create my domain
later link to choose your free domain name at a later date from your Bluehost account.
If you are getting your domain name with Bluehost enter the domain name you would like to have and
you’ll see to the right of where you enter a domain name a box where you can choose the domain
extension you want to use.
I recommend you select a .com if you can as this is still the most popular domain extension and .com is
what most people will type in the search engines when trying to find a site.
bluehost-choose-domain-extension
Once you choose the domain that you would like to have, click the next button, and Bluehost will now
let you know if the domain is available or not. If it’s available, it will say available.
8. bluehost-domain-name-available
If the domain you choose is unavailable it will let you know. It can be common if a domain name is
unavailable so don’t worry. You could try the domain with a different domain extension, with a -,adding
a word to it, or choosing a different domain for your site.
bluehost-domain-name-unavailable
Let’s continue to the next step in our how to buy hosting from Bluehost guide.
One thing I want to mention is if your domain name was purchased with another company you’ll need
to change your nameservers to point to Bluehost.
9. If you need help with this just let me know via email and I will help you. Bluehost’s friendly support
team can quickly help you too.
Two of the top domain registrars today is Namecheap and Godaddy. If you purchased your domain
name via Namecheap you can visit my step by step post on pointing your Namecheap domain to
Bluehost.
If you bought your domain name with Godaddy here’s a post that goes over pointing your Godaddy
domain to Bluehost.
4. Enter Account Information
5. Now you want to input your account information to continue with our how to buy hosting from
Bluehost guide.
bluehost-account-information
5. Select Package Information
6. You’ll now be on a page where you want to select your package information. You will see account
plan.
10. bluehost-package-information
This is where you want to choose the Bluehost hosting term you would like to purchase your hosting
for. You can choose 12 months, 24 months, or 36 months. You will see you will get the free domain
registration and a free Let’s Encrypt SSL Certificate.
You will see the longer you purchase your Bluehost hosting for the cheaper the pricing will be.
bluehost-account-plan
Every site nowadays needs to have an SSL Certificate. Google uses it as one of their ranking factors
when ranking sites. Another important reason to have an SSL Certificate is it protects your customer’s
information like usernames,passwords,and credit card numbers.
bluehost-lets-encrypt-ssl-certificate
6. Choose Package Extras
7. Next, in our how to buy hosting from Bluehost guide you will notice some add-ons that you can
select or un-select. These add-ons are entirely optional, and you can always add them at a later date if
you decide you need one.
11. bluehost-package-extras
These add-ons consist of Domain Privacy + Protection, Codeguard Basic, Bluehost SEO Tools Start, 1
Office 365 Mailbox, and Sitelock Security Essential.
I highly recommend you get the domain privacy as this keeps your personal information private by
replacing your contact information with Bluehost’s information.
By keeping your personal information private, you will eliminate telemarketers calling you and
emailing you trying to sell you their marketing services, etc.
12. bluehost-domain-privacy-protection
Codeguard Basic backups your site daily and allows you to restore your site to a previous version in
case something happens and you need a previous version.
bluehost-codeguard-basic
Bluehost SEO Tools Start gives you a detailed plan and a personalized marketing report so you can
optimize your site for the right keywords in which you want to rank for.
Bluehost SEO Tools Start will also automatically submit your site to searchengines without you having
to create a Google Webmasters account and doing so manually from the start.
I do want to mention that your site will get crawled and indexed by Google on its own so I really don’t
recommend SEO Tool Start if you are getting it just for the auto search engine submission. You might
find the free reports and advice they give you helpful.
7. Enter Payment Information
13. 8. The last step in our how to buy hosting from Bluehost is to fill out your billing information. Once
you have entered your billing information make sure you accept the terms and conditions and click on
the green submit button.
bluehost-payment-information
You have now successfully purchased hosting from Bluehost.
You will now receive a welcome email from Bluehost with your Bluehost Cpanel login credentials.
You will also receive an email where you need to activate your domain name if you got your free
domain name buying hosting from Bluehost.
Ignore this step if you purchased your domain name from another company.
You will now be asked to create a password that you would like for Bluehost.
bluehost-choose-password
You want to click on the create your password button. You will now be directed to a page where you
can create your password for your website or blog using WordPress.
Make sure you select the I have read and agreed to Bluehost’s Terms and Conditions to continue with
our how to buy hosting from Bluehost guide.
14. bluehost-create-password
In September of 2017 Bluehost made updates making the process of starting a website or starting a blog
easier.Afterthe payment page,Bluehost will now automatically walk you through the stepsof installing
and setting up a site using one of the top platforms being used to build websites known as WordPress.
The platform is used by this very blog, and Fortune 500 companies all around the world use it. In fact,
this year WordPress now powers over 30% of websites.
If for any reason you don’t want to start your site with WordPress you can easily build your site using
another site builder of your choice with Bluehost. You just need to login to your Bluehost Cpanel and
continue starting your site how you would like.
You can disregard the steps I go through below using WordPress if you aren’t going to use WordPress
for your site. I provided a screenshot of Bluehost’s Cpanel at the end of this how to buy hosting from
Bluehost post so you can see what it looks like.
Let’s continue in setting up your site.
You will now see a congratulations page pop up. You want to select the blue login button to log in to
Bluehost so you can continue choosing a free WordPress theme for your site.
15. bluehost-login
The next step after you have purchased web hosting from Bluehost is choosing a WordPress theme.
Bluehost gives you the option to choose a free WordPress theme. They have a lot of excellent themes
to choose from.
Under the themes showcased you will see skip this step. I recommend doing this for now as I’m going
to show you where you can get a ton of free WordPress themes from. But if you see a theme that sticks
out go ahead and select it. You can easily change themes.
bluehost-pick-wordpress-theme
The WordPress..orgdirectory has tons of greatfree themes to choose from aswell. Click here to browse
through them.
16. wordpress-org-free-wordpress-themes
I will be showing you how you can choose free WordPress themes straight from the WordPress
dashboard a little later in this post.
wordpress-dashboard-free-wordpress-themes
17. If you find yourself struggling with customizing your WordPress theme, Themeforest is a great site
where I get all of my Premium themes. They have pre-made professional blog and website themes that
look like an award-winning design agency designed them.
themeforest-premium-wordpress-themes
Once you skip the themes step or choose a theme that you like you will be on a page that says you’re
all set, start building. Select the start building button to be taken to the WordPress dashboard so you
can create and customize your site.
bluehost-wordpress- login
You will now be in the WordPress dashboard. You will find that it will ask you a few questions. Feel
free to click the option stating you don’t need any help if you’d like.
wordpress-dashboard-bluehost
18. You’ll see some Bluehost tools on the WordPress dashboard that are extremely helpful when you are
first creating your website or blog.
You can easily add new site pages, blog posts, customize the menu, and install Woocommerce if you
are going to be selling products on your site.
bluehost-tools
A button that says launch your blog should popup. Click the button, and you will be able to name your
site title and site description.
bluehost-launch-your-wordpress-site
You will see tabs over on the left-hand side. This is where you can go to easily add pages, add blog
posts, read comments on your site, add images, etc.
19. wordpress-side-menu
You will see Appearance. Hover over that, and you will see Themes.
appearance-themes-wordpress
Select this, and you are now brought to the WordPress themes page. Click add new.
wordpress-theme-add-new
You will see free WordPress themes to choose from. You can select featured themes, popular themes,
etc.
21. If you download a Premium theme from Themeforest as I mentioned earlier, you can easily add the
theme into WordPress by clicking upload theme where you select from the list of thousands of free
WordPress themes.
upload-wordpress-theme
You can now choose the file from your computer for the WordPress theme.
upload-wordpress-theme-zip-file
One of the most popular free drag and drop editors for WordPress is Elementor. Elementor makes the
website creation process easy. Elementor has over 4 million active installations.
elementor-drag-and-drop-editor
22. Lastly, I want to provide you with a screenshot of the Bluehost Cpanel to end our how to buy hosting
from Bluehost guide. This is what the Bluehost Cpanel looks like when you log in to it. You can easily
access your billing, account information, nameservers,free site builders, etc.
bluehost-cpanel
This concludes our how to buy hosting from Bluehost step-by-step beginners guide.
If you purchased a plan that allows unlimited sites you might find our how to add an addon domain in
Bluehost helpful as it goes over how to add more than one site to your Bluehost web hosting account.
If you haven’t already get your Bluehost hosting discount now plus your free domain name.
how-to-purchase-hosting-from-bluehost
Final Thoughts
I hope you enjoyed my step by step guide on how to buy hosting from Bluehost.
23. Let us know in the comments below if you liked this post! We would love to hear from you.
Bluehost website link to purchase hosting : https://bit.ly/3ldsnrZ
- A YouTube video that shows you everything from scratch to the end : https://bit.ly/2Jj1Cph