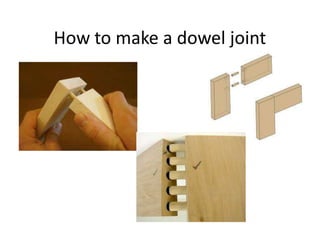
This document provides instructions for making a dowel joint in 5 steps: 1) Marking holes with a pencil cross, 2) Drilling holes safely using a pillar drill, hair tie, and protective gear. 3) Cutting dowels with a tenon saw and bench hook. 4) Gluing dowels into holes with PVA glue and wiping excess. 5) Letting the joint set for 6 hours with optional tape support.
2. 1. Marking out your hole
It is important to mark out
the hole so that it is
accurately drilled.
You always mark with a
sharp pencil and a cross,
not a dot. (this is also
more accurate!)
Make sure you bring a
pencil to next lesson.
3. 2. Drilling
You will be using a pillar drill to
drill your hole. You will be
shown how to use this next
lesson.
It is very important that you
wear an apron and goggles and
have your sleeves pushed back
and hair tucked in.
Make sure you bring a hair band
to next lesson if you have long
hair, and do not wear any
jewellery.
4. 3. Cutting the Dowel
You will use a tenon saw
and bench hook to cut
your dowel.
Tenon saws help you to
cut straight lines.
It is important to keep
your fingers out of the
way and tell an adult if
you are hurt.
5. 4. Gluing your joint
You will be using PVA
glue to glue your dowels
into your holes.
You should wipe off
excess glue with tissue
before it dries, once your
joint is in position.
You must wash your
hands after using glue.
6. 5. Leaving to set.
You must leave your
joint to dry for 6 hours.
You may need to
support it with some
masking tape.