SlideShare a Scribd company logo
1 of 51
Download to read offline
Film: 21st Century Literacy
A strategy for film education across the UK
I N GSU
I L MF
I N
H O OCS L S
A PRACTICAL GUIDE
Using Film In Schools: a Practical Guide
Introduction 2
/1
Using Film In Schools: A Practical Guide ©2010 Film: 21st Century Literacy
1 Using film 4
An overview of film education and its role and value
■ Manageable filmmaking
■ Opportunities for film education in the curriculum
■ Film and other outcomes
■ Informal learning
■ Principles of film education
■ Continuing professional development
■ Working with partners
■ Work-related learning and progression to the creative industries
2 Spaces and equipment 13
Advice on technology and spaces for film viewing and filmmaking
■ Learning contexts
■ Access to film education
■ General advice for procurement
■ Film viewing equipment and spaces
■ Filmmaking equipment and spaces
3 Partners, resources and funding 38
Directory of partner organisations, sources of support and funding, and resources
■ Partners
■ UK-wide organisations
■ Nations and regions
■ Local partners
■ Resources
4 The law and film education 44
■ Copyright
■ Film classification
■ Privacy
■ Defamation
■ Security
■ Disclaimer
Acknowledgements 50
Introduction
This is a guide for schools who want to deliver film activities in and out of the classroom. Using Film In Schools:
A Practical Guide will help teachers and headteachers integrate filmmaking, watching and critical analysis across
the curriculum.
The guide is part of Film: 21st Century Literacy, a 3-year Strategy to recognise the value of film in education.
Film: 21st Century Literacy is funded by the UK Film Council and delivered by the British Film Institute, Skillset,
Film Education, First Light and FILMCLUB. We are also working with Partnerships for Schools to publish this
guide.
Over the past year, schools have asked us a number of questions, for example, what of equipment should we be
buying? What’s the best school environment for watching or making films? How do we ensure we don’t breach
copyright? What other partners can we work with? Are there any other resources?
Film can be delivered in schools easily and relatively cheaply. This guide will show you how.
/2
Raising standards with film
Film is increasingly being recognised by teachers as a valuable tool that can be used to re-engage young people
with the curriculum and increase their overall motivation for learning.
Film is very popular with young people. They are not afraid to use it in lessons, and enjoy doing so. Film is
a tool you can use to motivate and engage pupils in the classroom, and contextualise difficult areas of the
curriculum.
Film can help children to be more positive about the whole school experience, and showing films to children that
go beyond Hollywood is recognised by teachers as helping to broaden their pupils’ minds.
Media Education Wales’ Ffilmschool 2 transition project, in a South Wales cluster, has shown that teaching
with film can make the majority of students more interested in writing. The project made the students’
writing more descriptive and enhanced their range of expressions. In another project funded by the BFI,
the percentage of children writing at their expected class level rose from 29% to 75%.
“The video workshops have helped my writing because I am forced to focus on one thing at a time and
think about it in-depth.” (Ffilmschool 2 pupil)
The Projector world cinema project run by the Cornerhouse Cinema in association with Manchester
Metropolitan University and Routes Into Languages used world cinema to teach foreign languages.
Following the project, the numbers of young people who said they now wanted to go on to study languages
at A Level rose by 20%.
“Learning Arabic in a creative environment like the cinema and gallery spaces was very stimulating and
motivating...I’ve seen improvements in my students’ confidence and in using Arabic.” (Teacher)
Using Film In Schools: A Practical Guide ©2010 Film: 21st Century Literacy
Introduction /3
Going beyond Hollywood
We know that young people are eager to watch new kinds of films. They are not put off by subtitles, and even
very young children are keen to experiment with new genres.
There is a huge range of films available for young people: archive, animation, European and world cinema, short
films and documentaries. Film education plugs a gap by taking them beyond Hollywood. It broadens the minds
of young people and provides them with a more diverse range of cultural experiences.
For example:
■ FILMCLUBs are broadening the range of films young people can watch from around the world
■ BFI resources introduce young people to the wealth of classic British cinema from the last 100 years
■ National Schools Film Week offered an increased focus on European cinema last year, tapping into a rich and
diverse range of films
A project in the East Midlands offered teachers in schools across eight local authorities the chance to use
film for a year. Many had never done so before. By the end of the first year, two thirds were reporting that
the project had made them more enthusiastic about teaching, and had changed their pedagogy. 100% of
teachers felt that film could reach difficult or challenging pupils (80% strongly).
Bringing the elements together
The best educational experience for young people brings together filmmaking, watching and critical analysis.
This is probably easier to do in primary schools, where a single film project can weave together different areas
of the curriculum with other creative activities such as music and drama.
At all Key Stages, by bringing these elements together, teachers can create a richer film learning experience.
Young people can learn the language of film, whilst developing new literacy skills of their own.
Using this guide
Using Film in Schools: A Practical Guide will help you to:
■ Identify where film can contribute to delivering the curriculum
■ Choose the right kit to make, watch and display films in school
■ Make the best use of spaces and the school environment
■ Navigate copyright and other legal issues
■ Source outside partners to work with
■ Access useful film resources
Other useful information sources exist to support teachers working across the curriculum. These are listed in
Chapter 4. We will be continually updating this guide to make it continually relevant.
If you have any comments or can suggest additional areas you think we should cover please email Adam
Cooper at adam@21stcenturyliteracy.org.uk
Using Film In Schools: A Practical Guide ©2010 Film: 21st Century Literacy
1. Using film /4
You can use film to enhance learning across the curriculum, whatever your level of expertise. Teaching in subjects
from English and Modern Foreign Languages to Science and PE can benefit from using simple cameras for
recording, note-taking or reviewing, or from showing short clips to enhance children’s understanding of a topic.
Using film doesn’t have to be complicated, and you don’t have to restrict it to separate filmmaking projects or
to screening complete feature films. You probably already have suitable cameras in your school, and most
computers are suitable for viewing or editing film clips.
This section looks at how you can use film in different subject and topic areas and informal education, and how
it can contribute to broader outcomes.
In a recent project in East Midlands primary schools, nearly 70% of teachers said that film education didn’t
take a long time to plan compared with other creative activities, and that the technology was easy to use:
and 100% said that using film education was worth the effort.
Manageable filmmaking
If you decide to move from basic video recording to structured filmmaking projects, start by keeping the films
short and simple. Making films more than a few minutes long will involve repetitive and time-consuming work.
Five minutes is long for a school film: twenty or thirty seconds may be all you need.
Look for ways of filmmaking that give children plenty of opportunity for creative learning and avoid activities that
are unnecessarily difficult. Trying to imitate television drama or Hollywood film requires good acting, planning,
and a high level of technical skill and attention to detail. Would it be easier to use an advertisement, a title
sequence, or a public information film as a model?
Choose equipment that’s easy to learn and
use. Do you need bulky camcorders and
professional editing software? Some very
imaginative films have been made with very
simple cameras and software. Can you use a
phone camera, or a still camera that records
movies?
Do you need to record live sound? This is
hard to do well. Can you manage without it by
recording a voiceover, or creating a soundtrack,
on a computer?
Animation may appear to be time-consuming, but a short clay animation film can take less time than doing a live
action sequence properly. It offers much more scope to be imaginative with sets, locations and costumes in an
ordinary classroom.
There are many different ways to plan a filmmaking project, and you need to choose one which is suitable for
your students. Detailed scripts and storyboards aren’t always necessary: you can try using mindmaps or simple
shot lists as an alternative. Discussion, collaboration and groupwork are some of the most valuable aspects of
film education, so try to create plenty of opportunities for these.
Using Film In Schools: A Practical Guide ©2010 Film: 21st Century Literacy
1. Using film
These are a few of the ways that film education can contribute to learning across the curriculum.
Opportunities for film education in the curriculum
/5
Primary Secondary
KS1+ KS2+ KS3+ KS4+ 16+
English
Use moving images as a stimulus for speaking and listening
Use short films to develop understanding of narrative and point of view
Use moving images as a stimulus for writing, e.g. letters, news items, film reviews
View the opening scene from an adaptation before reading the book, and consider
what it tells the viewer about genre, narrative and character
Translate a short film excerpt into a written story, poem, news report or letter
Make a film adaptation of a story or a scene from a book
Use filmmaking to explore the imagery in a poem
Explore and compare the techniques used in print and moving
image texts
Explore how film language techniques are used for effect and
persuasion in propaganda and documentary films
Analyse or compare film versions of literary texts, considering
features such as depiction of characters, narrative structure and
the use of film language
Write film scripts
History
View archive film to develop understanding of an historical period
Use clay animation to depict an historical event
Make film documentaries incorporating archive footage
Make fiction films based on an historical period or event, perhaps one in the local area
Compare, analyse and discuss different (fictional or
documentary) film representations of an historical period, event
or character
Explore the techniques used in propaganda films
Geography
Use film to record and present information about an area, e.g. the local area, or an area visited on a field trip
Use clay animation to represent geographical processes, e.g. glaciation or the
formation of oxbow lakes
View, discuss and consider fiction or documentary
representations of places, natural phenomena or environmental
issues
View contrasting fiction films about a country and consider how
they represent it
Using Film In Schools: A Practical Guide ©2010 Film: 21st Century Literacy
1. Using film /6
Primary Secondary
KS1+ KS2+ KS3+ KS4+ 16+
Modern Foreign Languages
Watch a film excerpt in the target language, listening for specific words or phrases
View films to develop country-specific knowledge
Make films (using either live action or animation) of fictional stories, or real-life
scenarios such as visiting a shop or going to the dentist
Script and perform a voiceover in the target language for a film sequence
Create a film advertisement in the target language
View film extracts in the target language to develop
comprehension skills; use visual and audio clues – e.g. lighting,
performance, music, sound effects – to aid understanding
Science
Use film to record experiments
Use film techniques, e.g. close-ups, timelapse and slow motion, to analyse and
demonstrate processes and principles
Use fiction and factual films to stimulate discussion and writing
about aspects of a scientific debate, e.g. global warming,
overfishing, genetic engineering
Design and Technology
Use video to record product testing and disassembly, e.g. using slow-motion, timelapse
Use film as part of the design research process
Design characters and sets to make an animated film
Make films to explain the function of components in a product, e.g. through a
disassembly with explanatory voiceover
Mathematics
Use video cameras to collect examples of shapes, numbers, patterns, angles
Watch films that feature simple numbers and shapes
Make animations to explain mathematical or geometric principles
Use video cameras to record and plot movement, e.g. to show
that the trajectory of a thrown ball is a parabola
Citizenship
Use short films, children’s films and feature films to stimulate discussion and writing about issues of
citizenship. Using film can provide a way for children to address personal issues at one remove
Explore the techniques which films use to present issues, groups, institutions or events
in positive or negative ways
Explore issues of film censorship and regulation
Consider how representations can change over time, by viewing modern and older films
Create campaigning videos on specific issues
Make fiction or documentary films about their own lives or local problems. Use
techniques such as animation, montage and film poems to explore difficult or
challenging issues
Using Film In Schools: A Practical Guide ©2010 Film: 21st Century Literacy
1. Using film /7
Primary Secondary
KS1+ KS2+ KS3+ KS4+ 16+
PE, Dance
Use video as a way to immediately review performance and correct technique
Create films which use slow-motion, freeze-frame, close-up and
voiceover to explain technique in detail
Drama
Use video to review and improve performance
View film extracts to explore aspects of performance
Make a film version of a drama performance
Music
Use a short film sequence as stimulus for a simple composition
Create a soundtrack for a short film sequence
Create a film interpretation of a piece of music
Analyse the techniques used in the score for a film sequence
Create several different soundtracks for the same sequence to
change the genre or mood
Create a piece of music to use as the basis for a montage or title
sequence
Use a cue sheet to plan a score
Art
Use video to collect examples of shapes, colours or patterns
Look for examples of shapes, colours, patterns in film extracts
Use video to record making processes
Use video to record observations
Create animations including sets and models
Create costume and set designs for films
Investigate artist and non-narrative filmmakers
Create abstract/montage films
Explore the use of lighting in film
Explore animation techniques used in title sequences
Create title sequences using these techniques
Using Film In Schools: A Practical Guide ©2010 Film: 21st Century Literacy
1. Using film
Film and other outcomes
/8
Film can contribute to other outcomes at a whole-school and local
area level. You can highlight its role in school improvement plans,
and when preparing for inspection. For example, watching, viewing
and making films can impact positively on achievement and help
pupils to enjoy their learning, and it can provide opportunities for
pupils to contribute to school and the wider community. Behaviour
and attendance can also be improved.
Many teachers have reported that film education activities have
encouraged isolated or disaffected pupils to participate and has
increased their confidence. It also provides opportunities for pupils
to develop workplace skills, technical skills and the ‘soft skills’ of
groupwork and discussion.
Film can also contribute to wider objectives in the local area, for
example by reducing antisocial behaviour and encouraging cultural
understanding.
Fast-Forward is a programme at Cinema City in Norwich, which provides film education activities for
14-16 year old students who are at risk of exclusion. The project enables them to create their own films,
learning scriptwriting and technical skills, and to develop their critical understanding through film viewing
and reviewing.
“I have noticed a change in the girls who come on the course...they’ve improved their attendance at
school...behaviour’s been a lot better and grades have gone up.” (Teacher)
Teachers on the East Midlands Cine Hubs project, which integrates film education into learning across the
curriculum, reported that the children have benefited immensely from the experience. They had seen a rise
in writing, language and communication skills and a huge impact upon emotional literacy and wellbeing,
with the project enabling some children to discover new talents and overcome shyness.
Glebe School in Bromley, a mixed special foundation school, had an OFSTED report in May 2010 which
described community cohesion as ‘outstanding’ and said that ‘...the hugely successful FILMCLUB has had
a major impact on helping students to develop and share their beliefs, cultures, and information about their
religions and experiences’.
Using Film In Schools: A Practical Guide ©2010 Film: 21st Century Literacy
1. Using film /9
Principles of film education
Film education includes three elements: critical (understanding and analysing films); cultural (widening learners’
experience of film) and creative (learners make films themselves). There are opportunities for each of these
across the curriculum, and it can be valuable to combine all three approaches.
Critical
You can use this approach in English, e.g. by students analysing how camera, sound and editing are used in an
adaptation, a documentary or a persuasive text such as an advertisement. You can also use these techniques
to analyse moving image sources and interpretations in History.
Cultural
You can use unfamiliar films, and films from different countries and periods, in a range of subjects. ‘World
Cinema’ can be used to explore Citizenship and issues such as globalisation. Older films can help students to
learn about life in the past, and experimental films can be used for stimulus in Art and Music.
Creative
Filmmakingcanbeusedasawayofrecording,analysing
and depicting processes from Science experiments to
Dance performances; to present information in subjects
from Mathematics to History: and for creative expression
in English, Drama, Art and Music.
The Rural Media Company’s Young Shoots project has worked with Hereford Library Service to develop a
collection of films suitable for rural youth clubs, where they have provided screenings. They ran filmmaking
sessions for 13-19 year olds in collaboration with the Courtyard Centre for the Arts, and screenings and
practical film workshops in villages, linked to Flicks in the Sticks and the Borderlines Film Festival.
“I have been able to develop relationships with pupils who are ‘hard to reach’. Pupils with behavioural/
emotional/social difficulties have been able to settle down, focus and relax.” (Teacher)
Informal learning
Film education can be an effective and popular element of informal education activities, both as after-school
provision (such as film clubs) and as part of extended services including summer camps, Saturday schools and
after-school filmmaking clubs.
Many arts venues and other cultural organisations offer informal film education activities. These include
filmmaking, editing and animation workshops and screenings. For more detail on organisations who can provide
these activities, see the section on partners.
Using Film In Schools: A Practical Guide ©2010 Film: 21st Century Literacy
1. Using film /10
Continuing professional development
Training for film education doesn’t have to be expensive or demanding. However, teachers and support staff
will be able to integrate film into their teaching more easily if they are familiar with basic concepts and teaching
techniques and confident with the equipment they will be using.
There are a number of different kinds of organisations and individuals around the UK who provide film education
training. They include cinema venues, City Learning Centres and independent filmmakers. In some areas, ‘lead
practitioners’ or experienced ‘lead schools’ can provide training and mentoring to local schools.
A wide variety of training is available. It can include:
■ basic introductions to film language and filmmaking
■ using film in specific subjects or to address specific topics
■ individual films and how to use them
■ technical skills including camera, editing and sound recording
■ scriptwriting and story development
Training doesn’t have to be ‘top-down’: some children and young people have technical skills or film knowledge
which they can share with others. Their own skills should be used and acknowledged where possible; in some
cases, disaffected students have taken a lead role in filmmaking, gaining the respect of teachers and their peers.
Peer tutoring can be a very effective way for children to learn technical filmmaking skills.
Working with partners (see section 3)
Outside partners, including film professionals, can make a valuable contribution to film education. Their input
can include giving advice on provision as part of schools’ capital programmes, providing training to staff, and
working directly with young people. You may be able to find information about potential partners from existing
local partnerships.
Professionals can give young people an insight into different aspects of the filmmaking process, from directing
and editing to scriptwriting and sound. Young people often value the input of ‘real’ filmmakers. You can use
professionals as mentors for large-scale filmmaking projects (such as those funded by First Light) or to provide
masterclasses integrated into ordinary lessons.
Some cinema venues provide education programmes. Those that don’t are often open to approaches from local
schools. They will sometimes provide daytime schools screenings, special screenings, or cinema visits where
children get to see how a cinema works. You could also approach local film societies.
Some independent filmmakers are experienced in working with children or young people. In some parts of the
UK, screen agencies have provided training in film education principles and techniques for filmmakers wanting
to work with young people.
The relationship between teachers and film professionals should be an equal partnership. Film professionals
have experience and technical skills but they are not experts in education. In some cases, they can be over-
ambitious about a film’s scale and level of technical sophistication. It’s important to plan and agree projects in
detail in advance to ensure that the young people have ‘ownership’ and opportunities for creative expression,
rather than just ‘shadowing’ the professionals.
Using Film In Schools: A Practical Guide ©2010 Film: 21st Century Literacy
1. Using film /11
Other partners include local higher education institutions, which often have outreach programmes aimed at
widening participation.
You could also contact writers with experience or knowledge of film, such as local scriptwriters or authors whose
work has been adapted for the screen and film reviewers from the local newspaper.
Obviously when working with partners it is important to comply with good practice in child protection, including
seeking enhanced CRB disclosures where necessary.
Work-related learning and
First Light ran a project for 6-13 year olds on a Farnham housing estate with very limited youth facilities.
Children made a film linking social problems to local history and folklore. Professional filmmaker Ian Lewis
acted as mentor, supporting the students during their filmmaking and training them in industry-standard
practice.
“Our mentor...helped source professional equipment, encouraged support from the broadcast industry,
acted as an impartial sounding board for ideas and introduced us to contacts we may have struggled to
gain.”
Film organisations, such as local production companies,
larger film organisations and cinema venues, can
provide opportunities for work-related learning, from
basic work experience to longer-term apprenticeships.
‘Young apprenticeships’, two-day a week placements
over two years, are available to 14-16 year olds in
England.
The 14-19 Creative and Media Diploma (available in
England, and as part of the Welsh Baccalaureate
framework in Wales) has a substantial work-related
element: half of the Principal Learning within the
Diploma must be with an employer.
The Dukeries College used film to deliver the first year of the Creative and Media Diploma, working with
Nottingham Broadway Media Centre. They integrated film production right across their Diploma programme,
examples including production budgeting for Functional Maths and crew roles for Creative Teamwork.
progression to the creative industries
Using Film In Schools: A Practical Guide ©2010 Film: 21st Century Literacy
1. Using film /12
Norwich University College of the Arts (HE), Media Projects East (production company) and Cinema City
(venue) have teamed up to offer film and animation workshops to learners across Norfolk’s High Schools
and Sixth Form Colleges. These 1-2 day courses for 13-19 year olds offer hands-on experience, careers
advice and guidance, and advice on generating a portfolio of work for applying to Higher Education.
Ealing Institute of Media is the only Further Education college to be part of the Skillset Screen Academy
network. They bring in professionals to run masterclasses and workshops throughout the year, leading
to an annual ‘35mm project’ where students work with the support of industry mentors to make a TV
commercial, a 5-minute drama and a music promo (using professional equipment) on a sound stage at
Shepperton Studios.
Using Film In Schools: A Practical Guide ©2010 Film: 21st Century Literacy
2. Spaces and equipment /13
Film education can take place in many different contexts. This section will suggest how to use and adapt existing
spaces and equipment for film education and the things you need to consider when establishing new spaces
and facilities.
Film education should provide opportunities for children to view, discuss and explore films, and to actively engage
in filmmaking. These activities can all take place within a normal classroom, but there are some advantages in
using dedicated spaces, particularly for specialist courses.
Learning contexts
When you are planning for film viewing and filmmaking, the focus should be on the learning experience. What
will children learn from these activities and what other learning activities will be linked to them?
Where will the activities take place – in the classroom, at a partner organisation, a local cinema, a mediatheque,
or another school? Will children be working in groups or individually? In general, film education will focus more
on group work with younger children, and there will be more emphasis on individual work as they get older.
Film viewing
This can involve group or whole-class discussion and debate; individual or group research exploring a film’s
context and subject; and individual writing, from reviews and analysis to creative writing and poetry.
Clips or extracts are short and manageable: they can be
studied in detail, either as a whole class activity or by groups
and individuals. Complete short films can be very useful in
literacy or language work: unlike an extract, they will contain
a complete narrative, but they are short enough to be used
in a normal lesson. When working with clips/extracts and
short films, it’s useful to be able to pause and replay them,
play image and sound separately and perhaps annotate
them. Students should be able to work in groups and take
notes while viewing.
Children should also have opportunities to view complete feature films, where they can immerse themselves in
the world of the film. Here, a more ‘cinematic’ experience is important. The ideal school setup includes a large
screen, comfortable seating, a good sound system, a powerful projector, blackout or near-blackout, and good
sound insulation. But there are some relatively cheap ways of improving the viewing experience in an ordinary
classroom or hall.
Filmmaking
Learning activities can include creative writing, (e.g. synopsis, treatment and scripts); transactional writing,
(creating a ‘shooting schedule’, evaluating the finished film); planning, organisation and working in teams; critical
viewing and reflection, e.g. when watching ‘rushes’ (raw filmed footage) before editing, and when viewing the
finished film.
You should consider how the technical skills of filmmaking will be taught. Will you be demonstrating techniques
to the whole class for them to emulate, or will you be teaching these skills separately to smaller groups or
individuals? Will students teach skills to each other and work in teams, or will they work largely as individuals?
Using Film In Schools: A Practical Guide ©2010 Film: 21st Century Literacy
2. Spaces and equipment /14
Access to film education
You should consider access when you are planning spaces, choosing equipment, and planning activities. It can
be difficult to design in provision to meet everyone’s access requirements. You will need to be pro-active but also
to consult and make adaptations for individual users.
Film viewing
For film viewing, you should provide spaces for wheelchair users (and their personal assistants). If possible,
provide a choice of positions: users with visual or hearing impairments may prefer to be located at the front
(make sure the front row isn’t too close to the screen) but others may be more comfortable in the middle rows or
at the rear. Providing extra space between seat rows will make access easier.
Many DVDs have subtitles in English, which can be useful for those with hearing impairments or children whose
first language is not English. Check that subtitles are visible to all viewers who might need them: in a room
with no rake they may not be visible from the back. Many DVDs have audio descriptions: the RNIB have a
downloadable list on their website.
When buying a DVD player, consider whether it
has easy-to-use controls (including a dedicated
button for audio description). ‘Talking menus’ are
also useful.
Viewers should be given information about the
venue or viewing space, and the content of any
films which might cause problems: for example,
strobe lighting or flash photography can trigger
fits or migraines. Use plain English and easy read
information. A useful guide can be downloaded
from the EHRC.
Children on the autistic spectrum may find a traditional cinema experience, with full blackout, disturbing: consider
reducing the sound levels, maintaining lighting at reduced levels and enabling freedom of movement. They may
also find the subject matter or narrative style of some films unpleasant.
You should consider additional signage and lighting, which can be helpful for viewers with visual impairments.
Stewards or helpers could wear high-visibility clothing so that they can be identified when the lights are low.
Some viewers will find it difficult to sit through a long film, and will need breaks and/or access to a quiet space
during screenings.
Filmmaking
Disabled users should be supported to participate fully in filmmaking. Their impairments should not be a reason
to limit the roles they play: students with visual impairments can use cameras and those with hearing impairments
can work with sound.
A number of different solutions can help to facilitate access. Some are commercially available, though in some
cases DIY improvisation may be necessary. Any adaptations should be made in consultation with individual
users.
Using Film In Schools: A Practical Guide ©2010 Film: 21st Century Literacy
2. Spaces and equipment /15
Cameras
When buying cameras, evaluate how easy the controls are to use. Push-buttons and levers may be better
than joysticks or dials for users with motor impairments. Touchscreens can be fiddly, and some menus can be
complicated and confusing (though the camera may have a simpler ‘basic’ setting).
Some cameras come with remote controls, which can be very useful for students with motor or mobility
impairments. They can sometimes be modified for individual needs: if you need to do this it’s worth approaching
the manufacturer, as some have made free modifications for disabled users.
For users with visual impairments, the size of the camera screen is important. You may also be able to connect
the camera to an external monitor or laptop to provide a bigger image.
Other equipment
Wheelchairs can be equipped with camera mounts, either purpose-built ones or monopods (one-legged tripods)
securely attached by gaffer tape; you can also attach a monopod to a walking stick or crutch.
A ‘Fig Rig’ (a large ring of tubing, with a camera mount in the centre) can make it easier for users with motor
impairments to hold cameras.
You can colour-code cables (using labels or insulating tape) for users with visual impairments or learning
difficulties.
Editing
You should ensure that doors, room layout and the heights of working surfaces facilitate access for wheelchair
users and students with other impairments.
Editing programmes
Some basic editing programmes offer simple drag-and-drop editing, making them relatively easy to use.
Unfortunately, professional programmes are complex and screen readers currently do not work with them.
To improve access, you can:
■ Use a large screen, or preferably two screens
■ Set up keyboard shortcuts or voice commands for editing operations
■ Consider using a special colour-coded keyboard or overlay
■ Use speakers rather than headphones so that deaf users can feel sound vibrations
■ Change programme settings, e.g. by making track and icon sizes larger and displaying audio waveforms
Using Film In Schools: A Practical Guide ©2010 Film: 21st Century Literacy
2. Spaces and equipment /16
General advice for procurement
Filmmaking technology is evolving rapidly, but the principles of film education – and how to plan for it – remain
broadly the same.
Points to consider
■ Don’t ‘overspecify’: make sure the equipment is suitable for your needs.
■ Allow for the cost of consumables (e.g. batteries, bulbs for projectors and lighting, modelling clay for animation),
repairs and replacements.
■ Include costs for licensing if you will be showing films to the public.
■ Include costs for staff training. Compare the relative training cost implications of different hardware and
software solutions.
■ Don’t spend all the budget at the start: allow for upgrading hardware and software in subsequent years.
■ Consult your network manager/ICT supplier early in the planning process to discuss hardware and software
compatibility, bandwidth and storage.
■ Consider where you need specialist professional
advice: e.g. if you are setting up specialist spaces such
as studios or cinema auditoriums, you will probably
need to employ a professional; but some equipment
suppliers will provide advice for free.
■ Try to get free independent advice, e.g. from local
filmmakers or cultural organisations, rather than relying
exclusively on professionals and equipment suppliers.
■ Contact other schools who have set up film education
provision: find out what equipment they use, what they
think of it, and any problems or issues they have encountered.
■ Ensure that all equipment is compatible, e.g. will the editing software work with the video that the cameras
record? Do you need extra conversion software?
■ For a refurbishment or new build project, ringfence the funding for hardware and software, but buy it as late
as possible to avoid it being obsolete.
■ Ensure that your provision meets access requirements for all potential users.
■ Undertake a health and safety audit/risk assessment.
■ Consult with the local community and look for opportunities for community links and uses.
■ Consider ‘joining up’ funding – e.g. can you get funding from other sources if you provide community access
to some of the facilities?
Where to buy equipment
There may be advantages to using centralised procurement, managed services, or purchasing as a cluster.
Some hardware and software manufacturers sell through specialist education suppliers. Online retailers can
be cheaper for some equipment, but you should check that they are genuine suppliers selling UK stock (some
sell ‘grey imports’ – foreign models without UK guarantees). If you aren’t familiar with the retailer, research their
reputation for customer service online and check that they have a UK postal address.
Using Film In Schools: A Practical Guide ©2010 Film: 21st Century Literacy
2. Spaces and equipment /17
Film viewing equipment and spaces
There are several contexts in which film viewing can be used in school, for example:
■ You can show short films, or excerpts from films, for a whole class
■ Pupils can view them on computers, either as individuals or groups
■ You can screen full-length films, perhaps as part of an after-school film club
See the table on Page 23 for a summary of equipment and space options.
Basic requirements
You need a room with some control over light
levels; a data projector, screen and speakers;
and a player, either a standalone DVD player or a
computer. You can also use an LCD screen as a
replacement for, or complement to, a data projector.
Using a data projector
and whiteboard
You can show films using a standard classroom
data projector, a computer with a DVD drive and
a whiteboard. This makes it easy to integrate film
viewing into normal teaching, but image size and
sound quality may be compromised.
Player
You can use a standalone DVD player, or a computer with a DVD drive.
Using a computer makes it possible to screen films from video-sharing sites, show clips which are stored on
your hard drive or intranet, and (with interactive whiteboard software) annotate clips and stills. (Be aware of
copyright). Some DVD-playing software, and some standalone players, allow you to ‘bookmark’ sections of a
disc so you can go straight to them.
Currently there is little advantage in using the high definition Blu-Ray format: players and projectors are
expensive and many useful films are only available on standard definition DVD. But it’s worth considering high
definition to ‘futureproof’ a new installation.
Projector
If you use a data projector, you need it to be bright enough for the room size and the lighting conditions. If you
can’t black out the room you will need a more powerful projector.
Projector brightness is measured in ‘lumens’. As a general guide, for a classroom you need a minimum of
2000 lumens, and for a hall or auditorium with a 4m by 3m screen you need around 7000 lumens. You can get
higher-powered projectors but they are very expensive, as are replacement bulbs. ‘Short-throw’ projectors,
which have special wide-angle lenses, are useful if there are limitations on projector position or space.
Using Film In Schools: A Practical Guide ©2010 Film: 21st Century Literacy
2. Spaces and equipment /18
Check that the projector is easy to use and adjust. If
it is to be used in different spaces, make sure that it’s
not too heavy to move. For a fixed installation, make
sure that the projector can be accessed for focusing,
adjustment and maintenance. Make sure that the
remote control is kept in a safe place.
You may need to make adjustments on your DVD
player or computer to get satisfactory image quality
from a projector or LCD display: follow instructions
for ‘calibrating the display’.
Screen
The larger the screen, the more cinematic the experience will be for the students. Pull-down projection screens
are normally better than whiteboards and silver screens will provide better contrast than white screens. 4m x 3m
(12’ x 9’) will provide a good viewing experience in most halls.
Alternatives to projectors
You can use wall- or ceiling-mounted LCD screens as an alternative or complement for projectors. These will
provide a watchable picture in normal classroom lighting, so students can view them while talking to each other
and writing. They are also useful for camera training: you can connect the video output from your camera to the
screen, so students can practise setting up shots while the class views the image.
Sound
Most films have complex soundtracks. Some parts are very loud and some parts are very quiet (a wide
dynamic range). If your sound system isn’t good enough, students can miss details which are important to their
understanding and enjoyment.
You may not need to buy new speakers. Most schools have good speakers somewhere, perhaps in the music
department or the hall: can you borrow them?
The most straightforward way to improve the sound in a classroom is to replace basic computer speakers. An
8 inch ‘dynamic’ speaker system will provide a much better experience. (Dynamic means they have their own
built-in amplifier). For a hall, a PA system with an amplifier and 12 inch speakers should be enough. (Speaker
size is a better measure than manufacturers’ stated power output, which is often misleading.)
For occasional film viewing, you probably don’t need surround-sound as it needs expert setting up. Unless
you have the technical expertise (and a sound meter) you are likely to get better results with a stereo sound
system.
If you are playing your film from a computer, you may need to buy leads or adaptors, as PA systems tend to use
‘RCA phono’ leads or full-size jack sockets, rather than the minijacks used by most computers. A wide range of
adaptors is available from electronics suppliers.
Speaker positioning
Speakers should be positioned close to the screen. They shouldn’t be mounted high on the wall, as this will
cause some of the high frequencies to be lost. If they are mounted high up, they should be angled down towards
the students.
Using Film In Schools: A Practical Guide ©2010 Film: 21st Century Literacy
2. Spaces and equipment /19
Wall surfaces
Curtains can cut down sound from outside and
prevent reflected sound from muddying the sound
from speakers.
Sound levels
Sound levels should be set in a full room. If you
set levels in an empty room, the sound will be
noticeably quieter when the pupils come in. Sound
is sometimes not loud enough because teachers are
worried about damaging students’ hearing, but this is
not a problem when playing a feature film at cinema
volume. Hearing damage is caused by sustained exposure to loud sound, and normally in a film only part of the
soundtrack is really loud. A recent research study found no evidence that normal cinema volume levels cause
hearing damage.
Positioning the chairs
If you have a choice of positioning the chairs, it is best to move the front row further away from the screen so
that the sound levels don’t vary too much between front and back rows. You can also curve the seating so that
chairs in each row are at roughly equal distances from the speakers.
Comfort is important for viewing feature films. New chairs should have padded seats; you could buy cushions if
you are using standard hard chairs. Beanbags are more informal (but take up a lot of storage space).
Using Film In Schools: A Practical Guide ©2010 Film: 21st Century Literacy
2. Spaces and equipment /20
Other factors
Sound and picture sometimes go slightly out of synchronisation, because digital images take longer to process
than sound. Many adults won’t notice this difference but children are more sensitive to it. You can solve the
problem by using a ‘digital audio delay’ device costing less than £100 (though you may need to employ a trained
specialist to set it up).
If you have a choice of where you locate the film viewing space, you should keep it away from outside sources
of sound which can disrupt the viewing experience.
Blinds
Blackout can be a real problem. Low winter sun, in a room with no blinds, can make an image on a whiteboard
impossible to see. Improving the blackout is often cheaper than upgrading the projector.
You don’t have to buy expensive blinds that produce a full blackout. You may be able to use domestic blackout
roller blinds which are widely available (they must be properly installed with cord retainers to avoid a strangulation
hazard). They are not particularly durable, so if they are to be used regularly you may be better off buying higher-
quality blinds. If you are using standard vertical blinds in an ordinary classroom, swivel them so that the light is
pointing away from the students.
Access to online films
Online films are a valuable resource, and it is important
that staff and students can access them where
necessary. Many schools are concerned about some
of the material shown on video-sharing sites, and
about the bandwidth they require, but infrastructure
and policy should allow them to be used for legitimate
teaching and learning purposes. Some schools
maintain control by allowing video-sharing sites to be
accessed only within specific teaching spaces or by
specific users.
You need to be aware of copyright when showing
online films, as many clips on video sharing sites
breach copyright.
Using Film In Schools: A Practical Guide ©2010 Film: 21st Century Literacy
2. Spaces and equipment /21
Film viewing in newbuild
or refurbished spaces
Large-scale film viewing can take place in a
dedicated cinema space, in a theatre space, or in a
multipurpose space such as a hall.
Seating
Sightlines are important: can all audience members
see the screen comfortably? A dedicated cinema or
theatre space should have a rake (sloping rows of
seats) to ensure this. In a multi-use space you could
consider retractable padded ‘bleacher’ seating.
Sound and acoustics
If possible, the room should be located away from external sources of noise (e.g. playing fields, roads, plant)
and it should be isolated by using high mass wall construction, sound lobbies, damped pipework and airtight
service junctions. This will also prevent cinema noise from disturbing other activities. A projection booth needs
to be acoustically isolated from the auditorium.
Within the room the priority is to limit sound reflections which can make it hard to hear details. You can avoid
this through damping (the use of curtains, drapes and sound panels). In a multi-purpose space it’s best if the
acoustic properties of the room are adjustable, as cinema screenings require different characteristics to music
or theatre performance.
Uneven wall finishes, shelving or special panels can be useful for providing diffusion, which ensures that the
sound is evenly spread around the room rather than concentrated in one space.
Services
Heating, lighting and ventilation need to be adequate for the size of the space. In multi-use spaces they should
be adaptable for different requirements (e.g. warmer but with lower lighting for cinema use). The ideal cinema
‘house lighting’ can be adjusted smoothly to blackout levels (which requires tungsten lighting), while other
activities such as sport require much brighter fluorescent lighting. Separate lighting sytems for different activities
may be best.
Windows
Where windows are required, these are best positioned at high level, at the sides of the room, with easily
controlled manual or automatic blackout blinds. Rooflights are best avoided as they are difficult to black out.
Storage
Storage space will be required for films/DVDS and may be required for movable seating.
Projection booth
The projection booth may need to be larger than in a traditional cinema so that several students can work in it,
together with a teacher.
Using Film In Schools: A Practical Guide ©2010 Film: 21st Century Literacy
2. Spaces and equipment /22
Public access
Some schools have halls, or purpose-built auditoriums, which they use as public access cinema and theatre
spaces. Providing an occasional public screening can be relatively straightforward: if you don’t already have an
appropriate premises license, you must notify the local authority in advance (in England and Wales you use a
Temporary Events Notice; Scotland and Northern Ireland have slightly different requirements).
If you want to set up and use a space for regular public screenings, you will need to ensure that public access
does not conflict with the school’s everyday activities. You will require a Premises Licence from your local
authority if you regularly charge for ‘regulated entertainment’ (which includes film screenings), so you should
consult them early in the process.
Spaces used regularly as public access cinemas may need:
■ a clearly identifiable, attractive public entrance
■ sufficient circulation/queuing space
■ separation from the rest of the school (for security)
■ additional security lighting and car park spaces
■ separate box office, storage and Manager’s Office
■ services (e.g. electricity, heating, telephone, internet) provided and charged separately
■ additional toilet facilities, adequate for an influx of users before and after screenings
■ additional fire and safety facilities
Cinemas are more likely to be economically viable if they also include provision for the sale of sweets/refreshments
and a bar.
Filmbank’s Single Title Screening Licence is a way to get recent films (some as little as 10-12 weeks after their
cinema release) before they are available on DVD.
Saffron Screen is a public cinema at County High School, Saffron Walden. The district council provided
funding so that the school’s new auditorium could be developed as a cinema. In the evenings and at
weekends the cinema runs a popular programme of evening and public screenings and film education
activities for adults and young people, and provided National Schools Film Week screenings for local
Primary schools. The school now offers Film Studies and runs a FILMCLUB.
Using Film In Schools: A Practical Guide ©2010 Film: 21st Century Literacy
2. Spaces and equipment /23
Film viewing summary
Basic Intermediate High spec Cinema spec
Space Classroom Classroom Hall Purpose-built
space with
controlled
lighting, separate
projection booth,
sound isolation
Player Computer with
DVD drive, or
DVD player
Computer with
DVD drive and
bookmarking
software, or
DVD player with
bookmark feature
Computer/player
with Blu-Ray and
bookmarking
feature
Blu-ray/DVD
player
Screen Whiteboard Pull-down white
screen
4 x 3m silver
screen
Built-in cinema
screen with
curtains/
adjustable
masking
Projector Standard
classroom
projector
2000 lumen
projector
7000 lumen
projector
10000 lumen
or better high-
definition projector
Possibly 16mm
or 35mm film
projector
Sound Computer
speakers
8 inch dynamic
speakers
PA with 12 inch
speakers
Dedicated
surround sound
system
Seating Standard
classroom chairs
Chairs with
cushions, or
beanbags
Padded chairs Raked cinema
seating
Blinds Standard
classroom blinds
Blackout roller
blinds from DIY
store/furniture
superstore
Purpose-made
blackout blinds
Windowless room
Using Film In Schools: A Practical Guide ©2010 Film: 21st Century Literacy
2. Spaces and equipment /24
Filmmaking equipment and spaces
As with film viewing, the learning context should determine the choice of equipment and how spaces are set up
and used. Younger children are most likely to be working in groups, making films as teams; as students progress
through the school there will be an increasing emphasis on individual work and higher technical quality.
See the table on page 35 for a summary of equipment and space options.
Basic requirements
You need a video camera of some kind. It could be a camcorder, a still camera or a mobile phone. You can make
films without a computer, using ‘in-camera editing’: planning the shots carefully, then shooting them in the right
order.
To edit your film, you need a computer with editing software. You need to check that your cameras and computers
will work together (see below). You may also need tripods, microphones and headphones.
Group size
Group size will determine the number of cameras and computers you need. As a general rule, 3-5 students
can work effectively as a filming team. If groups are larger than this it is hard for all members to participate
effectively.
Locations
Many schools use locations within the school, such as corridors or playing fields, for filming. This can be
limiting as it will often be obvious that the scenes are shot in a school. If space permits, you could have a room
set up with standard props which could be used in a number of student films. You could use a drama space
with filmmaking props stored in an adjacent storage space.
Hazelwood College in Belfast has adapted an ordinary classroom as a basic studio set for filmmaking as
part of CCEA’s Moving Image Arts specification. The room has a hospital bed at one end, a ‘living room’
sofa and chairs at the other end, and a green ‘chromakey’ screen.
Using Film In Schools: A Practical Guide ©2010 Film: 21st Century Literacy
2. Spaces and equipment /25
Cameras
There are several different camera types and recording formats. Image quality, reliability and ease of use varies
between makes and models. Consumer guide magazines and websites are useful for assessing image quality
and reliability, but may not cover other criteria which are important for education.
Camera prices range from under £100 to several
thousands. It may be better to buy a number of cheap,
simple cameras rather than one or two more expensive
ones: they are usually easier to use, a whole class can
be working with them at once, and because of their
cheapness it’s not a disaster if one is damaged or stolen.
Another strategy is to have a set of cheaper cameras
which can be used by all classes, and a few better-
quality cameras for production work by older students.
You should check that the camera records in a format which your video editing software can handle, or which can
be easily converted (see below). Look on the software manufacturer’s website for a list of compatible cameras.
Some cameras come with their own conversion software.
Thomas Hardye School in Dorset has bought basic video cameras costing under £100 each. Because
they are cheap and simple, the school can afford more cameras. Staff are more confident about using
them, so film gets used across a wider range of ages and subject areas.
Basic cameras (up to £100)
Most new cameras in this price range have an upright shape, a fixed screen and simple controls. They record onto
built-in memory or removable memory cards. They are easy to use, making them ideal for younger children, or
for students to take out of school for documentary projects or video diaries. Some don’t have image stabilisation
or microphone sockets.
Recharging is important: some models have built-in batteries which you have to recharge by connecting the
camera to the computer or a special USB charger. This is very inconvenient if the battery goes flat when you’re
in the middle of filming. It’s better to have interchangeable batteries (preferably standard AA or AAA batteries)
so you can carry spares.
Mid-range cameras (£100-£500)
When you spend over £100 you have a wide choice, including higher-specification versions of the basic cameras
mentioned above, and cameras with a standard camcorder shape and fold-out screen. Cameras with fold-out
screens are better for group use. Most cameras in this price range either record onto memory cards, an internal
hard drive, or both (see below).
Medium to high-end cameras (over £500)
Once you pay over £500 for a camera you should get very good image quality and a full range of manual
controls. Size and shape is important. Larger semi-professional cameras are heavier and can be unsuitable
for some projects, but they will normally give better image quality (particularly in poor light) and sound, and the
controls will be bigger and easier to use. They should also be more durable.
Using Film In Schools: A Practical Guide ©2010 Film: 21st Century Literacy
2. Spaces and equipment /26
Other cameras
Handheld devices
Some handheld devices (such as mobile phones and digital audio players) include video cameras, and some
even have built-in editing software.
Still cameras
Many digital still cameras can record video. You can get compact still cameras which record basic ‘VGA’ video
for under £60, and compacts which record in high definition for less than £200. They are often smaller than
equivalent video cameras, and may have a wider zoom range. But they can be awkward to hold steadily, and
they usually have limited sound recording capabilities.
A few single-lens reflex (SLR) and system cameras, starting at around £500, can record high definition video.
Because they have large image sensors and can use high quality interchangeable lenses, they record much
better video in low light and it’s easier to achieve ‘shallow focus’ effects. But they are awkward to handhold and
focus, and sound recording can be poor: many SLR filmmakers use separate digital audio recorders, matching
sound and image in the editing process.
These disadvantages mean that it may be better to wait before considering this option. Two manufacturers have
already announced large-sensor video cameras which should combine the image quality of SLRs with the ease-
of-use and audio features of camcorders. They are expensive but it is likely that more affordable versions will
soon become available.
Miniature video cameras
You can get cheap video cameras which are specially designed for ‘spy’ or sports use. They range in price from
around £60 to under £10. These cameras have limited features (they don’t have screens or zoom lenses), but
they are useful in situations where a very small camera is needed or the camera might be broken or stolen. The
cheapest versions are fiddly to use and are unlikely to be very durable.
Recording formats
Most new cameras record onto memory cards or hard drives. They import faster than tape cameras and you
can easily choose to import only the clips you want. However, many schools are still using video or animation
software which is designed to work with digital tape cameras.
Card and disc-based cameras normally connect to the computer using standard USB cables. You can buy
USB card readers, so you can import footage from a card without using the camera. Tape-based cameras use
different Firewire (IIEE1392) cables.
Memory card
This is becoming the most popular recording medium. Some cameras come with built-in memory, but most
require you to buy your own cards. SD (‘Secure Digital’) is the standard format. When buying cards, check that
they are compatible with your camera and have a fast enough ‘speed class’ (check the camera manual), and
that they have a big enough capacity: video (particularly high definition video) can rapidly fill up a small memory
card.
Using Film In Schools: A Practical Guide ©2010 Film: 21st Century Literacy
2. Spaces and equipment /27
Hard disc
Some cameras come with built-in hard discs. They are more expensive than equivalent card-based cameras,
but hard discs are cheaper per unit of memory. Despite this, in schools it may be more manageable to use a
separate memory card for each project or group.
Hybrid cameras
Some cameras with hard drives offer the option of using memory cards as well.
Digital video tape
miniDV digital video tape used to be the most common
format for video cameras used in schools. It’s now
becoming rare, and cheap miniDV cameras are no longer
made. miniDV can only be imported in ‘real time’ (so 10
minutes of video will take 10 minutes to import).
Many schools are still using video editing software which
will only work directly with miniDV cameras connected
using a ‘Firewire’ (IIEE1392) cable. But you may be able
to use separate software to import video from a USB
camera and then convert it.
Not all computers have Firewire, so you may need to buy a Firewire card to use a miniDV camera. Some
laptops can’t be fitted with Firewire cards, and Firewire to USB converters don’t seem to work with video editing
software.
Some animation software is designed to work with Firewire cameras, but if you don’t have these, you may be
able to use USB webcams instead.
Definition
Most cameras record in VGA, standard definition (SD) or high definition format. For reasonable image quality
you should avoid any camera that records at less than VGA (640 x 480) resolution. Some editing software can
only handle standard definition (SD).
High-definition footage usually looks better than SD, but you should consider whether you actually need it. It
takes up much more disc space than standard definition and requires more computer processing power. There
are several different high-definition formats and you should check that your editing software can handle the
specific format that your camera records.
Using Film In Schools: A Practical Guide ©2010 Film: 21st Century Literacy
2. Spaces and equipment /28
Cameras: points to consider
■ How big is the internal hard drive or built-in memory?
■ Does the camera have a good built-in microphone?
■ Does it have a microphone socket?
■ Can you plug in headphones?
■ Does it have good image stabilisation?
■ How good are the images in low light?
■ How wide can the camera zoom out? Can you get wide-angle adaptors to fit it?
■ How easy is it to use – are the controls fiddly? Is the screen big enough?
■ Can you connect it to an external monitor?
■ Does it let you set white balance, exposure and focus manually?
Other equipment for filming
Camera support
Using a tripod will usually make a big difference to image quality. With a
tripod, shots will be steadier, students will take more time planning their
shots, and they will find it easier to work in groups.
A wide range of tripods is available. For video you need a tripod with a
‘pan and tilt’ head; more expensive tripods have ‘fluid heads’ for smoother
movement.
If children are sufficiently disciplined to frame their pictures carefully and
hold the camera steady, working ‘handheld’ can allow them to experiment
with unusual shots and camera positions. But using handheld cameras
without having practised framing will usually result in unwatchable, shaky
and chaotic films.
Supporting moving cameras
To get smooth ‘tracking’ and ‘crane’ shots you need suitable camera supports. You can film simple tracking
shots by mounting the camera on a wheelchair or skateboard. A Fig Rig (a ring of tubing with a camera mount
in the middle) can make handheld camerawork more fluid, and easier for students with motor impairments. For
industry-focused courses you may want to consider getting a professional ‘dolly’ and a ‘jib’ for crane shots.
Sound
Sound is very important in film, and a film soundtrack can consist of many separate elements and audio tracks.
For serious filmmaking you need equipment that will let you make films with good sound quality, whether you
record it live or add it later.
It’s hard to record live sound well unless you have separate microphones and are prepared to take some time to
get the sound right. For many filmmaking projects, you may not need to use live sound at all.
You will often get better results if your students concentrate just on the images while they are filming, and create
the soundtrack on the computer, using sound effects, music loops and voiceover. You will need sound editing or
music creation software for this (see page 29).
Using Film In Schools: A Practical Guide ©2010 Film: 21st Century Literacy
2. Spaces and equipment /29
Microphones
Most cheaper cameras have poor built-in microphones. To improve live sound recording, you can use a separate
microphone. There are several different kinds:
■ A camera-mounted video microphone may give
better sound quality than the built-in microphone,
and it will be more ‘directional’ (picking up more
of the sound from the direction it’s pointed at, and
cutting out other sound).
■ Handheld microphones can be used for interviews,
or held just out of shot for closeups.
■ Lavalier or ‘tieclip’ mics are good for interviews,
and are the cheapest way to improve the quality
of recorded speech. They can also be useful for
recording live music. Make sure the ones you buy
can take batteries: some will only work if they are plugged into a socket which provides power.
■ Boom-mounted directional microphones are the standard solution for professional drama production. One
student will need to hold the boom and point the microphone at the sound source, making sure that it doesn’t
dip into the shot. These can provide very good sound quality but are quite complicated to use well.
Better-quality professional microphones use ‘balanced’ three-pin XLR plugs. Only expensive professional
cameras have XLR sockets, though you can buy XLR to minijack adaptors.
Windshields are essential for outdoor filming. Many microphones come with simple foam windshields, but the
most effective ones are furry.
Few schools use radio microphones, which are expensive and complicated to use. Digital audio recorders (see
below) can be used instead.
Digital audio recorders
Digital audio recorders, costing from £100 upwards, are small portable devices which record high-quality audio.
(They should not be confused with basic digital memo recorders.) Most record onto SD memory cards or built-in
memory. They can be useful for recording live sound while filming.
They can give better sound quality than recording into a video camera. Because they aren’t attached to the
camera, they allow more choice of microphone position: for example, you could put one in an actor’s pocket
attached to a tieclip microphone. Synchronising image and sound is fiddly and is only practical with fairly
sophisticated video editing programmes. You’ll need to use a clapperboard while filming.
These recorders can also be used to record music, voice and other sounds for creating soundtracks on the
computer.
Headphones
When recording live sound, you should use headphones to monitor the sound while you film. This is particularly
important if you are using an external microphone, as often the sound level is too low, there are unwanted
background sounds, or the microphone has not been turned on. You should consider headphones which allow
you to limit the volume (to protect students’ hearing) though these are more expensive.
Using Film In Schools: A Practical Guide ©2010 Film: 21st Century Literacy
2. Spaces and equipment /30
Green screen
Green screen, or ‘chromakey’, is popular in many schools.
The subject is filmed against a special green background.
The editing software replaces the green with another image,
so students can appear to be acting in front of any kind
of background or flying through the air. Green screen is
particularly useful for animation backdrops, where animated
characters can appear to be interacting with ‘live action’
footage, e.g. walking around the school or in the town high
street.
For filming, you need a backdrop of the correct green colour. You can buy chromakey green paint, green material,
and elasticated panels. If you are setting up a dedicated space for filming, you could consider painting a wall
chromakey green. You need dedicated, directional lighting for good quality images: normally the background
needs to be more brightly lit than the main subject.
Lighting
Most schools don’t need professional film lighting. For higher-level and vocational courses it may be important,
but it is complex and difficult to use and can be dangerous. It may be better to buy more expensive cameras,
which can produce better images in low light, instead.
You can use basic equipment like torches or desk lamps to experiment with lighting. If you need more light, you
can use builders/DIY lights (these are cheaper than film lights, but pose health and safety issues as they get
very hot). If you have a room with ordinary bulbs, you can provide more light by temporarily replacing them with
higher-powered energy-saving bulbs. Some filmmakers use these bulbs with Chinese-style paper lampshades.
These are safer than film lights because they are much cooler, but with any kind of mains-powered lighting you
need to be aware of trip hazards.
Reflectors are useful for filling in heavy shadows. You can buy folding elasticated reflectors, or you can use
sheets of white insulation board, or hardboard panels with aluminium foil glued to them.
Traditional film lighting uses three lights: a main or ‘key’ light, a ‘fill’ light to provide some light in the shadows,
and a backlight (or ‘rim light’) to illuminate the edge of the subject so that it stands out from the background.
You can imitate the effect of some of these lights by using the DIY suggestions above. For example, a torch or
builders’ light – positioned well to the side of the subject – can provide ‘low-key’ lighting for a thriller scene, and
a reflector can substitute for a ‘fill light’.
You can buy professional lighting in sets, either as tungsten lights (‘redheads’) or as cold LED lights. LED lights
are more expensive and cooler; LED ‘arrays’ are good for producing even, soft lighting. You can get ‘softboxes’
to produce this kind of lighting with tungsten lights.
There are major health and safety issues with lighting:
■ Tungsten lights run very hot and can burn fingers and cause fires
■ Bulbs can shatter, so lights should never be used without safety glass
■ LED lights can cause permanent eye damage and should always be used with diffusers
■ Students can trip over stands and cables, and lights can fall over onto them
Using Film In Schools: A Practical Guide ©2010 Film: 21st Century Literacy
2. Spaces and equipment /31
Editing
Most computers can be used for basic video editing, but professional video editing software requires computers
with quite a high specification: check the system requirements.
Laptop or desktop
Desktop computers are best for vocational courses and higher-end video editing, as they can often be upgraded
with additional video cards and hard drives, and may be able to use bigger screens which will make it easier to
use complex software.
Laptops allow for more flexible use of spaces, and they can be taken on field trips. It’s also easier for groups
to work around them (they should be provided with mice). If you are planning to use sets of laptops you should
consider buying specialised cases. You can get trolley cases, suitable for moving sets of laptops to a secure
storage area or between teaching spaces. You can also get much more rugged cases designed for transporting
sets of laptops in vehicles.
Computer displays
You can use most computer monitors for basic video editing. When buying monitors, you should check your
editing programme’s minimum requirements. Most programmes require a minimum resolution of 1024 x 768 but
will be easier to use with a bigger screen.
If you’re buying displays for professional editing programmes, your monitor size should be at least 17 inches.
You can also consider colour depth (how many colours the monitor can display: the greater the depth, the
more realistic the colour should be). Professional video editing stations normally use two displays. However,
higher resolutions, greater colour depth and using two monitors requires more computer power: check that your
computer can handle them or can be upgraded.
Other hardware
Microphones and audio interfaces are useful for recording voiceovers and connecting musical instruments.
Portable hard drives are useful for transferring media between computers, and collecting students’ completed
films. USB music keyboards can be used for creating soundtracks.
Software
Most computers come with basic video editing software pre-installed or available as a free download. The most
recent versions of these software packages will work with a wide range of video formats and definitions. You
should check that the software is compatible with any camera you are planning to buy.
If you are buying a large number of copies, the major
manufacturers offer substantially reduced ‘volume
licensing’ prices for educational institutions.
Included (‘free’) editing software
Both main computer operating systems have an editing
package aimed at consumers. These use a single main
window for viewing the image and are relatively easy
to use.
Using Film In Schools: A Practical Guide ©2010 Film: 21st Century Literacy
2. Spaces and equipment /32
Intermediate editing software
For £50-£60 (cheaper for volume licenses) there are several different programmes which are more sophisticated
than the free packages. Most use a two-window layout (where you view your original source material in one
window and the film you are creating in another window) and a ‘timeline’ (where you can view your film as a
series of clips and sound files). Complex projects are usually easier to manage with one of these programmes.
They vary in features, ease-of-use and reliability.
Professional editing software
Professional editing software packages (around £400 upwards) all use a timeline-based interface and are the
best solution for vocational courses and complex projects. They can usually accept a wider range of video
formats than basic or intermediate software. They will take longer to learn, are more expensive, and are not
suitable for the youngest pupils.
Other software for filmmaking
You can also buy software applications which allow you to add effects, titles and motion to your videos. Professional
‘grading’ software allows detailed colour matching and effects.
The major professional editing packages already include some of these features, so check the features of your
editing package before you buy any extra applications.
Audio editing and soundtrack creation
Audio editing and soundtrack creation software is very useful. Some computers come with bundled (included)
audio software, and there are also some free open-source audio editing tools. Some pro video editing packages
also include audio software.
Sound software can include some or all of these features:
■ Basic audio editing, e.g. adjusting volume levels, splicing together different sections of a recording
■ Music creation, using loops and sound effects included with the software, or using MIDI instruments and/or
real instruments and vocals
■ The ability to import a video track so you can match your soundtrack exactly to your film
Network setup and media management
A media department will need a strategy for managing and backing up students’ video work while they are making
their films, and archiving their work and deleting the working files when the films are completed. Uncompressed
video files are too big to edit over a network, so your computers must be set up so you can save to a local
drive. You will need a lot of disc space while editing, as video files are very large. Normally the finished film (the
exported end product, which can be viewed and distributed) will take up much less space.
Points to consider:
■ Where will users’ video files be saved?
This could be on the main system drive, a separate partition on the main drive, or an external hard drive. Set
up a logical system for naming and saving files and ensure that students stick to it.
Many video programmes create a ‘project file’ which doesn’t contain the original media – it just ‘refers’ to it.
This can cause problems if the project or media files are moved. It’s simpler if the project and media files
are kept in one directory and can be moved together if necessary. Some programmes store them in different
locations by default: you may be able to change this using the application preferences.
Using Film In Schools: A Practical Guide ©2010 Film: 21st Century Literacy
2. Spaces and equipment /33
■ How will users’ work be backed-up?
Obviously it’s important to back-up coursework. You could do this by backing up files to a network drive at
the end of each day. You can also get students to keep back-up copies of their work on their own hard drive
or memory stick. This is not a good strategy as the primary back-up, as files may become lost or corrupted.
(Memory sticks are not very reliable).
■ When will users’ work be deleted?
At some point you will need to delete students’ work from your computers. Some schools do this once a term,
or at the end of each project. Before you do this you need to ensure that the finished film has been exported
at the quality required, and that you know where your copy is located. You could archive completed films on
DVD-ROM.
Bandwidth and storage
You need sufficient bandwidth to move large files across the network (e.g. for backing up students’ video files
to a network drive) and for viewing films. You will also need enough storage space for back-up and for keeping
video files. This is particularly important for courses such as the Creative and Media Diploma, where students
need a space to keep video ‘logs’ of their activity. If film and media activity is concentrated in one area, you could
consider providing a higher-bandwidth network just in that part of the school.
Mixing operating systems
Some schools use one operating system for filmmaking or creative activity while the rest of the school uses a
different OS. Properly set up mixed networks should not cause problems, but if you are selecting an ICT provider
and you want to use a different OS for filmmaking you should check whether the provider has experience of
supporting this mixed environment.
In this situation some schools prefer to have a separate network for the filmmaking computers. This has some
advantages if the main school network isn’t set up for mixed operating systems, but it’s important that the
filmmaking computers can access the Internet, both to access online resources and for software updates.
Classroom organisation
Schools use different approaches for setting up sets of computers for video editing in a classroom, depending
on the learning context.
Some teachers prefer to have the computers around the periphery of the room. This makes it easy for the
teacher to see what each student is doing and to move between students. It’s also the easiest place to locate
power supplies and network connections. It’s less suitable for situations where the students imitate a process
that the teacher is demonstrating on the whiteboard (e.g. showing them basic editing operations and where to
save their work). It leaves a large open space in the centre of the room which can be used for demonstrating
and practising filming techniques.
Others prefer a traditional classroom set up with computers in rows, and the teacher either at the front of the
class, or at the back of the class where they can see what students are doing on their own computers.
If students are to work in groups, it may be easier to use laptops with the students working around larger tables.
Using mice makes it easier for all group members to participate (e.g. with a rule that they take it in turns on the
mouse) and lets them position the laptop where they can all see it.
For extended school activities or in Primary schools, a less formal arrangement may be desirable, e.g. using
laptops and beanbags.
Using Film In Schools: A Practical Guide ©2010 Film: 21st Century Literacy
2. Spaces and equipment /34
Managing sound while editing
If several students are working individually in one room,
they can use headphones. These should be on-ear
headphones (with pads which can be cleaned): students
should not share in-ear headphones. An alternative
is to ask them to bring their own headphones, which
can minimise the risk of transmitting ear infections. You
should be able to regulate the volume level, or give
students clear instructions about limiting the volume.
For pair and group work, students need to be able
to hear the soundtrack and talk to each other. This is
easiest if they use speakers rather than headphones,
but if there are several groups working in the room they
may not be able to hear the soundtrack over competing sound from other groups.
Pairs of students can use two-into-one headphone splitters, and you can buy splitters with five or more sockets,
but using headphones makes it harder for the students to interact with each other.
With laptops, if groups are able to work without supervision, they could go off to work in separate quiet locations
(e.g. the library, or group rooms). Music practice rooms can make ideal spaces for sound editing.
Using Film In Schools: A Practical Guide ©2010 Film: 21st Century Literacy
2. Spaces and equipment /35
Filmmaking summary
Basic Intermediate High spec
Camera Compact camcorder,
phone or still camera
with video mode
(£60-£120) each
Midrange camcorder
(£200-£500)
Pro or semi-pro, SD,
miniDV or HDDl
Spaces for filming Classroom, spaces in
the school, locations
around the town
Classroom equipped as
studio
Chromakey screen (£60
upwards)
Studio
Sound recording Don’t record live sound
Use the built-in
microphone
Basic mics/tieclip mics
plugged into camera
(£30 upwards)
Headphones (£20
upwards)
Digital sound recorder
(£100 upwards)
Professional video
mics, including
directional boom mics,
headphones
Camera support Basic tripod with pan
and tilt head
(£30)
Midrange tripod with
pan and tilt head
(£50-£100)
Wheelchair, Skateboard
Professional tripod with
fluid head
Dolly
Jib
Lighting Available light
Torches
Desk lamps
DIY builders’ lamps,
homemade reflectors
(£0-£50)
Set of tungsten
‘redheads’, elastic
reflectors
(£400+)
Tungsten or LED lights
Reflectors
Editing hardware Standard school
computers
Computers with
extra memory, faster
processors
Microphones
Hard drives
Standalone computers
with two external
displays
Microphones
Hard drives
Editing Free software included
with OS
Semi-professional
software (£40-£50)
Professional editing
software
Additional
software
Free sound editing
software
File conversion
Basic sound editing and
creation software
(£60)
Effects
Titling
Sound editing
Motion graphics
Grading
Using Film In Schools: A Practical Guide ©2010 Film: 21st Century Literacy
2. Spaces and equipment /36
Newbuild or refurbished spaces for filmmaking
In a primary school, a single flexible space is probably the most suitable space for filmmaking.
In a secondary setting, particularly for specialist courses, you may want dedicated spaces: perhaps a large
studio space for group teaching and filming, plus ‘breakout’ rooms for small-group or individual activities such
as editing.
If you are aiming to emulate a TV studio you may want a separate control booth. The size of the control room
should be determined by the amount of equipment it will contain, and the number of students (plus teacher) who
are likely to be working in it at any one time.
The best shape for the main room is a simple, flexible
rectangular or almost square shape.Alarge room with a
high ceiling will offer more choice of camera positions.
If the room is to have windows, they should be at the
side of the room and fitted with blackout blinds. A
smooth floor surface is important for using tripods and
dollies. Carpet is best avoided (particularly in spaces
used for animation as modelling clay gets everywhere)
but you may want it as part of the set in one part of the
room.
Acoustic separation is important for filming. This can be achieved by using the same techniques as mentioned
in the film viewing section, and by ‘box within box’ construction where the walls, floor and ceiling are physically
separate from the structure of the building. It’s also important to avoid buzzing and noise from lights or
services.
The breakout editing rooms should be located off, or close to, the main room and with good acoustic separation
from the main room and each other. All these rooms will require adequate provision of network points and
electrical sockets. Cables will need to be run between a control booth and a studio space.
Using Film In Schools: A Practical Guide ©2010 Film: 21st Century Literacy
2. Spaces and equipment /37
Animation
Stop-frame animation can include clay animation, drawn or cutout animation, sand animation, cel animation
(drawn animation using several layers) and ‘pixilation’(where real objects or people are animated). Clay animation
is probably the most popular kind of animation in schools. You can also do ‘computer animation’.
Basic requirements for stop-frame animation
You need a camera, animation software, a tripod or other camera support, and a space or surface on which
to set up your models, objects or drawings.
You may also want lights, a flatbed scanner (for scanning drawings or other images), a graphics tablet (easier
to draw with than a mouse) and a chromakey background.
Camera
Most stop-frame animation software requires the use of a USB webcam or a miniDV camera (see below) and
may not work with digital still cameras or disc/card-based cameras.
Webcams are cheap and easy to handle but you should check that the specific model is compatible with your
stop-frame software. Some webcams have flexible stands which mean that you don’t need a tripod.
If your school has miniDV cameras (and your computers have Firewire/IIEE1394 sockets) you can probably use
these instead.
Stop-frame animation software
Stop-frame animation software is relatively cheap and it’s much easier than trying to animate with standard video
editing software (though there are ways of doing this).
Important features include ‘onion-skinning’ (which allows you to view several frames overlaid on each other)
and the ability to delete frames. Chromakey (green screen) is also useful. You should be able to export your
animated sequences in a format which your video editing software can use, so that you can edit sequences
together and add sound and effects.
Spaces for animation
Clay animation can get messy so a carpeted room is not suitable.
For each animation station, you need space for your computer, connected to a camera on a tripod or stand
(which you should be able to move). You may also need space for lighting. You can use ordinary desk lamps to
light animation sets (though beware of heat and trip hazards). For tabletop animation a mini-tripod can be useful
(unless your camera has a built-in stand).
For drawn animation, you can use an ordinary tripod with the camera pointing straight down, a copy stand (which
positions the camera vertically and has lights) or a professional animation stand, which has pegs for accurate
positioning of animation ‘cels’.
Using Film In Schools: A Practical Guide ©2010 Film: 21st Century Literacy
3. Partners, resources and funding /38
This section looks at where to find partners, resources and
funding for film education: online, from UK-wide organisations,
and from regional and local bodies.
Several different kinds of partner organisation can provide
useful support for schools and teachers. This support can
range from theoretical and practical activity with children and
young people, to advice and training for teachers. Partners can
also provide useful advice on setting up and equipping for film
education, sometimes as part of a Cultural Stakeholder Group.
A number of cinema and multi-arts venues and film festivals have film education programmes, which can
include workshops and study days for students and training for teachers.
Resource centres such as City Learning Centres (in England) and Creative Learning Centres (in Northern
Ireland) can provide practical support and training for film education.
Film education organisations with a UK-wide or regional/national remit also provide a range of training and
support. Some participatory media and community arts organisations provide workshops and training on
film and filmmaking. A number of independent filmmakers and film production organisations also provide
educational activity or training, particularly support for filmmaking projects.
Partners
■ BFI Education
Promotes understanding and appreciation of Britain’s television heritage and culture. Their education activities
include publications, events and training.
www.bfi.org.uk/education
■ FILMCLUB
Provides films and support for after-school film clubs. It’s free to state-funded schools in England and is being
piloted in Wales, Northern Ireland and Scotland.
www.filmclub.org
■ Film Education
Produces free resources, organises events and screenings including National Schools Film Week, and
provides training and support for teachers.
www.filmeducation.org
■ First Light
Provides funding and support for filmmaking by children and young people.
www.firstlightonline.co.uk
■ Skillset
The industry body which supports skills and training for the UK creative industries.
www.skillset.org
UK-wide organisations
Using Film In Schools: A Practical Guide ©2010 Film: 21st Century Literacy
3. Partners, resources and funding /39
Your local screen agency may be able to help you find suitable partners.
In England, the screen agencies are:
■ EM Media (East Midlands) www.em-media.org.uk
■ Film London http://filmlondon.org.uk
■ Northern Film & Media (North-east England) www.northernmedia.org
■ Screen South www.screensouth.org
■ Screen WM (West Midlands) www.screenwm.co.uk
■ Screen Yorkshire www.screenyorkshire.co.uk
■ South West Screen www.swscreen.co.uk
■ Vision and Media (North-west England) www.visionandmedia.co.uk
In the Nations, the screen agencies are:
■ Creative Scotland www.creativescotland.com
■ Film Agency for Wales www.filmagencywales.com
■ Northern Ireland Screen www.northernirelandscreen.co.uk
The Film Agency for Wales and Creative Scotland keep registers of providers in their area.
Other organisations who may be able to help you identify partners include:
■ Arts Council of England www.artscouncil.org.uk
■ Arts Council for Wales www.artswales.org.uk
Nations and regions
Local partners
The interactive map will help you to locate potential partners in your area.
www.mediaed.org.uk (link from organisations section)
Please note that we have not screened these organisations for child protection purposes or evaluated the
quality of their provision.
Resources
There are a lot of resources available to support teaching and learning about film and filmmaking.
Online resources include introductory guides to teaching film and filmmaking; downloadable study guides on
individual themes or topics; films to view or edit online, and films to download and edit yourselves.
DVD resources include selections of short films addressing specific ages, topics or curriculum requirements, as
well as resources including clips to edit.
A wide range of resources on film education and filmmaking are available to buy online from the BFI Filmstore
http://filmstore.bfi.org.uk
Using Film In Schools: A Practical Guide ©2010 Film: 21st Century Literacy
3. Partners, resources and funding /40
Introducing film education
Several sites offer ‘how-to’ information on using film in the
classroom, covering both film and filmmaking. They include:
■ MediaEd
■ the Scottish site Moving Image Education
■ Films for Learning
BFI Education also produces two substantial, downloadable
PDF guides to using film across the curriculum:
■ Look Again for Primary schools www.bfi.org.uk/education/teaching/lookagain
■ Moving Images in the Classroom for Secondary schools www.bfi.org.uk/education/teaching/miic
The FilmStreet website includes separate sections for children and teachers www.filmstreet.co.uk
Using film in specific subjects
■ BFI Education produces several free downloadable resources, including teaching notes to accompany their
Mitchell and Kenyon archive film DVD; The World in the Movies, a guide to using film to explore citizenship;
and an online guide to using their Disabling Imagery DVD which explores representations of disability in the
movies.
www.bfi.org.uk/education
■ Film Education provides a wide range of free resources on specific topics, including Local History and
Sound (Primary) and Shakespeare on Film, The Holocaust and Documentary (Secondary). They also sell two
DVDs on film interpretations of Shakespeare: Shakespeare on Screen and Romeo and Juliet.
www.filmeducation.org
■ FILMCLUB’s site includes ‘themes’ which group films that can be used to address specific topics, e.g.
Colonialism, Childhood.
www.filmclub.org
■ SBBFC the British Board of Film Classification’s student site, has useful resources and case studies exploring
issues of censorship and classification (e.g. for Citizenship). CBBFC is their site for Primary schoolchildren.
www.sbbfc.co.uk www.cbbfc.co.uk
Using individual films
Free resources
Several sites offer free downloadable study guides and teachers’ notes.
■ Film Education offers resources based on contemporary film and recent releases, with material available
across the curriculum and for Primary and Secondary level.
www.filmeducation.org
■ Cornerhouse focuses mainly on Modern Foreign Languages at Secondary level, covering films in Spanish,
French, Italian, Arabic, Mandarin and Urdu.
www.cornerhouse.org
Using Film In Schools: A Practical Guide ©2010 Film: 21st Century Literacy
3. Partners, resources and funding /41
Films to view online or download
■ BFI Screenonline provides access to a large range of British short films, and clips from feature films, from
the 1890s to the present day. The films on the site can only be accessed in schools, colleges, universities and
libraries and you have to register.
www.screenonline.org.uk
■ Moving Image Education also has a small number of short films and clips available to view or download.
www.movingimageeducation.org
■ The Yorkshire Film Archive has a large number of archive film clips organised by theme, decade and area.
You have to register to access the films.
www.yorkshirefilmarchive.com
■ Internationally, the Internet Archive has a huge range of films, many of which are downloadable in a variety
of formats.
www.archive.org
There are many other sites where you can view or download films (not all of which will be suitable for education).
There’s a useful summary on the BBC Film Network site www.bbc.co.uk/filmnetwork
Collections of films to buy
■ BFI Education produces several useful selections of short films with supporting material, which are specially
selected for each Key Stage – Starting Stories and Story Shorts for Primary schools, and Screening Shorts,
Moving Shorts and Real Shorts for Secondary schools.
www.bfi.org.uk/education
■ The English and Media Centre publishes the DVD Double Take and other stories, containing 90 minutes of
short films and supporting materials aimed at 11-16 year olds.
www.englishandmedia.co.uk
Filmmaking and editing
Online or downloadable films to edit
There are several sources of online film clips which you can incorporate into your own films. The Creative
Archive Licence provides free access to clips on a range of themes, for nonprofit, non-promotional, ‘share-alike’
use in the UK. Films are available from two major sources:
■ Open University www.open2.net/creativearchive
■ British Film Institute www.bfi.org.uk/creativearchive
Other sources
■ The Wellcome Foundation has over 100 hours of Creative Commons films on healthcare and medicine in
the 20th Century.
http://library.wellcome.ac.uk/wellcomefilm.htm
■ Many schools in the UK have free access to the British Pathé archive under agreements with Regional
Broadband Consortia or local authorities.
www.britishpathe.com
Using Film In Schools: A Practical Guide ©2010 Film: 21st Century Literacy
3. Partners, resources and funding /42
■ You can also search for public domain films on the Internet Archive.
www.archive.org
■ Scotland on Screen has over 200 films which can be downloaded for use in Scottish schools.
http://scotlandonscreen.org.uk
■ National Archives Focus on Film includes clips organised into themes, which you can download and edit.
www.nationalarchives.gov.uk/education/focuson/film
■ BFI Screenonline includes the Cutting Room, an online editing tool where you can practise editing with clips
from archive film or rushes from modern films.
www.screenonline.org.uk/education/thecuttingroom
■ Wevee is an online editing tool which enables you to edit archive film clips and contemporary music tracks
together and share the results online.
www.wevee.co.uk
Editing resources to buy
■ Film Education produces two interactive CD-ROMs, MoPix and The Red Shoes, in each of which students
edit their own versions of a film sequence using the built-in editing tool.
www.filmeducation.org
■ The English and Media Centre publishes MoviePower, a set of moving image sequences and activities with
a built-in editor.
www.englishandmedia.co.uk
■ Media Education Wales produces Editsense, a set of film sequences to be edited using standard editing
software on Macs or PCs.
mediaedwales.org.uk
Films made by children and young people
Several sites allow you to view films made by children and young people.
■ Films for Learning is a site run by teachers, allows you to search for films by curriculum area.
www.filmsforlearning.org
■ Planet Scicast features short science films, and has a useful ‘how-to’ guide.
www.planet-scicast.com
■ You can view films made on First Light projects.
www.firstlightonline.co.uk
■ MediaBox films are made by disadvantaged 13-19 year olds.
www.media-box.co.uk
■ The English and Media Centre sells Mediamagazine Student
Films, a compilation of films made by sixth-form students.
www.englishandmedia.co.uk
Using Film In Schools: A Practical Guide ©2010 Film: 21st Century Literacy
3. Partners, resources and funding /43
Funding
There are a number of sources of funding for filmmaking activities at both UK-wide and regional/national level.
Many of these require a proportion of match funding, so you should look to ‘join up’ funding streams early in the
project planning process.
The major UK-wide funding for filmmaking is provided by First Light. This supports filmmaking by children and
young people but is only available for activities which are not related to the curriculum.
www.firstlightonline.co.uk
Some Screen Agencies (see page 39) provide funding for education projects.
Other funding streams which you could consider for supporting film education and filmmaking (depending on
your location) include:
■ 14-19 Diploma delivery
■ Creative Partnerships
■ Communities First (in Wales)
■ Disadvantage subsidy
■ Extended Schools
■ Local charitable trusts
■ London Gifted & Talented
■ Pupil Premium
■ Widening participation
Using Film In Schools: A Practical Guide ©2010 Film: 21st Century Literacy
Using film in schools

More Related Content

What's hot

Teacher's hand book
Teacher's hand bookTeacher's hand book
Teacher's hand bookhariom2015
 
Computer assisted instruction
Computer assisted instructionComputer assisted instruction
Computer assisted instructionvinuthamuneeb
 
Computer assisted instruction
Computer assisted instructionComputer assisted instruction
Computer assisted instructionTHANUJA MATHEW
 
Educational technology mcq
Educational technology mcqEducational technology mcq
Educational technology mcqDivyaSS7
 
Educational Technology
Educational TechnologyEducational Technology
Educational Technologyvazhichal12
 
Teacher in a Digital Era-1.pptx
Teacher in a Digital Era-1.pptxTeacher in a Digital Era-1.pptx
Teacher in a Digital Era-1.pptxParvathyBR
 
Computer assisted instruction(CAI)
Computer assisted instruction(CAI)Computer assisted instruction(CAI)
Computer assisted instruction(CAI)USMAN GANI AL HAQUE
 
Teaching Modalities
Teaching ModalitiesTeaching Modalities
Teaching ModalitiesPoojaWalia6
 
Computer Assisted Instruction (CAI)
Computer Assisted Instruction (CAI)Computer Assisted Instruction (CAI)
Computer Assisted Instruction (CAI)Atul Thakur
 
Qualities and competencies of commerce teacher
Qualities and competencies of commerce teacherQualities and competencies of commerce teacher
Qualities and competencies of commerce teacherSurekha Gireesh
 
Approaches in educational technology
Approaches in educational technologyApproaches in educational technology
Approaches in educational technologyFaKhalid
 
Teacher competencies, assignment
Teacher competencies, assignmentTeacher competencies, assignment
Teacher competencies, assignmentzenana sahla
 
Critical Pedagogy
Critical PedagogyCritical Pedagogy
Critical PedagogyCAITLAH
 
Computer assisted instructions B.Ed course cose 8620
Computer assisted instructions B.Ed course cose 8620Computer assisted instructions B.Ed course cose 8620
Computer assisted instructions B.Ed course cose 8620Habib Ullah Qamar
 
Levels of teaching
Levels of teachingLevels of teaching
Levels of teachingPoojaWalia6
 
Educational implications of cctv
Educational implications of cctvEducational implications of cctv
Educational implications of cctvMd Aamir Akhtar
 
Educational Technology, B.Ed. 1st year
Educational Technology, B.Ed. 1st yearEducational Technology, B.Ed. 1st year
Educational Technology, B.Ed. 1st yearNidhi Jain
 

What's hot (20)

models of teaching
models of teachingmodels of teaching
models of teaching
 
Teacher's hand book
Teacher's hand bookTeacher's hand book
Teacher's hand book
 
Online Teaching
Online Teaching Online Teaching
Online Teaching
 
Computer assisted instruction
Computer assisted instructionComputer assisted instruction
Computer assisted instruction
 
Computer assisted instruction
Computer assisted instructionComputer assisted instruction
Computer assisted instruction
 
Educational technology mcq
Educational technology mcqEducational technology mcq
Educational technology mcq
 
Educational Technology
Educational TechnologyEducational Technology
Educational Technology
 
Educational technology
Educational technologyEducational technology
Educational technology
 
Teacher in a Digital Era-1.pptx
Teacher in a Digital Era-1.pptxTeacher in a Digital Era-1.pptx
Teacher in a Digital Era-1.pptx
 
Computer assisted instruction(CAI)
Computer assisted instruction(CAI)Computer assisted instruction(CAI)
Computer assisted instruction(CAI)
 
Teaching Modalities
Teaching ModalitiesTeaching Modalities
Teaching Modalities
 
Computer Assisted Instruction (CAI)
Computer Assisted Instruction (CAI)Computer Assisted Instruction (CAI)
Computer Assisted Instruction (CAI)
 
Qualities and competencies of commerce teacher
Qualities and competencies of commerce teacherQualities and competencies of commerce teacher
Qualities and competencies of commerce teacher
 
Approaches in educational technology
Approaches in educational technologyApproaches in educational technology
Approaches in educational technology
 
Teacher competencies, assignment
Teacher competencies, assignmentTeacher competencies, assignment
Teacher competencies, assignment
 
Critical Pedagogy
Critical PedagogyCritical Pedagogy
Critical Pedagogy
 
Computer assisted instructions B.Ed course cose 8620
Computer assisted instructions B.Ed course cose 8620Computer assisted instructions B.Ed course cose 8620
Computer assisted instructions B.Ed course cose 8620
 
Levels of teaching
Levels of teachingLevels of teaching
Levels of teaching
 
Educational implications of cctv
Educational implications of cctvEducational implications of cctv
Educational implications of cctv
 
Educational Technology, B.Ed. 1st year
Educational Technology, B.Ed. 1st yearEducational Technology, B.Ed. 1st year
Educational Technology, B.Ed. 1st year
 

Similar to Using film in schools

Using of videos,animations, movies and tv broadcast in education
Using of videos,animations, movies and tv broadcast in educationUsing of videos,animations, movies and tv broadcast in education
Using of videos,animations, movies and tv broadcast in educationMuhammad kashif
 
Film Language
Film LanguageFilm Language
Film LanguageIan Wall
 
NOTES ON SPECIAL SCHOOLS AND VIDEOCONFERENCING
NOTES ON SPECIAL SCHOOLS AND VIDEOCONFERENCINGNOTES ON SPECIAL SCHOOLS AND VIDEOCONFERENCING
NOTES ON SPECIAL SCHOOLS AND VIDEOCONFERENCINGVideoguy
 
Non print media
Non print mediaNon print media
Non print mediaCHIPPY8281
 
EPE 222 Film Based Instrutional Plan
EPE 222 Film Based Instrutional PlanEPE 222 Film Based Instrutional Plan
EPE 222 Film Based Instrutional PlanLey Leal
 
Civic Life Project School presentation 090313
Civic Life Project School presentation 090313Civic Life Project School presentation 090313
Civic Life Project School presentation 090313Civic Life Project
 
Waters, adam eme 2040 multimedia presentation
Waters,  adam eme 2040 multimedia presentationWaters,  adam eme 2040 multimedia presentation
Waters, adam eme 2040 multimedia presentationAdam Waters
 
Final analysis of the film education survey
Final analysis of the film education surveyFinal analysis of the film education survey
Final analysis of the film education surveymarkreid1895
 
Movies effects on efl learners
Movies effects on efl learnersMovies effects on efl learners
Movies effects on efl learnersBilal Yaseen
 
Movie Effects on EFL Learners at Iraqi School in Kuala Lumpur
Movie Effects on EFL Learners at Iraqi School in Kuala LumpurMovie Effects on EFL Learners at Iraqi School in Kuala Lumpur
Movie Effects on EFL Learners at Iraqi School in Kuala LumpurHani Shakir
 
Revision guide audiences and-institutions-the-film-industry
Revision guide audiences and-institutions-the-film-industryRevision guide audiences and-institutions-the-film-industry
Revision guide audiences and-institutions-the-film-industryGreat Baddow High School Media
 
Using Animation To Engage Students In Narrative
Using Animation To Engage Students In NarrativeUsing Animation To Engage Students In Narrative
Using Animation To Engage Students In NarrativeDepartment Of Education
 
TLM-Traditional & Modern
TLM-Traditional & ModernTLM-Traditional & Modern
TLM-Traditional & ModernJerslin Muller
 
L057 te tip sheets booklet_final_v2_digital_web-1
L057 te tip sheets booklet_final_v2_digital_web-1L057 te tip sheets booklet_final_v2_digital_web-1
L057 te tip sheets booklet_final_v2_digital_web-1Ana Cristina Zuñiga
 
Media Literacy Week
Media Literacy WeekMedia Literacy Week
Media Literacy WeekDon Goble
 

Similar to Using film in schools (20)

Using of videos,animations, movies and tv broadcast in education
Using of videos,animations, movies and tv broadcast in educationUsing of videos,animations, movies and tv broadcast in education
Using of videos,animations, movies and tv broadcast in education
 
Guide for teachers
Guide for teachersGuide for teachers
Guide for teachers
 
Online assignment
Online assignmentOnline assignment
Online assignment
 
Film Language
Film LanguageFilm Language
Film Language
 
NOTES ON SPECIAL SCHOOLS AND VIDEOCONFERENCING
NOTES ON SPECIAL SCHOOLS AND VIDEOCONFERENCINGNOTES ON SPECIAL SCHOOLS AND VIDEOCONFERENCING
NOTES ON SPECIAL SCHOOLS AND VIDEOCONFERENCING
 
Non print media
Non print mediaNon print media
Non print media
 
EPE 222 Film Based Instrutional Plan
EPE 222 Film Based Instrutional PlanEPE 222 Film Based Instrutional Plan
EPE 222 Film Based Instrutional Plan
 
Civic Life Project School presentation 090313
Civic Life Project School presentation 090313Civic Life Project School presentation 090313
Civic Life Project School presentation 090313
 
Waters, adam eme 2040 multimedia presentation
Waters,  adam eme 2040 multimedia presentationWaters,  adam eme 2040 multimedia presentation
Waters, adam eme 2040 multimedia presentation
 
Final analysis of the film education survey
Final analysis of the film education surveyFinal analysis of the film education survey
Final analysis of the film education survey
 
Movies effects on efl learners
Movies effects on efl learnersMovies effects on efl learners
Movies effects on efl learners
 
Movie Effects on EFL Learners at Iraqi School in Kuala Lumpur
Movie Effects on EFL Learners at Iraqi School in Kuala LumpurMovie Effects on EFL Learners at Iraqi School in Kuala Lumpur
Movie Effects on EFL Learners at Iraqi School in Kuala Lumpur
 
Revision guide audiences and-institutions-the-film-industry
Revision guide audiences and-institutions-the-film-industryRevision guide audiences and-institutions-the-film-industry
Revision guide audiences and-institutions-the-film-industry
 
Using Animation To Engage Students In Narrative
Using Animation To Engage Students In NarrativeUsing Animation To Engage Students In Narrative
Using Animation To Engage Students In Narrative
 
TLM-Traditional & Modern
TLM-Traditional & ModernTLM-Traditional & Modern
TLM-Traditional & Modern
 
Creative TLM.pptx
Creative TLM.pptxCreative TLM.pptx
Creative TLM.pptx
 
L057 te tip sheets booklet_final_v2_digital_web-1
L057 te tip sheets booklet_final_v2_digital_web-1L057 te tip sheets booklet_final_v2_digital_web-1
L057 te tip sheets booklet_final_v2_digital_web-1
 
Practicum
PracticumPracticum
Practicum
 
Media Literacy Week
Media Literacy WeekMedia Literacy Week
Media Literacy Week
 
Mẫu đề cương luận văn thạc sĩ khoa ngoại ngữ
Mẫu đề cương luận văn thạc sĩ khoa ngoại ngữMẫu đề cương luận văn thạc sĩ khoa ngoại ngữ
Mẫu đề cương luận văn thạc sĩ khoa ngoại ngữ
 

Recently uploaded

4.18.24 Movement Legacies, Reflection, and Review.pptx
4.18.24 Movement Legacies, Reflection, and Review.pptx4.18.24 Movement Legacies, Reflection, and Review.pptx
4.18.24 Movement Legacies, Reflection, and Review.pptxmary850239
 
Roles & Responsibilities in Pharmacovigilance
Roles & Responsibilities in PharmacovigilanceRoles & Responsibilities in Pharmacovigilance
Roles & Responsibilities in PharmacovigilanceSamikshaHamane
 
ANG SEKTOR NG agrikultura.pptx QUARTER 4
ANG SEKTOR NG agrikultura.pptx QUARTER 4ANG SEKTOR NG agrikultura.pptx QUARTER 4
ANG SEKTOR NG agrikultura.pptx QUARTER 4MiaBumagat1
 
Incoming and Outgoing Shipments in 3 STEPS Using Odoo 17
Incoming and Outgoing Shipments in 3 STEPS Using Odoo 17Incoming and Outgoing Shipments in 3 STEPS Using Odoo 17
Incoming and Outgoing Shipments in 3 STEPS Using Odoo 17Celine George
 
Karra SKD Conference Presentation Revised.pptx
Karra SKD Conference Presentation Revised.pptxKarra SKD Conference Presentation Revised.pptx
Karra SKD Conference Presentation Revised.pptxAshokKarra1
 
INTRODUCTION TO CATHOLIC CHRISTOLOGY.pptx
INTRODUCTION TO CATHOLIC CHRISTOLOGY.pptxINTRODUCTION TO CATHOLIC CHRISTOLOGY.pptx
INTRODUCTION TO CATHOLIC CHRISTOLOGY.pptxHumphrey A Beña
 
MULTIDISCIPLINRY NATURE OF THE ENVIRONMENTAL STUDIES.pptx
MULTIDISCIPLINRY NATURE OF THE ENVIRONMENTAL STUDIES.pptxMULTIDISCIPLINRY NATURE OF THE ENVIRONMENTAL STUDIES.pptx
MULTIDISCIPLINRY NATURE OF THE ENVIRONMENTAL STUDIES.pptxAnupkumar Sharma
 
Gas measurement O2,Co2,& ph) 04/2024.pptx
Gas measurement O2,Co2,& ph) 04/2024.pptxGas measurement O2,Co2,& ph) 04/2024.pptx
Gas measurement O2,Co2,& ph) 04/2024.pptxDr.Ibrahim Hassaan
 
GRADE 4 - SUMMATIVE TEST QUARTER 4 ALL SUBJECTS
GRADE 4 - SUMMATIVE TEST QUARTER 4 ALL SUBJECTSGRADE 4 - SUMMATIVE TEST QUARTER 4 ALL SUBJECTS
GRADE 4 - SUMMATIVE TEST QUARTER 4 ALL SUBJECTSJoshuaGantuangco2
 
Proudly South Africa powerpoint Thorisha.pptx
Proudly South Africa powerpoint Thorisha.pptxProudly South Africa powerpoint Thorisha.pptx
Proudly South Africa powerpoint Thorisha.pptxthorishapillay1
 
ACC 2024 Chronicles. Cardiology. Exam.pdf
ACC 2024 Chronicles. Cardiology. Exam.pdfACC 2024 Chronicles. Cardiology. Exam.pdf
ACC 2024 Chronicles. Cardiology. Exam.pdfSpandanaRallapalli
 
ENGLISH 7_Q4_LESSON 2_ Employing a Variety of Strategies for Effective Interp...
ENGLISH 7_Q4_LESSON 2_ Employing a Variety of Strategies for Effective Interp...ENGLISH 7_Q4_LESSON 2_ Employing a Variety of Strategies for Effective Interp...
ENGLISH 7_Q4_LESSON 2_ Employing a Variety of Strategies for Effective Interp...JhezDiaz1
 
How to Add Barcode on PDF Report in Odoo 17
How to Add Barcode on PDF Report in Odoo 17How to Add Barcode on PDF Report in Odoo 17
How to Add Barcode on PDF Report in Odoo 17Celine George
 
Judging the Relevance and worth of ideas part 2.pptx
Judging the Relevance  and worth of ideas part 2.pptxJudging the Relevance  and worth of ideas part 2.pptx
Judging the Relevance and worth of ideas part 2.pptxSherlyMaeNeri
 
Field Attribute Index Feature in Odoo 17
Field Attribute Index Feature in Odoo 17Field Attribute Index Feature in Odoo 17
Field Attribute Index Feature in Odoo 17Celine George
 

Recently uploaded (20)

4.18.24 Movement Legacies, Reflection, and Review.pptx
4.18.24 Movement Legacies, Reflection, and Review.pptx4.18.24 Movement Legacies, Reflection, and Review.pptx
4.18.24 Movement Legacies, Reflection, and Review.pptx
 
Roles & Responsibilities in Pharmacovigilance
Roles & Responsibilities in PharmacovigilanceRoles & Responsibilities in Pharmacovigilance
Roles & Responsibilities in Pharmacovigilance
 
ANG SEKTOR NG agrikultura.pptx QUARTER 4
ANG SEKTOR NG agrikultura.pptx QUARTER 4ANG SEKTOR NG agrikultura.pptx QUARTER 4
ANG SEKTOR NG agrikultura.pptx QUARTER 4
 
Incoming and Outgoing Shipments in 3 STEPS Using Odoo 17
Incoming and Outgoing Shipments in 3 STEPS Using Odoo 17Incoming and Outgoing Shipments in 3 STEPS Using Odoo 17
Incoming and Outgoing Shipments in 3 STEPS Using Odoo 17
 
Karra SKD Conference Presentation Revised.pptx
Karra SKD Conference Presentation Revised.pptxKarra SKD Conference Presentation Revised.pptx
Karra SKD Conference Presentation Revised.pptx
 
INTRODUCTION TO CATHOLIC CHRISTOLOGY.pptx
INTRODUCTION TO CATHOLIC CHRISTOLOGY.pptxINTRODUCTION TO CATHOLIC CHRISTOLOGY.pptx
INTRODUCTION TO CATHOLIC CHRISTOLOGY.pptx
 
TataKelola dan KamSiber Kecerdasan Buatan v022.pdf
TataKelola dan KamSiber Kecerdasan Buatan v022.pdfTataKelola dan KamSiber Kecerdasan Buatan v022.pdf
TataKelola dan KamSiber Kecerdasan Buatan v022.pdf
 
MULTIDISCIPLINRY NATURE OF THE ENVIRONMENTAL STUDIES.pptx
MULTIDISCIPLINRY NATURE OF THE ENVIRONMENTAL STUDIES.pptxMULTIDISCIPLINRY NATURE OF THE ENVIRONMENTAL STUDIES.pptx
MULTIDISCIPLINRY NATURE OF THE ENVIRONMENTAL STUDIES.pptx
 
Gas measurement O2,Co2,& ph) 04/2024.pptx
Gas measurement O2,Co2,& ph) 04/2024.pptxGas measurement O2,Co2,& ph) 04/2024.pptx
Gas measurement O2,Co2,& ph) 04/2024.pptx
 
GRADE 4 - SUMMATIVE TEST QUARTER 4 ALL SUBJECTS
GRADE 4 - SUMMATIVE TEST QUARTER 4 ALL SUBJECTSGRADE 4 - SUMMATIVE TEST QUARTER 4 ALL SUBJECTS
GRADE 4 - SUMMATIVE TEST QUARTER 4 ALL SUBJECTS
 
Proudly South Africa powerpoint Thorisha.pptx
Proudly South Africa powerpoint Thorisha.pptxProudly South Africa powerpoint Thorisha.pptx
Proudly South Africa powerpoint Thorisha.pptx
 
ACC 2024 Chronicles. Cardiology. Exam.pdf
ACC 2024 Chronicles. Cardiology. Exam.pdfACC 2024 Chronicles. Cardiology. Exam.pdf
ACC 2024 Chronicles. Cardiology. Exam.pdf
 
YOUVE_GOT_EMAIL_PRELIMS_EL_DORADO_2024.pptx
YOUVE_GOT_EMAIL_PRELIMS_EL_DORADO_2024.pptxYOUVE_GOT_EMAIL_PRELIMS_EL_DORADO_2024.pptx
YOUVE_GOT_EMAIL_PRELIMS_EL_DORADO_2024.pptx
 
OS-operating systems- ch04 (Threads) ...
OS-operating systems- ch04 (Threads) ...OS-operating systems- ch04 (Threads) ...
OS-operating systems- ch04 (Threads) ...
 
LEFT_ON_C'N_ PRELIMS_EL_DORADO_2024.pptx
LEFT_ON_C'N_ PRELIMS_EL_DORADO_2024.pptxLEFT_ON_C'N_ PRELIMS_EL_DORADO_2024.pptx
LEFT_ON_C'N_ PRELIMS_EL_DORADO_2024.pptx
 
Model Call Girl in Tilak Nagar Delhi reach out to us at 🔝9953056974🔝
Model Call Girl in Tilak Nagar Delhi reach out to us at 🔝9953056974🔝Model Call Girl in Tilak Nagar Delhi reach out to us at 🔝9953056974🔝
Model Call Girl in Tilak Nagar Delhi reach out to us at 🔝9953056974🔝
 
ENGLISH 7_Q4_LESSON 2_ Employing a Variety of Strategies for Effective Interp...
ENGLISH 7_Q4_LESSON 2_ Employing a Variety of Strategies for Effective Interp...ENGLISH 7_Q4_LESSON 2_ Employing a Variety of Strategies for Effective Interp...
ENGLISH 7_Q4_LESSON 2_ Employing a Variety of Strategies for Effective Interp...
 
How to Add Barcode on PDF Report in Odoo 17
How to Add Barcode on PDF Report in Odoo 17How to Add Barcode on PDF Report in Odoo 17
How to Add Barcode on PDF Report in Odoo 17
 
Judging the Relevance and worth of ideas part 2.pptx
Judging the Relevance  and worth of ideas part 2.pptxJudging the Relevance  and worth of ideas part 2.pptx
Judging the Relevance and worth of ideas part 2.pptx
 
Field Attribute Index Feature in Odoo 17
Field Attribute Index Feature in Odoo 17Field Attribute Index Feature in Odoo 17
Field Attribute Index Feature in Odoo 17
 

Using film in schools

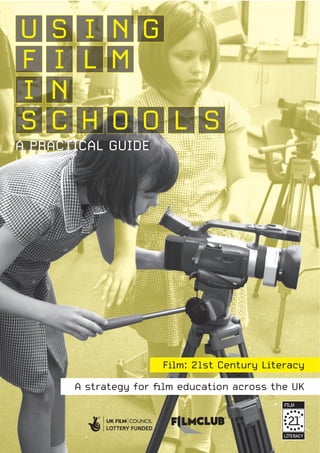
  • 1. Film: 21st Century Literacy A strategy for film education across the UK I N GSU I L MF I N H O OCS L S A PRACTICAL GUIDE
  • 2. Using Film In Schools: a Practical Guide Introduction 2 /1 Using Film In Schools: A Practical Guide ©2010 Film: 21st Century Literacy 1 Using film 4 An overview of film education and its role and value ■ Manageable filmmaking ■ Opportunities for film education in the curriculum ■ Film and other outcomes ■ Informal learning ■ Principles of film education ■ Continuing professional development ■ Working with partners ■ Work-related learning and progression to the creative industries 2 Spaces and equipment 13 Advice on technology and spaces for film viewing and filmmaking ■ Learning contexts ■ Access to film education ■ General advice for procurement ■ Film viewing equipment and spaces ■ Filmmaking equipment and spaces 3 Partners, resources and funding 38 Directory of partner organisations, sources of support and funding, and resources ■ Partners ■ UK-wide organisations ■ Nations and regions ■ Local partners ■ Resources 4 The law and film education 44 ■ Copyright ■ Film classification ■ Privacy ■ Defamation ■ Security ■ Disclaimer Acknowledgements 50
  • 3. Introduction This is a guide for schools who want to deliver film activities in and out of the classroom. Using Film In Schools: A Practical Guide will help teachers and headteachers integrate filmmaking, watching and critical analysis across the curriculum. The guide is part of Film: 21st Century Literacy, a 3-year Strategy to recognise the value of film in education. Film: 21st Century Literacy is funded by the UK Film Council and delivered by the British Film Institute, Skillset, Film Education, First Light and FILMCLUB. We are also working with Partnerships for Schools to publish this guide. Over the past year, schools have asked us a number of questions, for example, what of equipment should we be buying? What’s the best school environment for watching or making films? How do we ensure we don’t breach copyright? What other partners can we work with? Are there any other resources? Film can be delivered in schools easily and relatively cheaply. This guide will show you how. /2 Raising standards with film Film is increasingly being recognised by teachers as a valuable tool that can be used to re-engage young people with the curriculum and increase their overall motivation for learning. Film is very popular with young people. They are not afraid to use it in lessons, and enjoy doing so. Film is a tool you can use to motivate and engage pupils in the classroom, and contextualise difficult areas of the curriculum. Film can help children to be more positive about the whole school experience, and showing films to children that go beyond Hollywood is recognised by teachers as helping to broaden their pupils’ minds. Media Education Wales’ Ffilmschool 2 transition project, in a South Wales cluster, has shown that teaching with film can make the majority of students more interested in writing. The project made the students’ writing more descriptive and enhanced their range of expressions. In another project funded by the BFI, the percentage of children writing at their expected class level rose from 29% to 75%. “The video workshops have helped my writing because I am forced to focus on one thing at a time and think about it in-depth.” (Ffilmschool 2 pupil) The Projector world cinema project run by the Cornerhouse Cinema in association with Manchester Metropolitan University and Routes Into Languages used world cinema to teach foreign languages. Following the project, the numbers of young people who said they now wanted to go on to study languages at A Level rose by 20%. “Learning Arabic in a creative environment like the cinema and gallery spaces was very stimulating and motivating...I’ve seen improvements in my students’ confidence and in using Arabic.” (Teacher) Using Film In Schools: A Practical Guide ©2010 Film: 21st Century Literacy
  • 4. Introduction /3 Going beyond Hollywood We know that young people are eager to watch new kinds of films. They are not put off by subtitles, and even very young children are keen to experiment with new genres. There is a huge range of films available for young people: archive, animation, European and world cinema, short films and documentaries. Film education plugs a gap by taking them beyond Hollywood. It broadens the minds of young people and provides them with a more diverse range of cultural experiences. For example: ■ FILMCLUBs are broadening the range of films young people can watch from around the world ■ BFI resources introduce young people to the wealth of classic British cinema from the last 100 years ■ National Schools Film Week offered an increased focus on European cinema last year, tapping into a rich and diverse range of films A project in the East Midlands offered teachers in schools across eight local authorities the chance to use film for a year. Many had never done so before. By the end of the first year, two thirds were reporting that the project had made them more enthusiastic about teaching, and had changed their pedagogy. 100% of teachers felt that film could reach difficult or challenging pupils (80% strongly). Bringing the elements together The best educational experience for young people brings together filmmaking, watching and critical analysis. This is probably easier to do in primary schools, where a single film project can weave together different areas of the curriculum with other creative activities such as music and drama. At all Key Stages, by bringing these elements together, teachers can create a richer film learning experience. Young people can learn the language of film, whilst developing new literacy skills of their own. Using this guide Using Film in Schools: A Practical Guide will help you to: ■ Identify where film can contribute to delivering the curriculum ■ Choose the right kit to make, watch and display films in school ■ Make the best use of spaces and the school environment ■ Navigate copyright and other legal issues ■ Source outside partners to work with ■ Access useful film resources Other useful information sources exist to support teachers working across the curriculum. These are listed in Chapter 4. We will be continually updating this guide to make it continually relevant. If you have any comments or can suggest additional areas you think we should cover please email Adam Cooper at adam@21stcenturyliteracy.org.uk Using Film In Schools: A Practical Guide ©2010 Film: 21st Century Literacy
  • 5. 1. Using film /4 You can use film to enhance learning across the curriculum, whatever your level of expertise. Teaching in subjects from English and Modern Foreign Languages to Science and PE can benefit from using simple cameras for recording, note-taking or reviewing, or from showing short clips to enhance children’s understanding of a topic. Using film doesn’t have to be complicated, and you don’t have to restrict it to separate filmmaking projects or to screening complete feature films. You probably already have suitable cameras in your school, and most computers are suitable for viewing or editing film clips. This section looks at how you can use film in different subject and topic areas and informal education, and how it can contribute to broader outcomes. In a recent project in East Midlands primary schools, nearly 70% of teachers said that film education didn’t take a long time to plan compared with other creative activities, and that the technology was easy to use: and 100% said that using film education was worth the effort. Manageable filmmaking If you decide to move from basic video recording to structured filmmaking projects, start by keeping the films short and simple. Making films more than a few minutes long will involve repetitive and time-consuming work. Five minutes is long for a school film: twenty or thirty seconds may be all you need. Look for ways of filmmaking that give children plenty of opportunity for creative learning and avoid activities that are unnecessarily difficult. Trying to imitate television drama or Hollywood film requires good acting, planning, and a high level of technical skill and attention to detail. Would it be easier to use an advertisement, a title sequence, or a public information film as a model? Choose equipment that’s easy to learn and use. Do you need bulky camcorders and professional editing software? Some very imaginative films have been made with very simple cameras and software. Can you use a phone camera, or a still camera that records movies? Do you need to record live sound? This is hard to do well. Can you manage without it by recording a voiceover, or creating a soundtrack, on a computer? Animation may appear to be time-consuming, but a short clay animation film can take less time than doing a live action sequence properly. It offers much more scope to be imaginative with sets, locations and costumes in an ordinary classroom. There are many different ways to plan a filmmaking project, and you need to choose one which is suitable for your students. Detailed scripts and storyboards aren’t always necessary: you can try using mindmaps or simple shot lists as an alternative. Discussion, collaboration and groupwork are some of the most valuable aspects of film education, so try to create plenty of opportunities for these. Using Film In Schools: A Practical Guide ©2010 Film: 21st Century Literacy
  • 6. 1. Using film These are a few of the ways that film education can contribute to learning across the curriculum. Opportunities for film education in the curriculum /5 Primary Secondary KS1+ KS2+ KS3+ KS4+ 16+ English Use moving images as a stimulus for speaking and listening Use short films to develop understanding of narrative and point of view Use moving images as a stimulus for writing, e.g. letters, news items, film reviews View the opening scene from an adaptation before reading the book, and consider what it tells the viewer about genre, narrative and character Translate a short film excerpt into a written story, poem, news report or letter Make a film adaptation of a story or a scene from a book Use filmmaking to explore the imagery in a poem Explore and compare the techniques used in print and moving image texts Explore how film language techniques are used for effect and persuasion in propaganda and documentary films Analyse or compare film versions of literary texts, considering features such as depiction of characters, narrative structure and the use of film language Write film scripts History View archive film to develop understanding of an historical period Use clay animation to depict an historical event Make film documentaries incorporating archive footage Make fiction films based on an historical period or event, perhaps one in the local area Compare, analyse and discuss different (fictional or documentary) film representations of an historical period, event or character Explore the techniques used in propaganda films Geography Use film to record and present information about an area, e.g. the local area, or an area visited on a field trip Use clay animation to represent geographical processes, e.g. glaciation or the formation of oxbow lakes View, discuss and consider fiction or documentary representations of places, natural phenomena or environmental issues View contrasting fiction films about a country and consider how they represent it Using Film In Schools: A Practical Guide ©2010 Film: 21st Century Literacy
  • 7. 1. Using film /6 Primary Secondary KS1+ KS2+ KS3+ KS4+ 16+ Modern Foreign Languages Watch a film excerpt in the target language, listening for specific words or phrases View films to develop country-specific knowledge Make films (using either live action or animation) of fictional stories, or real-life scenarios such as visiting a shop or going to the dentist Script and perform a voiceover in the target language for a film sequence Create a film advertisement in the target language View film extracts in the target language to develop comprehension skills; use visual and audio clues – e.g. lighting, performance, music, sound effects – to aid understanding Science Use film to record experiments Use film techniques, e.g. close-ups, timelapse and slow motion, to analyse and demonstrate processes and principles Use fiction and factual films to stimulate discussion and writing about aspects of a scientific debate, e.g. global warming, overfishing, genetic engineering Design and Technology Use video to record product testing and disassembly, e.g. using slow-motion, timelapse Use film as part of the design research process Design characters and sets to make an animated film Make films to explain the function of components in a product, e.g. through a disassembly with explanatory voiceover Mathematics Use video cameras to collect examples of shapes, numbers, patterns, angles Watch films that feature simple numbers and shapes Make animations to explain mathematical or geometric principles Use video cameras to record and plot movement, e.g. to show that the trajectory of a thrown ball is a parabola Citizenship Use short films, children’s films and feature films to stimulate discussion and writing about issues of citizenship. Using film can provide a way for children to address personal issues at one remove Explore the techniques which films use to present issues, groups, institutions or events in positive or negative ways Explore issues of film censorship and regulation Consider how representations can change over time, by viewing modern and older films Create campaigning videos on specific issues Make fiction or documentary films about their own lives or local problems. Use techniques such as animation, montage and film poems to explore difficult or challenging issues Using Film In Schools: A Practical Guide ©2010 Film: 21st Century Literacy
  • 8. 1. Using film /7 Primary Secondary KS1+ KS2+ KS3+ KS4+ 16+ PE, Dance Use video as a way to immediately review performance and correct technique Create films which use slow-motion, freeze-frame, close-up and voiceover to explain technique in detail Drama Use video to review and improve performance View film extracts to explore aspects of performance Make a film version of a drama performance Music Use a short film sequence as stimulus for a simple composition Create a soundtrack for a short film sequence Create a film interpretation of a piece of music Analyse the techniques used in the score for a film sequence Create several different soundtracks for the same sequence to change the genre or mood Create a piece of music to use as the basis for a montage or title sequence Use a cue sheet to plan a score Art Use video to collect examples of shapes, colours or patterns Look for examples of shapes, colours, patterns in film extracts Use video to record making processes Use video to record observations Create animations including sets and models Create costume and set designs for films Investigate artist and non-narrative filmmakers Create abstract/montage films Explore the use of lighting in film Explore animation techniques used in title sequences Create title sequences using these techniques Using Film In Schools: A Practical Guide ©2010 Film: 21st Century Literacy
  • 9. 1. Using film Film and other outcomes /8 Film can contribute to other outcomes at a whole-school and local area level. You can highlight its role in school improvement plans, and when preparing for inspection. For example, watching, viewing and making films can impact positively on achievement and help pupils to enjoy their learning, and it can provide opportunities for pupils to contribute to school and the wider community. Behaviour and attendance can also be improved. Many teachers have reported that film education activities have encouraged isolated or disaffected pupils to participate and has increased their confidence. It also provides opportunities for pupils to develop workplace skills, technical skills and the ‘soft skills’ of groupwork and discussion. Film can also contribute to wider objectives in the local area, for example by reducing antisocial behaviour and encouraging cultural understanding. Fast-Forward is a programme at Cinema City in Norwich, which provides film education activities for 14-16 year old students who are at risk of exclusion. The project enables them to create their own films, learning scriptwriting and technical skills, and to develop their critical understanding through film viewing and reviewing. “I have noticed a change in the girls who come on the course...they’ve improved their attendance at school...behaviour’s been a lot better and grades have gone up.” (Teacher) Teachers on the East Midlands Cine Hubs project, which integrates film education into learning across the curriculum, reported that the children have benefited immensely from the experience. They had seen a rise in writing, language and communication skills and a huge impact upon emotional literacy and wellbeing, with the project enabling some children to discover new talents and overcome shyness. Glebe School in Bromley, a mixed special foundation school, had an OFSTED report in May 2010 which described community cohesion as ‘outstanding’ and said that ‘...the hugely successful FILMCLUB has had a major impact on helping students to develop and share their beliefs, cultures, and information about their religions and experiences’. Using Film In Schools: A Practical Guide ©2010 Film: 21st Century Literacy
  • 10. 1. Using film /9 Principles of film education Film education includes three elements: critical (understanding and analysing films); cultural (widening learners’ experience of film) and creative (learners make films themselves). There are opportunities for each of these across the curriculum, and it can be valuable to combine all three approaches. Critical You can use this approach in English, e.g. by students analysing how camera, sound and editing are used in an adaptation, a documentary or a persuasive text such as an advertisement. You can also use these techniques to analyse moving image sources and interpretations in History. Cultural You can use unfamiliar films, and films from different countries and periods, in a range of subjects. ‘World Cinema’ can be used to explore Citizenship and issues such as globalisation. Older films can help students to learn about life in the past, and experimental films can be used for stimulus in Art and Music. Creative Filmmakingcanbeusedasawayofrecording,analysing and depicting processes from Science experiments to Dance performances; to present information in subjects from Mathematics to History: and for creative expression in English, Drama, Art and Music. The Rural Media Company’s Young Shoots project has worked with Hereford Library Service to develop a collection of films suitable for rural youth clubs, where they have provided screenings. They ran filmmaking sessions for 13-19 year olds in collaboration with the Courtyard Centre for the Arts, and screenings and practical film workshops in villages, linked to Flicks in the Sticks and the Borderlines Film Festival. “I have been able to develop relationships with pupils who are ‘hard to reach’. Pupils with behavioural/ emotional/social difficulties have been able to settle down, focus and relax.” (Teacher) Informal learning Film education can be an effective and popular element of informal education activities, both as after-school provision (such as film clubs) and as part of extended services including summer camps, Saturday schools and after-school filmmaking clubs. Many arts venues and other cultural organisations offer informal film education activities. These include filmmaking, editing and animation workshops and screenings. For more detail on organisations who can provide these activities, see the section on partners. Using Film In Schools: A Practical Guide ©2010 Film: 21st Century Literacy
  • 11. 1. Using film /10 Continuing professional development Training for film education doesn’t have to be expensive or demanding. However, teachers and support staff will be able to integrate film into their teaching more easily if they are familiar with basic concepts and teaching techniques and confident with the equipment they will be using. There are a number of different kinds of organisations and individuals around the UK who provide film education training. They include cinema venues, City Learning Centres and independent filmmakers. In some areas, ‘lead practitioners’ or experienced ‘lead schools’ can provide training and mentoring to local schools. A wide variety of training is available. It can include: ■ basic introductions to film language and filmmaking ■ using film in specific subjects or to address specific topics ■ individual films and how to use them ■ technical skills including camera, editing and sound recording ■ scriptwriting and story development Training doesn’t have to be ‘top-down’: some children and young people have technical skills or film knowledge which they can share with others. Their own skills should be used and acknowledged where possible; in some cases, disaffected students have taken a lead role in filmmaking, gaining the respect of teachers and their peers. Peer tutoring can be a very effective way for children to learn technical filmmaking skills. Working with partners (see section 3) Outside partners, including film professionals, can make a valuable contribution to film education. Their input can include giving advice on provision as part of schools’ capital programmes, providing training to staff, and working directly with young people. You may be able to find information about potential partners from existing local partnerships. Professionals can give young people an insight into different aspects of the filmmaking process, from directing and editing to scriptwriting and sound. Young people often value the input of ‘real’ filmmakers. You can use professionals as mentors for large-scale filmmaking projects (such as those funded by First Light) or to provide masterclasses integrated into ordinary lessons. Some cinema venues provide education programmes. Those that don’t are often open to approaches from local schools. They will sometimes provide daytime schools screenings, special screenings, or cinema visits where children get to see how a cinema works. You could also approach local film societies. Some independent filmmakers are experienced in working with children or young people. In some parts of the UK, screen agencies have provided training in film education principles and techniques for filmmakers wanting to work with young people. The relationship between teachers and film professionals should be an equal partnership. Film professionals have experience and technical skills but they are not experts in education. In some cases, they can be over- ambitious about a film’s scale and level of technical sophistication. It’s important to plan and agree projects in detail in advance to ensure that the young people have ‘ownership’ and opportunities for creative expression, rather than just ‘shadowing’ the professionals. Using Film In Schools: A Practical Guide ©2010 Film: 21st Century Literacy
  • 12. 1. Using film /11 Other partners include local higher education institutions, which often have outreach programmes aimed at widening participation. You could also contact writers with experience or knowledge of film, such as local scriptwriters or authors whose work has been adapted for the screen and film reviewers from the local newspaper. Obviously when working with partners it is important to comply with good practice in child protection, including seeking enhanced CRB disclosures where necessary. Work-related learning and First Light ran a project for 6-13 year olds on a Farnham housing estate with very limited youth facilities. Children made a film linking social problems to local history and folklore. Professional filmmaker Ian Lewis acted as mentor, supporting the students during their filmmaking and training them in industry-standard practice. “Our mentor...helped source professional equipment, encouraged support from the broadcast industry, acted as an impartial sounding board for ideas and introduced us to contacts we may have struggled to gain.” Film organisations, such as local production companies, larger film organisations and cinema venues, can provide opportunities for work-related learning, from basic work experience to longer-term apprenticeships. ‘Young apprenticeships’, two-day a week placements over two years, are available to 14-16 year olds in England. The 14-19 Creative and Media Diploma (available in England, and as part of the Welsh Baccalaureate framework in Wales) has a substantial work-related element: half of the Principal Learning within the Diploma must be with an employer. The Dukeries College used film to deliver the first year of the Creative and Media Diploma, working with Nottingham Broadway Media Centre. They integrated film production right across their Diploma programme, examples including production budgeting for Functional Maths and crew roles for Creative Teamwork. progression to the creative industries Using Film In Schools: A Practical Guide ©2010 Film: 21st Century Literacy
  • 13. 1. Using film /12 Norwich University College of the Arts (HE), Media Projects East (production company) and Cinema City (venue) have teamed up to offer film and animation workshops to learners across Norfolk’s High Schools and Sixth Form Colleges. These 1-2 day courses for 13-19 year olds offer hands-on experience, careers advice and guidance, and advice on generating a portfolio of work for applying to Higher Education. Ealing Institute of Media is the only Further Education college to be part of the Skillset Screen Academy network. They bring in professionals to run masterclasses and workshops throughout the year, leading to an annual ‘35mm project’ where students work with the support of industry mentors to make a TV commercial, a 5-minute drama and a music promo (using professional equipment) on a sound stage at Shepperton Studios. Using Film In Schools: A Practical Guide ©2010 Film: 21st Century Literacy
  • 14. 2. Spaces and equipment /13 Film education can take place in many different contexts. This section will suggest how to use and adapt existing spaces and equipment for film education and the things you need to consider when establishing new spaces and facilities. Film education should provide opportunities for children to view, discuss and explore films, and to actively engage in filmmaking. These activities can all take place within a normal classroom, but there are some advantages in using dedicated spaces, particularly for specialist courses. Learning contexts When you are planning for film viewing and filmmaking, the focus should be on the learning experience. What will children learn from these activities and what other learning activities will be linked to them? Where will the activities take place – in the classroom, at a partner organisation, a local cinema, a mediatheque, or another school? Will children be working in groups or individually? In general, film education will focus more on group work with younger children, and there will be more emphasis on individual work as they get older. Film viewing This can involve group or whole-class discussion and debate; individual or group research exploring a film’s context and subject; and individual writing, from reviews and analysis to creative writing and poetry. Clips or extracts are short and manageable: they can be studied in detail, either as a whole class activity or by groups and individuals. Complete short films can be very useful in literacy or language work: unlike an extract, they will contain a complete narrative, but they are short enough to be used in a normal lesson. When working with clips/extracts and short films, it’s useful to be able to pause and replay them, play image and sound separately and perhaps annotate them. Students should be able to work in groups and take notes while viewing. Children should also have opportunities to view complete feature films, where they can immerse themselves in the world of the film. Here, a more ‘cinematic’ experience is important. The ideal school setup includes a large screen, comfortable seating, a good sound system, a powerful projector, blackout or near-blackout, and good sound insulation. But there are some relatively cheap ways of improving the viewing experience in an ordinary classroom or hall. Filmmaking Learning activities can include creative writing, (e.g. synopsis, treatment and scripts); transactional writing, (creating a ‘shooting schedule’, evaluating the finished film); planning, organisation and working in teams; critical viewing and reflection, e.g. when watching ‘rushes’ (raw filmed footage) before editing, and when viewing the finished film. You should consider how the technical skills of filmmaking will be taught. Will you be demonstrating techniques to the whole class for them to emulate, or will you be teaching these skills separately to smaller groups or individuals? Will students teach skills to each other and work in teams, or will they work largely as individuals? Using Film In Schools: A Practical Guide ©2010 Film: 21st Century Literacy
  • 15. 2. Spaces and equipment /14 Access to film education You should consider access when you are planning spaces, choosing equipment, and planning activities. It can be difficult to design in provision to meet everyone’s access requirements. You will need to be pro-active but also to consult and make adaptations for individual users. Film viewing For film viewing, you should provide spaces for wheelchair users (and their personal assistants). If possible, provide a choice of positions: users with visual or hearing impairments may prefer to be located at the front (make sure the front row isn’t too close to the screen) but others may be more comfortable in the middle rows or at the rear. Providing extra space between seat rows will make access easier. Many DVDs have subtitles in English, which can be useful for those with hearing impairments or children whose first language is not English. Check that subtitles are visible to all viewers who might need them: in a room with no rake they may not be visible from the back. Many DVDs have audio descriptions: the RNIB have a downloadable list on their website. When buying a DVD player, consider whether it has easy-to-use controls (including a dedicated button for audio description). ‘Talking menus’ are also useful. Viewers should be given information about the venue or viewing space, and the content of any films which might cause problems: for example, strobe lighting or flash photography can trigger fits or migraines. Use plain English and easy read information. A useful guide can be downloaded from the EHRC. Children on the autistic spectrum may find a traditional cinema experience, with full blackout, disturbing: consider reducing the sound levels, maintaining lighting at reduced levels and enabling freedom of movement. They may also find the subject matter or narrative style of some films unpleasant. You should consider additional signage and lighting, which can be helpful for viewers with visual impairments. Stewards or helpers could wear high-visibility clothing so that they can be identified when the lights are low. Some viewers will find it difficult to sit through a long film, and will need breaks and/or access to a quiet space during screenings. Filmmaking Disabled users should be supported to participate fully in filmmaking. Their impairments should not be a reason to limit the roles they play: students with visual impairments can use cameras and those with hearing impairments can work with sound. A number of different solutions can help to facilitate access. Some are commercially available, though in some cases DIY improvisation may be necessary. Any adaptations should be made in consultation with individual users. Using Film In Schools: A Practical Guide ©2010 Film: 21st Century Literacy
  • 16. 2. Spaces and equipment /15 Cameras When buying cameras, evaluate how easy the controls are to use. Push-buttons and levers may be better than joysticks or dials for users with motor impairments. Touchscreens can be fiddly, and some menus can be complicated and confusing (though the camera may have a simpler ‘basic’ setting). Some cameras come with remote controls, which can be very useful for students with motor or mobility impairments. They can sometimes be modified for individual needs: if you need to do this it’s worth approaching the manufacturer, as some have made free modifications for disabled users. For users with visual impairments, the size of the camera screen is important. You may also be able to connect the camera to an external monitor or laptop to provide a bigger image. Other equipment Wheelchairs can be equipped with camera mounts, either purpose-built ones or monopods (one-legged tripods) securely attached by gaffer tape; you can also attach a monopod to a walking stick or crutch. A ‘Fig Rig’ (a large ring of tubing, with a camera mount in the centre) can make it easier for users with motor impairments to hold cameras. You can colour-code cables (using labels or insulating tape) for users with visual impairments or learning difficulties. Editing You should ensure that doors, room layout and the heights of working surfaces facilitate access for wheelchair users and students with other impairments. Editing programmes Some basic editing programmes offer simple drag-and-drop editing, making them relatively easy to use. Unfortunately, professional programmes are complex and screen readers currently do not work with them. To improve access, you can: ■ Use a large screen, or preferably two screens ■ Set up keyboard shortcuts or voice commands for editing operations ■ Consider using a special colour-coded keyboard or overlay ■ Use speakers rather than headphones so that deaf users can feel sound vibrations ■ Change programme settings, e.g. by making track and icon sizes larger and displaying audio waveforms Using Film In Schools: A Practical Guide ©2010 Film: 21st Century Literacy
  • 17. 2. Spaces and equipment /16 General advice for procurement Filmmaking technology is evolving rapidly, but the principles of film education – and how to plan for it – remain broadly the same. Points to consider ■ Don’t ‘overspecify’: make sure the equipment is suitable for your needs. ■ Allow for the cost of consumables (e.g. batteries, bulbs for projectors and lighting, modelling clay for animation), repairs and replacements. ■ Include costs for licensing if you will be showing films to the public. ■ Include costs for staff training. Compare the relative training cost implications of different hardware and software solutions. ■ Don’t spend all the budget at the start: allow for upgrading hardware and software in subsequent years. ■ Consult your network manager/ICT supplier early in the planning process to discuss hardware and software compatibility, bandwidth and storage. ■ Consider where you need specialist professional advice: e.g. if you are setting up specialist spaces such as studios or cinema auditoriums, you will probably need to employ a professional; but some equipment suppliers will provide advice for free. ■ Try to get free independent advice, e.g. from local filmmakers or cultural organisations, rather than relying exclusively on professionals and equipment suppliers. ■ Contact other schools who have set up film education provision: find out what equipment they use, what they think of it, and any problems or issues they have encountered. ■ Ensure that all equipment is compatible, e.g. will the editing software work with the video that the cameras record? Do you need extra conversion software? ■ For a refurbishment or new build project, ringfence the funding for hardware and software, but buy it as late as possible to avoid it being obsolete. ■ Ensure that your provision meets access requirements for all potential users. ■ Undertake a health and safety audit/risk assessment. ■ Consult with the local community and look for opportunities for community links and uses. ■ Consider ‘joining up’ funding – e.g. can you get funding from other sources if you provide community access to some of the facilities? Where to buy equipment There may be advantages to using centralised procurement, managed services, or purchasing as a cluster. Some hardware and software manufacturers sell through specialist education suppliers. Online retailers can be cheaper for some equipment, but you should check that they are genuine suppliers selling UK stock (some sell ‘grey imports’ – foreign models without UK guarantees). If you aren’t familiar with the retailer, research their reputation for customer service online and check that they have a UK postal address. Using Film In Schools: A Practical Guide ©2010 Film: 21st Century Literacy
  • 18. 2. Spaces and equipment /17 Film viewing equipment and spaces There are several contexts in which film viewing can be used in school, for example: ■ You can show short films, or excerpts from films, for a whole class ■ Pupils can view them on computers, either as individuals or groups ■ You can screen full-length films, perhaps as part of an after-school film club See the table on Page 23 for a summary of equipment and space options. Basic requirements You need a room with some control over light levels; a data projector, screen and speakers; and a player, either a standalone DVD player or a computer. You can also use an LCD screen as a replacement for, or complement to, a data projector. Using a data projector and whiteboard You can show films using a standard classroom data projector, a computer with a DVD drive and a whiteboard. This makes it easy to integrate film viewing into normal teaching, but image size and sound quality may be compromised. Player You can use a standalone DVD player, or a computer with a DVD drive. Using a computer makes it possible to screen films from video-sharing sites, show clips which are stored on your hard drive or intranet, and (with interactive whiteboard software) annotate clips and stills. (Be aware of copyright). Some DVD-playing software, and some standalone players, allow you to ‘bookmark’ sections of a disc so you can go straight to them. Currently there is little advantage in using the high definition Blu-Ray format: players and projectors are expensive and many useful films are only available on standard definition DVD. But it’s worth considering high definition to ‘futureproof’ a new installation. Projector If you use a data projector, you need it to be bright enough for the room size and the lighting conditions. If you can’t black out the room you will need a more powerful projector. Projector brightness is measured in ‘lumens’. As a general guide, for a classroom you need a minimum of 2000 lumens, and for a hall or auditorium with a 4m by 3m screen you need around 7000 lumens. You can get higher-powered projectors but they are very expensive, as are replacement bulbs. ‘Short-throw’ projectors, which have special wide-angle lenses, are useful if there are limitations on projector position or space. Using Film In Schools: A Practical Guide ©2010 Film: 21st Century Literacy
  • 19. 2. Spaces and equipment /18 Check that the projector is easy to use and adjust. If it is to be used in different spaces, make sure that it’s not too heavy to move. For a fixed installation, make sure that the projector can be accessed for focusing, adjustment and maintenance. Make sure that the remote control is kept in a safe place. You may need to make adjustments on your DVD player or computer to get satisfactory image quality from a projector or LCD display: follow instructions for ‘calibrating the display’. Screen The larger the screen, the more cinematic the experience will be for the students. Pull-down projection screens are normally better than whiteboards and silver screens will provide better contrast than white screens. 4m x 3m (12’ x 9’) will provide a good viewing experience in most halls. Alternatives to projectors You can use wall- or ceiling-mounted LCD screens as an alternative or complement for projectors. These will provide a watchable picture in normal classroom lighting, so students can view them while talking to each other and writing. They are also useful for camera training: you can connect the video output from your camera to the screen, so students can practise setting up shots while the class views the image. Sound Most films have complex soundtracks. Some parts are very loud and some parts are very quiet (a wide dynamic range). If your sound system isn’t good enough, students can miss details which are important to their understanding and enjoyment. You may not need to buy new speakers. Most schools have good speakers somewhere, perhaps in the music department or the hall: can you borrow them? The most straightforward way to improve the sound in a classroom is to replace basic computer speakers. An 8 inch ‘dynamic’ speaker system will provide a much better experience. (Dynamic means they have their own built-in amplifier). For a hall, a PA system with an amplifier and 12 inch speakers should be enough. (Speaker size is a better measure than manufacturers’ stated power output, which is often misleading.) For occasional film viewing, you probably don’t need surround-sound as it needs expert setting up. Unless you have the technical expertise (and a sound meter) you are likely to get better results with a stereo sound system. If you are playing your film from a computer, you may need to buy leads or adaptors, as PA systems tend to use ‘RCA phono’ leads or full-size jack sockets, rather than the minijacks used by most computers. A wide range of adaptors is available from electronics suppliers. Speaker positioning Speakers should be positioned close to the screen. They shouldn’t be mounted high on the wall, as this will cause some of the high frequencies to be lost. If they are mounted high up, they should be angled down towards the students. Using Film In Schools: A Practical Guide ©2010 Film: 21st Century Literacy
  • 20. 2. Spaces and equipment /19 Wall surfaces Curtains can cut down sound from outside and prevent reflected sound from muddying the sound from speakers. Sound levels Sound levels should be set in a full room. If you set levels in an empty room, the sound will be noticeably quieter when the pupils come in. Sound is sometimes not loud enough because teachers are worried about damaging students’ hearing, but this is not a problem when playing a feature film at cinema volume. Hearing damage is caused by sustained exposure to loud sound, and normally in a film only part of the soundtrack is really loud. A recent research study found no evidence that normal cinema volume levels cause hearing damage. Positioning the chairs If you have a choice of positioning the chairs, it is best to move the front row further away from the screen so that the sound levels don’t vary too much between front and back rows. You can also curve the seating so that chairs in each row are at roughly equal distances from the speakers. Comfort is important for viewing feature films. New chairs should have padded seats; you could buy cushions if you are using standard hard chairs. Beanbags are more informal (but take up a lot of storage space). Using Film In Schools: A Practical Guide ©2010 Film: 21st Century Literacy
  • 21. 2. Spaces and equipment /20 Other factors Sound and picture sometimes go slightly out of synchronisation, because digital images take longer to process than sound. Many adults won’t notice this difference but children are more sensitive to it. You can solve the problem by using a ‘digital audio delay’ device costing less than £100 (though you may need to employ a trained specialist to set it up). If you have a choice of where you locate the film viewing space, you should keep it away from outside sources of sound which can disrupt the viewing experience. Blinds Blackout can be a real problem. Low winter sun, in a room with no blinds, can make an image on a whiteboard impossible to see. Improving the blackout is often cheaper than upgrading the projector. You don’t have to buy expensive blinds that produce a full blackout. You may be able to use domestic blackout roller blinds which are widely available (they must be properly installed with cord retainers to avoid a strangulation hazard). They are not particularly durable, so if they are to be used regularly you may be better off buying higher- quality blinds. If you are using standard vertical blinds in an ordinary classroom, swivel them so that the light is pointing away from the students. Access to online films Online films are a valuable resource, and it is important that staff and students can access them where necessary. Many schools are concerned about some of the material shown on video-sharing sites, and about the bandwidth they require, but infrastructure and policy should allow them to be used for legitimate teaching and learning purposes. Some schools maintain control by allowing video-sharing sites to be accessed only within specific teaching spaces or by specific users. You need to be aware of copyright when showing online films, as many clips on video sharing sites breach copyright. Using Film In Schools: A Practical Guide ©2010 Film: 21st Century Literacy
  • 22. 2. Spaces and equipment /21 Film viewing in newbuild or refurbished spaces Large-scale film viewing can take place in a dedicated cinema space, in a theatre space, or in a multipurpose space such as a hall. Seating Sightlines are important: can all audience members see the screen comfortably? A dedicated cinema or theatre space should have a rake (sloping rows of seats) to ensure this. In a multi-use space you could consider retractable padded ‘bleacher’ seating. Sound and acoustics If possible, the room should be located away from external sources of noise (e.g. playing fields, roads, plant) and it should be isolated by using high mass wall construction, sound lobbies, damped pipework and airtight service junctions. This will also prevent cinema noise from disturbing other activities. A projection booth needs to be acoustically isolated from the auditorium. Within the room the priority is to limit sound reflections which can make it hard to hear details. You can avoid this through damping (the use of curtains, drapes and sound panels). In a multi-purpose space it’s best if the acoustic properties of the room are adjustable, as cinema screenings require different characteristics to music or theatre performance. Uneven wall finishes, shelving or special panels can be useful for providing diffusion, which ensures that the sound is evenly spread around the room rather than concentrated in one space. Services Heating, lighting and ventilation need to be adequate for the size of the space. In multi-use spaces they should be adaptable for different requirements (e.g. warmer but with lower lighting for cinema use). The ideal cinema ‘house lighting’ can be adjusted smoothly to blackout levels (which requires tungsten lighting), while other activities such as sport require much brighter fluorescent lighting. Separate lighting sytems for different activities may be best. Windows Where windows are required, these are best positioned at high level, at the sides of the room, with easily controlled manual or automatic blackout blinds. Rooflights are best avoided as they are difficult to black out. Storage Storage space will be required for films/DVDS and may be required for movable seating. Projection booth The projection booth may need to be larger than in a traditional cinema so that several students can work in it, together with a teacher. Using Film In Schools: A Practical Guide ©2010 Film: 21st Century Literacy
  • 23. 2. Spaces and equipment /22 Public access Some schools have halls, or purpose-built auditoriums, which they use as public access cinema and theatre spaces. Providing an occasional public screening can be relatively straightforward: if you don’t already have an appropriate premises license, you must notify the local authority in advance (in England and Wales you use a Temporary Events Notice; Scotland and Northern Ireland have slightly different requirements). If you want to set up and use a space for regular public screenings, you will need to ensure that public access does not conflict with the school’s everyday activities. You will require a Premises Licence from your local authority if you regularly charge for ‘regulated entertainment’ (which includes film screenings), so you should consult them early in the process. Spaces used regularly as public access cinemas may need: ■ a clearly identifiable, attractive public entrance ■ sufficient circulation/queuing space ■ separation from the rest of the school (for security) ■ additional security lighting and car park spaces ■ separate box office, storage and Manager’s Office ■ services (e.g. electricity, heating, telephone, internet) provided and charged separately ■ additional toilet facilities, adequate for an influx of users before and after screenings ■ additional fire and safety facilities Cinemas are more likely to be economically viable if they also include provision for the sale of sweets/refreshments and a bar. Filmbank’s Single Title Screening Licence is a way to get recent films (some as little as 10-12 weeks after their cinema release) before they are available on DVD. Saffron Screen is a public cinema at County High School, Saffron Walden. The district council provided funding so that the school’s new auditorium could be developed as a cinema. In the evenings and at weekends the cinema runs a popular programme of evening and public screenings and film education activities for adults and young people, and provided National Schools Film Week screenings for local Primary schools. The school now offers Film Studies and runs a FILMCLUB. Using Film In Schools: A Practical Guide ©2010 Film: 21st Century Literacy
  • 24. 2. Spaces and equipment /23 Film viewing summary Basic Intermediate High spec Cinema spec Space Classroom Classroom Hall Purpose-built space with controlled lighting, separate projection booth, sound isolation Player Computer with DVD drive, or DVD player Computer with DVD drive and bookmarking software, or DVD player with bookmark feature Computer/player with Blu-Ray and bookmarking feature Blu-ray/DVD player Screen Whiteboard Pull-down white screen 4 x 3m silver screen Built-in cinema screen with curtains/ adjustable masking Projector Standard classroom projector 2000 lumen projector 7000 lumen projector 10000 lumen or better high- definition projector Possibly 16mm or 35mm film projector Sound Computer speakers 8 inch dynamic speakers PA with 12 inch speakers Dedicated surround sound system Seating Standard classroom chairs Chairs with cushions, or beanbags Padded chairs Raked cinema seating Blinds Standard classroom blinds Blackout roller blinds from DIY store/furniture superstore Purpose-made blackout blinds Windowless room Using Film In Schools: A Practical Guide ©2010 Film: 21st Century Literacy
  • 25. 2. Spaces and equipment /24 Filmmaking equipment and spaces As with film viewing, the learning context should determine the choice of equipment and how spaces are set up and used. Younger children are most likely to be working in groups, making films as teams; as students progress through the school there will be an increasing emphasis on individual work and higher technical quality. See the table on page 35 for a summary of equipment and space options. Basic requirements You need a video camera of some kind. It could be a camcorder, a still camera or a mobile phone. You can make films without a computer, using ‘in-camera editing’: planning the shots carefully, then shooting them in the right order. To edit your film, you need a computer with editing software. You need to check that your cameras and computers will work together (see below). You may also need tripods, microphones and headphones. Group size Group size will determine the number of cameras and computers you need. As a general rule, 3-5 students can work effectively as a filming team. If groups are larger than this it is hard for all members to participate effectively. Locations Many schools use locations within the school, such as corridors or playing fields, for filming. This can be limiting as it will often be obvious that the scenes are shot in a school. If space permits, you could have a room set up with standard props which could be used in a number of student films. You could use a drama space with filmmaking props stored in an adjacent storage space. Hazelwood College in Belfast has adapted an ordinary classroom as a basic studio set for filmmaking as part of CCEA’s Moving Image Arts specification. The room has a hospital bed at one end, a ‘living room’ sofa and chairs at the other end, and a green ‘chromakey’ screen. Using Film In Schools: A Practical Guide ©2010 Film: 21st Century Literacy
  • 26. 2. Spaces and equipment /25 Cameras There are several different camera types and recording formats. Image quality, reliability and ease of use varies between makes and models. Consumer guide magazines and websites are useful for assessing image quality and reliability, but may not cover other criteria which are important for education. Camera prices range from under £100 to several thousands. It may be better to buy a number of cheap, simple cameras rather than one or two more expensive ones: they are usually easier to use, a whole class can be working with them at once, and because of their cheapness it’s not a disaster if one is damaged or stolen. Another strategy is to have a set of cheaper cameras which can be used by all classes, and a few better- quality cameras for production work by older students. You should check that the camera records in a format which your video editing software can handle, or which can be easily converted (see below). Look on the software manufacturer’s website for a list of compatible cameras. Some cameras come with their own conversion software. Thomas Hardye School in Dorset has bought basic video cameras costing under £100 each. Because they are cheap and simple, the school can afford more cameras. Staff are more confident about using them, so film gets used across a wider range of ages and subject areas. Basic cameras (up to £100) Most new cameras in this price range have an upright shape, a fixed screen and simple controls. They record onto built-in memory or removable memory cards. They are easy to use, making them ideal for younger children, or for students to take out of school for documentary projects or video diaries. Some don’t have image stabilisation or microphone sockets. Recharging is important: some models have built-in batteries which you have to recharge by connecting the camera to the computer or a special USB charger. This is very inconvenient if the battery goes flat when you’re in the middle of filming. It’s better to have interchangeable batteries (preferably standard AA or AAA batteries) so you can carry spares. Mid-range cameras (£100-£500) When you spend over £100 you have a wide choice, including higher-specification versions of the basic cameras mentioned above, and cameras with a standard camcorder shape and fold-out screen. Cameras with fold-out screens are better for group use. Most cameras in this price range either record onto memory cards, an internal hard drive, or both (see below). Medium to high-end cameras (over £500) Once you pay over £500 for a camera you should get very good image quality and a full range of manual controls. Size and shape is important. Larger semi-professional cameras are heavier and can be unsuitable for some projects, but they will normally give better image quality (particularly in poor light) and sound, and the controls will be bigger and easier to use. They should also be more durable. Using Film In Schools: A Practical Guide ©2010 Film: 21st Century Literacy
  • 27. 2. Spaces and equipment /26 Other cameras Handheld devices Some handheld devices (such as mobile phones and digital audio players) include video cameras, and some even have built-in editing software. Still cameras Many digital still cameras can record video. You can get compact still cameras which record basic ‘VGA’ video for under £60, and compacts which record in high definition for less than £200. They are often smaller than equivalent video cameras, and may have a wider zoom range. But they can be awkward to hold steadily, and they usually have limited sound recording capabilities. A few single-lens reflex (SLR) and system cameras, starting at around £500, can record high definition video. Because they have large image sensors and can use high quality interchangeable lenses, they record much better video in low light and it’s easier to achieve ‘shallow focus’ effects. But they are awkward to handhold and focus, and sound recording can be poor: many SLR filmmakers use separate digital audio recorders, matching sound and image in the editing process. These disadvantages mean that it may be better to wait before considering this option. Two manufacturers have already announced large-sensor video cameras which should combine the image quality of SLRs with the ease- of-use and audio features of camcorders. They are expensive but it is likely that more affordable versions will soon become available. Miniature video cameras You can get cheap video cameras which are specially designed for ‘spy’ or sports use. They range in price from around £60 to under £10. These cameras have limited features (they don’t have screens or zoom lenses), but they are useful in situations where a very small camera is needed or the camera might be broken or stolen. The cheapest versions are fiddly to use and are unlikely to be very durable. Recording formats Most new cameras record onto memory cards or hard drives. They import faster than tape cameras and you can easily choose to import only the clips you want. However, many schools are still using video or animation software which is designed to work with digital tape cameras. Card and disc-based cameras normally connect to the computer using standard USB cables. You can buy USB card readers, so you can import footage from a card without using the camera. Tape-based cameras use different Firewire (IIEE1392) cables. Memory card This is becoming the most popular recording medium. Some cameras come with built-in memory, but most require you to buy your own cards. SD (‘Secure Digital’) is the standard format. When buying cards, check that they are compatible with your camera and have a fast enough ‘speed class’ (check the camera manual), and that they have a big enough capacity: video (particularly high definition video) can rapidly fill up a small memory card. Using Film In Schools: A Practical Guide ©2010 Film: 21st Century Literacy
  • 28. 2. Spaces and equipment /27 Hard disc Some cameras come with built-in hard discs. They are more expensive than equivalent card-based cameras, but hard discs are cheaper per unit of memory. Despite this, in schools it may be more manageable to use a separate memory card for each project or group. Hybrid cameras Some cameras with hard drives offer the option of using memory cards as well. Digital video tape miniDV digital video tape used to be the most common format for video cameras used in schools. It’s now becoming rare, and cheap miniDV cameras are no longer made. miniDV can only be imported in ‘real time’ (so 10 minutes of video will take 10 minutes to import). Many schools are still using video editing software which will only work directly with miniDV cameras connected using a ‘Firewire’ (IIEE1392) cable. But you may be able to use separate software to import video from a USB camera and then convert it. Not all computers have Firewire, so you may need to buy a Firewire card to use a miniDV camera. Some laptops can’t be fitted with Firewire cards, and Firewire to USB converters don’t seem to work with video editing software. Some animation software is designed to work with Firewire cameras, but if you don’t have these, you may be able to use USB webcams instead. Definition Most cameras record in VGA, standard definition (SD) or high definition format. For reasonable image quality you should avoid any camera that records at less than VGA (640 x 480) resolution. Some editing software can only handle standard definition (SD). High-definition footage usually looks better than SD, but you should consider whether you actually need it. It takes up much more disc space than standard definition and requires more computer processing power. There are several different high-definition formats and you should check that your editing software can handle the specific format that your camera records. Using Film In Schools: A Practical Guide ©2010 Film: 21st Century Literacy
  • 29. 2. Spaces and equipment /28 Cameras: points to consider ■ How big is the internal hard drive or built-in memory? ■ Does the camera have a good built-in microphone? ■ Does it have a microphone socket? ■ Can you plug in headphones? ■ Does it have good image stabilisation? ■ How good are the images in low light? ■ How wide can the camera zoom out? Can you get wide-angle adaptors to fit it? ■ How easy is it to use – are the controls fiddly? Is the screen big enough? ■ Can you connect it to an external monitor? ■ Does it let you set white balance, exposure and focus manually? Other equipment for filming Camera support Using a tripod will usually make a big difference to image quality. With a tripod, shots will be steadier, students will take more time planning their shots, and they will find it easier to work in groups. A wide range of tripods is available. For video you need a tripod with a ‘pan and tilt’ head; more expensive tripods have ‘fluid heads’ for smoother movement. If children are sufficiently disciplined to frame their pictures carefully and hold the camera steady, working ‘handheld’ can allow them to experiment with unusual shots and camera positions. But using handheld cameras without having practised framing will usually result in unwatchable, shaky and chaotic films. Supporting moving cameras To get smooth ‘tracking’ and ‘crane’ shots you need suitable camera supports. You can film simple tracking shots by mounting the camera on a wheelchair or skateboard. A Fig Rig (a ring of tubing with a camera mount in the middle) can make handheld camerawork more fluid, and easier for students with motor impairments. For industry-focused courses you may want to consider getting a professional ‘dolly’ and a ‘jib’ for crane shots. Sound Sound is very important in film, and a film soundtrack can consist of many separate elements and audio tracks. For serious filmmaking you need equipment that will let you make films with good sound quality, whether you record it live or add it later. It’s hard to record live sound well unless you have separate microphones and are prepared to take some time to get the sound right. For many filmmaking projects, you may not need to use live sound at all. You will often get better results if your students concentrate just on the images while they are filming, and create the soundtrack on the computer, using sound effects, music loops and voiceover. You will need sound editing or music creation software for this (see page 29). Using Film In Schools: A Practical Guide ©2010 Film: 21st Century Literacy
  • 30. 2. Spaces and equipment /29 Microphones Most cheaper cameras have poor built-in microphones. To improve live sound recording, you can use a separate microphone. There are several different kinds: ■ A camera-mounted video microphone may give better sound quality than the built-in microphone, and it will be more ‘directional’ (picking up more of the sound from the direction it’s pointed at, and cutting out other sound). ■ Handheld microphones can be used for interviews, or held just out of shot for closeups. ■ Lavalier or ‘tieclip’ mics are good for interviews, and are the cheapest way to improve the quality of recorded speech. They can also be useful for recording live music. Make sure the ones you buy can take batteries: some will only work if they are plugged into a socket which provides power. ■ Boom-mounted directional microphones are the standard solution for professional drama production. One student will need to hold the boom and point the microphone at the sound source, making sure that it doesn’t dip into the shot. These can provide very good sound quality but are quite complicated to use well. Better-quality professional microphones use ‘balanced’ three-pin XLR plugs. Only expensive professional cameras have XLR sockets, though you can buy XLR to minijack adaptors. Windshields are essential for outdoor filming. Many microphones come with simple foam windshields, but the most effective ones are furry. Few schools use radio microphones, which are expensive and complicated to use. Digital audio recorders (see below) can be used instead. Digital audio recorders Digital audio recorders, costing from £100 upwards, are small portable devices which record high-quality audio. (They should not be confused with basic digital memo recorders.) Most record onto SD memory cards or built-in memory. They can be useful for recording live sound while filming. They can give better sound quality than recording into a video camera. Because they aren’t attached to the camera, they allow more choice of microphone position: for example, you could put one in an actor’s pocket attached to a tieclip microphone. Synchronising image and sound is fiddly and is only practical with fairly sophisticated video editing programmes. You’ll need to use a clapperboard while filming. These recorders can also be used to record music, voice and other sounds for creating soundtracks on the computer. Headphones When recording live sound, you should use headphones to monitor the sound while you film. This is particularly important if you are using an external microphone, as often the sound level is too low, there are unwanted background sounds, or the microphone has not been turned on. You should consider headphones which allow you to limit the volume (to protect students’ hearing) though these are more expensive. Using Film In Schools: A Practical Guide ©2010 Film: 21st Century Literacy
  • 31. 2. Spaces and equipment /30 Green screen Green screen, or ‘chromakey’, is popular in many schools. The subject is filmed against a special green background. The editing software replaces the green with another image, so students can appear to be acting in front of any kind of background or flying through the air. Green screen is particularly useful for animation backdrops, where animated characters can appear to be interacting with ‘live action’ footage, e.g. walking around the school or in the town high street. For filming, you need a backdrop of the correct green colour. You can buy chromakey green paint, green material, and elasticated panels. If you are setting up a dedicated space for filming, you could consider painting a wall chromakey green. You need dedicated, directional lighting for good quality images: normally the background needs to be more brightly lit than the main subject. Lighting Most schools don’t need professional film lighting. For higher-level and vocational courses it may be important, but it is complex and difficult to use and can be dangerous. It may be better to buy more expensive cameras, which can produce better images in low light, instead. You can use basic equipment like torches or desk lamps to experiment with lighting. If you need more light, you can use builders/DIY lights (these are cheaper than film lights, but pose health and safety issues as they get very hot). If you have a room with ordinary bulbs, you can provide more light by temporarily replacing them with higher-powered energy-saving bulbs. Some filmmakers use these bulbs with Chinese-style paper lampshades. These are safer than film lights because they are much cooler, but with any kind of mains-powered lighting you need to be aware of trip hazards. Reflectors are useful for filling in heavy shadows. You can buy folding elasticated reflectors, or you can use sheets of white insulation board, or hardboard panels with aluminium foil glued to them. Traditional film lighting uses three lights: a main or ‘key’ light, a ‘fill’ light to provide some light in the shadows, and a backlight (or ‘rim light’) to illuminate the edge of the subject so that it stands out from the background. You can imitate the effect of some of these lights by using the DIY suggestions above. For example, a torch or builders’ light – positioned well to the side of the subject – can provide ‘low-key’ lighting for a thriller scene, and a reflector can substitute for a ‘fill light’. You can buy professional lighting in sets, either as tungsten lights (‘redheads’) or as cold LED lights. LED lights are more expensive and cooler; LED ‘arrays’ are good for producing even, soft lighting. You can get ‘softboxes’ to produce this kind of lighting with tungsten lights. There are major health and safety issues with lighting: ■ Tungsten lights run very hot and can burn fingers and cause fires ■ Bulbs can shatter, so lights should never be used without safety glass ■ LED lights can cause permanent eye damage and should always be used with diffusers ■ Students can trip over stands and cables, and lights can fall over onto them Using Film In Schools: A Practical Guide ©2010 Film: 21st Century Literacy
  • 32. 2. Spaces and equipment /31 Editing Most computers can be used for basic video editing, but professional video editing software requires computers with quite a high specification: check the system requirements. Laptop or desktop Desktop computers are best for vocational courses and higher-end video editing, as they can often be upgraded with additional video cards and hard drives, and may be able to use bigger screens which will make it easier to use complex software. Laptops allow for more flexible use of spaces, and they can be taken on field trips. It’s also easier for groups to work around them (they should be provided with mice). If you are planning to use sets of laptops you should consider buying specialised cases. You can get trolley cases, suitable for moving sets of laptops to a secure storage area or between teaching spaces. You can also get much more rugged cases designed for transporting sets of laptops in vehicles. Computer displays You can use most computer monitors for basic video editing. When buying monitors, you should check your editing programme’s minimum requirements. Most programmes require a minimum resolution of 1024 x 768 but will be easier to use with a bigger screen. If you’re buying displays for professional editing programmes, your monitor size should be at least 17 inches. You can also consider colour depth (how many colours the monitor can display: the greater the depth, the more realistic the colour should be). Professional video editing stations normally use two displays. However, higher resolutions, greater colour depth and using two monitors requires more computer power: check that your computer can handle them or can be upgraded. Other hardware Microphones and audio interfaces are useful for recording voiceovers and connecting musical instruments. Portable hard drives are useful for transferring media between computers, and collecting students’ completed films. USB music keyboards can be used for creating soundtracks. Software Most computers come with basic video editing software pre-installed or available as a free download. The most recent versions of these software packages will work with a wide range of video formats and definitions. You should check that the software is compatible with any camera you are planning to buy. If you are buying a large number of copies, the major manufacturers offer substantially reduced ‘volume licensing’ prices for educational institutions. Included (‘free’) editing software Both main computer operating systems have an editing package aimed at consumers. These use a single main window for viewing the image and are relatively easy to use. Using Film In Schools: A Practical Guide ©2010 Film: 21st Century Literacy
  • 33. 2. Spaces and equipment /32 Intermediate editing software For £50-£60 (cheaper for volume licenses) there are several different programmes which are more sophisticated than the free packages. Most use a two-window layout (where you view your original source material in one window and the film you are creating in another window) and a ‘timeline’ (where you can view your film as a series of clips and sound files). Complex projects are usually easier to manage with one of these programmes. They vary in features, ease-of-use and reliability. Professional editing software Professional editing software packages (around £400 upwards) all use a timeline-based interface and are the best solution for vocational courses and complex projects. They can usually accept a wider range of video formats than basic or intermediate software. They will take longer to learn, are more expensive, and are not suitable for the youngest pupils. Other software for filmmaking You can also buy software applications which allow you to add effects, titles and motion to your videos. Professional ‘grading’ software allows detailed colour matching and effects. The major professional editing packages already include some of these features, so check the features of your editing package before you buy any extra applications. Audio editing and soundtrack creation Audio editing and soundtrack creation software is very useful. Some computers come with bundled (included) audio software, and there are also some free open-source audio editing tools. Some pro video editing packages also include audio software. Sound software can include some or all of these features: ■ Basic audio editing, e.g. adjusting volume levels, splicing together different sections of a recording ■ Music creation, using loops and sound effects included with the software, or using MIDI instruments and/or real instruments and vocals ■ The ability to import a video track so you can match your soundtrack exactly to your film Network setup and media management A media department will need a strategy for managing and backing up students’ video work while they are making their films, and archiving their work and deleting the working files when the films are completed. Uncompressed video files are too big to edit over a network, so your computers must be set up so you can save to a local drive. You will need a lot of disc space while editing, as video files are very large. Normally the finished film (the exported end product, which can be viewed and distributed) will take up much less space. Points to consider: ■ Where will users’ video files be saved? This could be on the main system drive, a separate partition on the main drive, or an external hard drive. Set up a logical system for naming and saving files and ensure that students stick to it. Many video programmes create a ‘project file’ which doesn’t contain the original media – it just ‘refers’ to it. This can cause problems if the project or media files are moved. It’s simpler if the project and media files are kept in one directory and can be moved together if necessary. Some programmes store them in different locations by default: you may be able to change this using the application preferences. Using Film In Schools: A Practical Guide ©2010 Film: 21st Century Literacy
  • 34. 2. Spaces and equipment /33 ■ How will users’ work be backed-up? Obviously it’s important to back-up coursework. You could do this by backing up files to a network drive at the end of each day. You can also get students to keep back-up copies of their work on their own hard drive or memory stick. This is not a good strategy as the primary back-up, as files may become lost or corrupted. (Memory sticks are not very reliable). ■ When will users’ work be deleted? At some point you will need to delete students’ work from your computers. Some schools do this once a term, or at the end of each project. Before you do this you need to ensure that the finished film has been exported at the quality required, and that you know where your copy is located. You could archive completed films on DVD-ROM. Bandwidth and storage You need sufficient bandwidth to move large files across the network (e.g. for backing up students’ video files to a network drive) and for viewing films. You will also need enough storage space for back-up and for keeping video files. This is particularly important for courses such as the Creative and Media Diploma, where students need a space to keep video ‘logs’ of their activity. If film and media activity is concentrated in one area, you could consider providing a higher-bandwidth network just in that part of the school. Mixing operating systems Some schools use one operating system for filmmaking or creative activity while the rest of the school uses a different OS. Properly set up mixed networks should not cause problems, but if you are selecting an ICT provider and you want to use a different OS for filmmaking you should check whether the provider has experience of supporting this mixed environment. In this situation some schools prefer to have a separate network for the filmmaking computers. This has some advantages if the main school network isn’t set up for mixed operating systems, but it’s important that the filmmaking computers can access the Internet, both to access online resources and for software updates. Classroom organisation Schools use different approaches for setting up sets of computers for video editing in a classroom, depending on the learning context. Some teachers prefer to have the computers around the periphery of the room. This makes it easy for the teacher to see what each student is doing and to move between students. It’s also the easiest place to locate power supplies and network connections. It’s less suitable for situations where the students imitate a process that the teacher is demonstrating on the whiteboard (e.g. showing them basic editing operations and where to save their work). It leaves a large open space in the centre of the room which can be used for demonstrating and practising filming techniques. Others prefer a traditional classroom set up with computers in rows, and the teacher either at the front of the class, or at the back of the class where they can see what students are doing on their own computers. If students are to work in groups, it may be easier to use laptops with the students working around larger tables. Using mice makes it easier for all group members to participate (e.g. with a rule that they take it in turns on the mouse) and lets them position the laptop where they can all see it. For extended school activities or in Primary schools, a less formal arrangement may be desirable, e.g. using laptops and beanbags. Using Film In Schools: A Practical Guide ©2010 Film: 21st Century Literacy
  • 35. 2. Spaces and equipment /34 Managing sound while editing If several students are working individually in one room, they can use headphones. These should be on-ear headphones (with pads which can be cleaned): students should not share in-ear headphones. An alternative is to ask them to bring their own headphones, which can minimise the risk of transmitting ear infections. You should be able to regulate the volume level, or give students clear instructions about limiting the volume. For pair and group work, students need to be able to hear the soundtrack and talk to each other. This is easiest if they use speakers rather than headphones, but if there are several groups working in the room they may not be able to hear the soundtrack over competing sound from other groups. Pairs of students can use two-into-one headphone splitters, and you can buy splitters with five or more sockets, but using headphones makes it harder for the students to interact with each other. With laptops, if groups are able to work without supervision, they could go off to work in separate quiet locations (e.g. the library, or group rooms). Music practice rooms can make ideal spaces for sound editing. Using Film In Schools: A Practical Guide ©2010 Film: 21st Century Literacy
  • 36. 2. Spaces and equipment /35 Filmmaking summary Basic Intermediate High spec Camera Compact camcorder, phone or still camera with video mode (£60-£120) each Midrange camcorder (£200-£500) Pro or semi-pro, SD, miniDV or HDDl Spaces for filming Classroom, spaces in the school, locations around the town Classroom equipped as studio Chromakey screen (£60 upwards) Studio Sound recording Don’t record live sound Use the built-in microphone Basic mics/tieclip mics plugged into camera (£30 upwards) Headphones (£20 upwards) Digital sound recorder (£100 upwards) Professional video mics, including directional boom mics, headphones Camera support Basic tripod with pan and tilt head (£30) Midrange tripod with pan and tilt head (£50-£100) Wheelchair, Skateboard Professional tripod with fluid head Dolly Jib Lighting Available light Torches Desk lamps DIY builders’ lamps, homemade reflectors (£0-£50) Set of tungsten ‘redheads’, elastic reflectors (£400+) Tungsten or LED lights Reflectors Editing hardware Standard school computers Computers with extra memory, faster processors Microphones Hard drives Standalone computers with two external displays Microphones Hard drives Editing Free software included with OS Semi-professional software (£40-£50) Professional editing software Additional software Free sound editing software File conversion Basic sound editing and creation software (£60) Effects Titling Sound editing Motion graphics Grading Using Film In Schools: A Practical Guide ©2010 Film: 21st Century Literacy
  • 37. 2. Spaces and equipment /36 Newbuild or refurbished spaces for filmmaking In a primary school, a single flexible space is probably the most suitable space for filmmaking. In a secondary setting, particularly for specialist courses, you may want dedicated spaces: perhaps a large studio space for group teaching and filming, plus ‘breakout’ rooms for small-group or individual activities such as editing. If you are aiming to emulate a TV studio you may want a separate control booth. The size of the control room should be determined by the amount of equipment it will contain, and the number of students (plus teacher) who are likely to be working in it at any one time. The best shape for the main room is a simple, flexible rectangular or almost square shape.Alarge room with a high ceiling will offer more choice of camera positions. If the room is to have windows, they should be at the side of the room and fitted with blackout blinds. A smooth floor surface is important for using tripods and dollies. Carpet is best avoided (particularly in spaces used for animation as modelling clay gets everywhere) but you may want it as part of the set in one part of the room. Acoustic separation is important for filming. This can be achieved by using the same techniques as mentioned in the film viewing section, and by ‘box within box’ construction where the walls, floor and ceiling are physically separate from the structure of the building. It’s also important to avoid buzzing and noise from lights or services. The breakout editing rooms should be located off, or close to, the main room and with good acoustic separation from the main room and each other. All these rooms will require adequate provision of network points and electrical sockets. Cables will need to be run between a control booth and a studio space. Using Film In Schools: A Practical Guide ©2010 Film: 21st Century Literacy
  • 38. 2. Spaces and equipment /37 Animation Stop-frame animation can include clay animation, drawn or cutout animation, sand animation, cel animation (drawn animation using several layers) and ‘pixilation’(where real objects or people are animated). Clay animation is probably the most popular kind of animation in schools. You can also do ‘computer animation’. Basic requirements for stop-frame animation You need a camera, animation software, a tripod or other camera support, and a space or surface on which to set up your models, objects or drawings. You may also want lights, a flatbed scanner (for scanning drawings or other images), a graphics tablet (easier to draw with than a mouse) and a chromakey background. Camera Most stop-frame animation software requires the use of a USB webcam or a miniDV camera (see below) and may not work with digital still cameras or disc/card-based cameras. Webcams are cheap and easy to handle but you should check that the specific model is compatible with your stop-frame software. Some webcams have flexible stands which mean that you don’t need a tripod. If your school has miniDV cameras (and your computers have Firewire/IIEE1394 sockets) you can probably use these instead. Stop-frame animation software Stop-frame animation software is relatively cheap and it’s much easier than trying to animate with standard video editing software (though there are ways of doing this). Important features include ‘onion-skinning’ (which allows you to view several frames overlaid on each other) and the ability to delete frames. Chromakey (green screen) is also useful. You should be able to export your animated sequences in a format which your video editing software can use, so that you can edit sequences together and add sound and effects. Spaces for animation Clay animation can get messy so a carpeted room is not suitable. For each animation station, you need space for your computer, connected to a camera on a tripod or stand (which you should be able to move). You may also need space for lighting. You can use ordinary desk lamps to light animation sets (though beware of heat and trip hazards). For tabletop animation a mini-tripod can be useful (unless your camera has a built-in stand). For drawn animation, you can use an ordinary tripod with the camera pointing straight down, a copy stand (which positions the camera vertically and has lights) or a professional animation stand, which has pegs for accurate positioning of animation ‘cels’. Using Film In Schools: A Practical Guide ©2010 Film: 21st Century Literacy
  • 39. 3. Partners, resources and funding /38 This section looks at where to find partners, resources and funding for film education: online, from UK-wide organisations, and from regional and local bodies. Several different kinds of partner organisation can provide useful support for schools and teachers. This support can range from theoretical and practical activity with children and young people, to advice and training for teachers. Partners can also provide useful advice on setting up and equipping for film education, sometimes as part of a Cultural Stakeholder Group. A number of cinema and multi-arts venues and film festivals have film education programmes, which can include workshops and study days for students and training for teachers. Resource centres such as City Learning Centres (in England) and Creative Learning Centres (in Northern Ireland) can provide practical support and training for film education. Film education organisations with a UK-wide or regional/national remit also provide a range of training and support. Some participatory media and community arts organisations provide workshops and training on film and filmmaking. A number of independent filmmakers and film production organisations also provide educational activity or training, particularly support for filmmaking projects. Partners ■ BFI Education Promotes understanding and appreciation of Britain’s television heritage and culture. Their education activities include publications, events and training. www.bfi.org.uk/education ■ FILMCLUB Provides films and support for after-school film clubs. It’s free to state-funded schools in England and is being piloted in Wales, Northern Ireland and Scotland. www.filmclub.org ■ Film Education Produces free resources, organises events and screenings including National Schools Film Week, and provides training and support for teachers. www.filmeducation.org ■ First Light Provides funding and support for filmmaking by children and young people. www.firstlightonline.co.uk ■ Skillset The industry body which supports skills and training for the UK creative industries. www.skillset.org UK-wide organisations Using Film In Schools: A Practical Guide ©2010 Film: 21st Century Literacy
  • 40. 3. Partners, resources and funding /39 Your local screen agency may be able to help you find suitable partners. In England, the screen agencies are: ■ EM Media (East Midlands) www.em-media.org.uk ■ Film London http://filmlondon.org.uk ■ Northern Film & Media (North-east England) www.northernmedia.org ■ Screen South www.screensouth.org ■ Screen WM (West Midlands) www.screenwm.co.uk ■ Screen Yorkshire www.screenyorkshire.co.uk ■ South West Screen www.swscreen.co.uk ■ Vision and Media (North-west England) www.visionandmedia.co.uk In the Nations, the screen agencies are: ■ Creative Scotland www.creativescotland.com ■ Film Agency for Wales www.filmagencywales.com ■ Northern Ireland Screen www.northernirelandscreen.co.uk The Film Agency for Wales and Creative Scotland keep registers of providers in their area. Other organisations who may be able to help you identify partners include: ■ Arts Council of England www.artscouncil.org.uk ■ Arts Council for Wales www.artswales.org.uk Nations and regions Local partners The interactive map will help you to locate potential partners in your area. www.mediaed.org.uk (link from organisations section) Please note that we have not screened these organisations for child protection purposes or evaluated the quality of their provision. Resources There are a lot of resources available to support teaching and learning about film and filmmaking. Online resources include introductory guides to teaching film and filmmaking; downloadable study guides on individual themes or topics; films to view or edit online, and films to download and edit yourselves. DVD resources include selections of short films addressing specific ages, topics or curriculum requirements, as well as resources including clips to edit. A wide range of resources on film education and filmmaking are available to buy online from the BFI Filmstore http://filmstore.bfi.org.uk Using Film In Schools: A Practical Guide ©2010 Film: 21st Century Literacy
  • 41. 3. Partners, resources and funding /40 Introducing film education Several sites offer ‘how-to’ information on using film in the classroom, covering both film and filmmaking. They include: ■ MediaEd ■ the Scottish site Moving Image Education ■ Films for Learning BFI Education also produces two substantial, downloadable PDF guides to using film across the curriculum: ■ Look Again for Primary schools www.bfi.org.uk/education/teaching/lookagain ■ Moving Images in the Classroom for Secondary schools www.bfi.org.uk/education/teaching/miic The FilmStreet website includes separate sections for children and teachers www.filmstreet.co.uk Using film in specific subjects ■ BFI Education produces several free downloadable resources, including teaching notes to accompany their Mitchell and Kenyon archive film DVD; The World in the Movies, a guide to using film to explore citizenship; and an online guide to using their Disabling Imagery DVD which explores representations of disability in the movies. www.bfi.org.uk/education ■ Film Education provides a wide range of free resources on specific topics, including Local History and Sound (Primary) and Shakespeare on Film, The Holocaust and Documentary (Secondary). They also sell two DVDs on film interpretations of Shakespeare: Shakespeare on Screen and Romeo and Juliet. www.filmeducation.org ■ FILMCLUB’s site includes ‘themes’ which group films that can be used to address specific topics, e.g. Colonialism, Childhood. www.filmclub.org ■ SBBFC the British Board of Film Classification’s student site, has useful resources and case studies exploring issues of censorship and classification (e.g. for Citizenship). CBBFC is their site for Primary schoolchildren. www.sbbfc.co.uk www.cbbfc.co.uk Using individual films Free resources Several sites offer free downloadable study guides and teachers’ notes. ■ Film Education offers resources based on contemporary film and recent releases, with material available across the curriculum and for Primary and Secondary level. www.filmeducation.org ■ Cornerhouse focuses mainly on Modern Foreign Languages at Secondary level, covering films in Spanish, French, Italian, Arabic, Mandarin and Urdu. www.cornerhouse.org Using Film In Schools: A Practical Guide ©2010 Film: 21st Century Literacy
  • 42. 3. Partners, resources and funding /41 Films to view online or download ■ BFI Screenonline provides access to a large range of British short films, and clips from feature films, from the 1890s to the present day. The films on the site can only be accessed in schools, colleges, universities and libraries and you have to register. www.screenonline.org.uk ■ Moving Image Education also has a small number of short films and clips available to view or download. www.movingimageeducation.org ■ The Yorkshire Film Archive has a large number of archive film clips organised by theme, decade and area. You have to register to access the films. www.yorkshirefilmarchive.com ■ Internationally, the Internet Archive has a huge range of films, many of which are downloadable in a variety of formats. www.archive.org There are many other sites where you can view or download films (not all of which will be suitable for education). There’s a useful summary on the BBC Film Network site www.bbc.co.uk/filmnetwork Collections of films to buy ■ BFI Education produces several useful selections of short films with supporting material, which are specially selected for each Key Stage – Starting Stories and Story Shorts for Primary schools, and Screening Shorts, Moving Shorts and Real Shorts for Secondary schools. www.bfi.org.uk/education ■ The English and Media Centre publishes the DVD Double Take and other stories, containing 90 minutes of short films and supporting materials aimed at 11-16 year olds. www.englishandmedia.co.uk Filmmaking and editing Online or downloadable films to edit There are several sources of online film clips which you can incorporate into your own films. The Creative Archive Licence provides free access to clips on a range of themes, for nonprofit, non-promotional, ‘share-alike’ use in the UK. Films are available from two major sources: ■ Open University www.open2.net/creativearchive ■ British Film Institute www.bfi.org.uk/creativearchive Other sources ■ The Wellcome Foundation has over 100 hours of Creative Commons films on healthcare and medicine in the 20th Century. http://library.wellcome.ac.uk/wellcomefilm.htm ■ Many schools in the UK have free access to the British Pathé archive under agreements with Regional Broadband Consortia or local authorities. www.britishpathe.com Using Film In Schools: A Practical Guide ©2010 Film: 21st Century Literacy
  • 43. 3. Partners, resources and funding /42 ■ You can also search for public domain films on the Internet Archive. www.archive.org ■ Scotland on Screen has over 200 films which can be downloaded for use in Scottish schools. http://scotlandonscreen.org.uk ■ National Archives Focus on Film includes clips organised into themes, which you can download and edit. www.nationalarchives.gov.uk/education/focuson/film ■ BFI Screenonline includes the Cutting Room, an online editing tool where you can practise editing with clips from archive film or rushes from modern films. www.screenonline.org.uk/education/thecuttingroom ■ Wevee is an online editing tool which enables you to edit archive film clips and contemporary music tracks together and share the results online. www.wevee.co.uk Editing resources to buy ■ Film Education produces two interactive CD-ROMs, MoPix and The Red Shoes, in each of which students edit their own versions of a film sequence using the built-in editing tool. www.filmeducation.org ■ The English and Media Centre publishes MoviePower, a set of moving image sequences and activities with a built-in editor. www.englishandmedia.co.uk ■ Media Education Wales produces Editsense, a set of film sequences to be edited using standard editing software on Macs or PCs. mediaedwales.org.uk Films made by children and young people Several sites allow you to view films made by children and young people. ■ Films for Learning is a site run by teachers, allows you to search for films by curriculum area. www.filmsforlearning.org ■ Planet Scicast features short science films, and has a useful ‘how-to’ guide. www.planet-scicast.com ■ You can view films made on First Light projects. www.firstlightonline.co.uk ■ MediaBox films are made by disadvantaged 13-19 year olds. www.media-box.co.uk ■ The English and Media Centre sells Mediamagazine Student Films, a compilation of films made by sixth-form students. www.englishandmedia.co.uk Using Film In Schools: A Practical Guide ©2010 Film: 21st Century Literacy
  • 44. 3. Partners, resources and funding /43 Funding There are a number of sources of funding for filmmaking activities at both UK-wide and regional/national level. Many of these require a proportion of match funding, so you should look to ‘join up’ funding streams early in the project planning process. The major UK-wide funding for filmmaking is provided by First Light. This supports filmmaking by children and young people but is only available for activities which are not related to the curriculum. www.firstlightonline.co.uk Some Screen Agencies (see page 39) provide funding for education projects. Other funding streams which you could consider for supporting film education and filmmaking (depending on your location) include: ■ 14-19 Diploma delivery ■ Creative Partnerships ■ Communities First (in Wales) ■ Disadvantage subsidy ■ Extended Schools ■ Local charitable trusts ■ London Gifted & Talented ■ Pupil Premium ■ Widening participation Using Film In Schools: A Practical Guide ©2010 Film: 21st Century Literacy