B12-2-Wire-Gas-Transmitter.pdf
•
0 likes•6 views

www.envimart.vn - ĐT: 028 77727979 - sales@envimart.vn - Nền tảng cung cấp thiết bị, vật tư ngành nước và môi trường. Chuyên cung cấp vật tư cho dự án xử lý nước sạch, nước thải và môi trường. Envimart luôn đồng hành, tin cậy với đối tác nhà thầu, nhà tích hợp và người sử dụng.

Recommended
More Related Content
Similar to B12-2-Wire-Gas-Transmitter.pdf
Similar to B12-2-Wire-Gas-Transmitter.pdf (20)
More from ENVIMART
More from ENVIMART (20)
Recently uploaded
Recently uploaded (20)
B12-2-Wire-Gas-Transmitter.pdf
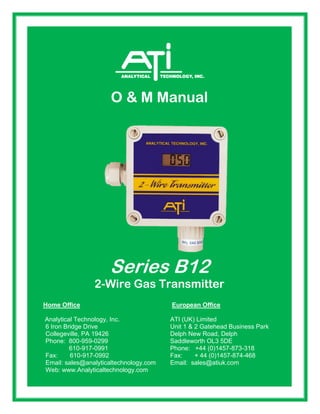
- 1. Fax: 610-917-0992 Fax: + 44 (0)1457-874-468 O & M Manual Series B12 2-Wire Gas Transmitter Home Office European Office Analytical Technology, Inc. ATI (UK) Limited 6 Iron Bridge Drive Unit 1 & 2 Gatehead Business Park Collegeville, PA 19426 Delph New Road, Delph Phone: 800-959-0299 Saddleworth OL3 5DE 610-917-0991 Phone: +44 (0)1457-873-318 Fax: 610-917-0992 Fax: + 44 (0)1457-874-468 Email: sales@analyticaltechnology.com Email: sales@atiuk.com Web: www.Analyticaltechnology.com
- 2. TABLE OF CONTENTS TABLE OF CONTENTS ............................................................................................................................................1 TABLE OF FIGURES ................................................................................................................................................1 INTRODUCTION .......................................................................................................................................................2 DUCT MOUNTED SENSORS .................................................................................................................................5 SPECIFICATIONS .....................................................................................................................................................6 INSTALLATION.........................................................................................................................................................7 MECHANICAL MOUNTING ..................................................................................................................................7 DUCT MOUNT SENSOR INSTALLATION ...........................................................................................................7 ELECTRICAL CONNECTIONS..............................................................................................................................8 OPERATION...........................................................................................................................................................13 TRANSMITTER TEST POINTS ............................................................................................................................13 DIGITAL DISPLAY OPTION................................................................................................................................14 CALIBRATION.........................................................................................................................................................15 ZERO ADJUSTMENT............................................................................................................................................15 SPAN ADJUSTMENT ............................................................................................................................................16 CALIBRATION OF DUCT MOUNT SENSORS ...................................................................................................17 PERIODIC RESPONSE TEST................................................................................................................................17 SPARE PARTS LIST B12 ........................................................................................................................................18 SPARE PARTS LIST (CONT’D).............................................................................................................................19
- 3. TABLE OF FIGURES FIGURE 1 - SERIES B12 NEMA 4X TRANSMITTER DINENSIONS...........................................................................3 FIGURE 2 - SERIES B12 EXPLOSION-PROOF TRANSMITTER DIMENSIONS ...........................................................4 FIGURE 3 - DUCT MOUNT SENSOR INSTALLATION (ATI-0348)............................................................................5 FIGURE 4 - DUCT MOUNT SENSOR INSTALLATION (ATI-0298)............................................................................7 FIGURE 5 - ELECTRICAL CONNECTIONS - STANDARD SYSTEM............................................................................8 FIGURE 6 - ELECTRICAL CONNECTIONS - REMOTE A10 SENSOR - (ATI-0147)....................................................9 FIGURE 7 - ELECTRICAL CONNECTIONS - INTEGRAL C10 SENSOR....................................................................10 FIGURE 8 - ELECTRICAL CONNECTIONS - C10 DUAL CONDULET SENSORS (ATI-0101).....................................11 FIGURE 9 - ELECT CONNECTIONS - CV10-18 ONLY DUAL CONDULET SENSORS (ATI-0101).............................12 FIGURE 10 - TRANSMITTER CONTROLS & TEST POINTS...................................................................................13 FIGURE 11 - TRANSMITTER CONTROLS & TEST POINTS (ATI-0205).................................................................14 FIGURE 12 - DUCT MOUNT SENSOR CALIBRATION (ATI-0299) ........................................................................17
- 4. Series B12 2-Wire Gas Transmitter __________________________________________________________________________________ O & M Manual Rev-P, (3/20) - 2 - INTRODUCTION The Series B12 is a two-wire transmitter for use in monitoring hazardous gases in ambient air. It is designed to monitor gas concentration in areas around storage cylinders, process piping, or gas feed equipment in virtually any type of industrial plant environment. Series B12 transmitters are available for monitoring a variety of gases and ranges as shown in Table 1. Each transmitter is manufactured for a specific gas and range, and cannot be modified for use with another gas sensor type. TABLE 1 GAS CODE NO. STD. RANGE MIN. RANGE MAX. RANGE GENERAL GASES Ammonia 15 0-100 PPM 0-50 PPM 0-1000 PPM Carbon Monoxide 16 0-100 PPM 0-50 PPM 0-1000 PPM Hydrogen 18 0-4 % 0-1000 PPM 0-10 % Oxygen 19 0-25% 0-5% 0-25% Phosgene 20 0-2 PPM 0-2 PPM 0-200 PPM Nitric Oxide 25 0-50 PPM 0-50 PPM 0-500 PPM Ethylene Oxide 37 0-20 PPM 0-20 PPM 0-200 PPM Formaldehyde 38 0-20 PPM 0-20 PPM 0-200 PPM Alcohol 39 0-500 PPM 0-500 PPM 0-2000 PPM Ethyne 40 0-500 PPM 0-500 PPM 0-2000 PPM Nitrogen Oxides 42 0-500 PPM 0-500 PPM 0-2000 PPM Organic Vapors 45 0-500 PPM 0-500 PPM 0-2000 PPM OXIDANT GASES Bromine 10 0-2 PPM 0-2 PPM 0-100 PPM Chlorine 11 0-10 PPM 0-2 PPM 0-100 PPM Chlorine Dioxide 12 0-2 PPM 0-2 PPM 0-100 PPM Fluorine 13 0-2 PPM 0-2 PPM 0-100 PPM Ozone 14 0-2 PPM 0-2 PPM 0-100 PPM Hydrogen Peroxide 34 0-10 PPM 0-10 PPM 2000 PPM Iodine 35 0-2 PPM 0-2 PPM 0-100 PPM ACID GASES Hydrogen Chloride 21 0-20 PPM 0-10 PPM 0-200 PPM Hydrogen Cyanide 22 0-20 PPM 0-10 PPM 0-200 PPM Hydrogen Fluoride 23 0-20 PPM 0-10 PPM 0-200 PPM Hydrogen Sulfide 24 0-50 PPM 0-10 PPM 0-500 PPM Nitrogen Dioxide 26 0-20 PPM 0-10 PPM 0-200 PPM Sulfur Dioxide 27 0-20 PPM 0-10 PPM 0-200 PPM HYDRIDE GASES Arsine 28 0-1000 PPB 0-1000 PPB 0-100 PPM Diborane 29 0-1000 PPB 0-1000 PPB 0-100 PPM Germane 30 0-1000 PPB 0-1000 PPB 0-100 PPM Hydrogen Selenide 31 0-1000 PPB 0-1000 PPB 0-100 PPM Phosphine 32 0-1000 PPB 0-1000 PPB 0-100 PPM Silane 33 0-10 PPM 0-1 PPM 0-100 PPM
- 5. Series B12 2-Wire Gas Transmitter __________________________________________________________________________________ O & M Manual Rev-P, (3/20) - 3 - B12 transmitters are loop-powered devices capable of operating from DC power supplies between 12 and 30 VDC. Normally, this transmitter will be powered from a 24 VDC supply from a plant wide monitoring computer, a data logger, or an alarm system that supplies the DC voltage. The output of the transmitter is a 4-20 mA signal which is linear with respect to concentration over the range of the sensing module. Transmitters are housed in a NEMA 4X polystyrene enclosure (Figure 1) suitable for installation in virtually any environment. The sensor is located in one of the enclosure knockouts, and one gland seal and one 1/2" conduit hub is supplied for customer installation. Knockouts are provided on all sides of the transmitter enclosure to simplify installation. An optional LCD display provides local indication of gas concentration on the front of the enclosure. The display is supplied only when specified on the order, and cannot be added in the field. B12 Transmitters are also available in an explosion-proof version. The explosion-proof version is housed in a galvanized steel enclosure (Figure 2) rated for Class 1, Div. 1, Groups B, C, & D locations. Sensors for this type of transmitter are housed in a special stainless steel housing that screws into one hub of the transmitter enclosure. LCD display is not available on the XP version. The sensing elements used in B12 transmitters are electrochemical sensors manufactured by ATI. These sensors are designed for use in ambient air or in ventilation ducts at temperatures of -30° to +50° C (some sensors rated to -40° C) and at relative humidities between 20 and 98% RH. Use of these sensors in extremely dry air or in condensing gas streams is not recommended. Figure 1 - Series B12 Nema 4X Transmitter Dinensions
- 6. Series B12 2-Wire Gas Transmitter __________________________________________________________________________________ O & M Manual Rev-P, (3/20) - 4 - Figure 2 - Series B12 Explosion-Proof Transmitter Dimensions
- 7. Series B12 2-Wire Gas Transmitter __________________________________________________________________________________ O & M Manual Rev-P, (3/20) - 5 - DUCT MOUNTED SENSORS A special sensor design is available as an option that allows toxic gas sensors to be inserted into a duct or pipe through a special adapter. This system is designed to allow gas monitoring in enclosed spaces with easy removal of the sensor for service. The special mounting fitting provides a method for feeding calibration gas to the sensor without complete removal from the duct. Duct mount sensors are provided with a special interface cable so that the transmitter electronics may be mounted up to 25 feet from the sensing location. Figure 3 below shows the components of the duct insertion version of the B12 gas transmitter. 2- W ireTrans mitte r NOTE: All conductors on cable only used on H2 sensors only, the RED and BLK conductors can be removed from cable for all other gas applications. Figure 3 - Duct Mount Sensor Installation (ATI-0348)
- 8. Series B12 2-Wire Gas Transmitter __________________________________________________________________________________ O & M Manual Rev-P, (3/20) - 6 - SPECIFICATIONS The following general specifications refer to all Series B12 transmitters. Because each transmitter contains a different sensor, there are specification differences for each gas. Gas specific information is provided with each transmitter. Gas Type: Customer selected from available sensor list. Range: Supplied with standard range for each gas unless otherwise specified. Accuracy: Generally ±5% of value, but limited by available calibration gas accuracy. Electronic Repeatability: ±1% Electronic Linearity: ±0.5% Zero Drift: Sensor dependent, but generally less than 1% of full scale per month, non-cumulative. Span Drift: Application dependent, but generally less than 3% per month. Output: Loop-powered 4-20 mA, 750 ohms maximum at 24 VDC Power: 12-30 VDC Display: None. Optional LCD display available. Enclosure: NEMA 4X Polystyrene Explosion-proof cast iron optional, Class 1, Div. 1, Groups B, C, & D. Controls: Zero and span potentiometers mounted on transmitter circuit board Operating Temperature: -30º to +55º C (except oxygen, which is -10º to +55º C) Sensor Pressure Limits: 7-30 PSIA (0.5-2 Bar) Weight: 0.25 Lbs (0.12 Kg.)
- 9. Series B12 2-Wire Gas Transmitter __________________________________________________________________________________ O & M Manual Rev-P, (3/20) - 7 - INSTALLATION Installation of a B12 Transmitter requires mechanically mounting the enclosure and connecting DC power to the system. MECHANICAL MOUNTING Standard NEMA 4X transmitter enclosures are surface mounted using screws inserted through the blind mounting holes accessible by removing the transmitter cover. Figure 1 shows the center-to- center mounting hole dimensions for this enclosure. If rigid conduit is to be used for wiring the transmitter, the transmitter can be supported directly from the conduit system without the use of mounting screws. The transmitter weighs only 4 ounces, so normal conduit supports will be adequate. If conduit is to be used, be sure that the conduit is sealed at the point were it enters the transmitter. Otherwise, condensation in the conduit system can drain into the transmitter causing failure of the electronic circuit board. CAUTION: When removing the cover of a transmitter with the LCD display option, do not try to separate the cover from the enclosure base by more than a few inches. The LCD display is hardwired to the transmitter circuit board, and the display cable is only a few inches long. Explosion-proof transmitter enclosures should be supported by the conduit system and the installation should include proper conduit seals as required by local electrical code. DUCT MOUNT SENSOR INSTALLATION Duct mounted sensors are designed to be inserted into an air duct or pipe through a special adapter fitting (part number 00-0814). This fitting has a 1” MNPT thread on the front for adapting to the duct or pipe. The actual duct adapter is customer supplied. Installation of this sensor requires that the 00-0814 adapter be screwed into the customer supplied adapter as shown in Figure 4 below. Screw in the adapter so that the calibration gas inlet port is oriented in a direction that gas tubing can easily be connected. Once the adapter is in place, the sensor will slide into the adapter easily. However, it is recommended that the sensor not be installed in the fitting until you are ready to start up the transmitter. This is especially true during construction when dust and dirt may be blowing through the duct system. Fouling of the sensor may result. Figure 4 - Duct Mount Sensor Installation (ATI-0298)
- 10. Series B12 2-Wire Gas Transmitter __________________________________________________________________________________ O & M Manual Rev-P, (3/20) - 8 - ELECTRICAL CONNECTIONS Standard transmitters are supplied with the sensor mounted to the transmitter. The sensor plugs into a connector on the transmitter circuit board. The only connections required for installation are the two loop connections. Figures 5 through 9 show the proper terminals for connecting the loop wiring. Figure 5 - Electrical Connections - Standard System
- 11. Series B12 2-Wire Gas Transmitter __________________________________________________________________________________ O & M Manual Rev-P, (3/20) - 9 - Figure 6 - Electrical Connections - Remote A10 Sensor - (ATI-0147)
- 12. Series B12 2-Wire Gas Transmitter __________________________________________________________________________________ O & M Manual Rev-P, (3/20) - 10 - Figure 7 - Electrical Connections - Integral C10 Sensor
- 13. Series B12 2-Wire Gas Transmitter __________________________________________________________________________________ O & M Manual Rev-P, (3/20) - 11 - Figure 8 - Electrical Connections - C10 Dual Condulet Sensors (ATI-0101)
- 14. Series B12 2-Wire Gas Transmitter __________________________________________________________________________________ O & M Manual Rev-P, (3/20) - 12 - Figure 9 - Elect Connections - CV10-18 Only Dual Condulet Sensors (ATI-0101)
- 15. Series B12 2-Wire Gas Transmitter __________________________________________________________________________________ O & M Manual Rev-P, (3/20) - 13 - OPERATION After mechanical and electrical installation is complete, the transmitter is ready for operation. Prior to start-up, recheck the loop wiring connection to be sure it's correct. Reversing the loop wiring will not damage the transmitter, but other devices in the loop may be adversely affected. As soon as DC loop power is applied, the transmitter will begin to operate, transmitting a 4-20 mA signal proportional to gas concentration. When first energized, many gas sensors will spike to a high value and then slowly begin to recover toward zero. This is normal, and transmitters should always be allowed to stabilize for at least a few hours before making any adjustments. Any receiving devices tied to the transmitter may show an alarm condition during this stabilization period. If possible, these alarm systems should be inhibited during this period. TRANSMITTER TEST POINTS In order to read the transmitter output locally, a digital volt (DVM) meter is recommended for transmitters without display. The transmitter circuit board contains test points marked TP1 (see Figure 10) that allow an operator to read the 4-20 mA output without breaking the loop wiring. The test points are across a precision 10-ohm resistor that is part of the current output circuit. Therefore, any changes at the test point are a direct indication of changes in the output signal. The test point voltage will be 40 - 200 mv. Proportional to 4-20 mA. This test point is used for zero and calibration functions. Figure 10 - Transmitter Controls & Test Points
- 16. Series B12 2-Wire Gas Transmitter __________________________________________________________________________________ O & M Manual Rev-P, (3/20) - 14 - DIGITAL DISPLAY OPTION Series B12 transmitters supplied with the optional LCD display has the display mounted to the enclosure cover with a clear lens protecting the display from dirt and moisture. The display is connected to the cover with a short ribbon cable soldered to the transmitter circuit board. The digital display is factory scaled to the transmitter range specified on the order. The LCD display indicates gas concentration directly in PPM or % depending on the range. It is directly in the 4-20 mA output circuit so that it is a very accurate indicator of the signal being transmitter to remote equipment. The display should be used for zeroing and calibration instead of the test points described in the calibration section of this manual. When removing the cover of a transmitter with the LCD display, be careful not to pull on the display interconnect cable. When you remove the cover, it can be temporarily fastened to the enclosure base as shown in Figure 11. Figure 11 - Transmitter Controls & Test Points (ATI-0205)
- 17. Series B12 2-Wire Gas Transmitter __________________________________________________________________________________ O & M Manual Rev-P, (3/20) - 15 - CALIBRATION B12 transmitters should be calibrated every 3-6 months. The frequency of calibration is dependent on the operating environment (sensors exposed to dirt, oil mist, or vapors need more frequent calibration) and the degree to which accuracy is important. Generally, more frequent calibration is done if the gas transmitter is located where personnel are working regularly. Transmitter calibration requires adjustment of both zero and span. Zero is adjusted when the sensor is exposed to zero air. Adjusting the span requires a source of span gas with a known concentration of the particular gas. Calibration kits, containing both zero air and span gas, are available from ATI for many toxic gases. Contact ATI or your local ATI representative if you have any questions on calibration gas sources. ZERO ADJUSTMENT As previously mentioned, adjusting the transmitter zero requires that the sensor be exposed to air that is free of the target gas or any other gases that might cause either negative or positive interference to that sensor. If the area in which the sensor is operating is know to be gas free, then the transmitter can be zeroed without further equipment. If not, use of "zero air" from a gas cylinder is recommended. Zero air is available as part of all ATI calibration kits, or may be obtained from any specialty gas supplier. When zero air is to be used, a calibration adapter (part no. 00-0118 for standard sensors or 00-0258 for explosion-proof sensors) must be used. The calibration adapter provides a confined space around the sensor into which the zero air can flow. Calibration adapters provide tube fittings at the bottom to connect air tubing as shown in Figure 10. The flow rate used should be 500 cc/minute. To zero the transmitter, remove the cover and connect a DVM to the test points shown in Figure 10. If the transmitter is supplied with the LCD option, no DVM is required. Place the calibration adapter on the sensor and allow zero air to flow to the sensor for 5 minutes. If the sensor is located in air known to be gas free, simply observe the DVM voltage to be sure that it is stable ± 1 mv. Use the zero potentiometer (Figure 10) to adjust the value to 40 millivolts or adjust the LCD to read 0 PPM or %.
- 18. Series B12 2-Wire Gas Transmitter __________________________________________________________________________________ O & M Manual Rev-P, (3/20) - 16 - SPAN ADJUSTMENT Adjusting the span requires a source of reliable span gas. If possible, a span gas with a gas concentration above 25% of the full scale transmitter range is recommended. Many span gases are available in convenient disposable cylinders, while other gases require a permeation system to generate a reliable standard. DO NOT ATTEMPT TO ADJUST THE SPAN OF A TRANSMITTER WITHOUT A RELIABLE SPAN GAS. To adjust the span, connect the span gas to the calibration adapter at the end of the sensor and allow the gas to flow for 5 minutes at 500cc/minute. Adjust the span potentiometer (Figure 10) until the proper voltage is displayed on the DVM. If the transmitter contains an LCD display, simply adjust the span potentiometer until the display indicates the value of the span gas. NOTE: Some types of gas sensor have a slower response than others and may take more than 5 minutes to stabilize when span gas is applied. For HCN, HCl, COCl2, HF, and NH3 sensors, allow span gas to run for 10 minutes before adjusting the span if you want to get close to 100% response. However, 5 minutes is normally enough to get to 95% response, so an alternative is to adjust the span to 95% of the gas concentration after 5 minutes. This will conserve span gas, which can be expensive in some cases. The proper voltage to set when adjusting transmitter span will vary depending on the range of the transmitter and the concentration of the gas used to set the span. The following formula is used to calculate the proper span voltage for any transmitter. V = 0.040 V + 0.160 X (Span Gas Concentration ÷ Transmitter Range) As an example, suppose you are calibrating a hydrogen sulfide transmitter with a range of 0-50 PPM using an H2S gas standard of 25 PPM. The above formula would then become: V = 0.040 V + 0.160 X (25 ÷ 50) = 0.120 V. Therefore, adjusting the transmitter to a reading of 120 mv. at the test point would properly calibrate the transmitter. NOTE: Newly installed systems or replacement sensors could take up to 12 hours to stabilize.
- 19. Series B12 2-Wire Gas Transmitter __________________________________________________________________________________ O & M Manual Rev-P, (3/20) - 17 - CALIBRATION OF DUCT MOUNT SENSORS The procedure for zeroing and calibration of duct mounted gas sensors is similar to that described on pages 16 and 17 except that the calibration is done with the sensor still mounted inside the mounting adapter fitting. This fitting contains a calibration gas connection on the side. See figure 12 below for the sensor orientation when in the calibrate position. ( This procedure is applicable to all insertion sensors with the exception of special Hydrogen Peroxide. These special H2O2 sensors require calibration outside of the duct adapter ) To zero and calibrate the duct sensor, pull the sensor out of the duct until the retaining pin clicks into the retaining slot. If you pull the sensor back slowly, the retaining pin will drop into place and automatically locate the sensor in the proper position opposite the gas inlet port. Connect your zero or span gas to the gas connection port and follow the zero and span adjustment procedures this as well as the previous page. Figure 12 - Duct Mount Sensor Calibration (ATI-0299) PERIODIC RESPONSE TEST While gas transmitters do not need frequent calibration, they should be checked regularly for proper sensor response. The purpose of regular response tests is to detect a sensor failure that does not affect the transmitter output. For instance, if a sensor membrane became coated with oil, the transmitter output might seem normal while the sensor might not respond to a gas leak. Sensors should be tested at least once a week using a simple "puff test" to verify proper operation. Most gas sensors can be tested easily and quickly using readily available chemicals. Contact ATI for recommended "puff test" procedures for a specific gas sensor.
- 20. Series B12 2-Wire Gas Transmitter __________________________________________________________________________________ O & M Manual Rev-P, (3/20) - 18 - SPARE PARTS LIST B12 Part Number Description 01-0068 Low Range Oxidant transmitter circuit board 01-0069 Hi Range Oxidant transmitter circuit board 01-0070 NH3 transmitter circuit board 01-0071 CO transmitter circuit board 01-0072 H2 transmitter circuit board 01-0073 O2 transmitter circuit board 01-0074 COCl2 transmitter circuit board 01-0075 HCl transmitter circuit board 01-0076 HCN transmitter circuit board 01-0077 HF transmitter circuit board 01-0078 H2S transmitter circuit board 01-0079 NO transmitter circuit board 01-0080 NO2 transmitter circuit board 01-0081 SO2 transmitter circuit board 01-0082 Low Range Hydride transmitter circuit board 01-0083 Hi Range Hydride transmitter circuit board 01-0084 H2O2 Low range transmitter circuit board 01-0085 Low Range Oxidant remote transmitter circuit board 01-0086 Hi Range Oxidant remote transmitter circuit board 01-0101 Super Hi Range Hydride transmitter circuit board 01-0148 H2O2 High range transmitter circuit board 01-0251 NOx transmitter circuit board 01-0255 C2H2 transmitter circuit board 01-0273 Organic Vapors transmitter circuit board 01-0087 NH3 remote transmitter circuit board 01-0088 CO remote transmitter circuit board 01-0089 H2 remote transmitter circuit board 01-0090 O2 remote transmitter circuit board 01-0091 COCl2 remote transmitter circuit board 01-0092 HCl remote transmitter circuit board 01-0093 HCN remote transmitter circuit board 01-0094 HF remote transmitter circuit board 01-0095 H2S transmitter circuit board 01-0096 NO remote transmitter circuit board 01-0097 NO2 remote transmitter circuit board 01-0098 SO2 remote transmitter circuit board 01-0099 Low Range Hydride remote transmitter circuit board 01-0100 Hi Range Hydride remote transmitter circuit board 01-0102 Super Hi Range Hydride remote transmitter circuit board 01-0103 H2O2 Low range remote transmitter circuit board 01-0150 H2O2 High range remote transmitter circuit board 01-0252 NOx remote transmitter circuit board 01-0256 C2H2 remote transmitter circuit board 01-0302 Organic Vapors remote transmitter circuit board 81-0002 NEMA-4X enclosure (top and bottom) 38-0002 Terminal block plug, 2 position 92-0005 Self-tapping screw (#8-1/2")
- 21. Series B12 2-Wire Gas Transmitter __________________________________________________________________________________ O & M Manual Rev-P, (3/20) - 19 - SPARE PARTS LIST (cont’d) Part Number Description 44-0017 1/2" NPT conduit hub 44-0018 Seal ring (required for NEMA-4X rating on conduit hub) PART NO. DESCRIPTION SENSORS 00-0002 A10-xx Low Oxidant (0-3 PPM and below)(Cl2, F2, Br2, ClO2) 00-0101 1 C10-xx Low Oxidant, explosion-proof (Cl2, F2, Br2, ClO2, O3) 00-0758 2 C10-xx DC Low Oxidant, explosion-proof (Cl2, F2, Br2, ClO2, O3) 00-0606 A10-xx Low Oxidant, Remote Sensor w/25ft cable (Cl2, F2, Br2, ClO2) 00-0081 A10-xx High Oxidant (0-5 PPM and above)(Cl2, F2, Br2, ClO2) 00-0100 1 C10-xx High Oxidant, X-proof (0-5 PPM and above)(Cl2, F2, Br2, ClO2) 00-0759 2 C10-xx DC High Oxidant, X-proof (0-5 PPM and above)(Cl2, F2, Br2, ClO2) 00-0607 A10-xx High Oxidant, Remote Sensor w/25ft cable)(Cl2, F2, Br2, ClO2) 00-1097 A10-14 Low Range Ozone Gas Sensor 00-1102 1 C10-14 Low Range Ozone, Explosion Proof 00-1303 2 C10-14 DC Low Range Ozone, Explosion Proof 00-1103 A10-14 Low Range Ozone, Remote Sensor w/25ft. cable 00-1099 A10-14 High Range Ozone Gas Sensor 00-1101 1 C10-14 High Range Ozone, Explosion Proof 00-1304 2 C10-14 DC High Range Ozone, Explosion Proof 00-1104 A10-14 High Range Ozone, Remote Sensor w/25ft. cable 00-0085 A10-15 Ammonia 00-0103 1 C10-15 Ammonia, explosion-proof 00-0761 2 C10-15 DC Ammonia, explosion-proof 00-0608 A10-15 Ammonia, Remote Sensor w/25ft cable 00-0092 A10-16 Carbon Monoxide 00-0110 1 C10-16 Carbon Monoxide, explosion-proof 00-0768 2 C10-16 DC Carbon Monoxide, explosion-proof 00-0609 A10-16 Carbon Monoxide remote Sensor w/25ft cable 00-0252 10-17 Combustible Gas, explosion-proof 00-0134 A10-18 Hydrogen 00-0135 1 C10-18 Hydrogen, explosion-proof 00-0766 2 C10-18 DC Hydrogen, explosion-proof 00-0610 A10-18 Hydrogen, Remote Sensor w/25ft cable 00-0089 A10-19 Oxygen 00-0611 A10-19 Oxygen, remote Sensor w/cable 00-0107 1 C10-19 Oxygen, explosion-proof 00-0765 2 C10-19 DC Oxygen, explosion-proof 00-0136 A10-20 Phosgene 00-0612 A10-20 Phosgene, Remote Sensor w/25ft cable 00-0137 1 C10-20 Phosgene, explosion-proof 00-1305 2 C10-20 DC Phosgene, explosion-proof 00-0087 A10-21 Hydrogen Chloride 00-0613 A10-21 Hydrogen Chloride, Remote Sensor w/25ft cable 00-0105 1 C10-21 Hydrogen Chloride, explosion-proof
- 22. Series B12 2-Wire Gas Transmitter __________________________________________________________________________________ O & M Manual Rev-P, (3/20) - 20 - 00-0763 2 C10-21 DC Hydrogen Chloride, explosion-proof 00-0088 A10-22 Hydrogen Cyanide 00-0614 A10-22 Hydrogen Cyanide, Remote Sensor w/25ft cable 00-0106 1 C10-22 Hydrogen Cyanide, explosion-proof 00-0764 2 C10-22 DC Hydrogen Cyanide, explosion-proof 00-0086 A10-23 Hydrogen Fluoride 00-0615 A10-23 Hydrogen Fluoride, Remote Sensor w/25ft cable 00-0104 1 C10-23 Hydrogen Fluoride, explosion-proof 00-0762 2 C10-23 DC Hydrogen Fluoride, explosion-proof 00-0091 A10-24 Hydrogen Sulfide 00-0616 A10-24 Hydrogen Sulfide, Remote Sensor w/25ft cable 00-0109 1 C10-24 Hydrogen Sulfide, explosion-proof 00-0767 2 C10-24 DC Hydrogen Sulfide, explosion-proof 00-0093 A10-25 Nitric Oxide 00-0617 A10-25 Nitric Oxide, Remote Sensor w/25ft cable 00-0111 1 C10-25 Nitric Oxide, explosion-proof 00-0769 2 C10-25 DC Nitric Oxide, explosion-proof 00-0094 A10-26 Nitrogen Dioxide 00-0618 A10-26 Nitrogen Dioxide, Remote Sensor w/25ft 00-0112 1 C10-26 Nitrogen Dioxide, explosion-proof 00-0770 2 C10-26 DC Nitrogen Dioxide, explosion-proof 00-0084 A10-27 Sulfur Dioxide 00-0619 A10-27 Sulfur Dioxide, Remote Sensor w/25ft cable 00-0102 1 C10-27 Sulfur Dioxide, explosion-proof 00-0760 2 C10-27 DC Sulfur Dioxide, explosion-proof 00-0096 A10-xx Low Range Hydrides (0-1000 PPB)* 00-0620 A10-xx Low Range Hydrides, Remote Sensor w/25ft. cable * 00-0114 1 C10-xx Low Range Hydrides, explosion-proof (0-1000 PPB)* 00-0773 2 C10-xx DC Low Range Hydrides, explosion-proof (0-1000 PPB)* 00-0095 A10-xx Hi Range Hydrides (5-100 PPM)* 00-0621 A10-xx Hi Range Hydrides, Remote Sensor w/25ft cable * 00-0113 1 C10-xx Hi Range Hydrides, explosion proof (5-100 PPM)* 00-0771 2 C10-xx DC Hi Range Hydrides, explosion proof (5-100 PPM)* 00-0621 A10-xx Super Hi Range Hydrides (500-1000 PPM)* 00-0622 A10-xx Super Hi Range Hydrides, Remote Sensor w/25ft cable 00-0713 1 C10-xx Super Hi Range Hydrides, explosion proof (500-1000 PPM)* 00-0772 2 C10-xx DC Super Hi Range Hydrides, explosion proof (500-1000 PPM)* 00-0142 A10-34 Hydrogen Peroxide 00-0623 A10-34 Hydrogen Peroxide, Remote Sensor w/25ft cable 00-0143 1 C10-34 Hydrogen Peroxide, explosion proof 00-0925 A10-37 ETO 00-1052 1 C10-37 ETO, explosion proof 00-1307 2 C10-37 DC ETO, explosion proof 00-1045 A10-38 Formaldehyde 00-1053 1 C10-38 Formaldehyde, explosion proof 00-1308 2 C10-38 DC Formaldehyde, explosion proof 00-0727 A10-39 Alcohol 00-0730 1 C10-39 Alcohol, explosion proof 00-1306 2 C10-39 DC Alcohol, explosion proof 00-0964 A10-40 C2H2 00-1413 A10-40 C2H2 Remote Sensor w/25’ cable 00-1202 1 C10-40 C2H2, explosion proof 00-1417 A10-42 NOx 00-1496 A10-45 Organic Vapors (specify gas) 00-1524 1 C10-45 Organic Vapors, explosion proof (specify gas)
- 23. Series B12 2-Wire Gas Transmitter __________________________________________________________________________________ O & M Manual Rev-P, (3/20) - 21 - NOTE: 1 - Ribbon Cable Style Sensors 2 – Leaded Style Sensors INSERTION SENSORS 00-0815 G10-xx Lo Oxidant 00-0816 G10-xx Hi Oxidant 00-1109 G10-14 Low Range Ozone 00-1110 G10-14 High Range Ozone 00-0817 G10-15 Ammonia 00-0818 G10-16 Carbon Monoxide 00-0819 G10-18 Hydrogen 00-0820 G10-19 Oxygen 00-0821 G10-20 Phosgene 00-0822 G10-21 Hydrogen Chloride 00-0823 G10-22 Hydrogen Cyanide 00-0824 G10-23 Hydrogen Fluoride 00-0825 G10-24 Hydrogen Sulfide 00-0826 G10-25 Nitric Oxide 00-0827 G10-26 Nitrogen Dioxide 00-0828 G10-27 Sulfur Dioxide 00-0829 G10-xx Lo Range Hydride 00-0830 G10-xx Hi Range Hydride 00-0831 G10-xx Super Hi Hydride 00-0832 G10-34 Hydrogen Peroxide, Low range 00-1087 G10-34 Hydrogen Peroxide, High range 00-1454 G10-34 Hydrogen Peroxide, Special high range 00-1309 G10-37 ETO 00-1310 G10-38 Formaldehyde 00-0833 G10-39 Alcohol 00-1202 G10-42 NOx 00-1303 G10-45 Organic Vapors (specify Gas) Note: 1. Asterisk indicates Hydrides (AsH3, B2H6, GeH4, H2Se, PH3, SiH3)
- 24. PRODUCT WARRANTY Analytical Technology, Inc. (Manufacturer) warrants to the Customer that if any part(s) of the Manufacturer's equipment proves to be defective in materials or workmanship within the earlier of 18 months of the date of shipment or 12 months of the date of start- up, such defective parts will be repaired or replaced free of charge. Inspection and repairs to products thought to be defective within the warranty period will be completed at the Manufacturer's facilities in Collegeville, PA. Products on which warranty repairs are required shall be shipped freight prepaid to the Manufacturer. The product(s) will be returned freight prepaid and allowed if it is determined by the manufacturer that the part(s) failed due to defective materials or workmanship. This warranty does not cover consumable items, batteries, or wear items subject to periodic replacement including lamps and fuses. Gas sensors carry a 12 months from date of shipment warranty and are subject to inspection for evidence of misuse, abuse, alteration, improper storage, or extended exposure to excessive gas concentrations. Should inspection indicate that sensors have failed due to any of the above, the warranty shall not apply. The Manufacturer assumes no liability for consequential damages of any kind, and the buyer by acceptance of this equipment will assume all liability for the consequences of its use or misuse by the Customer, his employees, or others. A defect within the meaning of this warranty is any part of any piece of a Manufacturer's product which shall, when such part is capable of being renewed, repaired, or replaced, operate to condemn such piece of equipment. This warranty is in lieu of all other warranties ( including without limiting the generality of the foregoing warranties of merchantability and fitness for a particular purpose), guarantees, obligations or liabilities expressed or implied by the Manufacturer or its representatives and by statute or rule of law. This warranty is void if the Manufacturer's product(s) has been subject to misuse or abuse, or has not been operated or stored in accordance with instructions, or if the serial number has been removed. Analytical Technology, Inc. makes no other warranty expressed or implied except as stated above.
- 25. WATER QUALITY MONITORS Dissolved Oxygen Free Chlorine Combined Chlorine Total Chlorine Residual Chlorine Dioxide Potassium Permanganate Dissolved Ozone pH/ORP Conductivity Hydrogen Peroxide Peracetic Acid Dissolved Sulfide Residual Sulfite Fluoride Dissolved Ammonia Turbidity Suspended Solids Sludge Blanket Level MetriNet Distribution Monitor GAS DETECTION PRODUCTS NH3 Ammonia CO Carbon Monoxide H2 Hydrogen NO Nitric Oxide O2 Oxygen CO Cl2 Phosgene Br2 Bromine Cl2 Chlorine ClO2 Chlorine Dioxide F2 Fluorine I2 Iodine HX Acid Gases C2H4O Ethylene Oxide C2H6O Alcohol O3 Ozone CH4 Methane (Combustible Gas) H2O2 Hydrogen Peroxide HCl Hydrogen Chloride HCN Hydrogen Cyanide HF Hydrogen Fluoride H2S Hydrogen Sulfide NO2 Nitrogen Dioxide NOx Oxides of Nitrogen SO2 Sulfur Dioxide H2Se Hydrogen Selenide B2H6 Diborane GeH4 Germane AsH3 Arsine PH3 Phosphine SiH4 Silane HCHO Formaldehyde C2H4O3 Peracetic Acid DMA Dimethylamine