
Recommended
More Related Content
What's hot
What's hot (20)
Similar to Imaging in oral implantology
Similar to Imaging in oral implantology (20)
More from Anish Amin
More from Anish Amin (11)
Recently uploaded
Recently uploaded (20)
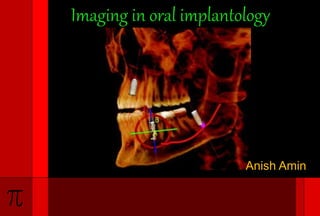
Imaging in oral implantology
- 1. Imaging in oral implantology Anish Amin
- 2. Digital radiography Cone beam volumetric tomography Imaging of vital structures Phases of imaging Introduction Interactive computed tomography. Periapical radiography Conclusion References Panoramic radiography Imaging modalities. Tomography & computed tomography Diagnostic templates CONTENTS
- 3. › The widespread use of dental implants in partially and completely edentulous patients has brought about a need to preoperatively depict and quantify the accurate bone height and contour and location of vital anatomic structures by radiographic examination › Multiple factors influence the selection of radiographic technique(s) for a particular case, including cost, availability, radiation exposure, and case type. › Diagnostic imaging techniques must always be interpreted in conjunction with a good clinical examination. › The decision is a balance between these factors and the Introduction
- 5. 1) Pre-surgical implant imaging oTo assess the overall status of the remaining dentition oTo identify and characterize the location and nature of the edentulous regions, particularly to determine the quantity , quality and angulations of boneo To determine the relationship of critical structures to the proposed implant site o To detect regional anatomic
- 6. 2) Surgical & intraoperative implant imaging › Evaluates the sites during and immediately after surgery › Assist in the optimal position and orientation of dental implants › To evaluate the healing and integration phase of implant surgery
- 7. 3) Post-prosthetic imaging › To evaluate the long-term maintenance of implant rigid fixation and function › To assess the Crestal bone levels around each implant › To evaluate the implant complex
- 8. Imaging modalities › The decision to image the patient is based on the patients clinical needs and its availability. › Imaging modalities can be: Analog / Digital imaging modalities Two-dimensional / Three –dimensional imaging modalities
- 9. Periapical radiography Indications: ›Evaluation of small edentulous spaces , Eg: in case of single tooth replacement ›Alignment and orientation of implants during surgery ›Recall/maintenance evaluations Intraoral periapical radiograph displaying the implant placed at the site of 11, and its relation to
- 10. oAmount of bone loss and peri- implantitis can be visualized oSubtle variations in bone activity is clearly seen oMinimal magnification with high resolution oThey are easy to obtain in the dental Advantage
- 11. Disadvantages oThey are susceptible to unpredictable magnification of anatomic structures, which does not allow reliable measurements. o Distortion is particularly accentuated in edentulous areas, where missing teeth and resorption of the alveolus necessitate film placement at significant angulation
- 12. Disadvantages ›Periapical radiographs are two-dimensional representations of three- dimensional objects and do not provide any information of the buccal-lingual dimension of the alveolar ridge. Structures that are
- 13. Disadvantages › The periapical image is limited by the size of film being used › Often, it is not possible to image the entire height of the remaining alveolar ridge, and when extensive mesial-distal areas need to be evaluated, multiple periapical films are required
- 14. Digital radiography › Process wherein the film is replaced by a sensor that collects the data › The analog information received is then interpreted by specialized software and an image is formulated by a computer monitor
- 15. › The resultant image can be modified in terms of gray scale, brightness, contrast, inversion and color enhancement › Computerised software programs like Dexisimplant are available that allowing for calibration of magnified images , ensuring accurate measurements
- 16. Advantages › Less radiation › Superior resolution › Instantaneous speed of image formation is highly useful during surgical placement of implants and the prosthetic verification of component placement Disadvantage› Size and thickness of the film and position of the connecting cord sometimes makes film placement difficult in some sites , such as those adjacent to tori or in case of tapered arch form in the region of canines
- 17. Panoramic radiograph o They display image slices through the jaws by producing a single image of the maxilla and mandible and their supporting structures in a frontal plane o The image receptor is either the radiograph film or can also be a digital storage phosphor plate or a digital charge – coupled device receptor
- 18. Indications: › Indicated when multiple implant placements are planned. › Initial assessment of vertical height of bone › Evaluation of gross anatomy of the jaws and any related pathologic findings
- 19. oThey display anatomic structures like nasal cavity, maxillary sinus, inferior alveolar canal and mental foramen. Advantages: o Convenience, ease and speed in performance dental office
- 20. Disadvantages o The resolution is lesser when compared to intraoral radiograph.o Cross sectional view is not demonstrated and is of little use in depicting the spatial relationship between the structureso A10-20% image magnification occurs, which is non uniform. This magnification is undesirable for both implant selection and implant site assessments. o Geometric distortion and overlapping of images of teeth can occur. o Overlapping of anterior region by vertebral column occurs.
- 21. Tomography Tomo= slice ; Graph=picture o Tomographic units produce cross-sectional slices of the jaws that can be as thin as 1 mm and are suitable for pre- and post-implant assessment o This technique enables the visualization of patient’s anatomy by blurring regions above and below the section
- 22. › The basic principle of tomography is that the x-ray tube and film are connected by a rigid bar called the fulcrum bar, which pivots on a point called fulcrum. › When the system is energized, the x-ray tube moves in one direction with the film plane moving in the opposite direction and the system pivoting about the fulcrum › The fulcrum remains stationary and defines the section of interest or the tomographic layer
- 23. › Different patterns of movement, including linear, circular, spiral or hypocycloidal have been attempted to reduce blurring artifacts and provide a sharper and more useful image. › Linear tomography is the simplest form , which has a one dimensional motion and produces blurring of adjacent sections and results in linear steak artifacts in the resulting image, which may obfuscate the section of
- 24. ›Circular, spiral and hypocycloidal are two- dimensional motions ›Hypocycloidal is generally accepted as the most effective blurring motion ›This technique is difficult
- 25. tomography › This technique enables the appreciation of spatial relationship between the critical structures and the implant site and quantification of the geometry of the implant site. The tomographic layers are thick and have adjacent structures that are blurred and superimposed on the image, limiting the usefulness of this technique for individual sites,
- 26. Advantages ›Cross- sectional views ›Constant magnification Disadvantages: ›Technique- sensitive ›Blurred images ›High radiation dose ›Multiple images needed ›Expensive
- 27. Computerised Tomography o CT is a digital imaging technique, which can generate 3D images using a very narrow “fan beam” that rotates around the patient, acquiring one thin slice (image) with each revolution o It was first applied successfully in implantology in the 1980s. The dental CT can be performed with a conventional CT, a spiral CT or a multislice CT scanner
- 28. o It allows clinicians to visualize the bony architecture, nerves, joints, sinuses and other structures much more completely than traditional flat radiographs o CT scans have been shown to be very accurate with the magnification effect, the same for both the anterior and posterior area, from a range of 0% to 6% in
- 29. Advantages › Negligible magnification › High contrast image › 3 dimensional bone models › Interactive treatment planning Disadvantages: ›High dose of radiation ›Technique – sensitive ‘FAN BEAM” Geometry
- 30. Recent advances in CT Cone Beam Volumetric Tomography Microtomograph
- 31. Dentascan oDentaScan is a computed tomography (CT) software program that allows the mandible and maxilla to be imaged in three planes: axial, panoramic and cross- sectional. o Data acquisition time for maxilla or mandible is about 15 min.
- 32. Cone Beam Volumetric Tomography › Because of higher radiation exposure, higher cost, huge footprint and difficulty in accessibility associated with CT, a new type of CT, CBVT was developed. NewTom 3G by AFP MercuRay by Hitachi 3D Accuitomo by J. Morita
- 33. The images recorded are placed onto a charge- coupled device chip and is then converted into axial, sagittal and coronal slices and permit reformatting to view traditional radiographic images as well as 3- dimensional soft The x- ray tube on these scanners rotates around 360 degrees and will capture images of the maxilla and mandible in 36 seconds , in which only 5.6 seconds is needed for exposure “ Cone beam” geometry
- 34. Indications: CBVT allows precise measurement of distance, area and volume.
- 35. › Assessment of the positions and states of the structures critical for adequate implant placement (e.g., inferior alveolar canal, location of the neurovascular bundle and the incisive and mental foramina, pneumatization of the maxillary sinus, floor of the maxillary sinus, nasal fossa); Indications:
- 36. Indications › Examination after placement of implants and bone grafts; › Evaluation of bone resorption and root retention, as well as lesions of the facial skeleton.
- 37. › Patients with claustrophobia, › Parkinson disease › tremors › disabling conditions that might cause a patient to be uncooperative Contraindications
- 38. Advantages o lower cost and more feasible compared to the computerised tomography o Radiation dose from a CBVT scanner is approx. 12.0 mSv , which is equivalent to 25 % of radiation from a typical panoramic radiograph or to five D-speed dental x-rays o Almost 0% magnification o No superimposition or overlapping of images, hence minimal distortion
- 39. Interactive computed tomography › This technique enables the radiologist to transfer the imaging study to the practitioner as a computer file and enables the practitioner to view and interact with the imaging study on their own computer
- 40. › It helps to measure the length and the width of the alveolus, measure bone quality and change the window and level of the grayscale of the study to enhance the perception of critical structures
- 41. An important feature of ICT is that the dentist and radiologist can perform electronic surgery (ES) by selecting and placing arbitrary- sized cylinders that simulate root form implants in the images. With an appropriately designed diagnostic template, ES can be performed to develop the patient’s treatment plan electronically in 3D
- 42. Superimposed on the CBVT image, electronic implants can be virtually previewed at arbitrary positions and orientations with respect to each other, the alveolus, critical structures and the prospective occlusion and esthetics. ES and ICT enable the development of a 3D treatment plan that is integrated with the patient’s anatomy and can be visualized before surgery.
- 43. Surgical guides › Computer generated drilling guides that are fabricated through the process of stereolithography using SimPlant software for ideal implant positioning
- 44. The diameter of the drilling tube is usually 0.2 mm larger than the corresponding drill, thus making angle deviation highly unlikely These successive diameter surgical osteotomy drill guides may be either bone, teeth or mucosa- borne Surgiguides have metal cylindrical tubes that correspond to the number of desired osteotomy preparations and specific drill diameters
- 45. CT based surgical guidance templates and navigation systems ›These systems allow the transfer of the pre-surgical plan to the patient , thus indicating when there is deviation from the predetermined drilling parameters ›Therefore the depth and trajectory of drilling sequence is made to the exact location of the pre-planned position
- 46. Imaging of vital structures in oral implantology
- 47. Mental foramen and mandibular canal › While using the two-dimensional radiographs for imaging Mental foramen and mandibular canal ,it is mainly dependent on the positioning. › The x-ray beam must be perpendicular to the tangent of the area in question between the foramen and the most anterior tooth
- 48. › If the image is taken from the mesio-oblique orientation, measurements will be fore-shortened › If disto-obliquely oriented then measurements will be elongated › Always the radiographic density should not increase above 2.8, after which the foramina becomes less apparent
- 49. › In edentulous mandibles, the risk of error is high because of the increased resorption of alveolar crest Studies have shown that the location of mental foramen on periapical and panoramic radiograph are inaccurate and sometimes on panoramic radiograph it represents a portion of
- 50. › Several studies have shown CT to be the most accurate and highly recommended when measurements are needed for the inferior alveolar canal and mental foramen
- 51. Mandibular lingual concavities › When there is advanced atrophy of posterior mandible, lingual concavities may be present › Within these concavities branches of facial artery may be present › Over estimation of the amount of bone may lead to perforation of lingual plate when drilling with
- 52. Mandibular ramus › Donor site for autogenous onlay bone grafting and is extremely variable in the amount of bone present . Hence adequate assessment of host bone present is not possible › Recommended : CT
- 53. Mandibular symphysis › Donor site for autogenous graft › Panoramic radiographs mostly overestimate the height of the available bone in the anterior region › An imaging technique that depicts the true bucco- lingual amount of bone is recommended › Recommended: conventional CT
- 54. Maxillary sinus › For implant placement detailed information is needed regarding the position of septa, maxillary sinus anatomy, sinus pathologies No radiographic modality till date gives more information on the above mentioned features than CT and hence
- 55. Intraoperative imaging › To verify the positioning and location of an osteotomy site or for identification of a vital structure, processing of standard radiograph film can take upto 6 minutes and hence is time- ineffcient › Current day digital imaging system gives instant images that can be manipulated, and allows accurate measurements and maintains aseptic protocol
- 56. Immediate post operative imaging › A periapical or panoramic radiograph should be taken post surgically so that a baseline image can be used to evaluate against future images › Additional imaging tools may be used to evaluate a zone of safety around the vital structures
- 57. Abutment and prosthetic component imaging › When evaluating for transfer of impressions along with the two- piece implant abutment component placement , radiographs should be taken to verify secure adaptation › Intraoral radiographs are recommended because of their high geometric resolution to evaluate for any fit discrepancy › X-ray beam should be directed at right angle to the longitudinal axis of the implant. Even a slight angulation may allow a slight gap to be noticed
- 58. Post prosthetic imaging › When investigating complications after implant placement, a panoramic radiograph is the most ideal technique › Whenever Single implant image or a detailed information of implant viewed on panoramic image is needed, a periapical radiograph › A post prosthetic radiograph helps in future evaluation of component fit verification and also
- 59. Recall and maintenance imaging › Follow up or recall radiographs are to be taken 1 year of functional loading and yearly for the first 3 years to asses the marginal bone levels
- 60. Radiographic sequence for dental implants imaging › Pretreatment › Immediate post surgical (baseline) › Healing period ( if necessary) › Second stage surgery › Post prosthetic surgery ( baseline) › 1 year postoperatively › After 1st year, every 2 years
- 61. Fabrication of diagnostic templates › The surfaces of the proposed restorations and the exact position and orientation of each dental implant should be incorporated into the diagnostic CT templates The design may vary from a vaccuformed reproduction of the wax-up - to one processed from acrylic reproduction of the diagnostic wax-up – to a
- 62. › The processed acrylic template may be modified by coating the proposed restorations with a thin film of barium sulfate and filling a hole drilled through the occlusal surface of the restoration with a gutta-percha › While radiographic examination GP point will be seen as radiopaque and will help in determining the position and orientation of the proposed implant
- 63. The next design modifies the previous design by drilling a 2 mm hole through the occlusal surface of the proposed restoration at the ideal position and orientation of the proposed implant site with a twist drill The vaccuform templates involve either coating of the proposed restorations with a thin film of barium sulfate. This does not depict the ideal position and orientation of the proposed implant Another method is to blend 10% barium sulfate and 90% cold cure acrylic , which makes the proposed restoration radiopaque and evident but again does not give idea about the position and orientation
- 64. › Recently radiographic teeth specifically designed for the fabrication of diagnostic templates have been introduced . › These are time saving, placed easily, provide consistently high radiopacity, have molds corresponding to prosthetic teeth used in the final restoration and are bonded easily with the template-based material
- 65. Conclusion › Although many modalities are available for imaging the implant site, the correct and required technique should be adopted depending on the case and the clinician’s judgment to interpret the image acquired. › The choice of pre-implant imaging must be considered carefully due to the radiation dose, the cost of each examination and the anticipated information that may be provided by the imaging
- 66. References › Misch CE. Contemporary implant dentistry. 3rd ed. St. Louis: Mosby Elsevier; 2008.Diagnostic imaging and techniques; p.38-67. › White SC, Pharoah MJ. Oral Radiology: Principles and Interpretation. 6th ed. St. Louis: Mosby Elsevier; 2009. › Mi les DA. The future of dental and maxillofacial imaging. Dent Clin North Am 2008; 52: 917-28. › Frederiksen NL. Diagnostic imaging in dental implantology. Oral Surgery Oral Medicine Oral
- 67. References › Ganz SD. Presurgical planning with CT-derived fabrication of surgical guides. J Oral Maxillofac Surg 2005; 63: 59-71. › Reiskin AB. Implant imaging. DCNA 1998; 42: 47-56. › Rashedi B, DMD, Tyndall DA. Tuned aperture computed tomography for cross-sectional implant site assessment in the posterior mandible. J Prosthodont 2003; 12: 176. › Vercruyssen M, Jacobs R, Van Assche N, van Steenberghe D. The use of CT scan based planning for oral rehabilitation by means of implants and its transfer to the surgical field: A critical review on accuracy. J Oral Rehabil 2008; 35: 454-74.
- 68. References o Dula K, Mini R, van der Stelt PF, Buser D. The radiographic assessment of implant patients: decision-making criteria. Int J Oral Maxillofac Implants. 2011; 16: 80-9. 2. oChau AC, Fung K. Comparison of radiation dose for implant imaging using conventional spiral tomography, computed tomography, and cone-beam computed tomography. Oral Surg Oral Med Oral Pathol Oral Radiol Endod. 2009; 107: 559-65. oTyndall DA, Price JB, Tetradis S, Ganz SD, Hildebolt C, Scarfe WC, et al. Position statement of the American Academy of Oral and Maxillofacial Radiology on selection criteria for the use of radiology in dental implantology with emphasis on cone beam computed
- 70. Imaging in oral implantology Anish Amin
Editor's Notes
- The widespread use of dental implants in partially and completely edentulous patients has brought about a need to preoperatively depict and quantify the accurate bone height and contour and location of vital anatomic structures by radiographic examination Multiple factors influence the selection of radiographic technique(s) for a particular case, including cost, availability, radiation exposure, and case type. Diagnostic imaging techniques must always be interpreted in conjunction with a good clinical examination. The decision is a balance between these factors and the desire to minimize risk of complications to the patient.
- There are three phases of imaging when it comes to oral implantology Phase 1 -Pre-surgical implant imaging Phase II Surgical and intraoperative implant imaging Phase III Post-prosthetic imaging
- The purpose of this pre surgical implant imaging is To assess the overall status of the remaining dentition To identify and characterize the location and nature of the edentulous regions, particularly to determine the quantity , quality and angulations of bone To determine the relationship of critical structures to the proposed implant site To detect regional anatomic abnormalities and pathologies. The reason is …Any of these factors may have important ramifications in the overall timing and sequencing of treatment phases, such as implant loading protocols and post prosthetic occlusal protection.
- Imaging during the Surgical & intraoperative phase is also very important as presurgical imaging for reasons like It helps to Evaluate the sites during and immediately after surgery Assist in the optimal position and orientation of dental implants It aids in evaluating the healing and integration phase of implant surgery It helps To ensure abutment position and prosthesis fabrication
- Post-prosthetic imaging This phase commences just after the placement of prosthesis and continues as long as the implants remain in the jaws To evaluate the long-term maintenance of implant rigid fixation and function To assess the Crestal bone levels around each implant To evaluate the implant complex
- Moving onto the imaging modalities used in oral implantology The decision to image the patient is based on the patients clinical needs and its availability. Imaging modalities can be: Analog / Digital imaging modalities Two-dimensional / Three –dimensional imaging modalities
- Periapical radiography is indicated to Evaluate small edentulous spaces , Eg: in case of single tooth replacement To assess the Alignment and orientation of implants during surgery During Recall/maintenance evaluations
- Advantages of this technique are Amount of bone loss and peri- implantitis can be visualized Subtle variations in bone activity is clearly seen Overall they provide an assessment of the quantity and quality of the edentulous alveolar ridge and the adjacent teeth. They are easy to obtain in the dental office, Inexpensive Deliver low radiation to the patient
- The disadvantages of periapical radiography is that They are susceptible to unpredictable magnification of anatomic structures, which does not allow reliable measurements. Distortion is particularly accentuated in edentulous areas, where missing teeth and resorption of the alveolus necessitate film placement at significant angulation in relation to the long axis of the teeth and alveolar bone
- Periapical radiographs are two-dimensional representations of three-dimensional objects and do not provide any information of the buccal-lingual dimension of the alveolar ridge. Structures that are distinctly separated in the buccal-lingual dimension appear to be overlapping.
- Often the image is limited by the size of film being used Often, it is not possible to image the entire height of the remaining alveolar ridge, and when extensive mesial-distal areas need to be evaluated, multiple periapical films are required
- Moving onto the digital radiography It is a Process wherein the film is replaced by a sensor that collects the data The analog information received is then interpreted by specialized software and an image is formulated by a computer monitor
- The resultant image can be modified in terms of gray scale, brightness, contrast, inversion and color enhancement Computerised software programs like Dexisimplant are available that allowing for calibration of magnified images , ensuring accurate measurements
- Digital radiography has a few advantages like Less radiation Superior resolution Instantaneous speed of image formation is highly useful during surgical placement of implants and the prosthetic verification of component placement The disadvantage of digital radiography is that Size and thickness of the film and position of the connecting cord sometimes makes film placement difficult in some sites , such as those adjacent to tori or in case of tapered arch form in the region of canines
- Moving onto the panoramic radiography They display image slices through the jaws by producing a single image of the maxilla and mandible and their supporting structures in a frontal plane The image receptor is either the radiograph film or can also be a digital storage phosphor plate or a digital charge – coupled device receptor
- Panoramic radiography is indicated when multiple implant placements are planned. For the Initial assessment of vertical height of bone For Evaluation of gross anatomy of the jaws and any related pathologic findings
- The advantages of panoramic radiography are They display anatomic structures like nasal cavity, maxillary sinus, inferior alveolar canal and mental foramen. Convenient, easy and faster to use in dental clinics
- Panoramic radiography has several disadvantages as well.. These are Mainly ….The resolution is lesser when compared to intraoral radiograph. Cross sectional view is not demonstrated and is of little use in depicting the spatial relationship between the structures A10-20% image magnification occurs, which is non uniform. This magnification is undesirable for both implant selection and implant site assessments. Geometric distortion and overlapping of images of teeth can occur. Overlapping of anterior region by vertebral column occurs.
- Now… moving onto Tomography It is a greek word which is tomo means slice and graph means picture Tomographic units produce cross-sectional slices of the jaws that can be as thin as 1 mm and are suitable for pre- and post-implant assessment This technique enables the visualization of patient’s anatomy by blurring regions above and below the section of interest.
- The basic principle of tomography is that the x-ray tube and film are connected by a rigid bar called the fulcrum bar, which pivots on a point called fulcrum. When the system is energized, the x-ray tube moves in one direction with the film plane moving in the opposite direction and the system pivoting about the fulcrum The fulcrum remains stationary and defines the section of interest or the tomographic layer
- Different patterns of movement, including linear, circular, spiral or hypocycloidal have been attempted to reduce blurring artifacts and provide a sharper and more useful image. Linear tomography is the simplest form , which has a one dimensional motion and produces blurring of adjacent sections and results in linear steak artifacts in the resulting image, which may obfuscate the section of interest
- Circular, spiral and hypocycloidal are two- dimensional motions Hypocycloidal is generally accepted as the most effective blurring motion This technique is difficult to use in cases of multiple implant sites.
- Coming to transtomography This technique enables the appreciation of spatial relationship between the critical structures and the implant site and quantification of the geometry of the implant site. The tomographic layers are thick and have adjacent structures that are blurred and superimposed on the image, limiting the usefulness of this technique for individual sites, especially in the anterior regions where the geometry of the alveolus changes rapidly.
- The advantages of conventional tomography are It porduces Cross- sectional views And the magnification is constant The disadvantages of this technique are Technique- sensitive Blurred images High radiation dose Multiple images needed Expensive
- Moving onto another type of tomography that is Computed tomography It is a digital imaging technique, which can generate 3D images using a very narrow “fan beam” that rotates around the patient, acquiring one thin slice (image) with each revolution It was first applied successfully in implantology in the 1980s. The dental CT can be performed with a conventional CT, a spiral CT or a multislice CT scanner
- It allows clinicians to visualize the bony architecture, nerves, joints, sinuses and other structures much more completely than traditional flat radiographs CT scans have been shown to be very accurate with the magnification effect, the same for both the anterior and posterior area, from a range of 0% to 6% in horizontal as well as 0-4% in the vertical dimension.
- The advantages of this Computed Tomography are Negligible magnification High contrast image 3 dimensional bone models Interactive treatment planning The disadvantages are High dose of radiation Technique – sensitive Expensive
- Coming DentaScan It is a computed tomography (CT) software program that allows the mandible and maxilla to be imaged in three planes: axial, panoramic and cross-sectional. Data acquisition time for maxilla or mandible is about 15 min. The effective dose of the standard DentaScan Protocol is around 8.16 mSv
- Moving on to one of the advanced technique CBVT…CONE BEAM VOLUMETRIC TOMOGRAPHY Because of higher radiation exposure, higher cost, huge footprint and difficulty in accessibility associated with CT, a new type of CT, CBVT was developed.
- The x- ray tube on these scanners rotates around 360 degrees and will capture images of the maxilla and mandible in 36 seconds , in which only 5.6 seconds is needed for exposure The images recorded are placed onto a charge- coupled device chip and is then converted into axial, sagittal and coronal slices and permit reformatting to view traditional radiographic images as well as 3- dimensional soft tissue or osseous images
- CBVT is mainly indicated for the reason being it allows precise measurement of distance, area and volume.
- It helps to Assessof the positions and states of the structures critical for adequate implant placement (e.g., inferior alveolar canal, location of the neurovascular bundle and the incisive and mental foramina, pneumatization of the maxillary sinus, floor of the maxillary sinus, nasal fossa);
- It is also useful in Examination after placement of implants and bone grafts; In Evaluation of bone resorption and root retention, as well as lesions of the facial skeleton.
- CBVT is contraindicated in Patients with claustrophobia, Parkinson disease tremors disabling conditions that might cause a patient to be uncooperative
- The advantages of CBVT are Radiation dose from a CBVT scanner is approx. 12.0 mSv , which is equivalent to 25 % of radiation from a typical panoramic radiograph or to five D-speed dental x-rays Almost 0% magnification No superimposition or overlapping of images, hence minimal distortion lower cost and more feasible compared to the computerised tomography
- Moving on to another advanced technique .. Interactive computed tomography This technique enables the radiologist to transfer the imaging study to the practitioner as a computer file and enables the practitioner to view and interact with the imaging study on their own computer
- It helps to measure the length and the width of the alveolus, measure bone quality and change the window and level of the grayscale of the study to enhance the perception of critical structures
- An important feature of ICT is that the dentist and radiologist can perform electronic surgery (ES) by selecting and placing arbitrary-sized cylinders that simulate root form implants in the images. With an appropriately designed diagnostic template, ES can be performed to develop the patient’s treatment plan electronically in 3D
- Superimposed on the CBVT image, electronic implants can be virtually previewed at arbitrary positions and orientations with respect to each other, the alveolus, critical structures and the prospective occlusion and esthetics. ES and ICT enable the development of a 3D treatment plan that is integrated with the patient’s anatomy and can be visualized before surgery.
- Coming to the surgical guides These are …Computer generated drilling guides that are fabricated through the process of stereolithography using SimPlant software for ideal implant positioning
- These successive diameter surgical osteotomy drill guides may be either bone, teeth or mucosa-borne Surgiguides have metal cylindrical tubes that correspond to the number of desired osteotomy preparations and specific drill diameters The diameter of the drilling tube is usually 0.2 mm larger than the corresponding drill, thus making angle deviation highly unlikely
- Moving on to the CT based surgical guidance templates and navigation systems These systems allow the transfer of the pre-surgical plan to the patient , thus indicating when there is deviation from the predetermined drilling parameters Therefore the depth and trajectory of drilling sequence is made to the exact location of the pre-planned position
- Coming to the Imaging of vital structures in oral implantology
- Coming to the The mental foramen and the mandibular canal… While using the two-dimensional radiographs for imaging Mental foramen and mandibular canal ,it is mainly dependent on the positioning. The x-ray beam must be perpendicular to the tangent of the area in question between the foramen and the most anterior tooth
- If the image is taken from the mesio-oblique orientation, measurements will be fore-shortened If disto-obliquely oriented then measurements will be elongated Always the radiographic density should not increase above 2.8, after which the foramina becomes less apparent
- In edentulous mandibles, the risk of error is high because of the increased resorption of alveolar crest Studies have shown that the location of mental foramen on periapical and panoramic radiograph are inaccurate and sometimes on panoramic radiograph it represents a portion of the mental canal as it leaves the mandibular canal
- Several studies have shown CT to be the most accurate and highly recommended when measurements are needed for the inferior alveolar canal and mental foramen
- Next are the Mandibular lingual concavities When there is advanced atrophy of posterior mandible, lingual concavities may be present Within these concavities branches of facial artery may be present Over estimation of the amount of bone may lead to perforation of lingual plate when drilling with the osteotomy CT is the recommended method
- Coming to the mandibular ramus Donor site for autogenous onlay bone grafting and is extremely variable in the amount of bone present . Hence adequate assessment of host bone present is not possible Recommended : CT
- Moving onto the mandibular symphysis.. It is the Donor site for autogenous graft Panoramic radiographs mostly overestimate the height of the available bone in the anterior region An imaging technique that depicts the true bucco-lingual amount of bone is recommended Recommended technique for this region is : conventional CT
- Imaging of the maxillary sinus area is also necessary …because For implant placement detailed information is needed regarding the position of septa, maxillary sinus anatomy, sinus pathologies No radiographic modality till date gives more information on the above mentioned features than CT and hence considered as the gold standard for evaluation of sinuses
- Intraoperative imaging is also of equal importance as the pre surgical imaging The reasons being To verify the positioning and location of an osteotomy site or for identification of a vital structure, processing of standard radiograph film can take upto 6 minutes and hence is time- ineffcient Current day digital imaging system gives instant images that can be manipulated, and allows accurate measurements and maintains aseptic protocol
- Speaking about the immediate post operative imaging A periapical or panoramic radiograph should be taken post surgically so that a baseline image can be used to evaluate against future images Additional imaging tools may be used to evaluate a zone of safety around the vital structures
- coming to the abutment and prosthetic component imaging When evaluating for transfer of impressions along with the two- piece implant abutment component placement , radiographs should be taken to verify secure adaptation Intraoral radiographs are recommended because of their high geometric resolution to evaluate for any fit discrepancy X-ray beam should be directed at right angle to the longitudinal axis of the implant. Even a slight angulation may allow a slight gap to be noticed If periapical radiographs is difficult to place, Bitewing radiographs or panoramic radiography can also be used .
- Now the post prosthetic imaging When investigating complications after implant placement, a panoramic radiograph is the most ideal technique Whenever a Single implant image or detailed information of implant viewed on panoramic image is needed a periapical radiograph is taken A post prosthetic radiograph helps in future evaluation of component fit verification and also for marginal bone level evaluation
- Coming to the recall and maintenance imaging Follow up or recall radiographs are to be taken 1 year of functional loading and yearly for the first 3 years to asses the marginal bone levels
- Hence the radiographic sequence for dental implants imaging can be summarized as Pretreatment Immediate post surgical (baseline) Healing period ( if necessary) Second stage surgery Post prosthetic surgery ( baseline) 1 year postoperatively After 1st year, every 2 years
- Coming to the fabrication of diagnostic templates It is beneficial in the exact positioning and orientation of implant . The surfaces of the proposed restorations and the exact position and orientation of each dental implant should be incorporated into the diagnostic CT templates The design may vary from a vaccuformed reproduction of the wax-up - to one processed from acrylic reproduction of the diagnostic wax-up – to a sophisticated specially designed radiopaque denture teeth
- The processed acrylic template may be modified by coating the proposed restorations with a thin film of barium sulfate and filling a hole drilled through the occlusal surface of the restoration with a gutta-percha While radiographic examination GP point will be seen as radiopaque and will help in determining the position and orientation of the proposed implant
- The vaccuform templates involve either coating of the proposed restorations with a thin film of barium sulfate. This does not depict the ideal position and orientation of the proposed implant Another method is to blend 10% barium sulfate and 90% cold cure acrylic , which makes the proposed restoration radiopaque and evident but again does not give idea about the position and orientation The next design modifies the previous design by drilling a 2 mm hole through the occlusal surface of the proposed restoration at the ideal position and orientation of the proposed implant site with a twist drill
- Recently radiographic teeth specifically designed for the fabrication of diagnostic templates have been introduced . These are time saving, placed easily, provide consistently high radiopacity, have molds corresponding to prosthetic teeth used in the final restoration and are bonded easily with the template-based material
- Coming to the conclusion…Although many modalities are available for imaging the implant site, the correct and required technique should be adopted depending on the case and the clinician’s judgment to interpret the image acquired. The choice of pre-implant imaging must be considered carefully due to the radiation dose, the cost of each examination and the anticipated information that may be provided by the imaging study. The risk-to-benefit ratio should be determined on an individual basis so as to maximize success.